You are using an out of date browser. It may not display this or other websites correctly.
You should upgrade or use an alternative browser.
You should upgrade or use an alternative browser.
Deagostini Falcon. Anyone seen this?
- Thread starter Howard
- Start date
Supercoolin
Active Member

Junk Pilot
Sr Member
Nor are they accurate to the filming models.
The landing lights provided with the Falcon are just to illuminate the underside of the kit when the Falcon has the landing gear deployed. They're not accurate to the full scale prop.
Dedalus5550
Sr Member
Nor are they accurate to the filming models.
Now that you bring that up, I wonder how many people will cover up the holes.
Reelo
Sr Member
I'll certainly work out my own version of ventral lights. Static warm white ones in 2 sizes, as well as small red ones which I will make pulsating (even if we never saw that on the original Falcon. It makes for an interesting visual, and as "warning lights" should do,it draws attention)Now that you bring that up, I wonder how many people will cover up the holes.
Sent from my Nexus 6P using Tapatalk
Reelo
Sr Member
Making a layout of the necessary LEDs as well as the wiring is no problem for my own needs. But I'll need to source the right board to control them. My brother in law is an electrician though, he might give me a few tipsOkay my laziness and desire for others to do my work is kicking in.
Some needs to put together the ultimate Deagstini Lighting/wiring kit. Simple and dummy proof.
Now get to it.
Thank you.
Tom
Sent from my Nexus 6P using Tapatalk
Making a layout of the necessary LEDs as well as the wiring is no problem for my own needs. But I'll need to source the right board to control them. My brother in law is an electrician though, he might give me a few tips
Sent from my Nexus 6P using Tapatalk
I must light this but lighting for me has not gone well. Ever!!!!!!!!!!
Tom
Rahn420
Well-Known Member
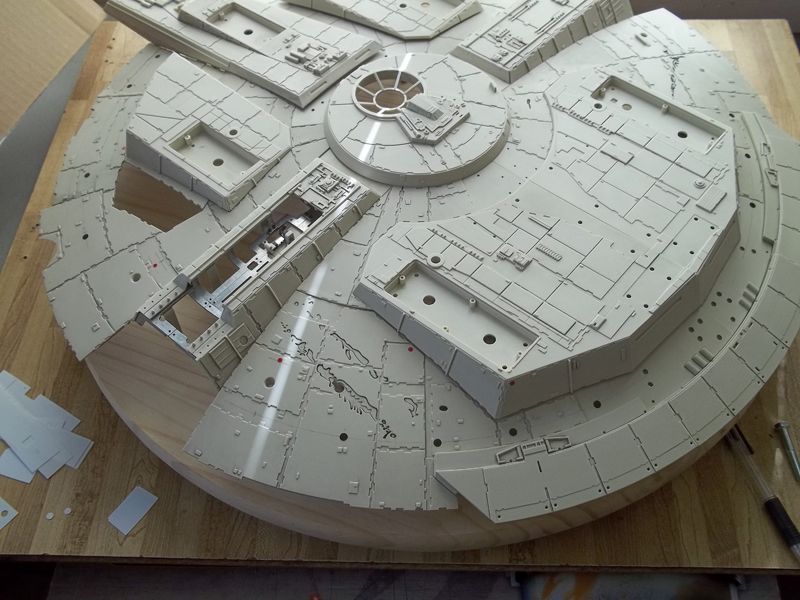
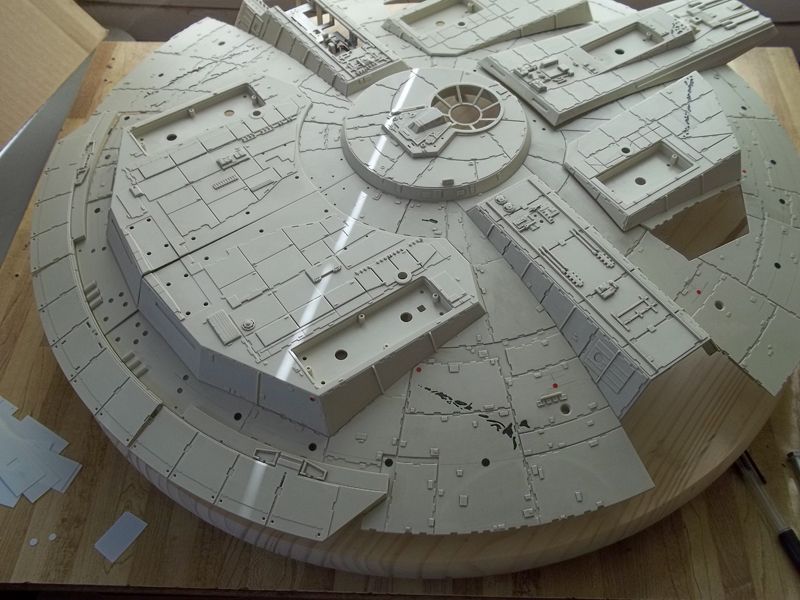
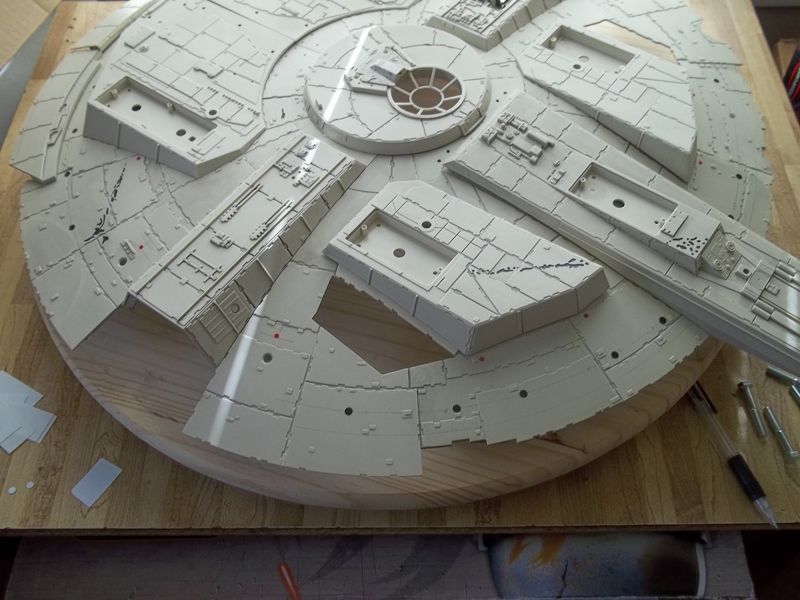
I've also been working on a exterior lighting layout.
It's based off a lot of factors, mostly the set piece and working around the framework as much as possible. Some lights land at framing. I'll be using prewired SMDs that are shallow enough to fit in the thickness of the plastic and trench out the back to get the wires between the framing and plates.
The black dots (that aren't holes) are for the white lights and the red are for... well, the red lights.
I must have rearranged those black dots a least a dozen times to get the 'balance' that my ocd demands.
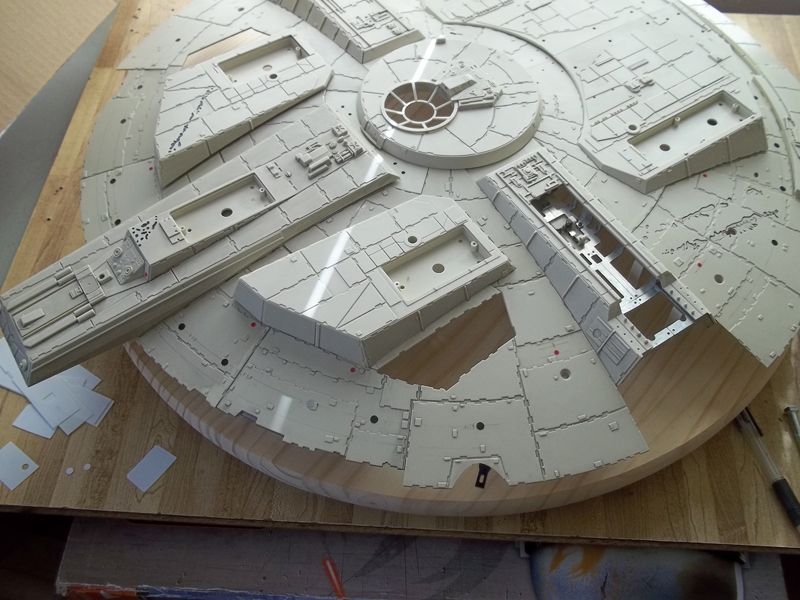
Also... how should I be linking photos to display thumbs instead of already full size??
It's based off a lot of factors, mostly the set piece and working around the framework as much as possible. Some lights land at framing. I'll be using prewired SMDs that are shallow enough to fit in the thickness of the plastic and trench out the back to get the wires between the framing and plates.
The black dots (that aren't holes) are for the white lights and the red are for... well, the red lights.
I must have rearranged those black dots a least a dozen times to get the 'balance' that my ocd demands.
Also... how should I be linking photos to display thumbs instead of already full size??
Last edited:
Well whatever you did to the photos Rahn they're a nice size now that fits within the page. 
Hehe great, one MORE thing for me to plan to do to this thing when I'm building it... so far all I've done is look at the parts in their baggies when they come in, and then stow them away. Right now I think the plan is to do the interior other than the cockpit as a separate entity... I don't foresee taking the covers off very often, especially since she'll be in a case, hehe, so having them apart allows me to enjoy both without having to constantly mess with the other.
Oh and I really like the lazy susan under the lower hull section! Nice way to get it to move for you rather than against you constantly!
Started working on the area with the missing plate edges today as the line drawing on the wiring diagram shows the missing edge, so it is unlikely that we will be getting a piece to fill in the gap.
I still have one notch to cut and I need to finish the notches already cut with some light filing. A very light skim of filler on the two armour plate pieces is also needed but I have other things to do. I will put up a couple of pictures of the finished edge next week. I also cut out the gap between two plates that was not present on the DeAgo one.


I still have one notch to cut and I need to finish the notches already cut with some light filing. A very light skim of filler on the two armour plate pieces is also needed but I have other things to do. I will put up a couple of pictures of the finished edge next week. I also cut out the gap between two plates that was not present on the DeAgo one.
Isn't that area near where the On/Off switch is positioned in the side wall? If os then it's entirely possible that this may be resolved when the area is completed. I'd be very wary of re-creating the missing edge at this early stage?
Hi Griffog, if you look a couple of pages back I suggested that myself, but after thinking about it a while I don't think we will get anything. Why would DeAgo talk about painting the bottom of it and offer the painting guides if the bottom plating wasn't complete? I think others from this forum have posted on the official build forum on the DeAgo website also asking if the edge would be completed at a later date and I haven't heard anything further on that yet.
No need to be weary of doing it. In the event of DeAgo issuing a filler piece I just won't use it or cut it off if it is moulded as part of the sidewall. The on/off switch is further forward, attached to the sidewall. It looks like the large circular greeblie will be used as the button.
Junk Pilot
Sr Member
We hope....
For the Aussies , Thursday release for us ????????????????????????,
Last edited by a moderator:
yeah,great news for everyone in oz.
just spoke to someone at deagostini here in oz and she confirmed that subscriptions start online in the next couple of weeks but you can start one with them over the phone now.
i'm gonna wait and go on line and get it started.
can't wait!!!
just spoke to someone at deagostini here in oz and she confirmed that subscriptions start online in the next couple of weeks but you can start one with them over the phone now.
i'm gonna wait and go on line and get it started.
can't wait!!!
Jedioz
Well-Known Member
Did you happen to ask about availability from news agents Mr Mofo77 ?yeah,great news for everyone in oz.
just spoke to someone at deagostini here in oz and she confirmed that subscriptions start online in the next couple of weeks but you can start one with them over the phone now.
i'm gonna wait and go on line and get it started.
can't wait!!!
To anyone in Australia looking at subscribing to the Falcon:
Whatever you do, do not subscribe online or over the phone.
Bissett Magazines handles all partwork distribution here, and they are an absolutely terrible company to deal with.
Their website is ancient and really unhelpful, they literally have like one person at their call center who really has no idea about what they're selling, and finally they put everything into a cheap plastic mail satchel with no fragile or do not bend notices on the packaging. This will result in Australia Post bending most parcels to fit most letter boxes, ending up with broken parts.
Do the right thing and subscribe through your local newsagent. You're guaranteed parts every week, and if anything is wrong they'll be more helpful in replacing issues, unlike Bissett who stick to the 4 issues a month system.
I have previously subscribed to partworks in Australia through Bissett (Bismarck, Lancaster and Endeavour) and I received nothing but headaches and broken parts. I was lucky if a month went by without something being broken.
Similar threads
- Replies
- 22
- Views
- 2,612
- Replies
- 5
- Views
- 1,139
- Replies
- 0
- Views
- 300