You are using an out of date browser. It may not display this or other websites correctly.
You should upgrade or use an alternative browser.
You should upgrade or use an alternative browser.
MOS General Zod Kryptonian Build, slow but steady
- Thread starter Creator1326
- Start date
-
- Tags
- man of steel
Creator1326
Well-Known Member
Thanks!Dude that is awesome! The whole suit is awesome!!!
I have a week off for Easter so I plan on knocking a lot of things out including some priming and starting the belts. I also have a great idea for how to mount the abdominal plates, it involves spandex and velcro. The ladies at the fabric store gave me a look when buying spandex today too lol.
Creator1326
Well-Known Member
The one pain about sewing fur is pulling the fur out of the seam since it's all done from the inside out like a bag, it's unavoidable. You can use a seam ripper or a toothpick. I have both but the toothpick seemed less likely to damage the material.

Creator1326
Well-Known Member
And now, revised placement. I didn't like the cape on the inside of the shoulder supports so I moved them to the outside and it made a world of difference.
On the left is the new placement, the right is the old placement.

Here's how the cape is attached. Square rings are sewn to webbing which is then sewn into the seam in between the microfiber and fur. No, I won't use twine when I'm done, a double sided black velcro tie will be in place.

And here is the full cape again. It didn't seem to make much of a difference in flow with the new placement of the mounting rings.

On the left is the new placement, the right is the old placement.
Here's how the cape is attached. Square rings are sewn to webbing which is then sewn into the seam in between the microfiber and fur. No, I won't use twine when I'm done, a double sided black velcro tie will be in place.
And here is the full cape again. It didn't seem to make much of a difference in flow with the new placement of the mounting rings.
Creator1326
Well-Known Member
Here is one of the belt straps. Some of the segments have a little irregular placement but it's not too bad. This was a test of the concept of using spandex as a strap and if it could support the weight of all the segments. It seems to have worked.

Creator1326
Well-Known Member
OMG sanding, sanding, sanding, patching, and more sanding. I've been using apoxie sculpt as my patching compound, it seems to stick to the spray filler and worbla equally well and it's less toxic than bondo. Oh and one more thing. The spray filler doesn't perfectly fill in the worbla so it can look "pitted" like ancient metal as this armor is supposed to be, so it's another happy accident.

And Shapeways finally found my saber that goes on his right arm, going to cut it up like a toy light saber so it extends. Basically it's just a squashed and stretched cylinder (oval-ish). Yes I used shapeways because I needed a big printer, otherwise I'd have used a makexyz.com printer.

And Shapeways finally found my saber that goes on his right arm, going to cut it up like a toy light saber so it extends. Basically it's just a squashed and stretched cylinder (oval-ish). Yes I used shapeways because I needed a big printer, otherwise I'd have used a makexyz.com printer.
Last edited:
Creator1326
Well-Known Member
Thanks! Slow but steady. Still putting off the boots and gauntlets. They're in progress but it's super slow.Awesome dude
Here's a pic of the strap matrix. Four straps attach to this thing and two go under it from the legs up the back. I may add a few antique gold-ish highlights but so far I like how this is turning out color wise. I used rub n' buff spanish copper and ebony mixed in some places and just rubbed it on as a shadow or dirt in the cracks effect.

Creator1326
Well-Known Member
So I used the "antique gold" rub n' buff for highlights and while it looks awesome in person it's difficult to photograph. I had to wait for the other coats to dry, base spanish copper mixed with ebony, ebony shadows and then the highlights. I'm trying to paint with light by starting off dark and where it looks like it'd rub on something I put on a highlight.

Creator1326
Well-Known Member
And here's the butterfly of carpel tunnel. This thing keeps the cloak off of my back. So yes, while it's on my back under the cloak if it gets too hot I still need this and the strap matrix above to be finished pieces if I take the cloak off.

Last edited:
Creator1326
Well-Known Member
Worked on the abdominal plates tonight. I think I might mute some of the gold on the top plate with more of the background color, it's a little too much. It's fortunate that I have a bad tube of ebony rub n' buff. It's all goobered up and makes blobs that stick in weird places which makes the "ground in grime" look more realistic.

Creator1326
Well-Known Member
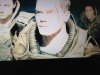
I couldn't wait any longer. I started to rub n' buff the chest  It's turning out ok. I had to let it dry a bit and then touch up spots and then buff it. I still have to add the dirt and grime as well as thin it out and use a paintbrush to do the collar. Unfortunately for you the JPG image doesn't do it justice.

It's turning out ok. I had to let it dry a bit and then touch up spots and then buff it. I still have to add the dirt and grime as well as thin it out and use a paintbrush to do the collar. Unfortunately for you the JPG image doesn't do it justice.Creator1326
Well-Known Member
Very nice! Love the attention to detail.
Thanks. I doubt most will notice the little things but I feel better about it. There are some "nerdy" spots of detail and sometimes these details are like falling down the rabbit hole
Sent from my iPhone using Tapatalk
Creator1326
Well-Known Member
Thanks woodyROM.Looking good dude!! I love all of the detail work, and the rub n buff looks great
I have just spent the last three hours attempting to paint on the shadows and highlights, it seems to have turned out well. I wish I had more light to take the picture by but this is as good as the pic is going to get. Turpentine and rub n' buff makes a paintbrush happy (FYI).


Creator1326
Well-Known Member


The one pain about sewing fur is pulling the fur out of the seam since it's all done from the inside out like a bag, it's unavoidable. You can use a seam ripper or a toothpick. I have both but the toothpick seemed less likely to damage the material.
First off, this build is amazing! Congrats on the progress.
Just thought I'd toss out a couple of quick tips for working with fur to cut down on the frustration of the pile (having built more Santa suits than I care to think about): cut from the back of the fur with a razor blade rather than scissors -it cuts down on the flying fuzz factor; then, take scissors and trim the pile down in the seam allowances. Just take the scissors and cut the pile almost to the backing all along the edges the width of the allowance. When you sew, go slowly and sweep the pile out of the seam allowance with your fingers as you go.
This will reduce bulk in the seams, give the fur a nice spread on the edges of the finished piece and will save you having to pull the pile out of the seams (which, as you mentioned, damages the fabric as well as takes a lot of time to get it even).
Cheers!
Creator1326
Well-Known Member
First off, this build is amazing! Congrats on the progress.
Just thought I'd toss out a couple of quick tips for working with fur to cut down on the frustration of the pile (having built more Santa suits than I care to think about): cut from the back of the fur with a razor blade rather than scissors -it cuts down on the flying fuzz factor; then, take scissors and trim the pile down in the seam allowances. Just take the scissors and cut the pile almost to the backing all along the edges the width of the allowance. When you sew, go slowly and sweep the pile out of the seam allowance with your fingers as you go.
This will reduce bulk in the seams, give the fur a nice spread on the edges of the finished piece and will save you having to pull the pile out of the seams (which, as you mentioned, damages the fabric as well as takes a lot of time to get it even).
Cheers!
Thanks. I'll remember that for the next fur thing I ever (never) build
- - - Updated - - -
Here is a pic of the side straps that go from the cod and chest down and back to the strap matrix.

Creator1326
Well-Known Member
Well I have the pauldrons painted now, they're a little too bright, like the ab plates I'll have to tone them down a bit.

Also, back to the belt segments. My 3D printer guy Joe has sent me 160 of them. Just 135 more to go.

Also, back to the belt segments. My 3D printer guy Joe has sent me 160 of them. Just 135 more to go.
Similar threads
- Replies
- 0
- Views
- 143
- Replies
- 3
- Views
- 1,540
- Replies
- 0
- Views
- 2,275