Borderlands Bandit Steve Cosplay - SKS Props

SKS Props

Sr Member
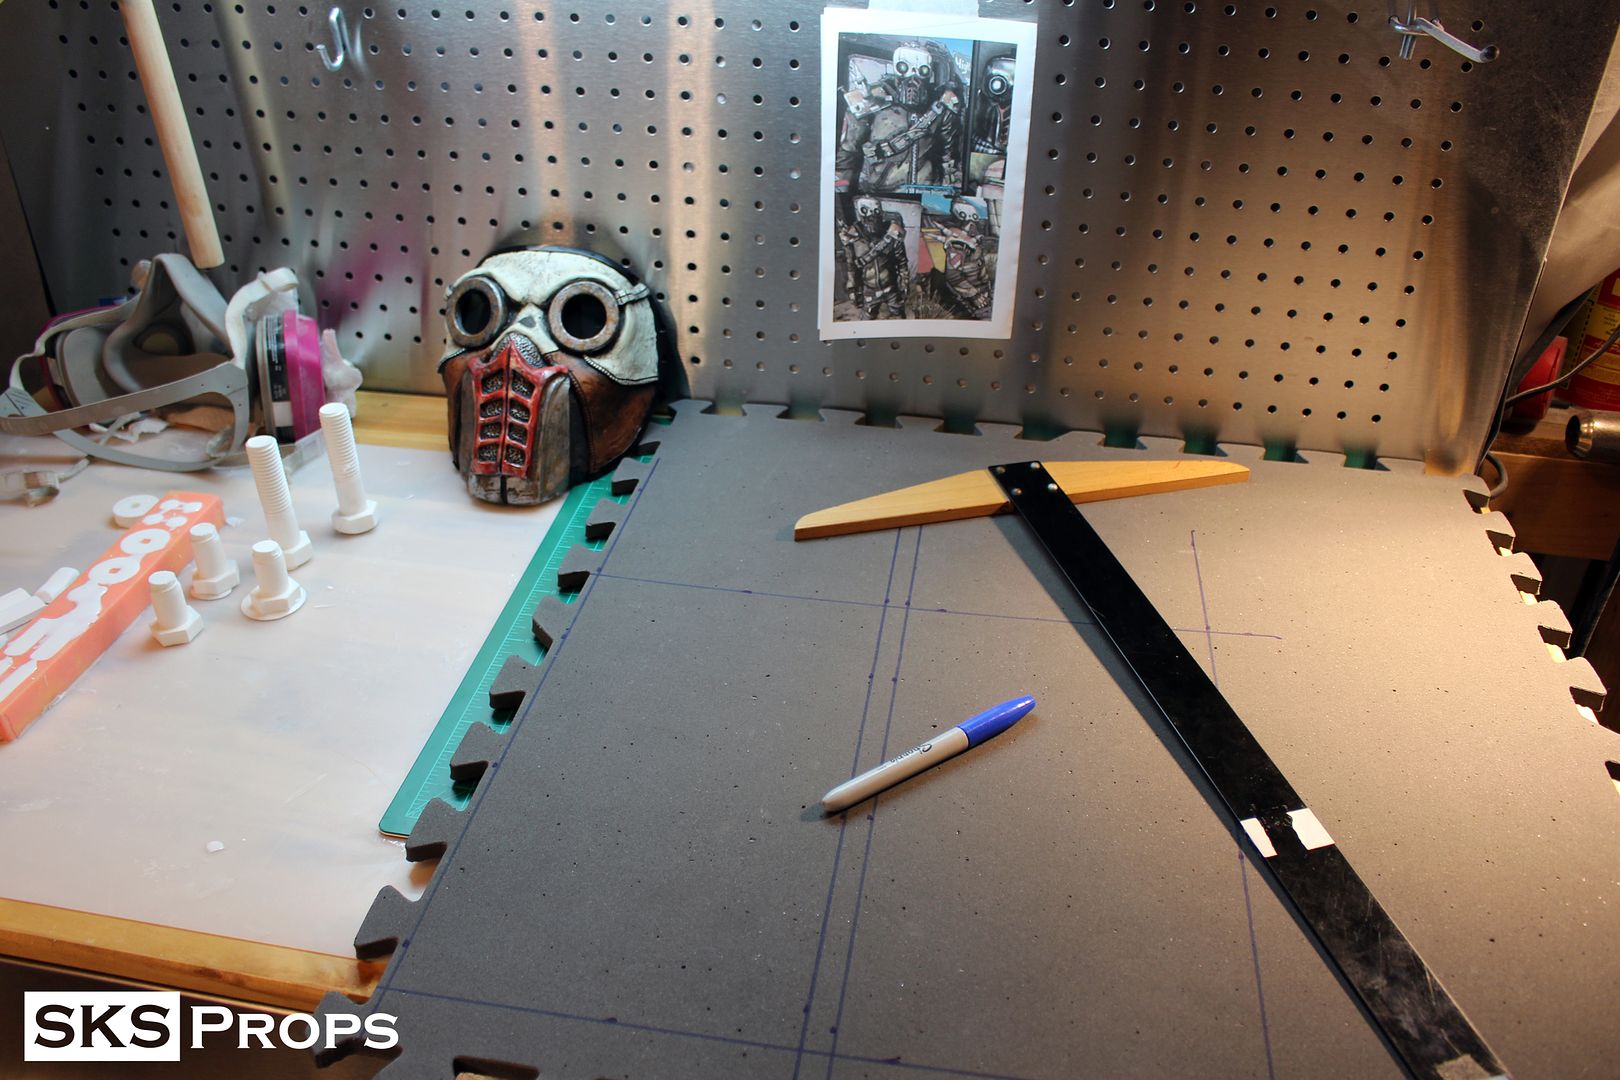
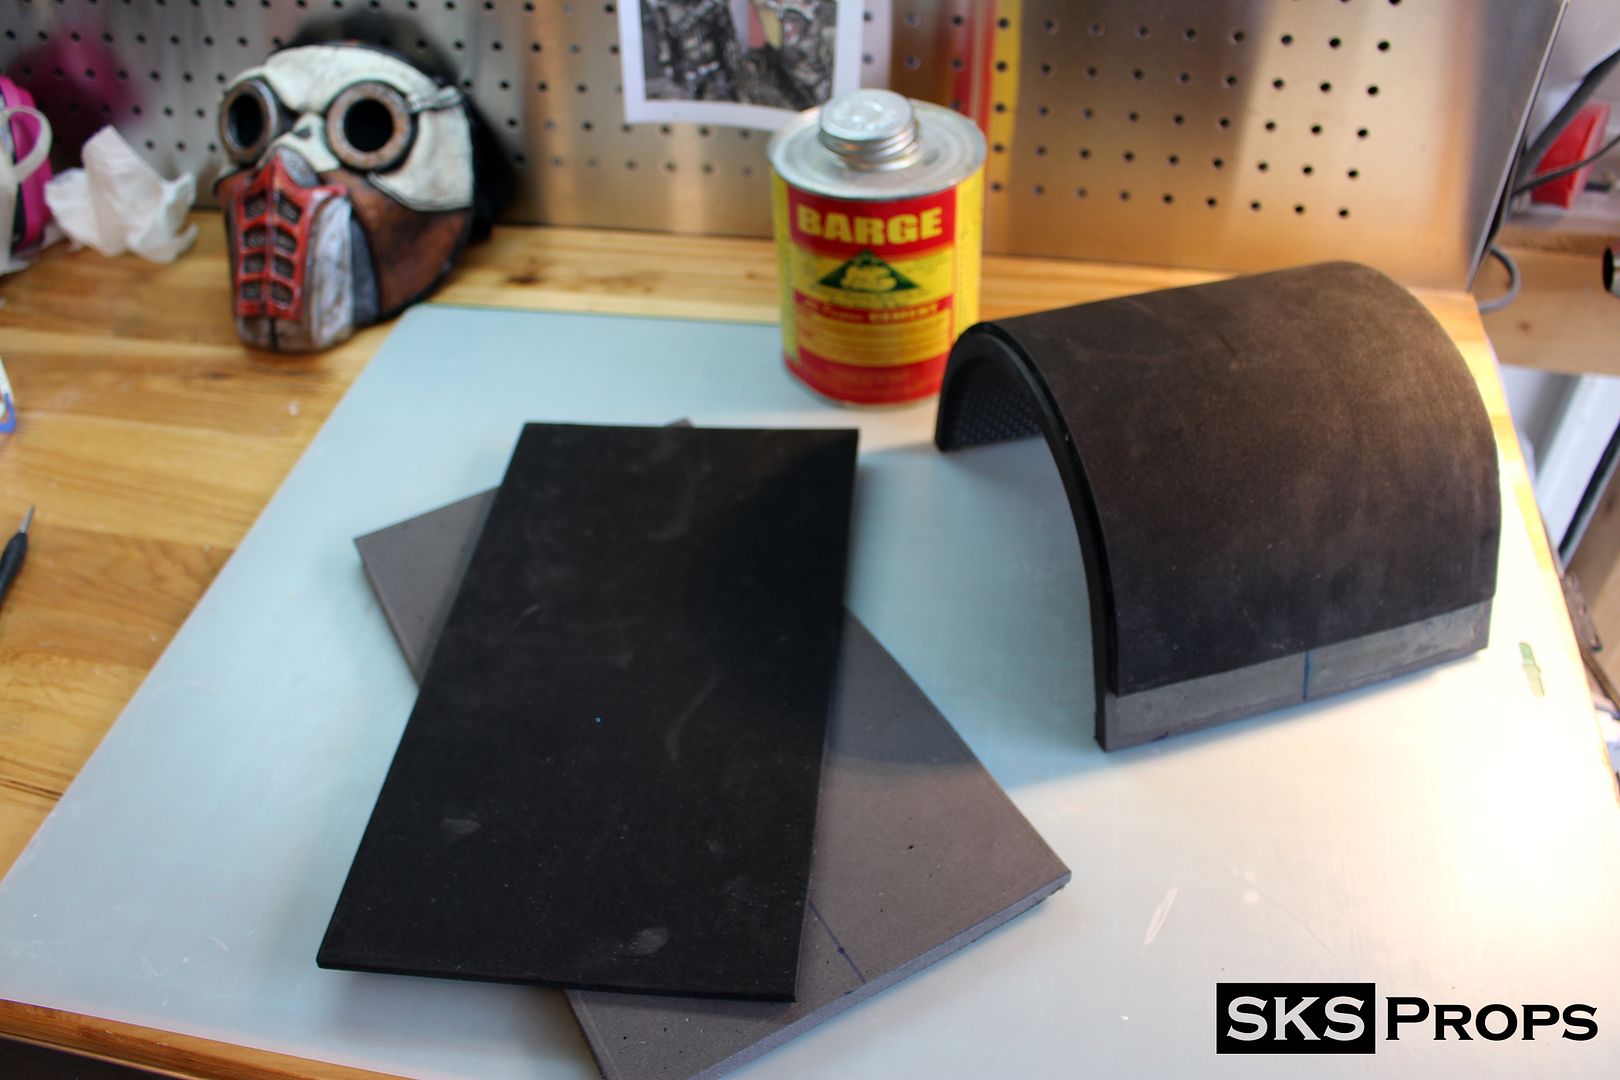
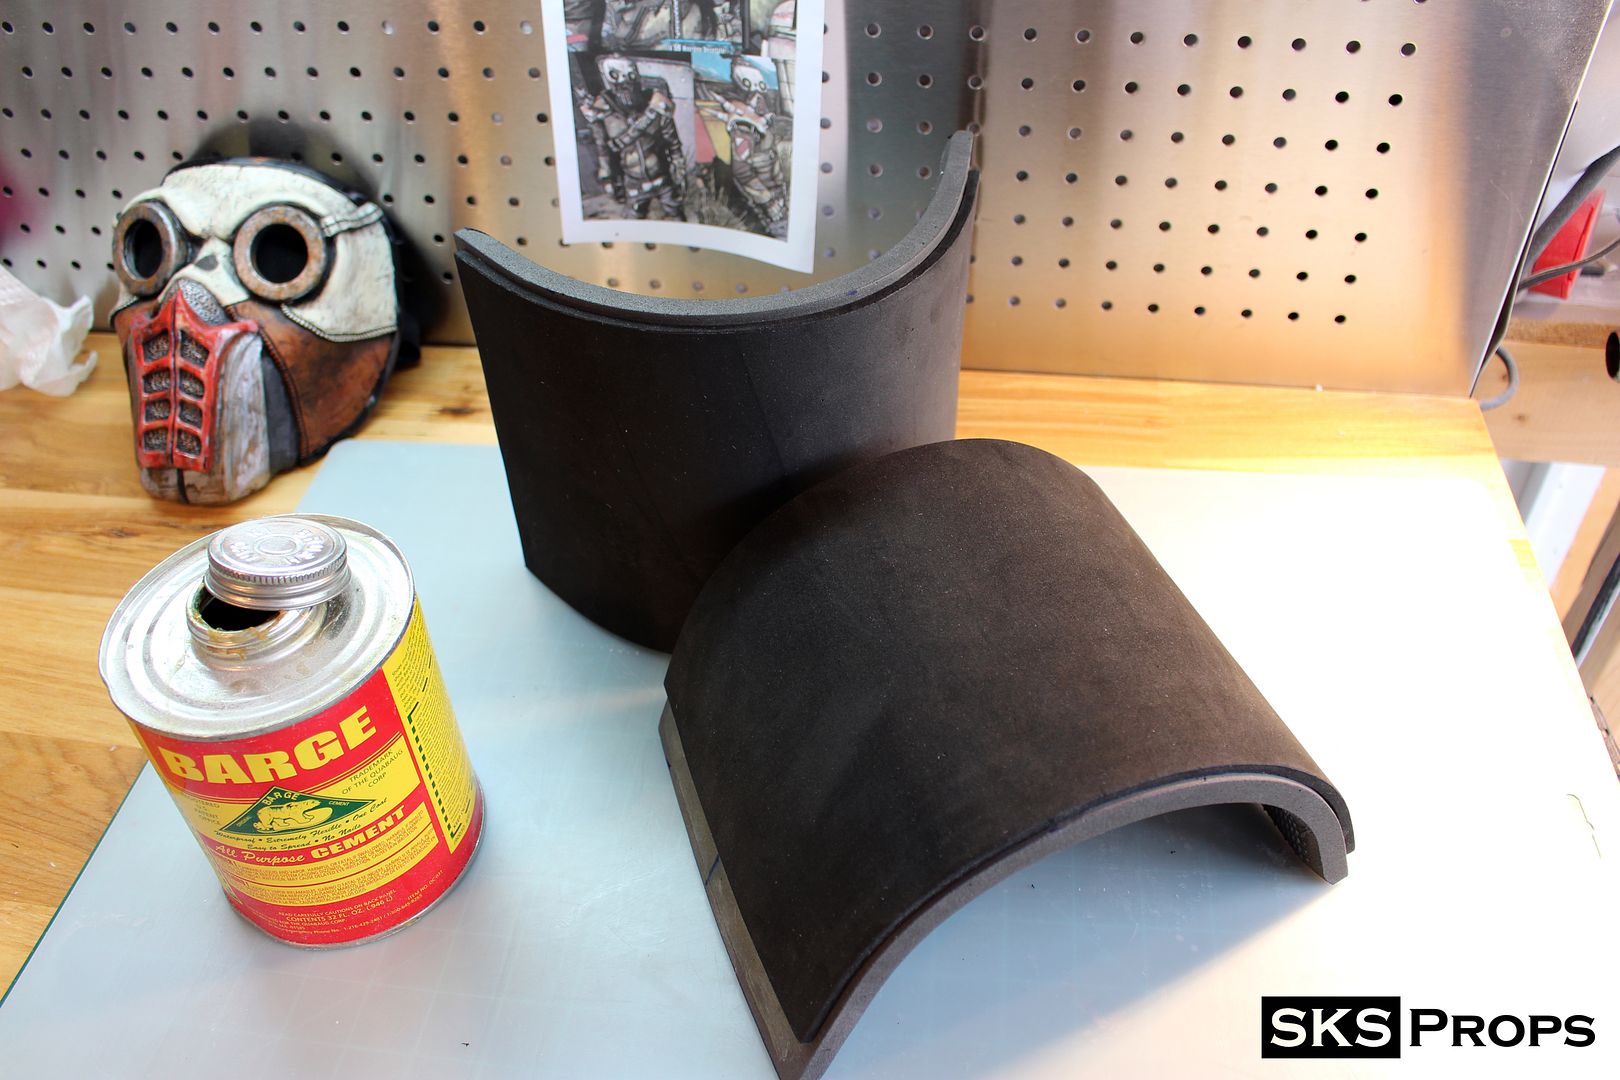
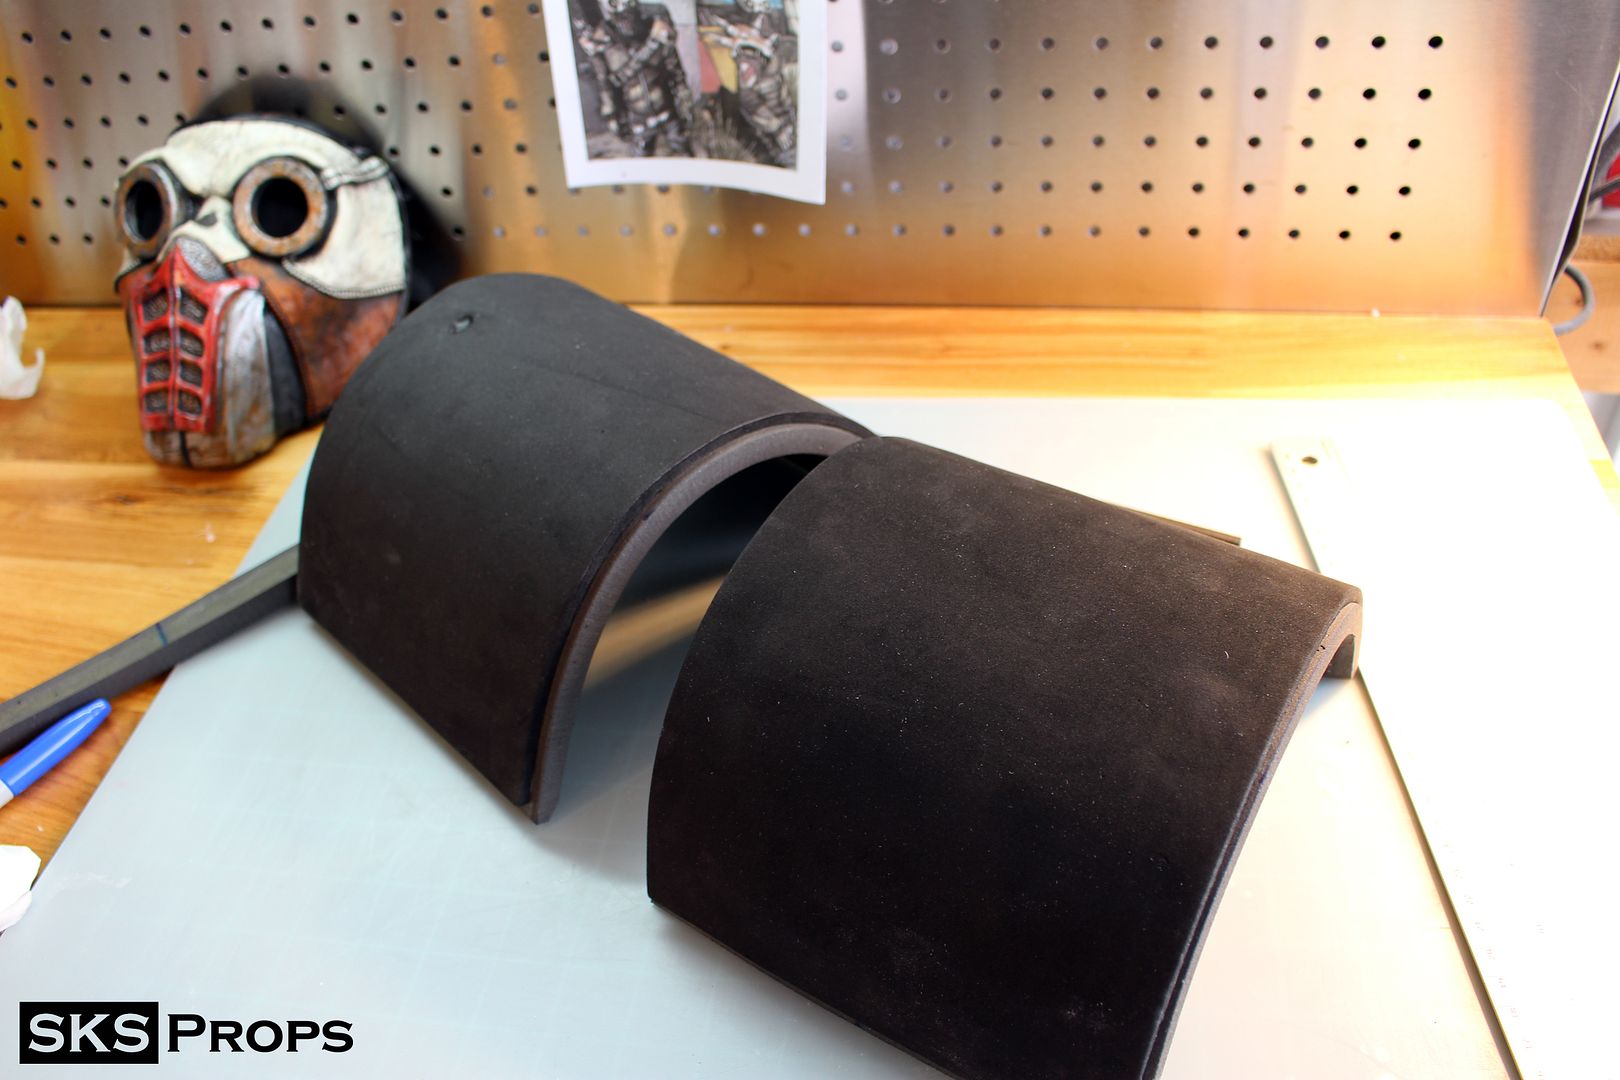
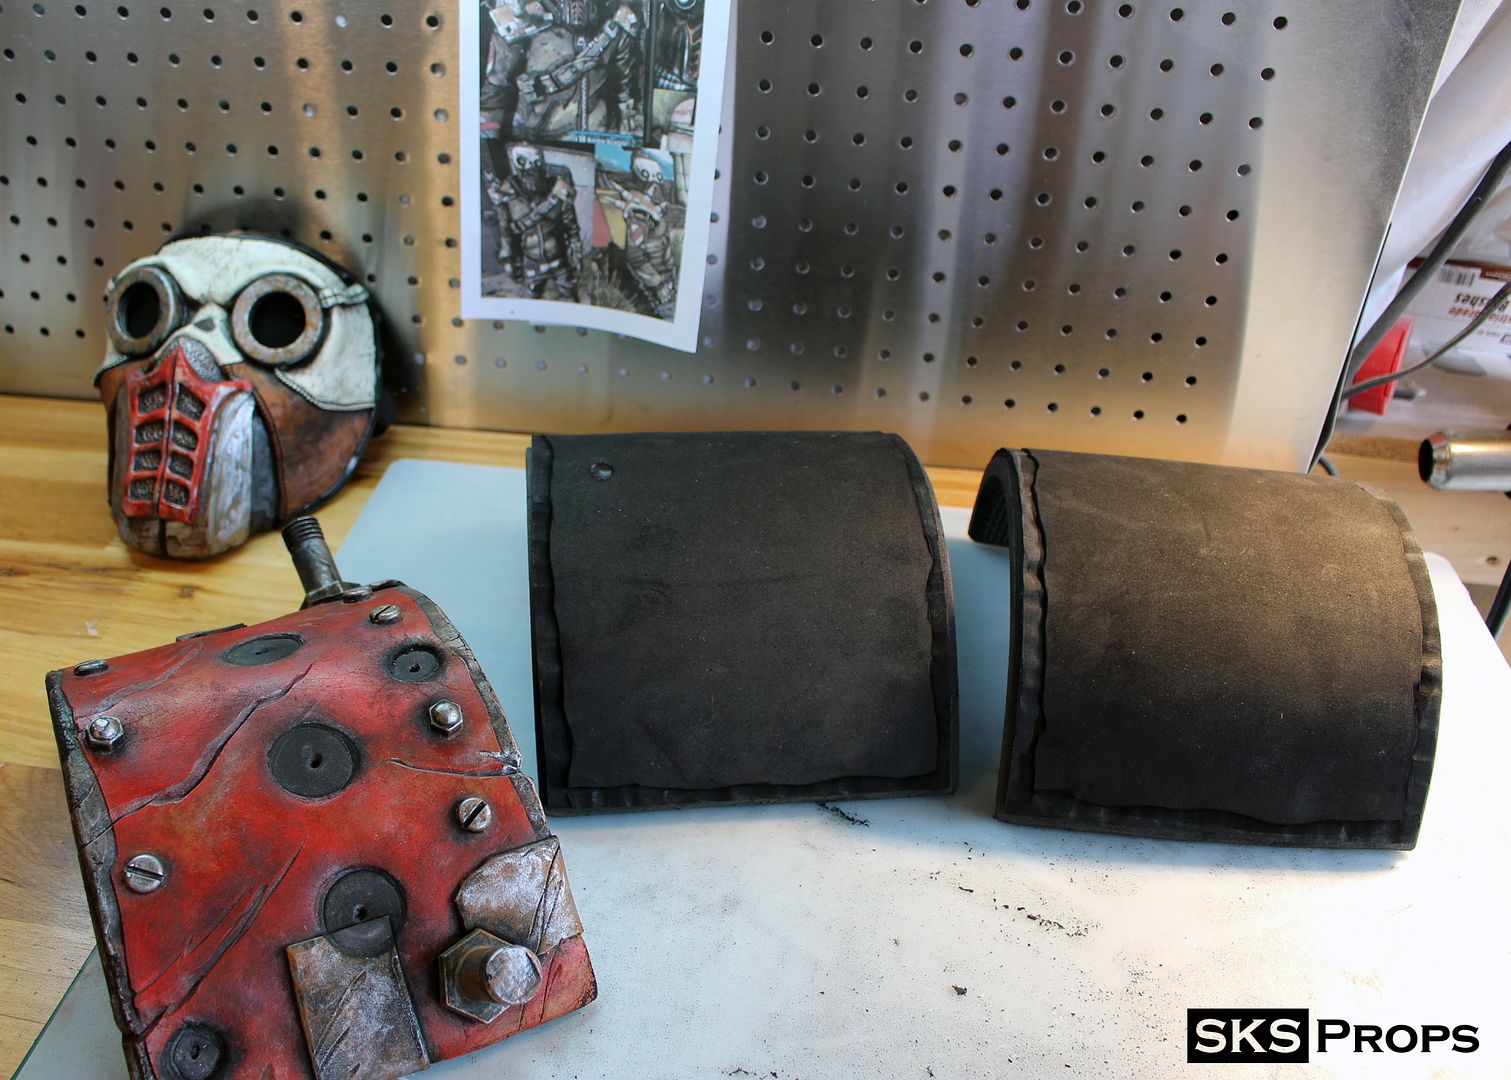
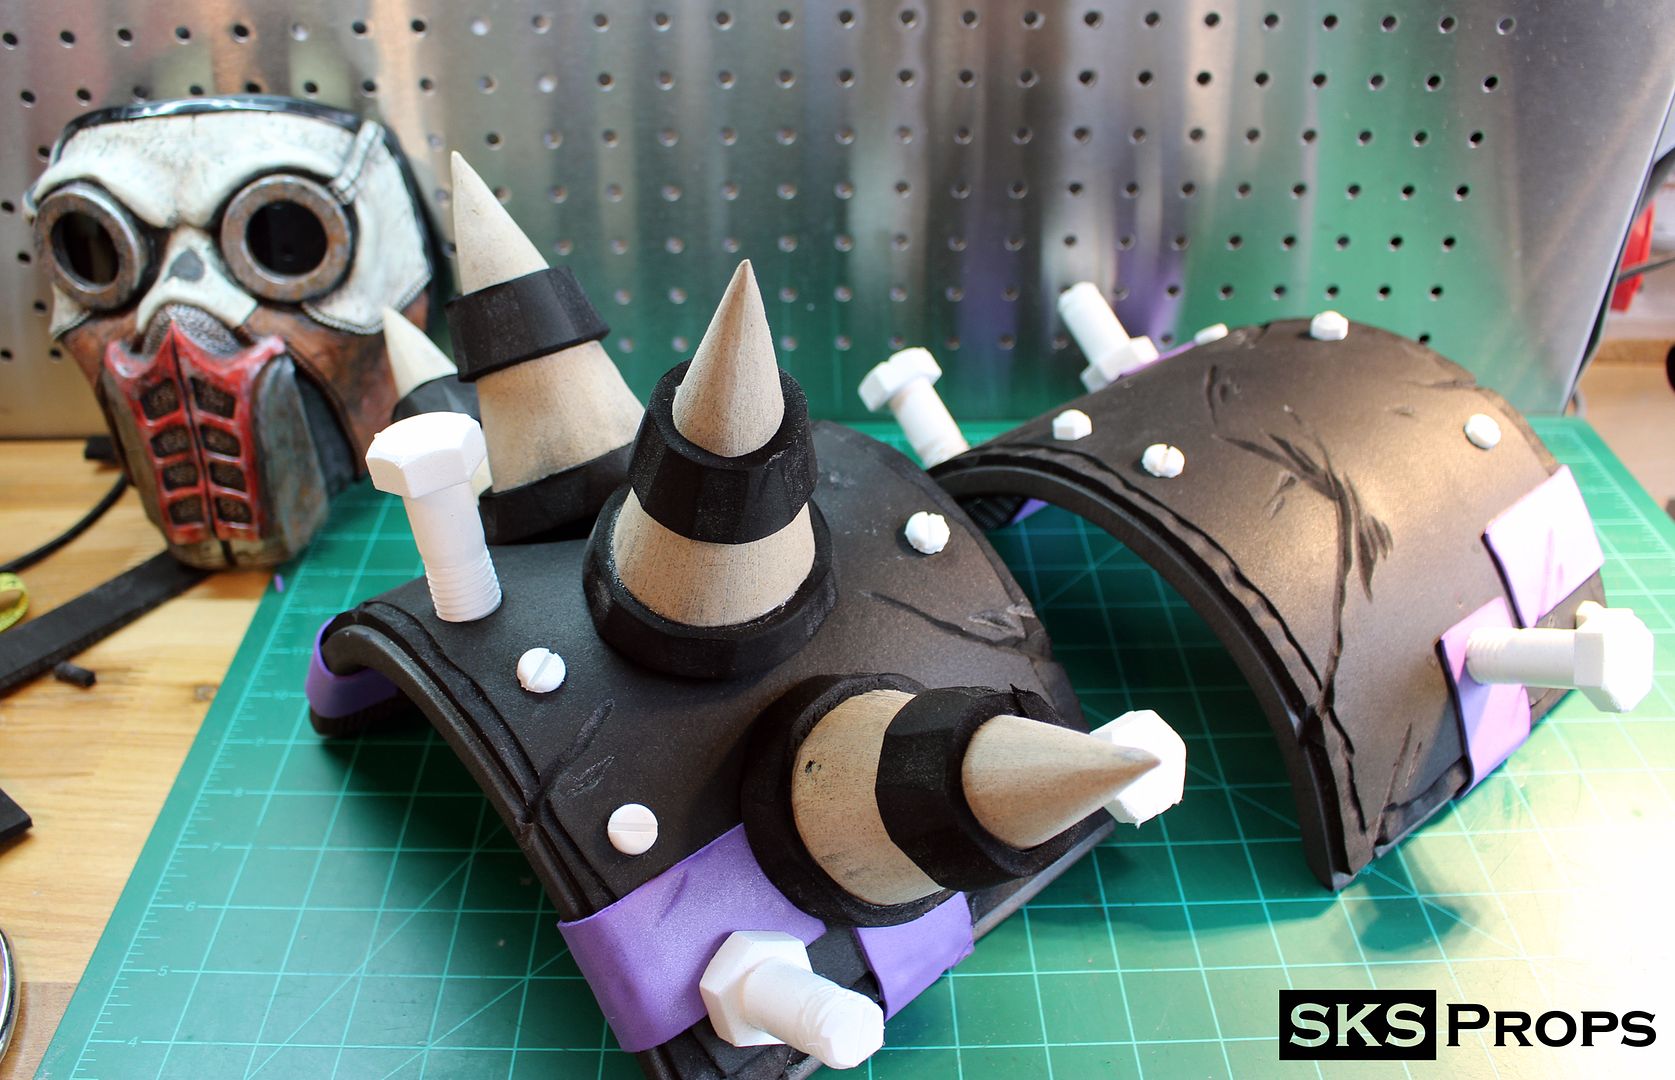
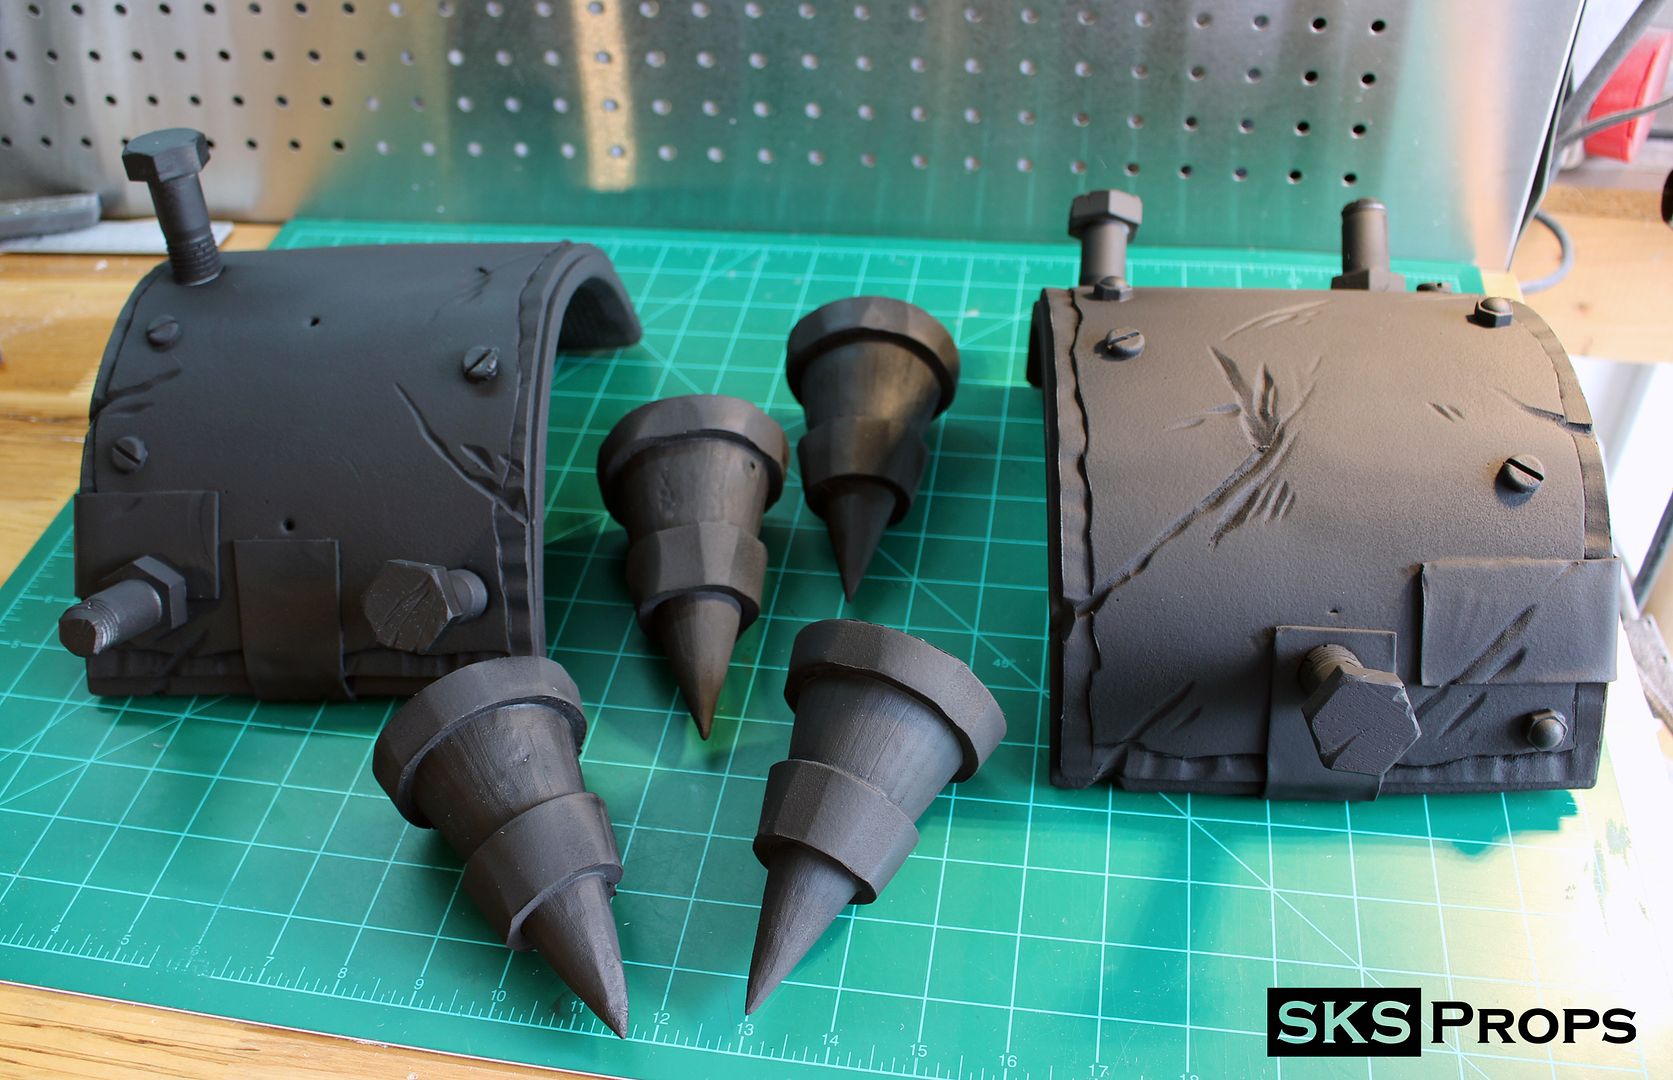
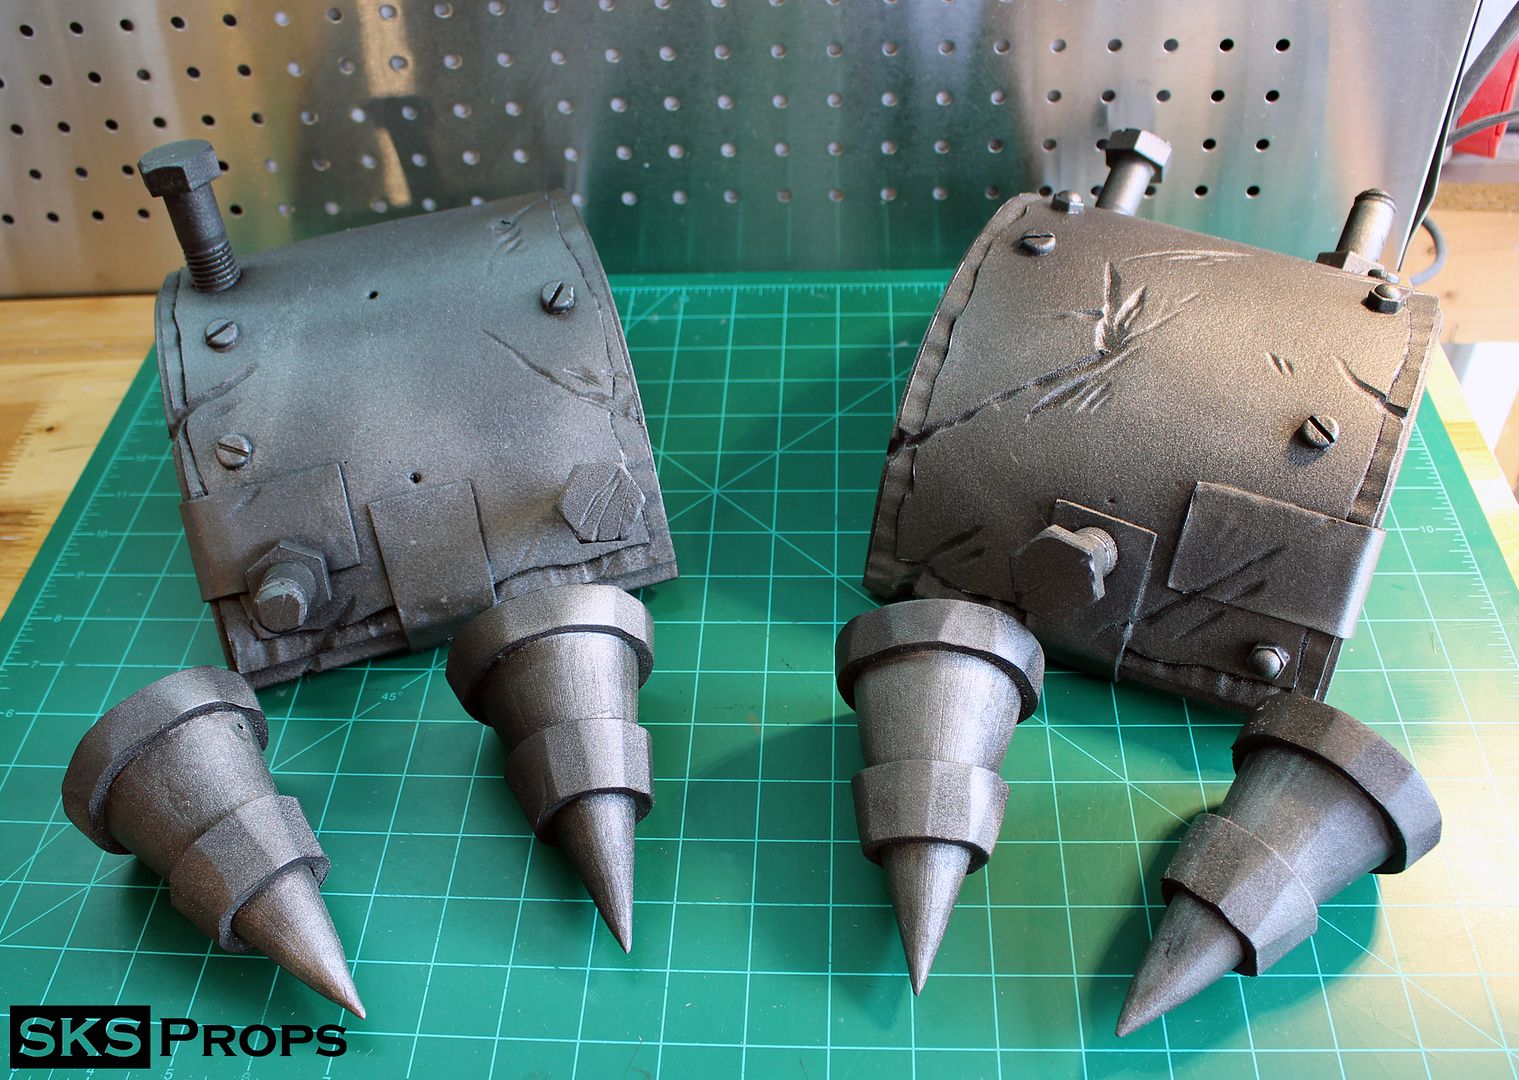
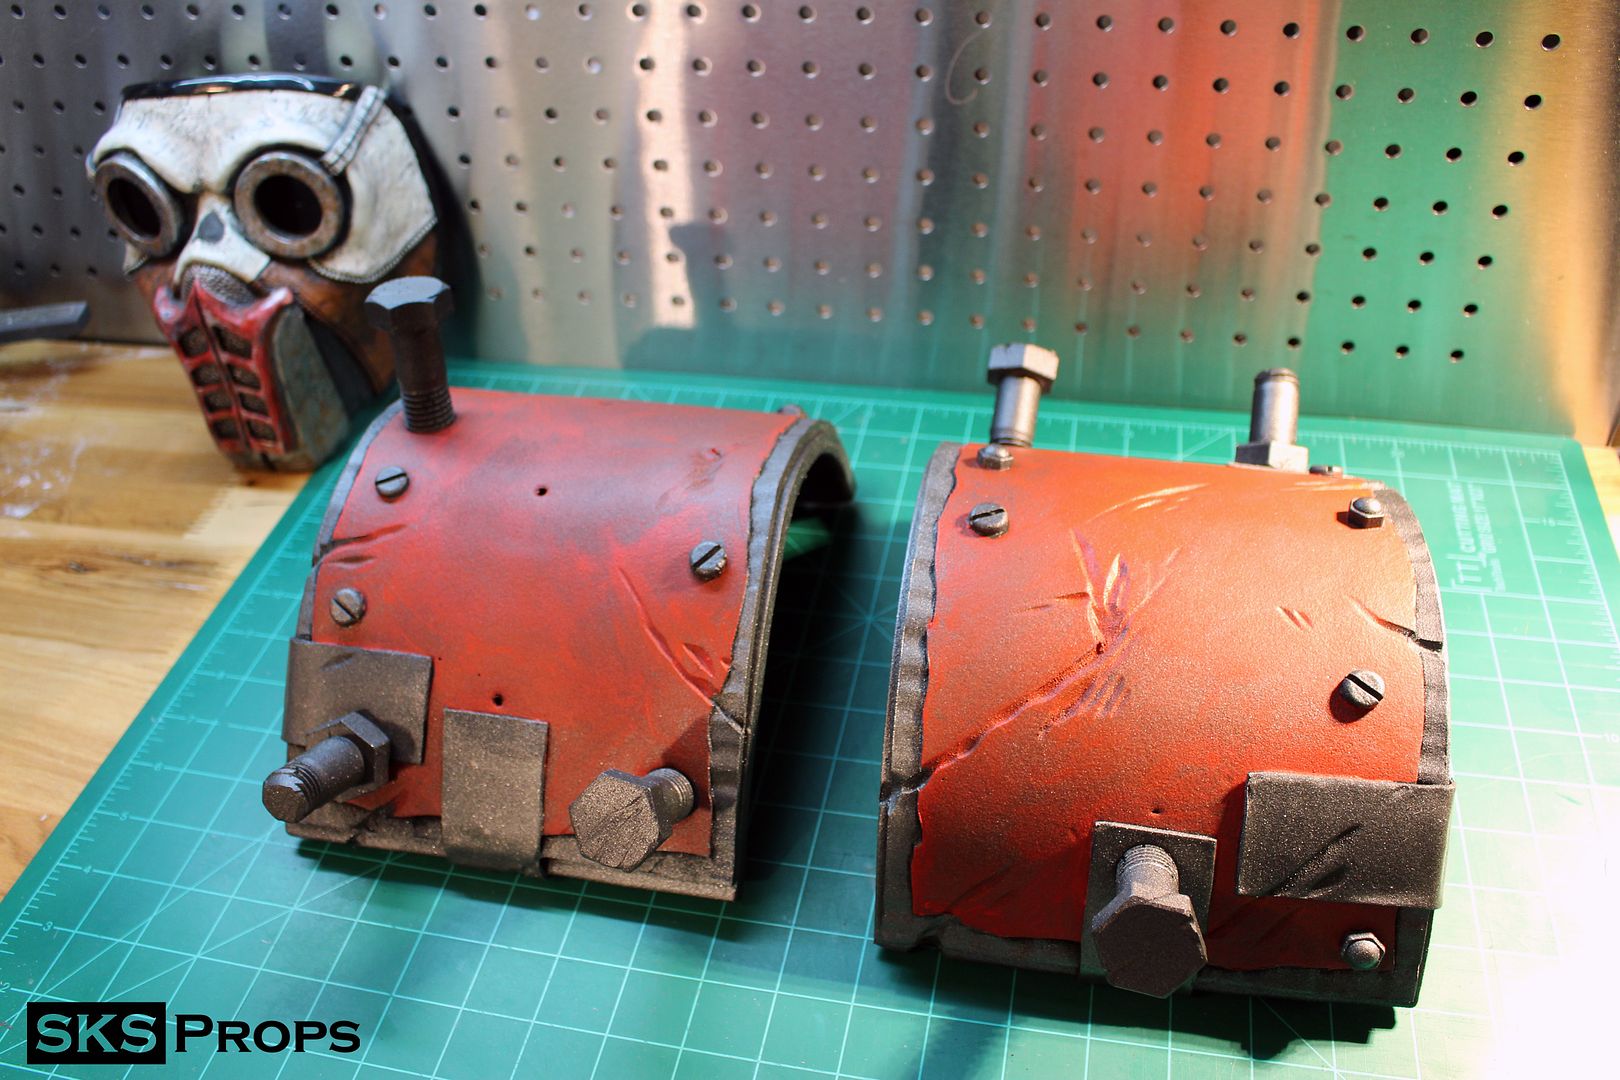
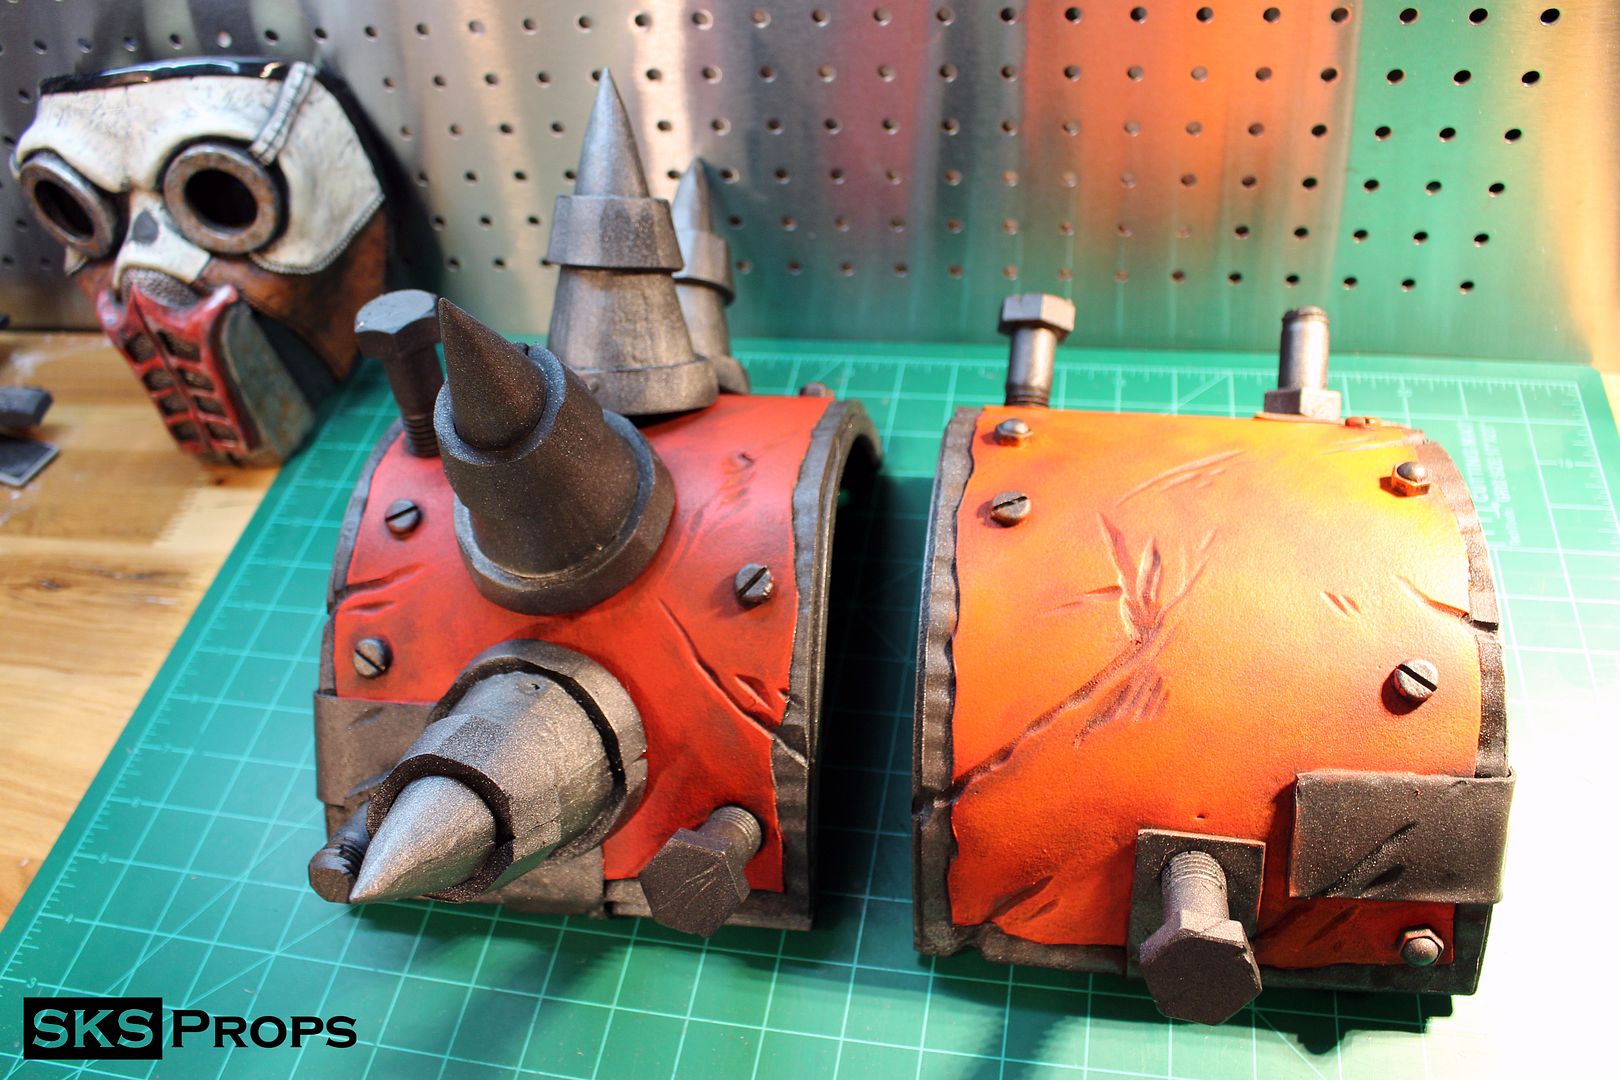
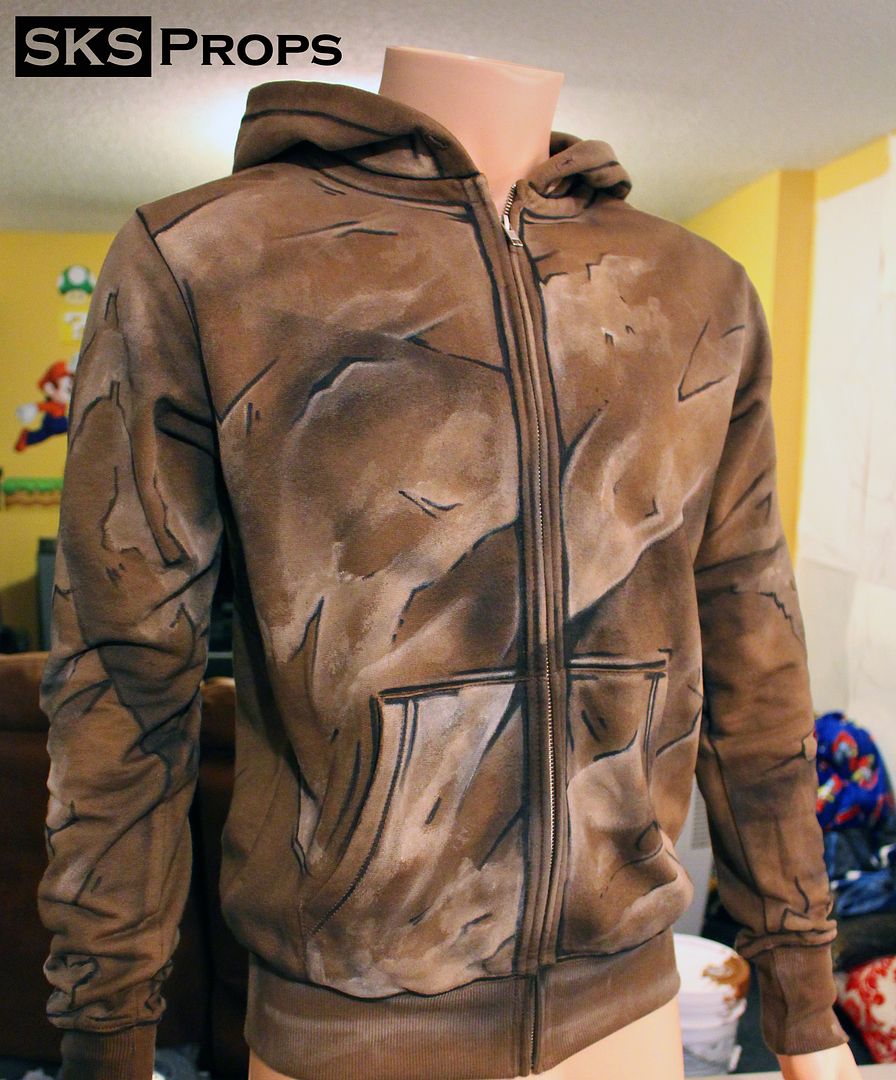
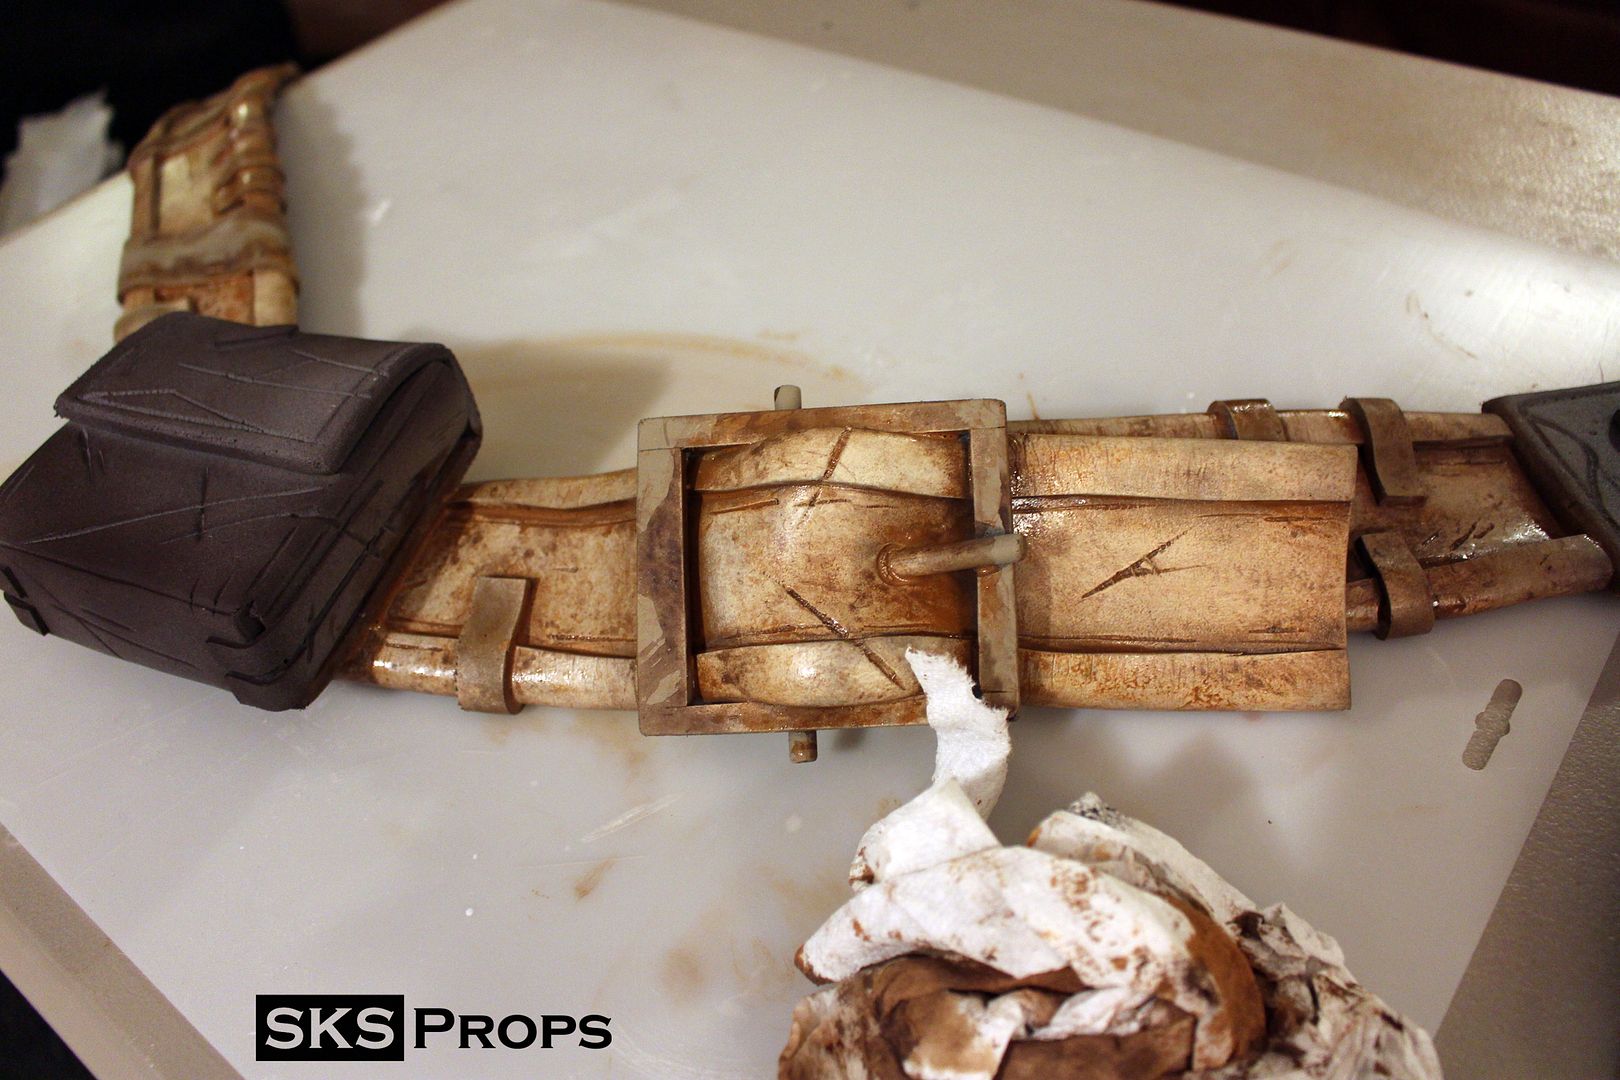
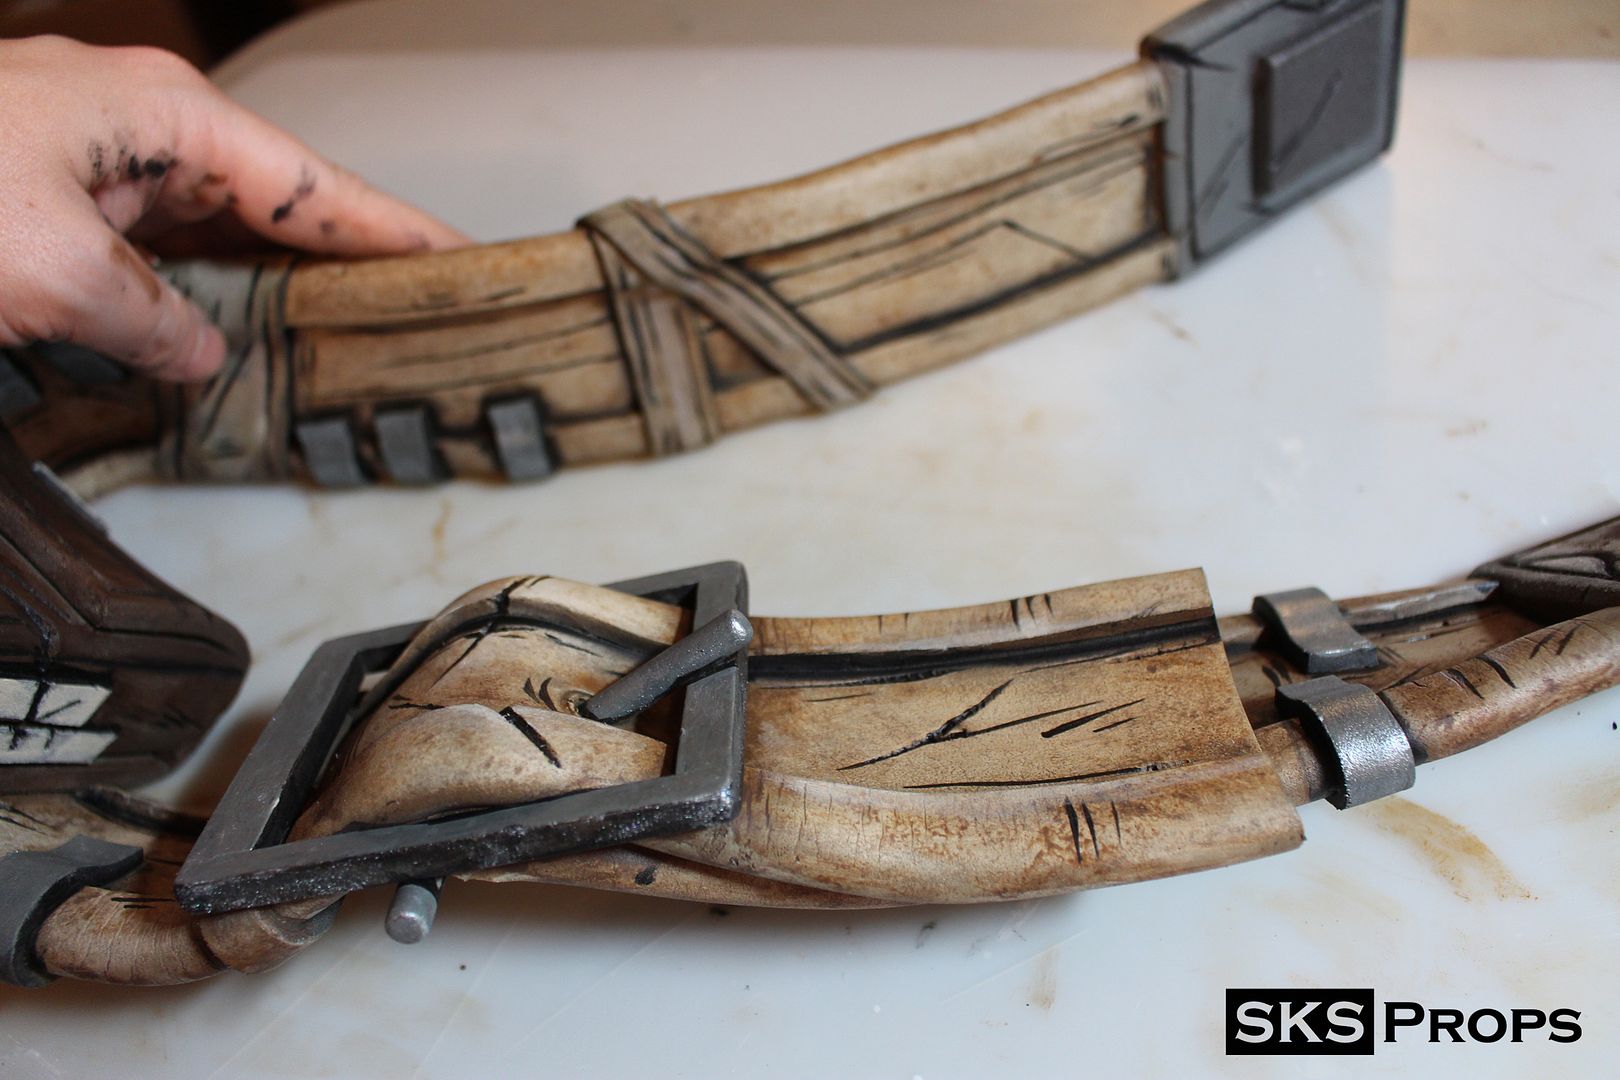
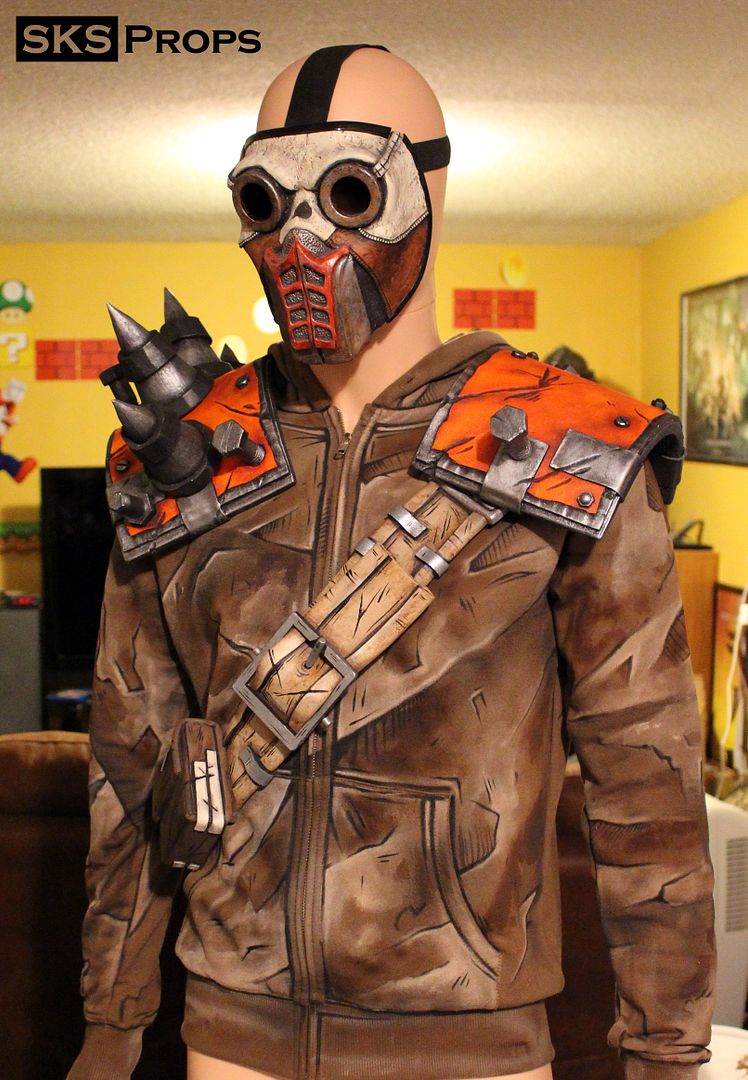
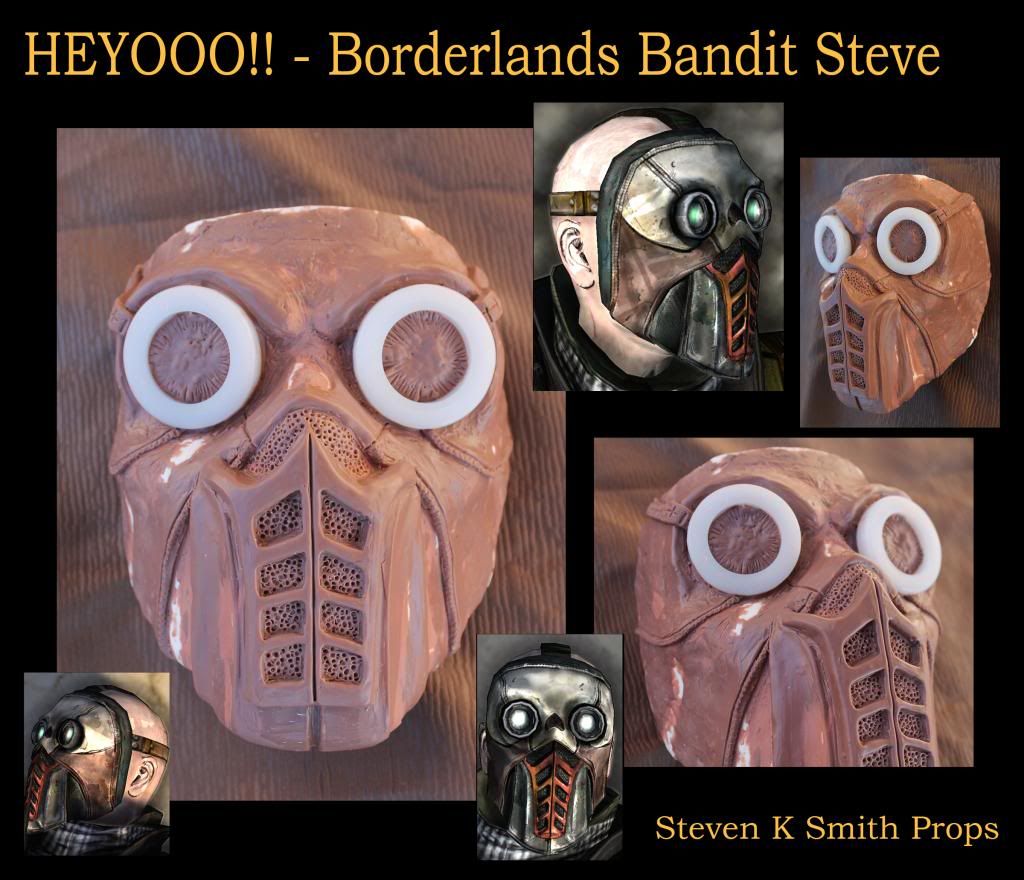
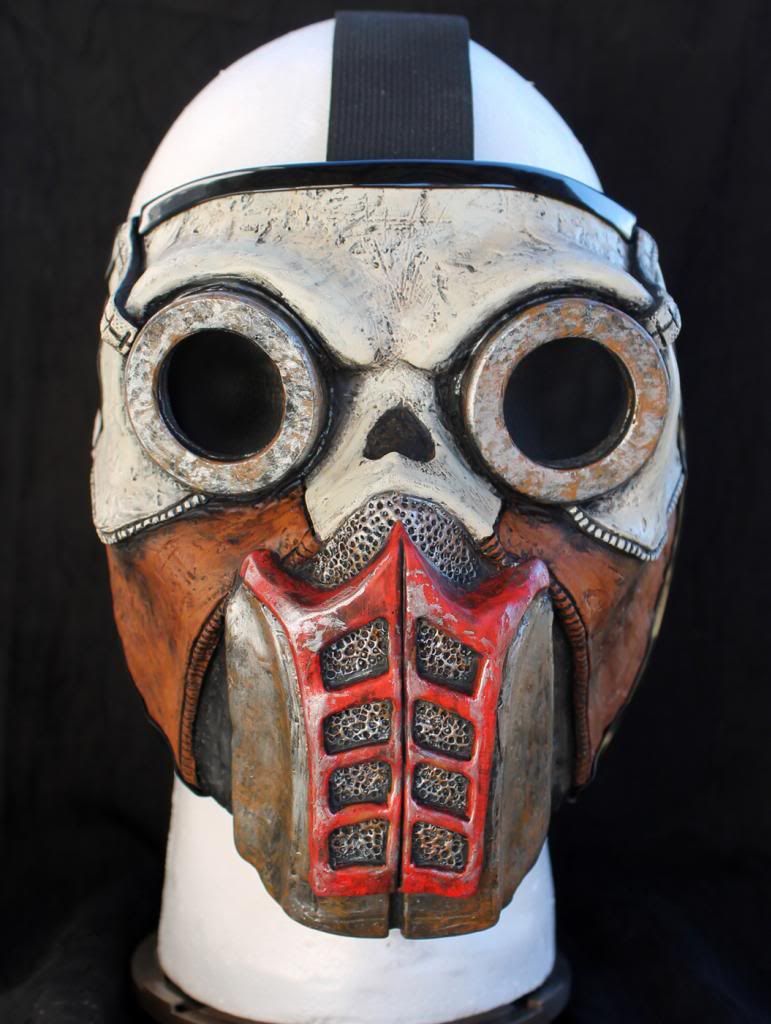
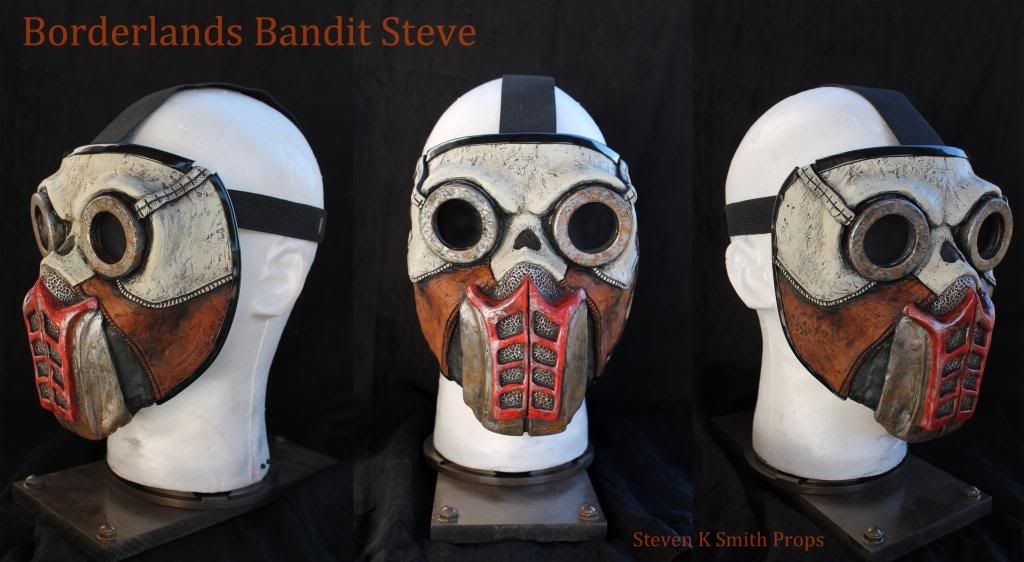
I will be building a full Borderlands Bandit Steve costume for Dragon Con 2015. So far I have a basic mask from Borderlands 1 that I will repaint a bit to make it more like the cell shaded look of the game. I will also be adding LEDs to the eyes because everyone likes things that light up. Like my other builds here is sculpted out of monster clay. Smooth-on rebound 25 for the jacket mold and plasti paste for the mother mold. Slush cast using smooth-on smooth cast 300. All of my masks are then hand painted and weathered using acrylic paints.

banditsteve_zpsce300307.jpg


banditstevesmall_zpse568088b.jpg


banditsteve1_zps9b03349a.jpg
 
Last edited:
Re: Borderlands Bandit Steve Mask Complete - HEYOOO!

Wow. Every one of these masks you've made are fantastic. Even that pistol looks great. Sir, you're a wizard.
 
Re: Borderlands Bandit Steve Mask Complete - HEYOOO!

I made this Steve mask over a year ago and now I am going to go back and revamp it a bit to make my Borderlands NPC costume for Dragon Con 2015. I will be showing a new mask paint job, as well as Led eyes, shoulder pads, and belts. Everything will be cell shaded, it should be a blast!!! Updates will begin next week.
 
Re: Borderlands Bandit Steve Mask Complete - HEYOOO!

So my game plan for this build will be to use the Borderlands Bandit Steve mask for the first game and the armor and costume from the second. The shoulder pads and belts will be constructed out of foam to keep the weight down. Reference material has been gathered and I plan on starting the shoulder pads today.

1_zpsk3rahdiv.jpg
 
Re: Borderlands Bandit Steve Cosplay - SKS Props Updated 7/2/2015

I started to make the shoulder pads yesterday. I used my old Borderlands 9 Toes shoulder pads as a guide and reference. They were the first costume pieces that I ever made out of foam and so I figured that I could improve on their construction. The base for the pads are made out of 2X2 Harbor Freight foam mats and will be skinned with 3mm Craft Foam. The base pads are cut out using a band say and have the bottom edge shaved off with a belt sander. The Craft Foam is scored and also cut out with the band saw. Using barge to adhere the two together I first roll the base shoulder pad to the desired shape. This is very important!! While curled I place the craft foam in the center of the base and roll it out in both directions. This will keep the curve in the shoulder pads without any additional forming. Next step will be to make the spikes.

2_zpsdiunfozo.jpg


3_zps5is3xs1a.jpg


4_zpsebovtmcg.jpg


5_zpsofb8yd2z.jpg


6_zpsok2ebto4.jpg


7_zpsfc9su3eq.jpg


8_zpsd2tza7n2.jpg


9_zpspazf92qs.jpg
 
Re: Borderlands Bandit Steve Cosplay - SKS Props Updated 7/3/2015

Started to detail the top layer of the Borderlands Steve shoulder pads. To create this multi layer effect I used a stone Dremel tool attachment. I included my original shoulder pad to give it some scale. These new ones are quite a bit tougher and should hold up great at cons for a couple of years.

10_zpsjrf0cg9a.jpg


11_zpsrzzropik.jpg
 
Re: Borderlands Bandit Steve Cosplay - SKS Props Updated 7/6/2015

Moving onto the spikes for my Borderlands Bandit Steve costume. The spikes are first shaped out of floral foam on a belt sander. Once I get the basic shape I wrap the foam in Tandy Leather's TerraFlex. I made a pattern out of an old Netflix sleeve so that the right amount it used every time. Once the Terraflex has cooled I attached a wingnut screw to the bottom and sand it surface smooth with a Dremel. For the wrapped details on the spike I glue 3mm craft foam directly to the TerraFlex. Holes are punched through the shoulder pad and the spikes are attached underneath with the wingnut. Resin cast bolts and screw heads are attached with either glue or screws. Battle damage details are scratched into the surface using a sanding drum on my Dremel.

12_zps9gamprg1.jpg


13_zps6cishefv.jpg


14_zpsazdfzmkv.jpg


15_zpsvlw2jtvs.jpg


16_zpsrbu1b0t7.jpg


17_zpsa3vdtrbz.jpg


18_zpskumhx3ew.jpg


19_zpsb6njwlwl.jpg


20_zpssuoyqngf.jpg
 
Re: Borderlands Bandit Steve Cosplay - SKS Props Updated 7/7/2015

Started the painting process on my Borderlands Bandit Steve shoulder pads. All of the foam pieces were coated with several thin layers of Plastidip and a final layer of Krylon Black primer. Once dry all parts are covered with Rustoleum's Dark Iron and then Bright Silver on highlight areas. A mixture of Cadmium Red and Cadmium Orange are hand painted onto the top metal panel of each pad. Next I will weather the spikes and then apply final washes and highlights.

21_zpsqdipvdrt.jpg


22_zps1rhcvhk9.jpg


23_zpsvcckgtsx.jpg


24_zpsxjq1u26a.jpg


26_zps4qjnibjg.jpg


25_zpslkflevju.jpg
 
Re: Borderlands Bandit Steve Cosplay - SKS Props Updated 7/8/2015

Small Borderlands Bandit Steve update today . The Spikes that were made out of floral foam and Tandy Leather's TerraFlex. Were sprayed with Rustoleum's Dark Iron and then Bright Silver then hand weathered using Liquitex Mars Black acrylic paints. Highlight areas were painted again using Liquitex Iridescent Rich Silver.

27_zpsmstxastv.jpg


28_zpsgb7fehwk.jpg
 
Re: Borderlands Bandit Steve Cosplay - SKS Props Updated 7/9/2015

Borderlands Bandit Steve shoulder pads are complete! I am really happy with how these came out. I finished off the additional black line details using Liquitex Mars Black acrylic paint. Then highlighted the "metal" with Iridescent Rich Silver. Next I will be working on the belt that wraps from his left shoulder around his body.


29_zpsosbqk0cr.jpg


30_zps12z807wp.jpg


31_zpsumv3xcse.jpg


32_zps9ig9xs25.jpg


33_zpsxvjckapw.jpg
 
Re: Borderlands Bandit Steve Cosplay - SKS Props Updated 7/10/2015

I found you on Instagram a while back and immediately followed. Every piece you turn out is more impressive than the last.
 
Re: Borderlands Bandit Steve Cosplay - SKS Props Updated 7/10/2015

Started constructing the belt that wraps around the upper body of Borderlands Band Steve. The belt will be made out of L200 and the buckle will be made out of styrene. First off I cut the belt to length then attach two decorative strips on the top and bottom using Barge cement. I take a thick piece of styrene and rough out the basic shape of my buckle. I cut it out using my band saw and string the belt through. I made the buckles hinge and bar out of a 1/4" wooden dowel. The belt will be made out of 5 individual piece that will all be combined to make the finished product. You will see what I am talking about when I show step two and three.

34_zpsfaus60qy.jpg


35_zpsp1tlyaaf.jpg


36_zps84y7ofu9.jpg


37_zpsyhltcgf0.jpg


38_zpspopihaes.jpg
 
Re: Borderlands Bandit Steve Cosplay - SKS Props Updated 7/14/2015

Started working on cell shading my Borderlands Bandit Steve hoodie. Still has a long way to go but it's getting there. Once this is complete I will put up a full painting walk through on cell shading.

41_zpszdwvsn5a.jpg
 
Re: Borderlands Bandit Steve Cosplay - SKS Props Updated 7/19/2015

Here are the steps I took to make a faux pouch for my Borderlands Bandit Steve belt. I start off by creating a basic version out of Bristol Board then transfer that to my 3mm craft foam. After the shape is cut out I make groves for the fold lines on the back side using a heat tool. Then it's just a matter of folding it all up and gluing it together using Barge cement. Additional cell shaded details are added using the same heat tool but a larger chisel attachment.

39_zpsxk5ocirw.jpg


40_zpstyew5qqj.jpg
 
Re: Borderlands Bandit Steve Cosplay - SKS Props Updated 7/20/2015

Since the pouch is complete I can move on and fabricate the rest of the belt that will wrap around Bandit Steve's chest. I attach the pouch to the first half of the belt I made using Barge cement. Then connect the back half of the belt to the other side. The entire belt is plasti dipped and sprayed with Krylon black primer then flat colored using a rattle can of camo beige. Taking it back inside to the painting I dry brush the belt using unbleached Titanium. A wash of Burnt Umber is brushed over the entire surface and then wiped off so it just pools in the recesses. After this has dried entirely I went back in with Mars black to cell shade and line the details.

42_zpsvxwekwxw.jpg


43_zpsud43bvda.jpg


44_zpsqk1garl2.jpg


45_zpsaxx6wkou.jpg


46_zpsbjswf4yp.jpg


47_zps04qzhfge.jpg


48_zpsnloxbjpr.jpg


49_zpsz6a7pya3.jpg


50_zpsnxco5eus.jpg
 
This thread is more than 8 years old.

Your message may be considered spam for the following reasons:

  1. This thread hasn't been active in some time. A new post in this thread might not contribute constructively to this discussion after so long.
If you wish to reply despite these issues, check the box below before replying.
Be aware that malicious compliance may result in more severe penalties.
Back
Top