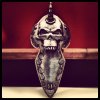
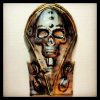
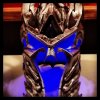
Lich King Build

More big progress!!!

A few days ago, I finally received my shipment of scale mail. The Lich King has scale mail that starts under his shoulder armor, and continues down both arms to his elbows. I ordered about 500 scales, but I think I'm going to need more. The regular chain mail continues from just above the elbow down to the wrist.

Here's is the backside of the scale mail as you "weave" it.
IMG_3549.JPG

Here's the front of the mail. I'll be airbrushing it the correct colors later one. Right now it most closely resembles brushed aluminum. Well...because it is! There's also a shot of my arm. Who wanted two tickets to the gun show?!?! :lol
IMG_3550.JPG
IMG_3551.JPG

I also finished applying the styrospray to the helmet today. I should be able to sand and prime it tomorrow. Then I'll be able to clean up any remaining spots and finally get the final paint on that thing!
IMG_3554.JPG

Here's are some pics of the rest of the items that are now coated in styrospray. They will require cleanup, more styrospray coating and then sand/prime before I paint them. The pieces are the hand gauntlets, forearms and the shin.
IMG_3555.JPGIMG_3556.JPGIMG_3557.JPG

Finally, I'm not printing the massive chest piece. These are the pieces that make up the collar section. I printed this first to make sure it was the right size. I'm going to print the entire chest, and then cut it in half on the sides. I'll make a quick connect system so I can easily get in/out of the chest piece. The seams will be hidden by the cape and shoulder armor.
IMG_3558.JPG
 
Today I made some real progress in the finishing department. Now, having said that, these pieces still need some work done to them, but they are really shaping up! :D

Here's the helmet after some sanding and being primed. Yes, there are defects, but they are supposed to be there. Armor is not like Iron Man...it shouldn't be smooth and glossy. It should be hand forged, battle damaged and dirty looking. This is the look I'm going after, hence the purposefully left imperfections.
One fix I did was to the previously broken pieces from the other day. I had to repair a weak print layer, which is why you see the small spring vice on the helmet.
IMG_3562.JPG
IMG_3563.JPG

Here are the shin, forearm and hand pieces after priming. Yes, you can see the glue lines. Yes, they will be taken care of. That is the point of the priming...it makes the defects very easy to see. Some will be sanded, others will need a very light addition of bondo.
IMG_3564.JPG
IMG_3565.JPG
IMG_3566.JPG

And, because I wanted to see how my paint looked, I shot the pieces with some color to see if it has the desired effect. Again, these are not finished pieces, but I wanted to see if my "hammered pewter" paint really looked like I hoped...and it had! This stuff is amazing! I've used the "cast iron" paint for a cannon project, so I knew that this Rustoleum was going to look great. It really does look like hammered and pitted metal. Now to clean it up and paint it for reals! :cool
IMG_3567.JPG
IMG_3568.JPG
IMG_3569.JPG
IMG_3570.JPG
 
Still making pretty good progress. Going to do final bondo on a number of parts along with a final sanding touchup on helmet. Helmet will be done except for paint/airbrush highlights.

I will be taking a few days off from the build to work on my printer. It seems that the area I print in (my basement) has gotten too cold this winter. If an ABS print cools too quickly, it splits. I've lost a number of prints due to this, so I'm going to be building an enclosure for the printer.

The enclosure will look like this when done: https://www.thingiverse.com/thing:213632
It will keep the temperature from the heated bed inside the printing area, allowing the print to cool MUCH slower and not split or warp.

After printing the parts for that project, I'll get back to printing the chest and slicing the shoulders, belt and thigh pieces. Then I have to print a few duplicates for my arms/legs, since I only printed one of each so far. Then a lot of cleanup and paint. Finally adding leather straps and buckles to hold everything on. Geesh...there's a ton to do yet!!! Still hoping (and praying!) to have this done for C2E2 at the end of April.

Pics to come later! :D
 
Quick update with some pics this time!

Over the course of this build, I've learned quite a bit about 3D printing these types of projects. As I move forward, I'm going to apply what I've learned, and hopefully save someone here a bunch of headaches.

First, print the largest pieces you can. While smaller pieces are easier to print and manage, it adds a ton of time to the process, uses more filament and weakens the structure. The more pieces you have to glue together, the more failure points you're creating. As I make the duplicate pieces, I'm slicing them different than I did for their counterparts. I also am off-setting slices, so that I don't have 4 corners coming together (very weak).

I also will be doing a bunch more prep work on the prints before I move forward to bondo/styrospray. Getting the plastic smoothed/sanded and as level as possible BEFORE doing these steps will save a bunch of work down the road.

Other than adding the rest of the paint and the leather straps, I'm calling this forearm piece done.
IMG_3621.JPG

Here's a piece being printed. All of the "towers" you see are support structures. When the print is done, you peel them off and throw them away. When printing overhangs, large angles or pieces out in space, you need to support them.
IMG_3622.JPG

My leather straps. Cut them by hand and applied the first coat of leather dye. Need to darken them up yet. I'll be getting the brass hardware and aging it appropriately.
IMG_3625.JPG

Right half of the chest piece. Shot from the side, front and on my body. Looks like a perfect fit...so far. I really won't know for sure until I start printing the neck areas.
IMG_3637.JPG
IMG_3638.JPG
IMG_3639.JPG
 
Big milestone today! I have a piece about 90% complete...meaning the paint is practically done, and all I have to do is add the leather straps and buckles!

Before I get to that, my gloves came in today and they are perfect! All I have to do is add some fur to the edge of the long cuff and they are done. Fit great, all leather, dark brown and only $26 off of eBay!
IMG_3651.JPG
IMG_3652.JPG

Here are some pictures before the gauntlet was completely painted. The ones that show it on my arm were just to test the fit of the gloves and placement of pieces. The hand piece isn't painted, and you can see the filigree stencil sitting on the gauntlet. I ended up cutting out custom stencils for all of the scroll work on the armor. I just used my Silhouette Cameo and they come out perfect each time!
IMG_3650.JPG
IMG_3653.JPG
IMG_3654.JPG

And here is the completed piece. Well, almost complete. I have to darken the lines around the scroll work, and repaint some of the black back to silver. It's too dark and not enough contrast.
IMG_3655.JPG
IMG_3656.JPG
IMG_3657.JPG
 
In looking at pictures of the Lich King, and the scale models I have, I'm not sure what colors to make the scroll work. The models show it as black on the silver throughout the armor, but all of the official drawings (digital) show the detail as blue.

I did spray the entire pieces with a light blue hue to make it look "cold" and frozen.

Comments and suggestions are appreciated!
 
Very Impressive. I have many fond memories or WOTLK as it was my favorite expansion. I have spent hours looking at the LK. I look forward to seeing the completed project.
 
Update time! Yeah, I haven't posted in a bit, but there is still plenty of work being done. And not just on the Lich...on my printer and other times as well. Lemme explain...

About a week or so ago, my 3D printer started to act up. The heated print head was jamming and causing all kinds of issues. I had to completely disassemble it and rebuild it. Then it worked for a day, but then jammed up. So, I ordered a new and improved head. But, wouldn't you know it, while that one was on order, I managed to get the original one working again! After all is said and done, I now have a brand new print head sitting on the desk waiting to be installed, while the old one is still working. I'll change them out when this roll of filament is used up. Oh, and all of this drama cost me about 4-5 days of print time. Boooooo!

Another new addition to the 3D printing family is my filament maker! I'm now the proud owner of a Filastruder and Filawinder. The "struder" makes filament for me at a cost of about $5 a roll, compared to purchasing rolls at around $25-$30. The "winder" spools the plastic as it is made. It saves a ton of headaches and helps keeps the filament an even thickness.

This is the Filastruder. You put plastic pellets in the hopper at the front, and an auger and heater melts the pellets and extrudes the filament out of the bottom.
IMG_3703.JPG

This is the laser eye for the winder. As the filament is made, it slowly drops in front of the eye. The eye notices the movement and winds the plastic the required amount to keep it even in the eyes. Very neat!
IMG_3706.JPG

The rest of the winder. Not much to explain here. It turns when told to by the eye. It also moves the filament back and forth so it stays neat on the spool.
IMG_3704.JPG

Finished leg gauntlet. I'm really happy with how this turned out!
IMG_3680.JPG

Finished arm gauntlet.
IMG_3662.JPG

A bunch of pictures of the finished helm. I installed blue LED lights above the eye holes. I intend on getting blue contacts as well. I'm also working on converting an e-cigarette into a mini smoke machine so I can have smoke pour from the eye holes when I activate it. Just like the Lich King in the game!
IMG_3677.JPG
IMG_3676.JPG
IMG_3674.JPG
IMG_3673.JPG
IMG_3672.JPG

Finally, a pile of chest piece parts. I've been printing like crazy, just haven't sanded, glued and epoxied them yet! Oh, the yellow is just yellow colored ABS. Everything is going to be primed/painted, so the colors don't matter.
IMG_3705.JPG
 
Very cool build! You think you will offer copies of your helmet in the JY?

I may clean it up even more and offer casts, but I would want permission from the original pep file maker, since that's how I did the 3D models.

Thanks for the compliment!


Sent from my iPhone using Tapatalk
 
This thread is more than 6 years old.

Your message may be considered spam for the following reasons:

  1. This thread hasn't been active in some time. A new post in this thread might not contribute constructively to this discussion after so long.
If you wish to reply despite these issues, check the box below before replying.
Be aware that malicious compliance may result in more severe penalties.
Back
Top