Kids' Halloween Costumes for 2013: WoW Geist, Generator Rex, Batman, Pink Batman

indiefilmgeek

Sr Member
I normally post my kid's Halloween costume builds earlier than this, but with four kids things are ALWAYS busy! Heck, I even missed this year's RPF Halloween Costume Contest. That actually works out great, as I get to enjoy all the awesome work everyone had done for their kids this year with having to worry about getting all my builds documented. :)

Anyway, I hope you enjoy a brief look at what we did this year!

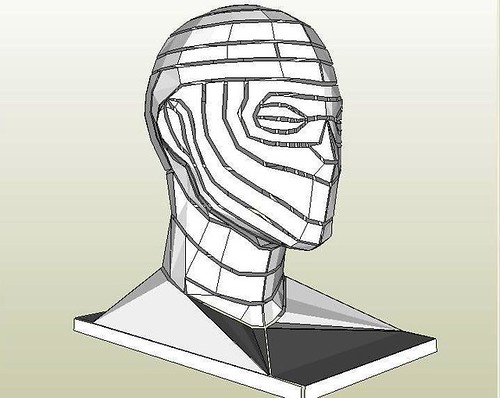
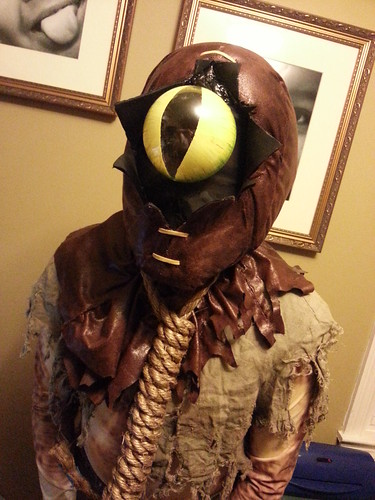
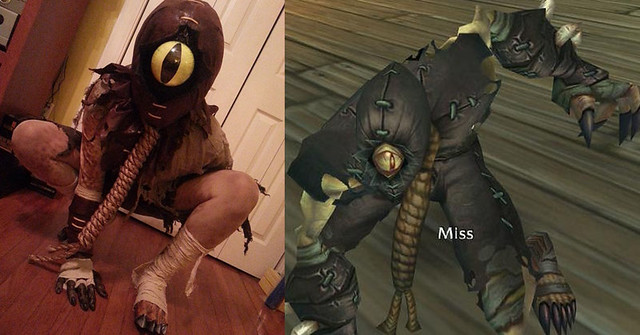
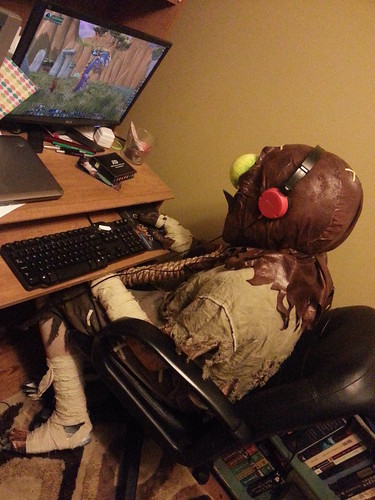
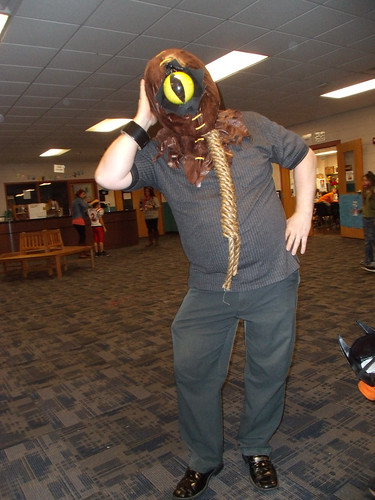
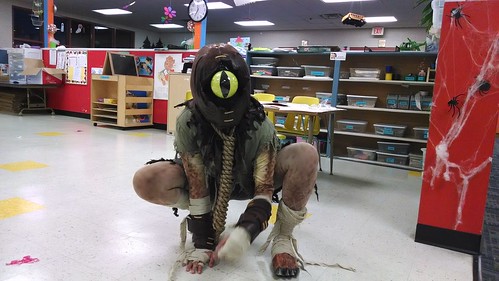
This year, Tino (now 11yr olds) wanted to be a Geist from World of Warcraft...
10752396603_e99fef6eb2.jpg

10751999675_118b0b8e16.jpg


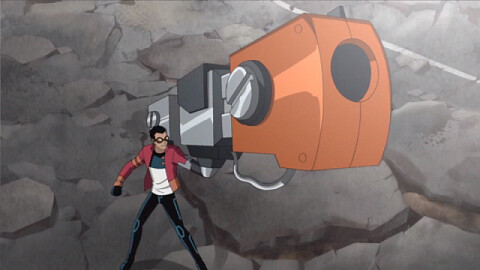
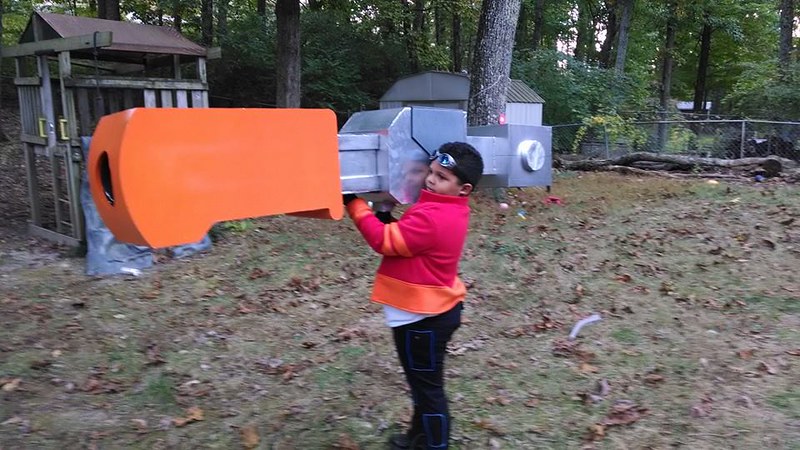
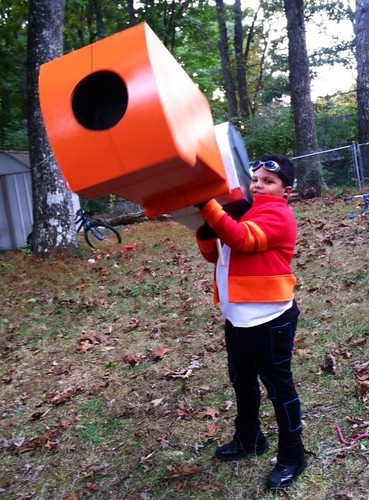
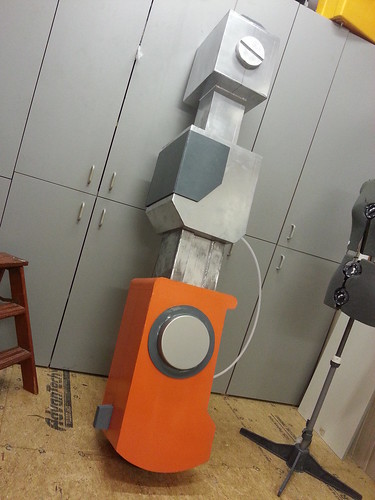
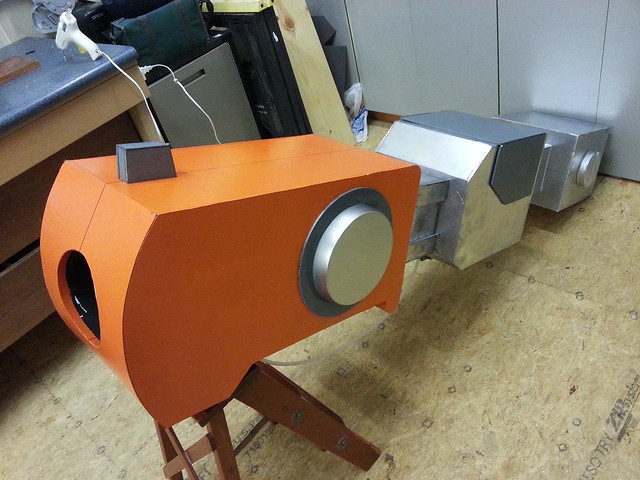
Mikey (now 7yr olds) wanted to be Generator Rex (older Cartoon Network character)...
10752324735_10cbd51f27.jpg
10752634156_ca7f93c7ab.jpg

10759599503_ebd2b62583.jpg
10752615546_c16e854bac.jpg


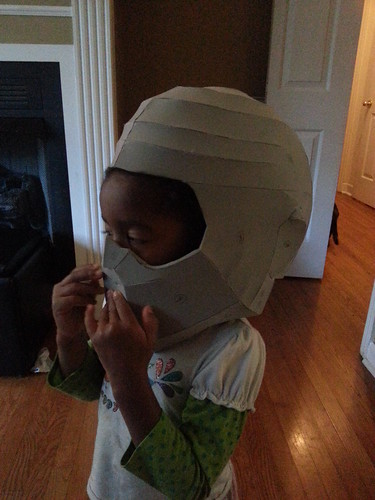
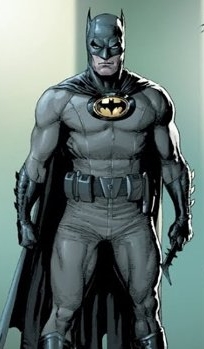
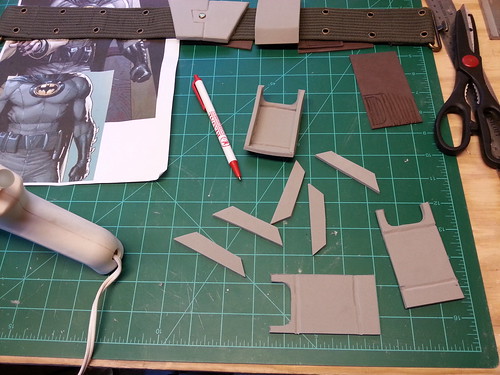
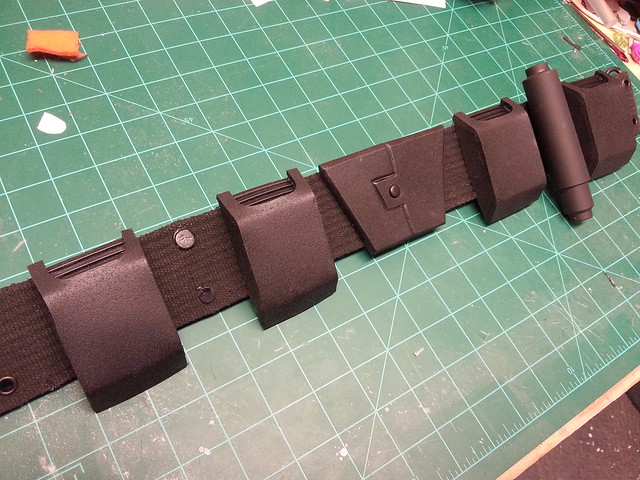
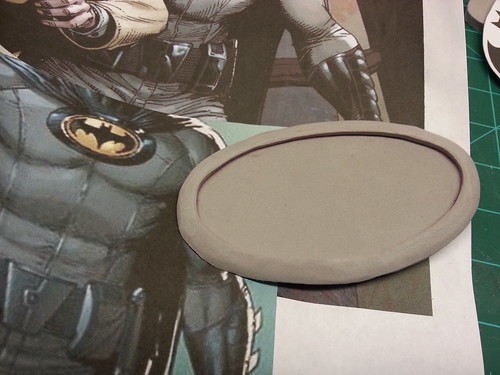
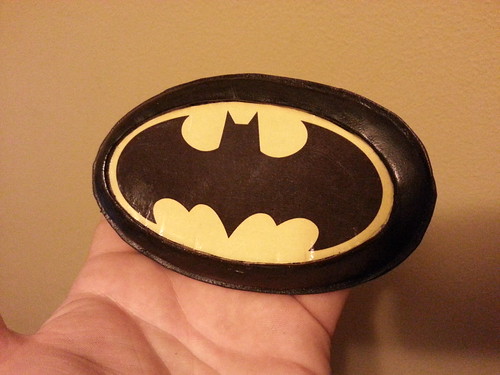
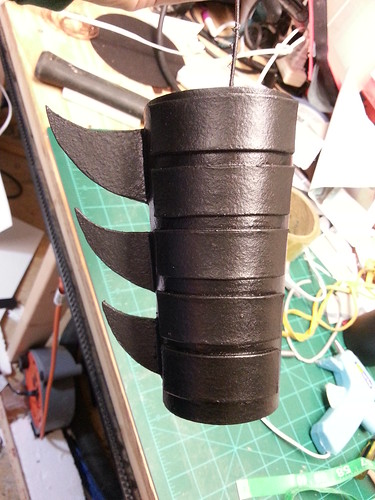
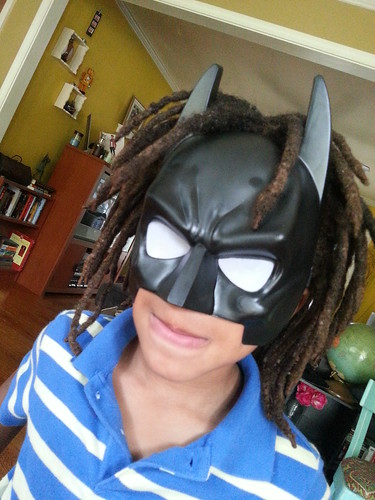
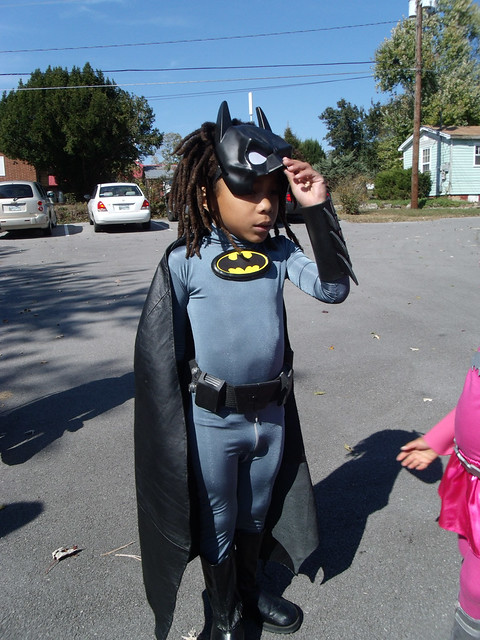
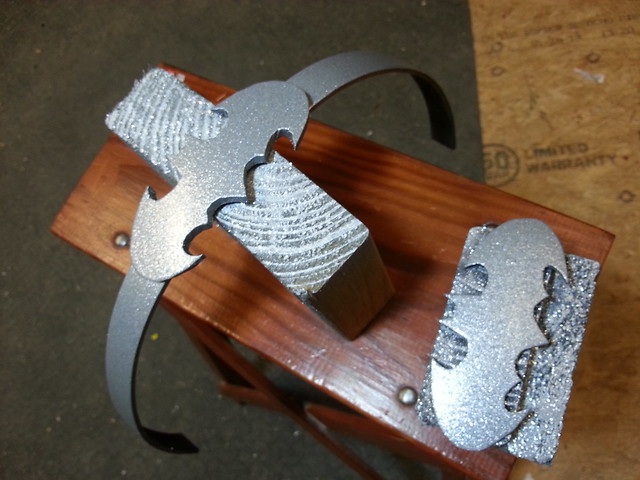
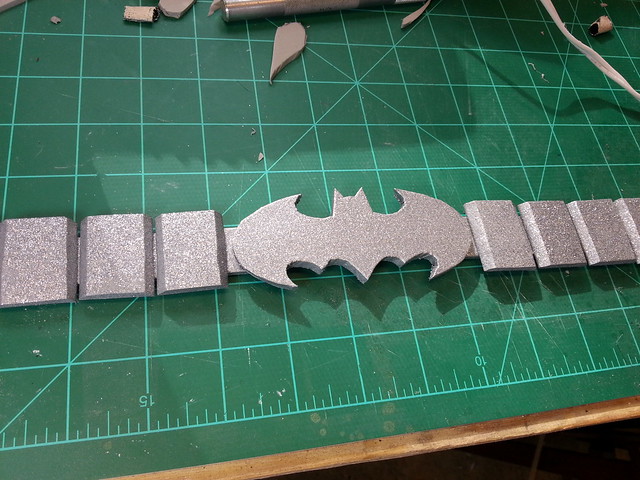
Jakim (5yr old) wanted to be batman (Earth One version)...

10752907833_b3e214a588.jpg


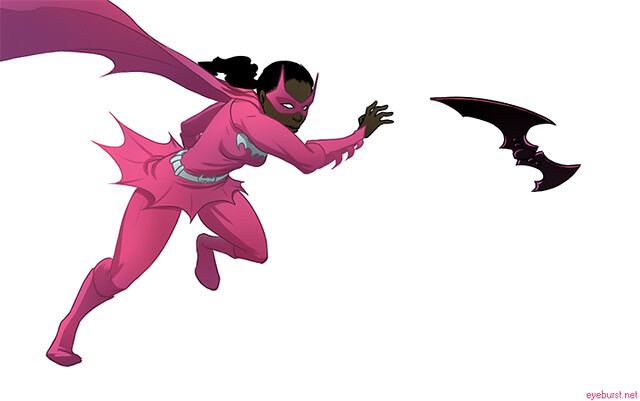
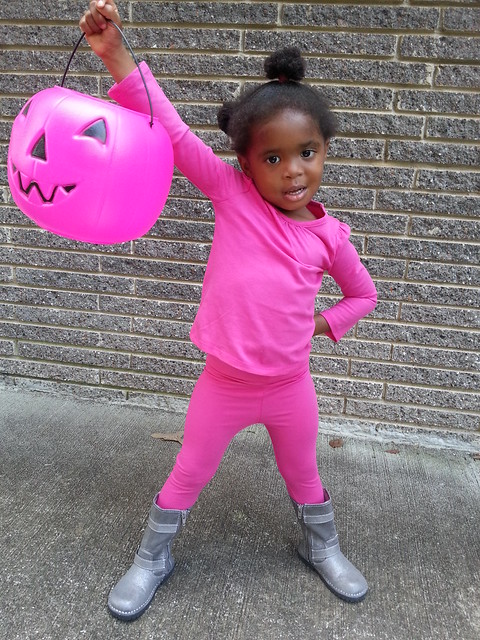
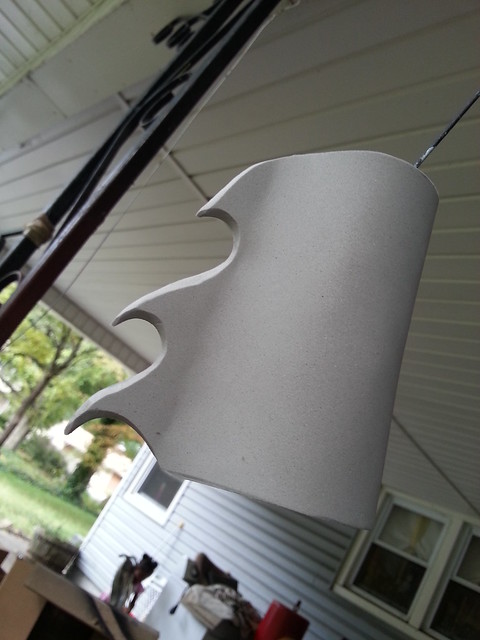
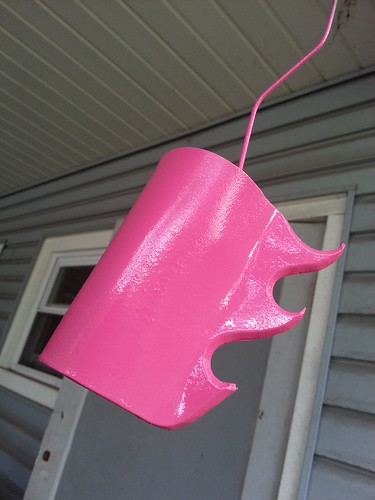
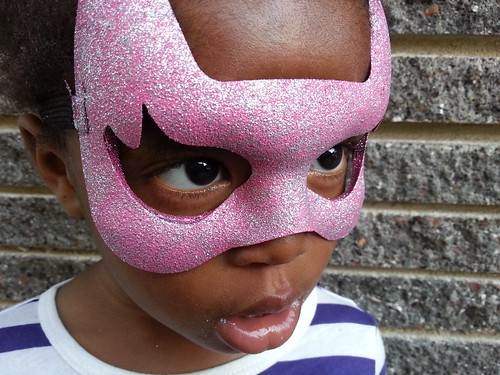
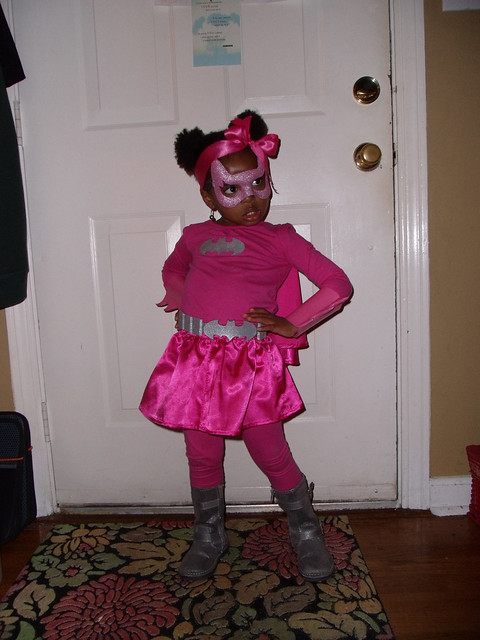
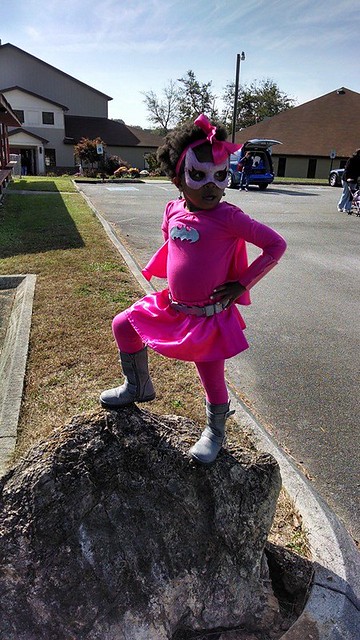
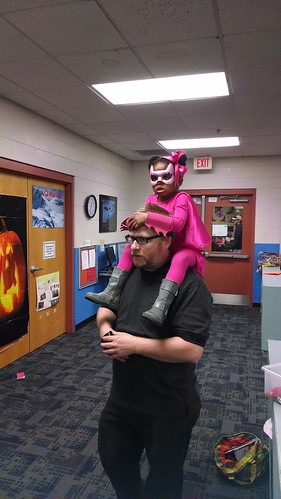
...and, finally, due to fact that her older brother wanted to be batman, our 3yr old little girl wanted to also be batman... except PINK!
10752396263_2466178c5a.jpg

10752198744_3442ddc32f.jpg


*******************************
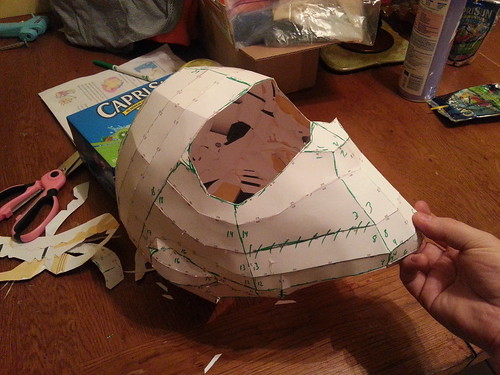
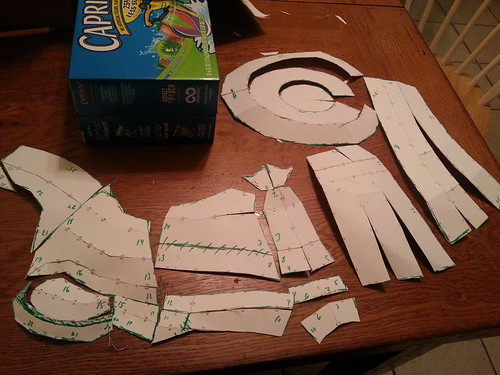
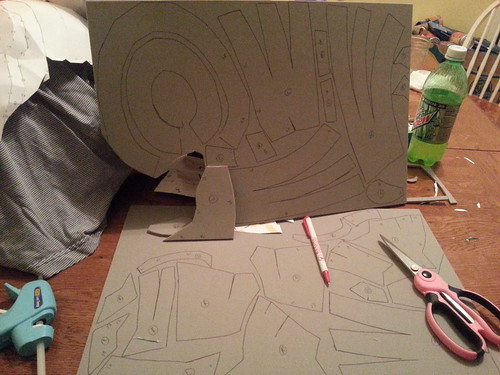
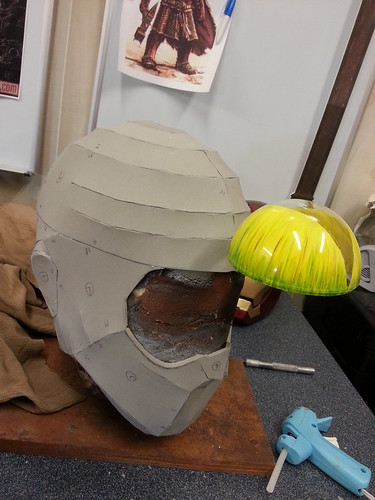
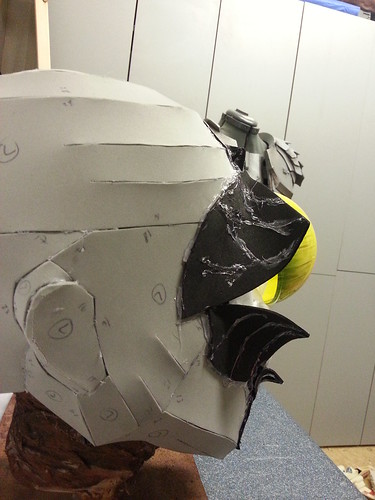
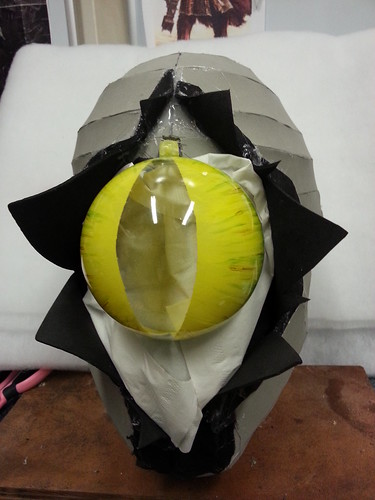
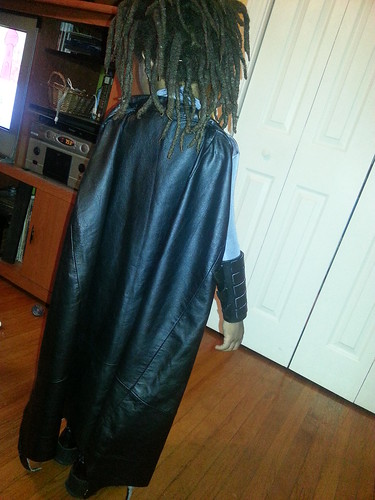
TINO'S BUILD: Geist from World of Warcraft
*******************************


As always, I try to do these on a budget and this costume was done for ~$100 total.

We had the undersuit from her Predator costume last year, so we started with that and began working on the other pieces we'd need.

MONSTER FEET:
I started with his monster feet. We took cheap deck shoes and I just roughed out where I wanted the claw-toes.
9698128760_b0b1ffd326.jpg


I then used EVA foam to create the basic shape of each claw-toe. I also used some of the hot-glue to create the transition ridge between the monster foot flesh and the claw.

After all the claw-toes were done this is roughly how they looked...
9698125032_042f9478dd.jpg


I then hit them with some Plasti-dip.
9694889705_930b4fc825.jpg


After this first layer, I went back and smoothed out the rough stops and transitions to the shoes with latex caulking. Then hit them again with a couple coats of Plasti-dip.
9694887869_792d686269.jpg


From there I used some latex fabric paint I had laying around and painted them up.
10752049185_6951e7dca3.jpg


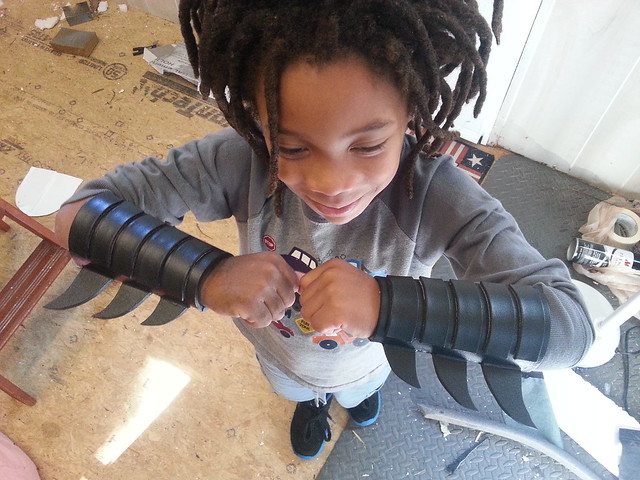
Here is an early test of them on Tino (I really wanted to know how they would work as he bent them in the crouching poise he used during cosplay).
9694885897_9e5b35f19e.jpg


I planned on covering the whole back of the feet with 'mummy' wrap that would transition directly to the mummy wrap on his lower legs.

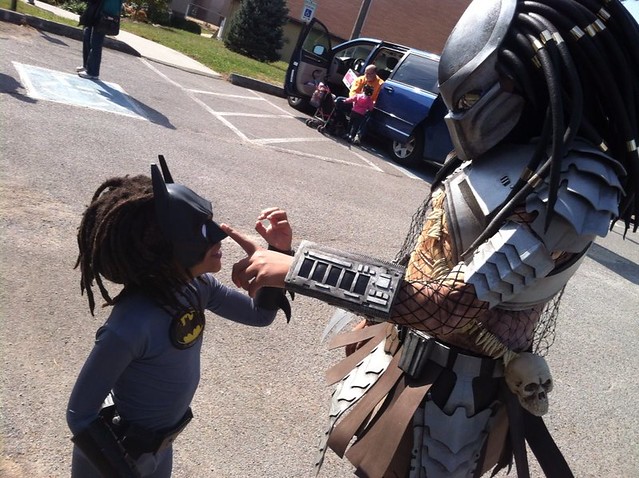
...They also came in handy as an addition to the couple of appearances of last year's Predator costume!
10759286095_6734f19c05_n.jpg

Predator Tino is unimpressed...
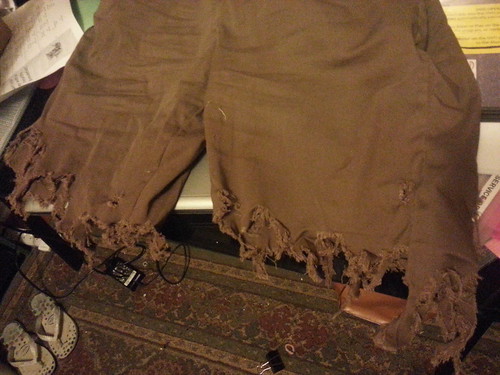
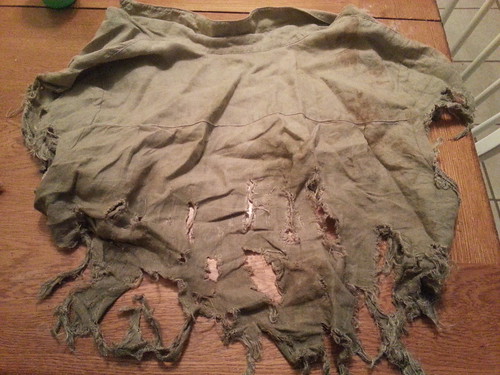
MUMMY WRAP:
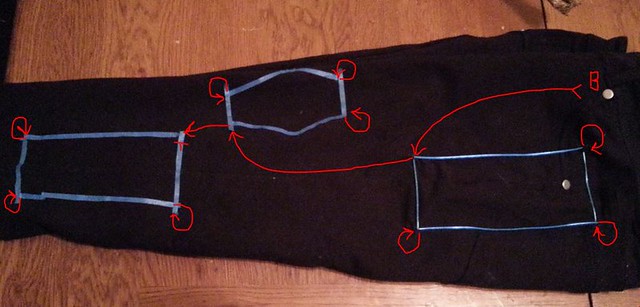
For this I just bought some very cheap muslin and cut it into strips (~2" wide). To make the job easier, I used a strip of wide painter's tape and simply cut along the line, then moved the tape to the new edge and repeated. It made the job go very quickly.
9698131134_3ac0dbe7b8.jpg


I then tea-dyed the material to give it a used-worn and dirty look. HERE is a good tutorial on that process. After dying the material, I hung it out to dry. :)
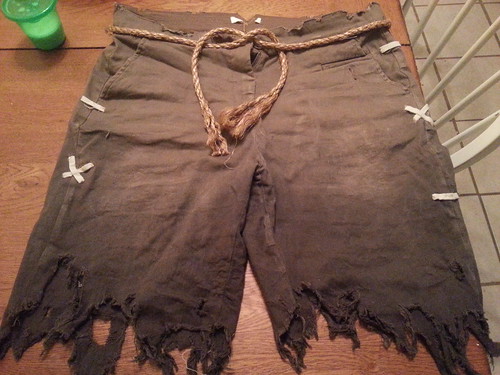
9694896559_aa70252cda.jpg


NOOSE:
So, the noose... (yeah, it's weird building a noose for your kiddo). I started off using an actual noose knot, but it simply didn't look like the CGI character. So, I decided to just wood-glue the rope into the shape I wanted. This made it look a lot closer to the reference pictures and made it 'safer' than having a real hang-man's noose knot.
9698122330_c48486d22f.jpg


Still wanting more safety, I cut the loop at the very top, harded the edges with wood glue and then sunk rare-earth magnets into both ends... this turned it into a 'clip-on noose'.
9698118492_9672dd7999.jpg
 

Attachments

  • 10752396603_e99fef6eb2_z.jpg
    10752396603_e99fef6eb2_z.jpg
    225 KB · Views: 167
Last edited:
Re: IndieFilmGeek's Kids Halloween Costumes for 2013: WoW Geist, Generator Rex, Batma

PANTS:
For these I started by buying a cheap pair of pants from a local thrift store. I then tore them up. Regarding 'how' to do this, you can start with cutting them off into the general shape you want. Then I mostly use scissors to get the edges into general shape. HERE's a good tutorial on the scissor method.
9698126126_ca56779eea.jpg


Then I further distress the fabric with sanding blocks and my dremel. HERE's an ok tutorial on the dremel distressing.

After that, I dyed the fabric (which was a first for me). The fading coloring I wanted is called Ombre dyeing. The tutorial I used to help me out was THIS one.
10758264074_d80ca7c6e3.jpg

*I didn't mention that I also added those large 'stitching' and rope details, but you can see them in this photo.

The finally, I take the piece outside and stomp, grind and pull it through the grass and mud. This is how the tatters of the shirt came out (using the same methods).
10758243056_4541322b1e.jpg
 
Re: IndieFilmGeek's Kids Halloween Costumes for 2013: WoW Geist, Generator Rex, Batma

Leather hood:
This was the largest challenge. I needed a basic 'hood shell', and my first thought was to use this paintball face-shield I picked up at at a yard sale for $1.
9694881259_e160929e02.jpg


But it simply didn't provide me enough coverage to work as a base to get the 'leather' material mounted on it. It also was uncomfortable for Tia to wear. So, that was out...

That's when I ran into this pep file for the helmet stand. Some folks on this forum have mentioned using it as a face shell, and I decided that it would be perfect my use!


10758582073_2e97f18833.jpg

PEP FILE

I only used the head (no neck parts). I made a VERY fast (and sloppy) pep build.
10026816816_8cc2c66863.jpg


I then marked it up and cut it into foam templates, that I would use to create a foam version of this.
10026799805_3e2e06fbbb.jpg


These are transferred to some 4mm EVA closed-cell foam.
10026746394_b2fe6c8d63.jpg


After it was all glued together, I widened the face opening and let the 4yr old test it out! :)
10758613266_bcf521a7fb.jpg


I then started working on the EYE BALL...

For that piece I just bought a $3 plastic Christmas ornament from a hobby store. These are the ones that come in two halves so you can paint the inside of them or fill them with stuff. For me, it was the perfect eye-ball!
I taped off where the pupil would be and then painted the eye from the inside (so the plastic of the orb on the outside would be glossy and look like a natural cornea.
9694883159_599ce0a3f3.jpg


9694882265_9489dd5c71.jpg


This worked pretty well, but I knew this would still be right in the middle of our vision. So, I designed a quick locking hinge (stolen from toy I picked up at another thrift store.
10026736734_187b94f72a.jpg


I then mounted this onto the foam head shell.
10026849603_0b3f3e4136.jpg


Next up was gluing a piece of thin black fabric over the face opening that would allow her to see out but also prevent people from seeing here face.
10752159176_081225361f.jpg


In the reference photo it looks like the leather is torn open where this cyclops-style eye is poking out. I cheated this opening wider to allow Tia more room on the sides of the eye-ball to see. And then started to glue more foam around the opening - to act as re-enforcing that the 'leather' fabric would be attached to.
10752074455_b97d86cbb2.jpg


It's ugly, but since it will all be covered, I didn't care. lol

Here is the whole opening finished from the side...
10752170654_fc10bfe701.jpg


and the front...
10752071975_92bcb936a8.jpg

*I've added a white tissue so you can see the black flaps against the black-out fabric.

After this, I used some thin batting (just glued it on the foam). This was to help round-out the rough corners of the foam).
10752067995_4dbe32cb10.jpg


Fabric time... here's the fabric I picked to use. It's very thin, but looks like leather.
10752386383_366eddcfb8.jpg


Then it was time to glue the fabric down to this... I started in the back (which is split open from the back of the neck to the top of the head, so she can get into it). Here is how it looked glued down. I still have pins in it (which I just hand stitched later).
10752368963_ea718caa7e.jpg


This shows the how well the back seam looks... it stayed closed enough by itself, that we never had to create any fasteners! :D
10752063705_5361aa7e28.jpg


I then distressed (just cut up) the edge of the 'leather' hood. I'm about half-way done here...
10752363603_04079eddd7.jpg


Once the wrapping was done, it this was an early test fitting with temp monster fingers.
10752179556_33f2cfcc47_z.jpg


And here is a WoW creature playing WoW...
10752096664_b9b0f2405c.jpg


And even funnier... here's ME in the hood.
10759347316_be4ea6d982.jpg

:lol:lol:lol

Final result of this budget build:
10759362475_6267b63f95.jpg
 
Last edited:
Re: IndieFilmGeek's Kids Halloween Costumes for 2013: WoW Geist, Generator Rex, Batma

MIKEY'S GENERATOR REX BUILD

So, for reference this was a Cartoon Network character.
10752324735_10cbd51f27.jpg


I found some black stretch pants (I think they were women-Capri pants actually, but they worked GREAT for Mikey! We also found some awesome boots at a thrift store. I'll note the illuminated wire later, but I wanted to mention that my mother actually created the t-shirt and jacket. She had some old patterns that were close and just faked the rest - she's pretty awesome! :)

PANTS:
I started with the black stretch pants and hand-stitched el-wire (illuminated wire) on them to make the geometric shapes seen in the cartoon. I've never worked with el-wire, and it wasn't very easy to keep in it in the desired shapes. I ended up using loops on the inside of the sharp corners.

Here is what it looked like as I had just stitched in the top rectangle (thin painter's tape marks off the other shapes for this leg).
9741366321_1decb1c00e.jpg


To explain what I mean about looping the corners, here is the inside path of the single 6ft el-wire for this leg:
10770783853_59a25f8753_z.jpg


The wire starts at the battery pack at the waist, and then takes that looping route down the leg until it ends. This turned out to be right at 6ft for Mikey's leg.

Here is a tragically terrible shot of what it looked like lit.
9743478348_972734b1ab.jpg


The Cannon:
While Rex can transform his limbs into many things, I decided early on that his 'slam cannon' would be thing that would keep him out of the most trouble. Obviously, since this is a cartoon they could do physically impossible things... check out the scale of this cannon...
10752634156_ca7f93c7ab.jpg


I was 'gifted' about 12 foam-boards from a work presentation that was finished and I used a bit of Styrofoam to support that. I purchased the paint and one piece of stiff card stock of the front of the gun and two $1 pie pans for the giant bolts, but this cannon was built for less than $20 total.

This is the front part of the cannon as I was re-enforcing the foam-boards with Styrofoam.
10752340773_25c39c5cd4.jpg


Here it is closed up...
10752117656_891e9ca80d.jpg


And here is the curved front of the cannon after I attached the stiff card stock I bought (the 'barrel' is half of a gallon bleach bottom I cut and dropped into the hole).
10752336443_7221680e3e.jpg


Then I built the middle section of the cannon...
10752334533_66c40f1426.jpg


...and the connecting bar...
10752331483_c994369647.jpg


At that point I wanted to test it out (prior to building the third (back) section...
10752026835_f60edb3122.jpg

*He doesn't seem to enjoy this toy at all, eh? :lol

At this point I did I a little painting... first the orange.
10752021975_4bfbe56107.jpg


The the silver metallic...
10752104706_799f734c18.jpg
\

Once I had these three pieces together I did a bit of distressing on the sliding pieces...
10752092696_7de0f16f01.jpg


Followed by creating the rear section of the cannon (it's now 6ft long).
10752320923_67554a3259.jpg


Here is Mikey testing out the painted version (prior to adding all the details)...
10752180076_e4328a68b1_c.jpg


10752615546_c16e854bac.jpg


Here is what the final cannon looks like...
10771194423_8da0437e7d.jpg


10770912895_9b55a35358_z.jpg


For a costume that cost less than $60 to build (fabric, paint, el-wire, pants and boots), I think we did alright! :)
 
Re: My Kids' Halloween Costumes for 2013: WoW Geist, Generator Rex, Batman(s)

Jakim's BATMAN (inspired by Earth One):

Jakim looked throw LOTS of Batman suits before landing on this one. Not sure if it was the lack of shorts or some other detail that sparked his interest, but I went with it!
10771047895_ea3dfc1d95_o.jpg


We started by ordering him a custom spandex suit. I decided a zippered fly would be a good idea (since he is 5yrs old and all) - and the Earth One suit seems to have a fly as well).

10752054865_53aa7228d1.jpg

*at least he has that intense batman stare down!

We had to do some minor adjusting, but overall it worked great for a starting point. From that point, I add some boots we found at a yard sale.
9541372871_fd2a2359c9.jpg


BELT:
And then I started working his belt. I took an old army belt and cut and create the pieces I wanted out of EVA foam.

9741330021_fa61351011.jpg


9741336031_66bc3e5a79_z.jpg


And here is what it looked like after a coating of black plasti-dip...
10752141674_b84816e589_z.jpg


BAT LOGO:
For the bat crest on his chest, I started with some 6mm foam and used a slow speed dremel with a fine grained stone tip to get the rounded edge I wanted.
10752047285_cb8f783750.jpg


It's rough, but after it was painted and I had used mod-podge to glue in a color print-out of the bat sign, it looked passable.
10771058724_45bb76fed7.jpg


GAUNTLETS:
For the gauntlets, I just used some paper and created a template for sizing purposes. I then created a tapered cylinder shape for the base of the bracers and then added the fins and some detailing. After I hit it them with some plasti-dip they looks pretty good.
10752008515_4d0d9388eb.jpg

* Note, I didn't see anything on the can, but plasti-dip does NOT work if you're using it under 50 degrees. I nearly ruined these multiple times trying it... then finally brought the cans inside to warm up to room temp. After that they worked just fine.

Here they are on Jakim...
10752306543_abf2d1ca96_z.jpg


For the cape, I actually HAD a long black leather woman's skirt I had purchased at a thrift store months prior (for the leather material, I promise). It turned out to be JUST the right size to work for his cape... so with some cutting and hand-stitching we had a leather cape!
10752302433_e5652fd066.jpg


Here is the other part of that test-fitting...
10752083896_a10d9e54a8.jpg


You'll note Jakim has DREADLOCKS... So, a normal cowl won't work. We opted for one of the store-bought masks... but Jakim INSISTED that we white the eyes out - so we did.

9743486248_0bf7f01a67.jpg


In the end, for less than $60 we had a pretty good looking Batman costume!
10759837996_3549af4dab_z.jpg


My favorite pic this Halloween was Jakim and Tia (in her Predator costume from last year)... I love this. :)
10752179866_f2809b2be6_z.jpg
 
When my 4yr old daughter asked to be 'pink Batman', I cringed. Cute isn't one of my stronger elements (and I thought she meant the retail 'girl version' costumes that have been popping up the last two years. But after my wife found this image, I was a bit more excited to take this one on.
10752396263_2466178c5a_z.jpg


We started with a nice pair of silver (sparkly) boots and a set of long-sleeves shirt and stretch pants that were matching pink. These (and paint) were the only purchases, so this costume was put together for less than $50.
10026872433_459146fb95_z.jpg


For the belt, I just fabricated it out of EVA foam.
10026803746_a55a7e1e67.jpg


then painted it with silver paint (and then a spray-on glitter coating).
10026787926_63f944ec57_z.jpg

*The other bat symbol is for her chest.

After is was full done, it looked like this:
10026710704_f27aa90a45_z.jpg


For her gauntlets, I also used EVA foam.
10026716744_3d876cd6d1_z.jpg


Once I had the size right, I shaped the fins with my dremel and the stone sanding tip.
10026842613_2ee8ae7093_z.jpg


Then hit them with Plasti-dip and pink paint.
10026708494_eae2e33386.jpg


With the pink top, the set-up looked like this:
10026698534_9c3285d70a_z.jpg


For the cape and skirt, I bought some pink satin and created some basic patterns that I mailed to my mother. 'Grandma' did all the sewing and then mailed back the skirt and cape for me to attach to the rest of the suit.
10026704284_3074d8afcb.jpg


Then we bought a retail mask and I painted it matching pink (and then sprayed on more glitter).
10752133226_29b091cdc5.jpg


End Result was this cute costume!
10759395426_17f4c99b51_z.jpg


10752198744_3442ddc32f_z.jpg


And while she didn't have an official 'batmobile', she got the next best ride available!
10759445324_d194955970.jpg


Thanks for checking these costumes out. I had a blast creating them and the kids loved showing them off! :)
 
Re: IndieFilmGeek's Kids Halloween Costumes for 2013: WoW Geist, Generator Rex, Batma

Generator Rex was one of my favorite TV shows growing up, and I just have to say that this is an adorable costume. Keep up the good work!
 
This thread is more than 9 years old.

Your message may be considered spam for the following reasons:

  1. This thread hasn't been active in some time. A new post in this thread might not contribute constructively to this discussion after so long.
If you wish to reply despite these issues, check the box below before replying.
Be aware that malicious compliance may result in more severe penalties.
Back
Top