Yarooon
Sr Member
anyone see this?
found it here: Print Page - marvel sheild C-17x "The Bus"
http://i116.photobucket.com/albums/o1/lenny100/DSC00028_zps3585064a.jpg
Nice Find al though he didn't stretch the plane
anyone see this?
found it here: Print Page - marvel sheild C-17x "The Bus"
http://i116.photobucket.com/albums/o1/lenny100/DSC00028_zps3585064a.jpg
")
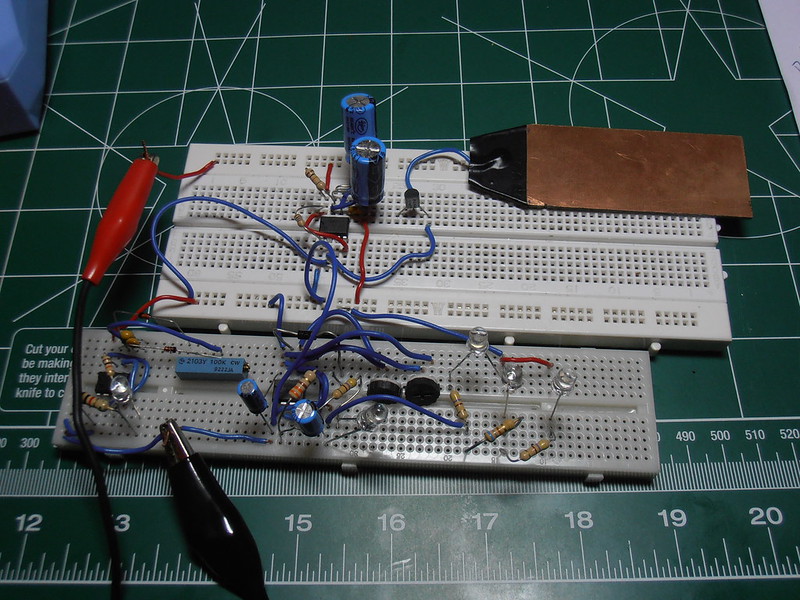
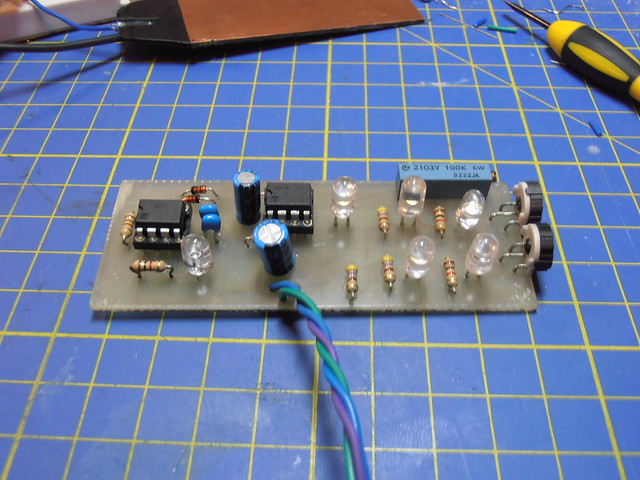
Sweet thats cool looking Will a shame to put it where no-one Will see itsome trial and error but I'm quite happy with my first in-house PCB. Unfortunately, the board pictured is now in the trash. Drill bit broke on the 3rd hole I was drilling.:angry
So all work stops for the next few hours while I lug my keister down to the center of Athens to pick up some carbide micro-drills and a drill press attachment for my dremel. :facepalm My cnc laser can't come fast enough...
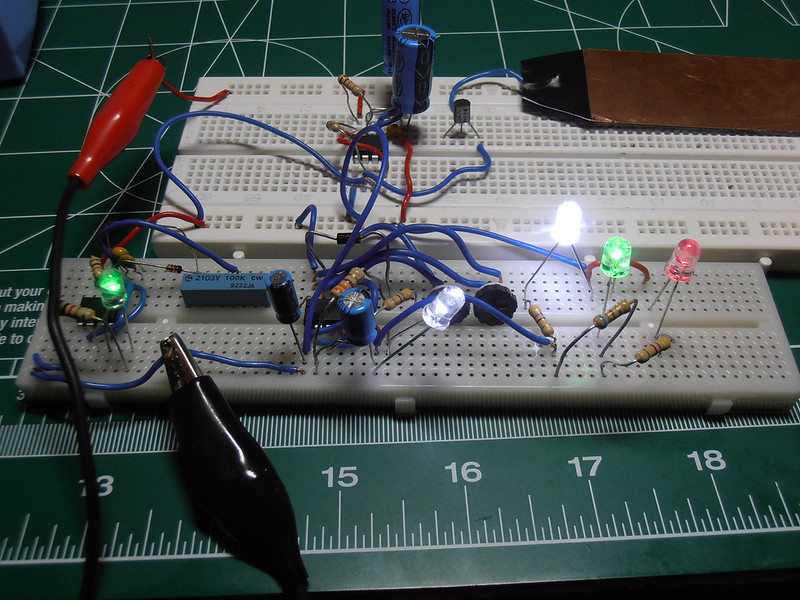
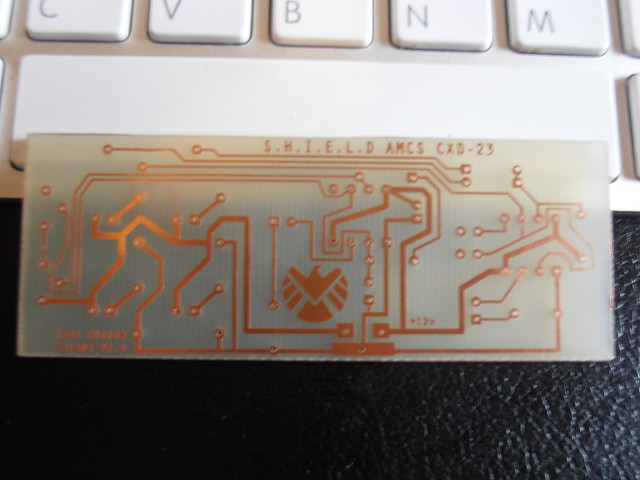
anyway... here it is... the SHIELD AMCS CXD-23 LED board...
https://farm3.staticflickr.com/2906/14033688090_be959b6f59_z.jpg
this is insanly cool!Here's an update to my build... Contest is over, but the Bus isn't done..Yet.
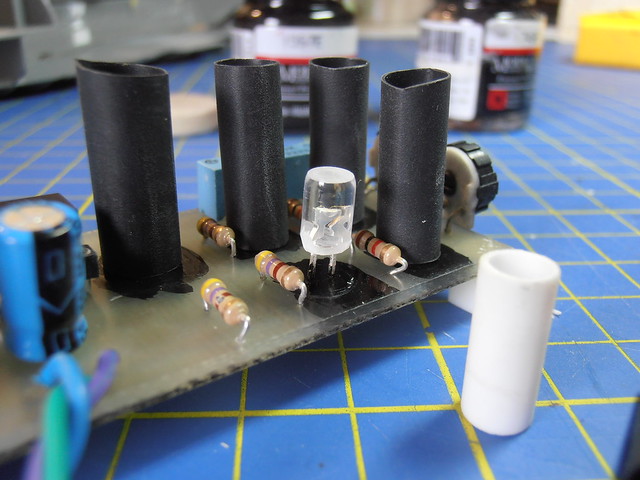
This is a mockup of the 12v power lines into the Bus.
https://farm6.staticflickr.com/5542/14124710948_db386bbac8_z.jpg
https://farm6.staticflickr.com/5311/14308039401_ebcfa594d7_z.jpg
on the model
https://farm3.staticflickr.com/2899/14307998231_6c1103227c_z.jpg
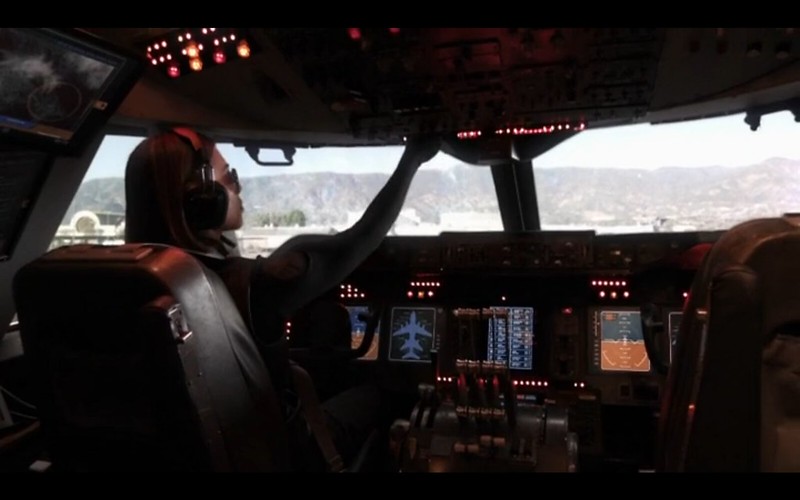
Cockpit detailing
https://farm6.staticflickr.com/5272/14124704428_f9abc64f12_z.jpg
https://farm3.staticflickr.com/2924/14124731550_2102d05c82_z.jpg
https://farm3.staticflickr.com/2932/14309502192_5dc153e140_z.jpg
Just before closing up the cargo area
https://farm4.staticflickr.com/3756/14316419884_920ff06217_z.jpg
closed up
https://farm6.staticflickr.com/5034/14130512937_beeb48dcd1_z.jpg
Painted the engines
https://farm4.staticflickr.com/3730/14288191636_5224b291dd_z.jpg
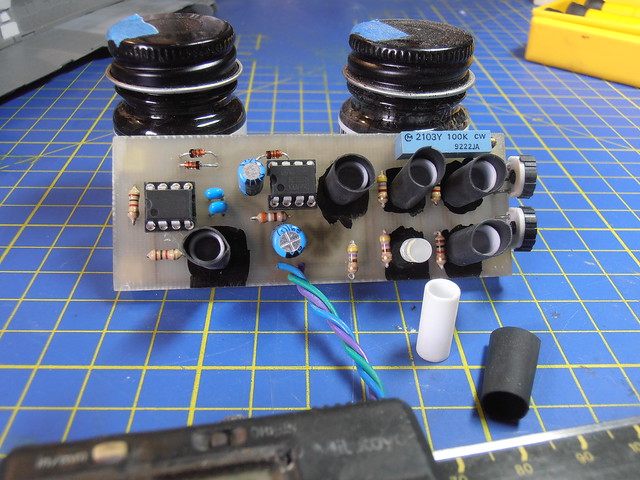
rear section attached so I can run the fiber optics
https://farm4.staticflickr.com/3685/14317037635_789143dedf_z.jpg
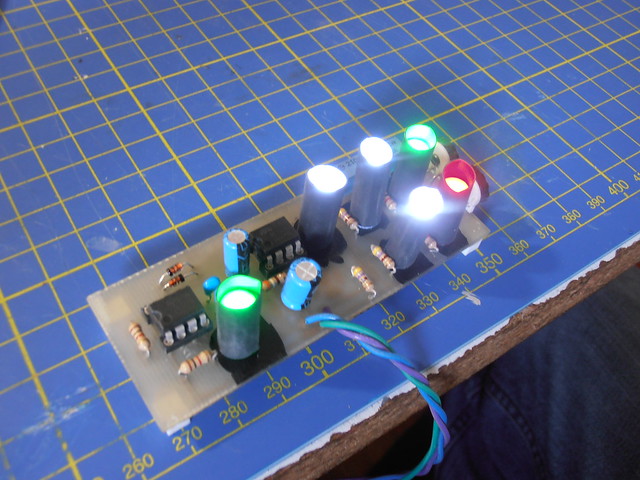
let there be light!
https://farm4.staticflickr.com/3768/14316405354_54645bfeb2_z.jpg
https://farm4.staticflickr.com/3774/14130424360_f918353c39_z.jpg
So that's where she's at now. I have to attach the center section and wings, finish off all fiber optics THEN I can work on the hump for Coulson's office. There's also some detailing and scribing that needs to get done prior to paint.