TRON Legacy - Flynn's Arcade 1:12 scale diorama

Seriously, each time I see this, it makes me want to see more of it, especially the end result.

I'll admit, I've thought of doing a diorama for T:L, basically recreating this shot, especially whenever I get around to doing a Real-World Sam Flynn custom figure:

garrett-hedlund-in-tron-leg.jpg


The big issue I can see is trying to create the "Home of TRON" neon sign in the background and making it look like its a neon sign that is glowing. But recreating the arcade machines shouldn't be too hard (though I kinda wonder what machines they had in the arcade scene, but I happen to have some papercraft models of the TRON machine, as well as a Space Paranoids machine. May even do a Fix-It Felix Jr. arcade machine to throw in there as a little easter egg).
 
Seriously, each time I see this, it makes me want to see more of it, especially the end result.

I'll admit, I've thought of doing a diorama for T:L, basically recreating this shot, especially whenever I get around to doing a Real-World Sam Flynn custom figure:

http://latimesherocomplex.files.wordpress.com/2010/09/garrett-hedlund-in-tron-leg.jpg?w=600&h=300

The big issue I can see is trying to create the "Home of TRON" neon sign in the background and making it look like its a neon sign that is glowing. But recreating the arcade machines shouldn't be too hard (though I kinda wonder what machines they had in the arcade scene, but I happen to have some papercraft models of the TRON machine, as well as a Space Paranoids machine. May even do a Fix-It Felix Jr. arcade machine to throw in there as a little easter egg).
This is not right at all, no sir.. in fact, it is OUTRAGES. Attacking me with an idea I cannot refuse, for what is the arcade without ARCADES (with echo sound after arcade) :lol
That is a great idea, so I am going to steal that one, I've got to now. By the way, what scale are you planing ?
And the easter egg is a great idea, go for it. But I will not take that one, it feels way too personal ;)
When it comes to the neon sign, there are a few options.

1. You can get a custom one made and that will cost you roughly $10k, I checked with the company that made scale neon signs for movies back in the 70-90´s but CGI put them out of miniature prop. Here is the message from the same guy who made the neons on Biff's Tower in BTTB 3:

Dear Patrik,
I've not made miniature (2mm) neon in a good many years (20 years?) and it would take time to re-learn the techniques. Every project that I have ever done has been for motion pictures, and those productions have gold plated budgets! Sadly, computer generated graphics have put me out of business where this technique is concerned.

Miniature neon is expensive--for your project I would figure no less than $10,000.

EL wire may be a good compromise.

Good luck to you.

Sincerely,

Bill Concannon

So unless you want to pay 10 grand, what you are left with is 2 choices.

2. You learn the technique how to bend thin glass tubes and coat them with phosphorus etc, a custom neon sign.

3. You cut the cost and compromise and choose electroluminescent wire. The principle for that and a neon sign is the same.

Here is a picture from That's cool wire.

elwiresizes-540.jpg


Making individual neon sections with el wire is not difficult, in fact, its child's play.


This is a good reference picture for the TRON sign.

home_of_tron.jpg


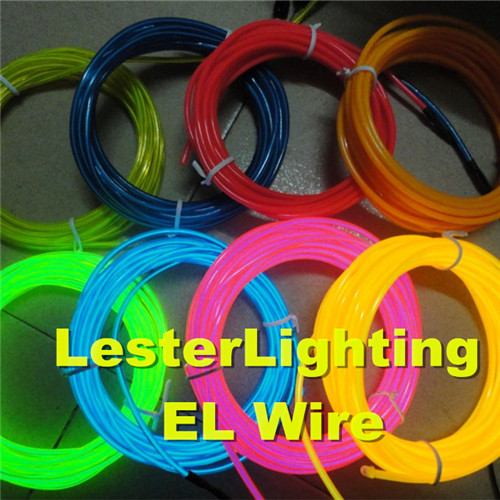
Here is a picture of 2.6 mm wire and I will say that is a great colour range and luminescences. Luminescence also depend on excitation energy or current, so check that so that you get as much as possible. I will do that as well.

New Polar light 3 2.6mm EL Wire With Higher Brightness 40V, View 2.6mm el wire, okled Product Details from Shenzhen Lesterlighting Technology Co., Ltd. on Alibaba.com
New_Polar_light_3_2_6mm_EL.jpg


.................

When it comes to the building. I've been thinking back and forth on how to do this. First of all, It will take me many months to complete, the size of this is so huge that I need to make this out of sections and brick by brick. I need to make some adjustments to the base construction, but when that is done and I know the size of the brick used on the Hull building, then I can start producing miniature bricks out of self drying brown/red clay. Yes, I will use real bricks and clad the facade using mortar. I will probably use for that ontop of (probably) veneer, plywood or balsa wood. I need to investigate this a bit further.

But its a relief to realise that I need to produce segments, instead of working with one large clay piece. It would not have worked. Just like you produce a real building out of segments, so will I.
 
Last edited by a moderator:
These are nickel tokens, but I should have gotten the brass token. For some reason, brass tokens feel real, so I will get the brass tokens.

10267908365_01583e6f37_o.jpg
 
Finally got the angle locked down. The entrance is 45 degree against wall A and wall B, while wall A & B is 90 degree against one another.

10274811366_71416ba484_b.jpg


And I made a 1:12 scale paper brick. Measurements used is the standard US: 7⅝ × 3⅝ × 2¼ in (imperial) 194 × 92 × 57 mm (metric).
1:12 scale brick is 16,16 x 0,76 x 0,475 mm

10275273213_b38ef66174_o.jpg
 
Last edited:
Wow, you have suddenly made me very interested in dioramas, this is gonna be so awesome :)


Subbed :thumbsup
 
Wow, you have suddenly made me very interested in dioramas, this is gonna be so awesome :)

Subbed :thumbsup
Once in a while something different surface .. he he. And you are right about that, its going to be awesome. Specially since I now have decided to include arcades and HOME of TRON neon sign thanks to CB2001 :rolleyes and on the other hand, what is a few days of extra work compared to the end result.
 
- Electroluminescent wire -

Deciding upon size (width) and brand is not easy since there are a few to select between and luminescences seams to vary a bit.
The only thing is to get a few samples and compare them. I am not entirely happy with the pictures published and what different company's claim since the picture quality and style may vary, one cannot simply go by their claim but instead one need a selected few and lay them side by side to really see the intensity compared to wire thickness. Searching for "what is the best wire / brand" is not as helpful either if one go by the above info.

However, I have decided to include 2 articles and a few company's that one can go with. I want to compare colour and intensity.

- ARTICLES -

1. How To Get Started with Electroluminescent (EL) Wire - Tested

2. diy neon sign - The Poopers | DIY Home & Wedding
..........

- COMPANY'S -

1. This is EL Wire from Live Wire - The Worlds Brightest Guaranteed! sample page that one can order.
Wire Samples

Looking at the picture, 2.5HB is the brightest and could work for the neon sign. However, when it comes to the HOME of TRON, I think one need to go for something thinner. The 2.3 and 1.2 mm seams to have the same luminescence so the thinner could work better for that one.

light-up-clothing_2247_22286915


2. Funnhouse Production got this to say about their's: High Bright Standard (2.6mm) Cool Neon wire is about 150% brighter than Angel Hair (1.2mm), Standard (2.3mm), Phat (3.2mm), and Tail wire. Its High Bright core also makes it glow bright for almost twice as many hours of use (it retains half its brightness after about 3,000 hours). Curl it around your finger and it will hold its shape thanks to its thicker core. Highly recommended for solid surfaces or applications (e.g. hats, bikes, signs) that don't involve repeated bending like clothing does. Use indoors or out.
media.nl


Again, 2.5HB (high bright) got the highest liminescence. Looking at Angle Hair is not too shaby either at 1.2mm, again thinking about the TRON sign inside the arcade.
color_chart.jpg


Company link: High Bright Standard - 2.6mm (WHBS)

3. glowcity.com claim to have really bright el wire. 2.5HB mm once more (I see a pattern).
Super Bright Glow In The Dark El Wire
25purplegifgood4.gif


4. Angleshine also seam to have a decent intensity bright color orange 1.4mm flashing el wire 1m+ DC3V inverter, View flashing el wire , Angelshine Product Details from Shenzhen Angel Shine Technology Co., Ltd. on Alibaba.com

5. Coolight is selling Angle Hair wire. Angel Hair 1.2mm EL Wire (indoor use) $1.15ft

That's it for now I guess, not much more I can do atm
 
Another trick would be to use an EL panel and clear projector cell. Do the sign in black and white, invert it and print to the OP cell and place over EL panel.


I used this trick for my first ever tron program costume (made before I became the rivet counter I am today :lol), though I found layering a few prints gave the best results.
5a2fdc59.jpg
 
This is not right at all, no sir.. in fact, it is OUTRAGES. Attacking me with an idea I cannot refuse, for what is the arcade without ARCADES (with echo sound after arcade) :lol
That is a great idea, so I am going to steal that one, I've got to now. By the way, what scale are you planing ?
And the easter egg is a great idea, go for it. But I will not take that one, it feels way too personal ;)
When it comes to the neon sign, there are a few options.

I'm sorry for putting the idea in your head ( ;) ), but if you want to go for it you can (in fact, you can do two dioramas if you want, one with Sam Flynn pulling up to the Arcade, like you plan, and one with Sam approaching the TRON arcade machine). You're welcome to take the idea and run with it.

1. You can get a custom one made and that will cost you roughly $10k, I checked with the company that made scale neon signs for movies back in the 70-90´s but CGI put them out of miniature prop. Here is the message from the same guy who made the neons on Biff's Tower in BTTB 3:

As good as it sounds, I'm not spending $10k for something like that (I'll try several alternatives first).

So unless you want to pay 10 grand, what you are left with is 2 choices.

2. You learn the technique how to bend thin glass tubes and coat them with phosphorus etc, a custom neon sign.

3. You cut the cost and compromise and choose electroluminescent wire. The principle for that and a neon sign is the same.

Here is a picture from That's cool wire.

http://www.thatscoolwire.com/applications/articles/articleImx/image/elwiresizes-540.jpg

I may have to go for this option, but instead of the blue, use one that's white in color and somehow paint sections the appropriate color. Thanks for providing this info, as it'll definitely be useful to me.

This is a good reference picture for the TRON sign.

http://static.tumblr.com/l6fccqd/gxfldtx1o/home_of_tron.jpg

That's a good shot, but I think it from the San Diego Comic-Con setup (when it comes to the lighting wise, but the layout of the sign appears to be the same as it is in the film). I plan on trying to make the sections that are lit up in the film.

However, the big issue is making the figure first before doing the rest of the setting. The scale I plan on doing is the 1:18 scale (to match the 3 3/4" size figures), as I plan on making a Real-World Sam Flynn figure in the same scale (trying to figure out the parts I want to use for the figure).

.................

When it comes to the building. I've been thinking back and forth on how to do this. First of all, It will take me many months to complete, the size of this is so huge that I need to make this out of sections and brick by brick. I need to make some adjustments to the base construction, but when that is done and I know the size of the brick used on the Hull building, then I can start producing miniature bricks out of self drying brown/red clay. Yes, I will use real bricks and clad the facade using mortar. I will probably use for that ontop of (probably) veneer, plywood or balsa wood. I need to investigate this a bit further.

But its a relief to realise that I need to produce segments, instead of working with one large clay piece. It would not have worked. Just like you produce a real building out of segments, so will I.

Saw the brick photo. Pretty good job on it (never thought of creating the bricks for a brick wall individually, but it's definitely work). :)
 
Last edited:
Another trick would be to use an EL panel and clear projector cell. Do the sign in black and white, invert it and print to the OP cell and place over EL panel. I used this trick for my first ever tron program costume (made before I became the rivet counter I am today :lol), though I found layering a few prints gave the best results.
http://i1225.photobucket.com/albums/ee395/Can-obi/5a2fdc59.jpg
Thank's for the input, however, el panel is flat while a real neon is not. I have thought about using panel to be honest, but it will simply not give the desired effect. But I am glad panels exist for they can be used in other places. So keep the advices coming.
 
CB2001
I'm sorry for putting the idea in your head ( ;) ), but if you want to go for it you can (in fact, you can do two dioramas if you want, one with Sam Flynn pulling up to the Arcade, like you plan, and one with Sam approaching the TRON arcade machine). You're welcome to take the idea and run with it.
Don't be, there is a high likelyhood that I would have derived to it on my own, oh yes, I am capable to using my brain... lol
And I have decided to recreate the entire arcade area on the inside, essentially expanding the model to accommodate that - and I was only going to replicate the Ducati... yeah right... lmao

I may have to go for this option, but instead of the blue, use one that's white in color and somehow paint sections the appropriate color. Thanks for providing this info, as it'll definitely be useful to me.
That's not a bad idea, to add a complementary colour to the surrounding environment of the sign, even candy / clear colour can work on the el wire.

That's a good shot, but I think it from the San Diego Comic-Con setup (when it comes to the lighting wise, but the layout of the sign appears to be the same as it is in the film). I plan on trying to make the sections that are lit up in the film.
There are differences between TRON, TRON Legacy and San Diego Comic-Con. In all aspects as a matter of fact. If we look at TRON 1982, the arcade is located in the city while Legacy is taking place in a forgotten district of the city and there are added / removed element on the building in Legacy - this fact is something that makes me very torn on how to display the building and is something that I will need to decide as I move forth.

However, the big issue is making the figure first before doing the rest of the setting. The scale I plan on doing is the 1:18 scale (to match the 3 3/4" size figures), as I plan on making a Real-World Sam Flynn figure in the same scale (trying to figure out the parts I want to use for the figure).
1:18 is something I cannot use.
.................

Saw the brick photo. Pretty good job on it (never thought of creating the bricks for a brick wall individually, but it's definitely work). :)
That is the only way as I see it today. After all, there are many parts that are repeated aka. a master mould is made which everything ells is created from. Since this is a 1:12 scale and rather large when it comes to a building, making the facade out of one piece is more or less stupid. So I will create master moulds that I can cast usable items from. The advantage is ofc that I only need to make the part by hand one time and be super picky about it. The rest is just laziness from thereon (kinda). And I will have 1:12 master moulds that I can re cast, opening up for selling kits, unpainted and unassembled.
..............

This brings me to the other thing I want to mention today. If I get oil based clay and make a large section - 16.16 mm thick (just like if you lay down the brick on its top or bottom side), then I can create a bunch of bricks on the fly that I use for my master brick mould. All I need to do then I use either a from of gypsum or clay and refill the negative mould and let it dry and I would have made 50-100 bricks very fast.

What is important here is a material that is cheap, can be poured in so that it fills patterns and at the same time retain strength when dry, and can dry over night or one day. Many brick's per day is the goal for that one. Keeping the ceramic material as a real building have. I think real materials like clay, wood, aluminium etc should be used when it comes to items like this.
So I will make a phone call today to a company called Kinn(.com) who is a retailer for products like this and get their advice on material.

I am also looking forward to making the arcades and also strive to achieve an authentic look even if there is going to be a plastic wrapping over them. Just imagen how AWESOME it will be when you are looking through the window's (real glass) on the model and inside is an lit arcade... oh yes, that will be awesome indeed :)
 
I think I struck gold, well, in terms of producing bricks that is, so let me update you on this.

So, I've been looking for a way to manufacture or get my hands on 1:12 scale bricks and ofc since this is an american building, I will use the standard US size 7⅝ × 3⅝ × 2¼ in (imperial) 194 × 92 × 57 mm (metric). I found a site that sell real brick in miniature sizes, but they are UK standard. I say but because this is the real deal or as real as it can get since they are using used bricks to manufacture the miniature scale. Now, I am tempted to go with that and and I would be very happy, however, the question is ofc.

Using English standard size 8½ × 4 × 2½ in (imperial) 215 × 102.5 × 65 mm (metric) instead of the the US size, how bad is that in terms of accuracy?

English 1:12 scale = 19 mm length x 6 mm height x 9 mm deep (according to richardstacey.com, see link bellow)
US 1:12 scale = 16.16 mm Length x 0,76 height x 0,475 mm deep (must be custom made)

Bricks
Bricks

Brickslips
Brickslips

So the option is getting real bricks, and so far, I can only locate English supplier or cast my own using gypsum and add pigment for colour. I have attached a link to a supplier, also located in England, but I am sure there are more than one. Pigment allow me to custom mix a colour and looking at the Hull building, it looks to be a dirty sienna / gault (creamy) colour with an uneven spread dark tint to some sections.

As that is not enough, if we look at the original Flynn's arcade, we can clearly see the original Hull building, while in Tron Legacy, they use a different type of brick that is brownish red in colour, which is more used in buildings aka more common. See attached image of all 3 references.

10298665234_7fc4449ab3_o.jpg


When it comes to pigmentation and colour distortion, I can pretty much use the material delivered by Dioramadebris and mix and bake as much as I like to the the desired effect. Using their pigment, I can get a dirty and distressed look besides using the sand and dirt I collected the other day (see image on page 2). I can water it down and brush it on (dry brush) as well as wet brush. I can also seal the pigment using a flat lacquer

Pigment
Powder Pigments

Here are tips and tricks from the same company
Diorama Debris Tips and Guides

When it comes to brick material, if I decide to custom make the brick, I will use a strong or hard gypsum / plaster. There are a few to select from including dentist stone, Polyblend, Merlin's Magic etc.

Merlin's Magic (a type of dental stone) including how to work with it
Hirst Arts Casting Page

Polyblend + Quikcrete acrylic concrete bonder/fortifier
Hint and tips using this material to produce scale bricks: http://jansdollhouses.com/casting-bricks/
Amazon.com: Custom Building Prod. PBG18025 Polyblend Sanded Tile Grout: Home Improvement

Here are some more tips and tricks for making scale bricks.
Hirst Arts Casting Page

So to wrap this reply up, any thoughts on what I should do regarding the bricks. Should I get the English real 1:12 scale brick or go forth with making my own custom US 1:12 scale brick ?
 
Stick to US sizes, it is a us building after all, and you can say you did every last bit of it too :thumbsup Though personally I'd switch the gypsum for a stone casting plaster like Ultracal 30 or equivalent to get a more realistic feel/texture to the bricks.
 
Stick to US sizes, it is a us building after all, and you can say you did every last bit of it too :thumbsup Though personally I'd switch the gypsum for a stone casting plaster like Ultracal 30 or equivalent to get a more realistic feel/texture to the bricks.
That is what I figured... lol

Ultracal 30 you say, hmm. I've been looking for something better than gypsum. I will check it out and thank's for the advice, very welcome :thumbsup

It turns out that Ultracal 30 is recommended by non other than Stan Winston School, so yay on that one :)
 
Last edited:
CB2001

Don't be, there is a high likelyhood that I would have derived to it on my own, oh yes, I am capable to using my brain... lol
And I have decided to recreate the entire arcade area on the inside, essentially expanding the model to accommodate that - and I was only going to replicate the Ducati... yeah right... lmao

Cool beans. Can't wait to see it. BTW, for the arcade machines I plan on making for mine, I'm going to use several papercraft models for it (I'll have to perform some trial and error to get the size right). So far, some of the ones I've picked up on are from Deviantart, but am looking around for others to include).


That's not a bad idea, to add a complementary colour to the surrounding environment of the sign, even candy / clear colour can work on the el wire.

Yeah. Plus, I think its much more cost-effective to just use one piece and paint sections than it is to use multiple ones for such small sections.

There are differences between TRON, TRON Legacy and San Diego Comic-Con. In all aspects as a matter of fact. If we look at TRON 1982, the arcade is located in the city while Legacy is taking place in a forgotten district of the city and there are added / removed element on the building in Legacy - this fact is something that makes me very torn on how to display the building and is something that I will need to decide as I move forth.

Well, you could look at it like this: In 1982 Flynn's Arcade was located in a district of the the city that used to get a lot of activity. So, after Flynn went missing and Encom closed down the arcade (to which they left everything with it alone and wouldn't sell the building), the area continued to have activity, with some modifications to the street (such as the modification to the road, the additions to buildings nearby to the arcade. This is possible, as my hometown is currently having some roadwork modification being done, and some houses that were on the main drag have been relocated, two-story buildings to be exact, to other parts of town

1:18 is something I cannot use.

Sorry, but like I said, I plan on doing the figure, and purposefully chose to stick with the 1:18 scale that Spin Masters used for their figures (I've even toyed around with doing figures of Flynn, Alan and Lora from the first film in the same scale). Plus, I have the Ducati Black Monster in 1:18 scale to match.

That is the only way as I see it today. After all, there are many parts that are repeated aka. a master mould is made which everything ells is created from. Since this is a 1:12 scale and rather large when it comes to a building, making the facade out of one piece is more or less stupid. So I will create master moulds that I can cast usable items from. The advantage is ofc that I only need to make the part by hand one time and be super picky about it. The rest is just laziness from thereon (kinda). And I will have 1:12 master moulds that I can re cast, opening up for selling kits, unpainted and unassembled.

That makes a lot of sense. Making molds of sections of the buildings and then assemble the pieces like how an actual kit would be, plus you can make multiple copies of the wall sections without having to worry about having to construct each wall individually.

This brings me to the other thing I want to mention today. If I get oil based clay and make a large section - 16.16 mm thick (just like if you lay down the brick on its top or bottom side), then I can create a bunch of bricks on the fly that I use for my master brick mould. All I need to do then I use either a from of gypsum or clay and refill the negative mould and let it dry and I would have made 50-100 bricks very fast.

What is important here is a material that is cheap, can be poured in so that it fills patterns and at the same time retain strength when dry, and can dry over night or one day. Many brick's per day is the goal for that one. Keeping the ceramic material as a real building have. I think real materials like clay, wood, aluminium etc should be used when it comes to items like this.
So I will make a phone call today to a company called Kinn(.com) who is a retailer for products like this and get their advice on material.

Go with your gut, sir. :)

I am also looking forward to making the arcades and also strive to achieve an authentic look even if there is going to be a plastic wrapping over them. Just imagen how AWESOME it will be when you are looking through the window's (real glass) on the model and inside is an lit arcade... oh yes, that will be awesome indeed :)

I was considering the same thing (basically have one light bulb that lights up the screen and the marquee for the machines). May have to experiment and see if I can get the light to work when it comes time for it). You could easily make a wooden cabinet, make a mold of the pieces and case it in resin and use clear plastic for the screens and marquees (which you could use clear printable water decals for the screens and marquees).
 
Last edited:
I was considering the same thing (basically have one light bulb that lights up the screen and the marquee for the machines). May have to experiment and see if I can get the light to work when it comes time for it). You could easily make a wooden cabinet, make a mold of the pieces and case it in resin and use clear plastic for the screens and marquees (which you could use clear printable water decals for the screens and marquees).
Yes, make a small wood cabinet, water slide decals is not needed, one can use clear overhead (projector) paper (plastic) and print the pattern on the same place 2-3 times to get a sufficient print, ofc, that also depend on the printer and the quality or dpi on that printer. Sometimes one run is sufficient. So water slide decals is not needed. Then take a simple white plastic (thin) and cut it out as the backdrop for the marquee and CRT screen and the light get's diffused / spread before it goes true the graphics. This is a rather simple and cheap solution and if one use materials that you can locate at home, well, then the cost is 0,-

LED's are cheap and last 10-20k hours or more, so they will last a very long time, an obvious choice today. So definetly looking forward to making the arcades.

Moving on.

Brick's
I took a photo from Google Maps that I felt was straight on the wall to keep the distortion as low as possible and imported it to Photoshop and used the ruler to check the brick size and so doing with 1:12 scale in mind and yes, its a match, meaning it is a US standard size.
I also checked the gap between the bricks (mortar layer) and got an average of 1 mm = circa 12 mm at 1:1 scale.

Using the 4.8 + 1 mm = 5.8 mm as the hight per layer and counting ALL the brick's from the concrete floor all the way to the ridge and in so doing, I get a total height of 119 brick's x 5,8 mm = 690,2 mm = 69,2 cm = 27,244 Inch plus roof ornament which is roughly:

10 x brick's = 58 mm = 5.8 cm + 69,2 cm = tot.height of 75 cm = 29,52 Inch at 1:12 scale

Which is just 3 cm away from my guess of 78 cm :D

So there we are with 119 brick + mortar and roof ornament. As we also could see from the satellite picture, the two walls (outside) is at 90 degree to one another. The inner walls in the entrance is also 90 degree's and this, this is very important for that gives us a fixed value. I can with this data calculate the size, length and height of every wall, door, window etc.

I will do that tomorrow and also start working on Flynn's blueprint arcade revision 2.
 
Last edited:
Now regarding the arcades. The most common monitor size is 19" and 26" with 19" being the older late 70's and early 80's while 26" is more common from mid 80's and well into the 90's and early 2000. Now a days 27-29" is not uncommon together with widescreen.

26" = 2.16" at 1:12
19" = 1.58" at 1:12
 
Last edited:
This thread is more than 3 years old.

Your message may be considered spam for the following reasons:

  1. This thread hasn't been active in some time. A new post in this thread might not contribute constructively to this discussion after so long.
If you wish to reply despite these issues, check the box below before replying.
Be aware that malicious compliance may result in more severe penalties.
Back
Top