Stunning work! Can't wait to see more pics!
You are using an out of date browser. It may not display this or other websites correctly.
You should upgrade or use an alternative browser.
You should upgrade or use an alternative browser.
Scratchbuilt Jabba's Sailbarge / Khetanna custom Toy and Model WIP
- Thread starter wbobafett
- Start date
wbobafett
Well-Known Member
UPDATE:
All pictures from this update can be found here:
http://swspaceclub.com/wbobafett/my-collection/customs/khetanna/khetanna2#04jan2017
Time is flying. This was a loooong break. Sorry for those who waited so long for this going on.
The last part of the hull should be next. Its mainly about the upper back part from the ship. I started with what I just noticed lately:


Looks like beeing a chain from an anchor in some way???
Getting on with the last panels to add to the hull (of course after puttying and sanding for hours......") ):
):


Not movie accurate but sort of. I had to change and improve them to match my "shortened version".
Adding some details to the rails (not sanded yet):


Also the broken strut from the movie modell:

And some overall shots from the back railings:


Hope you like it. Thanks for looking!
All pictures from this update can be found here:
http://swspaceclub.com/wbobafett/my-collection/customs/khetanna/khetanna2#04jan2017
Time is flying. This was a loooong break. Sorry for those who waited so long for this going on.
The last part of the hull should be next. Its mainly about the upper back part from the ship. I started with what I just noticed lately:
Looks like beeing a chain from an anchor in some way???
Getting on with the last panels to add to the hull (of course after puttying and sanding for hours......
):Not movie accurate but sort of. I had to change and improve them to match my "shortened version".
Adding some details to the rails (not sanded yet):
Also the broken strut from the movie modell:
And some overall shots from the back railings:
Hope you like it. Thanks for looking!
Sym-Cha
Master Member
Hi Wolff, ... thanks for returning to this project ... 2016 has been quite horrific for me personally ... so it warms my heart to see you'll continue and finish this wonderful scratchbuild further . . . it looks fantastic ... so keep up the good work and all the best wishes for 2017
Chaïm
Chaïm
Toadmeister
Sr Member
Very cool
Sent from my SM-G900V using Tapatalk
Sent from my SM-G900V using Tapatalk
wbobafett
Well-Known Member
UPDATE:
All pictures from this update can be found here:
http://swspaceclub.com/wbobafett/my-collection/customs/khetanna/khetanna2#05jan2017
Next up is the floor paneling to the back rear. Couldn't find a movie or ILM picture so I got one invented:


Also the ladder and other stuff for the details need to be made:


Here is a comparison with a set shot (The gargoyles cant be seen in this shot but are there......remember my version is a bit smaller.... )

Looking good so far I think:


Hope you like it. Thanks for looking!
All pictures from this update can be found here:
http://swspaceclub.com/wbobafett/my-collection/customs/khetanna/khetanna2#05jan2017
Next up is the floor paneling to the back rear. Couldn't find a movie or ILM picture so I got one invented:
Also the ladder and other stuff for the details need to be made:
Here is a comparison with a set shot (The gargoyles cant be seen in this shot but are there......remember my version is a bit smaller....
)Looking good so far I think:
Hope you like it. Thanks for looking!
Hagoth
Sr Member
Nice to see you back!
Even if it is not exactly to proportions no one will mistake what this is intended to be.
I'll bet that with all the detail you are putting into this most will not even notice the scale and proportion issues. :cool
This is an incredible project you have going here. Looking forward to the progress 2017 will bring.
Looks like you have made quite a bit of progress on the mast...
ucfierocharger
New Member
I have to say this is spectacular. (not that there is any doubt)
I'm also going to be making a few "toy" models, so its encouraging to see that others are excited/accepting of that concept as well. I'm on another modeling forum where they aren't as open to the idea of things not being 100% perfectly accurate. Even if it's not theirs :rolleyes
-RJ
I'm also going to be making a few "toy" models, so its encouraging to see that others are excited/accepting of that concept as well. I'm on another modeling forum where they aren't as open to the idea of things not being 100% perfectly accurate. Even if it's not theirs :rolleyes
-RJ
wbobafett
Well-Known Member
Thanks guys. Your comments always help to go on as quick as possible!!!
UPDATE:
All pictures from this update can be found here:
http://swspaceclub.com/wbobafett/my-collection/customs/khetanna/khetanna2#14jan2017
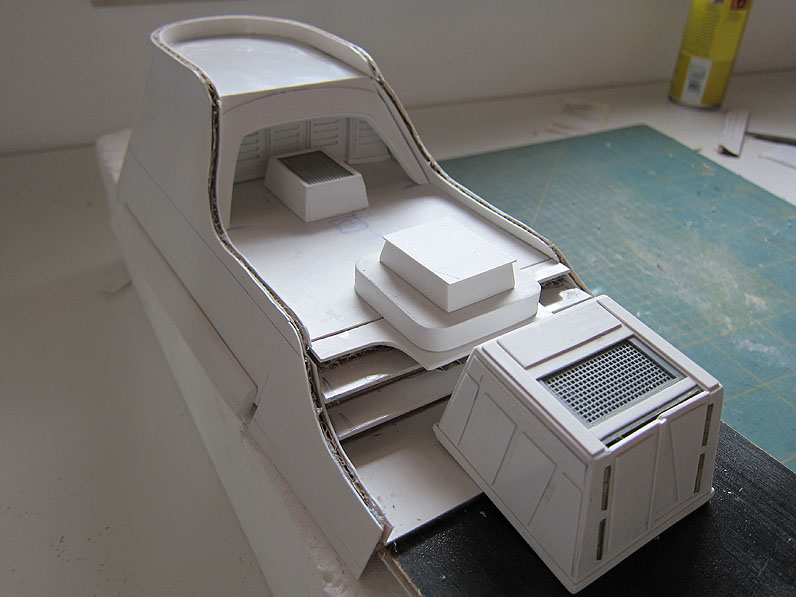
Here we go on with the deck. Still some stuff and details missing:
No on with the frustrating part: The deck-cannon.
I am working on the cannon from time to time since the beginning. Because it's a toy and toy 3 3/4 inch figures should be used it was clear to me to use the Hasbro cannon. Therfore it was always important to include it in the planning also for the size. Here is some old pics:
So far so good, but the cannon always looked ridiculously oversized. I planed and built two sockets by now only to throw them into the bin.
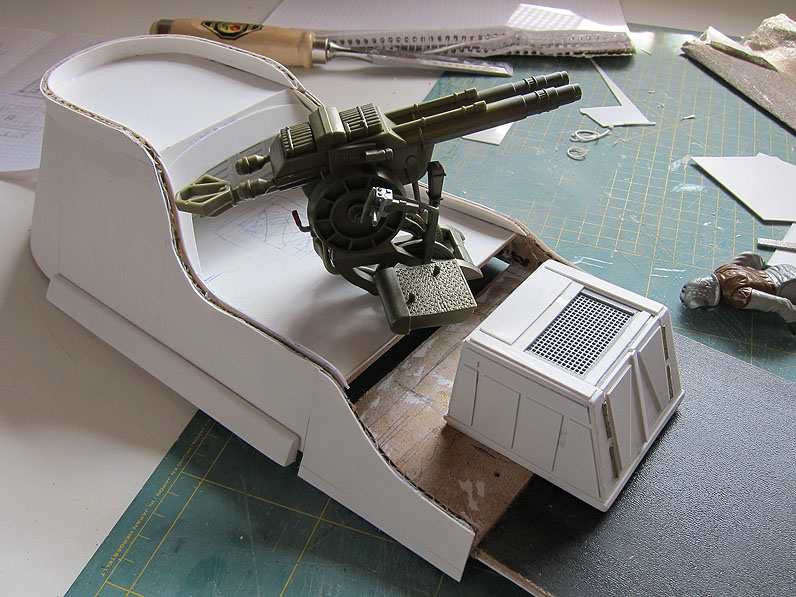
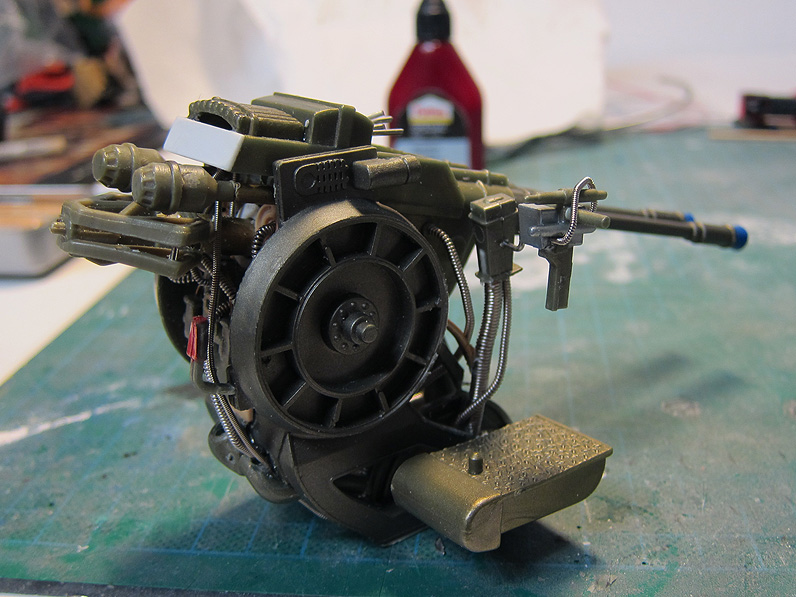
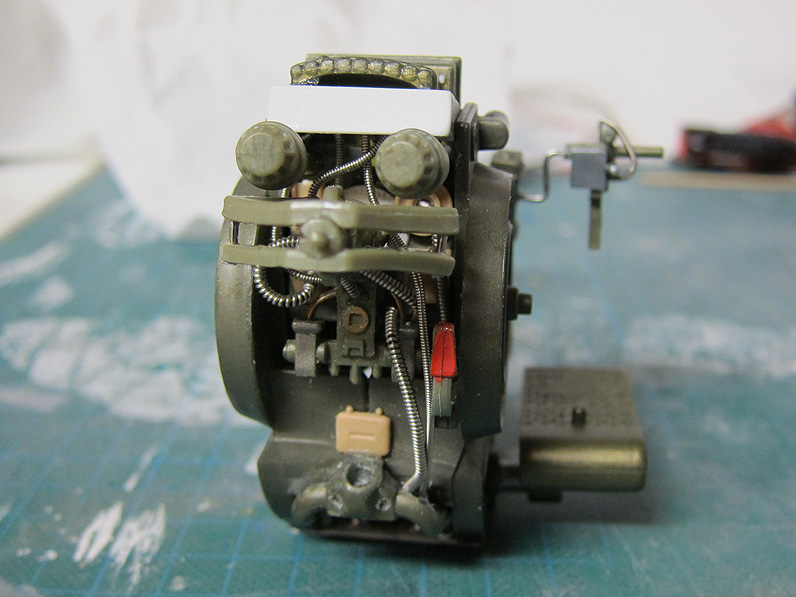
So here we go again. Hasbro cannon modification: Most annoying to me was the back of the cannon and the very wide step to the side.
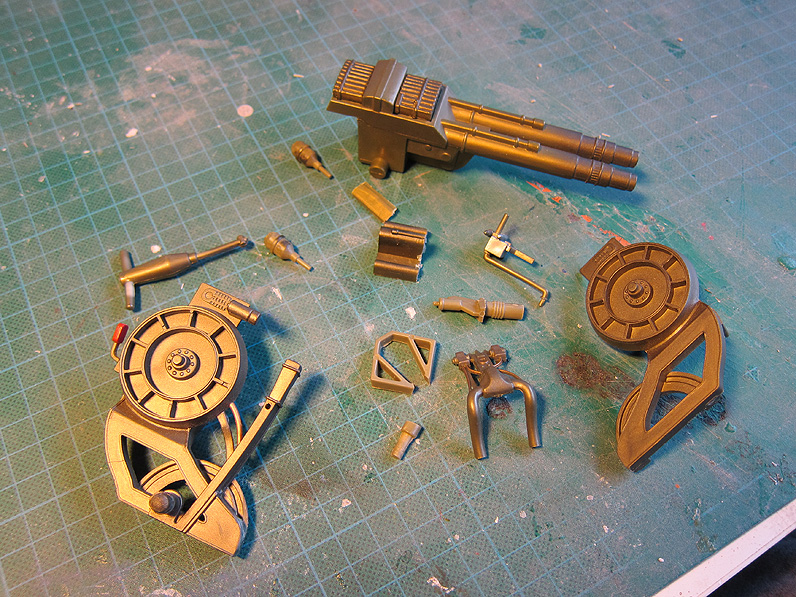
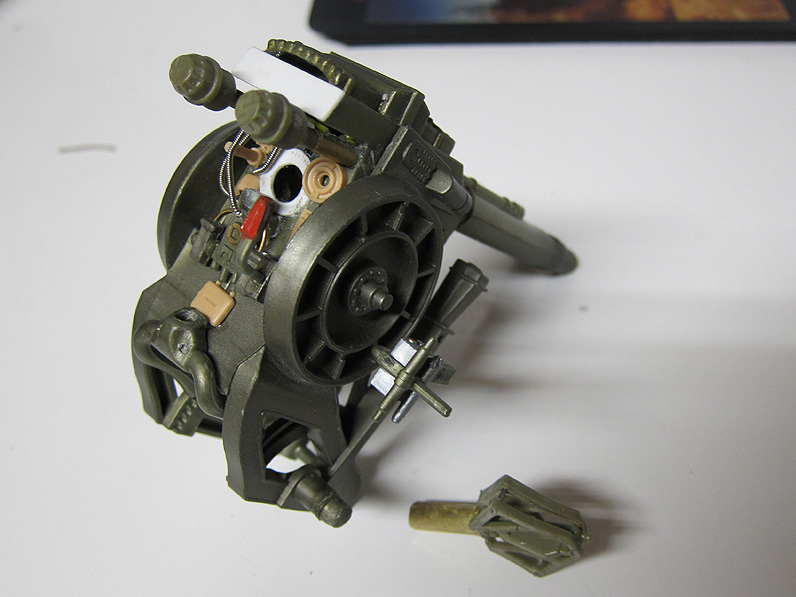
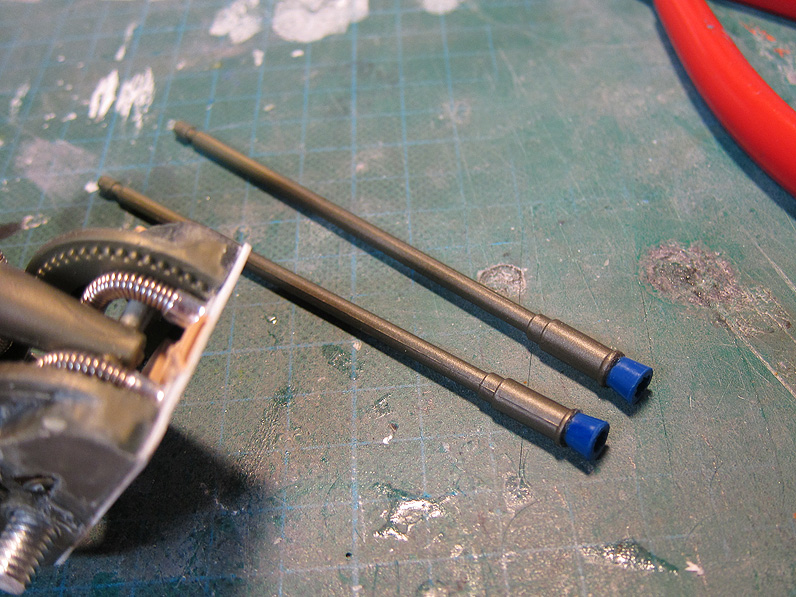
I also wanted the cannon still to fire the missiles, but the muzzles just looked wrong:
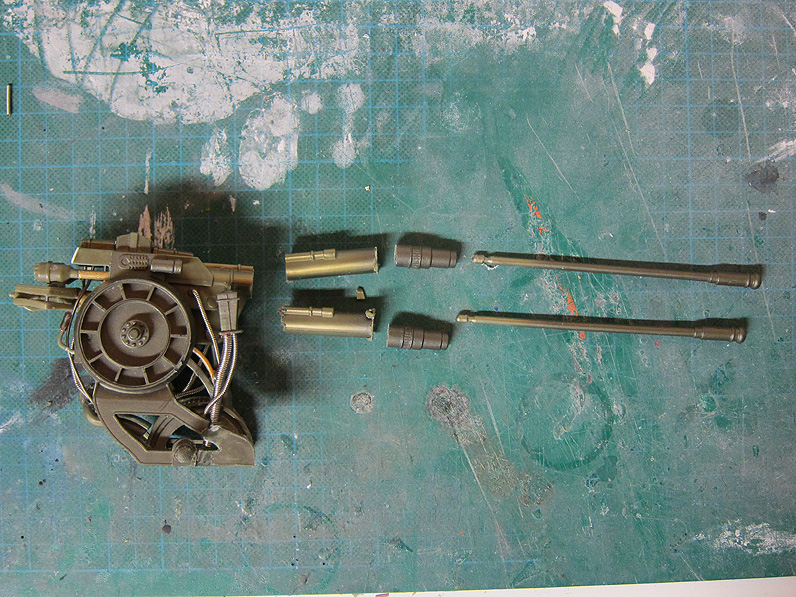
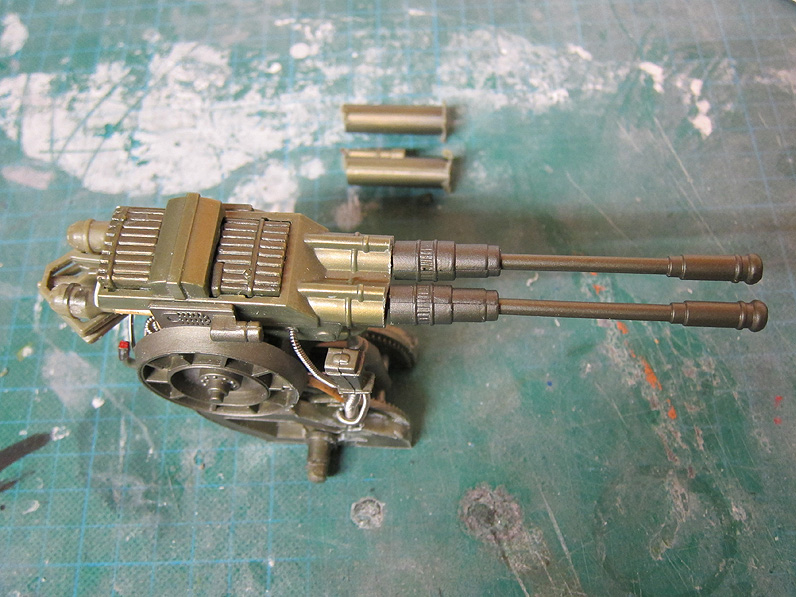
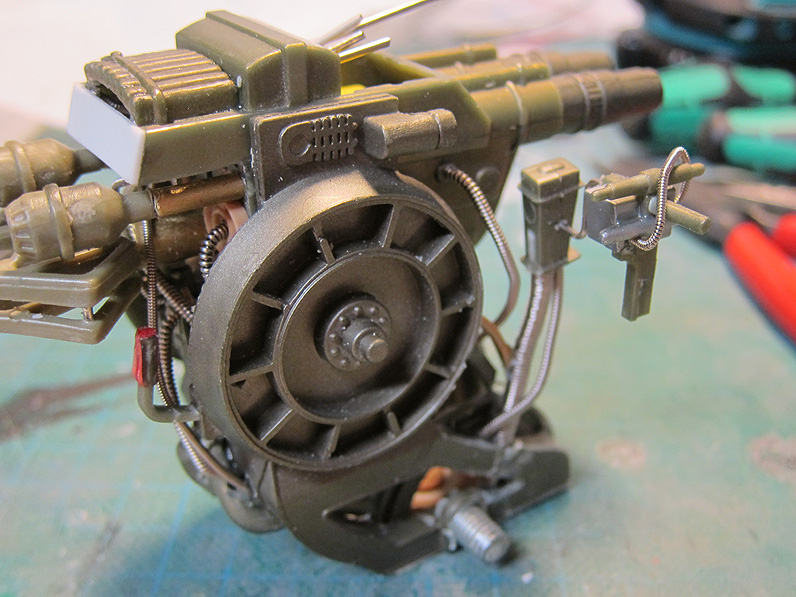
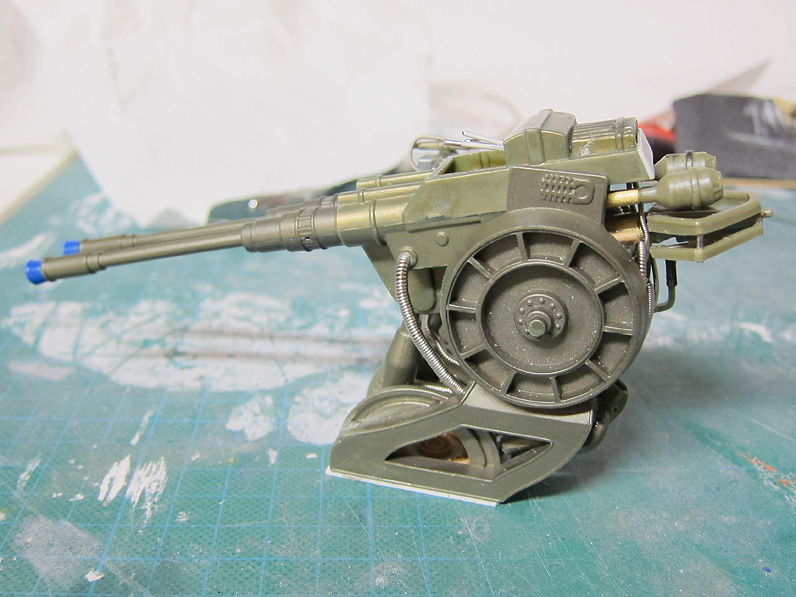
More modifictaions:
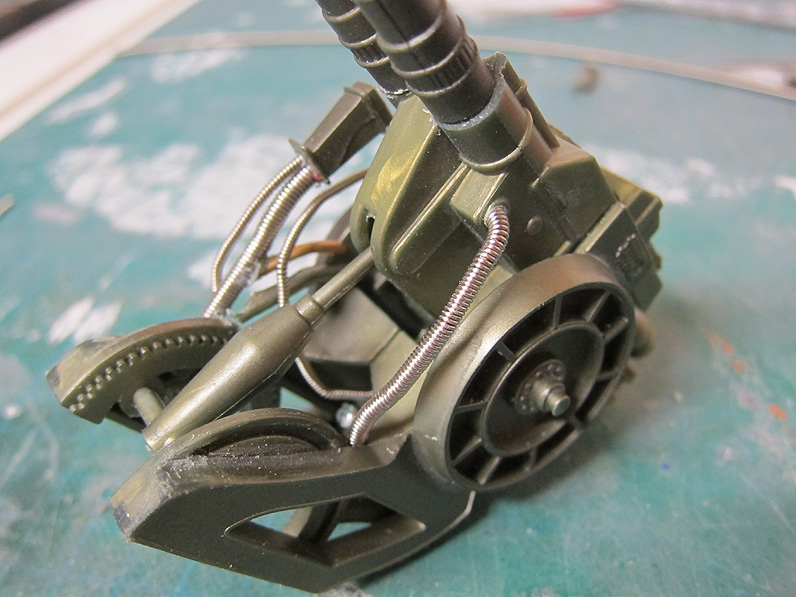
Buliding the base:

Proper end to the muzzles:
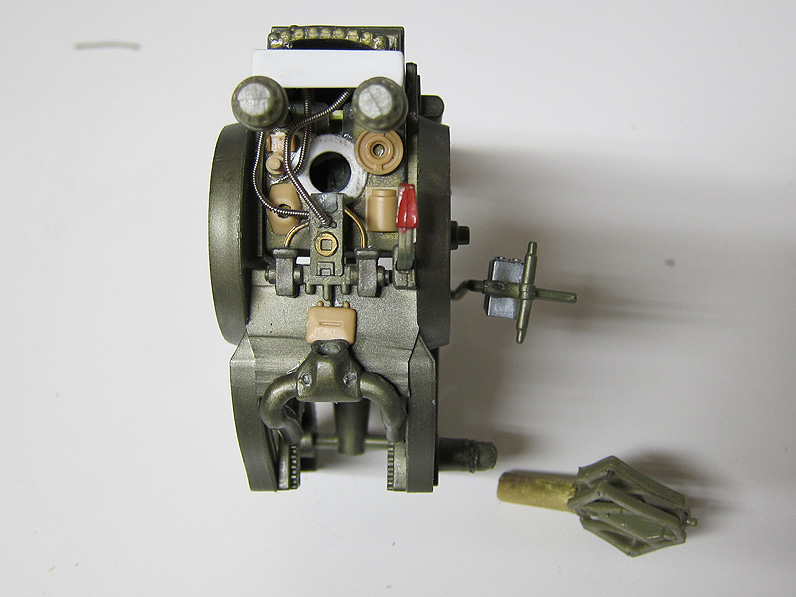
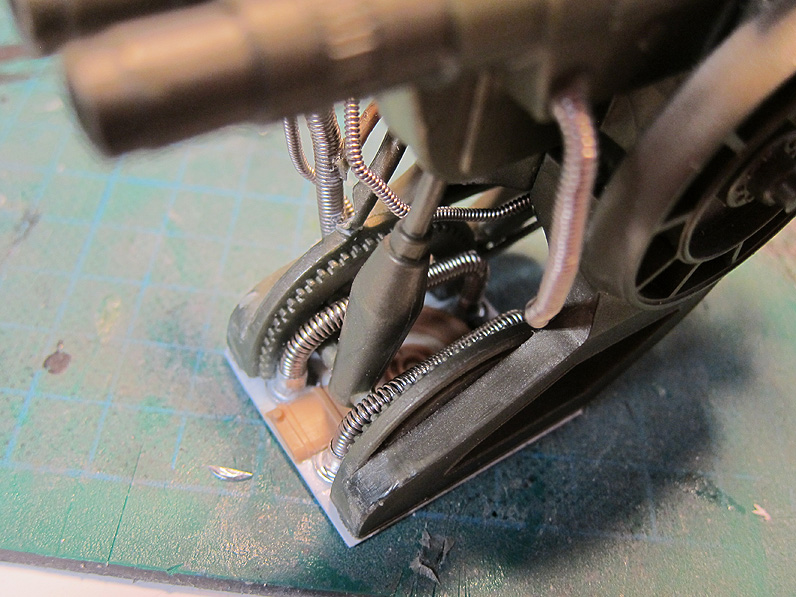
And now the worst case scenario. Some super glue found its way into the spring mechanism. The missiles don't launch anymore. I tried to release it with a scalpel, but the knob broke into pieces. Then I tried to drill 1 mm holes into the mechanism to add wires to connect it to the knob again...more things broke.......that is kind of very frustrating because I can't just dismantle the whole cannon without destroying most of the modifications.......I will need to think about this....for now it looks like this:


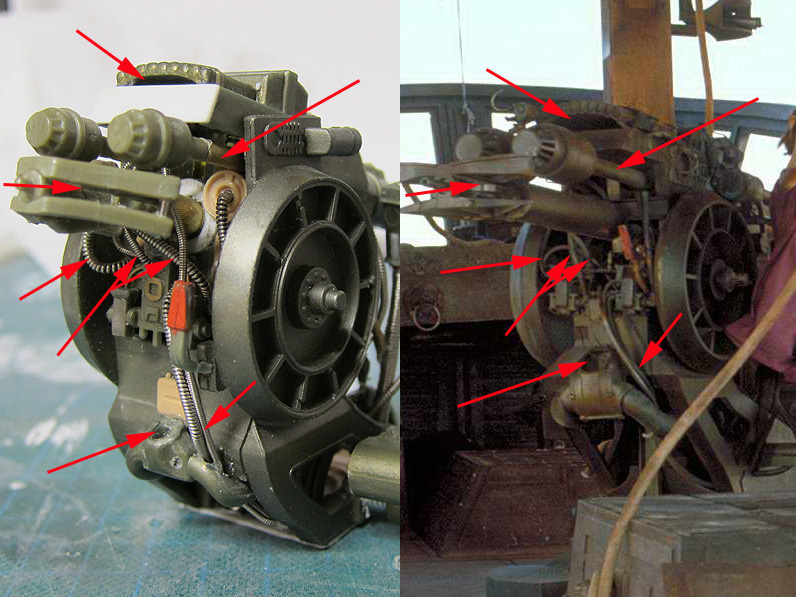
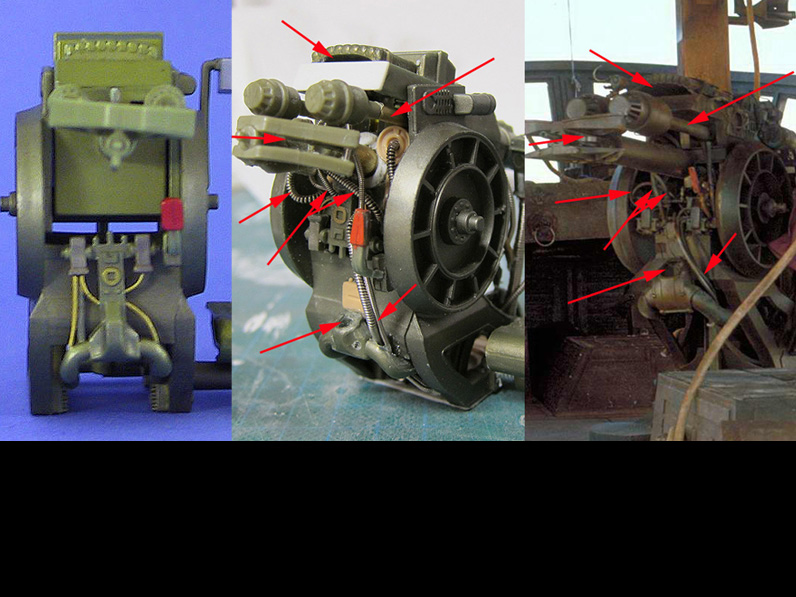
Comparison to Hasbro and the movie:
Hope you like it. Thanks for looking!
UPDATE:
All pictures from this update can be found here:
http://swspaceclub.com/wbobafett/my-collection/customs/khetanna/khetanna2#14jan2017
Here we go on with the deck. Still some stuff and details missing:
No on with the frustrating part: The deck-cannon.
I am working on the cannon from time to time since the beginning. Because it's a toy and toy 3 3/4 inch figures should be used it was clear to me to use the Hasbro cannon. Therfore it was always important to include it in the planning also for the size. Here is some old pics:
So far so good, but the cannon always looked ridiculously oversized. I planed and built two sockets by now only to throw them into the bin.
So here we go again. Hasbro cannon modification: Most annoying to me was the back of the cannon and the very wide step to the side.
I also wanted the cannon still to fire the missiles, but the muzzles just looked wrong:
More modifictaions:
Buliding the base:
Proper end to the muzzles:
And now the worst case scenario. Some super glue found its way into the spring mechanism. The missiles don't launch anymore. I tried to release it with a scalpel, but the knob broke into pieces. Then I tried to drill 1 mm holes into the mechanism to add wires to connect it to the knob again...more things broke.......that is kind of very frustrating because I can't just dismantle the whole cannon without destroying most of the modifications.......I will need to think about this....for now it looks like this:
Comparison to Hasbro and the movie:
Hope you like it. Thanks for looking!
Last edited:
I just spent an hour looking over this absolutely mind blowing skill and attention to detail. Amazing work! Thanks
wbobafett
Well-Known Member
Thanks HB1098S and zookone! Your comments help much. Much appreciated!
UPDATE:
All pictures from this update can be found here:
http://swspaceclub.com/wbobafett/my-collection/customs/khetanna/khetanna2#16jan2017
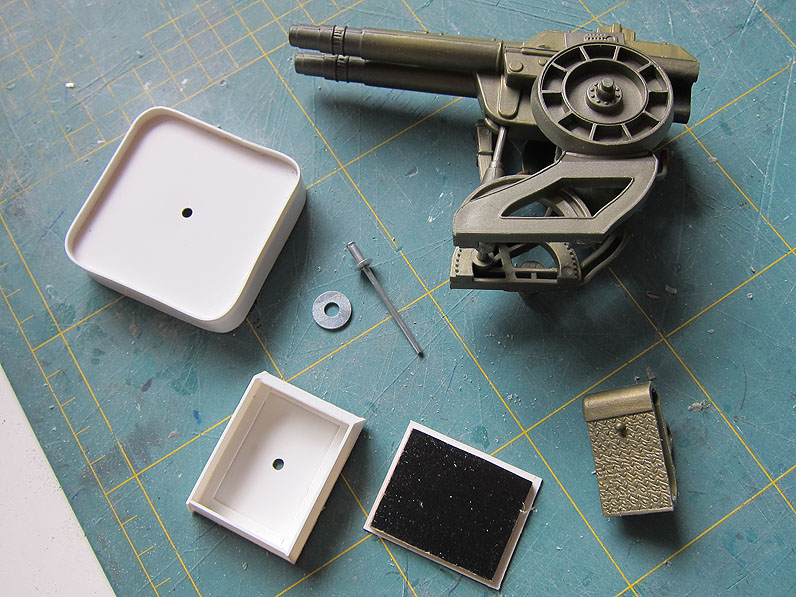
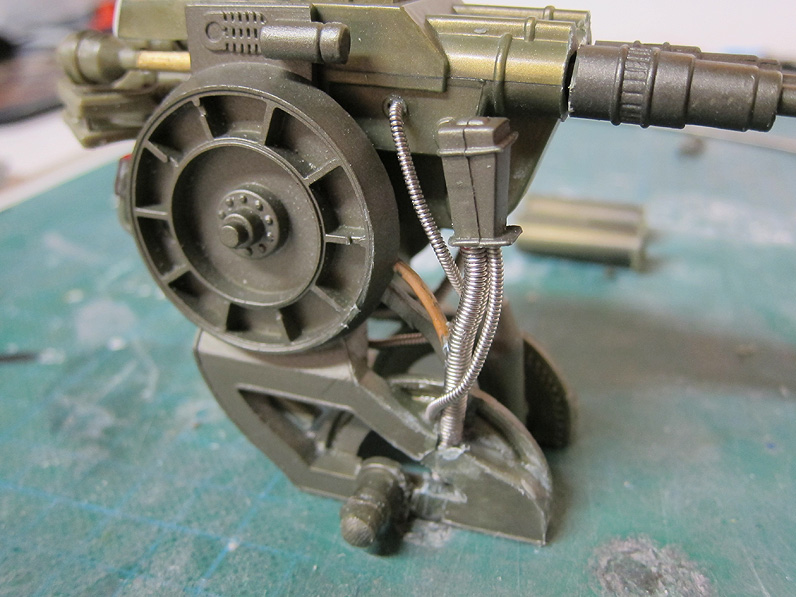
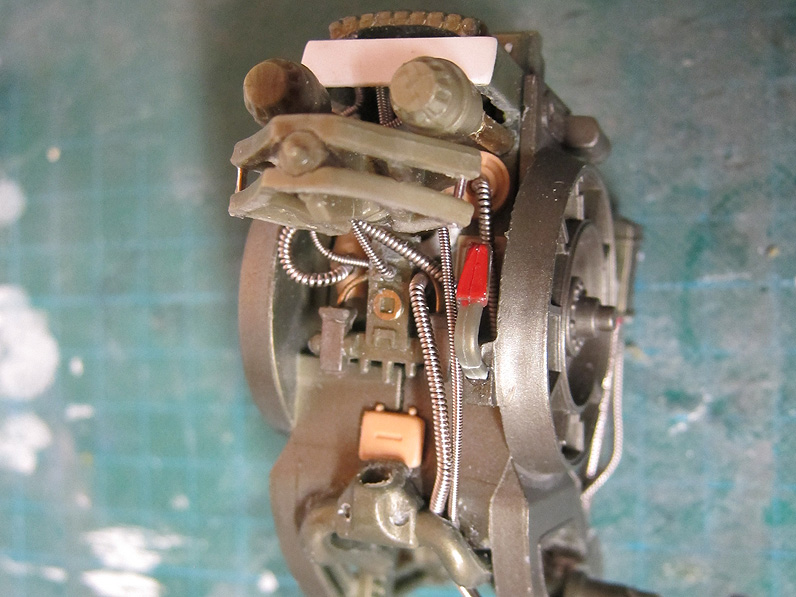
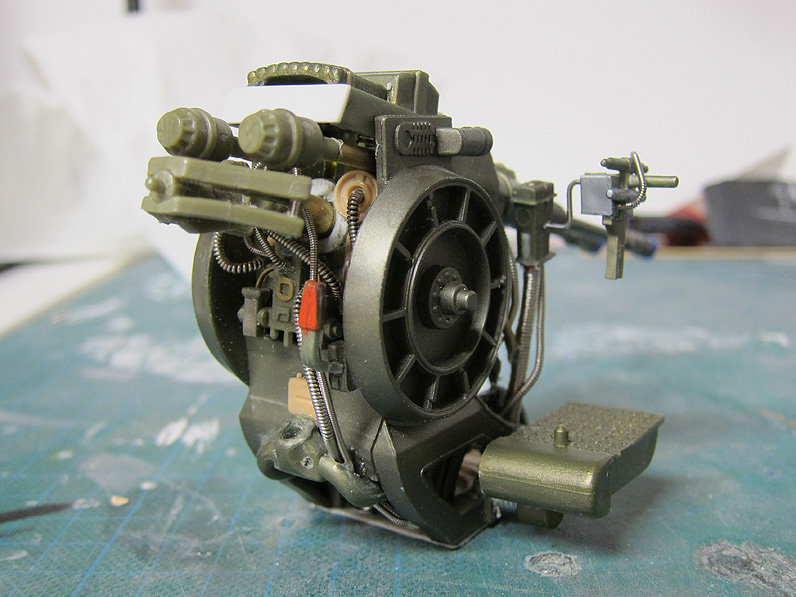
Okay...plan A, B and C failed. I removed all the stuff releasing the mechanism. I went with the most easy solution: I drilled holes into the top and got some wires to realease the cannons while pushing down. this works for now and can be removed (just pull)...that's good. The bad thing is: It wont work forever, at some point the top will break I think. Anyway...solution found for now and the knob will be placed in without glueing so I can make further repairs without breaking it apart.


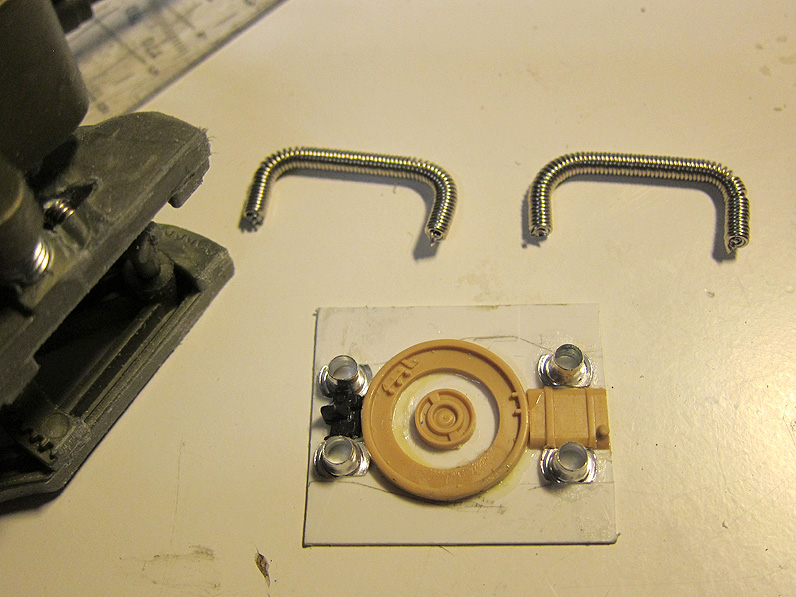
New solution found also on the base. I always worked with blind rivets. But the base went into the bin to safe some height. And I have not enough thickness to the top deck ...I would damage the inner ceiling. Anway...I came up with another solution that makes the deck cannon also removable any time while going safe and strong without dangeling: pin + magnets!


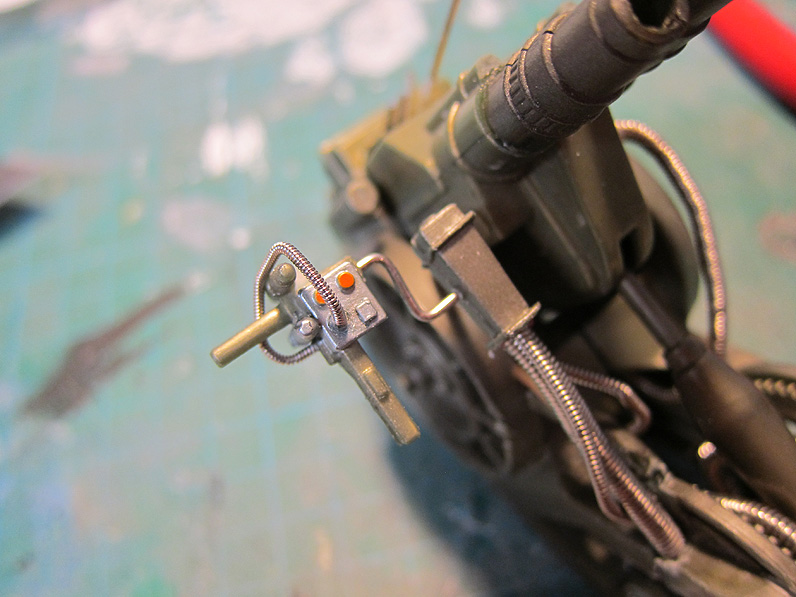
It's all very close and narrow. that's why the handles to the back of the cannon were shortened:


All worth the final product:


One quick shot....all put together

Hope you like it and thanks for looking!
UPDATE:
All pictures from this update can be found here:
http://swspaceclub.com/wbobafett/my-collection/customs/khetanna/khetanna2#16jan2017
Okay...plan A, B and C failed. I removed all the stuff releasing the mechanism. I went with the most easy solution: I drilled holes into the top and got some wires to realease the cannons while pushing down. this works for now and can be removed (just pull)...that's good. The bad thing is: It wont work forever, at some point the top will break I think. Anyway...solution found for now and the knob will be placed in without glueing so I can make further repairs without breaking it apart.
New solution found also on the base. I always worked with blind rivets. But the base went into the bin to safe some height. And I have not enough thickness to the top deck ...I would damage the inner ceiling. Anway...I came up with another solution that makes the deck cannon also removable any time while going safe and strong without dangeling: pin + magnets!
It's all very close and narrow. that's why the handles to the back of the cannon were shortened:
All worth the final product:
One quick shot....all put together
Hope you like it and thanks for looking!
wbobafett
Well-Known Member
UPDATE:
All pictures from this update can be found here:
http://swspaceclub.com/wbobafett/my-collection/customs/khetanna/khetanna2#20jan2017
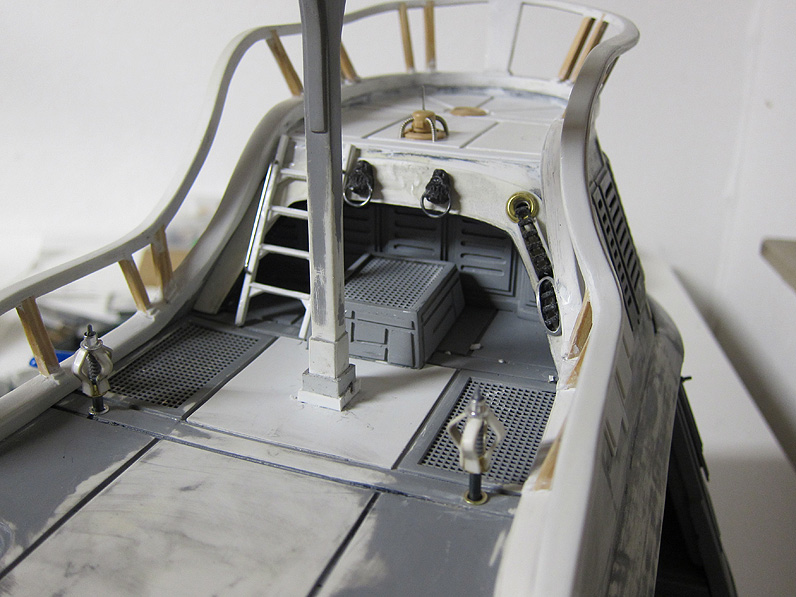
On with the deck. Last paneling to the floor:

Details with cables for the gun:


Details to the back wall and the doors/windows behind:


Comparison:


Old problem: The paneling to the top inside is falling apart....ever since. The problem here is I have added those after priming. The glue and the primer don't work well together it seems. After reglueing parts with super glue from time to time it all went worse plus they still fall down from time to time. I have to fix this before painting. Only solution seems to be doing it again: Removing the parts, sanding....a lot of sanding and glueing new parts.


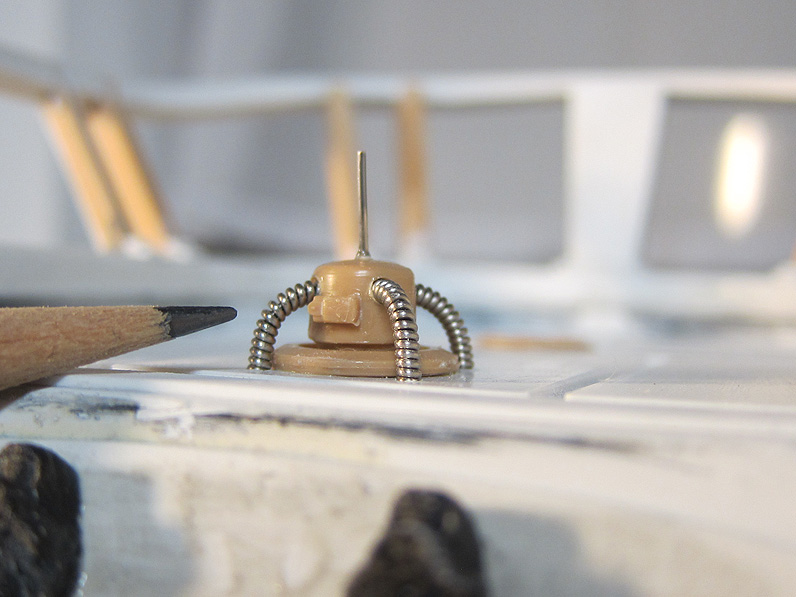
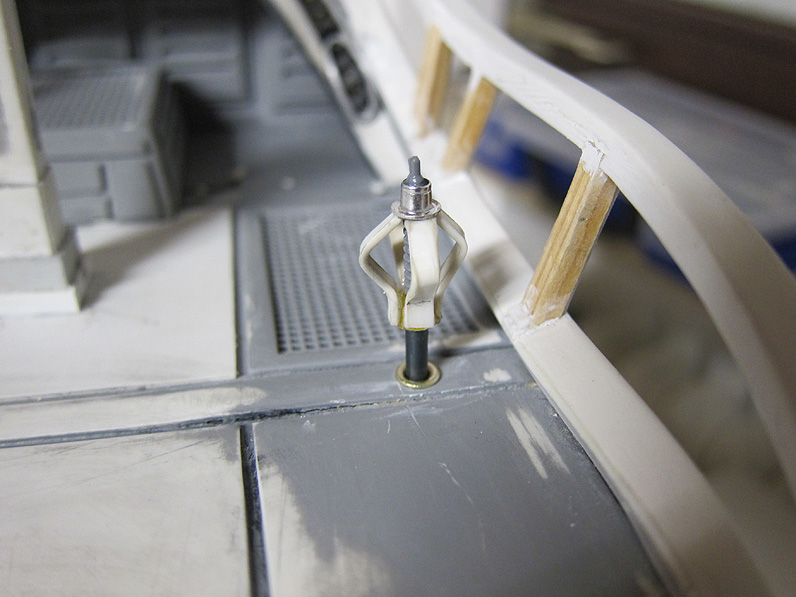
A detail for the masts...sort of speakers/megaphones?


Hope you like it. Thanks for looking!
Wolff
All pictures from this update can be found here:
http://swspaceclub.com/wbobafett/my-collection/customs/khetanna/khetanna2#20jan2017
On with the deck. Last paneling to the floor:
Details with cables for the gun:
Details to the back wall and the doors/windows behind:
Comparison:
Old problem: The paneling to the top inside is falling apart....ever since. The problem here is I have added those after priming. The glue and the primer don't work well together it seems. After reglueing parts with super glue from time to time it all went worse plus they still fall down from time to time. I have to fix this before painting. Only solution seems to be doing it again: Removing the parts, sanding....a lot of sanding and glueing new parts.
A detail for the masts...sort of speakers/megaphones?
Hope you like it. Thanks for looking!
Wolff
wbobafett
Well-Known Member
Thank you!
UPDATE:
All pictures from this update can be found here:
http://swspaceclub.com/wbobafett/my-collection/customs/khetanna/khetanna2#22jan2017
Fixing the partitions with magnets. I need to remove them again for painting, so this is probably the best solution.


Forgot to add an detail to the cannon:

Finsihed the seiling from the throne room:

And now....finally all parts are primed and can be put together:


Next up: Finishing the two Ishi Tib gargoyles and fixing the Rancor statue.
Hope you like it. Thanks for looking!
UPDATE:
All pictures from this update can be found here:
http://swspaceclub.com/wbobafett/my-collection/customs/khetanna/khetanna2#22jan2017
Fixing the partitions with magnets. I need to remove them again for painting, so this is probably the best solution.
Forgot to add an detail to the cannon:
Finsihed the seiling from the throne room:
And now....finally all parts are primed and can be put together:
Next up: Finishing the two Ishi Tib gargoyles and fixing the Rancor statue.
Hope you like it. Thanks for looking!
Absolutely gorgeous. I hope you're able to see past the frustrations of the project and take pride in the incredible work you've done.
Similar threads
- Replies
- 76
- Views
- 5,130