BTTF lenticular hat :: diamond select mods

leiter22

Well-Known Member
So I had one of these DS versions a little while back. Actually not that bad...the color looks pretty accurate IMO, the got it right by leaving out the holes and buttons. The only things that killed it for me was the black underside of the bill and the adjustable strap. Both inaccuracies. Well, I'm pretty good with a sewing machine, and these mods don't seem too difficult, so I thought what the heck! Picked up two of em for about 40 shipped (probably less than I could find the material for!). I'll be tackling the project as soon as they arrive and I'll post some pics.

I'm curious if anyone else here has tried this? I'd be surprised if it hasn't been attempted. Please show pics if you've done something similar!
 
My hats have arrived!! I will be getting started on this soon, but was wondering if anyone had some good pics of the screen used cap. I can't seem to find any. Also, what thread type/color was used? These hats use a clear thread like fishing line. As much as I'd hate to redo the entire construction, if it would add to the accuracy of the final hat, I may be up to it.

Thanks!
 
Ill be watching this thread, always wanted an accurate bttf2 cap but everyone selling the miraj cap wants an arm and leg for it. If you can alter the DS into accurate cap then there is still hope!
 
Would you be interested in selling some of the left over pieces from the extra cap? If so I'd also like to tackle this project.
 
Would you be interested in selling some of the left over pieces from the extra cap? If so I'd also like to tackle this project.

I could give you what's left, but it won't be enough to finish completely. You'll have the two panels to finish off the fitted back, but not the piece for the bottom of the brim. If you want to pm me your address I'd be happy to toss the scraps in the mail when I'm finished. I'll have no need for them.

On a side note, I picked up the thread, new needles and a stich puller today. That's all you really need to do this mod aside from the hats and a sewing machine. At least that's what I suspect. I'll be working on it over the weekend. May even get started sooner, we'll see. I'll post progress and pics
 
O.K. as promised here are some pics of the first bit of my mod attempt. I'm going for a look that appears "off the shelf", but we'll see whether that is possible or not with my sewing skills....:confused I won't show every little stage along the way....just the major ones. The mod itself is pretty straight forward...just a matter of how clean you can get with your machine (or by hand) Sorry, for the cell pics....didn't really feel like breaking out the equipment. :unsure

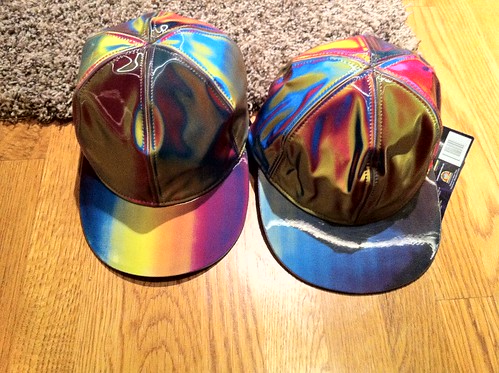
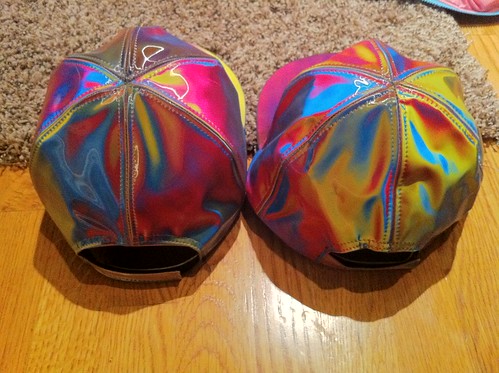
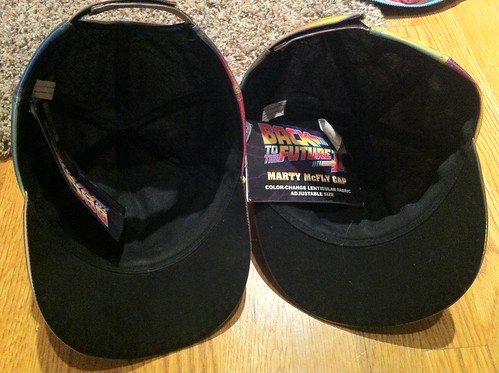
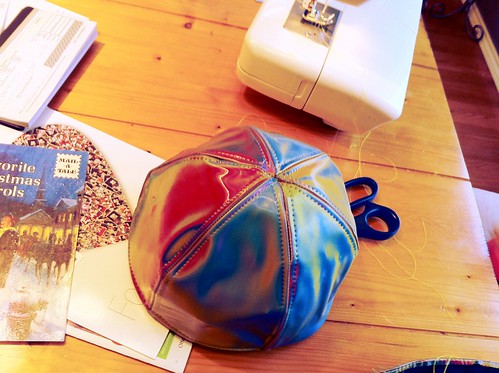
So here are pics front, back and underside of the 2 DS hats I'm starting with..

8276106629_a4b8364ccb.jpg


8276106081_cbf565f0cb.jpg


8277164466_d5540191b3.jpg


So the first thing I did was put the hat on and adjust it. Then I measured the outer and inner circumference of the hat. Figured I'd do this rather than measuring my head and guessing how much bigger to make it for comfort. This will be more important for those with smaller heads. My head is appx. 23.5" around, and that's about as big a fitted size as you can get with this mod unfortunately due to the size of the panels. Mine will fit just about perfect by my estimation without downsizing the back two panels.

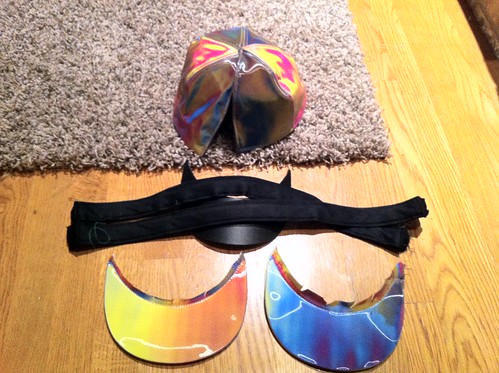
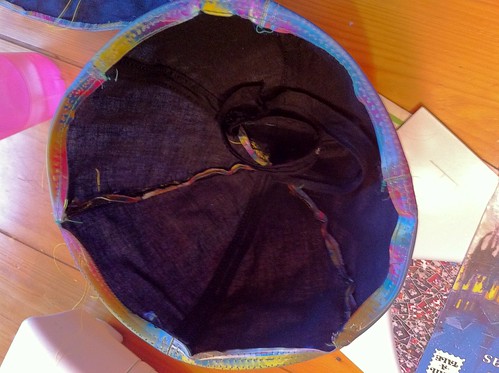
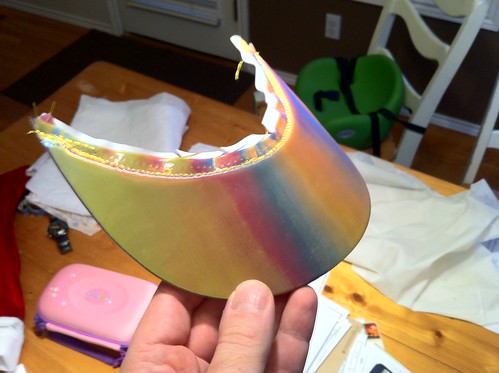
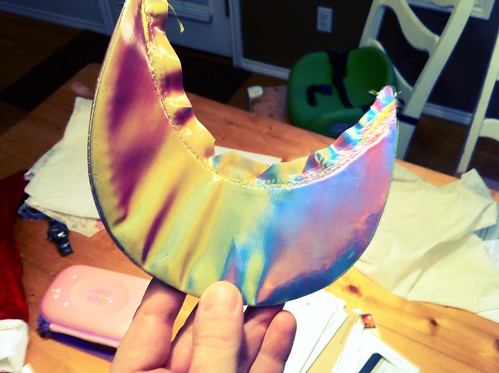
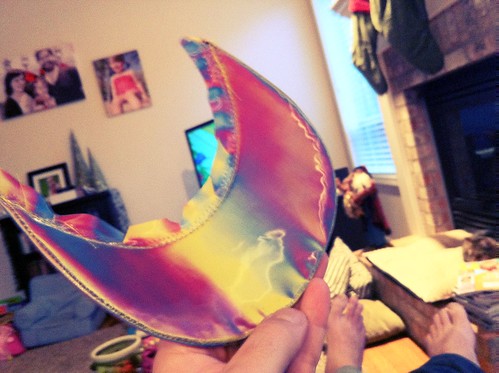
O.K....next was to disassemble the hats. I used a seam ripper you can pick up at any fabric or craft store. Be careful as you do this because you can easily "knick" the lenticular plastic material. I did that a couple times without realizing, but lucked out and had enough panels to complete it. Also, pay attention to the construction of the thing as you go to make it easier to reassemble. I started by pulling off the bills and taking them apart. Then you'll want to decide which of your two hats you want to be showing in front. These hats tend to be hit or miss with the condition of the lenticular. One of mine was fairly clean, and the other was wrinkled to hell. So obviously, choose the best of the two for the front of the cap. On that one you'll simply remove the back two panels that have the adjustable strap. Then you'll remove two of the best panels from the other to replace those.

Here's what I ended up with this evening after my deconstruction.....

8276104421_c7447926e2.jpg


Pretty straight forward what you need to keep for the rebuild....I'll be starting that tomorrow. Wish me luck!! This is the point that those of you with smaller heads will have to trim down your back panels.
 
OK, so far so good. This is what the outside looks like after I stitched the panels together. As you can see in the background, I'm using a rather inexpensive singer, and it hasn't been a problem so far. We'll see if it creates issue up the road.....

8279294146_1b769d8b49.jpg


and the inside....

8279294734_56c31df9a9.jpg


Now I have to restitch those fabric strips covering the inner seams....this may be a bit tougher. Finishing details always seem to be a bit more painful.
 
O.K...scratch the "off the rack" look. Not possible for me at this juncture. I'd need a better machine and more practice. That said, it's not bad. Here's the outside after stitching on the inside strips...

8279744848_247bc140df.jpg


And inside...

8279745232_1732c430da.jpg


Then onto the brim. This part I'm not completely satisfied with, but I'm not sure if the lenticular will hold up to tearing it apart again and restitching. Anyhow, what I did was sew the 2 lenticular parts of the brim together inside out, inserted the plastic part, and sewed shut. Now comes the problem, which you'll see in the pics. When the brim is bent, the top looks great because its stretched over the plastic, but the underside bunches from the bend. I understand that making the bottom half smaller would alleviate this, but then how would you stitch the two halves together evenly when one side is larger? Keeping in mind that this stuff isn't super easy to work with and stretch around. Any ideas would be helpful as I may consider redoing this step...

Top...

8279744472_41b4f5af01.jpg


Bottom

8279743668_d9136b3846.jpg
 
Ya how did you do it? I was thinking just make it slightly smaller, also maybe spray some adhesive and let it sit in the position you like, once it dries trip excess or see that extra little bit up.
 
Did you reuse the clear nylon "thread", or substitute something else in?

I'm using the clear thread for all the visible parts (unfortunately, I did not find out the actual thread used on the real cap until I was we'll under way with the project). The hidden stuff I'm just using what I had around that wouldn't clash too much, it's yellow.
 
This thread is more than 6 years old.

Your message may be considered spam for the following reasons:

  1. This thread hasn't been active in some time. A new post in this thread might not contribute constructively to this discussion after so long.
If you wish to reply despite these issues, check the box below before replying.
Be aware that malicious compliance may result in more severe penalties.
Back
Top