WARNING: My ramblings and psychosis to follow. TL;DR: I'm obsessed with building a remote-control cybermat and am encountering difficulties. Little help?
Sooo, I'm a complete and utter madman, primarily because of an obsession that I've had since I was 5 years old and watching old episides of Doctor Who on VHS tapes. I've always wanted a cybermat toy. I don't know what the hell it is about the stupid thing that I love so much, but I just adore it. So of course when the new series came out and they eventually brought a new version of the cybermat out, there was of course a toy.
And despite the fact that the episode it premiered in actually HAD the Doctor with a remote control with the cybermat... of course the toy wasn't RC. And it was a few inches smaller than scale. And it didn't have lights or make noise or anything. That's okay, though. It's still adorable and I'm happy to have it.
Unfortunately, it has not abated my obsession. I of course gutted one of them and inserted a tiny RC car and that works nicely... on my kitchen floor. See, the problem with me is that I live in an apartment with, you know, carpet. Tiny RC cars, especially when they're carrying a big shell on top of them, don't tend to work very well on carpeting. "Well, screw it," thought I - "If Character Options won't recognize the money it would make with this thing, I'll just make it my own damn self." I am by no means an expert prop maker. I make stuff out of cardboard and flashlights and acryllic paints and etc. I see things and I try to make them match other things.
And really, how simple an idea is this, right? Find RC car that works on carpet, make shell, put RC car inside of cybermat shell, and done. Oh, but this was simply the beginning of my quest.
Figuring that I was not the only person out there insane enough to want this, I did some searches online to see if others had done this before and attempt to replicate their success. Really the only one at the time was Kevin D's scartchbuild cybermat he had based off of the few still shots that had existed before the season had aired... and I honestly rather like it. You can see it in action here: Doctor Who New Cybermat Replica - YouTube
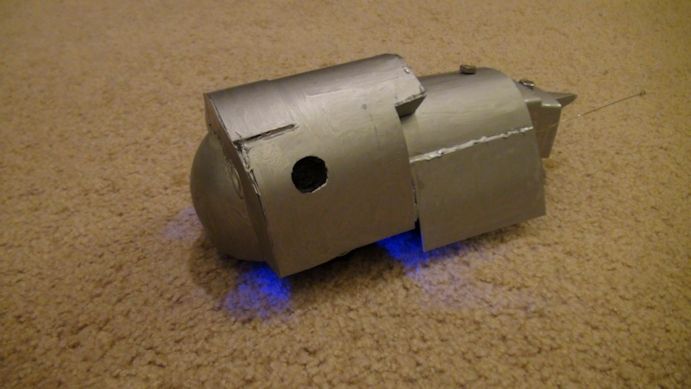
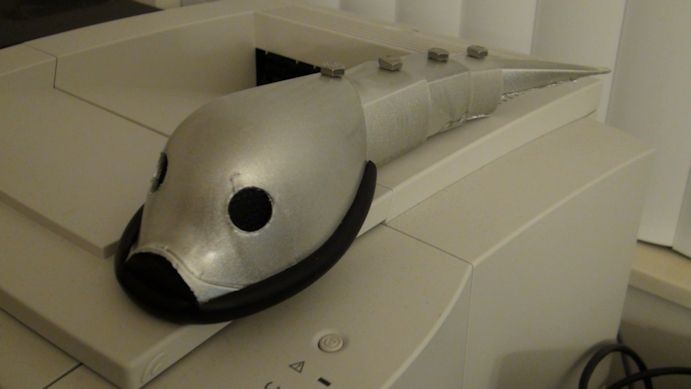
It's got lights, it's RC, and it's adorable. What's not to love? Of course, he did not leave instructions on what the hell he did save for a few bits of text on another forum along with some in-production pics. That got me going on SEVERAL ideas and eventually presented my Mark 1 cybermat, which I even made into a video tutorial, since of course being that my job is making an online web-series about comic books, a video about my obsession with cybermats means that all the supplies are tax write-offs. Watch SPECIAL: Cybermat Tutorial | Atop the Fourth Wall Episodes | Blip
And people liked it and that's great. Of course, it's got its flaws. Since it uses an IR receiver, the remote has to be held at a certain level and distance for it to pick it up. The tail does not sway back and forth, and the front could use a better transition for the mouth to the head. On a whim, I did another google search and came across another tutorial! Paul Bradford, who's actually a professional at this stuff, made a tutorial on an ingenious, inexpensive Tomb of the Cybermen-style cybermat: My Untempered Schism: 1967 Tomb Cybermat build...
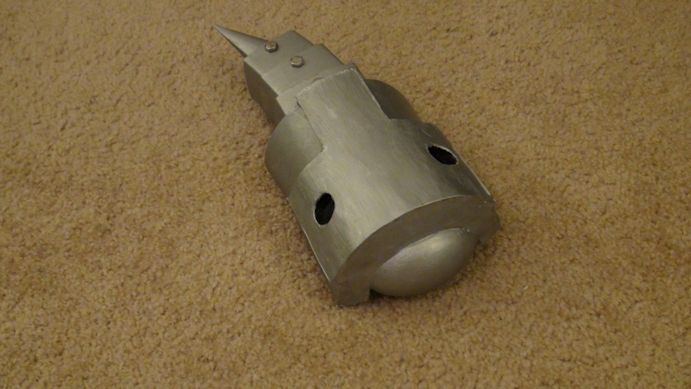
This stuff was brilliant to me and I was kicking myself for not thinking of it myself - a scoop for the head? Bolts so that the sections can actually MOVE? INGENIOUS. I contacted him and we've exchanged some e-mails and it's great, but of course I ran into my own problems with it. See, I don't really want a Tomb cybermat, I've been going for something either original or closer to the adorable "Closing Time"-style cybermat. And I revised more and more for my Mark 2 cybermat and I would have been happy with it, since I had located a small RC car that would have done the job if I hadn't started running into problems. The first was weight issues (my own fault due to how back-heavy it was). I added more weight to the front. It seemed fine. Then I took it out for a test drive at a comics convention and... for some reason the RC never quite worked right again. I would need to get within five feet for it to work despite it working fine previously in my home and it's never quite worked right since.
So, I figured, it was time to go back to the drawing board, which is kind of where I'm at now. The continuing problem I've had with the damn thing is the RC car. Most RC cars are either too big or too expensive to be what I want them to be. The problem I seem to keep running into in between is the infrared receiver. Standard radio control seems to be a dying art, but IR receivers end up getting blocked by the shell, making it almost impossible for it to be, you know, controlled. I was ready to throw myself into learning how to build an RC car from scratch... but apparently remote control vehicles are some kind of elite club that nobody wants to TEACH anybody, because I haven't found any "Beginner's Guide to RC car building" or the like. The closest was a book that I haven't purchased yet from Amazon that some fans of mine pointed my way, but I don't know if it's worth it depending on what direction I ultimately want to go.
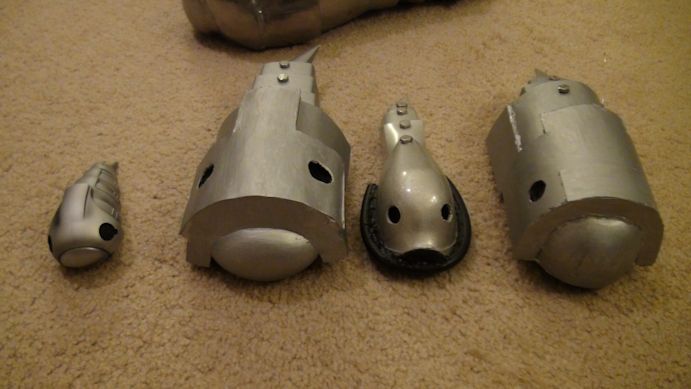
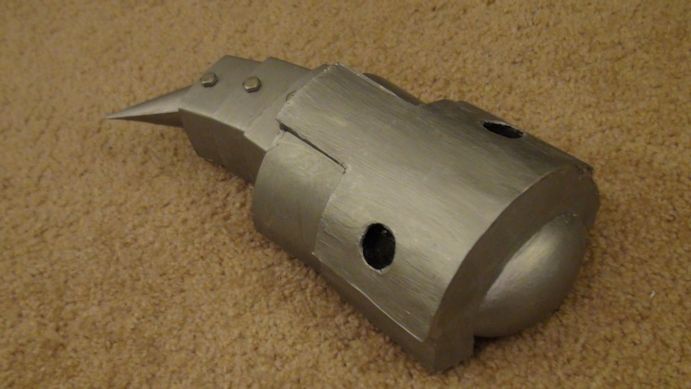
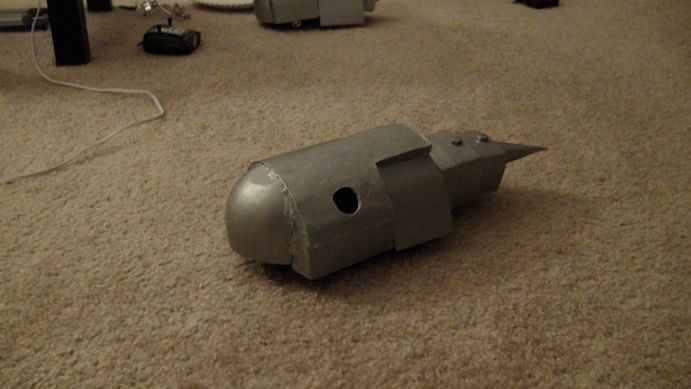
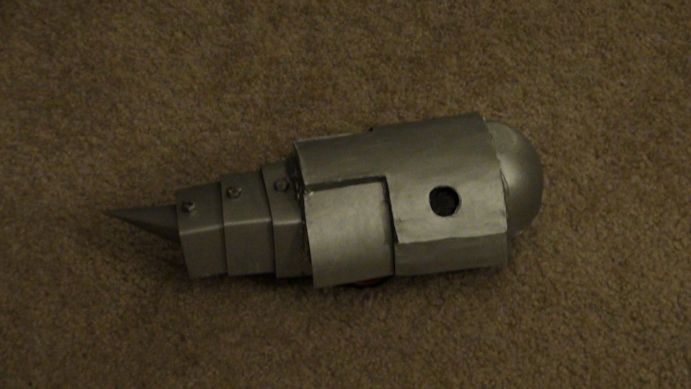
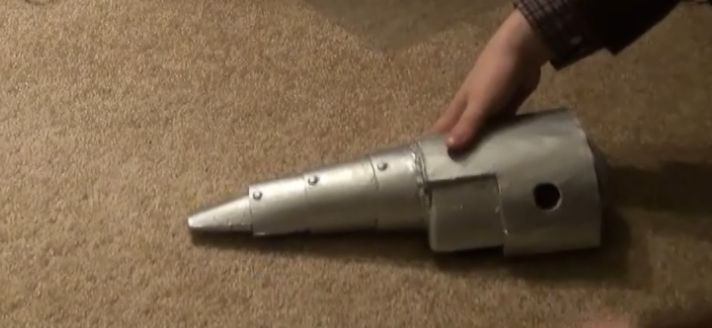
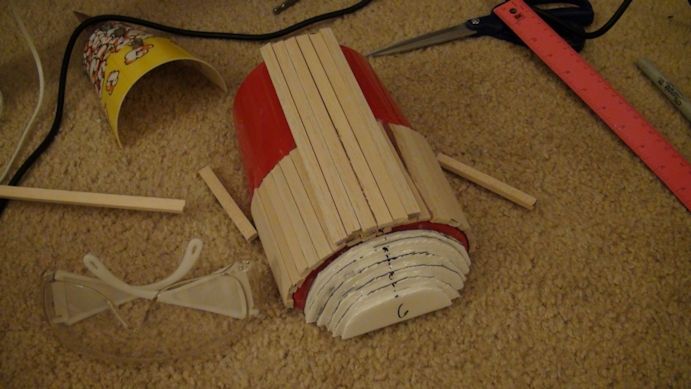
Realizing that I have a HUGE supply of LEGOs from my childhood AND that LEGO puts out RC material, it seemed like my problems were solved - I would just build an RC car that was the right size. HA. I did get the PowerForce RC stuff and I understand how it works. However, designs for an RC car or tank have run into problems. Either I don't have that one tiny little obscure technic piece that's only available in sets $50 and up or the things are too damn big or, in my latest build, the damn thing is doing poppa-wheelies. Still, I started work on another shell to try to incorporate what I had learned previously - the overall design of the Mark 1 but with the lighter materials of the Mark 2 AND moveable sections, but it's still big and bulky in order to accomodate one of the Lego tanks I had built.
So, here I am. I am throwing myself on the mercy of the forum. Am I insane to want a remote-controlled cybermat that is no longer than 12 inches and can work on friggin' CARPET? Or am I chasing some mad dream here for someone whose most major experience in prop construction involves hot glue and junk from a hardware store?
Sooo, I'm a complete and utter madman, primarily because of an obsession that I've had since I was 5 years old and watching old episides of Doctor Who on VHS tapes. I've always wanted a cybermat toy. I don't know what the hell it is about the stupid thing that I love so much, but I just adore it. So of course when the new series came out and they eventually brought a new version of the cybermat out, there was of course a toy.
And despite the fact that the episode it premiered in actually HAD the Doctor with a remote control with the cybermat... of course the toy wasn't RC. And it was a few inches smaller than scale. And it didn't have lights or make noise or anything. That's okay, though. It's still adorable and I'm happy to have it.
Unfortunately, it has not abated my obsession. I of course gutted one of them and inserted a tiny RC car and that works nicely... on my kitchen floor. See, the problem with me is that I live in an apartment with, you know, carpet. Tiny RC cars, especially when they're carrying a big shell on top of them, don't tend to work very well on carpeting. "Well, screw it," thought I - "If Character Options won't recognize the money it would make with this thing, I'll just make it my own damn self." I am by no means an expert prop maker. I make stuff out of cardboard and flashlights and acryllic paints and etc. I see things and I try to make them match other things.
And really, how simple an idea is this, right? Find RC car that works on carpet, make shell, put RC car inside of cybermat shell, and done. Oh, but this was simply the beginning of my quest.
Figuring that I was not the only person out there insane enough to want this, I did some searches online to see if others had done this before and attempt to replicate their success. Really the only one at the time was Kevin D's scartchbuild cybermat he had based off of the few still shots that had existed before the season had aired... and I honestly rather like it. You can see it in action here: Doctor Who New Cybermat Replica - YouTube
It's got lights, it's RC, and it's adorable. What's not to love? Of course, he did not leave instructions on what the hell he did save for a few bits of text on another forum along with some in-production pics. That got me going on SEVERAL ideas and eventually presented my Mark 1 cybermat, which I even made into a video tutorial, since of course being that my job is making an online web-series about comic books, a video about my obsession with cybermats means that all the supplies are tax write-offs. Watch SPECIAL: Cybermat Tutorial | Atop the Fourth Wall Episodes | Blip
And people liked it and that's great. Of course, it's got its flaws. Since it uses an IR receiver, the remote has to be held at a certain level and distance for it to pick it up. The tail does not sway back and forth, and the front could use a better transition for the mouth to the head. On a whim, I did another google search and came across another tutorial! Paul Bradford, who's actually a professional at this stuff, made a tutorial on an ingenious, inexpensive Tomb of the Cybermen-style cybermat: My Untempered Schism: 1967 Tomb Cybermat build...
This stuff was brilliant to me and I was kicking myself for not thinking of it myself - a scoop for the head? Bolts so that the sections can actually MOVE? INGENIOUS. I contacted him and we've exchanged some e-mails and it's great, but of course I ran into my own problems with it. See, I don't really want a Tomb cybermat, I've been going for something either original or closer to the adorable "Closing Time"-style cybermat. And I revised more and more for my Mark 2 cybermat and I would have been happy with it, since I had located a small RC car that would have done the job if I hadn't started running into problems. The first was weight issues (my own fault due to how back-heavy it was). I added more weight to the front. It seemed fine. Then I took it out for a test drive at a comics convention and... for some reason the RC never quite worked right again. I would need to get within five feet for it to work despite it working fine previously in my home and it's never quite worked right since.
So, I figured, it was time to go back to the drawing board, which is kind of where I'm at now. The continuing problem I've had with the damn thing is the RC car. Most RC cars are either too big or too expensive to be what I want them to be. The problem I seem to keep running into in between is the infrared receiver. Standard radio control seems to be a dying art, but IR receivers end up getting blocked by the shell, making it almost impossible for it to be, you know, controlled. I was ready to throw myself into learning how to build an RC car from scratch... but apparently remote control vehicles are some kind of elite club that nobody wants to TEACH anybody, because I haven't found any "Beginner's Guide to RC car building" or the like. The closest was a book that I haven't purchased yet from Amazon that some fans of mine pointed my way, but I don't know if it's worth it depending on what direction I ultimately want to go.
Realizing that I have a HUGE supply of LEGOs from my childhood AND that LEGO puts out RC material, it seemed like my problems were solved - I would just build an RC car that was the right size. HA. I did get the PowerForce RC stuff and I understand how it works. However, designs for an RC car or tank have run into problems. Either I don't have that one tiny little obscure technic piece that's only available in sets $50 and up or the things are too damn big or, in my latest build, the damn thing is doing poppa-wheelies. Still, I started work on another shell to try to incorporate what I had learned previously - the overall design of the Mark 1 but with the lighter materials of the Mark 2 AND moveable sections, but it's still big and bulky in order to accomodate one of the Lego tanks I had built.
So, here I am. I am throwing myself on the mercy of the forum. Am I insane to want a remote-controlled cybermat that is no longer than 12 inches and can work on friggin' CARPET? Or am I chasing some mad dream here for someone whose most major experience in prop construction involves hot glue and junk from a hardware store?
Last edited:
") i used to race rc cars so if i can help u with the rc part give me a shout.
i used to race rc cars so if i can help u with the rc part give me a shout.