Disguise Thor Mjolnir Hammer WIP

Travman93

Member
So, I'd like to start this off by thanking Kevin Gossett and every single member on here for inspiring me to do my very first build/upgrade/mod/whatever you'd like to call it. You guys never cease to amaze me and the people I pass these threads along to. As previously stated, this is my first time doing anything like this whatsoever. I'm 100% open comments, suggestions, tips, etc. Now, let's get started.

-4-8.jpg

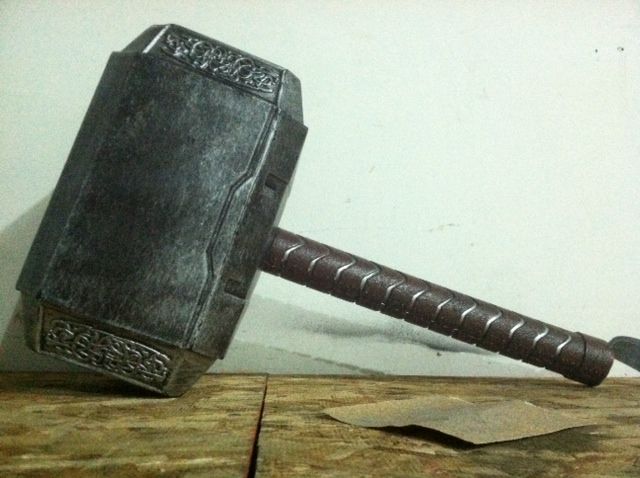
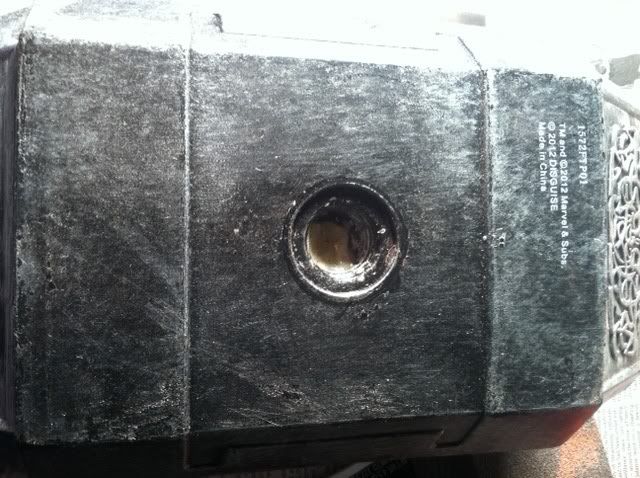
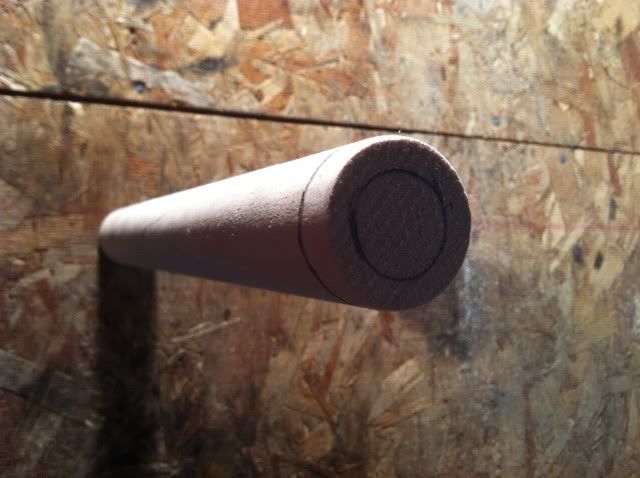
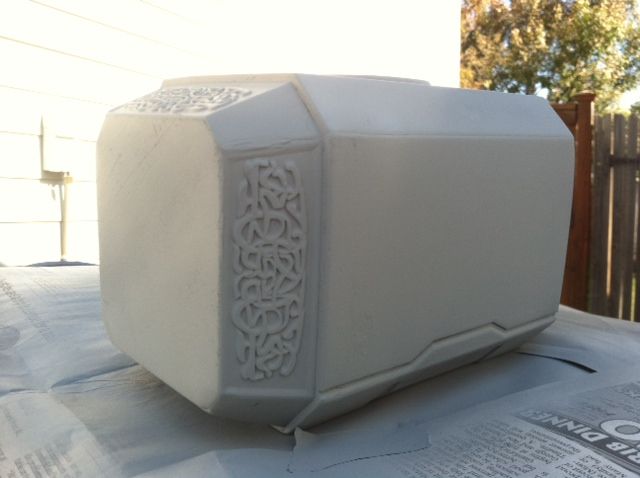
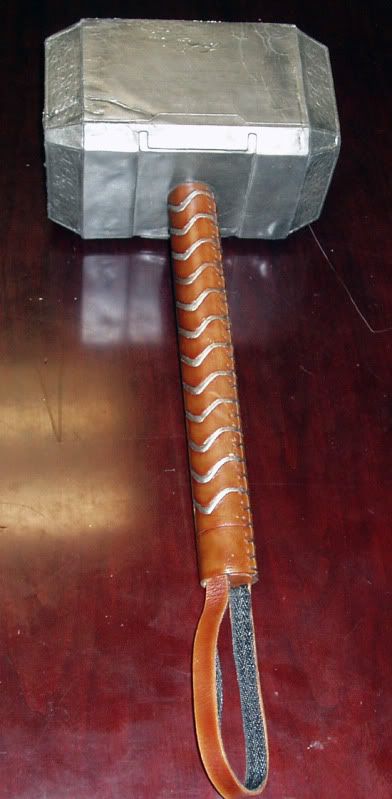
The Disguise Thor hammer I got for $10 at Target. Extremely light weight, bad paint job, terrible quality handle, but I love the size and scale of it.

-3-16.jpg

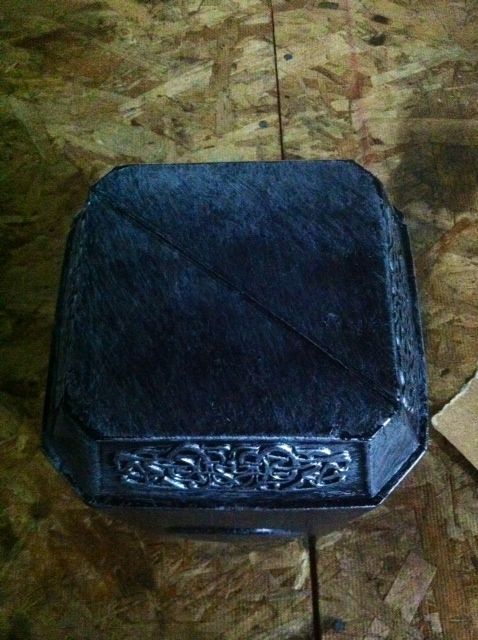
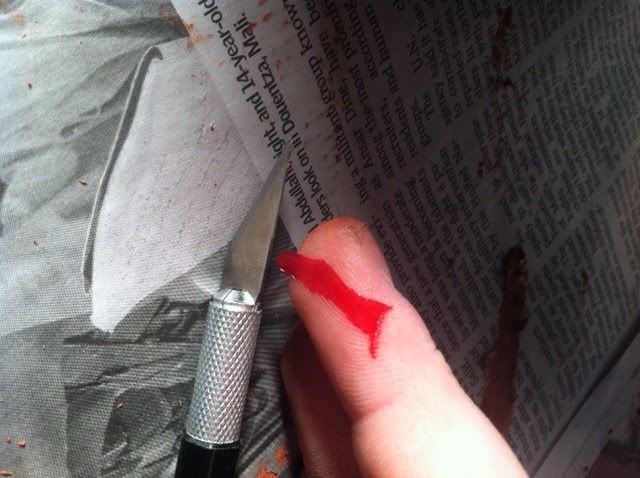
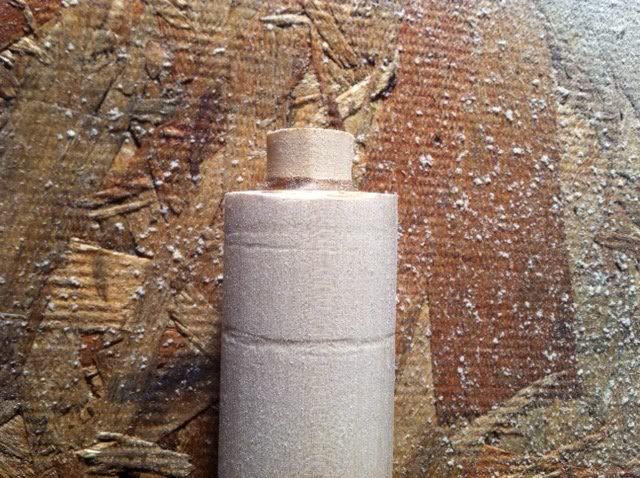
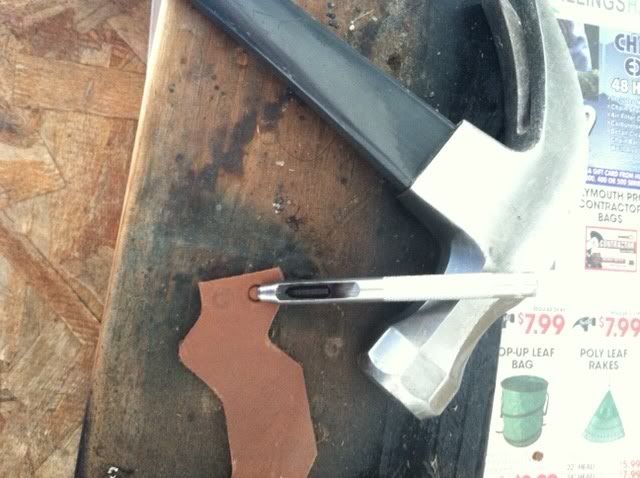
First step for me is to get rid of these pesky mold marks. They're on both ends of the head and jut out a good ways from the surface. I went ahead and sanded them both down until they were about as gone as they'll get.

-5-4.jpg

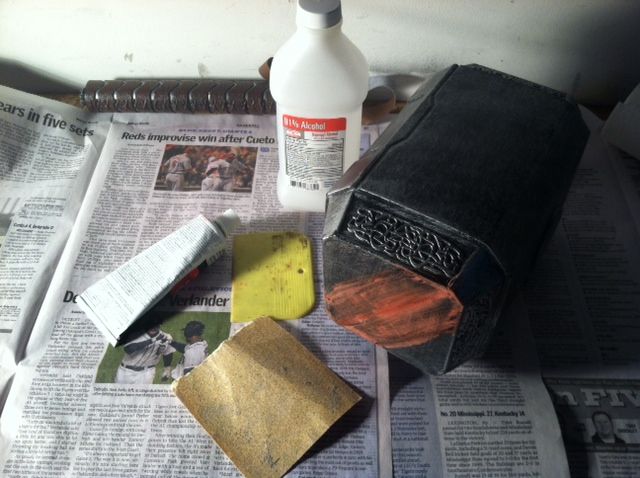
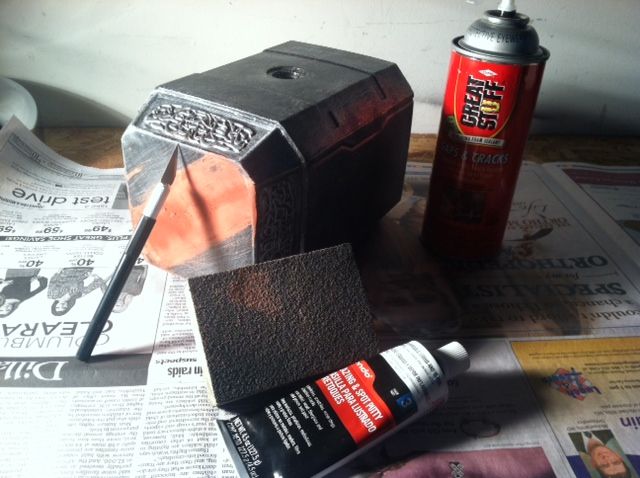
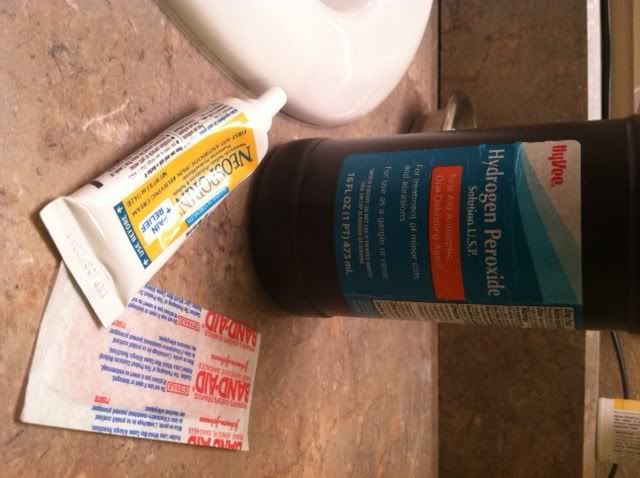
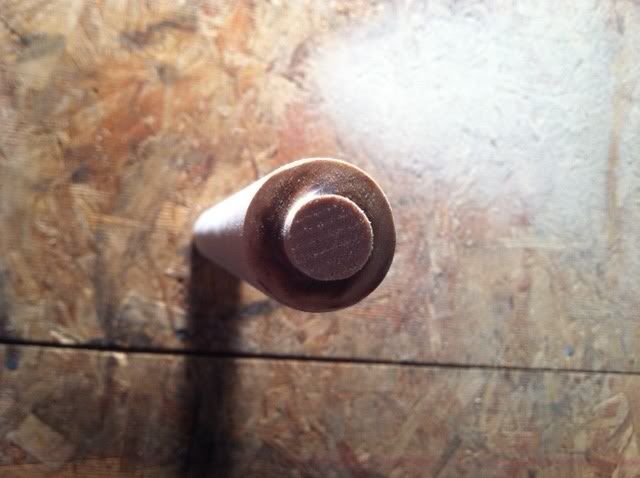
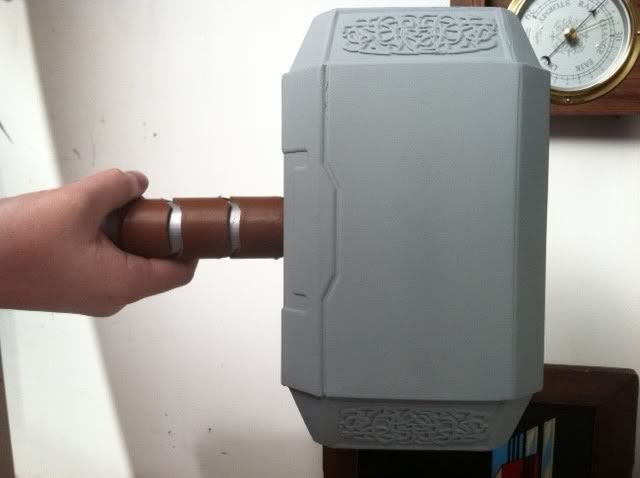
After sanding, I cleaned everything up with rubbing alcohol. I used the spot filler and the applicator to fill in my first coat so far. Up next is attempting to fill the gap that the mold mark left, as well as filling the head of the hammer.

I'll be trying my best to work on this nightly and post pictures nightly, as well. Being a college student and working definitely leaves me with little time, but most free time after work will go towards this. Thanks for looking!
 
Just got one of these today too - once I get past wanting to constantly play with it, I'll be doing the same, LOL
 
I was in the same boat! I can only imagine how awesome I looked posing with it in a striking stance, spinning it in my hand, and just beating stuff with it.
 
-6-3.jpg

After a long day filled with a trip to the hospital (Sprained rotator cuff sprain on the job), decided to try to accomplish a bit on the ol' hammer.

-7-3.jpg

I emptied a can of Great Stuff into it and rolled it around a bit to try and spread the foam as best as possible for even weight distribution. I decided to fill my gaps on the ends whilst waiting for this stuff to puff up a bit.

-8-3.jpg

And that was a bad idea. I had a bit of excess fall into the engravings, and grabbed the trusty Exacto to try and pick it up. I slipped up, and decided at that point to call it a day. Too much pain for one day.

-9-6.jpg

My supplies for the rest of the night.
 
-10-2.jpg

Alrighty, so I'm starting to work on the handle tonight. Working with about one and a half hands, so I might have to go back and clean this up quite a bit. I decided instead of just gluing my handle onto the hammer, I'll try to create a little nub just like the original handle. I used a caliper to measure the depth of the elevation, and drew a line to mark my depth.

-11-1.jpg

I tried my best to center the nub by laying them end to end and tracing the centralized circle right in the middle.

-12.jpg

Using a bench grinder, I slowly whittled my way down...

-13.jpg

And this was what I was left with. I sanded the entire thing down quite a bit, but I doubt I'll be able to get the grooves in it that will screw in. What I plan on doing is covering the entire top with glue or some adhesive and then sticking it into the head of the hammer. That is, after I finish up with this...

-14.jpg
 
It's nice knowing everyone is so excited about this. :rolleyes

-1-40.jpg

So it's time to move onwards with my hammer. I decided I wanted to prime the head of the hammer and try to get as much done with the handle as my shoulder will allow. (I'm extremely open to suggestions as far as paint and coulour of the head...) Using my ultra-high tech paint booth, I dove right in.

-2-22.jpg

Here is the head after one layer of primer. I did two layers in all, although I'm not too sure what I should've done. Tips, people! Tips!

-3-17.jpg

I primed my handle and added a coat of metallic silver paint to it. It turned out a lot more shiny than I expected, but I do like the metal shine it has to it. I through a light coat of clear coat on there, and attached my leather end caps.

-4-9.jpg

As for the leather straps, this was my biggest challenge by far. I had a hell of a time making the template and cutting them out. Out of nine straps, they aren't all 100% exact clones, but the differences are subtle enough and they'll be spaced throughout the hammer. I used a gasket punch and hammer to create the holes to lace them together. The leather lace is an 1/8th inch wide, so I punched a 3/32nd sized hole, if I remember correctly.

-5-5.jpg

Here's a little teaser as to what I have done so far. Lots of hard work, and kind of learning as I go. This is my first experience at all with this sort of stuff, but I love the feeling of creating something out of just these various supplies. Lots of views with very few replies. Don't be shy!
 
Looking good so far! The thing I changed from my first handle to my second was the gap between pieces. It's actually supposed to be a lot more subtle than you would think
 
Thank you so much! They aren't glued on just yet, so I'll save that for last! I switched up the lacing method, as well. Instead of making an X, I made them go straight across each other, making an =. This was mainly because my leather is fairly thin and the lacing is rather thick, so it left some pretty big bulges that didn't feel right in the hand.
 
I'm going to do this when I get hammer but I was wondering about the handle.

After seeing some pics of the hammer, I don't think there were actually leather straps on it. Any ideas on what I can do instead of the leather straps? I could be wrong about the leather straps, it just looks like there are silver shaped pieces raised on it.
 
yeah depending on how accurate you want to go there are 13 sections of leather on the handle including the slim part where the top of the handle meets the head and the longer piece at the bottom
 
Where did you get your leather? Craft shop or what? I really like how it looks so far! Can't wait till I see the finished product.
Thank you for the kind words! I got the leather at a place called Tandy Leather. It cost me $1.30 for a square foot, which has lasted me this whole project!

biggio7, I had a crazy idea of dremeling what would be my leather straps into the wood, and sort of inlaying them so that the entire handle is flush and even. That'd be a ton of work, but I'll keep it in mind for the next one!

JBReplicas, that's something I really struggled with. I didn't know how many to do or what, so I just kind of did my own thing. My finished handle will have strips that are 1 1/4" wide on an 11" handle. Not to mention my 1" wide leather end cap. I will more than likely have to do 8 pieces spread out evenly instead of 9 squished together.
 
I know what you mean, when I made mine I went over a load of ref pictures trying to count the pieces, I decided there were 13 so cut them all out, I had glued 10 down when I realised I had spaced them too far apart so had to start all over again!
 
Man, that would be terrible. I'm having a hard enough time on my first attempt. I can see myself trying more builds, because I'm loving how this is turning out. I can see why people love this so much and are so addicted to it!
 
I'm going to do this when I get hammer but I was wondering about the handle.

After seeing some pics of the hammer, I don't think there were actually leather straps on it. Any ideas on what I can do instead of the leather straps? I could be wrong about the leather straps, it just looks like there are silver shaped pieces raised on it.

If you're talking about the Avengers version, then yes the silver parts were raised. The Thor version however had the silver flush with the leather, possibly painted on

Thor-Hammer-1.jpg
 
Go for it! It really is a lot of fun! I'm going to try and work on it a bit more as soon as possible!
now I have no experience with foam..did you have to brace the hammer in any way to keep it from becoming misshapen while it expanded? or is the plastic strong enough on it's own?
 
I just emptied a can of Great Stuff into it. I didn't have any problem with warping or anything, I just wish I would've left it alone more as it dried out. It's a bit lopsided as far as weight goes, but I won't worry too much about it since it's for display.
 
This thread is more than 11 years old.

Your message may be considered spam for the following reasons:

  1. This thread hasn't been active in some time. A new post in this thread might not contribute constructively to this discussion after so long.
If you wish to reply despite these issues, check the box below before replying.
Be aware that malicious compliance may result in more severe penalties.
Back
Top