JFcustom
Sr Member
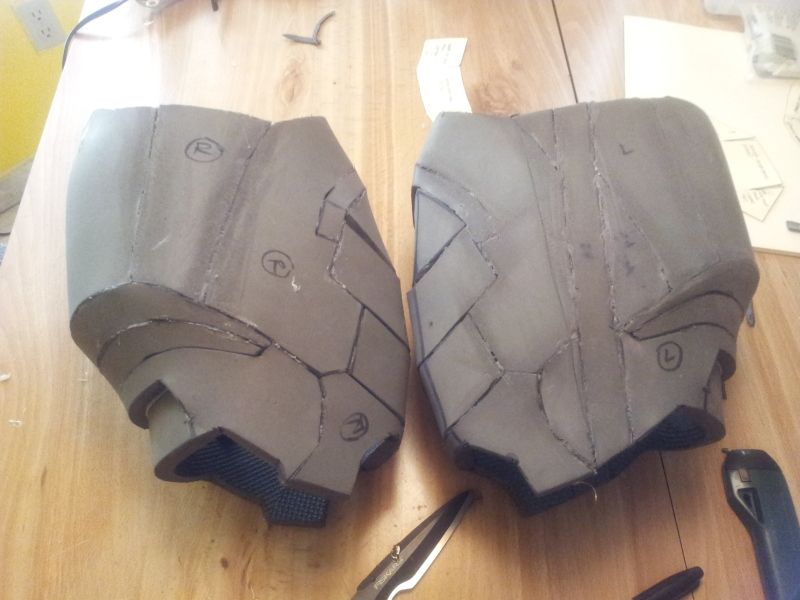
These last days, while building from measurements, I encountered a singular issue about the correct scaling of an Iron Man mk4/6 leg.
The quandary was :
If I built a well-scaled leg in height, the top of the thigh was too tight. If I scaled it wider, the leg was too long. If I scaled differently thigh and shin, in order to get the good lenth and the good width, the knee could not clamp properly... :facepalm So, instead of extracting back the original model to stretch it on my own and re-unfold it back (that could be workable but boring), or building it too narrow and adding afterward some foam extentions (that could be workable but unclean), I decided to take the easyest shortcut.
How to enlarge the top of this thigh while keeping the original knee proportions.
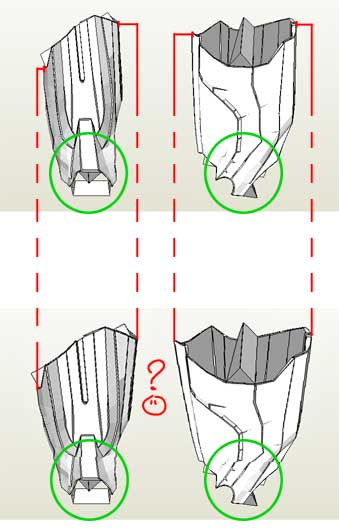
The trick is to add the foam extentions before cutting out the foam pieces. To do that, I split the appropriate patterns in two -those that build the top of the part-, leaving a progressive gap on each of the four sides : front back inner outer of the thigh. Progressive, because I want the bottom of the part -the knee- to remain the same size. See it in red :
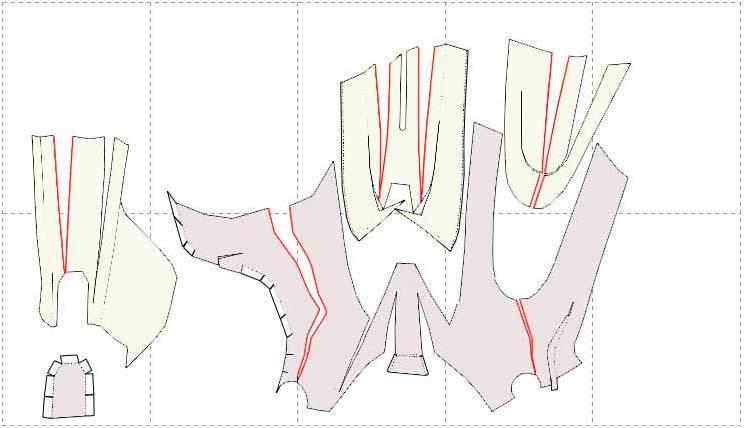
Then I print, and add the last corrections manualy by drawing some smoother new cutting lines. Here in red :
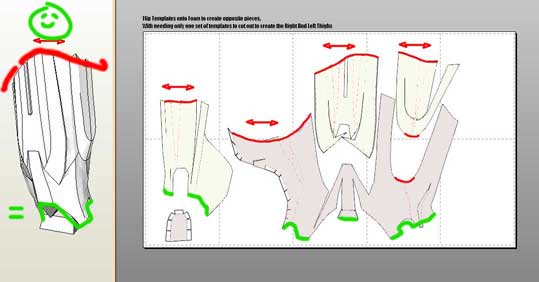
At the end, the green lines did not change at all, when the red ones allow a larger aperture of the top of the thigh. It takes 10 minutes, is potentially applicable to any part of a suit, and you get an unique custom scaled foam part.")
If you use other tips, or have known such a sizing scenario, please share here.
The quandary was :
If I built a well-scaled leg in height, the top of the thigh was too tight. If I scaled it wider, the leg was too long. If I scaled differently thigh and shin, in order to get the good lenth and the good width, the knee could not clamp properly... :facepalm So, instead of extracting back the original model to stretch it on my own and re-unfold it back (that could be workable but boring), or building it too narrow and adding afterward some foam extentions (that could be workable but unclean), I decided to take the easyest shortcut.
How to enlarge the top of this thigh while keeping the original knee proportions.
The trick is to add the foam extentions before cutting out the foam pieces. To do that, I split the appropriate patterns in two -those that build the top of the part-, leaving a progressive gap on each of the four sides : front back inner outer of the thigh. Progressive, because I want the bottom of the part -the knee- to remain the same size. See it in red :
Then I print, and add the last corrections manualy by drawing some smoother new cutting lines. Here in red :
At the end, the green lines did not change at all, when the red ones allow a larger aperture of the top of the thigh. It takes 10 minutes, is potentially applicable to any part of a suit, and you get an unique custom scaled foam part.
If you use other tips, or have known such a sizing scenario, please share here.
Last edited: