WIP, Modifying echo5633's Stormtrooper Helmet rough cast

DizzyStrmtroopr

Well-Known Member
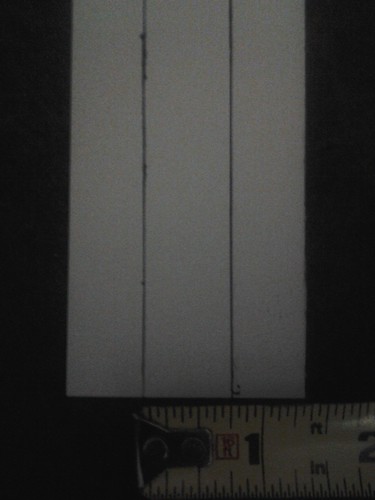
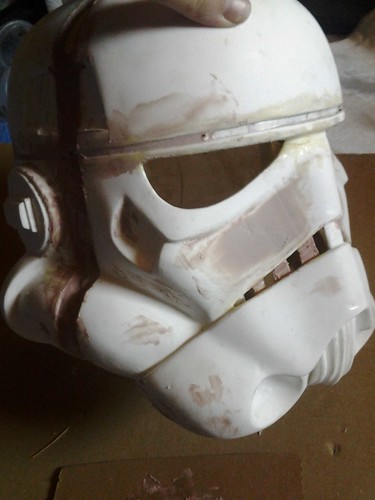
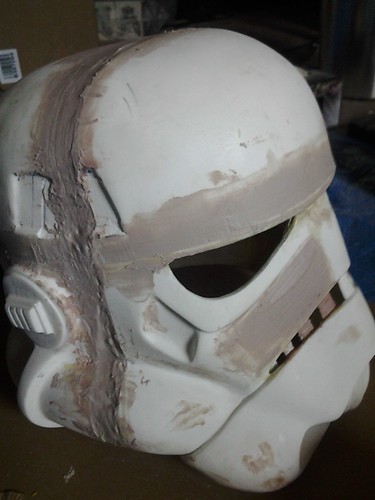
i'm making this thread to show those of you who may have bought the cast and are disappointed it doesnt fit you. ill show you how to make it bigger (thats what she said) by cutting and extending the face and cap, however theres only so big you can go before itll start to look deformed! im guessing a maximum of one inch between the cuts i made would be as far as you could go, i personally will be extending the pieces 3/4 inch to accommodate my forehead and nose. this may not work for everyone since the casts are consistent but our skulls are different.

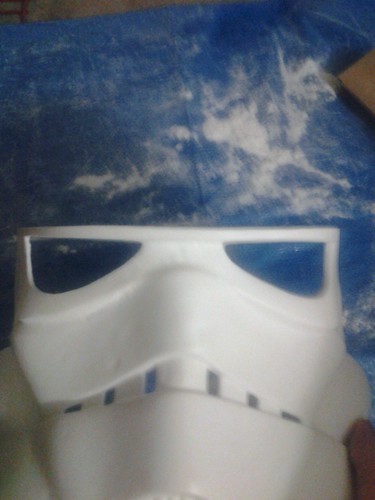
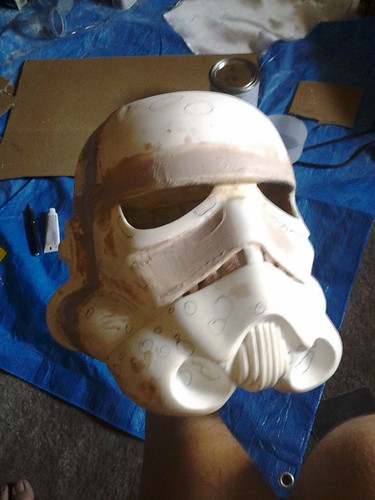
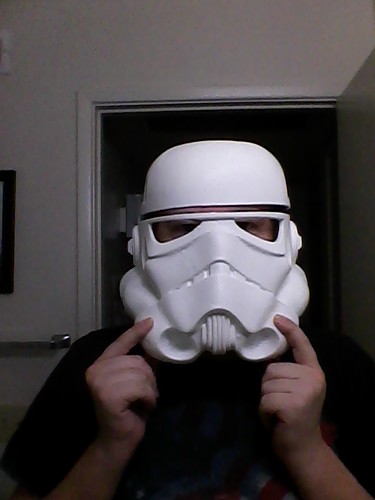
the measurement of the helmet is just over 10" tall and the same wide if you're wondering about scale factor. my stormtrooper pepakura armor i'm making is scaled perfectly to my body, so i didnt want that "bobble-head" effect i'd get with a regular screen-accurate 12" helmet. when i first put it on i couldnt even get my eyes up to the eyeholes. i am separating the cap from the face to extend the brow area, thus lowering the face so i can see out of it, and extending the face from the back so it doesnt squish my nose.

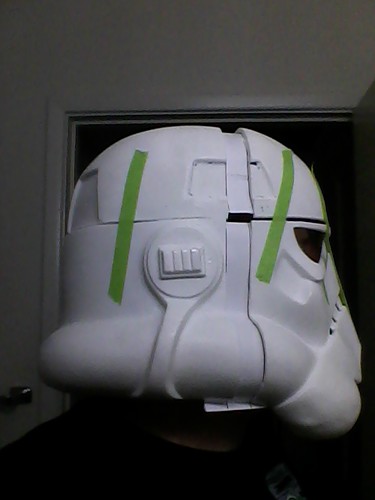
if you have this helmet in your display case now cuz you couldnt wear it, you may want to give my method a try! even if it STILL wont fit, the line and everything are still bondo'd and covered up by the brow trim anyway :)


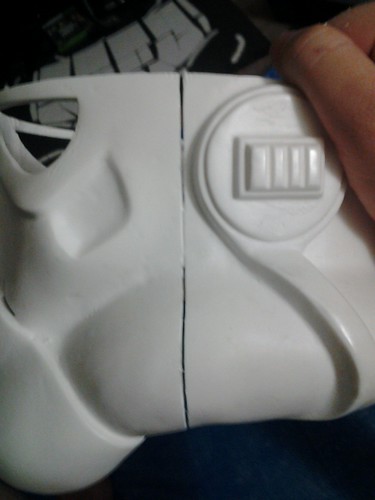
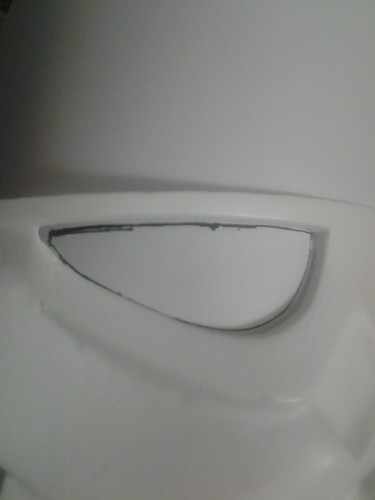
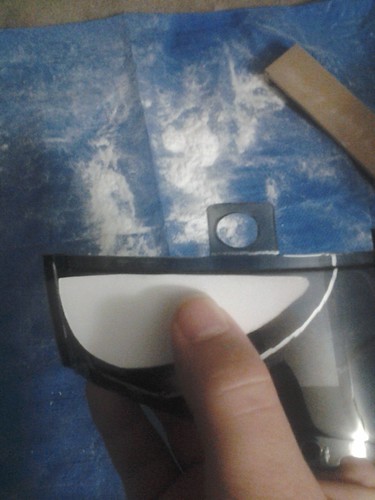
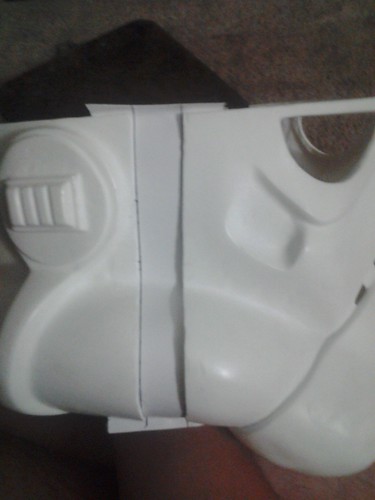
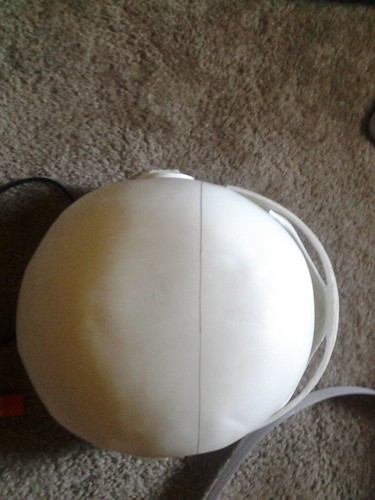
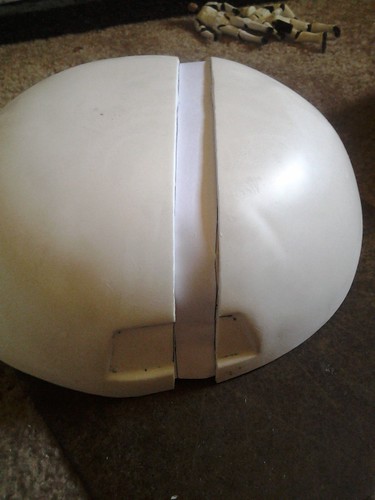
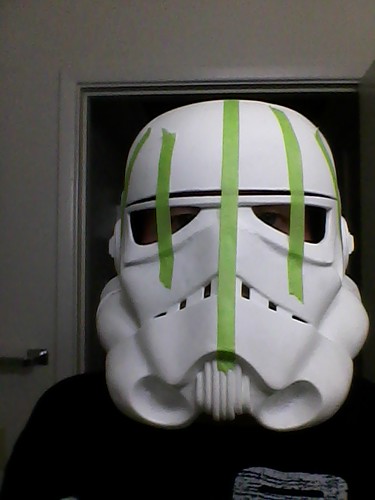
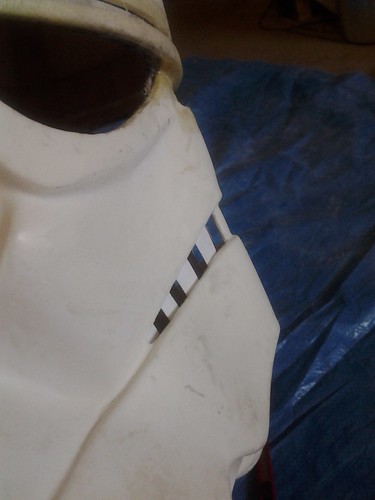
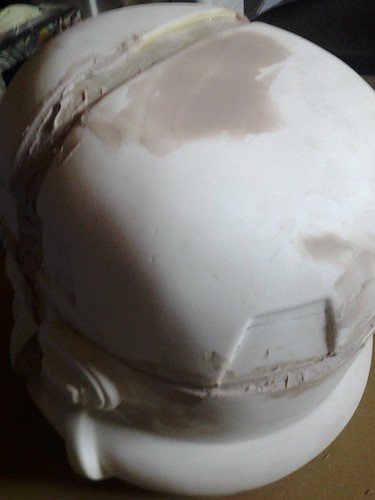
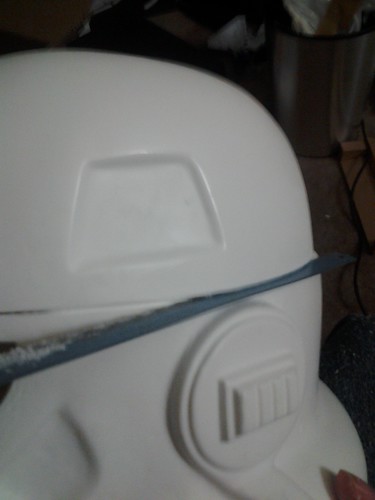
i scored a line from the 'step' in the back and went around to about 1/4 inch above the brow, using the blade of a hacksaw.

7842752340_ce679f6e5e.jpg


the left side may be a fraction off so just make it as straight as you can
7842755802_2467da7f4d.jpg


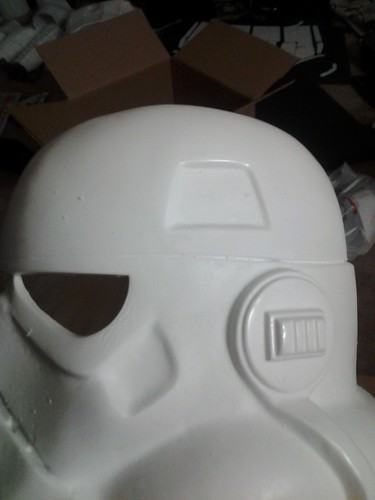
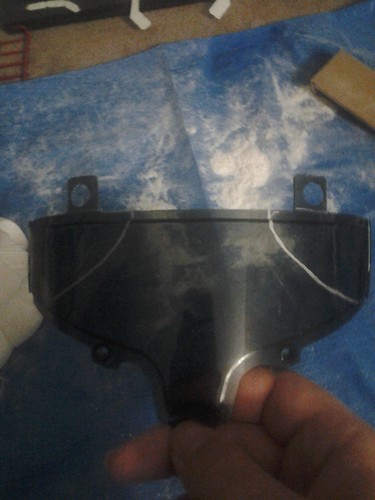
the right side is perfect
7842753458_d355b2544d.jpg


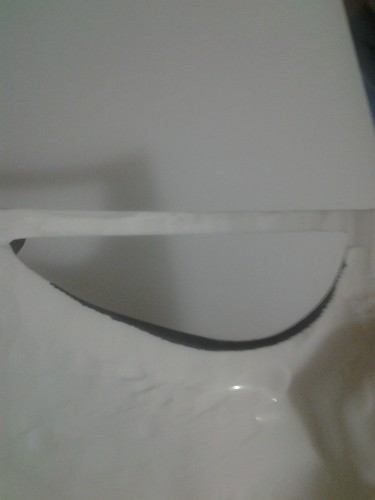
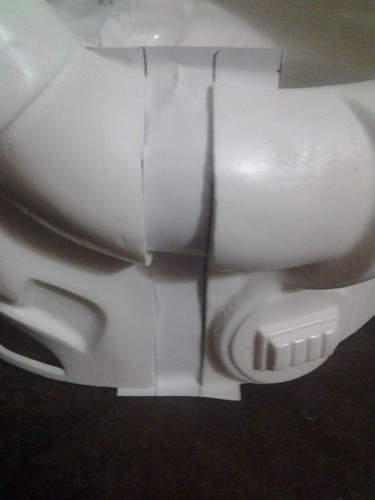
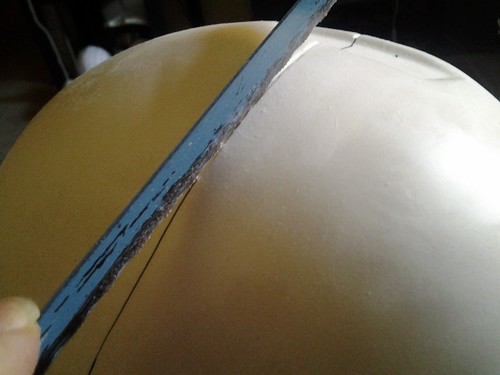
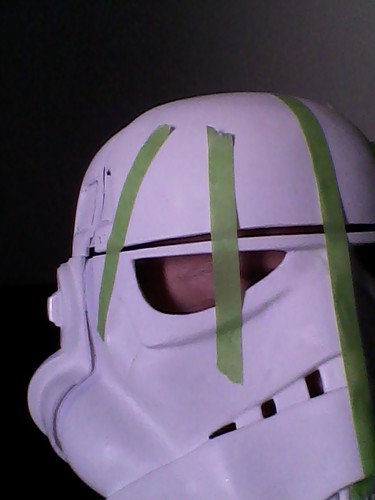
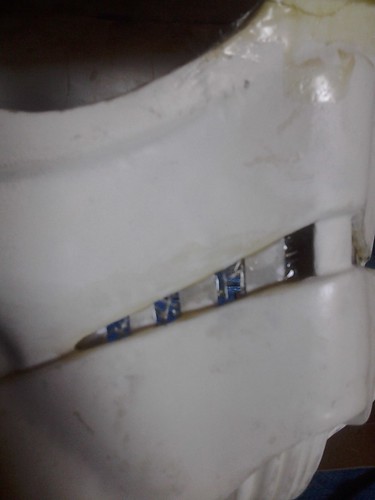
i keep scoring around evenly so it wont separate prematurely, when its thin enough itll come apart cleanly, no dremel required (yet)
7842751170_770a305276.jpg


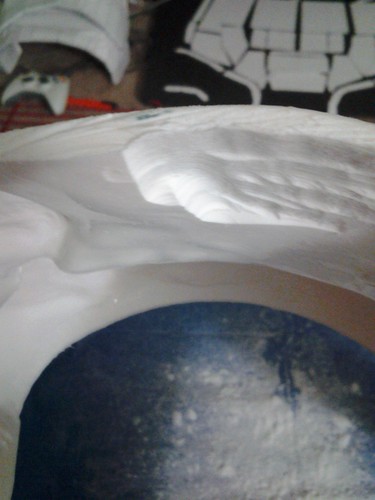
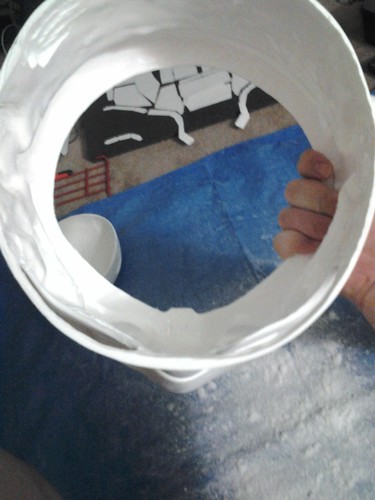
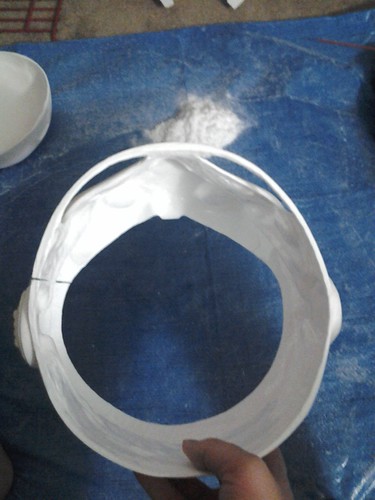
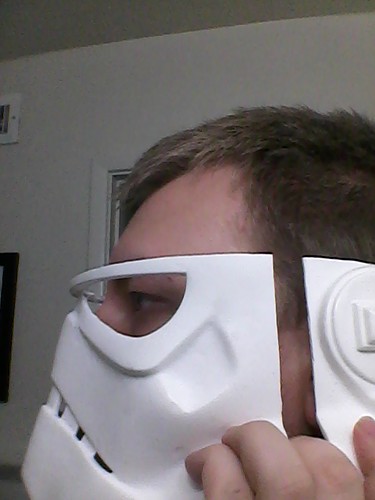
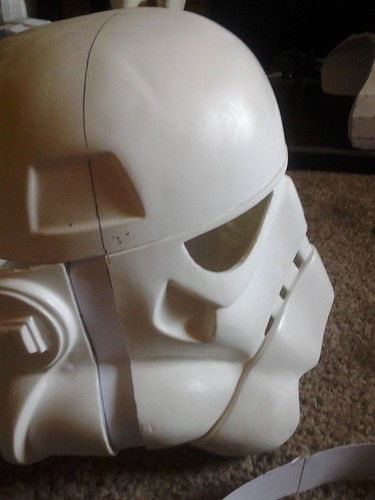
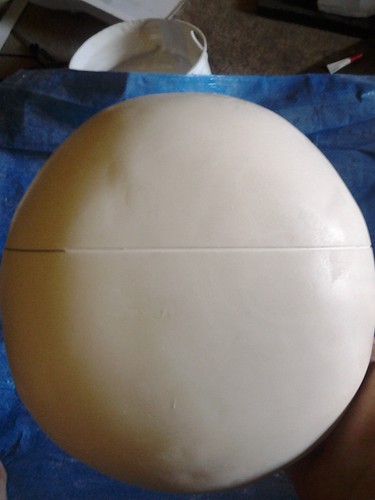
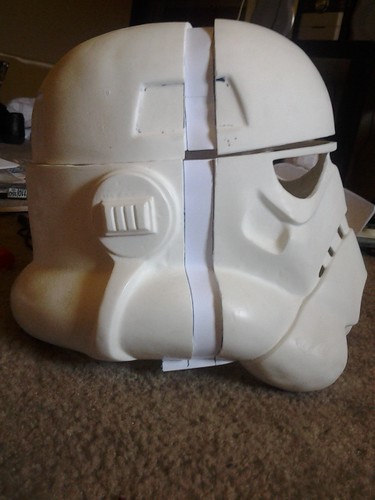
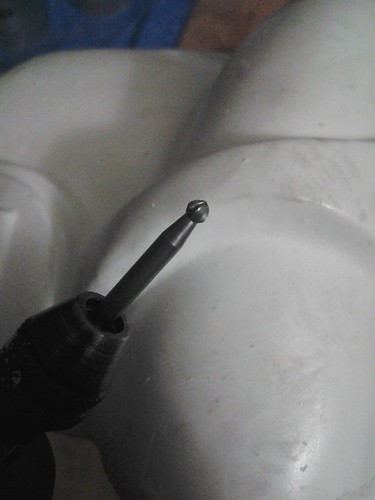
if you havent already, when you dremel the neck and eyes out so it fits around your melon, you can put on the 2 pieces and now you know my dilemma!

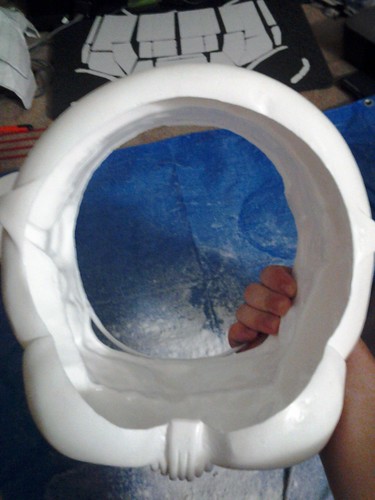
i hold the face off my shoulders, lowering my arms as if i'm standing straight, and the eyes are correctly lined up (mind the crookedness of the cap)
7842750244_f705e9e841.jpg


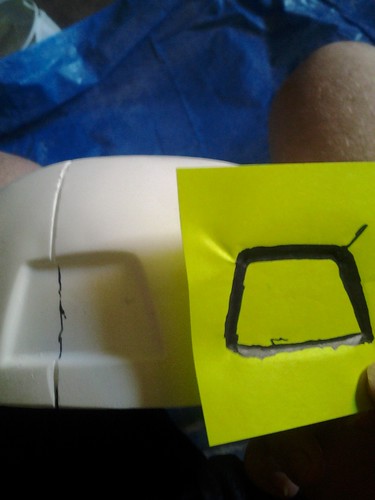
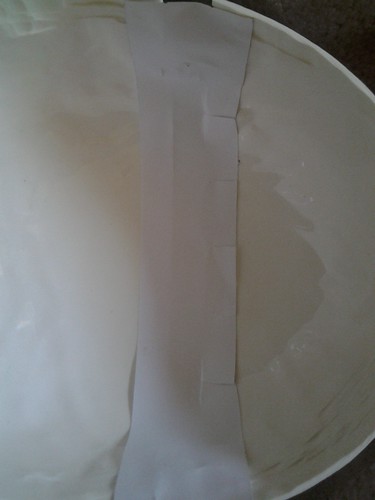
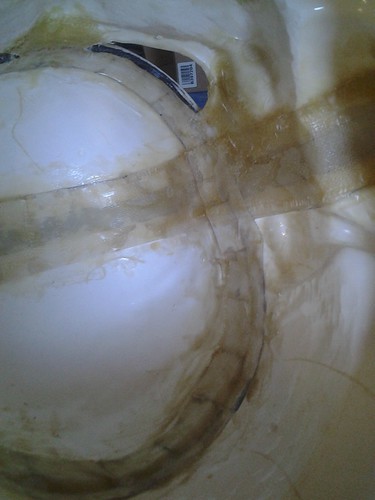
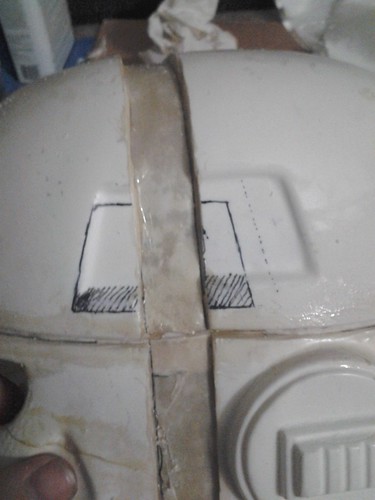
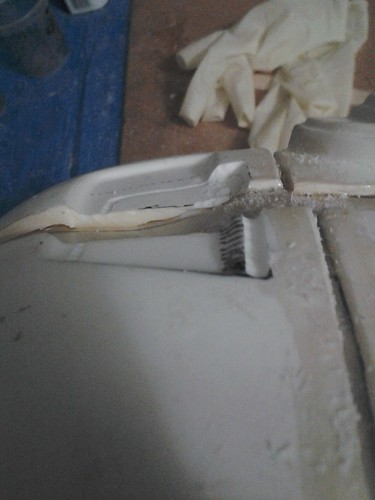
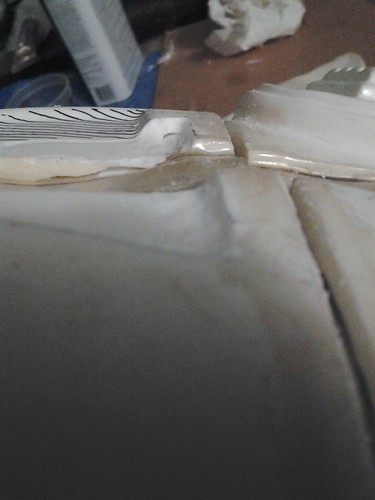
so this will be the final size, the gap will be filled with fiberglass-backed resined cardstock, just like many armor builds. now that ive extended the cap between 3/4 inch, my head rests comfortably inside and i can move my head around. so this helmet now fits almost perfect, i still have some dremeling to do because my nose is touching the inside frown
 
Last edited:
i dremeled out the areas that had thick amounts of material, high points, and the edges of the brow, back, and neck. ive made all the areas no thinner than 1/8th of an inch to keep structural integrity while reducing thickness/overall weight.

you can see there's a lot of excess material here. filing this down gives me more room inside
7848885026_840a447b79.jpg


the right eye area im assuming was warped on the original during resining, this resulted in the right cheek being more 'sunk in' than the left, so i dremeled some space out so they are more even
7848886536_a1c51031f4.jpg


you can see i thinned out the edge on the right side. i did my best to level out the asymmetry of the eyes, but i still might run into a problem when i put the lenses in, ill worry about that when the time comes. my plan is to use flat (curved) lenses
7848883596_9c6c58ba8b.jpg


here i cut and thinned out the neck for the neck trim
7848882066_eafb7a066b.jpg


now about the nose problem, it was pushing on my nose, but barely. it wasnt uncomfortable, just about as much pressure as when the cop askes you to touch your nose.. if you know what im talking about. but i figured, if im going to be at a con in this thing for a few hours, im not gonna want a smushed red nose when i pull it off. this led me to want to extend the face outward, bigger heads may want to do this as well.

i used the same cutting technique as before, making a small score in the top and keeping the blade straight, then keep cutting the groove.

i'm cutting 1/4 inch before the ears so the bondo will hide well when im done and the extension pieces will have some space to grab on to. its also less work because i dont have to redo the ears. all im doing is extending so it fits me better.
7848879672_f3509c981c.jpg


heres the top view for where i cut. i cut in the same place on the other side after i took this pic. this will enable me to make sure the ears are even from a top view when assembled while adding a bit of space on each side
7848878662_b7b8aa90d4.jpg


next i noticed the left (with helmet on) side eye is bigger than the right, the right is "squinting", i will make these the same size before i get to making the extensions
 
Last edited:
i know the stunt helmet has that bump in the right eye, but i dont like it!

i traced the eye on spare cardstock, then cut it out
7851636156_e6d2e14e91.jpg


i took the stencil, applied it over the squinty eye, and colored in the difference with a sharpie, this shows that i was right about the eyes being different
7851634682_9f93fc4c9d.jpg


now i just have to dremel the black part away for them to be even. liek dis:
7851633064_321fcee49a.jpg


thats better :)
7851630888_bd81033c8b.jpg


so while i have this eye template, i traced 1/4 inch around the lens on this clone trooper voice changer visor with a silver sharpie. i had taken apart the clone helmet to pull out the voice changer fyi. the paper is flat but the tracing is true to the curve, you cant tell from the camera angle
7851628580_c1d2ce431c.jpg


both eyelenses are on each end of the visor so in case i have to replace one someday i can just cut out another from the remaining area in the center! smart huh?
7851626206_5abf88fa44.jpg


now to the point of this thread! i held up the front and back separated at a length i was comfortable with that it doesnt touch my nose, which is 3/4, the width of my middle finger
7851623324_cb68c5319f.jpg


i cut 2 inches of cardstock and put a line 3/4 inch thick as a reference of where the sides need to be, the ends are to glue to the pieces
7851621480_75699a87fd.jpg


ive superglued the pieces to the ends like so, though hot glue would have been easier, this step is only temporary
7851617648_af1548ae76.jpg


heres a tip, put it upside down so that the pieces will stay even when you put the cap on
7851619714_13e0a152eb.jpg


now i have to resin and fiberglass the extensions before cutting and sizing the cap, almost coming together!
 
Last edited:
i decided to cut the cap cuz its my day off and im too tired to drive 2 miles to walmart for resin. anywho, i used some masking tape to get the measurement line for where i need to cut.

i suggest use the face cuts for the reference point, because the back has that ledge and may throw you off
7858730570_0cc187ee9a.jpg


then keep it straight to the other side. how did i know what was center? the front of the temples to the cut are 1 inch.
7858734054_174da25c4e.jpg


more detail into how i do my cuts. as easy as it would be to use a band or jigsaw, i have niether, plus using the hacksaw blade i have much mor control over the angle, camber, and pressure i put into the groove
7858727954_605a5cd770.jpg


just keep sawing the groove, keeping the trench even so no half snaps until you want it to. look at the control! the precision! ooohh, aaahhh.... :lol
7858725606_46aa7557e5.jpg


i figured now would be a good time to make a template of the temple, since im cutting it i will have to move it and make a new one to make up for the measurement change. i just pressed in on a post it note to keep for later
7858723356_c5199559a4.jpg


then do the same 3/4 inch strip thing between the 2 orange peel shapes. i cut slits in the front because its more concave
7858719246_ba95f9f51b.jpg


then same thing keep it on a flat surface so the edges are level
7858717052_005966d9cc.jpg


progress so far. you cant really say "well now the ears look too far back" because on the contrary they are perfectly lined up to my ears in the helmet
7858714494_6101e488d3.jpg


what you guys think so far? it feels comfortable now...
7858709674_f26cf79294.jpg


...but i still have to extend the cap up more. you can see that the extra space has already enabled me to see when i tilt the front down
7858711692_b3a7ba8118.jpg


but keeping it straight its not enough just yet, thats my eyebrow in the middle
7858745218_89f0674713.jpg


i did the same measuring technique but this time im only separating the face and cap 1/4 inch. this means the temples have to be re-carved 1/4 inch down, and the back of the temple 3/4 inch forward in order for the brow to be correct.
 
Last edited:
just a little update, i put 2 coats of resin on the extensions and am resining the horizontal cap extension now, will update again after fiberglass. i would highly recommend purchasing a cast from echo, he put a lot of work into the master and its fairly accurate mind the small size, but thats the point of this tutorial - making it fit. this project is actually quite fun and saves a lot of time, ive just been busy building my armor simultaneously, not to mention you really get a 'custom' fit if you're "short for a stormtrooper".
 
been busy with the armor, PLUS im getting "official" armor in soon (as compared to pepakura armor, actual abs 501st armor...)

i ended up only extending the cap 1/4 inch instead of 1/2". i just did the same thing as the sides, put a long cardstock strip around the cap, extensions are now fiberglassed. also added some glass to between the eyes for strength
8019875420_6926492a15.jpg


cut out the hero teeth and put some cardstock stunt style teeth in. the center tooth is the center tooth from the hero, just filed down skinnier for the stunt, i kept it for a guide when i bondo the other teeth plus i keep some structural integrity
8019683410_02bf78a560.jpg

8019700232_559720b9ce.jpg


then resin/fiberglassed the teeth, the stray fibers will be dremeled away when its dry
8019876877_65336bf58d.jpg


next step is to sand and start bondo on the whole helmet, finally!
 
since the cap was raised 1/4in and moved forward 3/4in, it split the temples, so the rear and top will need to be moved 1/4in down and 3/4 forward as well. here ive marked the new temple out. the diagonal lines need to be drilled
8025912584_2df1cde333.jpg


heres the dremel bit i use, its like a drill bit in the shape of a ball for engraving i think, but it cuts very smoothly in the plastic for the work im doing
8025907927_685820dc48.jpg


i made a little groove outline so i know where to stop the bondo, and milled out the rest of the material slowly in the style of a CNC machine
8025905193_6e963b352e.jpg


the new temple is done
8025898803_045f3aa437.jpg


now the old space (vertical lines) can be filled in with bondo
8025895612_2848e37be0.jpg


i start with a rough layer in the extension groove, start to fill in the brow area, and do a little uneven areas on the face. the right cheek in dipped in slightly so im building up bondo there to even out the face more
8025892411_a6c6c9369e.jpg


building up the ledge in the back. you can see im shortening the rear temples 1/4in also
8025889337_8ff8afa725.jpg


filled in the rest of the brow and the cheek, most of the extension, etc. still have a little bit to add to the teeth and fill in the old temple areas
8025886643_7c97d9a8ba.jpg


i also took the liberty of being incredibly nitpicky about all the tiny imperfections, so i circled them and will fill those in so ill have a helm as smooth as slave leia's body. so after i fill these in ill give it a sanding and hopefully ready for primer
8025883689_694d24a6ba.jpg
 
looks like your almost done and it looks good. I prefer the stunt style teeth as well i have no idea why I went with the hero.. I'm excited to see the finished product. :popcorn:thumbsup
 
looks like your almost done and it looks good. I prefer the stunt style teeth as well i have no idea why I went with the hero.. I'm excited to see the finished product. :popcorn:thumbsup

did you ever post your stunt conversion?


thats some serious effort!!! nice work, looking forward to seeing this finished

thanks!, its just too bad the rpf has become a wretched hive of iron men and spidermans :lol
in the beginning everybody here was a stormtrooper, then halo pep files came out so everyone was master chief, followed bybatman, then iron man, captain america, thor, spiderman.. every new movie creates a new fad and brings a wave of new fans :)
 
Last edited:
good to see that there are some troopers out there among the infinit "building the iron-man MCVXII" :D
 
This thread is more than 11 years old.

Your message may be considered spam for the following reasons:

  1. This thread hasn't been active in some time. A new post in this thread might not contribute constructively to this discussion after so long.
If you wish to reply despite these issues, check the box below before replying.
Be aware that malicious compliance may result in more severe penalties.
Back
Top