Archive&Future
Sr Member
Well hello n' all, I'm pretty new to this whole posting shenanigan..
Not too long back, my friend started making props for his Doctor Who fanseries; let's just say they involved a lot of paper, sellotape and poster paint (unforgivable, even if it IS a 13 year old making them) I offered to make him a "proper" TARDIS model for him instead, because the effects were really letting down the effort he put into it.
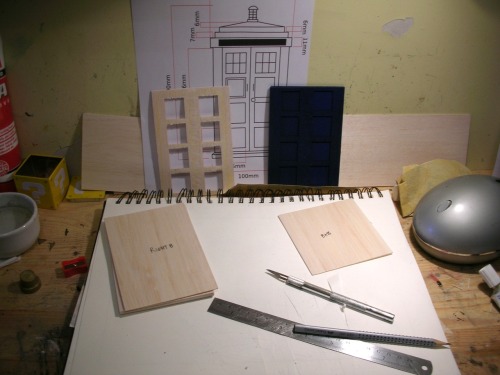
Backstory finished! I popped down to ModelZone and picked up 3 sheets of 2mm balsa sheet, along with 2 5mm balsa rods (totalling the grand sum of £9.23)
I knocked up some very quick ,relatively innaccurate, but importantly simple blueprints to work from
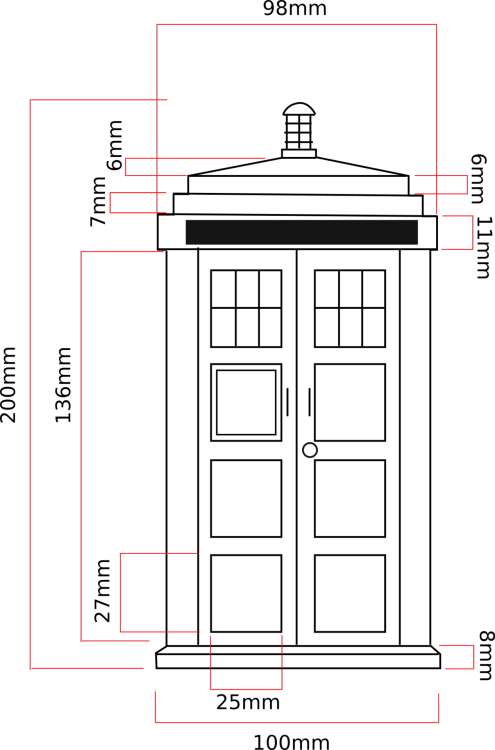
This is apparently about 1:15.4 scale
I started by cutting out rectangles for the main body panels, I made 8 of these; 4 plain and 4 that each had 8 25mm x 27mm rectangles cut out of them. These were then all stuck together and sprayed with black spray paint, and then blue, which gave it a very authentic colour without much effort.
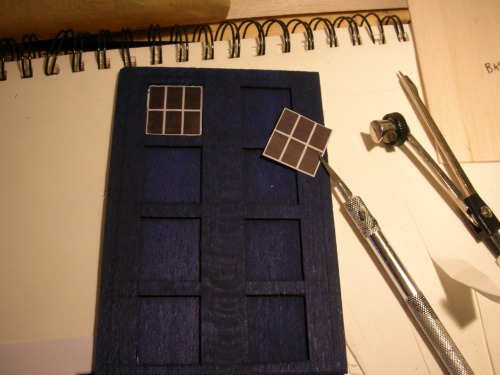
The windows were all printed out on paper, then cut out and stuck into place. Unfortunately, they were all fractionally too big.
Then I cut strips of balsa and stuck them to the edges, to form another raised area, and likewise added the strips where the "Police Box Public Call" signs would go.
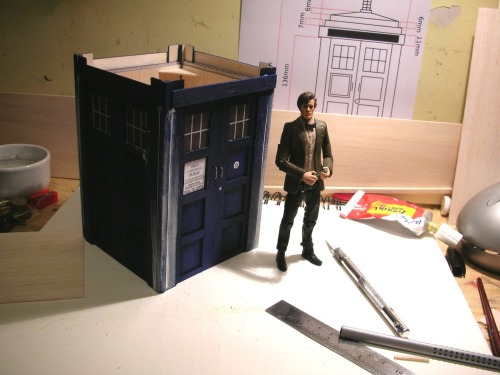
Once that was done, I made door handles from some wire, printed out the door sign and painted on the lock and St. John's ambulance symbol. After that, I started to glue it all together.
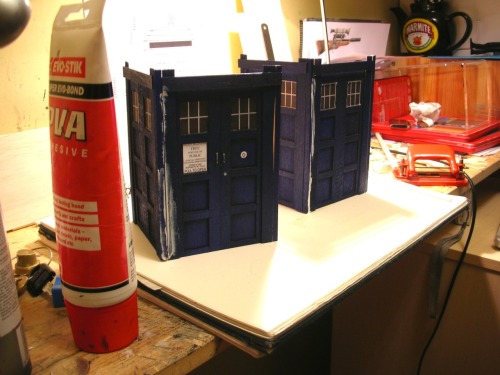
As you can see, it's pretty much the right scale for the official action figures
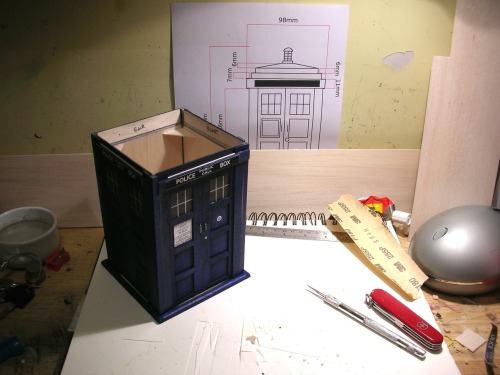
I then went on to fill some gaps up near the top, and make the base; which I bevelled with a sanding block before painting.
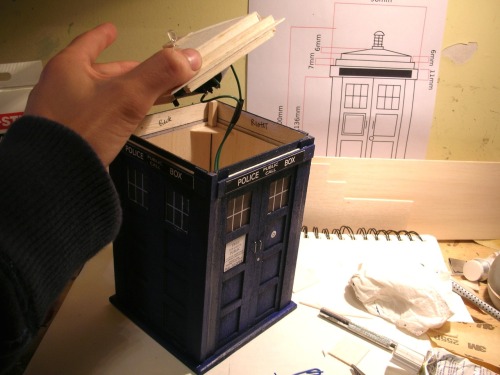
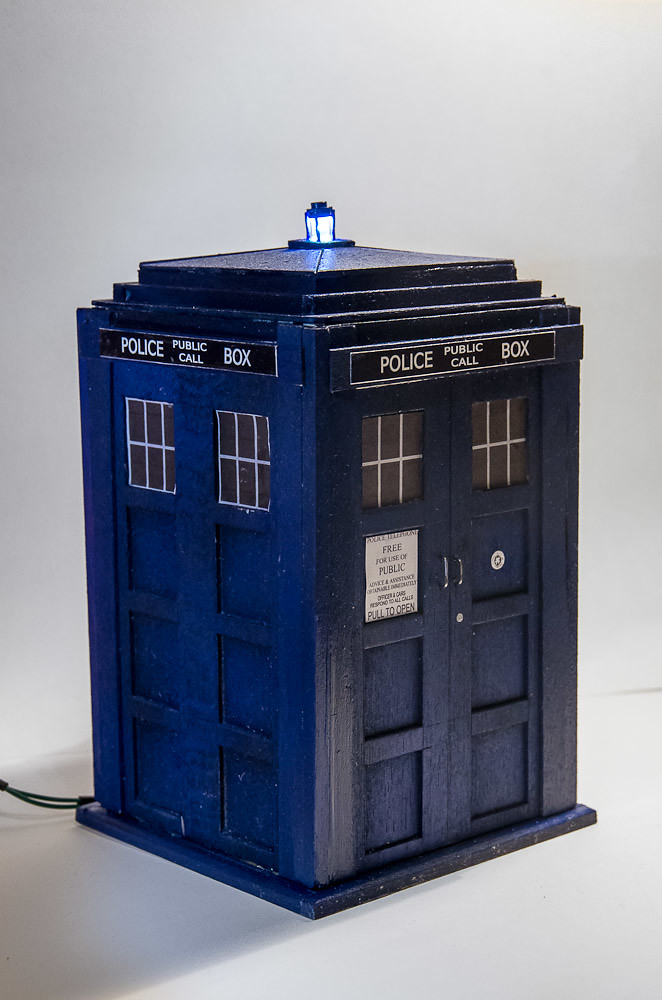
Afterwards, I built a portion of the roof. The roof is removable and held on by magnets, this is just so you can change the batteries; the battery pack itself is bolted to the underside of the lid/roof assembly, which powers a 5mm white LED, which in turn is controlled by a push-to-make button (so you can get the full TARDIS-y effect of the light going on and off)
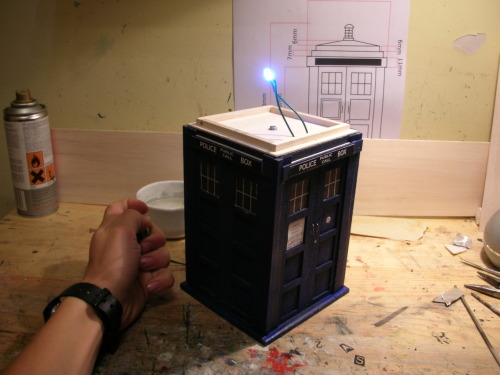
Lastly, I gave the lid the same paint job as everything else and made the lamp cage; which is comprised of 4 short pieces of wire and a Lego 1x1 round stud, all painted bluuee
I intend to build one for myself at some point, so suggestions and criticisms are welcome! :lol
Not too long back, my friend started making props for his Doctor Who fanseries; let's just say they involved a lot of paper, sellotape and poster paint (unforgivable, even if it IS a 13 year old making them) I offered to make him a "proper" TARDIS model for him instead, because the effects were really letting down the effort he put into it.
Backstory finished! I popped down to ModelZone and picked up 3 sheets of 2mm balsa sheet, along with 2 5mm balsa rods (totalling the grand sum of £9.23)
I knocked up some very quick ,relatively innaccurate, but importantly simple blueprints to work from
This is apparently about 1:15.4 scale
I started by cutting out rectangles for the main body panels, I made 8 of these; 4 plain and 4 that each had 8 25mm x 27mm rectangles cut out of them. These were then all stuck together and sprayed with black spray paint, and then blue, which gave it a very authentic colour without much effort.
The windows were all printed out on paper, then cut out and stuck into place. Unfortunately, they were all fractionally too big.
Then I cut strips of balsa and stuck them to the edges, to form another raised area, and likewise added the strips where the "Police Box Public Call" signs would go.
Once that was done, I made door handles from some wire, printed out the door sign and painted on the lock and St. John's ambulance symbol. After that, I started to glue it all together.
As you can see, it's pretty much the right scale for the official action figures
I then went on to fill some gaps up near the top, and make the base; which I bevelled with a sanding block before painting.
Afterwards, I built a portion of the roof. The roof is removable and held on by magnets, this is just so you can change the batteries; the battery pack itself is bolted to the underside of the lid/roof assembly, which powers a 5mm white LED, which in turn is controlled by a push-to-make button (so you can get the full TARDIS-y effect of the light going on and off)
Lastly, I gave the lid the same paint job as everything else and made the lamp cage; which is comprised of 4 short pieces of wire and a Lego 1x1 round stud, all painted bluuee
I intend to build one for myself at some point, so suggestions and criticisms are welcome! :lol