JremyDeaton
New Member
Sorry if this seems a little wordy and lengthy, but this a show off and tips post. This is not a tutorial on pepakura. Go here first before you do anything: http://www.therpf.com/f24/pepakura-question-thread-please-read-rules-first-87056/
Tons of reference stuff there.
Hello all! So here’s the story. Most of my life I have been told I look like Robert Downey Jr., among a couple of other celebs people say I look like... See:

I of course like RDJ and love his Iron Man / Tony Stark. So as a big fan of facial hair, I went on a image search for the Tony Stark goatee in order to replicate it upon my face. Could be me:

Somehow through my image search I ended up on this wonderful forum and was in awe of what people were doing here. And just like the many people here, I said to myself, “I’m gonna do that!” And... Just like many first timers I chose to create the Iron Man suit (Mark VII for me)
Yeah I know everyone does it. But I figure I got two main things going for me as a first timer. 1) There is an abundance of reference right here on this forum. And 2), did I mention that I have the whole looking like RDJ thing going for me?
Right now, I am still in the Pep stage of the helmet. So imagewise, there won’t be too much to post as of now. But I thought it would be helpful to share the beginning process, along with the techniques and supply info that I have picked up from here and on my own so far. As everyone else does, I will add to this thread as I go along for each process (fiberglass, bondo, painting and such).
Here we go -
I started out using Darkside501st's Iron Man Mk VII pepakura files, which uses a combination of other contributors files for the helmet, hands and boots, which is wonderfully detailed in his thread here: http://www.therpf.com/f24/darkside501sts-iron-man-mk-vii-pepakura-files-139470/
I printed them out on 110lb weight cardstock, which I picked up as being the norm to use.
* Tips about Pepakura Designer and printing:
- I would suggest downloading ‘Pepakura Designer’ instead of the ‘Viewer’. You will be able to change the appearance of the fold lines, which helped me better to tell the difference between a valley and mountain fold. I change the valley fold lines to a .3 dotted line instead of the hard to read dot dash. I found TheHeroTutorials’ youtube video very helpful here: How To Use PEPAKURA For Costume Building- Part 2- (Getting Started with Software) - YouTube
- Reference the Pepakura file: During your cutting and gluing process, keep Pepakura Designer open. On paper the numbers can be small or printed over by a neighboring side. But Pepakura Designer has tools to easily identify which sides go to where. Play around with it.
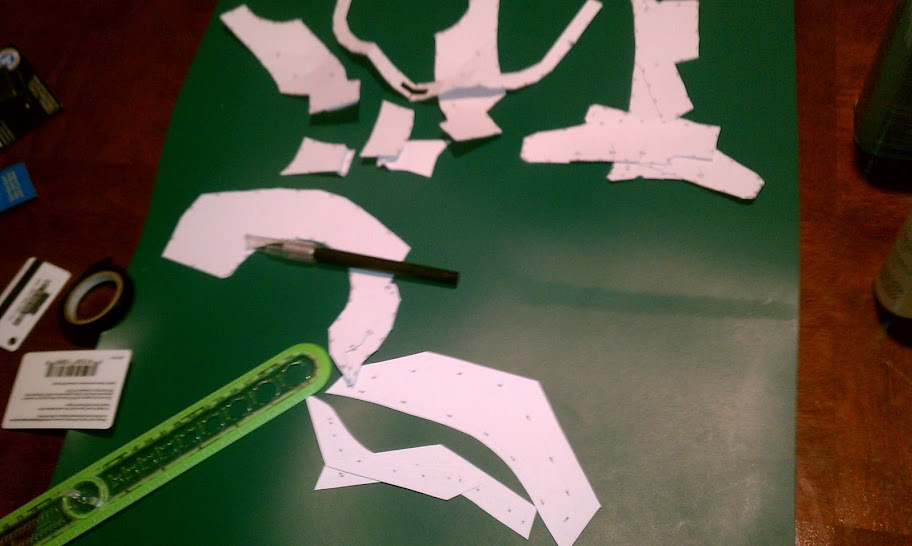
Then I cut:
* Tips on cutting:
- Supplies: Scissors, Hobby Knife (and EXTRA blades), a Cutting Pad or Board of some sort, and a Credit Card.
- Hobby Knife: I don’t really recommend any particular brand. Just get one where the blades can be replaced, because you will go through LOTS of them.
- Save your hobby knife blades: Use a good pair of sharp scissors to do most of your cutting. I cut along all the main edges and the tops of tabs with scissors. then I use my hobby knife for the spots I just can’t get with scissors.
- Rulers suck: You may see a ruler in the image, but it was taken within the first few minutes of cutting. Using a ruler for a straight edge can be more cumbersome than helpful. As you go along you will get used to ‘freehanding’ cuts with the hobby knife. BUT if you absolutely need a straight edge, I suggest using a credit card. Unlike most rulers, credit cards don’t usually have beveled edges that can mysteriously move the line of your cut.
Then I fold:
* Tips on folding:
This is the part that really irritated me, so I hope my pain and suffering can help out other Pep beginners.
- Supplies: Hobby Knife, and Flat / Straight Edge Tweezers.
- Scoring: Folding card stock normally never produces clean results without scoring it first. And believe it or not, for the first hour or so, It never crossed my mind to do this :facepalm. Using the back side of the hobby knife, press down (medium pressure) and follow along the fold lines. This seems to work the best for me so far. Some people will lightly use the blade side of the knife to score. However, as a beginner I would highly advise against this at first. I have tried it a few times If you aren’t careful you will experience slight rips to complete detachments during the gluing phase.
- Valley folds: These folds can still be a bit iffy even after scoring because the scoring on the line (front side of the paper) really only helps mountain folds. I guess you could score along the back side for these folds, but it seems like it would be more guesswork gauging where the line would be. My solution? I use Tweezers! Straight Edge tweezers work for me. I clamp down on the fold line and fold on down the line. Do this initially in a few spots on the fold, then crease normally.
- Tiny fold lines: Sometime you will come across fold lines that can be 1mm or less from an edge. Don’t even try to fold these. Instead leave them be. I will cover what I do with these in the gluing tips.
-- side note --
I also use the tweezers for gluing too, which I will explain later. Also, use your woman's tweezers... My wife got mad at me for taking hers.
Then I glue:
* Tips on Gluing:
-- side note -> Everyone has their own favorite methods and products they like to use for gluing. This is just what I like to use and how. My advice here is to experiment. I did a lot of test pieces trying different glues and techniques before I came up with this one.
- Supplies: Hot Glue Gun and Glue sticks, Beacon’s ‘Zip Dry’ paper glue, and Tweezers.
- Super Glue: I have seen a few people here talking about using super glue. As a beginner, I would advise against it. Two reasons; 1) It doesn’t have what I like to call a good ‘Fudge Time’ (time period to maneuver the piece before the glue dries.) and 2) it can be difficult to get off your skin.
- ‘Zip Dry’ paper glue: I love using this stuff. The scrapbooking ladies swear by it. It's kind of like a weird hybrid of super glue and rubber cement. It has a ‘fudge time’ about 6 to 8 seconds, but can hold its place during that ‘fudge time’ (no slippage). I lightly apply a thin, thin coat on the tabs, and realistically could just stop at that. It's that good.
- Gluing method: I like to glue the tabs one by one mostly. If it’s a tiny piece, then I will apply and glue more than one. Some people have a method about where to start first and work from there, but I find that as long as you got your numbers lined up, you should do okay.
- Tweezers: I use the tweezers to place and hold down those tiny and hard to reach places.
- Hot Glue: I don’t use the hot glue for gluing pieces together at all. I used to reinforce intersections that could be very fragile (I hate tiny pieces). I just recently realized I could also use it to help hold and mold folds (say that 5 times). I do this by laying a thin bead of glue in the crease of the fold, on the backside of course. This reinforces and holds the folds in the position (angle) you want it in, instead of having the fold kind of spread out before you get a chance to resin it later.
- Tiny fold lines and glue: Told you I would get back to this. I basically overlap and glue the tiny section. And if it needs the actual fold I achieve this by applying my hot glue, reinforcement fold hold method. BAM!
-- side note --
I currently do not have an image of any finished pieces using my new hot glue hold, mold the fold method, because I started a rebuild using the method last night. But when complete I will add them.
The first faceplate piece I did modeled by The Mew after she threw a fit about her tweezers:
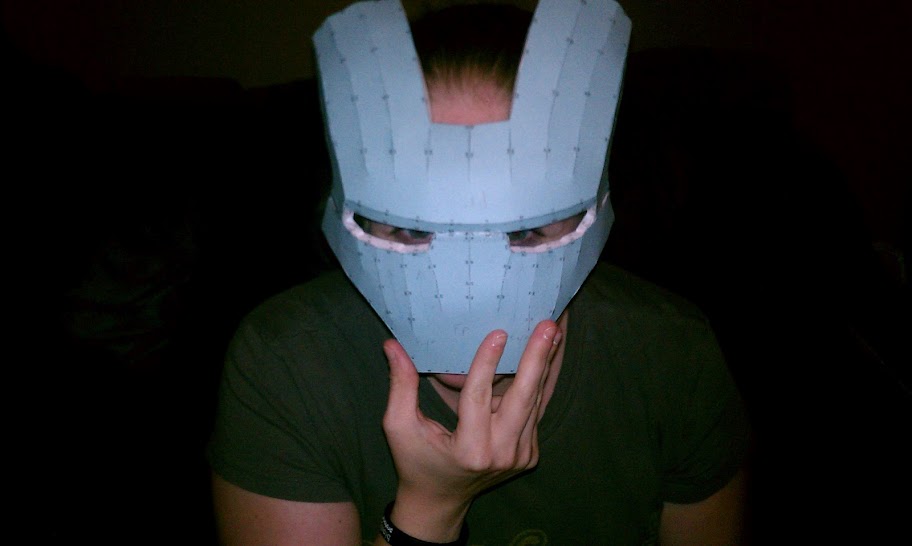
This piece will not be used, due to my new hot glue hold, mold the fold method not being applied to it. I have restarted and will post those pictures soon.
Well so far that is it. I hope I was a little insightful to anybody new to this like me. Like I said, as I progress on the build, I will update each step with the tips and techniques that I use. If I was unclear any anything I mentioned above, let me know and I will attempt to be more detailed about it. If you would like to see images of the techniques being applied please ask, and I will also try to include more images later.
I will keep you posted.
Tons of reference stuff there.
Hello all! So here’s the story. Most of my life I have been told I look like Robert Downey Jr., among a couple of other celebs people say I look like... See:
I of course like RDJ and love his Iron Man / Tony Stark. So as a big fan of facial hair, I went on a image search for the Tony Stark goatee in order to replicate it upon my face. Could be me:
Somehow through my image search I ended up on this wonderful forum and was in awe of what people were doing here. And just like the many people here, I said to myself, “I’m gonna do that!” And... Just like many first timers I chose to create the Iron Man suit (Mark VII for me)
Yeah I know everyone does it. But I figure I got two main things going for me as a first timer. 1) There is an abundance of reference right here on this forum. And 2), did I mention that I have the whole looking like RDJ thing going for me?
Right now, I am still in the Pep stage of the helmet. So imagewise, there won’t be too much to post as of now. But I thought it would be helpful to share the beginning process, along with the techniques and supply info that I have picked up from here and on my own so far. As everyone else does, I will add to this thread as I go along for each process (fiberglass, bondo, painting and such).
Here we go -
I started out using Darkside501st's Iron Man Mk VII pepakura files, which uses a combination of other contributors files for the helmet, hands and boots, which is wonderfully detailed in his thread here: http://www.therpf.com/f24/darkside501sts-iron-man-mk-vii-pepakura-files-139470/
I printed them out on 110lb weight cardstock, which I picked up as being the norm to use.
* Tips about Pepakura Designer and printing:
- I would suggest downloading ‘Pepakura Designer’ instead of the ‘Viewer’. You will be able to change the appearance of the fold lines, which helped me better to tell the difference between a valley and mountain fold. I change the valley fold lines to a .3 dotted line instead of the hard to read dot dash. I found TheHeroTutorials’ youtube video very helpful here: How To Use PEPAKURA For Costume Building- Part 2- (Getting Started with Software) - YouTube
- Reference the Pepakura file: During your cutting and gluing process, keep Pepakura Designer open. On paper the numbers can be small or printed over by a neighboring side. But Pepakura Designer has tools to easily identify which sides go to where. Play around with it.
Then I cut:
* Tips on cutting:
- Supplies: Scissors, Hobby Knife (and EXTRA blades), a Cutting Pad or Board of some sort, and a Credit Card.
- Hobby Knife: I don’t really recommend any particular brand. Just get one where the blades can be replaced, because you will go through LOTS of them.
- Save your hobby knife blades: Use a good pair of sharp scissors to do most of your cutting. I cut along all the main edges and the tops of tabs with scissors. then I use my hobby knife for the spots I just can’t get with scissors.
- Rulers suck: You may see a ruler in the image, but it was taken within the first few minutes of cutting. Using a ruler for a straight edge can be more cumbersome than helpful. As you go along you will get used to ‘freehanding’ cuts with the hobby knife. BUT if you absolutely need a straight edge, I suggest using a credit card. Unlike most rulers, credit cards don’t usually have beveled edges that can mysteriously move the line of your cut.
Then I fold:
* Tips on folding:
This is the part that really irritated me, so I hope my pain and suffering can help out other Pep beginners.
- Supplies: Hobby Knife, and Flat / Straight Edge Tweezers.
- Scoring: Folding card stock normally never produces clean results without scoring it first. And believe it or not, for the first hour or so, It never crossed my mind to do this :facepalm. Using the back side of the hobby knife, press down (medium pressure) and follow along the fold lines. This seems to work the best for me so far. Some people will lightly use the blade side of the knife to score. However, as a beginner I would highly advise against this at first. I have tried it a few times If you aren’t careful you will experience slight rips to complete detachments during the gluing phase.
- Valley folds: These folds can still be a bit iffy even after scoring because the scoring on the line (front side of the paper) really only helps mountain folds. I guess you could score along the back side for these folds, but it seems like it would be more guesswork gauging where the line would be. My solution? I use Tweezers! Straight Edge tweezers work for me. I clamp down on the fold line and fold on down the line. Do this initially in a few spots on the fold, then crease normally.
- Tiny fold lines: Sometime you will come across fold lines that can be 1mm or less from an edge. Don’t even try to fold these. Instead leave them be. I will cover what I do with these in the gluing tips.
-- side note --
I also use the tweezers for gluing too, which I will explain later. Also, use your woman's tweezers... My wife got mad at me for taking hers.
Then I glue:
* Tips on Gluing:
-- side note -> Everyone has their own favorite methods and products they like to use for gluing. This is just what I like to use and how. My advice here is to experiment. I did a lot of test pieces trying different glues and techniques before I came up with this one.
- Supplies: Hot Glue Gun and Glue sticks, Beacon’s ‘Zip Dry’ paper glue, and Tweezers.
- Super Glue: I have seen a few people here talking about using super glue. As a beginner, I would advise against it. Two reasons; 1) It doesn’t have what I like to call a good ‘Fudge Time’ (time period to maneuver the piece before the glue dries.) and 2) it can be difficult to get off your skin.
- ‘Zip Dry’ paper glue: I love using this stuff. The scrapbooking ladies swear by it. It's kind of like a weird hybrid of super glue and rubber cement. It has a ‘fudge time’ about 6 to 8 seconds, but can hold its place during that ‘fudge time’ (no slippage). I lightly apply a thin, thin coat on the tabs, and realistically could just stop at that. It's that good.
- Gluing method: I like to glue the tabs one by one mostly. If it’s a tiny piece, then I will apply and glue more than one. Some people have a method about where to start first and work from there, but I find that as long as you got your numbers lined up, you should do okay.
- Tweezers: I use the tweezers to place and hold down those tiny and hard to reach places.
- Hot Glue: I don’t use the hot glue for gluing pieces together at all. I used to reinforce intersections that could be very fragile (I hate tiny pieces). I just recently realized I could also use it to help hold and mold folds (say that 5 times). I do this by laying a thin bead of glue in the crease of the fold, on the backside of course. This reinforces and holds the folds in the position (angle) you want it in, instead of having the fold kind of spread out before you get a chance to resin it later.
- Tiny fold lines and glue: Told you I would get back to this. I basically overlap and glue the tiny section. And if it needs the actual fold I achieve this by applying my hot glue, reinforcement fold hold method. BAM!
-- side note --
I currently do not have an image of any finished pieces using my new hot glue hold, mold the fold method, because I started a rebuild using the method last night. But when complete I will add them.
The first faceplate piece I did modeled by The Mew after she threw a fit about her tweezers:
This piece will not be used, due to my new hot glue hold, mold the fold method not being applied to it. I have restarted and will post those pictures soon.
Well so far that is it. I hope I was a little insightful to anybody new to this like me. Like I said, as I progress on the build, I will update each step with the tips and techniques that I use. If I was unclear any anything I mentioned above, let me know and I will attempt to be more detailed about it. If you would like to see images of the techniques being applied please ask, and I will also try to include more images later.
I will keep you posted.