You are using an out of date browser. It may not display this or other websites correctly.
You should upgrade or use an alternative browser.
You should upgrade or use an alternative browser.
1:1 Millennium Falcon Cockpit Replica - Group Build
- Thread starter SteveStarkiller
- Start date
crystaloftruth
Member
Do you have access to somewhere with air conditioning? The dryer air might get the paint to set properly.Now for the bad news: The new color paint is NOT curing. It's been 2 weeks and it although dry to the touch it is still tacky. This is NOT good. I don't know what to do... we're 2 weeks from TEDx and this is a HUGE concern... :facepalm
maruska
Sr Member
Hi Gang,
I'm considering a "slight" deviation from the established color template for the "stand alone" console. What do you guys think about a MUCH darker grey or even a satin black instead of the grey I've been using? The light grey would stay the same. It would look very similar to Maruska's 3D model...
console complete | the falconer
I think the dark grey I'm using now is too light. Opinions?
SK,
I meant to comment on this when I first saw it. My assumptions regarding color stem from from a little margin note on the full-scale set blue prints that specify that the surfaces of the cockpit are veneered in Formica. Formica only offers a few colors in solid - i.e. not marble or stone fleck or woodgrain or some other god awful finish.
Specifically - things like a gray and black are only offered in, well gray and black. Not a lot of choice. Many of these basic finishes haven't changed from the 70's.
Cheers,
J.
Hi Gang,
A good day at the lab...
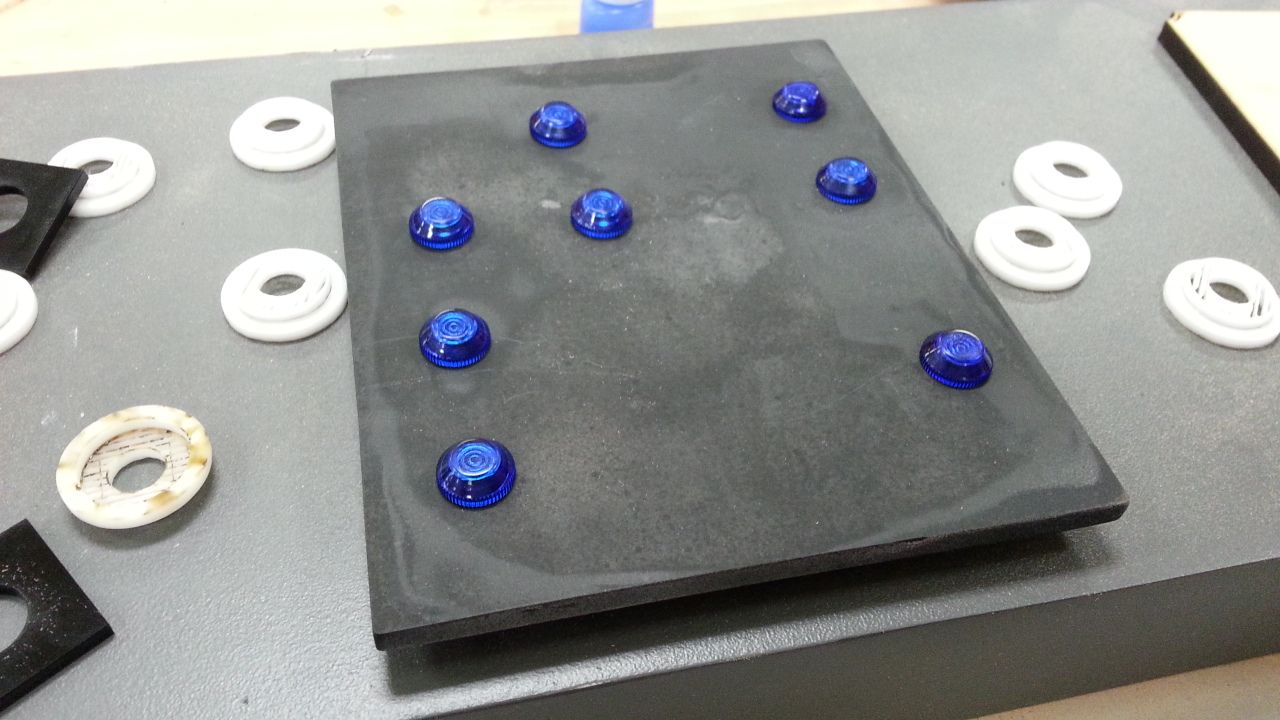
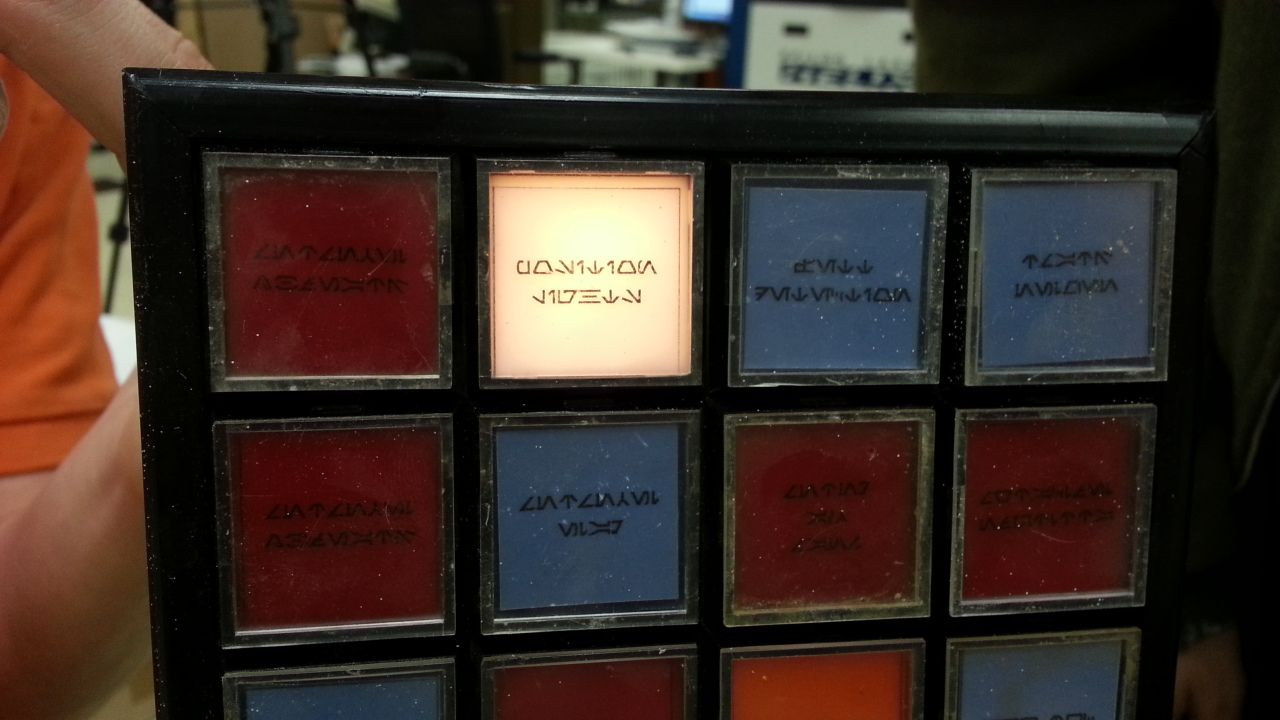
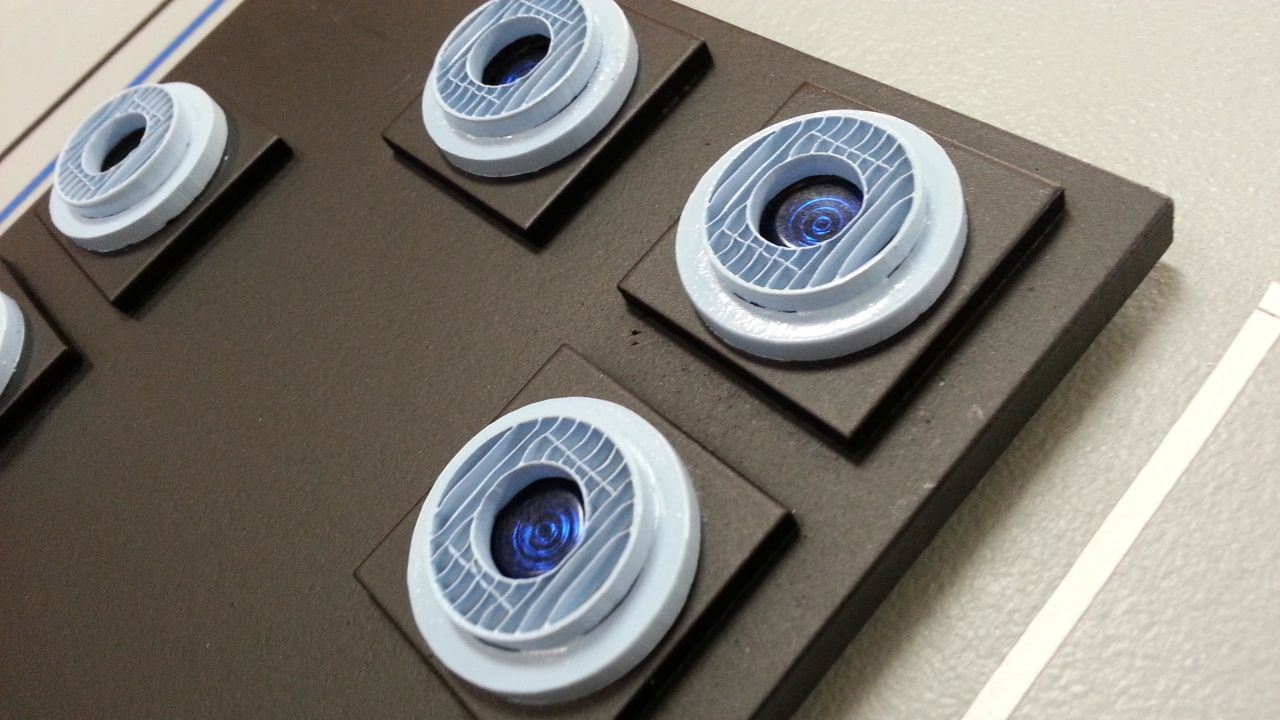
We cut new blue tiles for the button panel but quickly realized they tiles need to be translucent... ugh...

Temp blue tiles
Work continued on the throttle housing
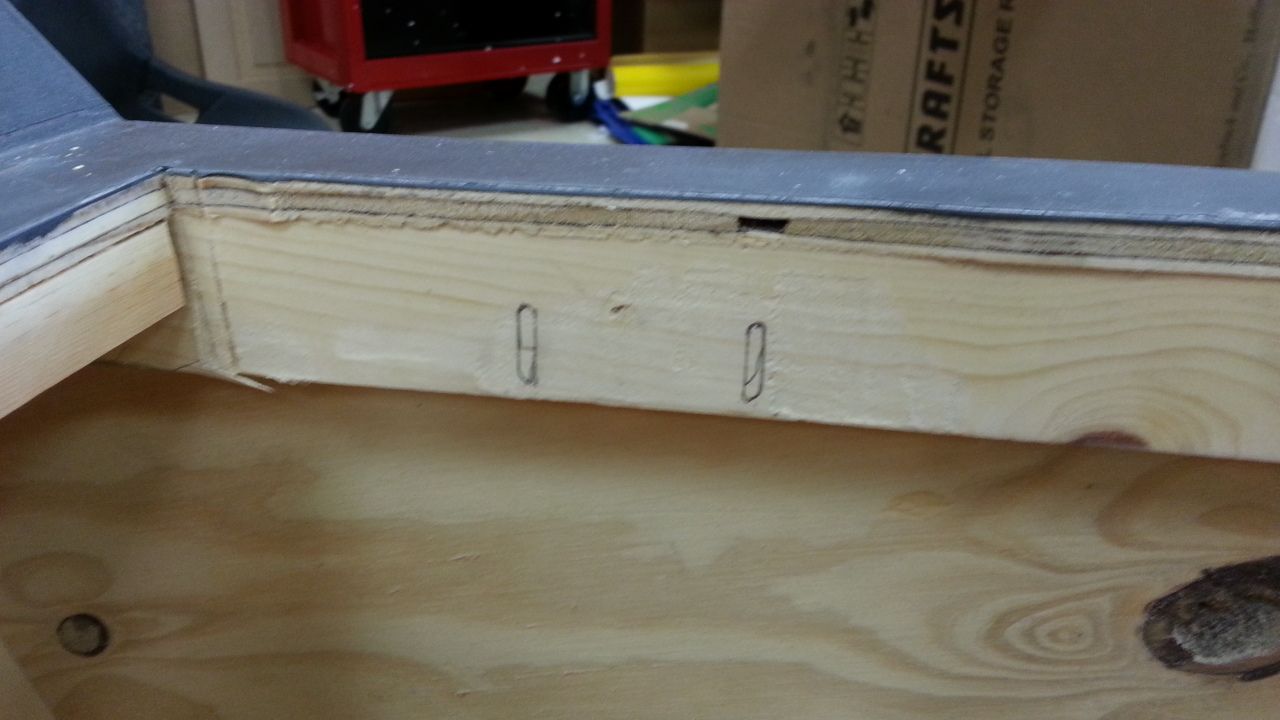
Top edge needed to be trimmed
Is it me or am I about to be Punished?
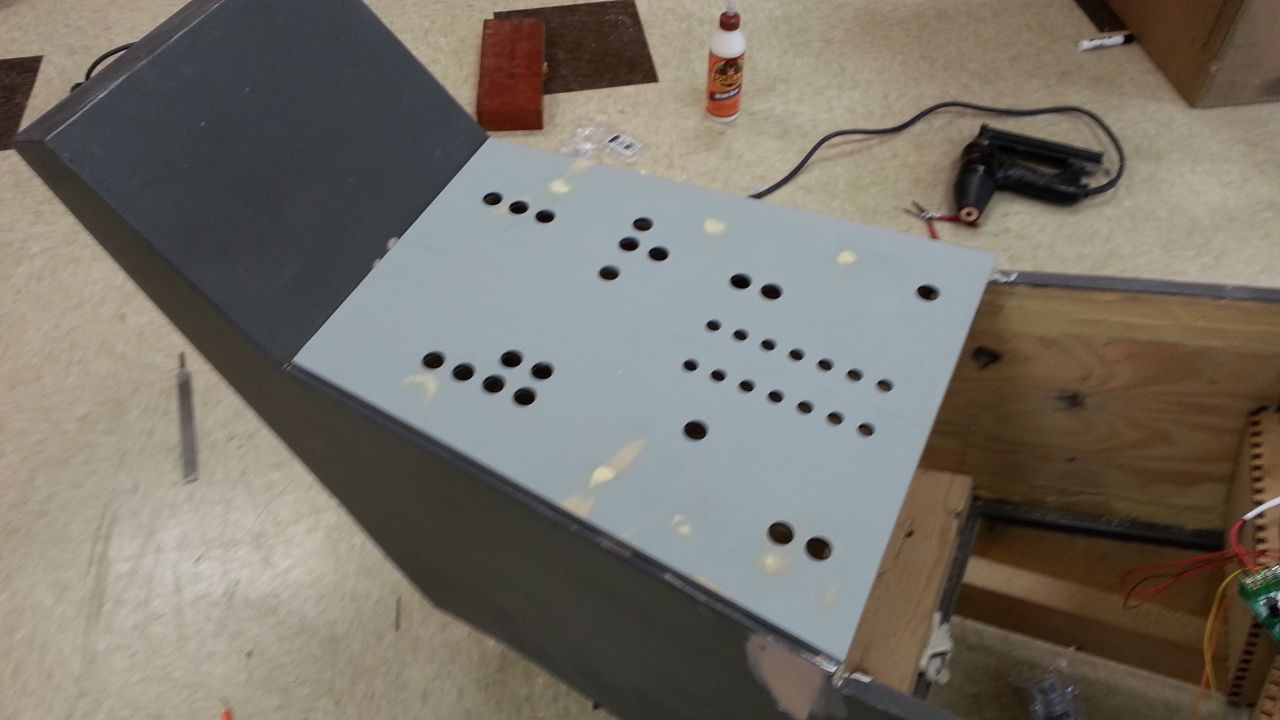
Painted the new back panel and temp placed the greeblies
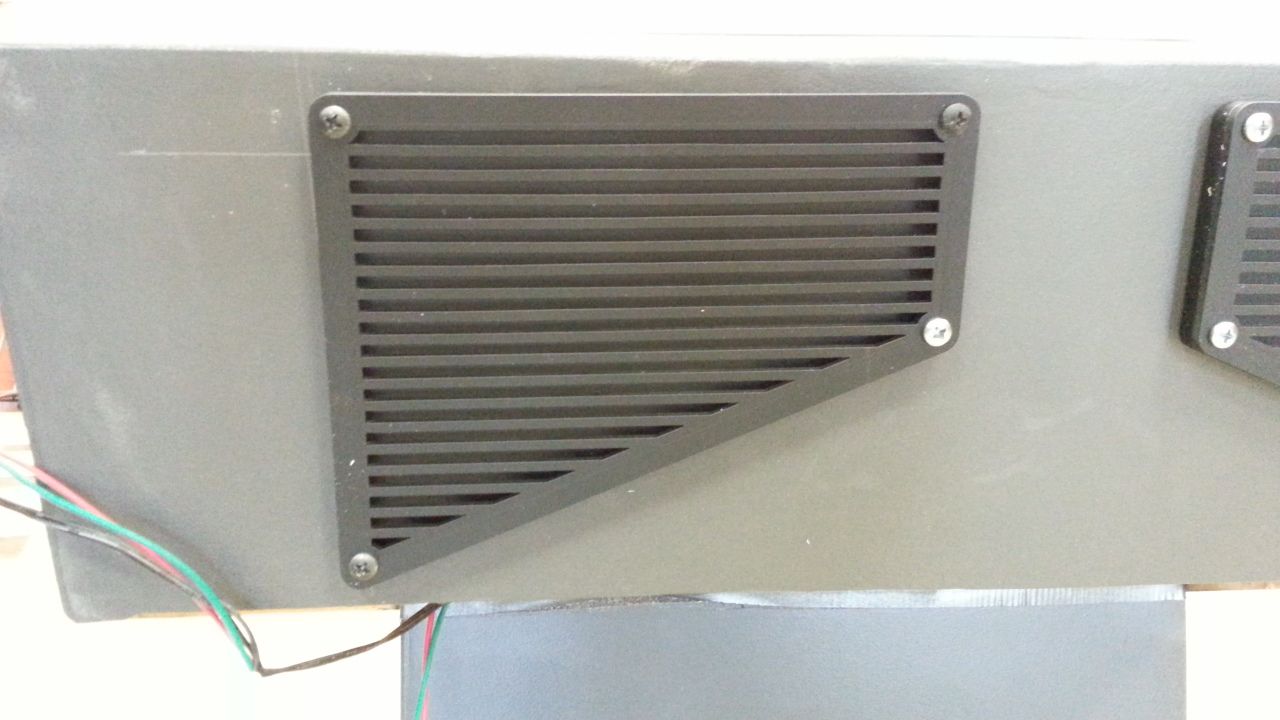
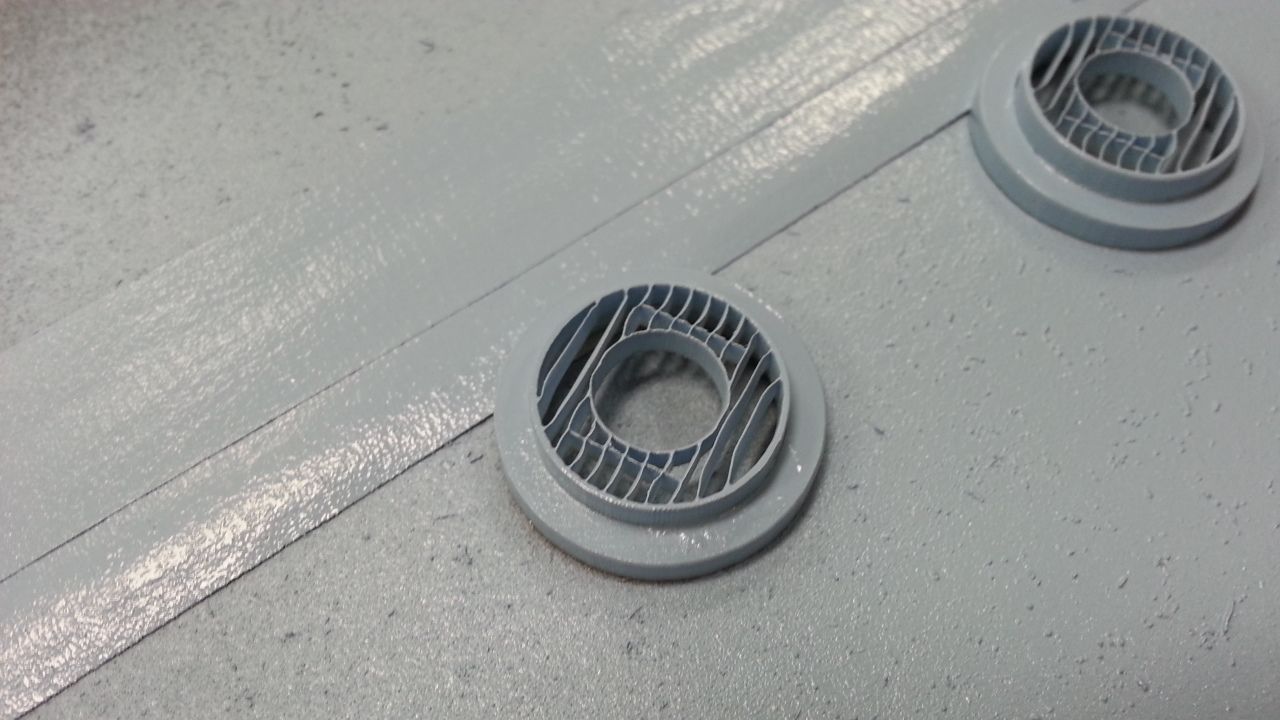
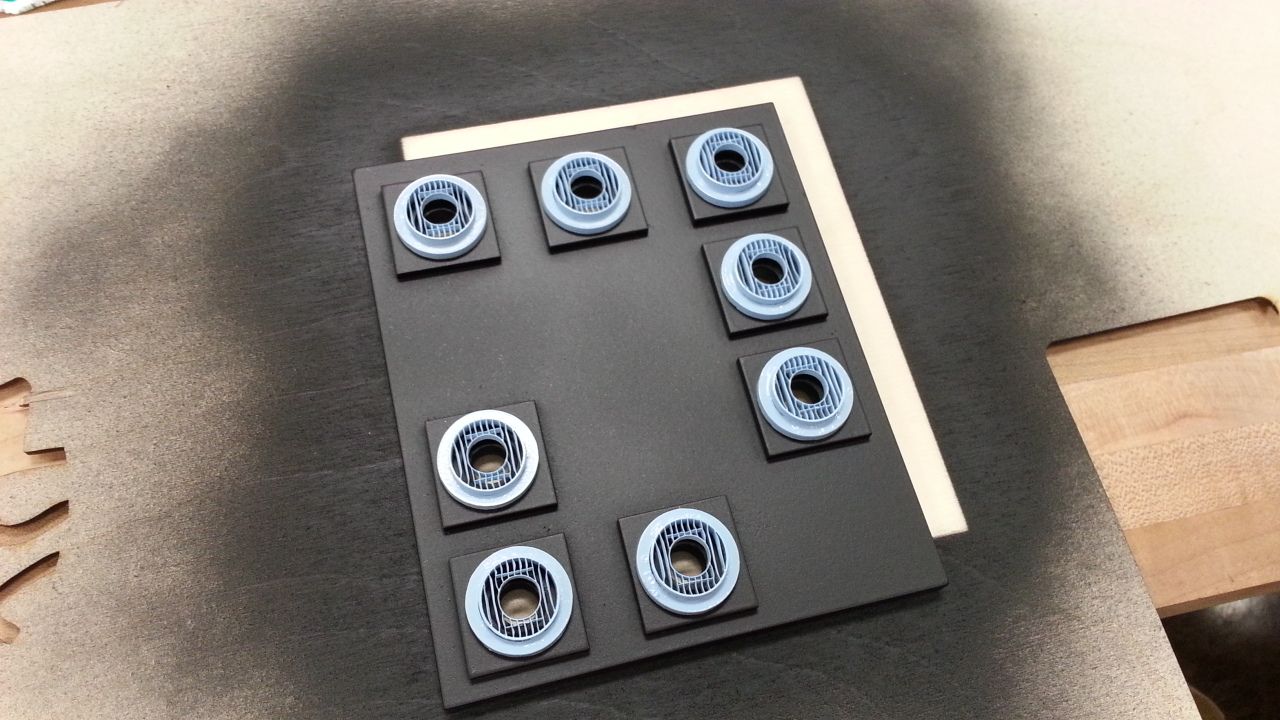
Installed the new front vents
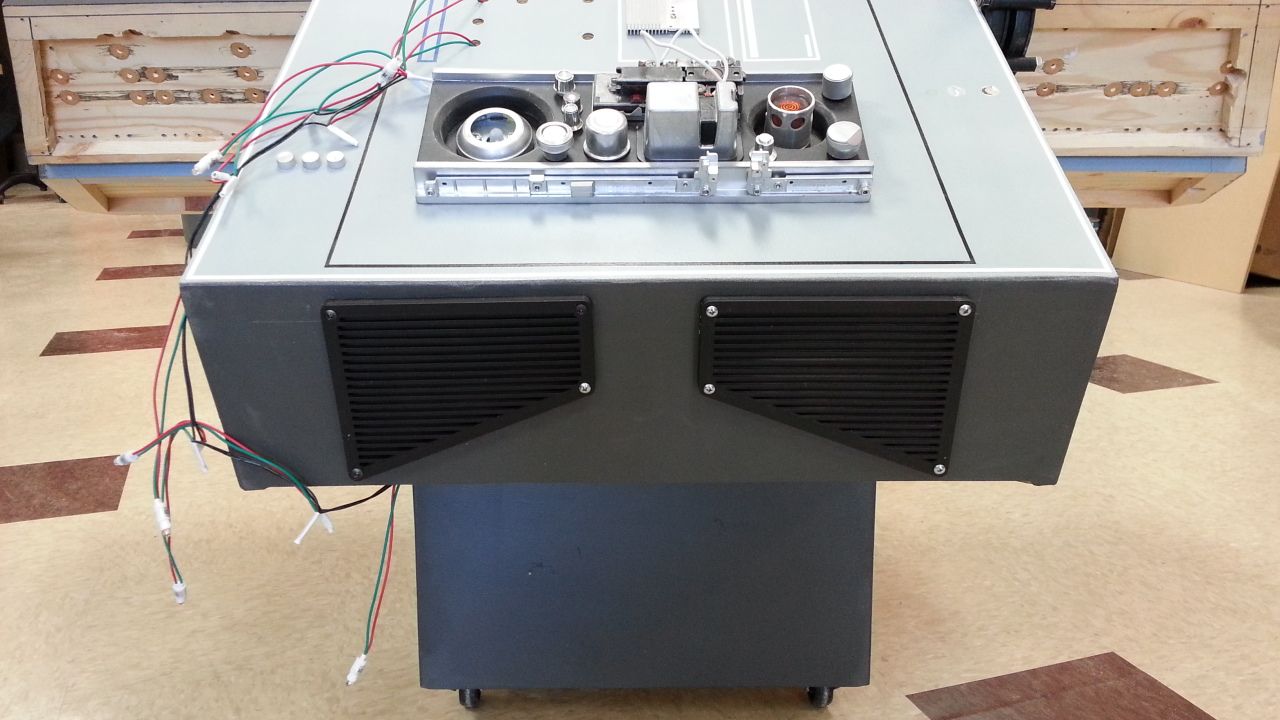
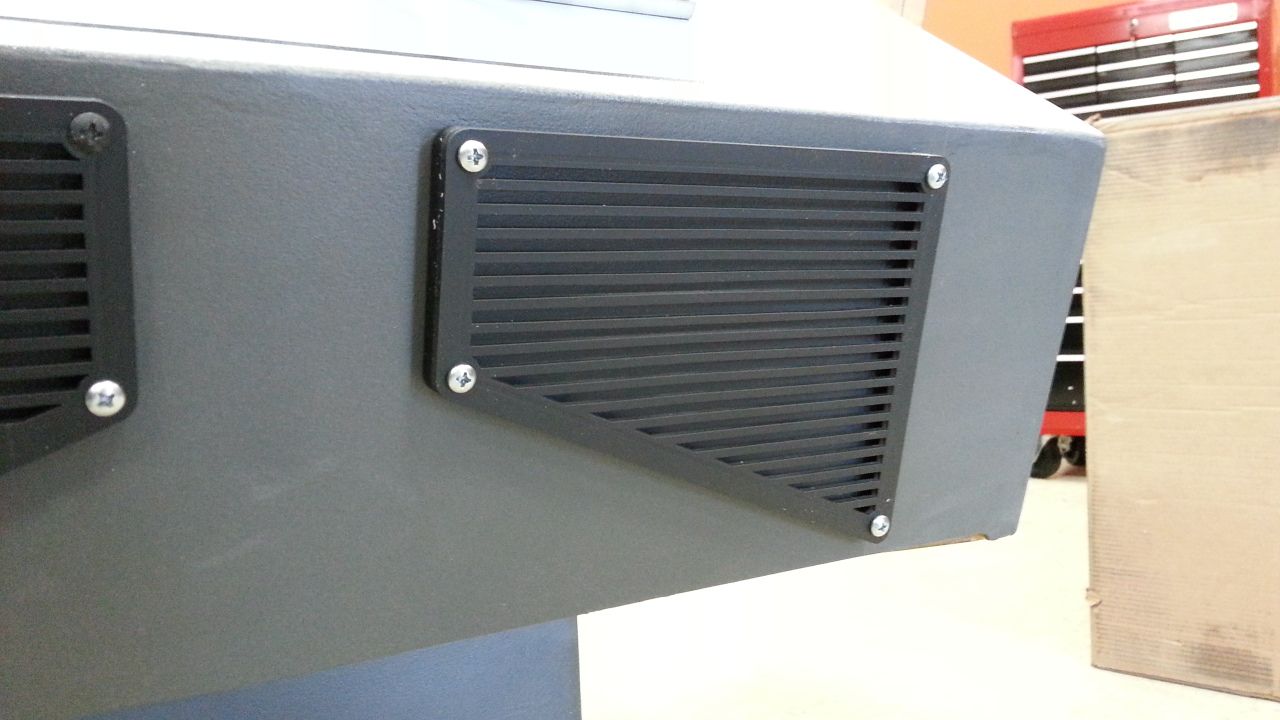
The vent is acrylic with an MDF back panel
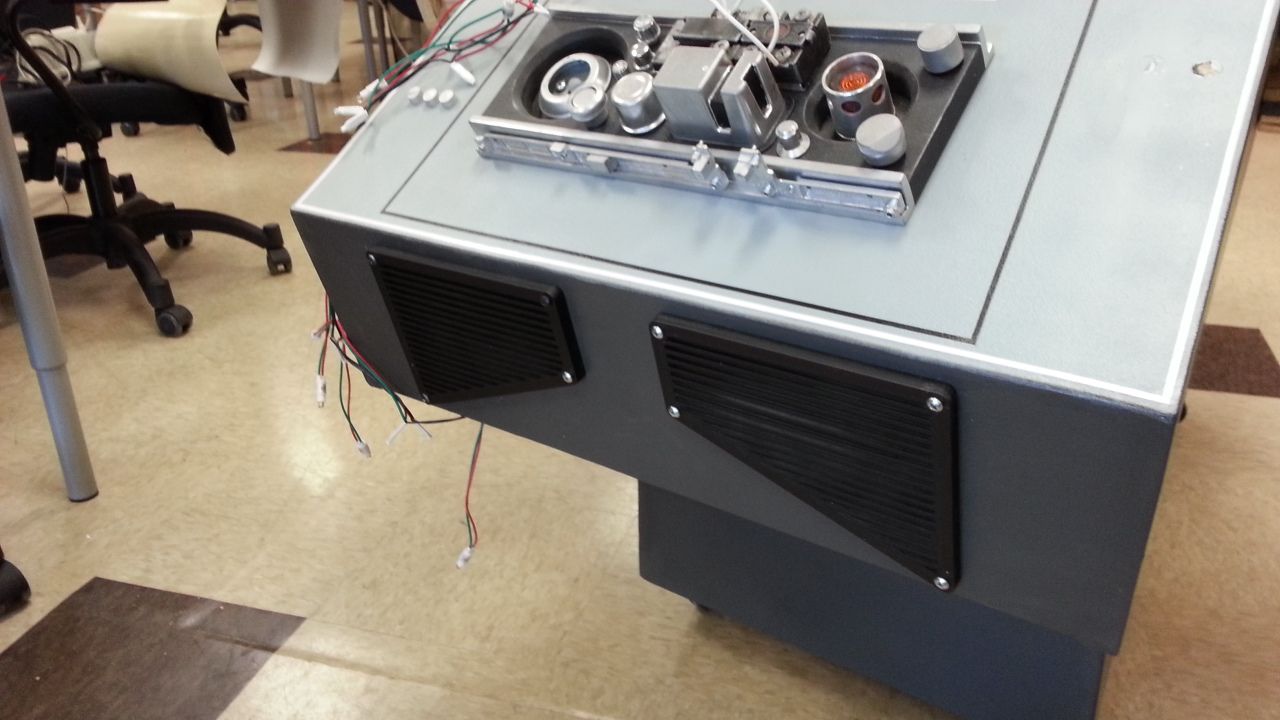
Back panel was adhered to the console

Instead of permanently adhering the armrest panel we used magnets

In place and easy access
Back side
We the scrapped this original front greeblie
In place for a new design
The design included adding these - to be painted a light blue
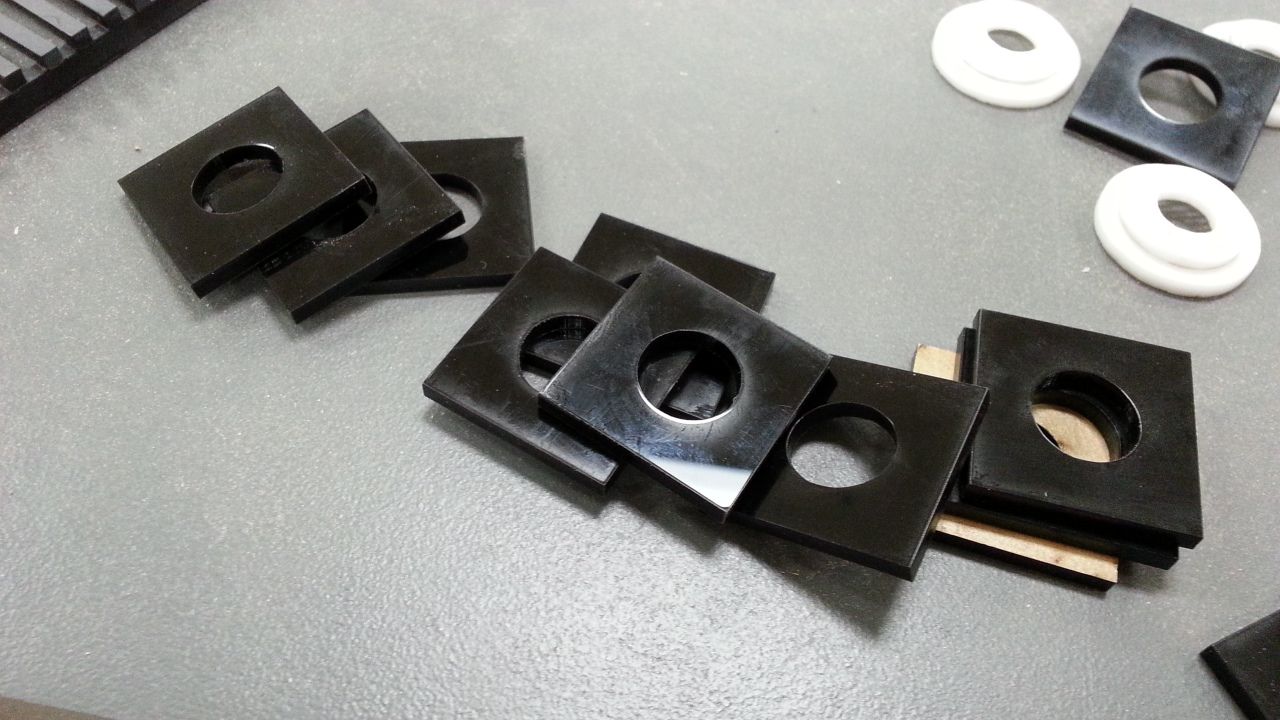
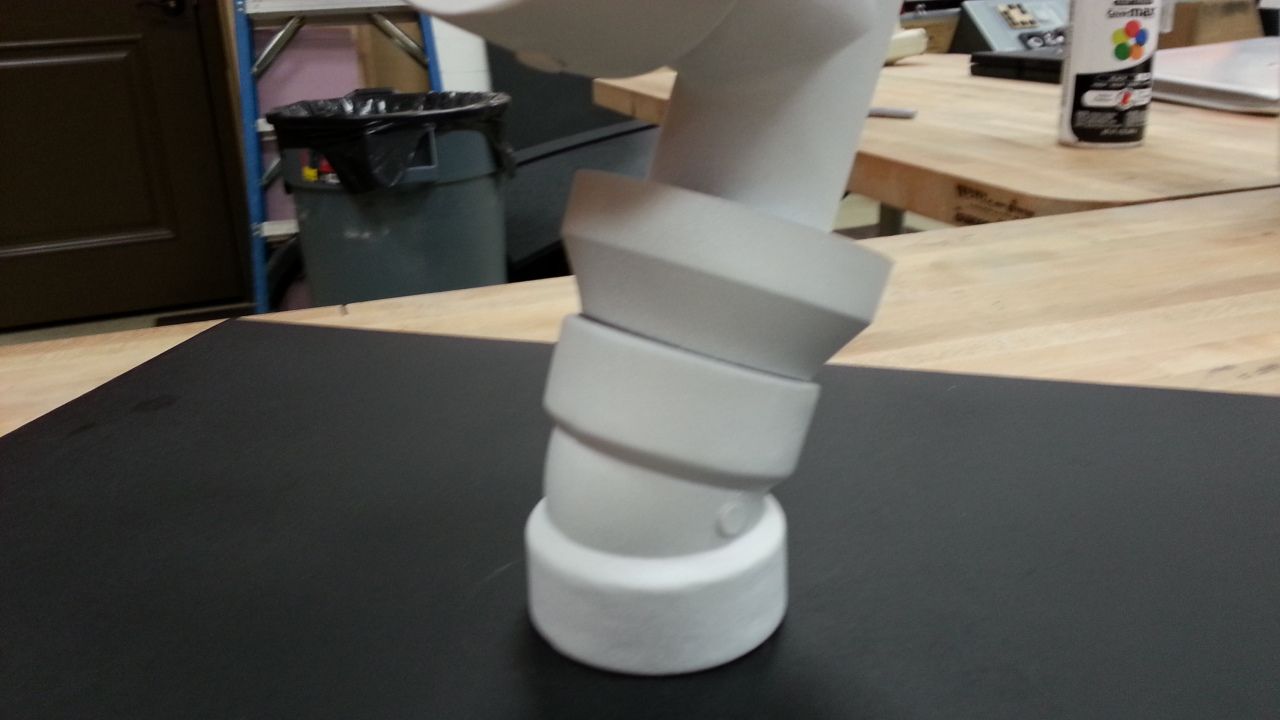
I then worked a little on the yokes - the black piece is 1 of 2 new bottom panels for the lower instrument panel (also helped see the yoke)

We mounted this plastic reducer backwards - still need to add some extra details
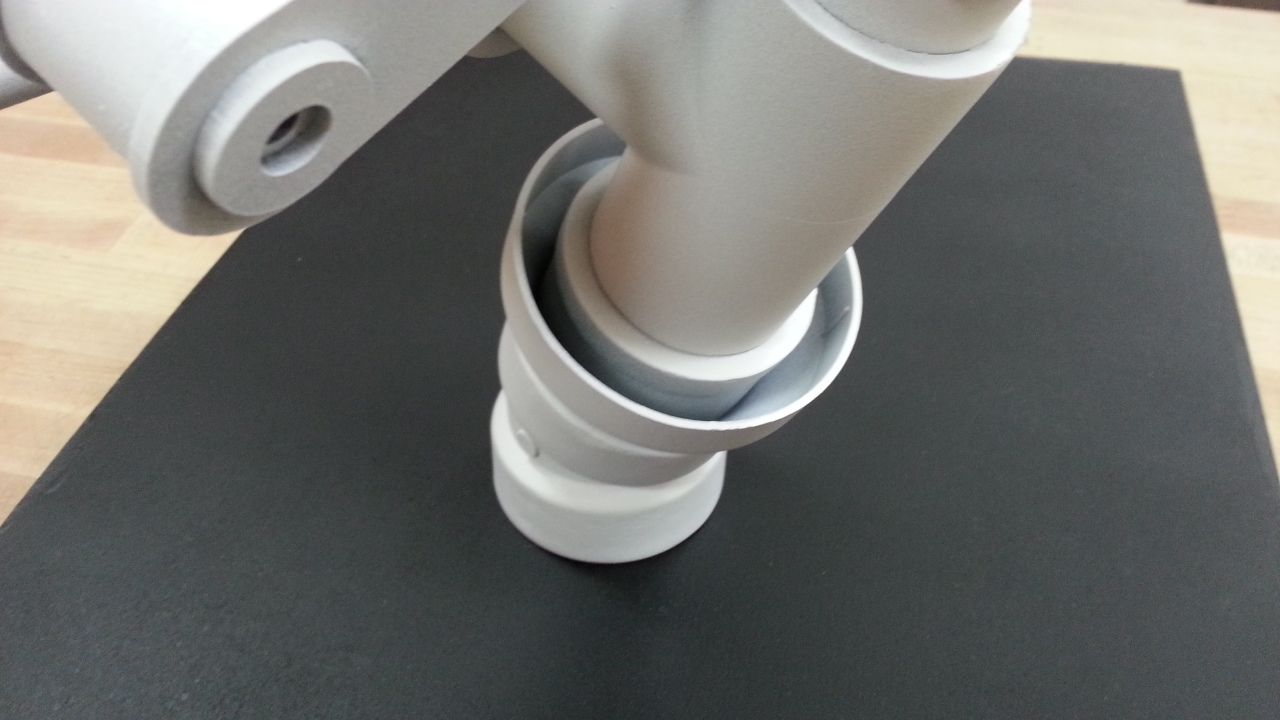
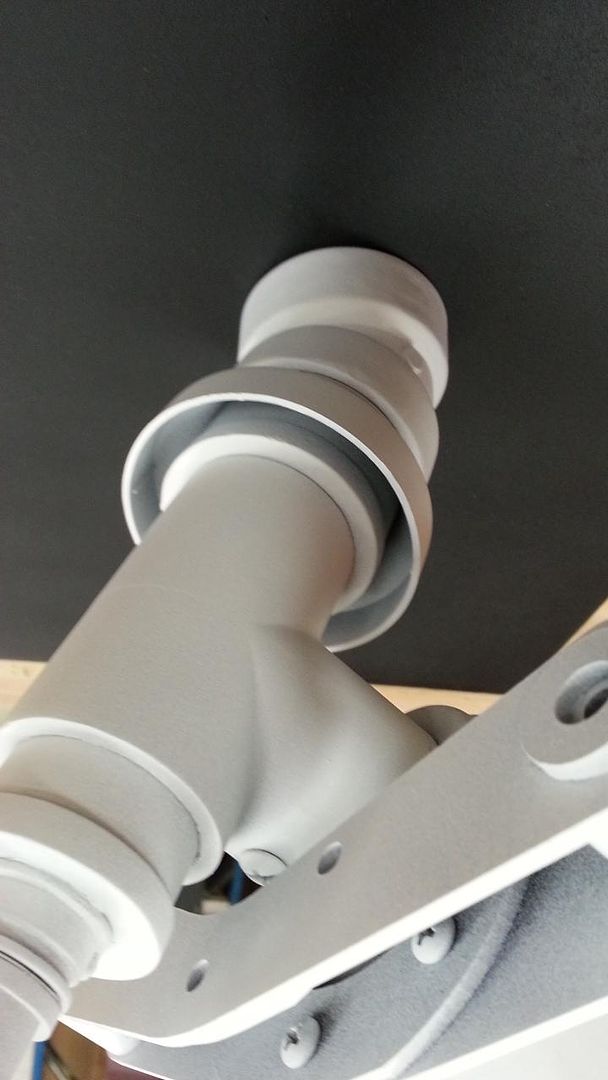
I love the profile
Nearing the end?
More Tomorrow!
A good day at the lab...
We cut new blue tiles for the button panel but quickly realized they tiles need to be translucent... ugh...
Temp blue tiles
Work continued on the throttle housing
Top edge needed to be trimmed
Is it me or am I about to be Punished?
Painted the new back panel and temp placed the greeblies
Installed the new front vents
The vent is acrylic with an MDF back panel
Back panel was adhered to the console
Instead of permanently adhering the armrest panel we used magnets
In place and easy access
Back side
We the scrapped this original front greeblie
In place for a new design
The design included adding these - to be painted a light blue
I then worked a little on the yokes - the black piece is 1 of 2 new bottom panels for the lower instrument panel (also helped see the yoke)
We mounted this plastic reducer backwards - still need to add some extra details
I love the profile
Nearing the end?
More Tomorrow!
Last edited:
Hi Gang,
Re: Your suggestions:
Love it!
That sounds so wrong in so many ways!")
Brings a nice balance from one genre to the next
What's a really good 2001 quote? How about "HALL 9000 - DAVE"?
Those are good ones!
I like that one too. I was also thinking of "271"
I've got 32 slots... I think we can make it happen
LOL - I like that
Hi E,
Unfortunately kickstarters and/or any sort of donation fund is strictly out of the question... I'll refer you to the FullScaleFalcon.com site...
Thanks much!
Hey Fuzz, thank you for the very kind words... It really means a lot. Just a little further to go until we move to the new console and back to the cockpit!
Hi SB,
Thanks much!
Hey Kev! Thanks! You would be very surprised how heavy that button cluster is. It must weigh 7-10 pounds! We should have a lot lit up by this weekend!
Hey Joe,
Thanks! I'm really looking forward to seeing them lit. That's going to completely change the look and feel of the console
Hi J,
Thanks! There was a point in time during the weekend I thought I was going to go insane... Nothing seemed to be coming together...
Hey OK,
It's not the humidity. We think we may have figured out what the issue is. I'll let you guys know this evening. Fingers crossed! Thanks for the kind words!
Hi C,
The console is at the lab - temp controlled, low humidity, etc. As I mentioned above, I think I know what the issue is...
Hey J,
That's what we thought at first - the extra *** that was added to original paint ruined the gallon - but that just doesn't sound right. But I did a little investigating when I got home and realized something... I'll let you know tonight what I find out.
That's really good to know! THANK YOU! This changes the way I can approach future builds. The CNC can cut through the Formica like butter...
- - - Updated - - -
Hi Gang,
Re: Your suggestions:
Love it!
That sounds so wrong in so many ways!
Brings a nice balance from one genre to the next
What's a really good 2001 quote? How about "HALL 9000 - DAVE"?
Those are good ones!
I like that one too. I was also thinking of "271"
I've got 32 slots... I think we can make it happen
LOL - I like that
Hi E,
Unfortunately kickstarters and/or any sort of donation fund is strictly out of the question... I'll refer you to the FullScaleFalcon.com site...
Thanks much!
Hey Fuzz, thank you for the very kind words... It really means a lot. Just a little further to go until we move to the new console and back to the cockpit!
Hi SB,
Thanks much!
Hey Kev! Thanks! You would be very surprised how heavy that button cluster is. It must weigh 7-10 pounds! We should have a lot lit up by this weekend!
Hey Joe,
Thanks! I'm really looking forward to seeing them lit. That's going to completely change the look and feel of the console
Hi J,
Thanks! There was a point in time during the weekend I thought I was going to go insane... Nothing seemed to be coming together...
Hey OK,
It's not the humidity. We think we may have figured out what the issue is. I'll let you guys know this evening. Fingers crossed! Thanks for the kind words!
Hi C,
The console is at the lab - temp controlled, low humidity, etc. As I mentioned above, I think I know what the issue is...
Hey J,
That's what we thought at first - the extra *** that was added to original paint ruined the gallon - but that just doesn't sound right. But I did a little investigating when I got home and realized something... I'll let you know tonight what I find out.
That's really good to know! THANK YOU! This changes the way I can approach future builds. The CNC can cut through the Formica like butter...
Re: Your suggestions:
"Colt .45 Malt Liquor Dispenser" :lol
Love it!
Or you could just say that Han spilled some Corellian nerf juice.
That sounds so wrong in so many ways!
"Engage"
Brings a nice balance from one genre to the next
How about a cheeky 2001 button?
What's a really good 2001 quote? How about "HALL 9000 - DAVE"?
"Few Maneuvers", "Special Modifications" and "Dust Crops"
Those are good ones!
Don't Panic is a must
I like that one too. I was also thinking of "271"
One of the buttons has to say "It's not my fault!"
I've got 32 slots... I think we can make it happen
Make a button labeled "The Odds", and make sure it's never lit...
LOL - I like that
A suggestion: Build a kickstarter or some other similar dontation fund and sell the buttons with the donor's name in them.
Hi E,
Unfortunately kickstarters and/or any sort of donation fund is strictly out of the question... I'll refer you to the FullScaleFalcon.com site...
AMAZING!!!!
Thanks much!
This is so much more than a replica build. Watching your build from its inception to what it has become and where it is headed, my god this is amazing!
Hey Fuzz, thank you for the very kind words... It really means a lot. Just a little further to go until we move to the new console and back to the cockpit!
looking good there
Hi SB,
Thanks much!
Now we're getting there, I sure do like those buttons!
Hey Kev! Thanks! You would be very surprised how heavy that button cluster is. It must weigh 7-10 pounds! We should have a lot lit up by this weekend!
I'll have to agree with the gangs here: love those buttons! They surely give that 70's look to the cockpit.
Hey Joe,
Thanks! I'm really looking forward to seeing them lit. That's going to completely change the look and feel of the console
The details of this awesome project are insane!!! :thumbsup
Hi J,
Thanks! There was a point in time during the weekend I thought I was going to go insane...
Nothing seemed to be coming together...Darn southeast humidity! Looking great though!
Hey OK,
It's not the humidity. We think we may have figured out what the issue is. I'll let you guys know this evening. Fingers crossed! Thanks for the kind words!
Do you have access to somewhere with air conditioning? The dryer air might get the paint to set properly.
Hi C,
The console is at the lab - temp controlled, low humidity, etc. As I mentioned above, I think I know what the issue is...
What type of paint is it? Sounds like a chemical reaction...
Hey J,
That's what we thought at first - the extra *** that was added to original paint ruined the gallon - but that just doesn't sound right. But I did a little investigating when I got home and realized something... I'll let you know tonight what I find out.
SK,
I meant to comment on this when I first saw it. My assumptions regarding color stem from from a little margin note on the full-scale set blue prints that specify that the surfaces of the cockpit are veneered in Formica. Formica only offers a few colors in solid - i.e. not marble or stone fleck or woodgrain or some other god awful finish.
Specifically - things like a gray and black are only offered in, well gray and black. Not a lot of choice. Many of these basic finishes haven't changed from the 70's.
Cheers,
J.
That's really good to know! THANK YOU! This changes the way I can approach future builds. The CNC can cut through the Formica like butter...
- - - Updated - - -
Hi Gang,
Re: Your suggestions:
"Colt .45 Malt Liquor Dispenser" :lol
Love it!
Or you could just say that Han spilled some Corellian nerf juice.
That sounds so wrong in so many ways!
"Engage"
Brings a nice balance from one genre to the next
How about a cheeky 2001 button?
What's a really good 2001 quote? How about "HALL 9000 - DAVE"?
"Few Maneuvers", "Special Modifications" and "Dust Crops"
Those are good ones!
Don't Panic is a must
I like that one too. I was also thinking of "271"
One of the buttons has to say "It's not my fault!"
I've got 32 slots... I think we can make it happen
Make a button labeled "The Odds", and make sure it's never lit...
LOL - I like that
A suggestion: Build a kickstarter or some other similar dontation fund and sell the buttons with the donor's name in them.
Hi E,
Unfortunately kickstarters and/or any sort of donation fund is strictly out of the question... I'll refer you to the FullScaleFalcon.com site...
AMAZING!!!!
Thanks much!
This is so much more than a replica build. Watching your build from its inception to what it has become and where it is headed, my god this is amazing!
Hey Fuzz, thank you for the very kind words... It really means a lot. Just a little further to go until we move to the new console and back to the cockpit!
looking good there
Hi SB,
Thanks much!
Now we're getting there, I sure do like those buttons!
Hey Kev! Thanks! You would be very surprised how heavy that button cluster is. It must weigh 7-10 pounds! We should have a lot lit up by this weekend!
I'll have to agree with the gangs here: love those buttons! They surely give that 70's look to the cockpit.
Hey Joe,
Thanks! I'm really looking forward to seeing them lit. That's going to completely change the look and feel of the console
The details of this awesome project are insane!!! :thumbsup
Hi J,
Thanks! There was a point in time during the weekend I thought I was going to go insane...
Nothing seemed to be coming together...Darn southeast humidity! Looking great though!
Hey OK,
It's not the humidity. We think we may have figured out what the issue is. I'll let you guys know this evening. Fingers crossed! Thanks for the kind words!
Do you have access to somewhere with air conditioning? The dryer air might get the paint to set properly.
Hi C,
The console is at the lab - temp controlled, low humidity, etc. As I mentioned above, I think I know what the issue is...
What type of paint is it? Sounds like a chemical reaction...
Hey J,
That's what we thought at first - the extra *** that was added to original paint ruined the gallon - but that just doesn't sound right. But I did a little investigating when I got home and realized something... I'll let you know tonight what I find out.
SK,
I meant to comment on this when I first saw it. My assumptions regarding color stem from from a little margin note on the full-scale set blue prints that specify that the surfaces of the cockpit are veneered in Formica. Formica only offers a few colors in solid - i.e. not marble or stone fleck or woodgrain or some other god awful finish.
Specifically - things like a gray and black are only offered in, well gray and black. Not a lot of choice. Many of these basic finishes haven't changed from the 70's.
Cheers,
J.
That's really good to know! THANK YOU! This changes the way I can approach future builds. The CNC can cut through the Formica like butter...
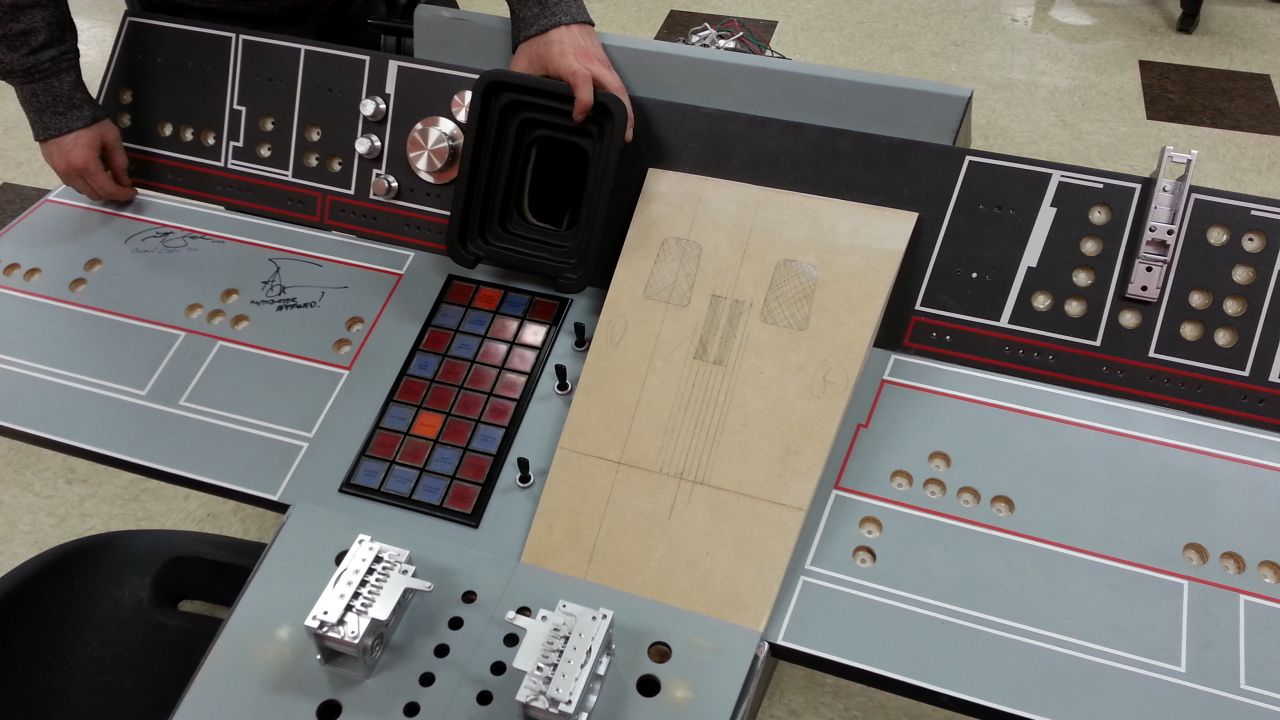
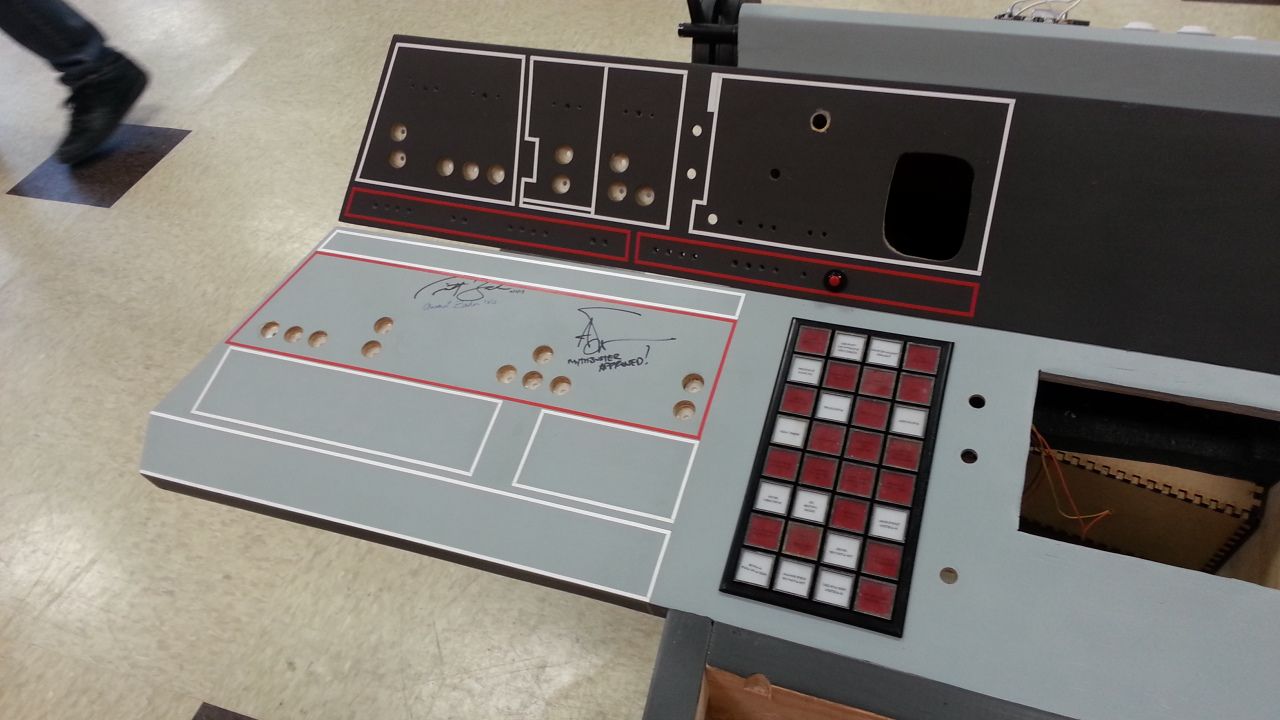
Hi Gang,
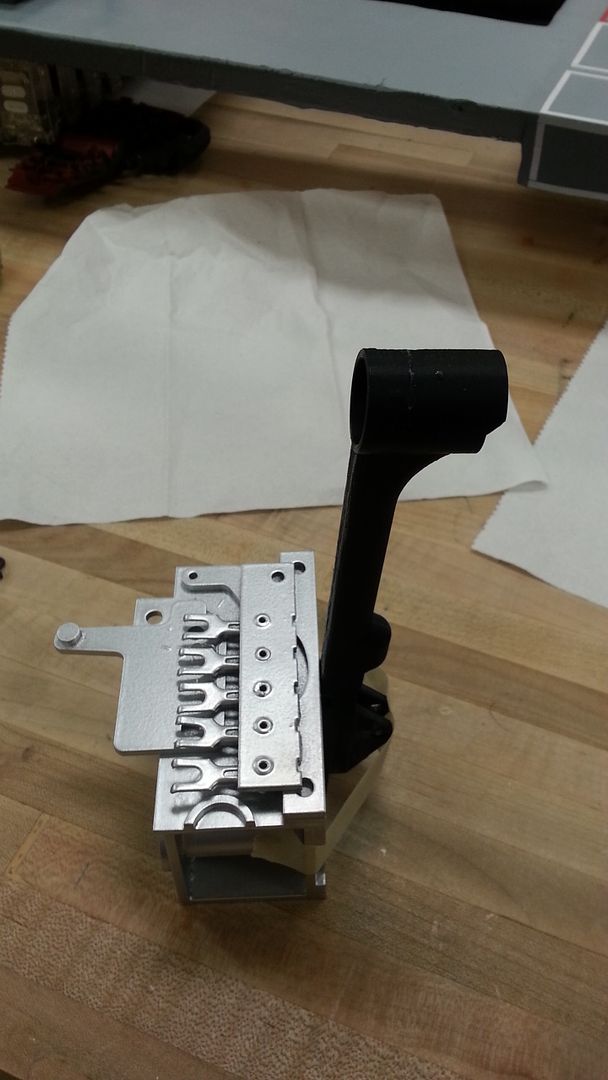
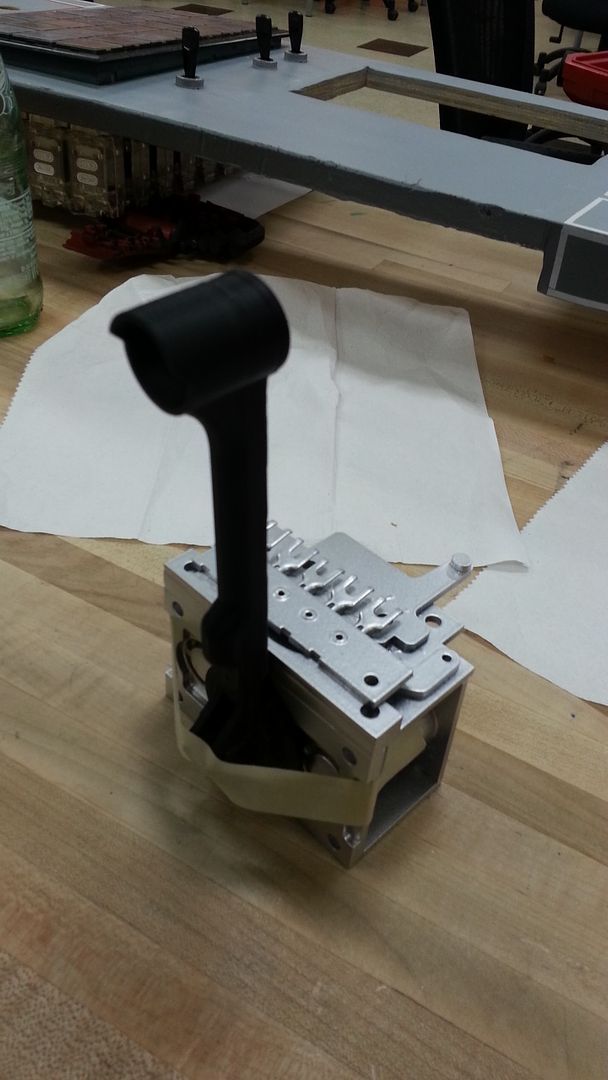
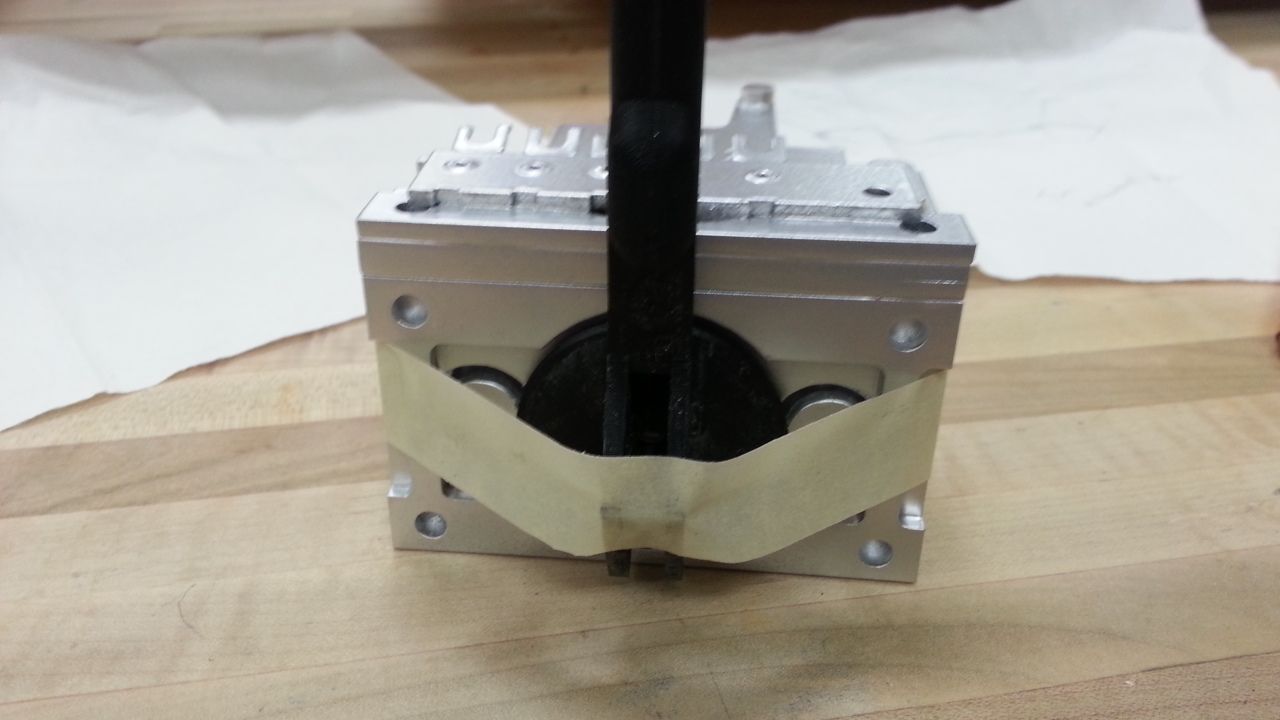
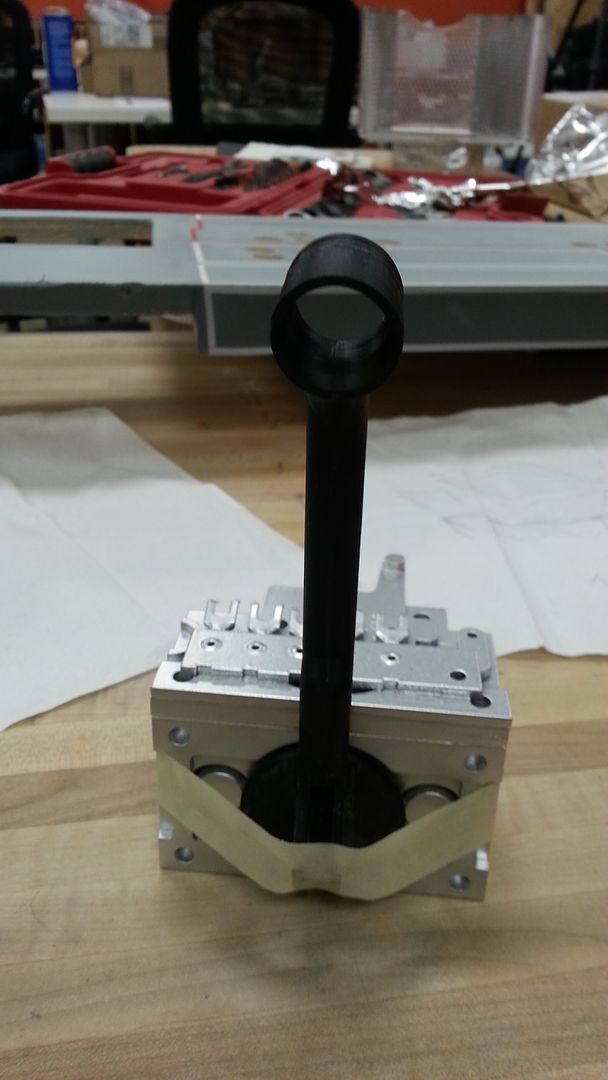
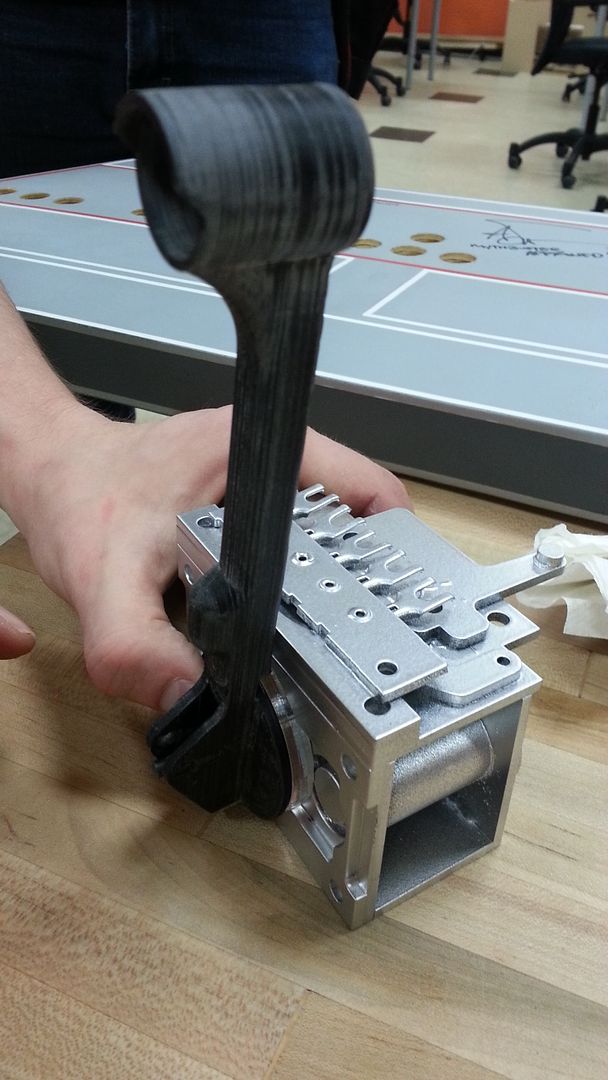
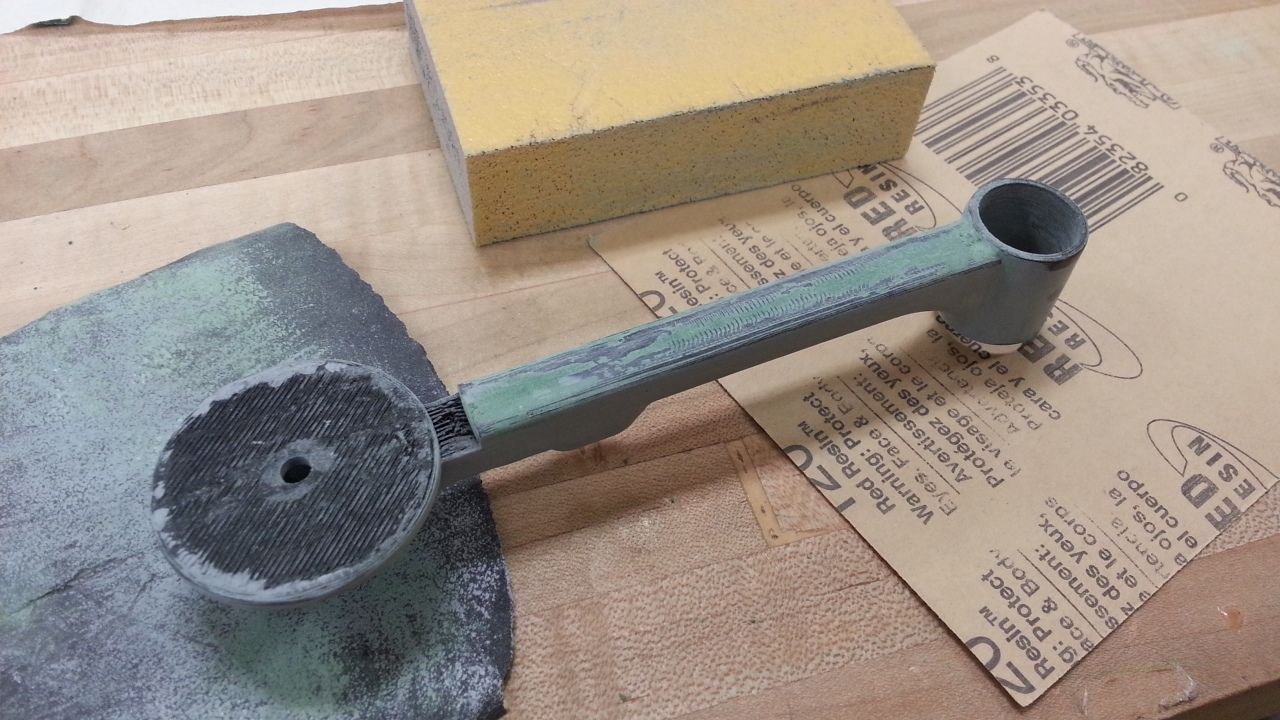
Great day at the lab! When I arrived I found Mike had begun 3D printing one of the two armrest lever greeblies (based on Starkiller's original 3D model) with the NEW 3D pinter
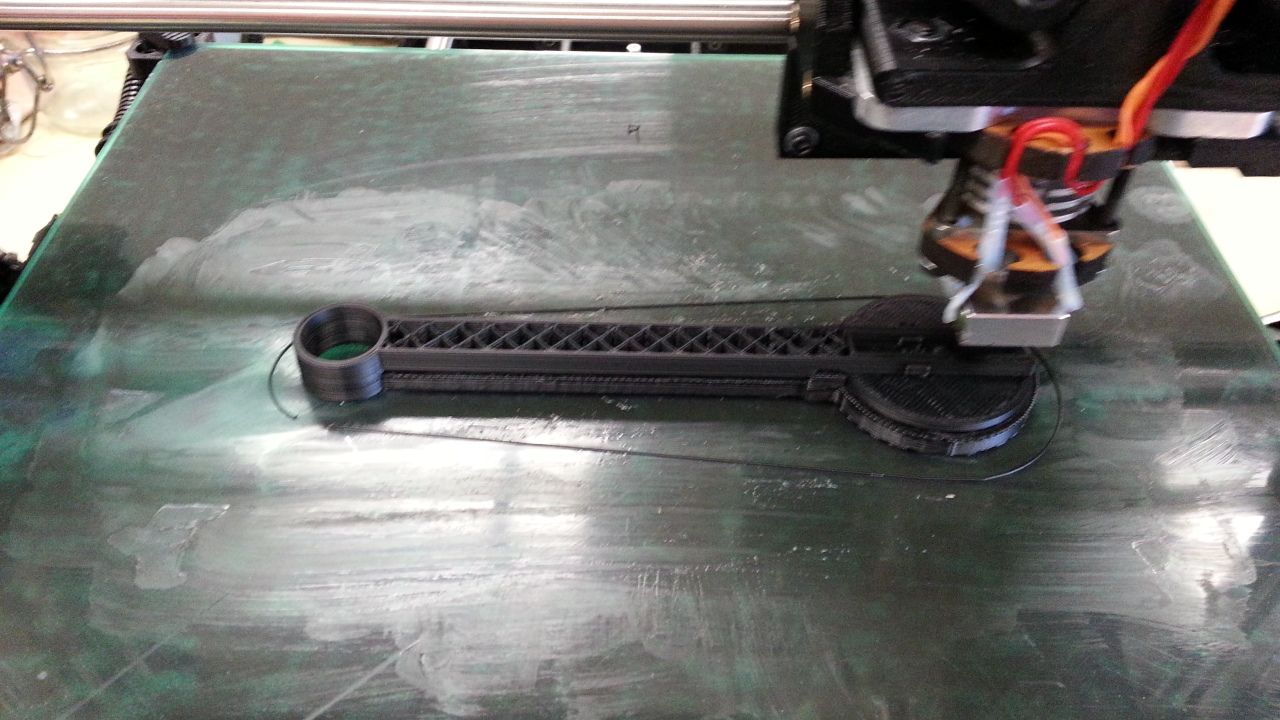
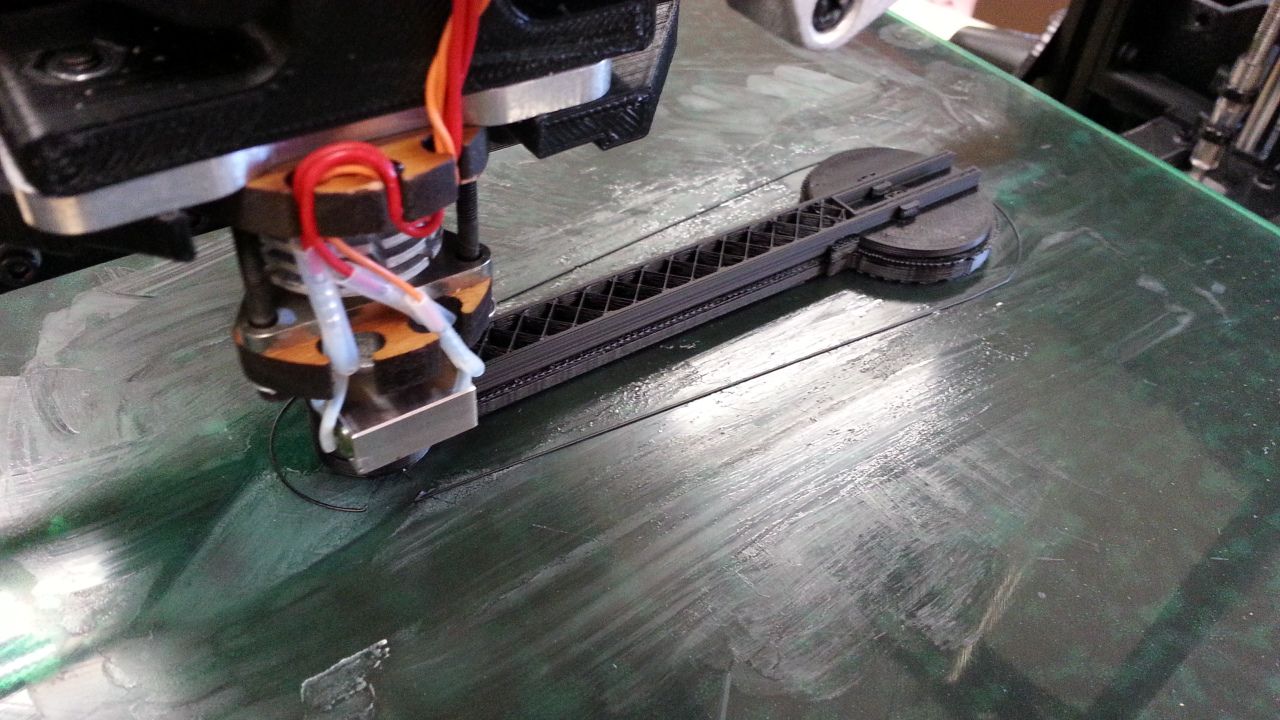
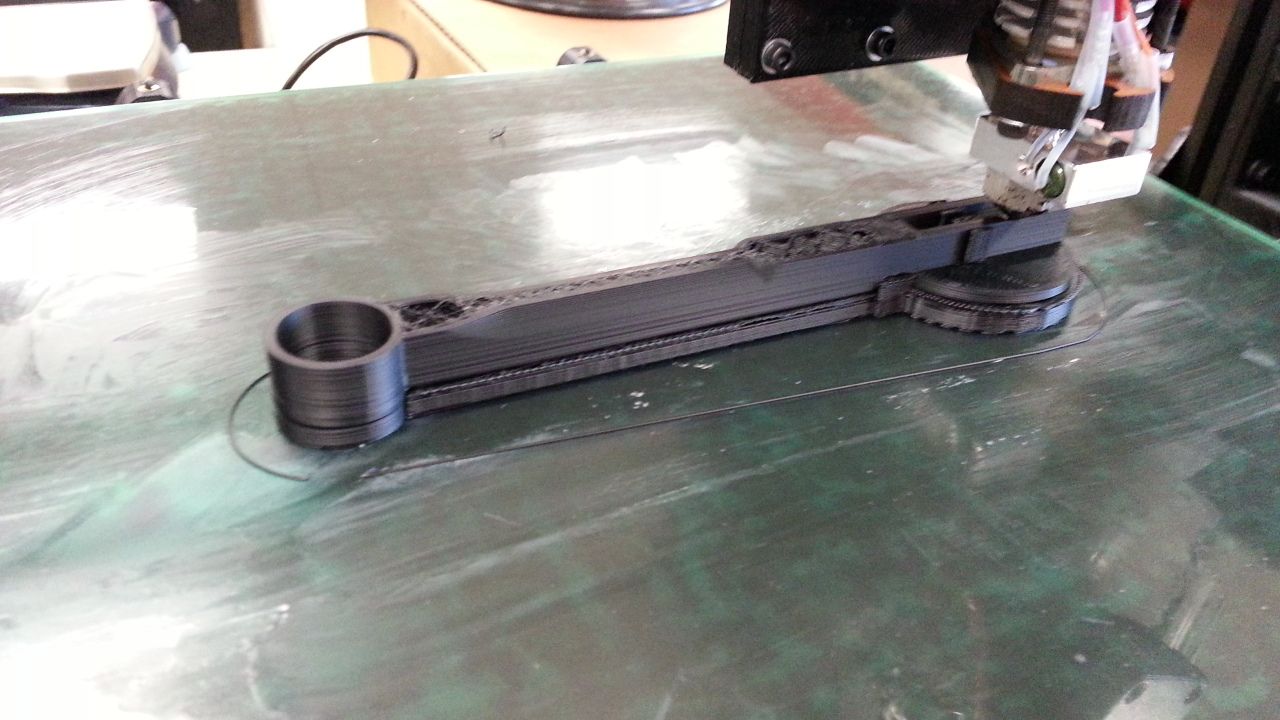
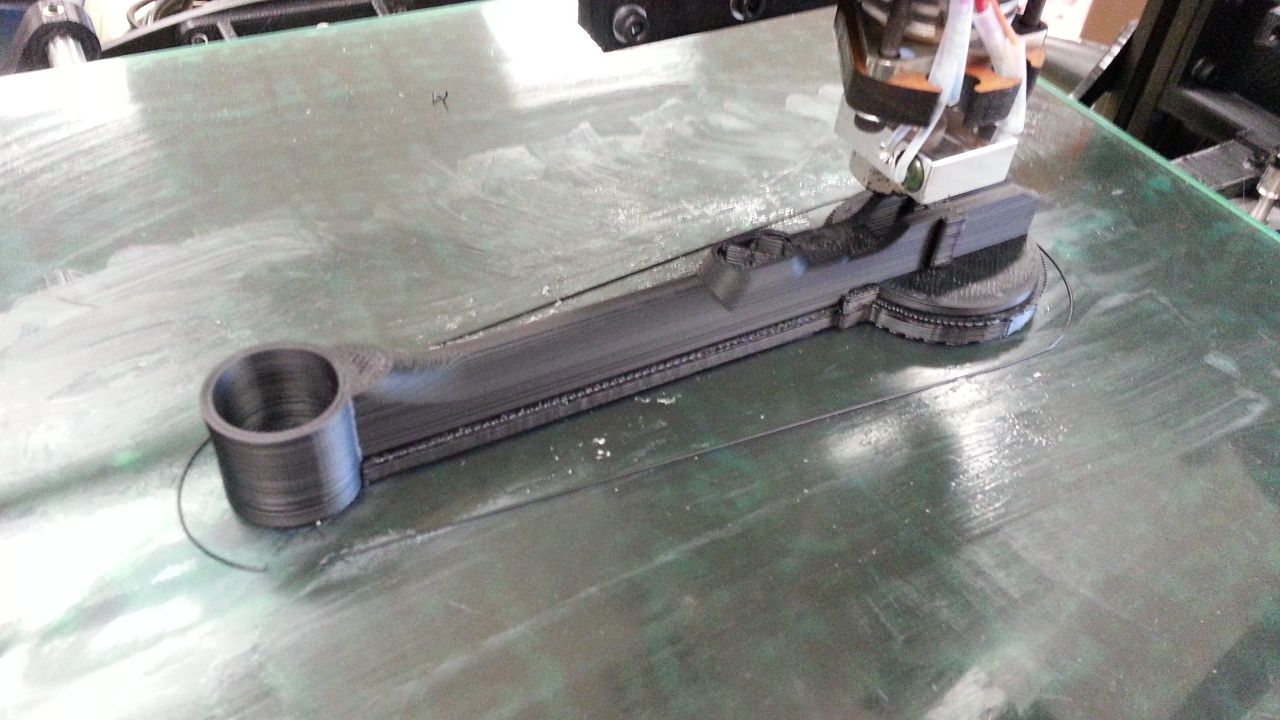
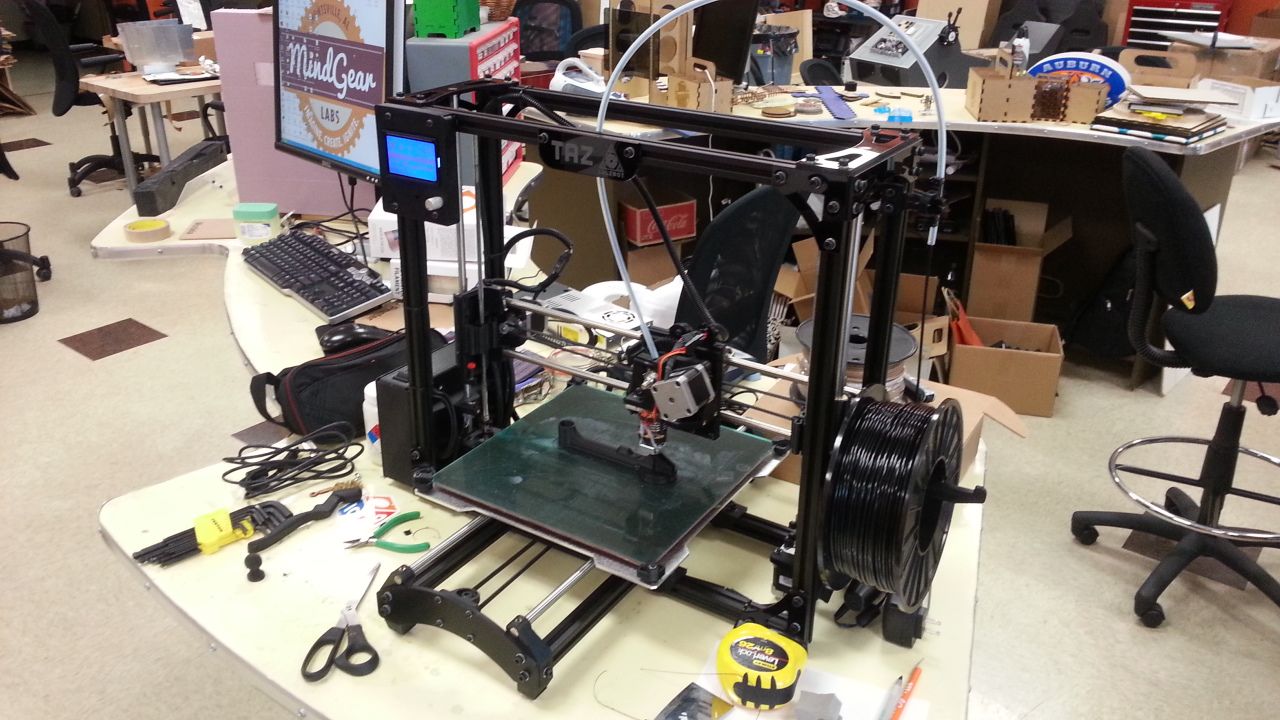
The print took approx. 2-2.5 hours
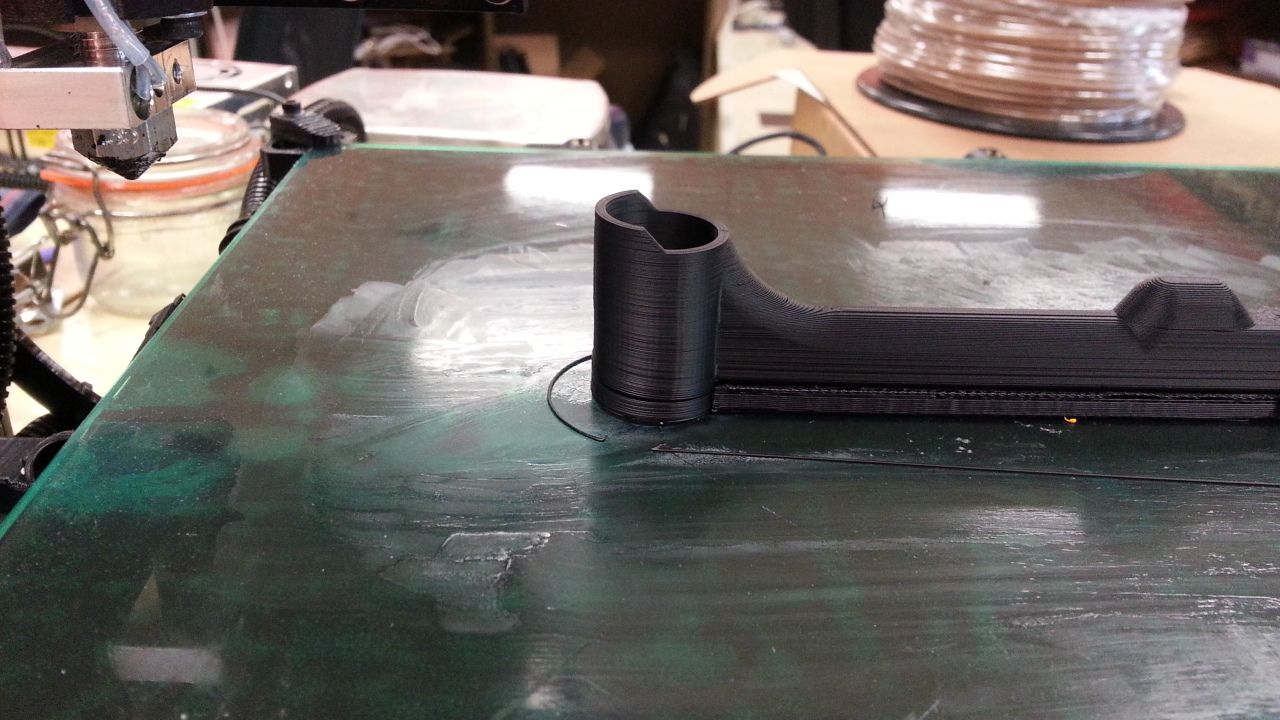
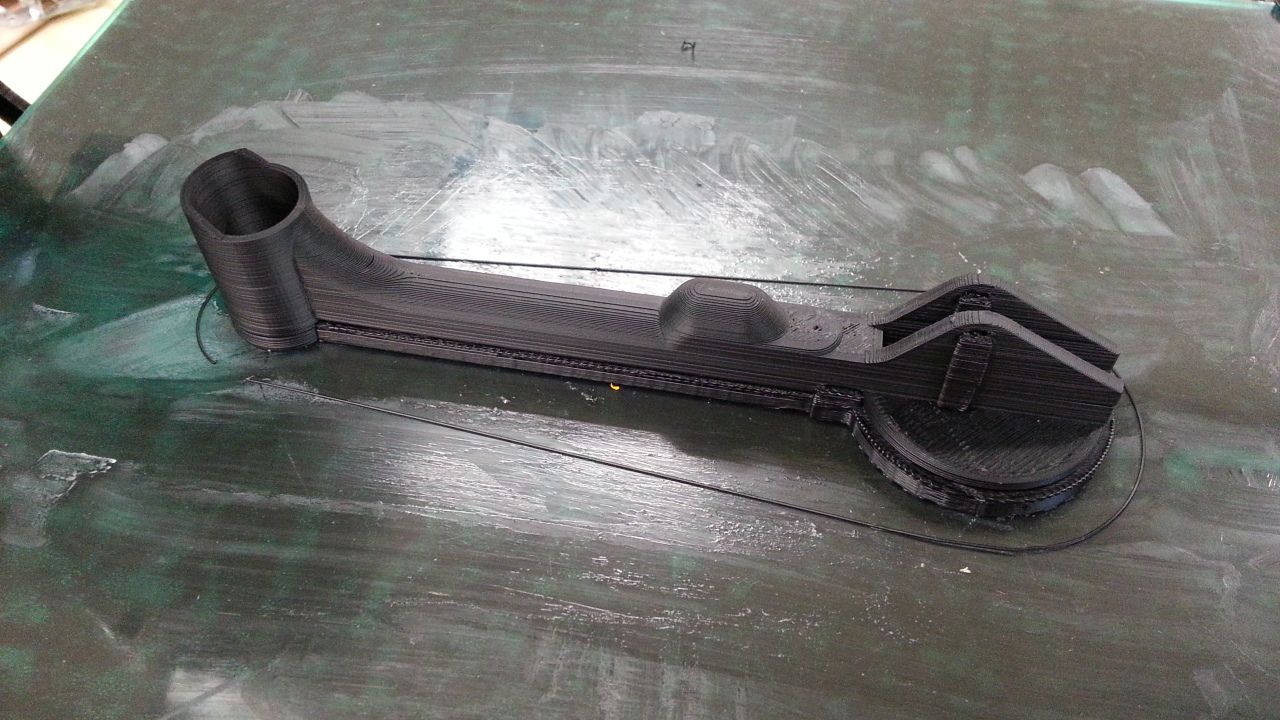
All the flash has been removed
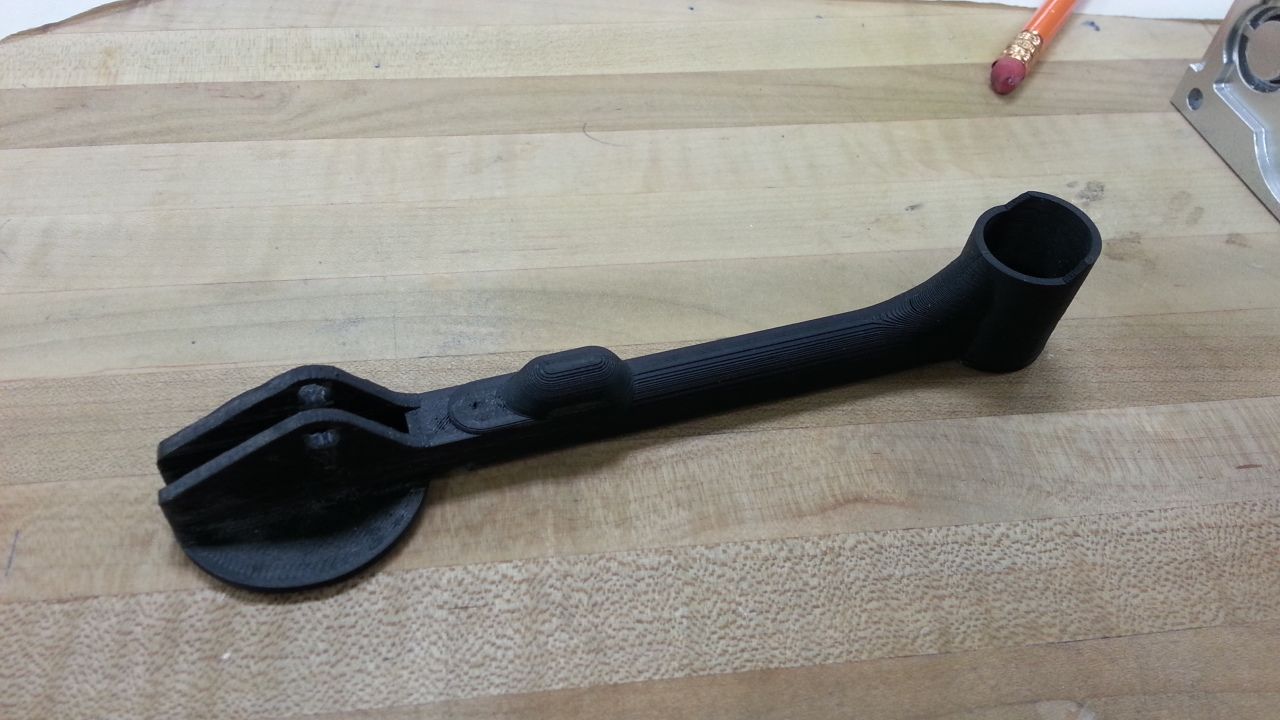
Against the body
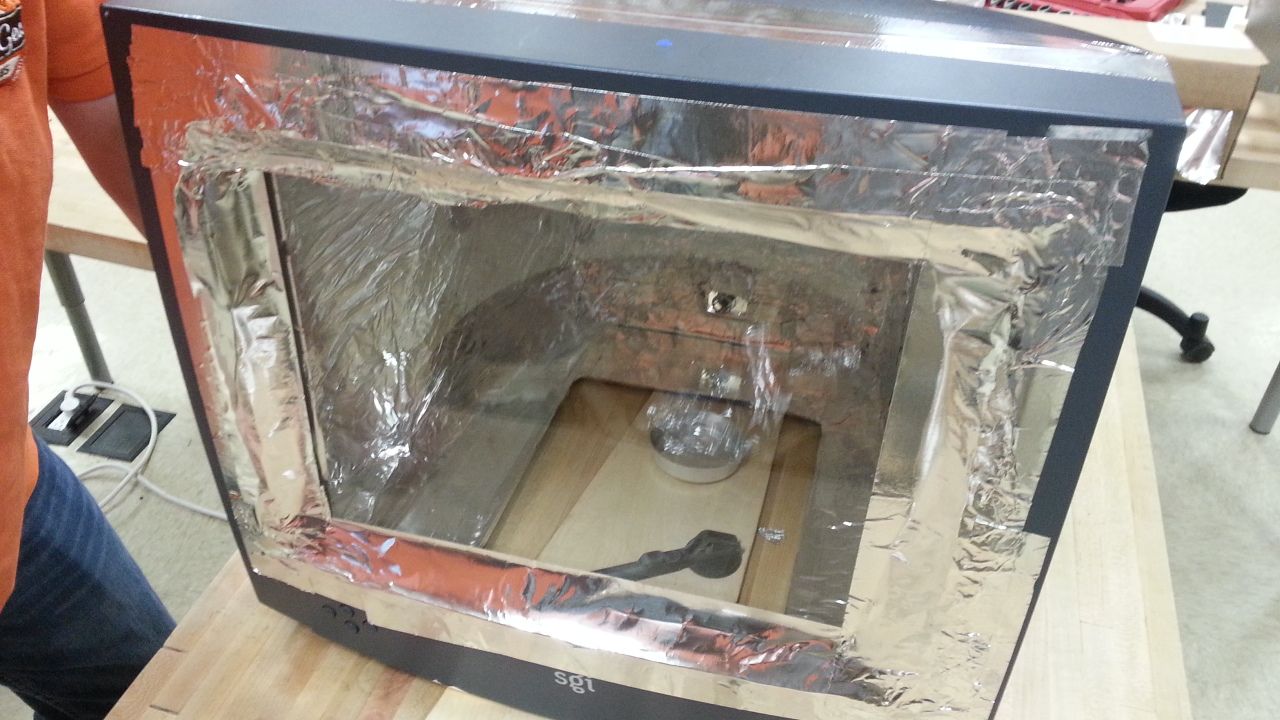
Mike was also in the middle of creating what I call the "Easy Bake Oven". Basically, you put your 3D print inside the box with acetone and a heat source. The vapors from the acetone slowly melts the 3D print surface making it nice and smooth - referred to as "vapor polishing".
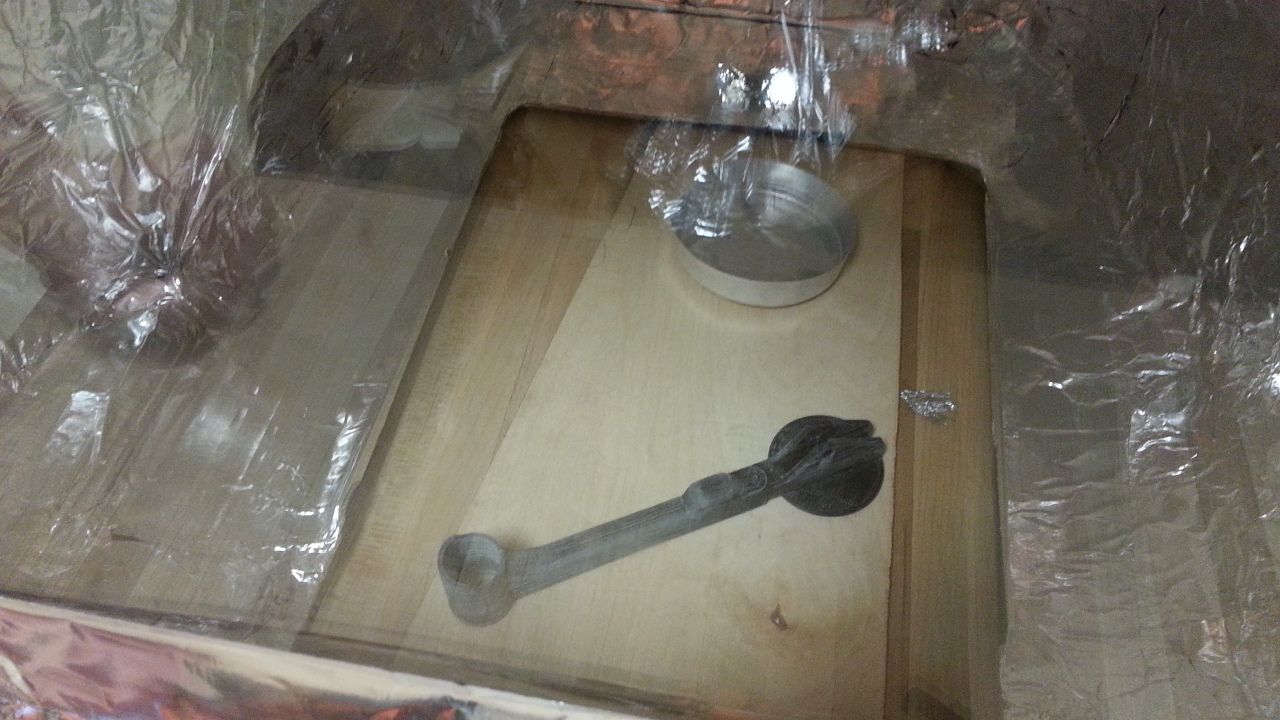
Note the heat gun at the rear bottom
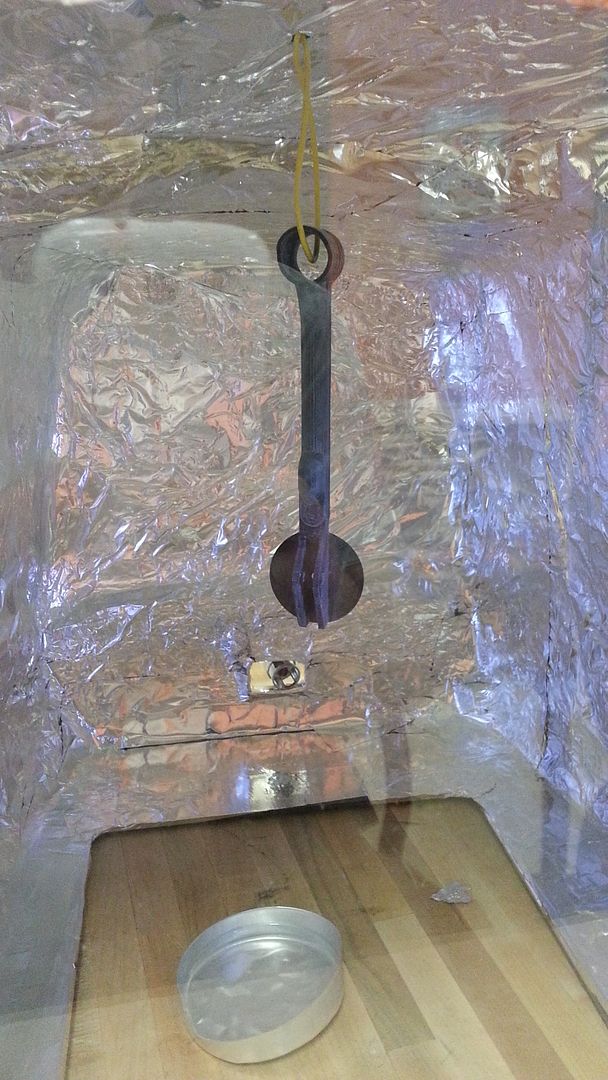
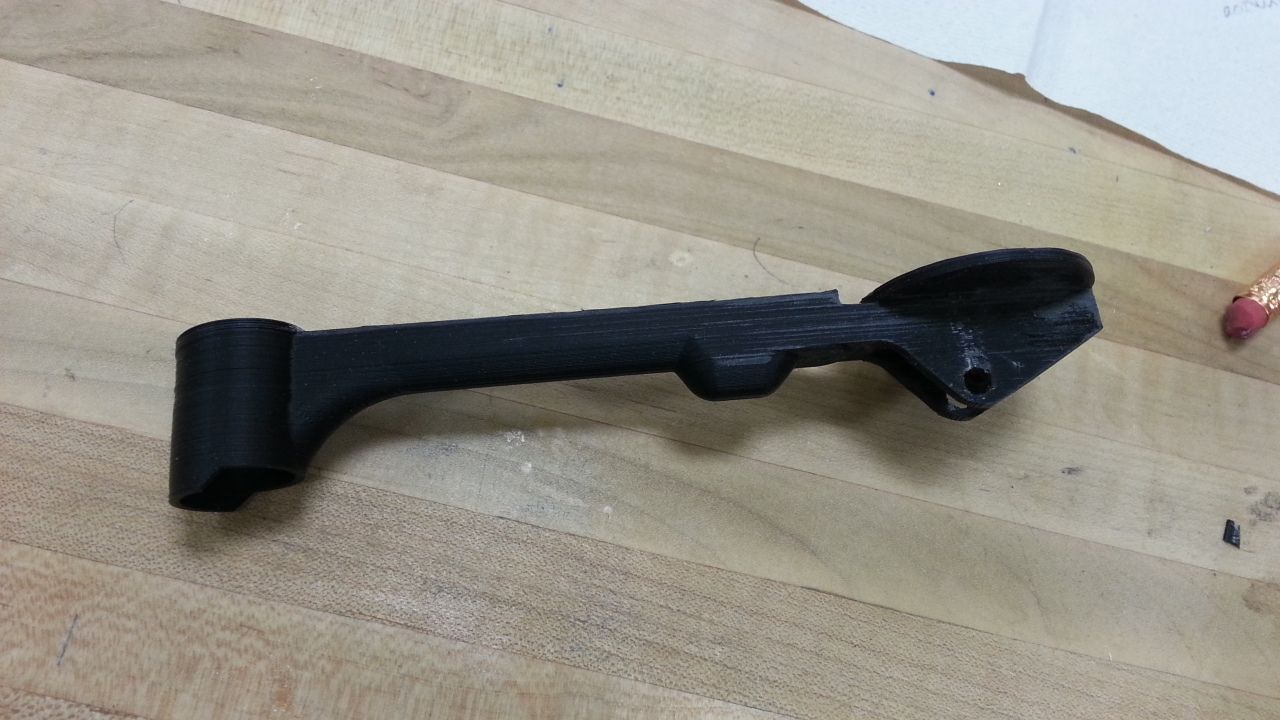
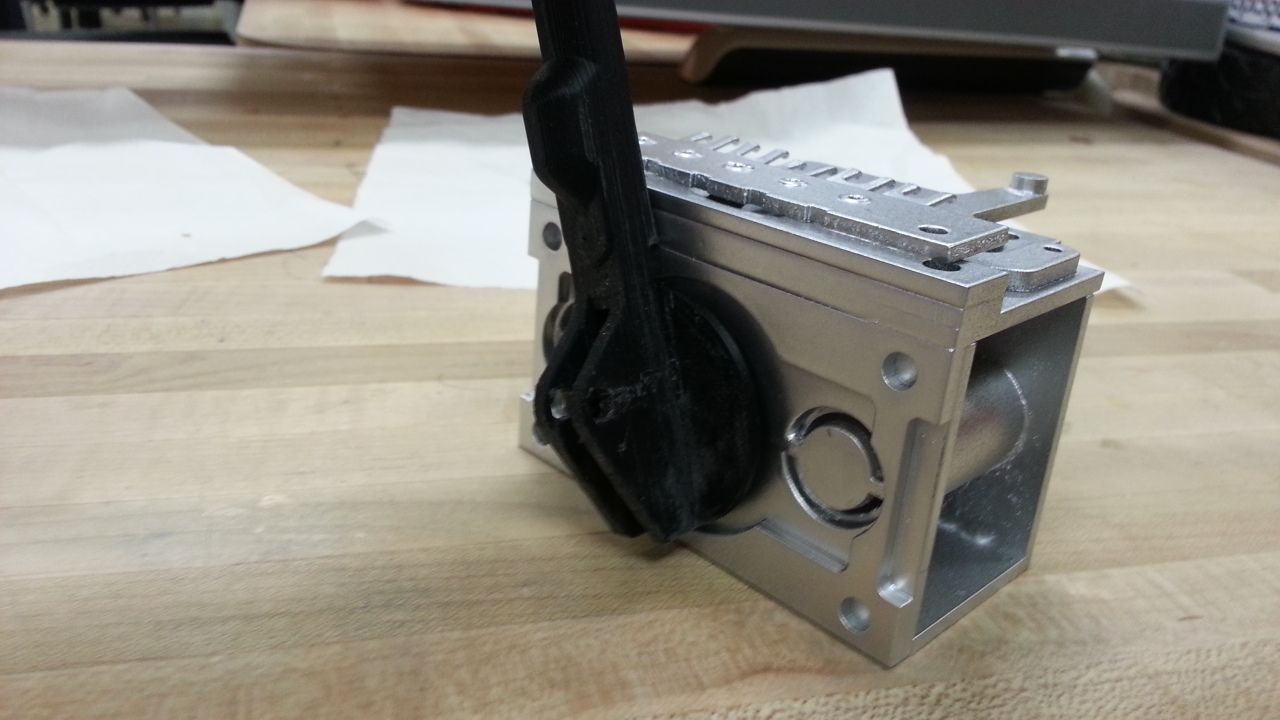
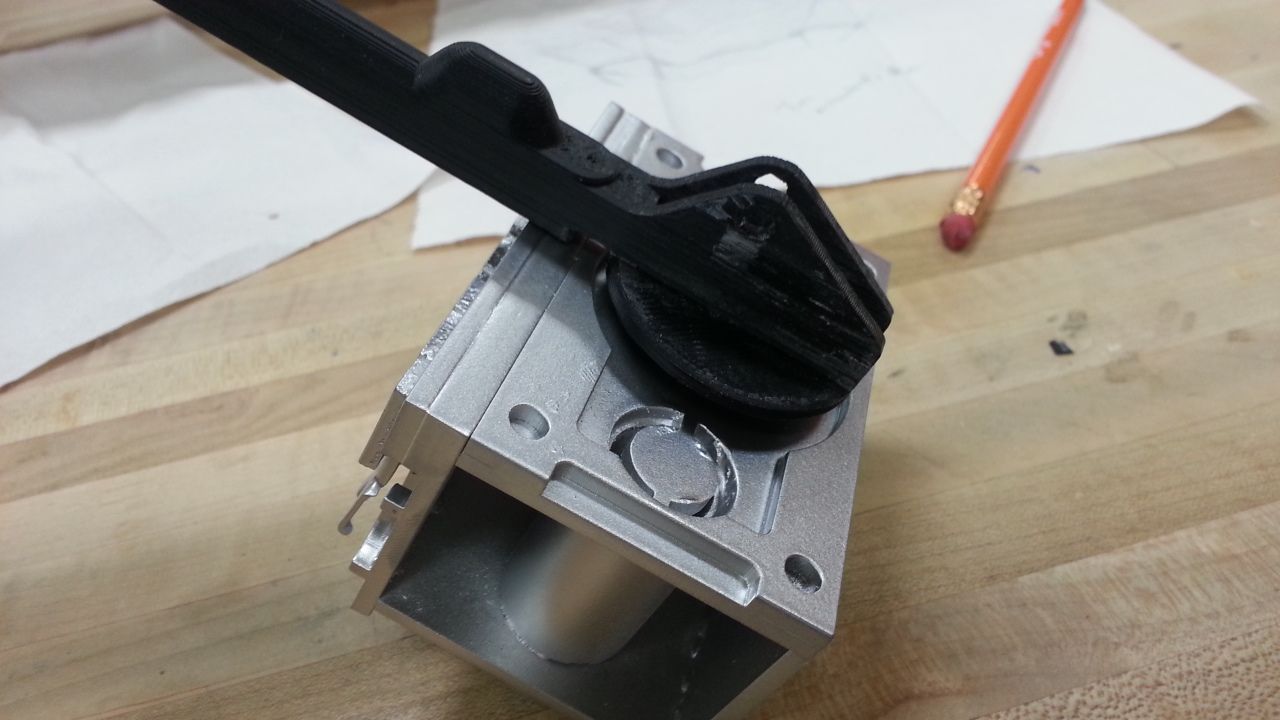
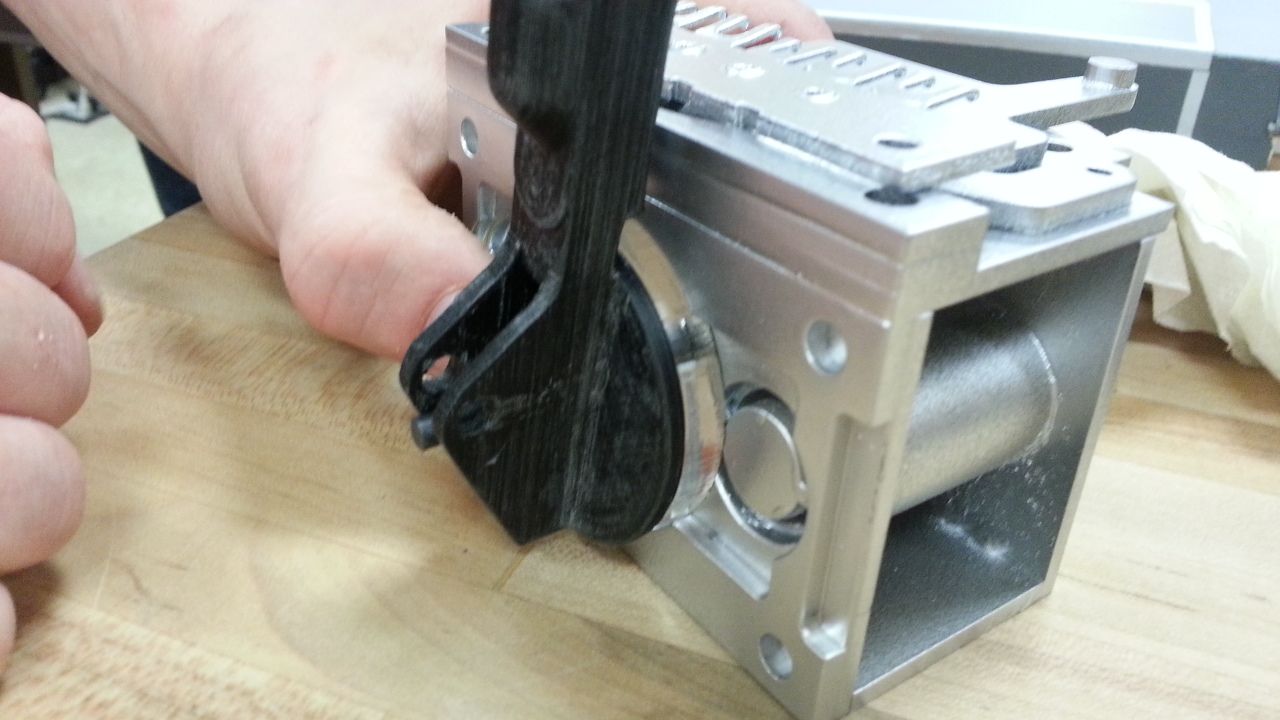
Mike then laser cut two 1/4" clear acrylic spacers for the lever. I'm going to leave them clear - I LOVE the look!
All we need now is a knob
During all this excitement I was able to solve the paint issue (whether I actually solved it or not remains a mystery). I applied several layers of satin clear and that removed the tacky feeling and hardened the paint
I then applied a few more coats of paint to the armrest panel... where my shirt caught the edge of the panel and it hit the floor right on one of the corners...
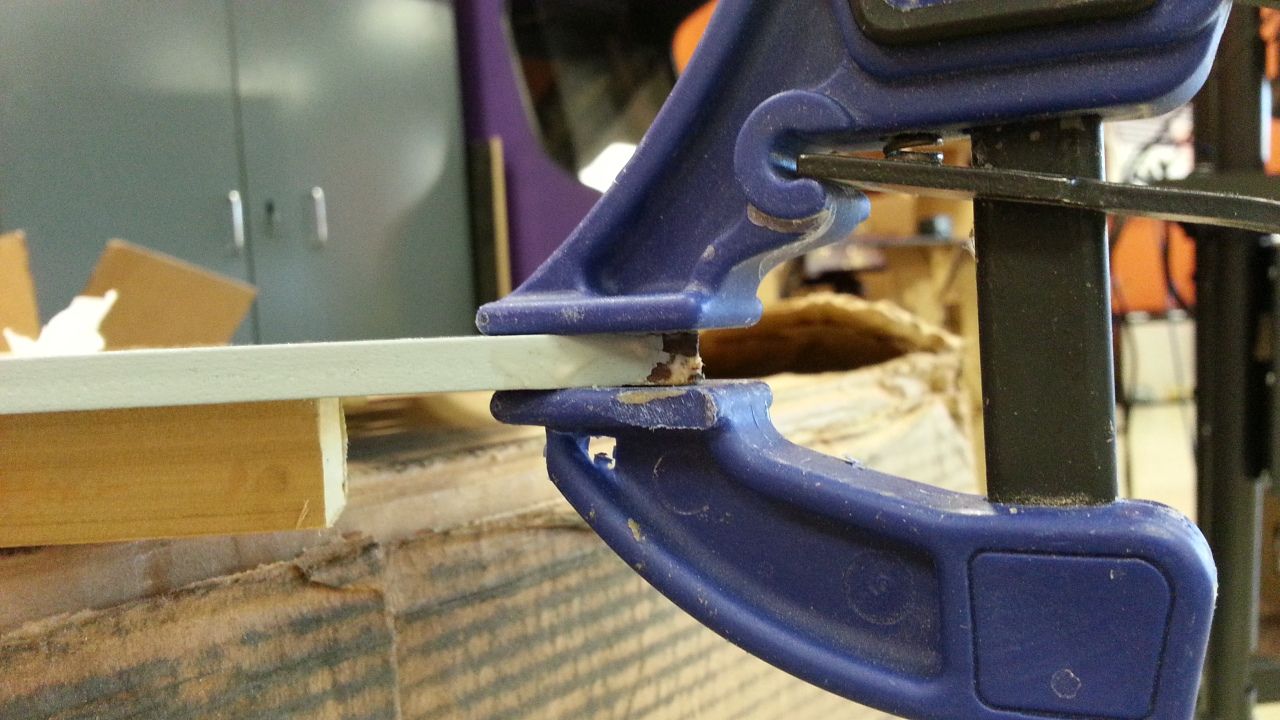
SQUISH! I loaded the bent corner with wood glue and clamped in place - worked like a charm
Added another coat of paint to the console - I will then add a coat of satin clear
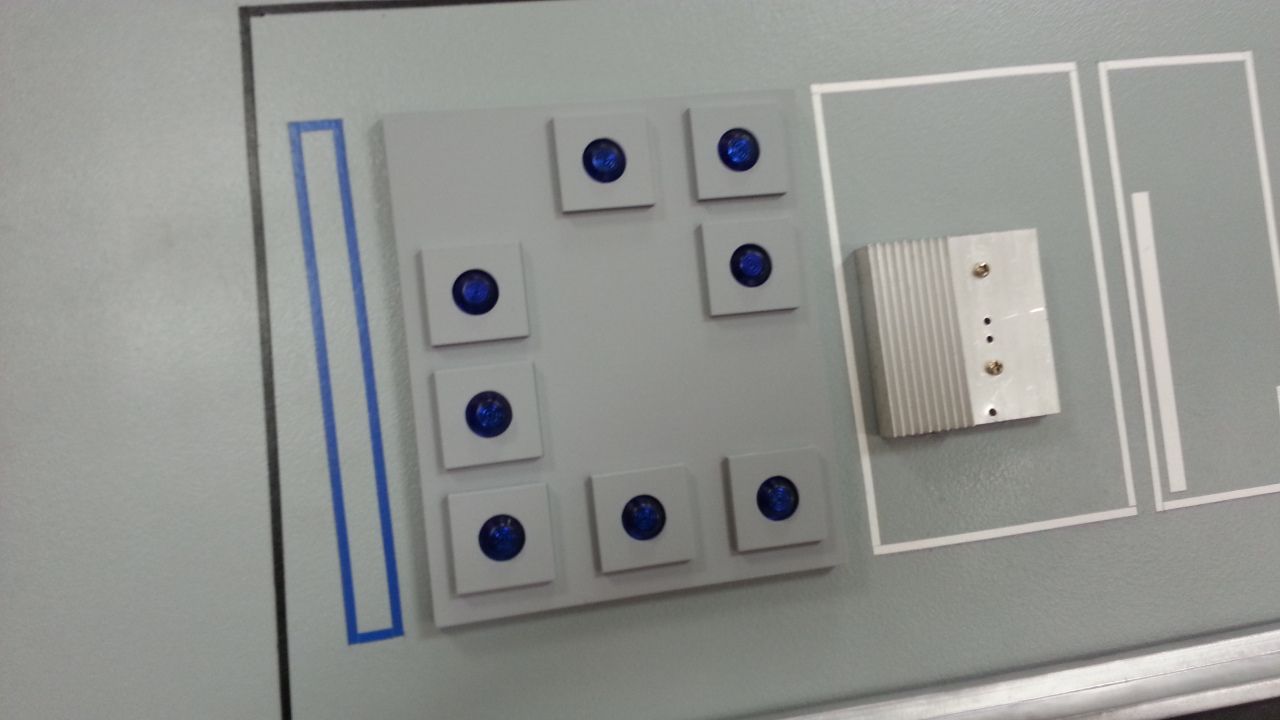
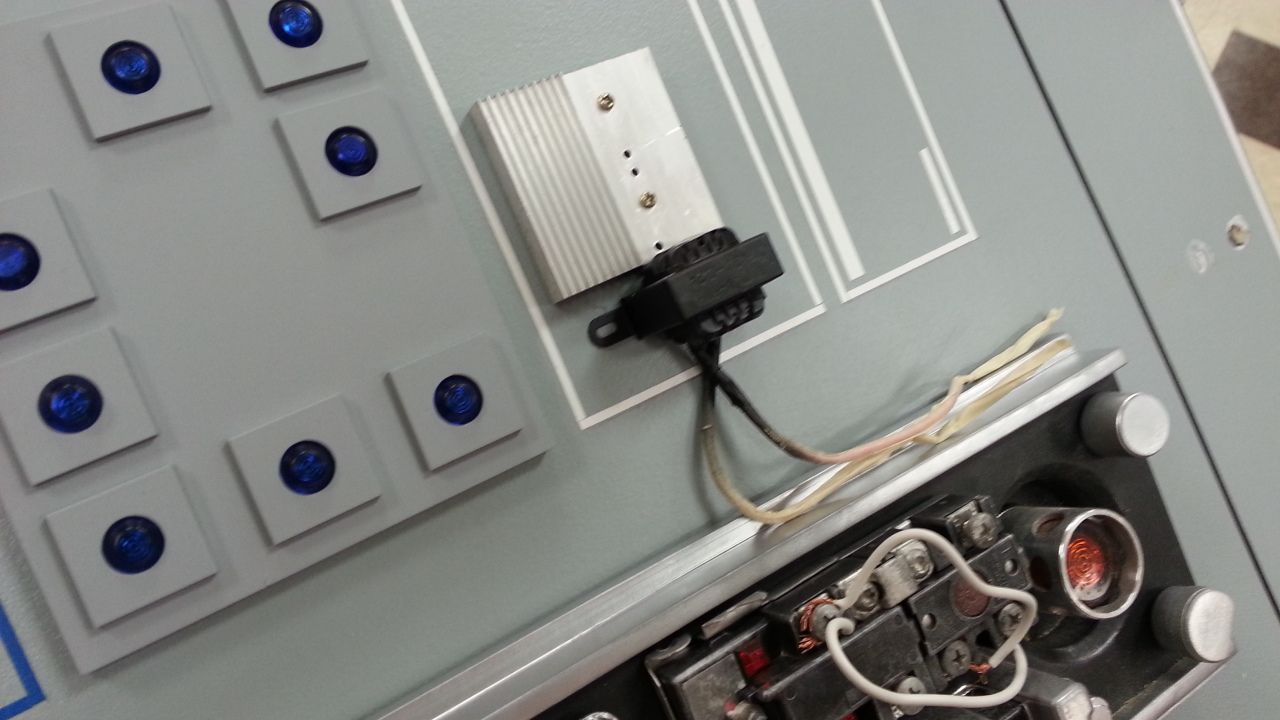
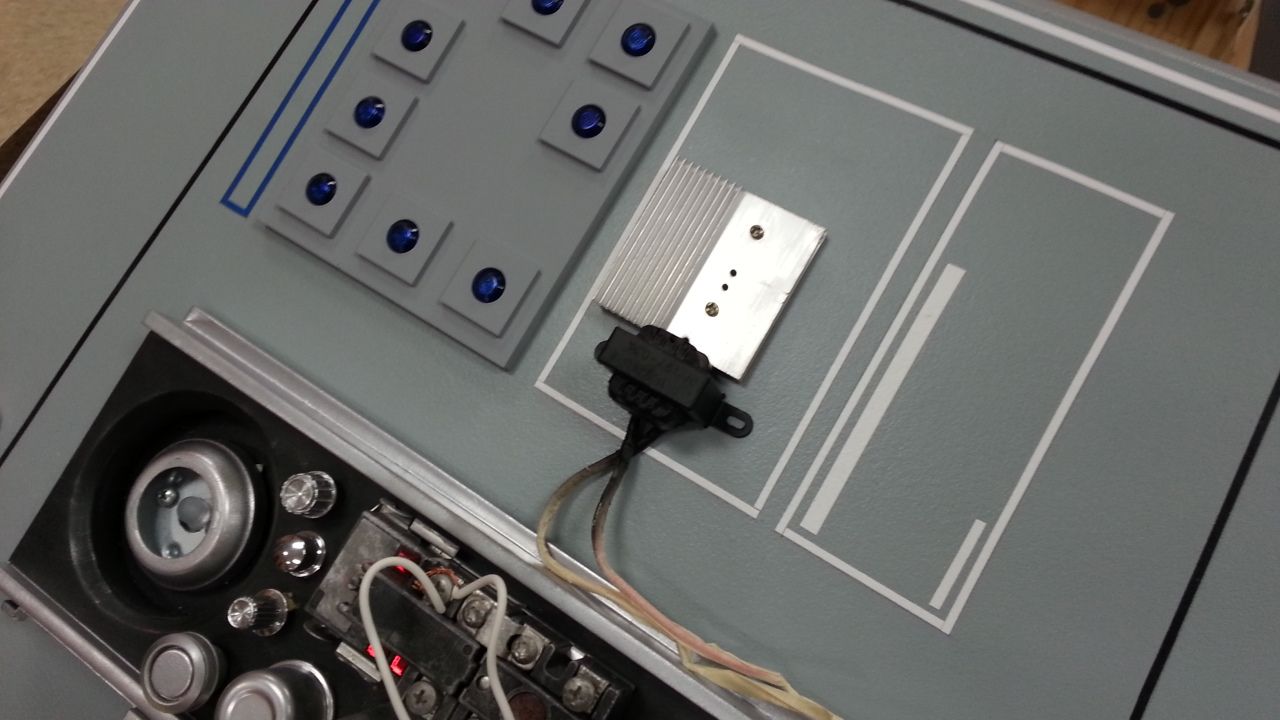
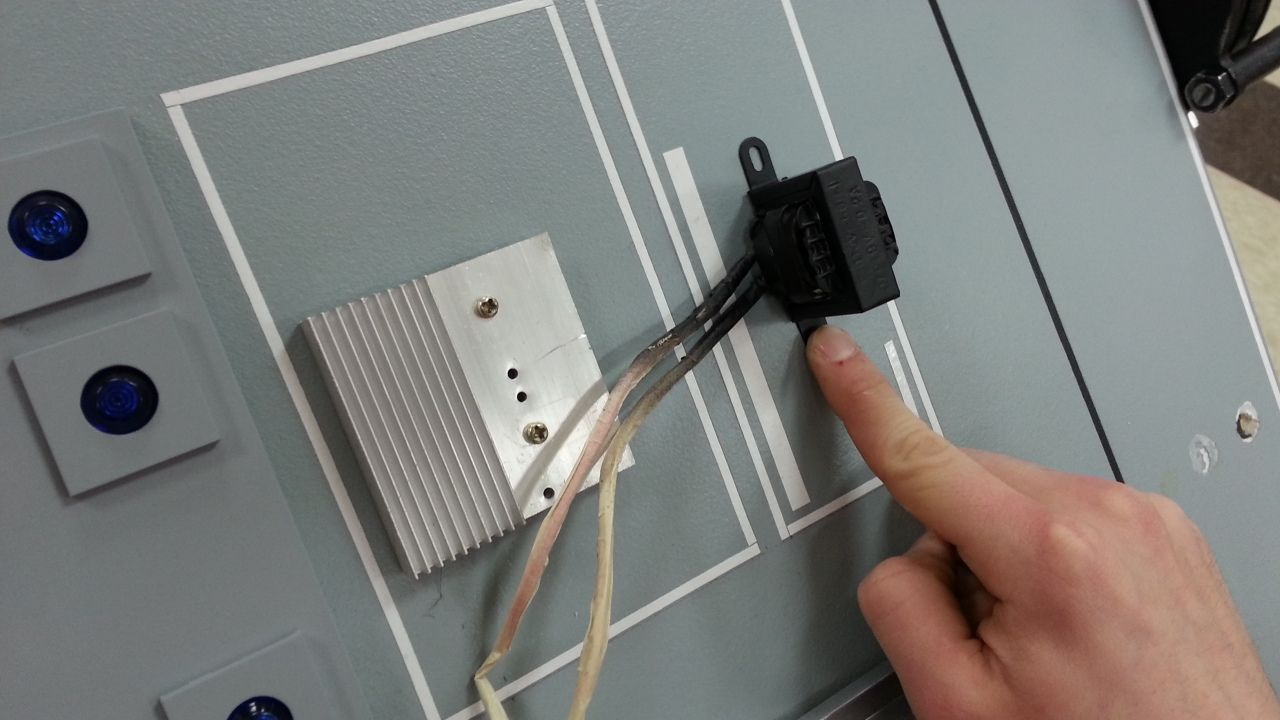
Dan then showed up and got to work on the first of many phases of the lighting... Let's see if these lights actually work?
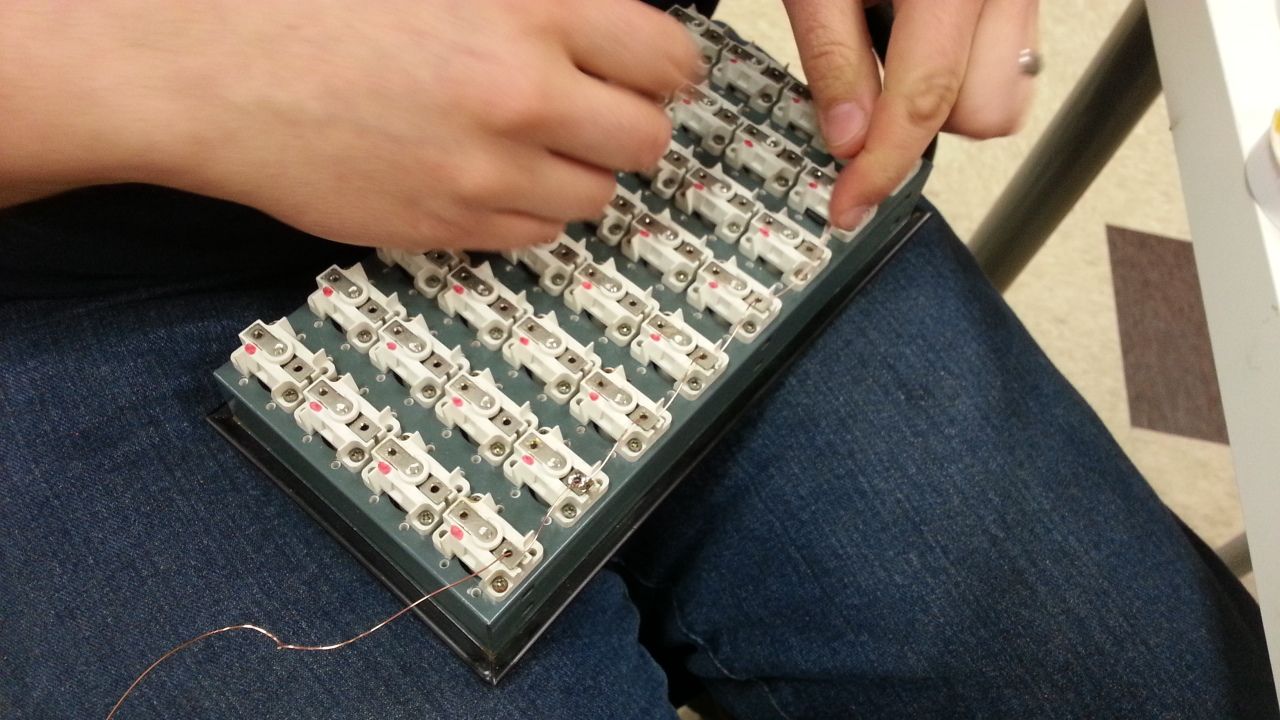
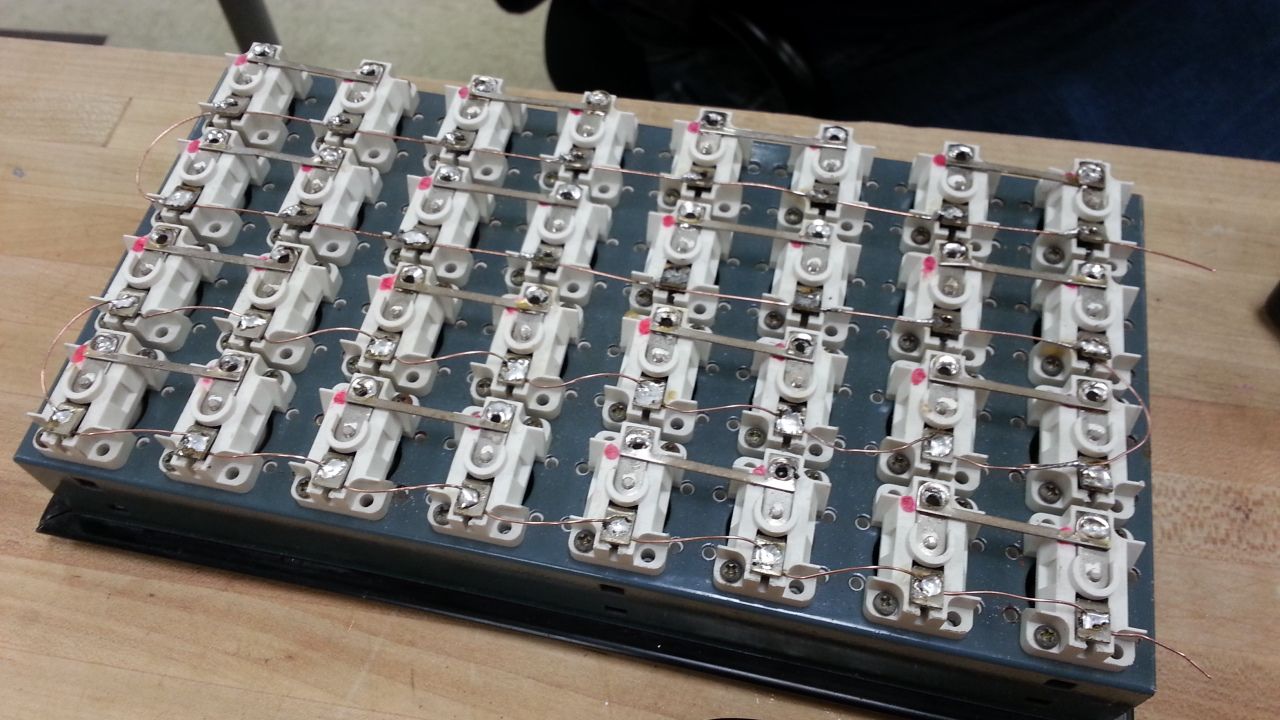
We removed all the unnecessary parts of the button panel and Dan got to work with the soldering iron
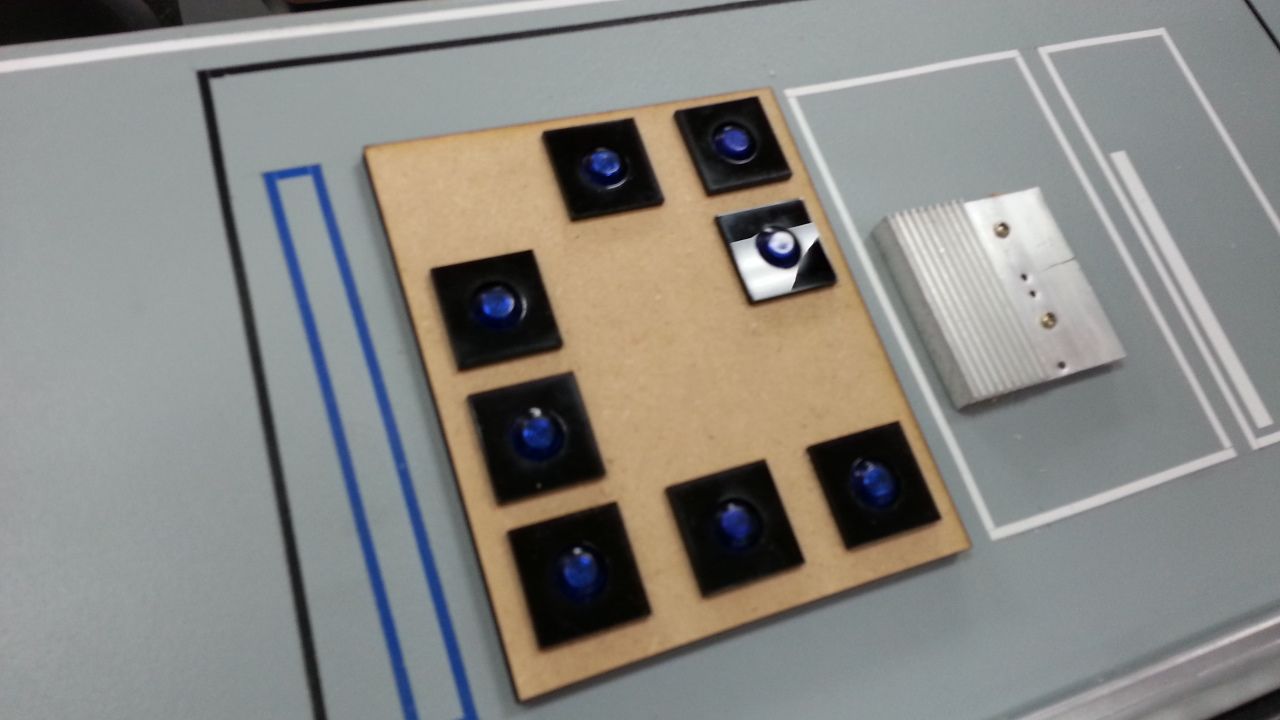
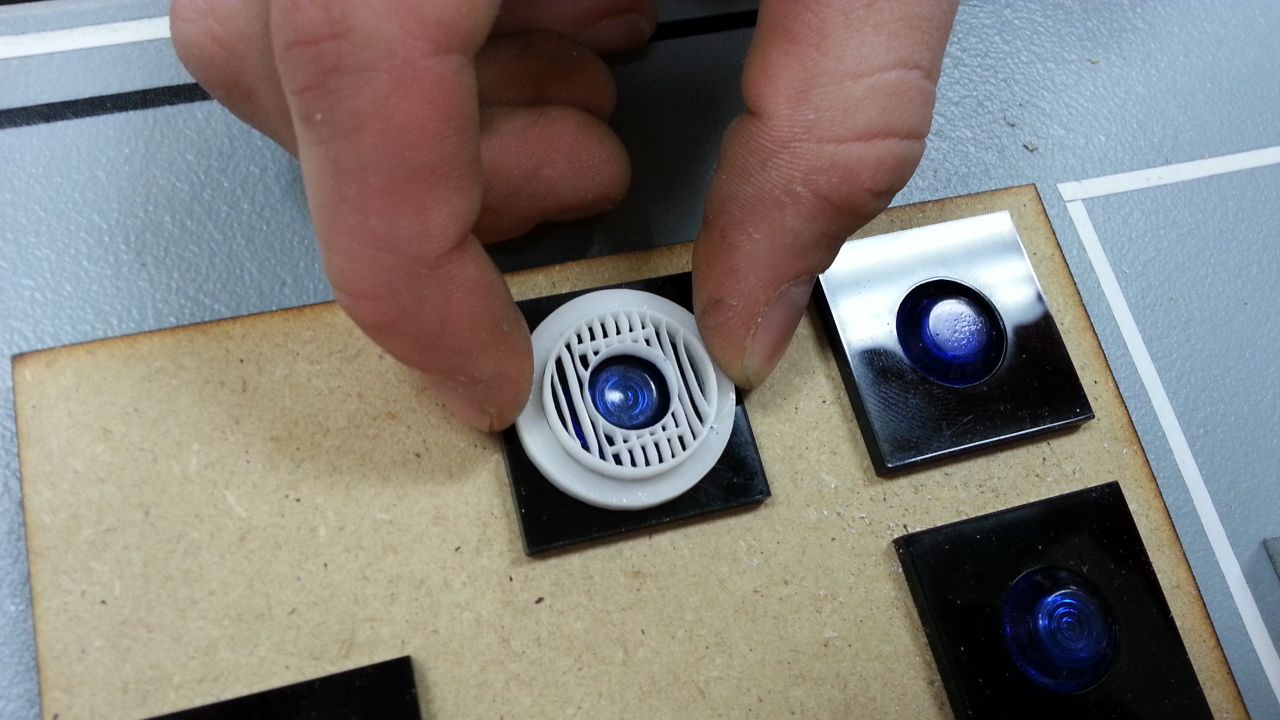
I then found the perfect button for the nav screen!
I then switched gears and worked on the front panel greeblie - needs black paint
Mike found another greeblie to add...
Trying out different positions
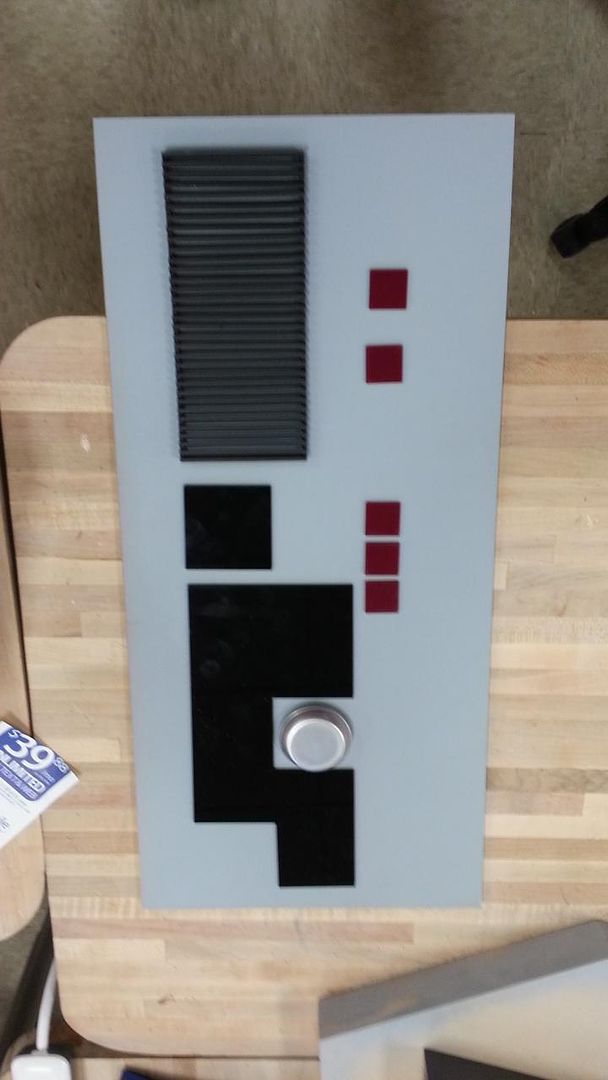
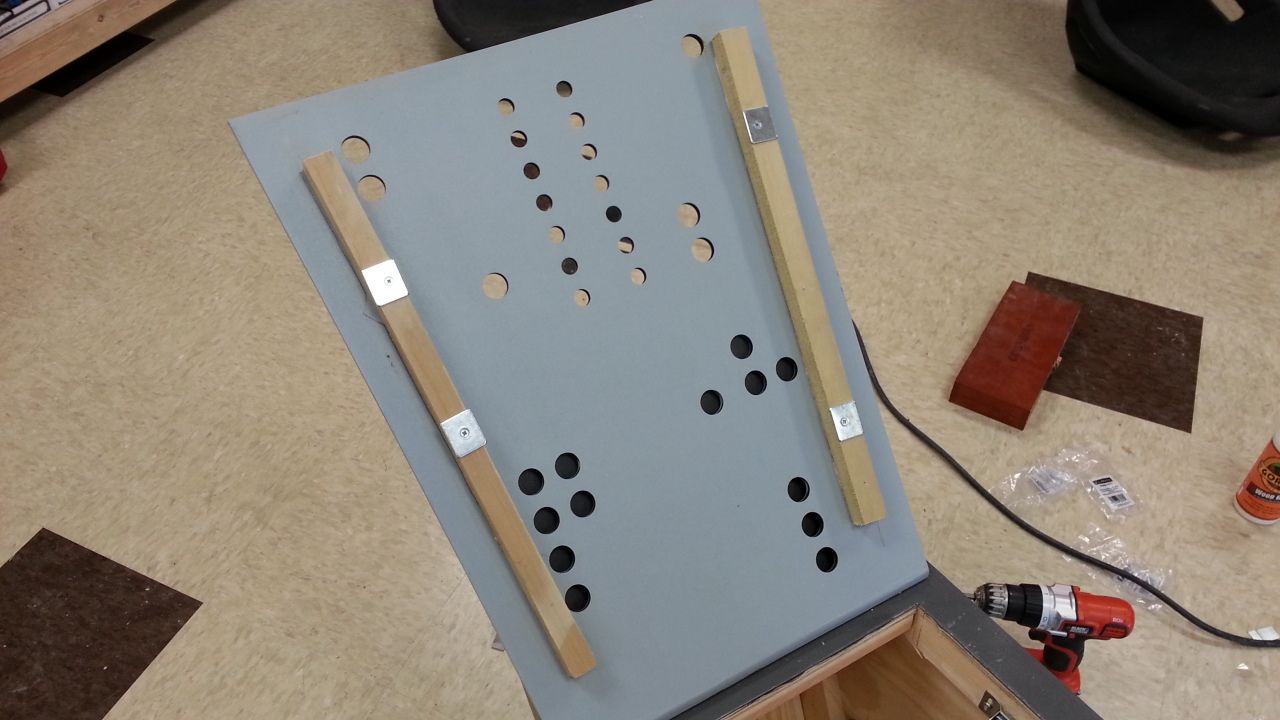
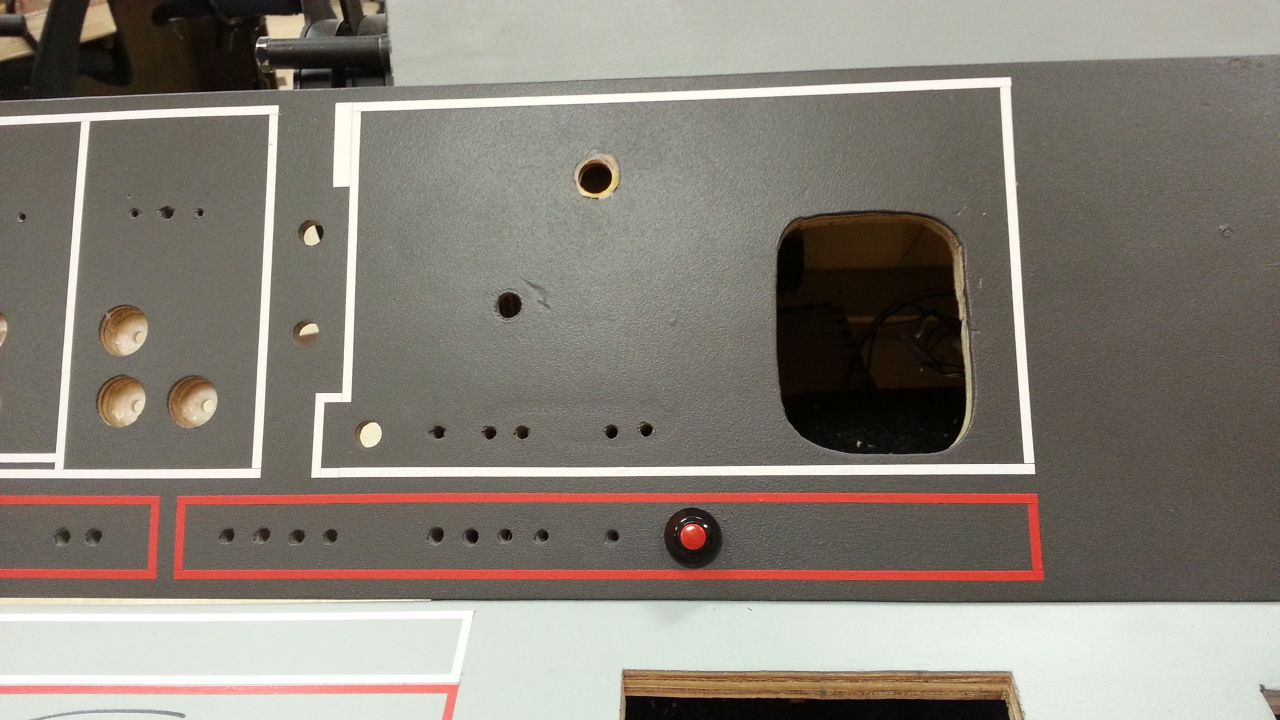
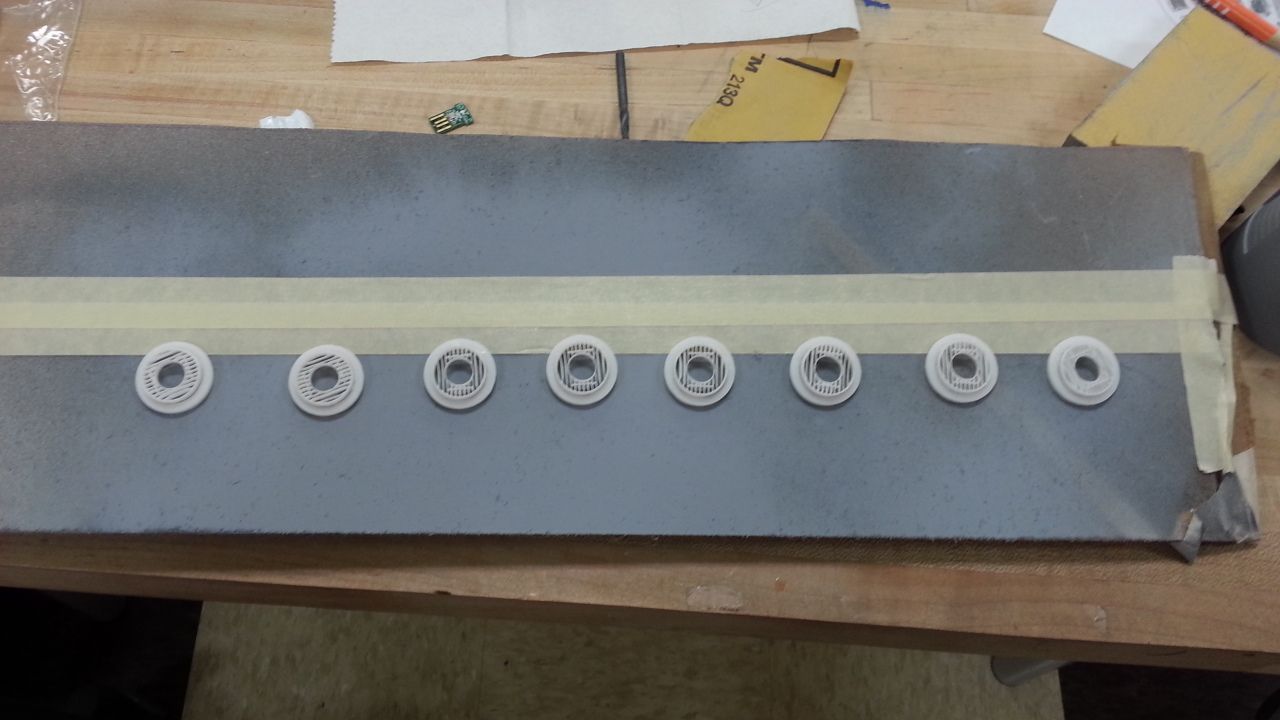
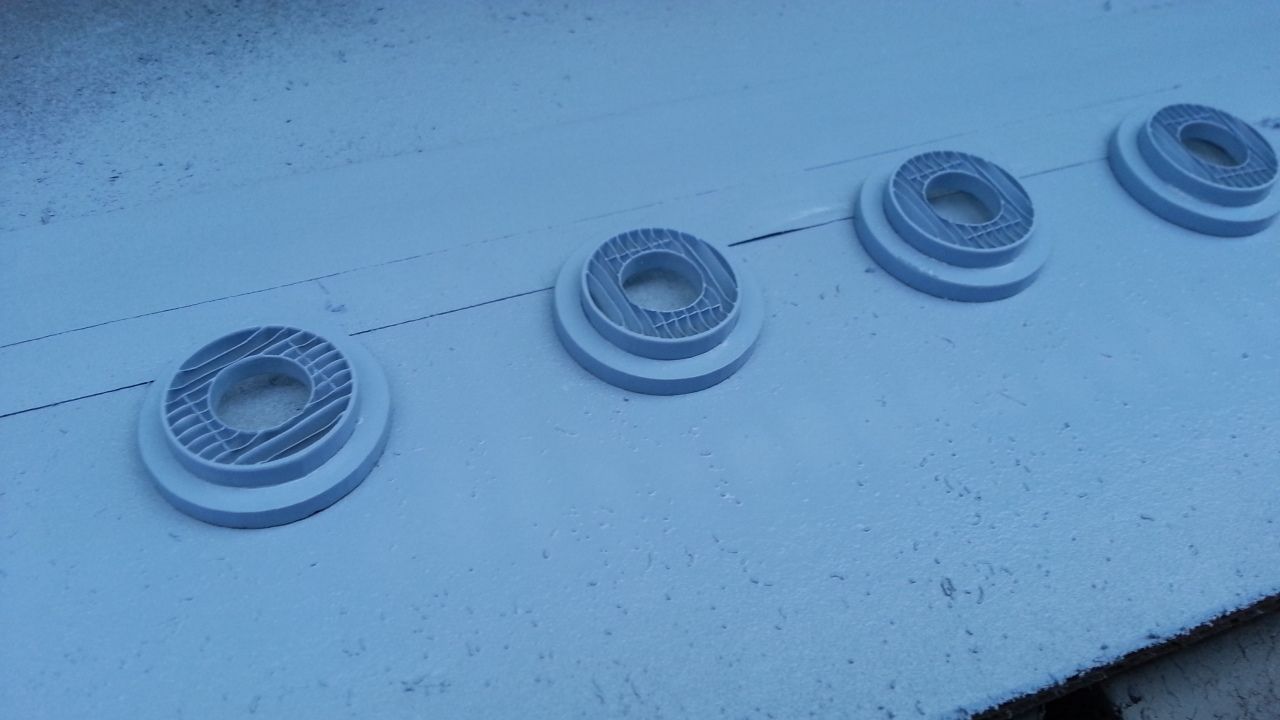
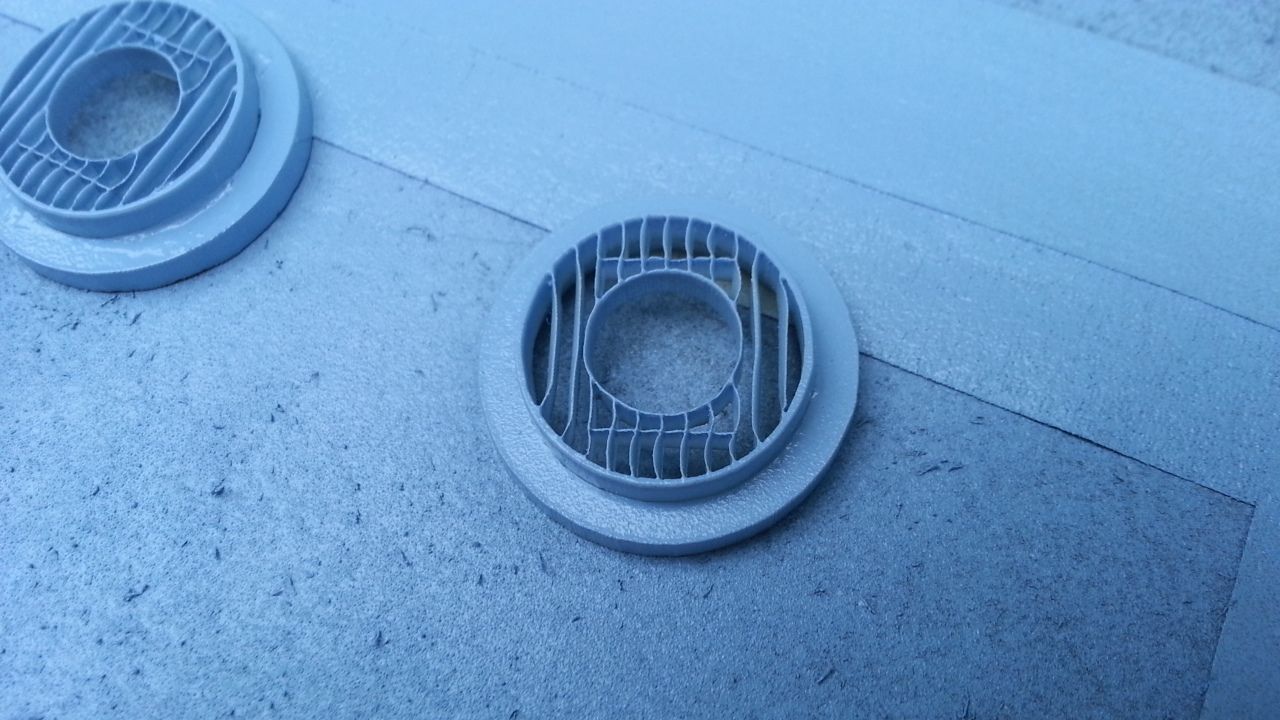
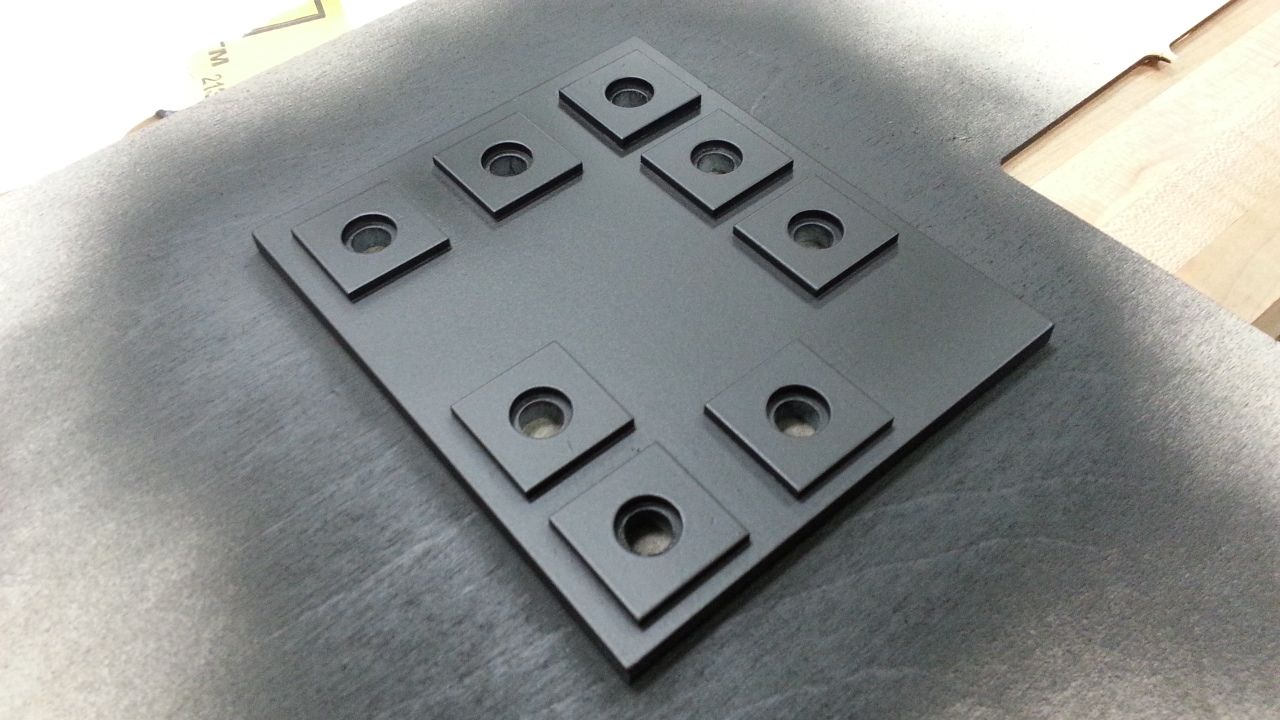
Back to this panel... As I mentioned, these little vents will be painted light blue
I love the laser cutter!
MORE to follow!
Great day at the lab! When I arrived I found Mike had begun 3D printing one of the two armrest lever greeblies (based on Starkiller's original 3D model) with the NEW 3D pinter
The print took approx. 2-2.5 hours
All the flash has been removed
Against the body
Mike was also in the middle of creating what I call the "Easy Bake Oven". Basically, you put your 3D print inside the box with acetone and a heat source. The vapors from the acetone slowly melts the 3D print surface making it nice and smooth - referred to as "vapor polishing".
Note the heat gun at the rear bottom
Mike then laser cut two 1/4" clear acrylic spacers for the lever. I'm going to leave them clear - I LOVE the look!
All we need now is a knob
During all this excitement I was able to solve the paint issue (whether I actually solved it or not remains a mystery). I applied several layers of satin clear and that removed the tacky feeling and hardened the paint
I then applied a few more coats of paint to the armrest panel... where my shirt caught the edge of the panel and it hit the floor right on one of the corners...
SQUISH! I loaded the bent corner with wood glue and clamped in place - worked like a charm
Added another coat of paint to the console - I will then add a coat of satin clear
Dan then showed up and got to work on the first of many phases of the lighting... Let's see if these lights actually work?
We removed all the unnecessary parts of the button panel and Dan got to work with the soldering iron
I then found the perfect button for the nav screen!
I then switched gears and worked on the front panel greeblie - needs black paint
Mike found another greeblie to add...
Trying out different positions
Back to this panel... As I mentioned, these little vents will be painted light blue
I love the laser cutter!
MORE to follow!
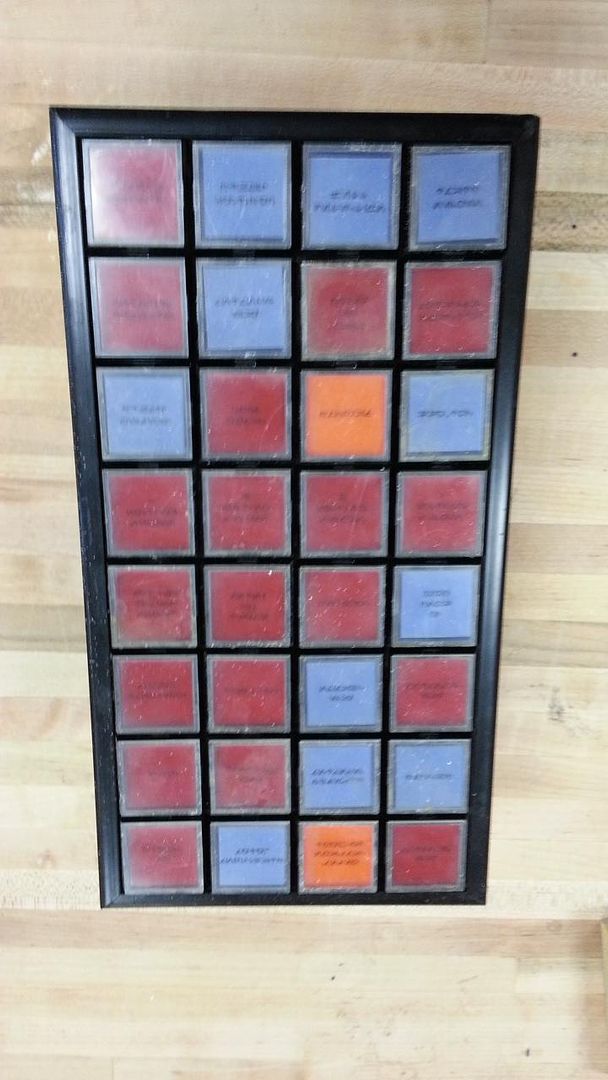
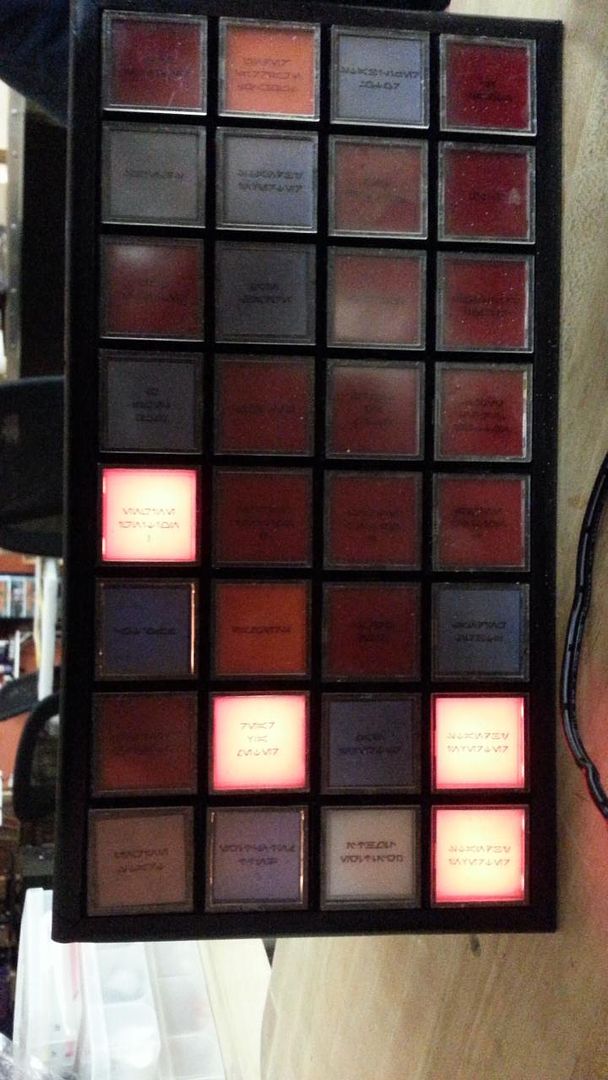
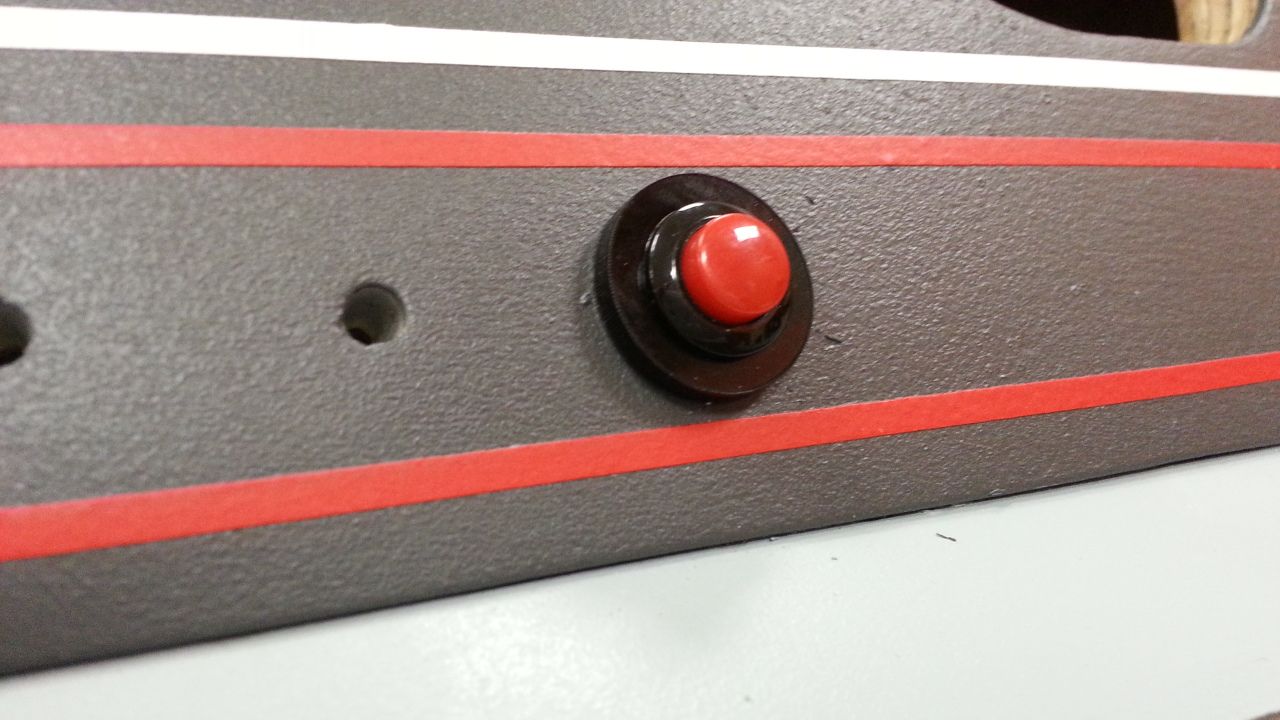
Hi Gang,
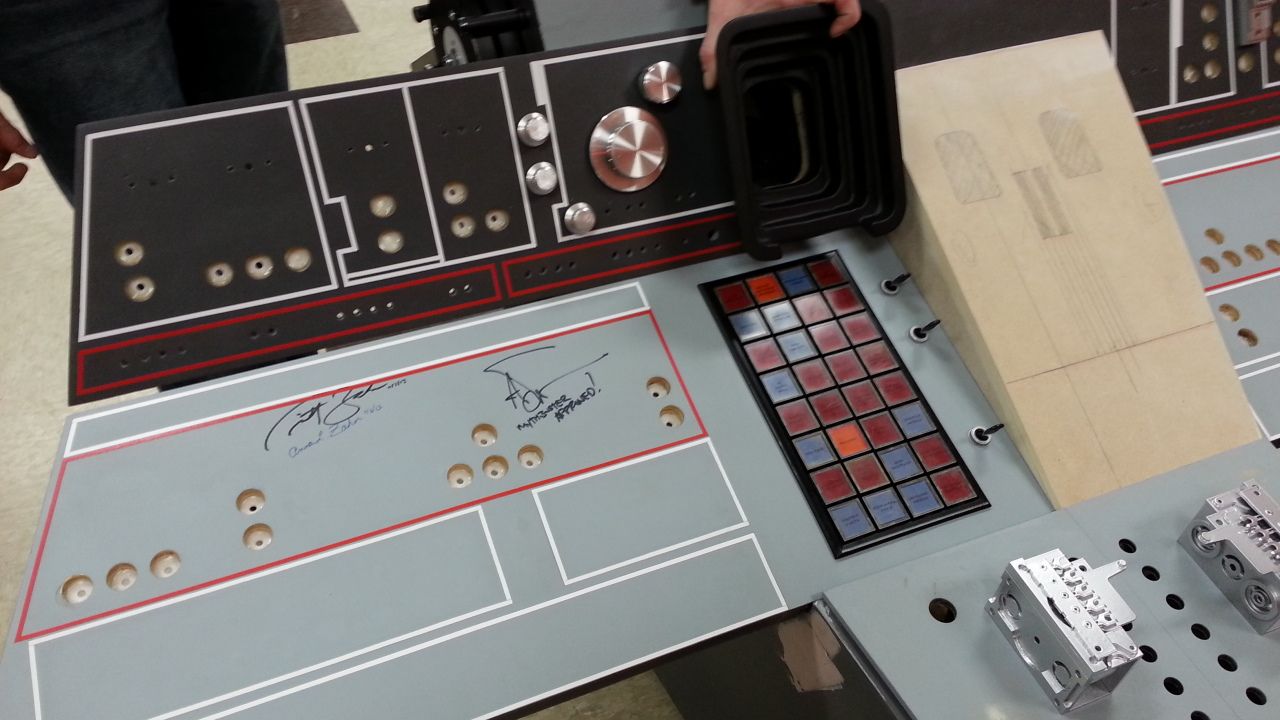
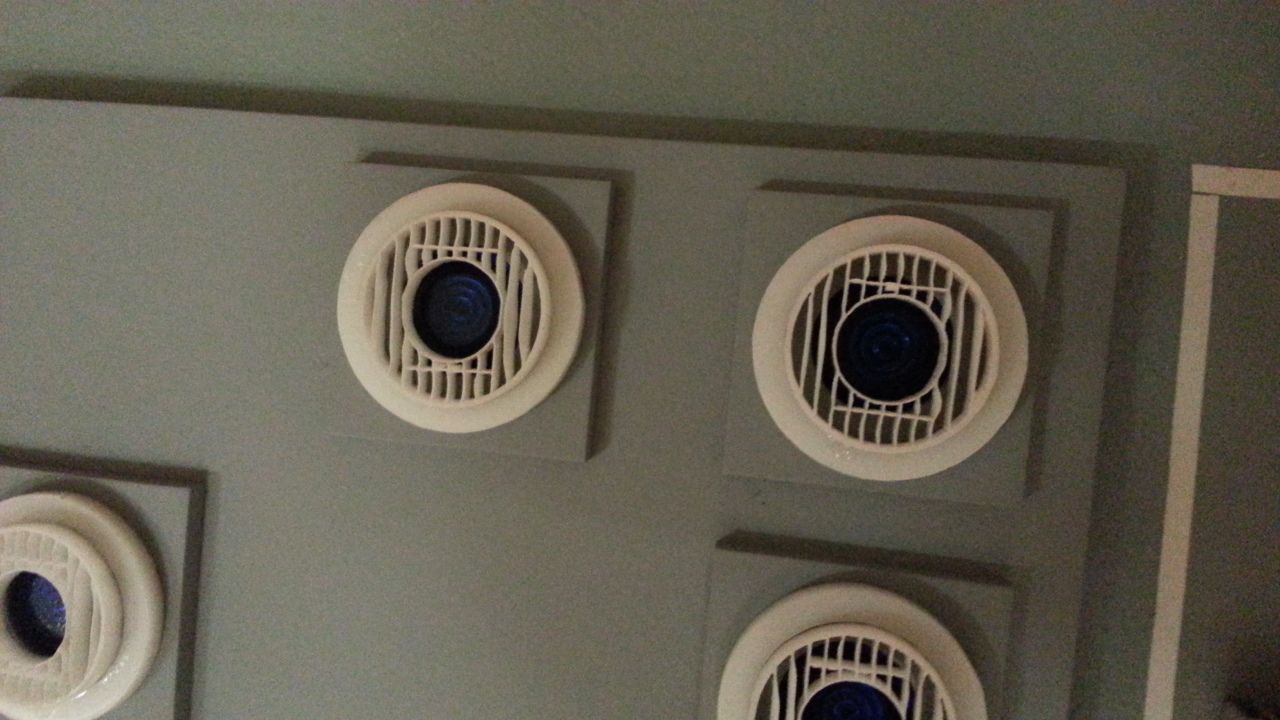
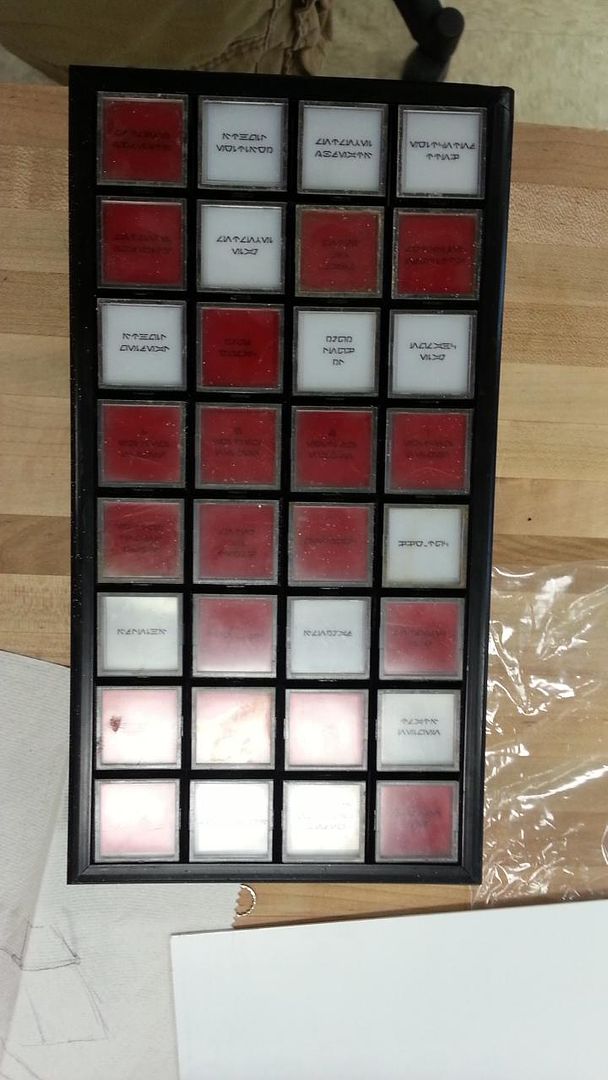
The new buttons are here...
The new buttons are here...
tehfailsafe
New Member
So awesome!
Any plans to weather it up a bit? Almost seems like it just came off the lot!
Any plans to weather it up a bit? Almost seems like it just came off the lot!
red4
Sr Member
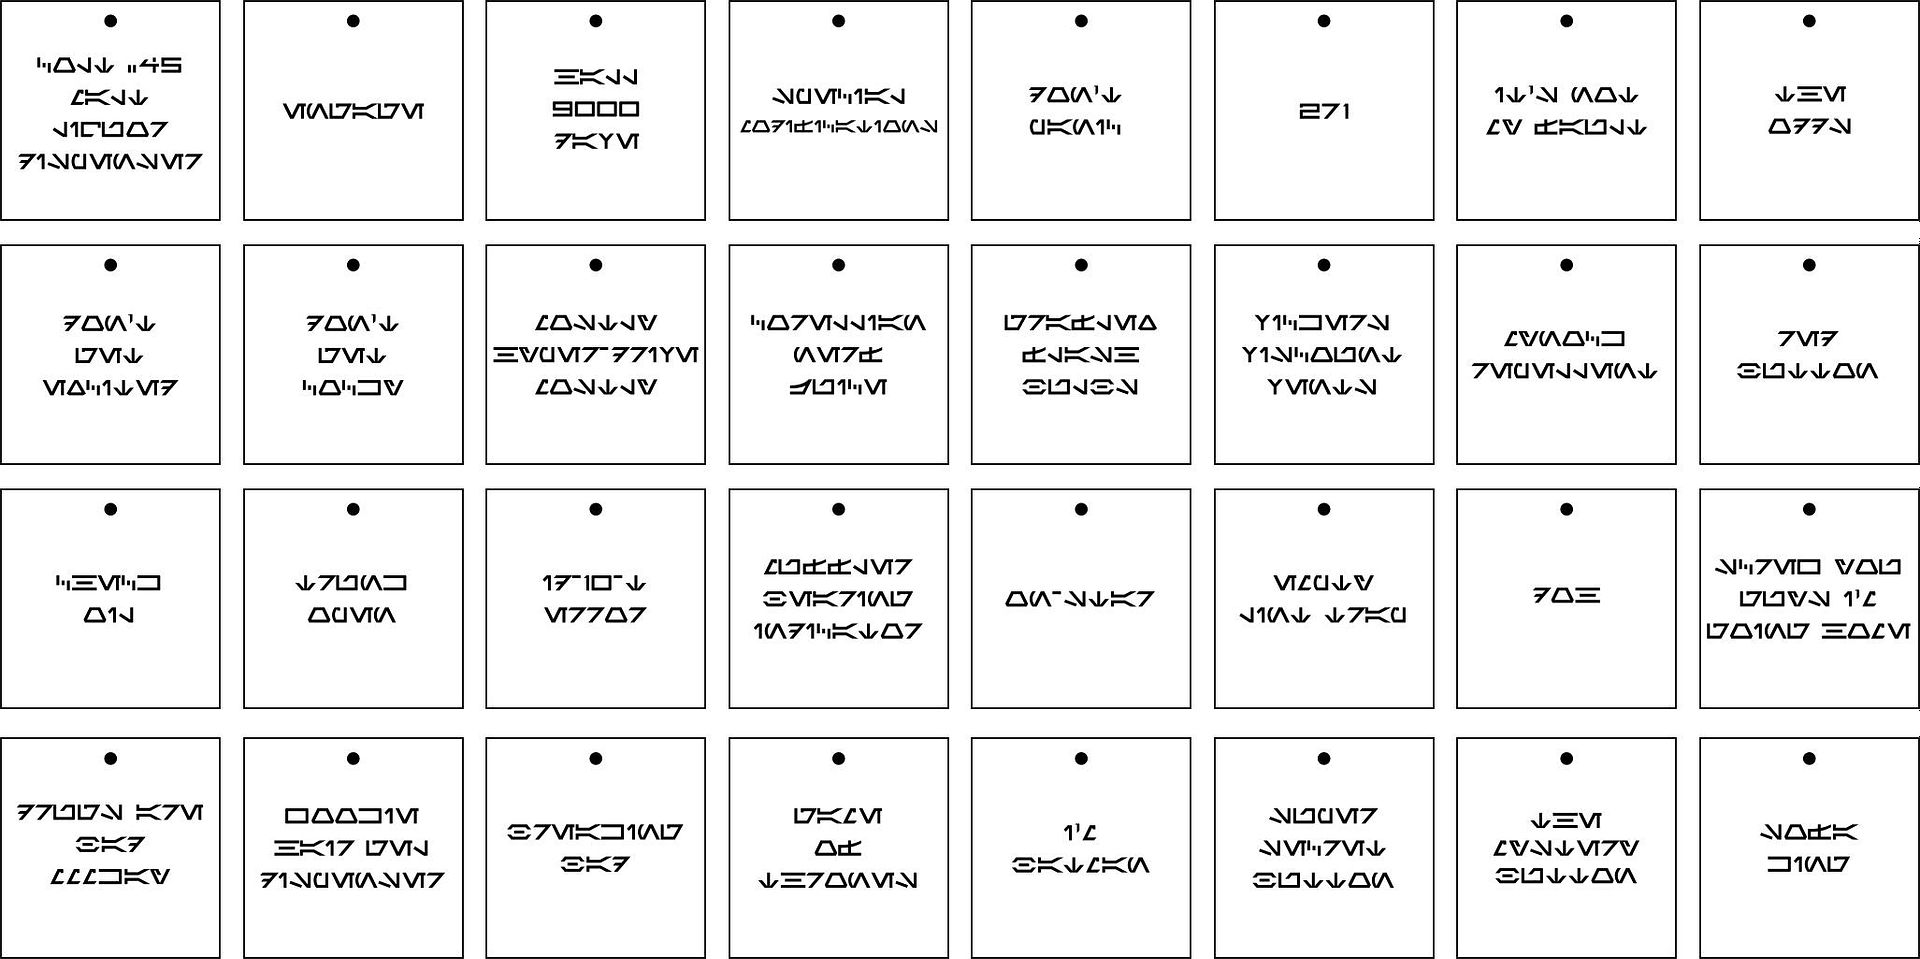
I can't read Aurebesh worth a damn. Anyone care to translate? I've already got an Aurebesh to Roman letters alphabet chart, so I'll get cracking.
Hal is misspelled as Hall.
I'm exhausted after 10 translations.
Colt .45 Malt (something, I stopped here)
Engage
Hall 9000 Dave (should be Hal)
Special Modifications
Don't Panic
It's not my fault
The Odds
Don't get excited
Don't get cocky
Mostly Hyper-drive Mostly
Corellian Nerf Juice
Hal is misspelled as Hall.
I'm exhausted after 10 translations.
Colt .45 Malt (something, I stopped here)
Engage
Hall 9000 Dave (should be Hal)
Special Modifications
Don't Panic
It's not my fault
The Odds
Don't get excited
Don't get cocky
Mostly Hyper-drive Mostly
Corellian Nerf Juice
Last edited:
Hi Gang,
GREAT DAY AT MGL!
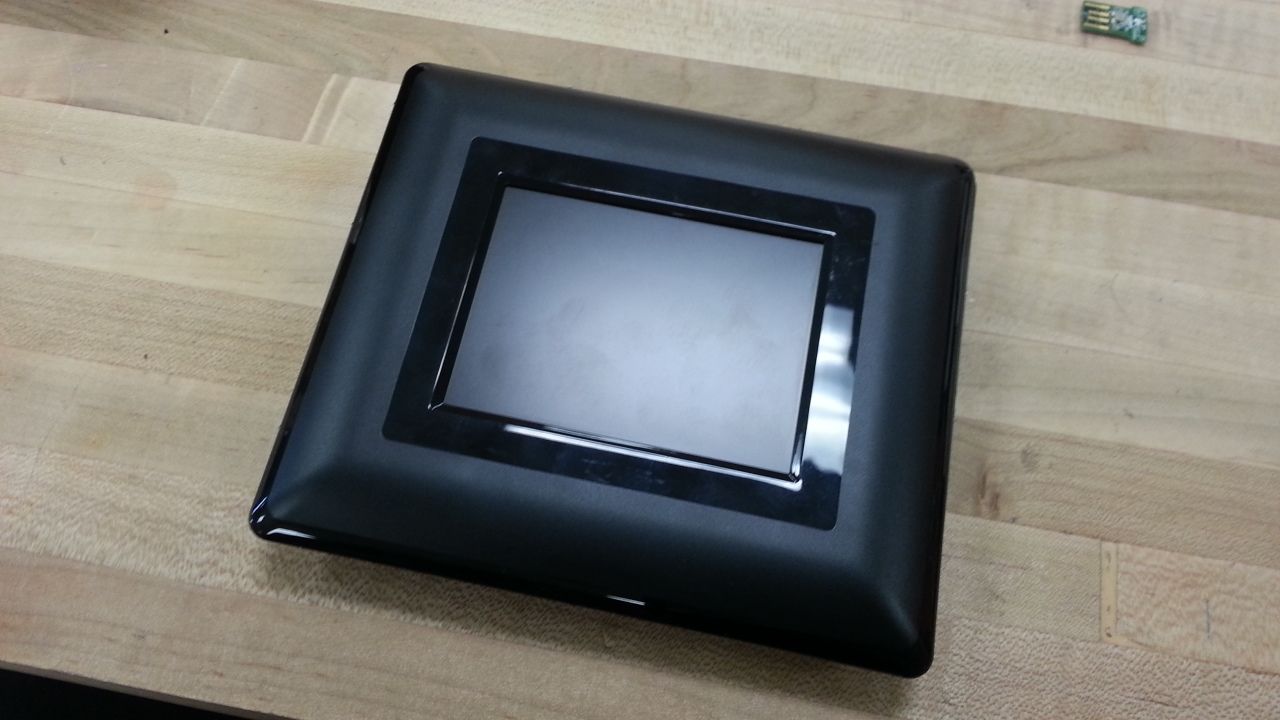
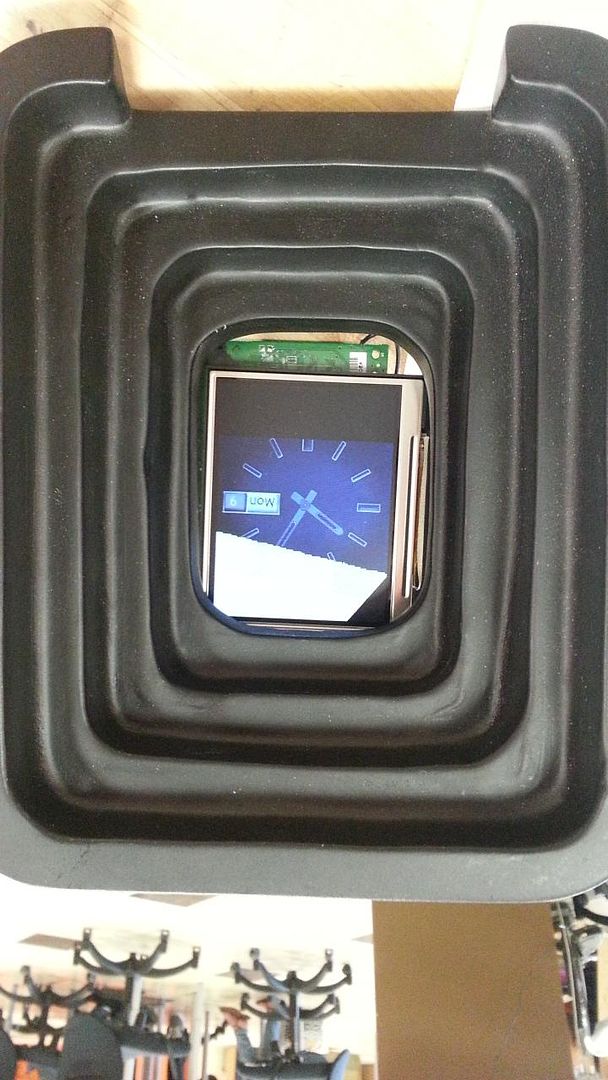
Came home to a FedEx package - a digital picture frame. Unfortunately the frame was NOT as it was described in the auction...
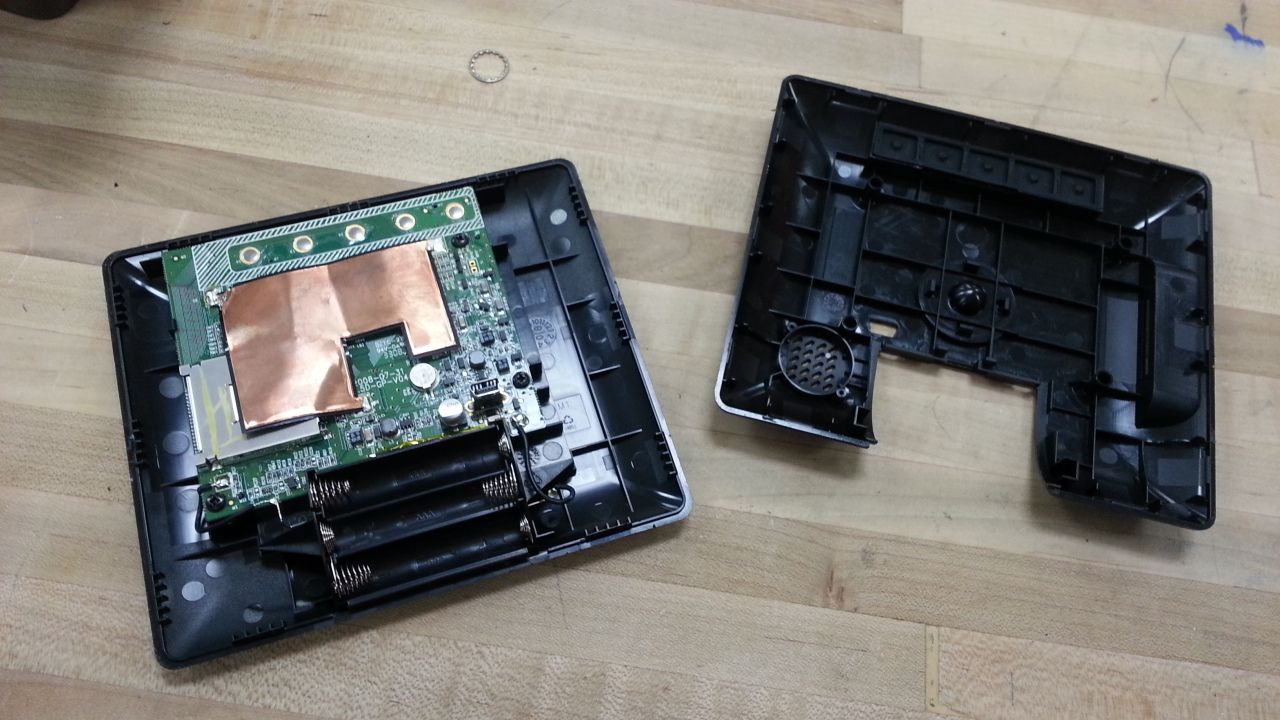
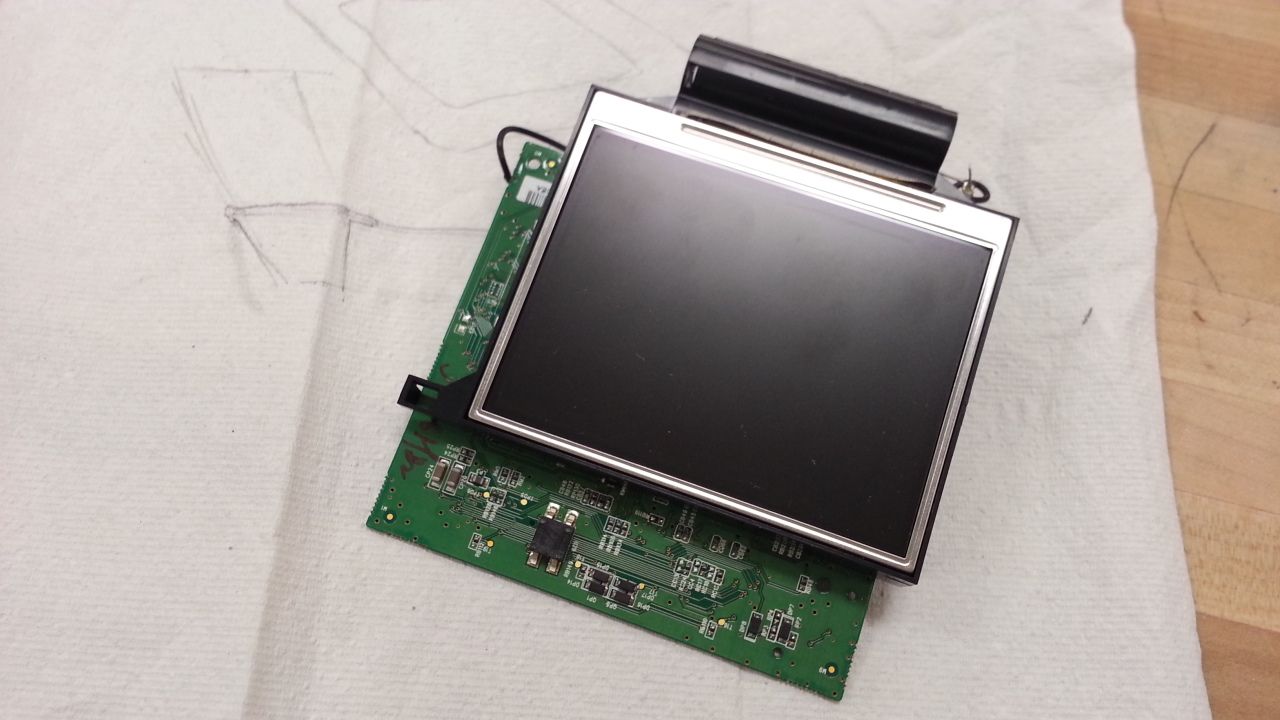
As you can see - the screen is too small so we're going to simply backlight the mattebox
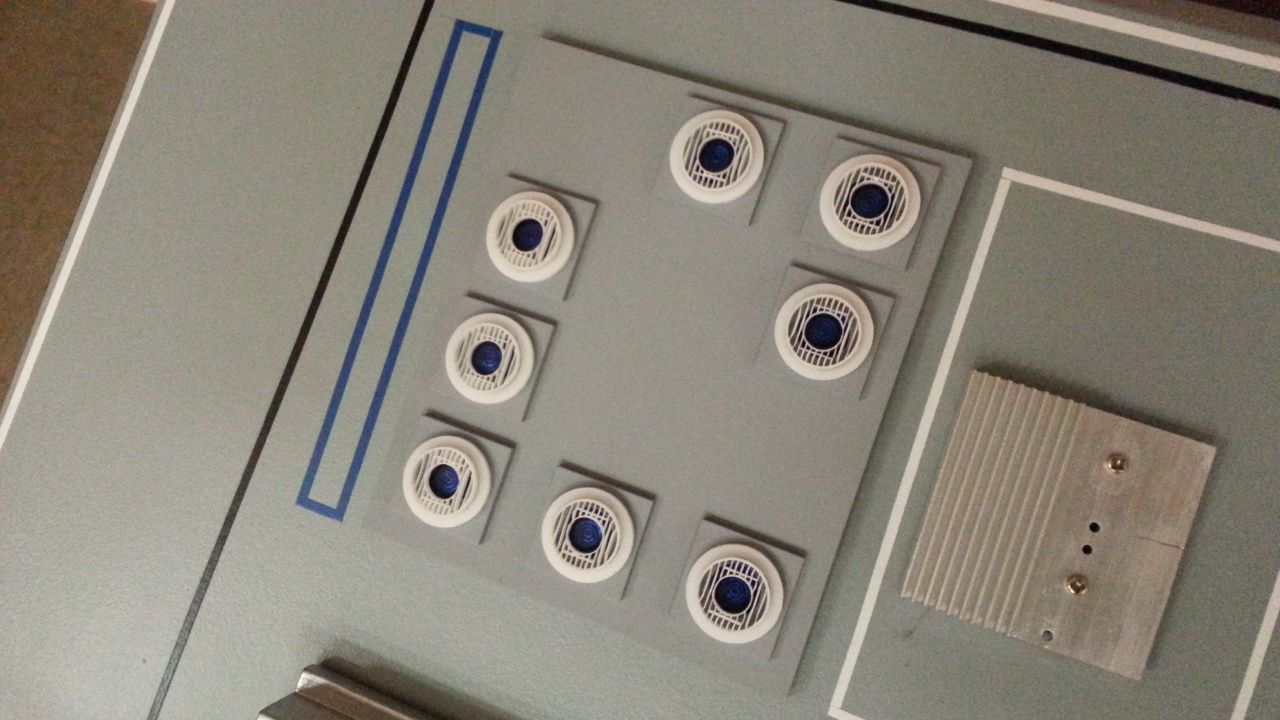
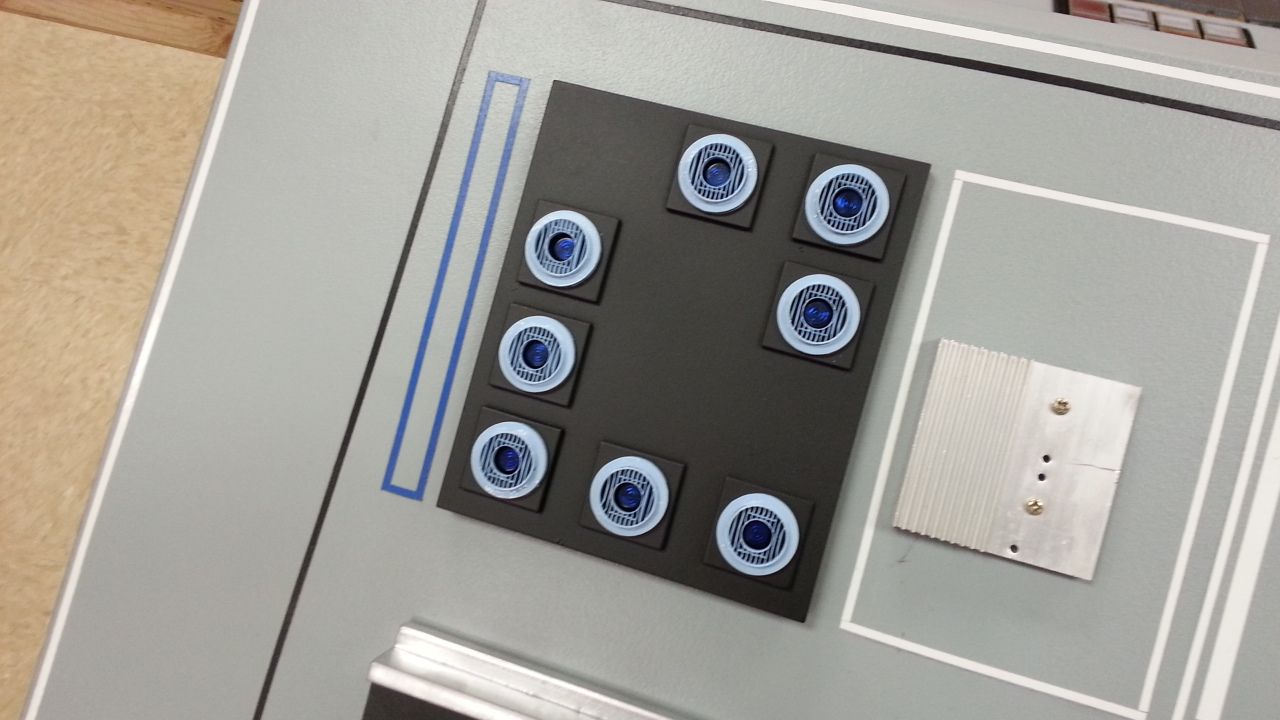
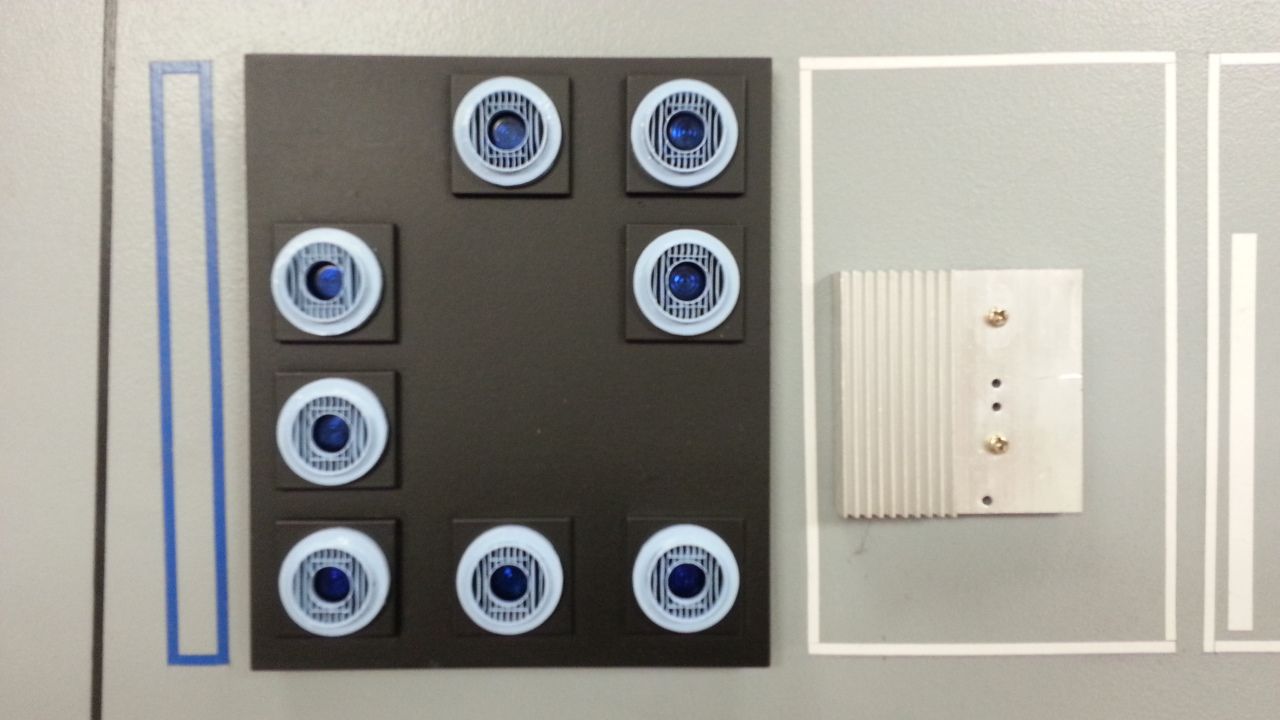
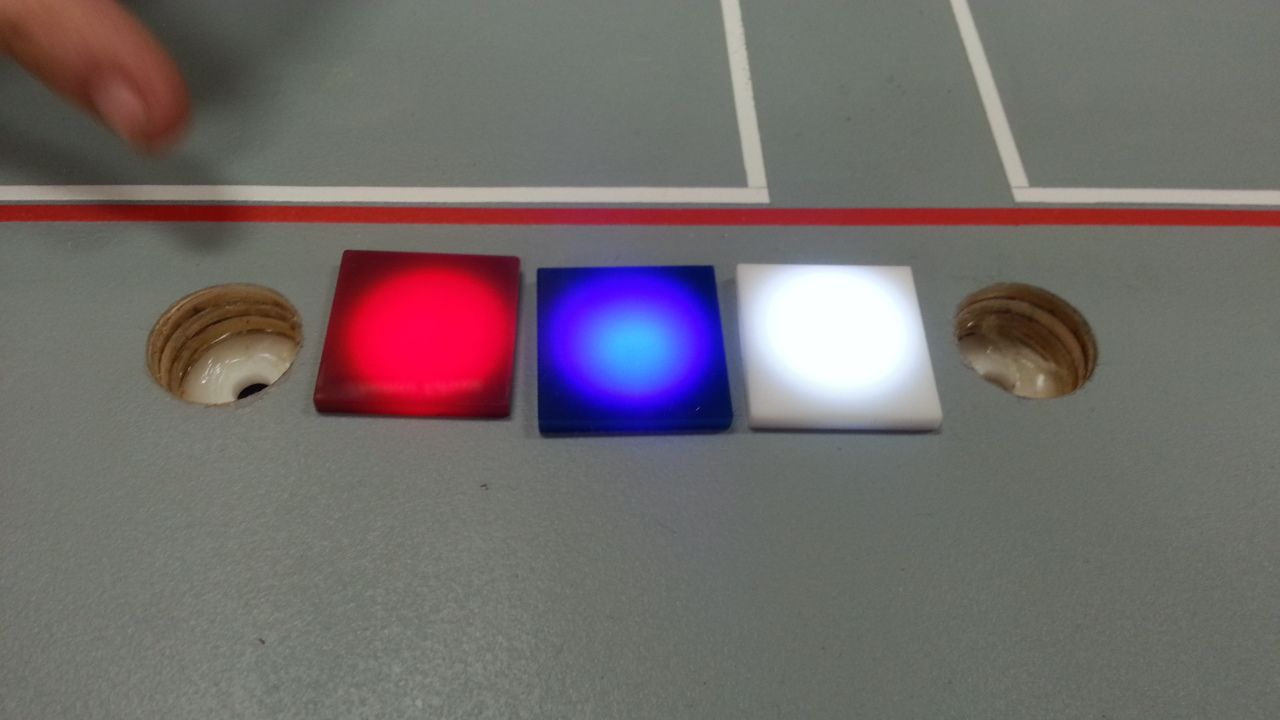
I then changed out all the blue and orange buttons for red and white. I really like it!
First of two 3D prints of the armrest lever all primed and filled and ready for paint? maybe?

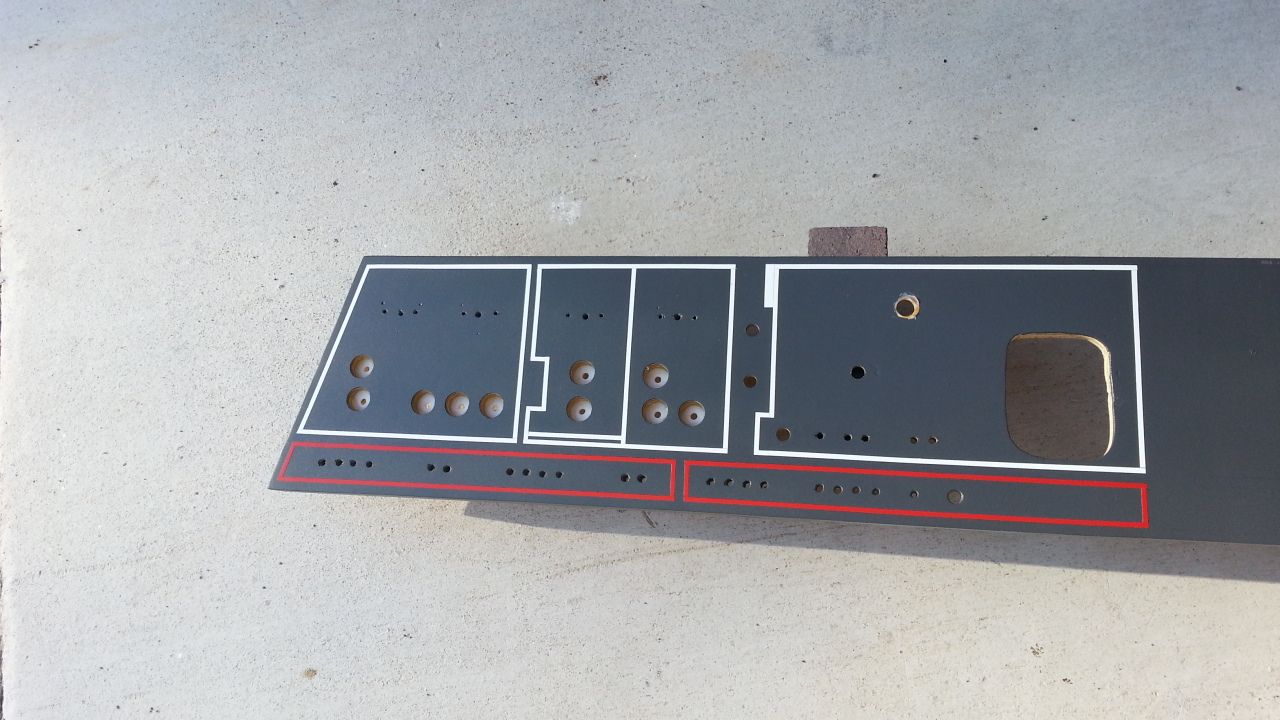
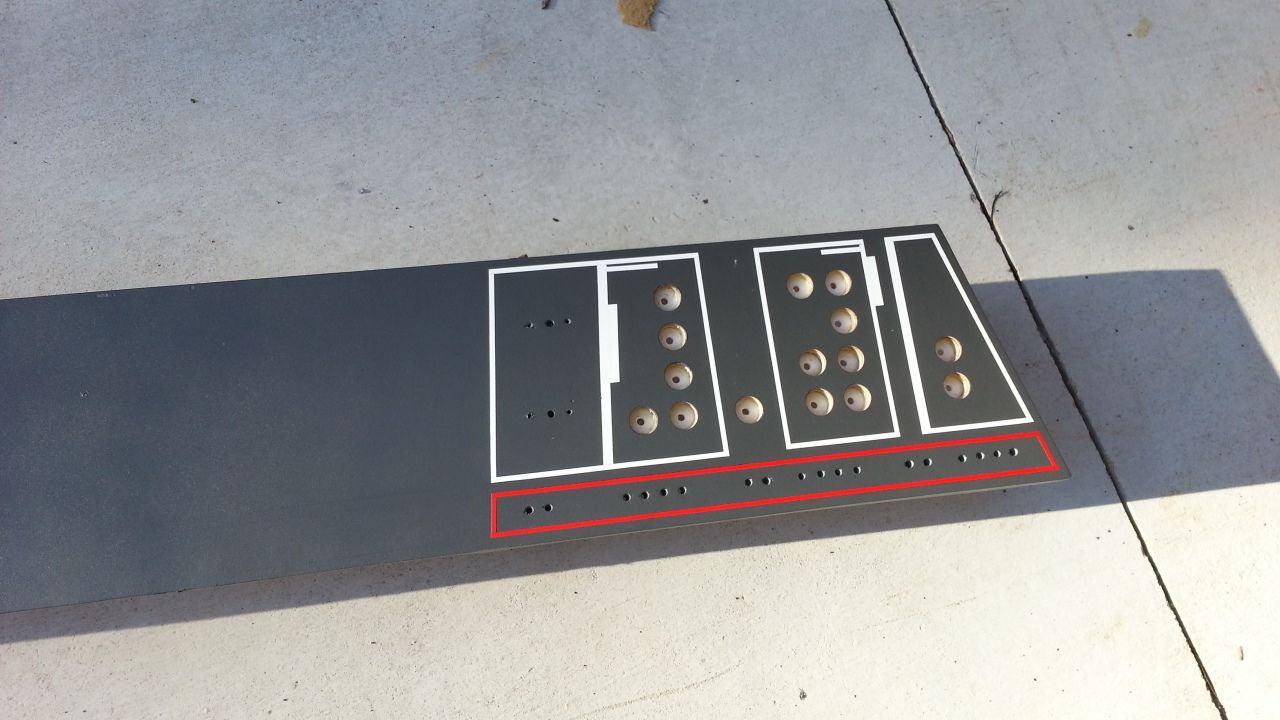
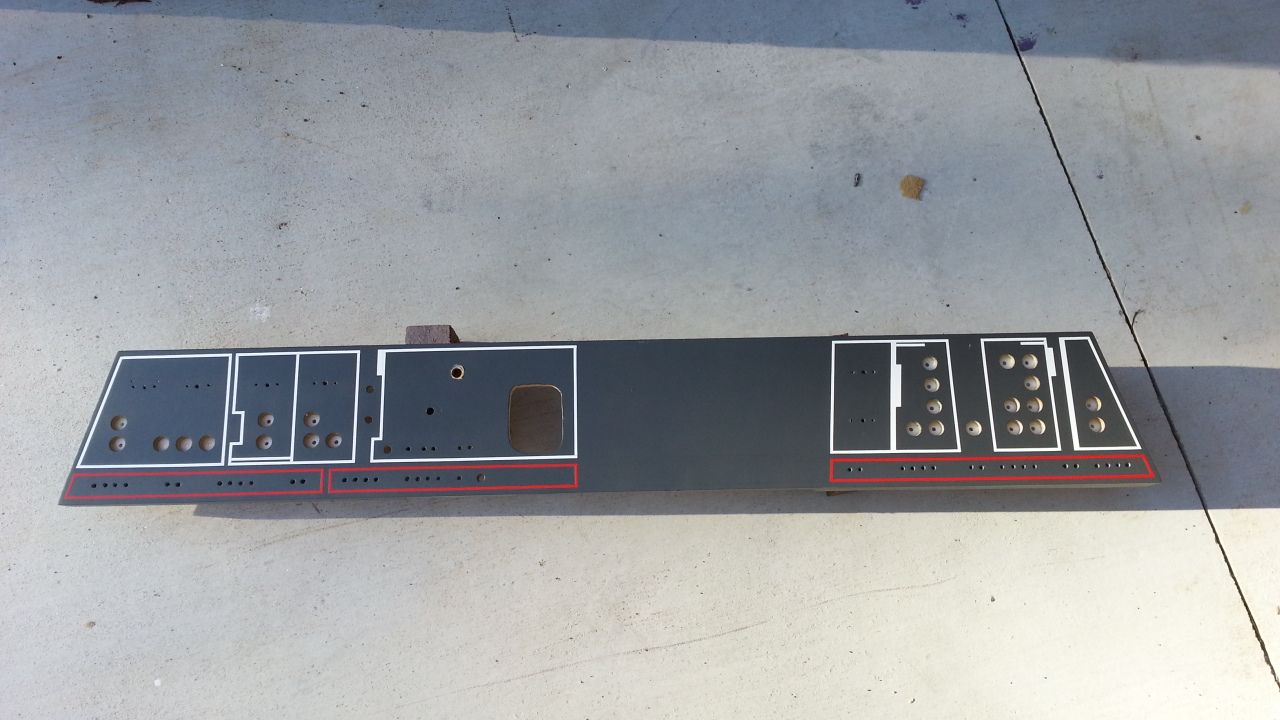
Work continues on the panels

And greeblies
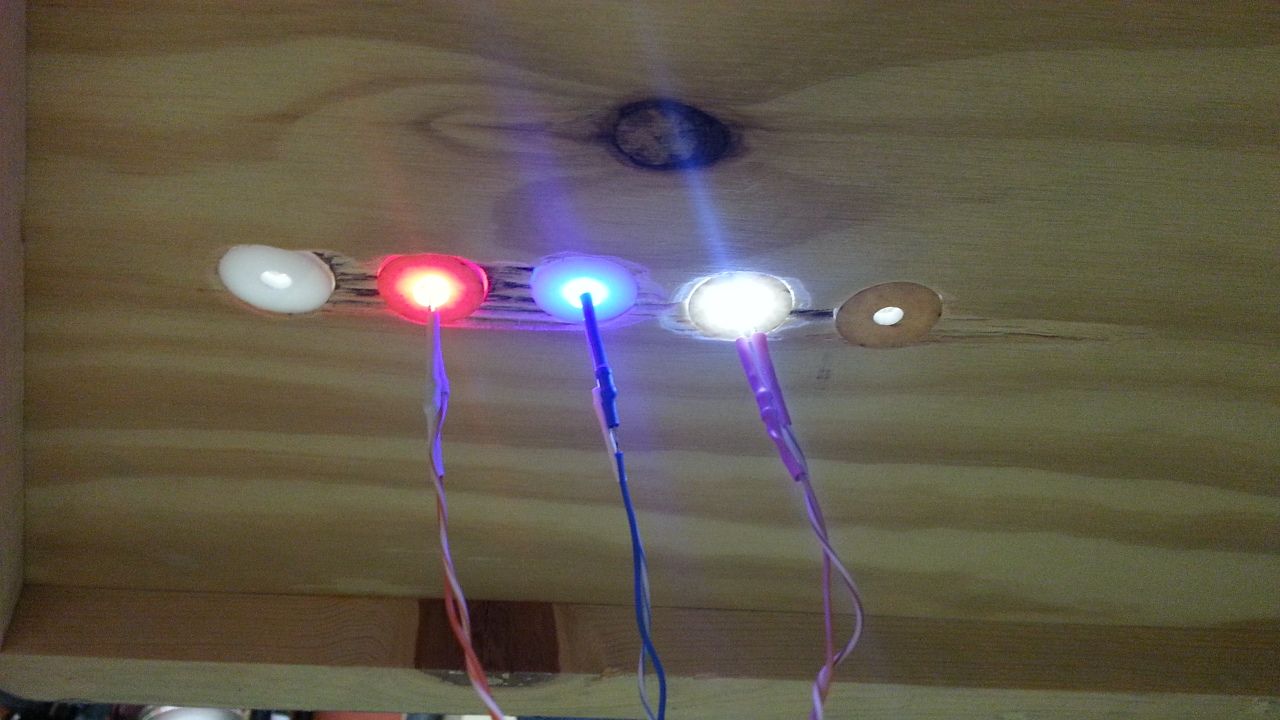
LED test

More LEDs (the actual LEDs are going in!)
HMMMM... what the heck is this?
And this?
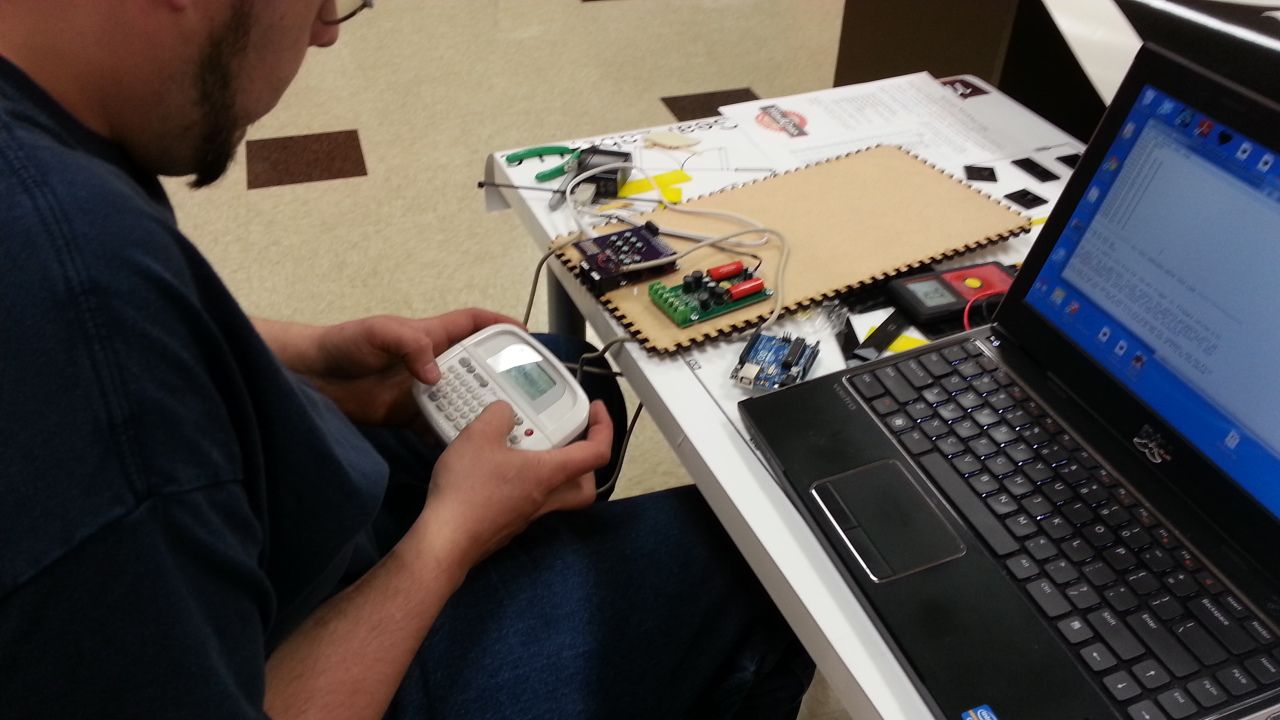
VIDEOS of Dan explaining the new sound board with a little special something... We had a few interruptions... Hope you guys like the Vids!!!!
Part 1 - it s big file so please be patient
Part 2
LOTS MORE TO FOLLOW!
GREAT DAY AT MGL!
Came home to a FedEx package - a digital picture frame. Unfortunately the frame was NOT as it was described in the auction...
As you can see - the screen is too small so we're going to simply backlight the mattebox
I then changed out all the blue and orange buttons for red and white. I really like it!
First of two 3D prints of the armrest lever all primed and filled and ready for paint? maybe?
Work continues on the panels
And greeblies
LED test
More LEDs (the actual LEDs are going in!)
HMMMM... what the heck is this?
And this?
VIDEOS of Dan explaining the new sound board with a little special something... We had a few interruptions...
Hope you guys like the Vids!!!!Part 1 - it s big file so please be patient
Part 2
LOTS MORE TO FOLLOW!
Smeeon
New Member
I should really introduce myself to everyone here. I'm Daniel "smeeon" Valdez, I've been recruited onto this project to lead the electronics, sounds and animation of the Falcon. You saw me in the above video and previously when I Rick Rolled you all mwahaha *cough*
First off let me say what an honor it is to work on such a prestigious prop. It really is a dream for someone like me who grew up on Star Wars and inspired by my older brother's Star Wars model collection that he painted with great detail, one of which was an incomplete falcon in a box that I always wanted to finish for him. Well I've taken the next step and went straight to the big league lol.
I do smart home automation by trade and have been fabricating props and costumes for 10 years now. I work locally with 2 Story Props on collaborated projects often and you will probably hear me talk about them from time to time. My partner in crime and the other half of my prop creation posse is Jake Polatty who you might see in videos and hear me talking about. He is my close friend and programmer of arduinos and other micro-processors. He's the one that got my Admiral Ackbar animatronic costume to blink based on input from my face while wearing it. My wonderful wife got me into the costuming world heavily 10 years ago and you will also see her in videos or hear mention of her from time to time as her specialty is the fabric side of costuming and her Muppets that she carefully crafts with the greatest details. So with me on this project you get my whole crew and without them I couldn't do what I do best.
For more of my projects check out my youtube channel Daniel Valdez - YouTube or my website which I'm absolutely terrible about updating Smeeon Fabrications - Welcome
Getting to make the falcon live and breathe through practical effects and electronic effects that the real prop never produced until post is part of why I love building and fabricating things and being part of a fantastic community.
First off let me say what an honor it is to work on such a prestigious prop. It really is a dream for someone like me who grew up on Star Wars and inspired by my older brother's Star Wars model collection that he painted with great detail, one of which was an incomplete falcon in a box that I always wanted to finish for him. Well I've taken the next step and went straight to the big league lol.
I do smart home automation by trade and have been fabricating props and costumes for 10 years now. I work locally with 2 Story Props on collaborated projects often and you will probably hear me talk about them from time to time. My partner in crime and the other half of my prop creation posse is Jake Polatty who you might see in videos and hear me talking about. He is my close friend and programmer of arduinos and other micro-processors. He's the one that got my Admiral Ackbar animatronic costume to blink based on input from my face while wearing it. My wonderful wife got me into the costuming world heavily 10 years ago and you will also see her in videos or hear mention of her from time to time as her specialty is the fabric side of costuming and her Muppets that she carefully crafts with the greatest details. So with me on this project you get my whole crew
and without them I couldn't do what I do best.For more of my projects check out my youtube channel Daniel Valdez - YouTube or my website which I'm absolutely terrible about updating Smeeon Fabrications - Welcome
Getting to make the falcon live and breathe through practical effects and electronic effects that the real prop never produced until post is part of why I love building and fabricating things and being part of a fantastic community.
purplybunny
Active Member
Loving the progress of this! Excellent work
Hi Gang,
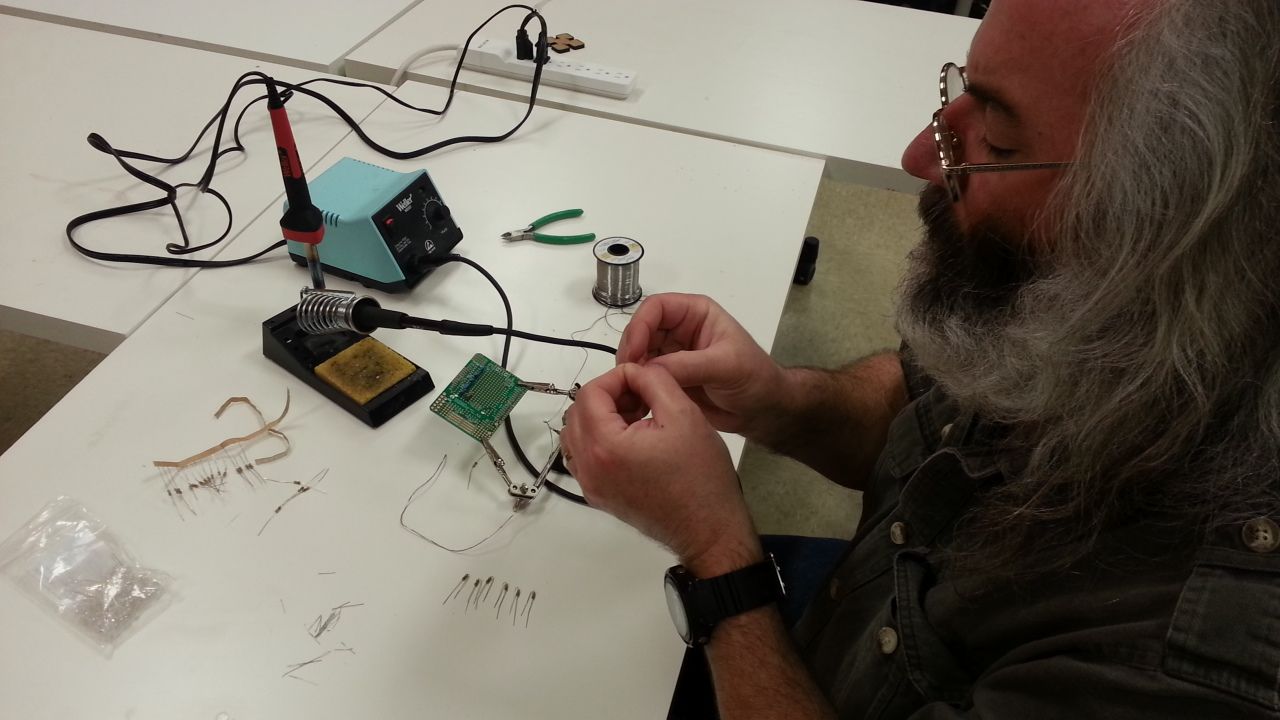
It was another BUSY night at the lab. Not too many pics but we do have a NEW vid... We also have another volunteer helping Daniel and Jake with the soldering and wiring! Enjoy!
Daniel working his MAGIC!
Mike sanding the other armrest lever greeblie
Our newest team member Doug soldering away
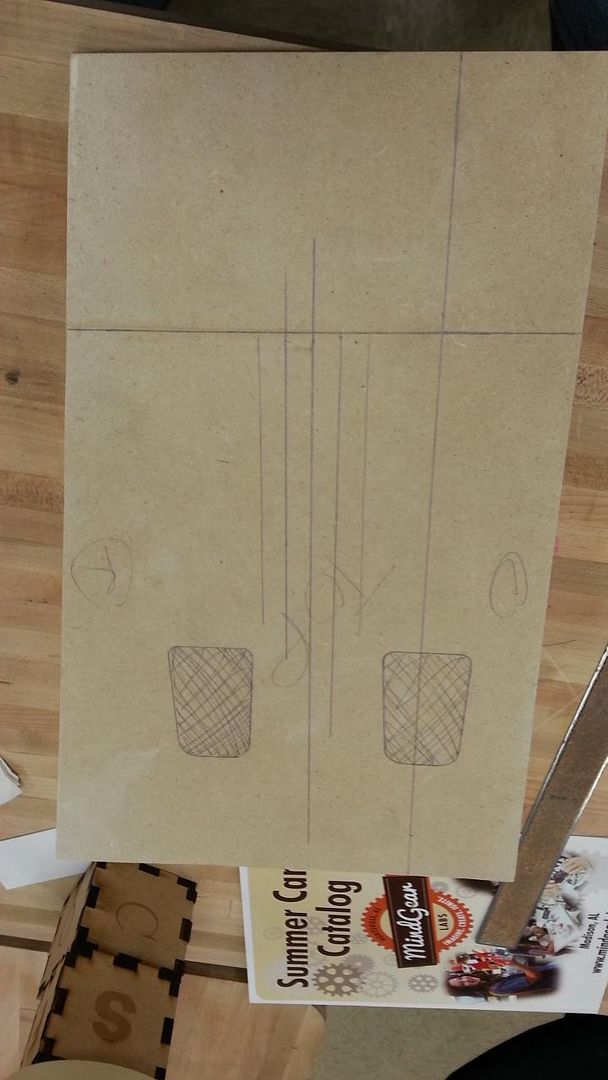
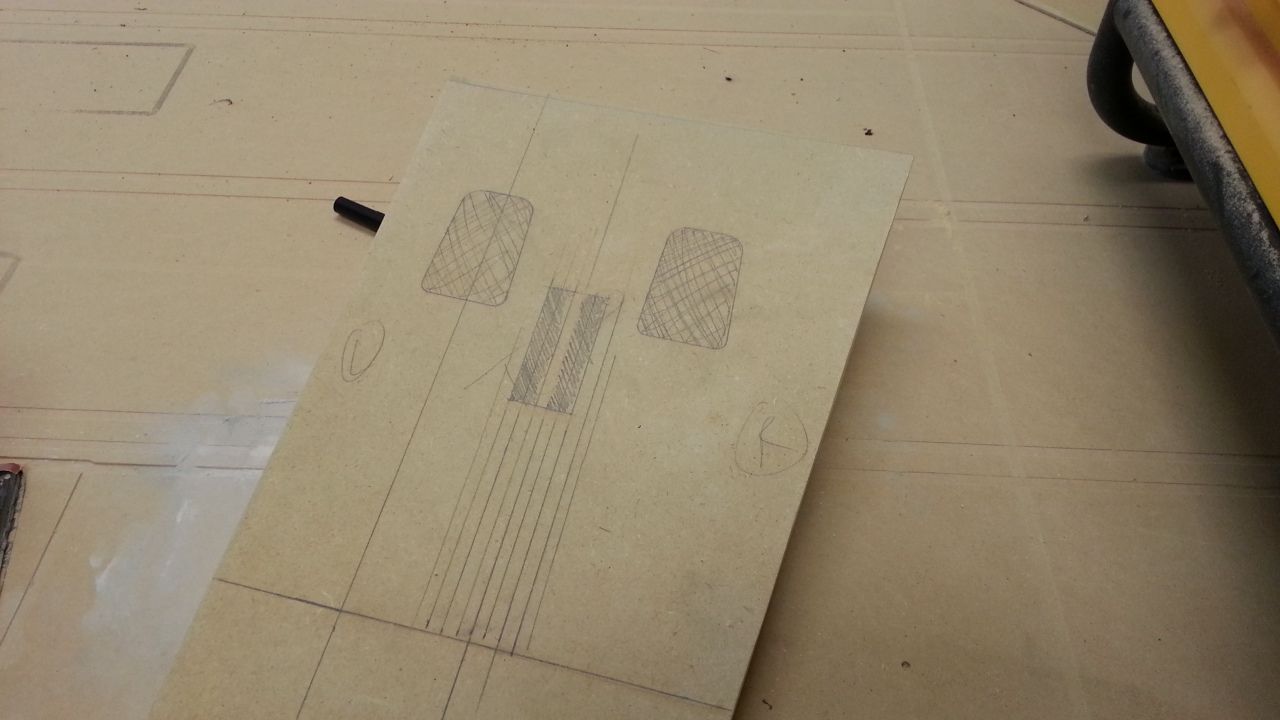
I then started back on the throttle housing
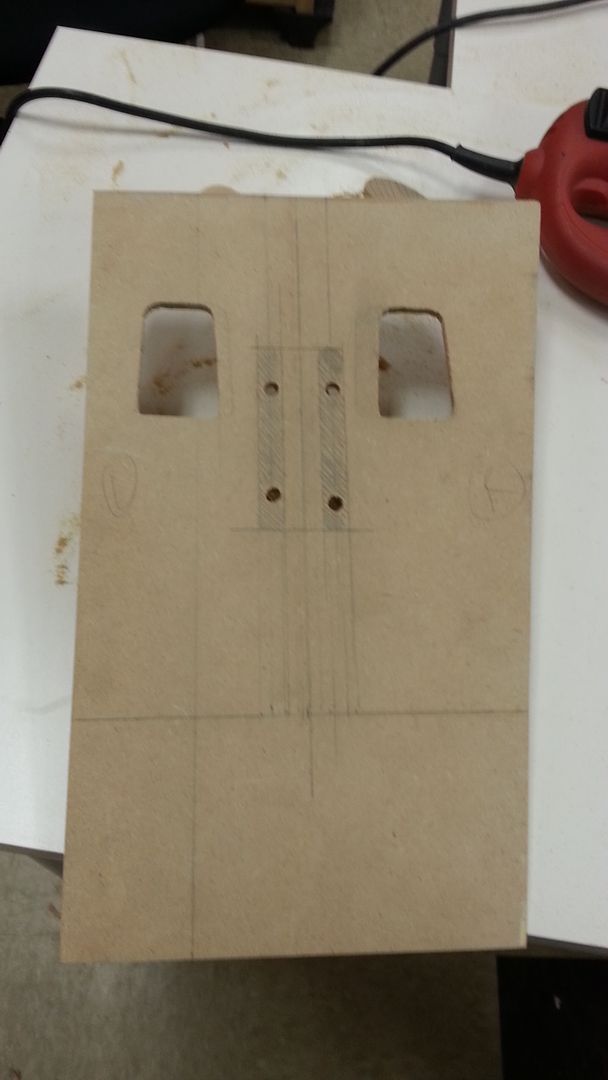
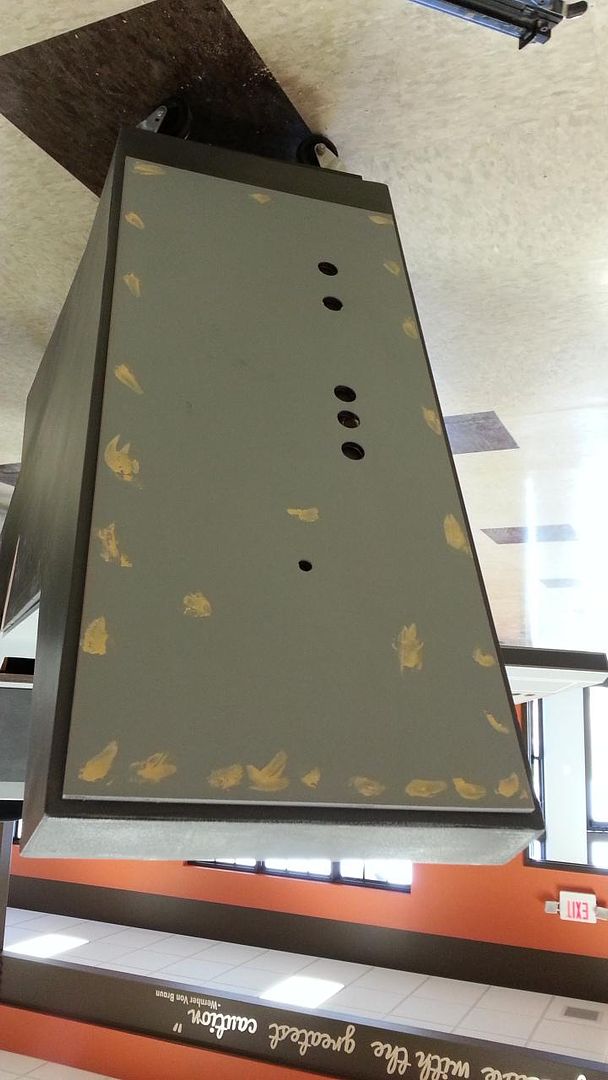
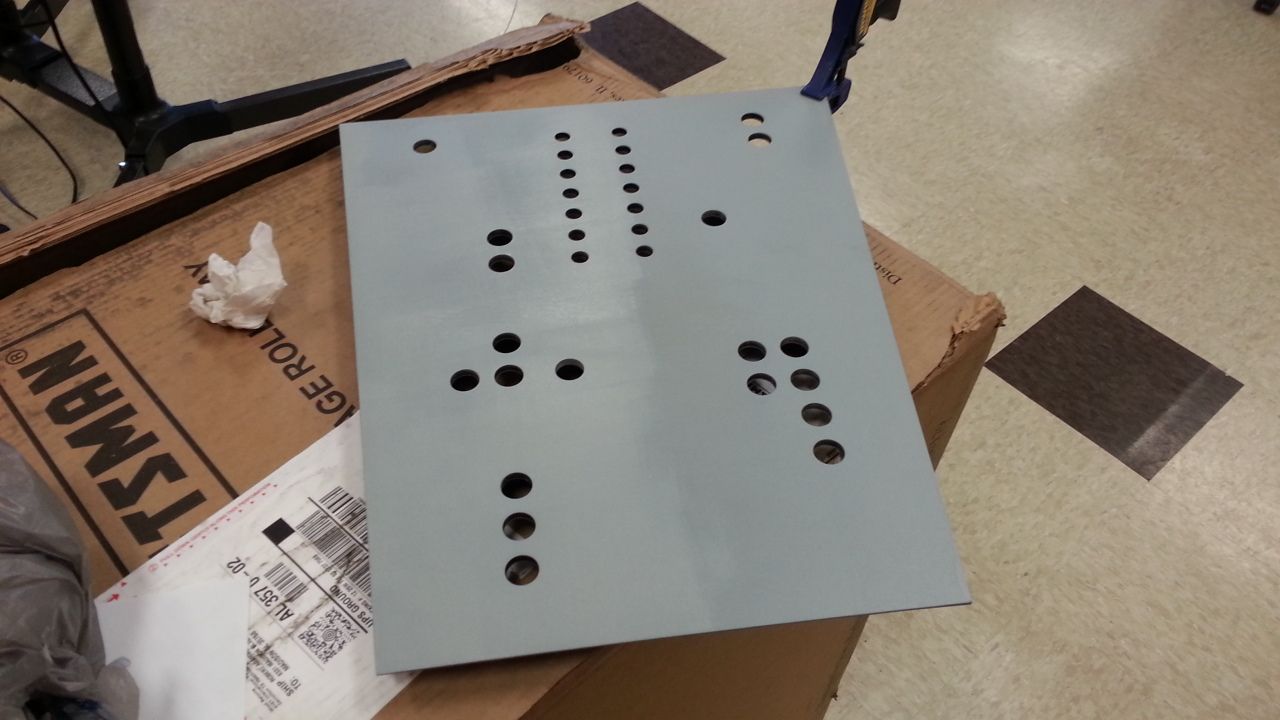
Holes cut and primered - need to straighten up those center lines - maybe the laser cutter can work it's magic?


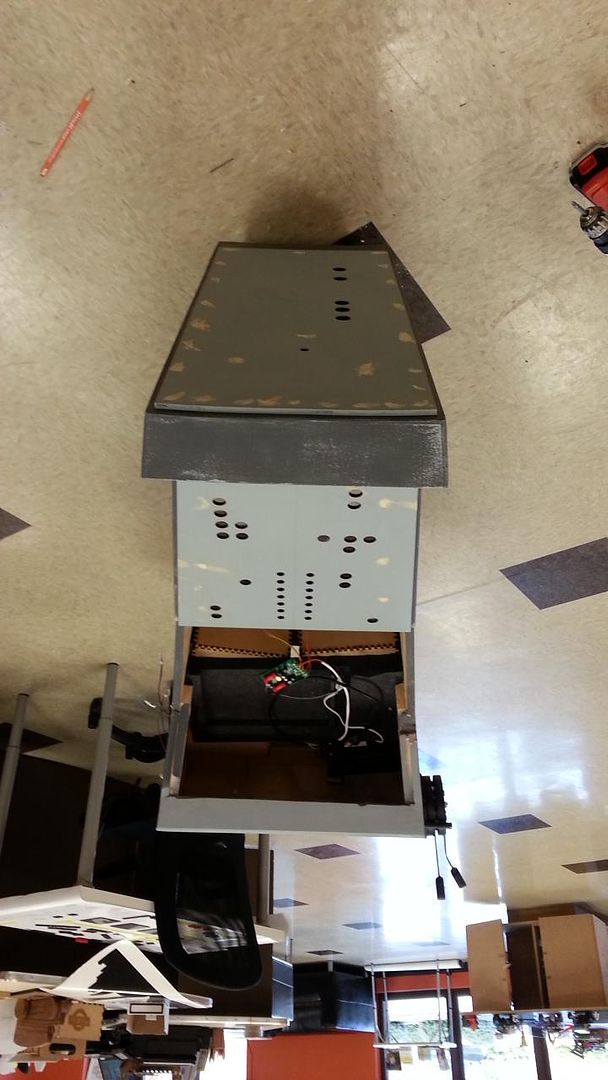
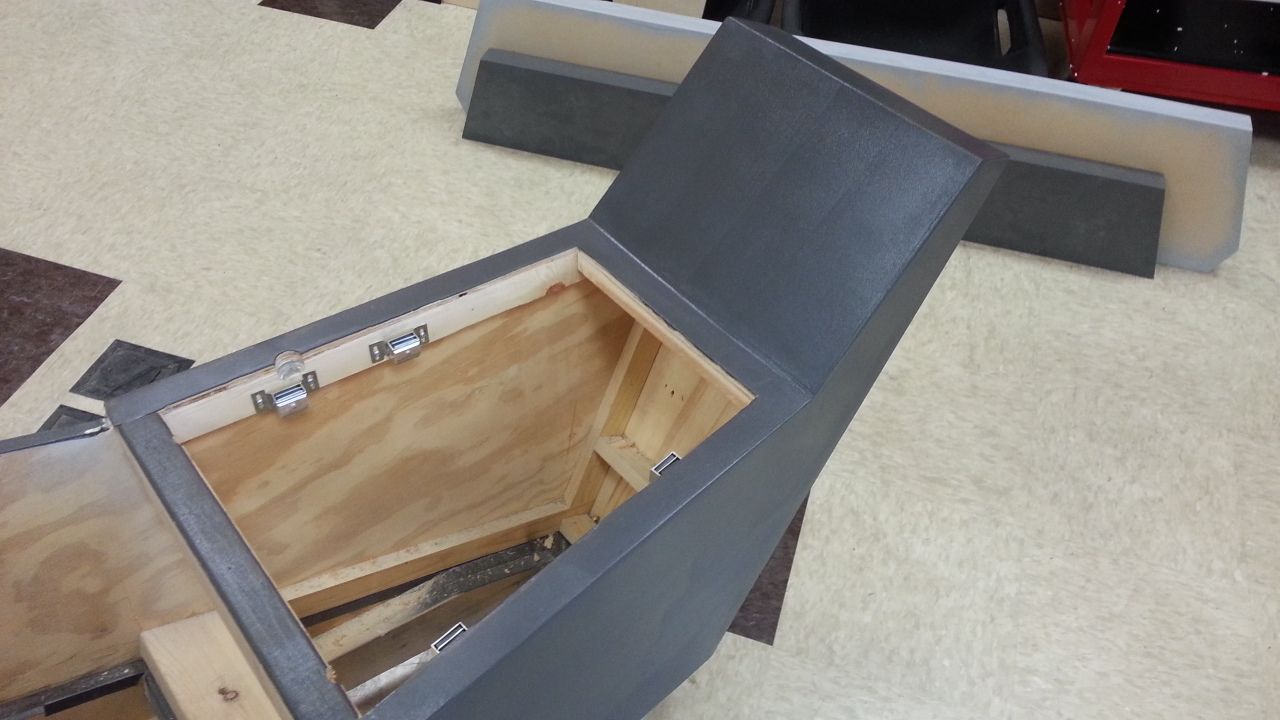
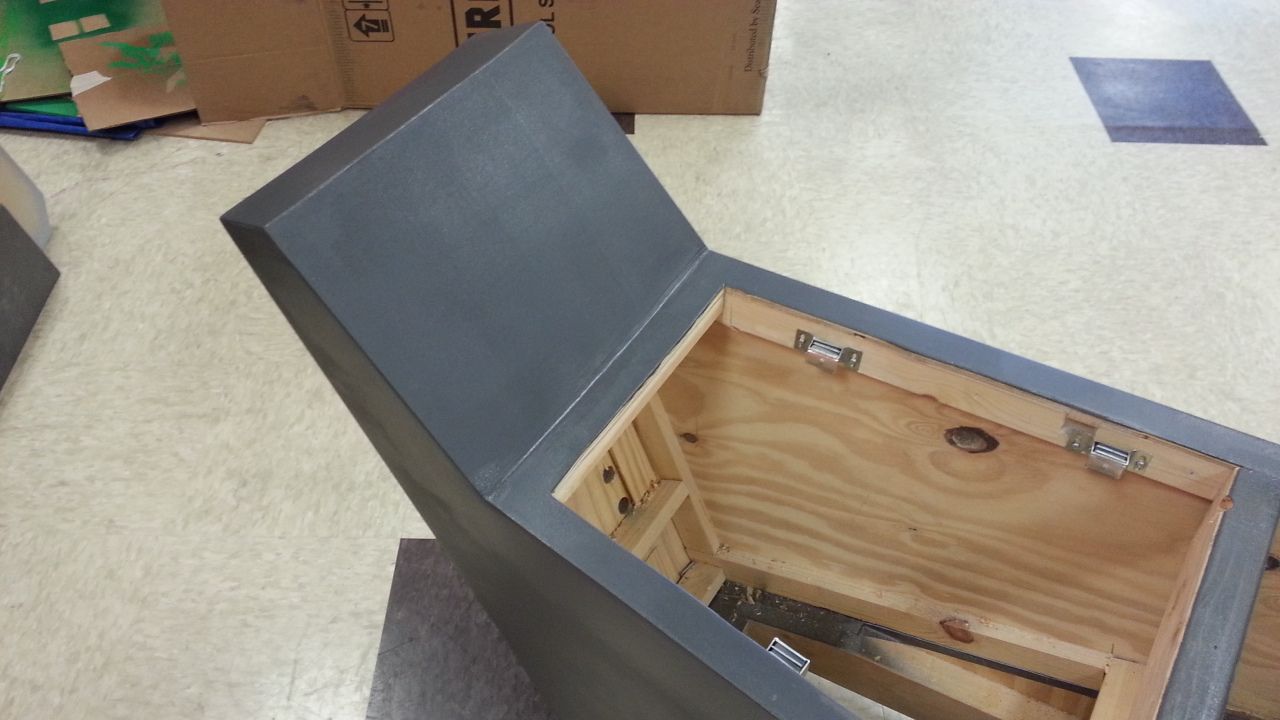
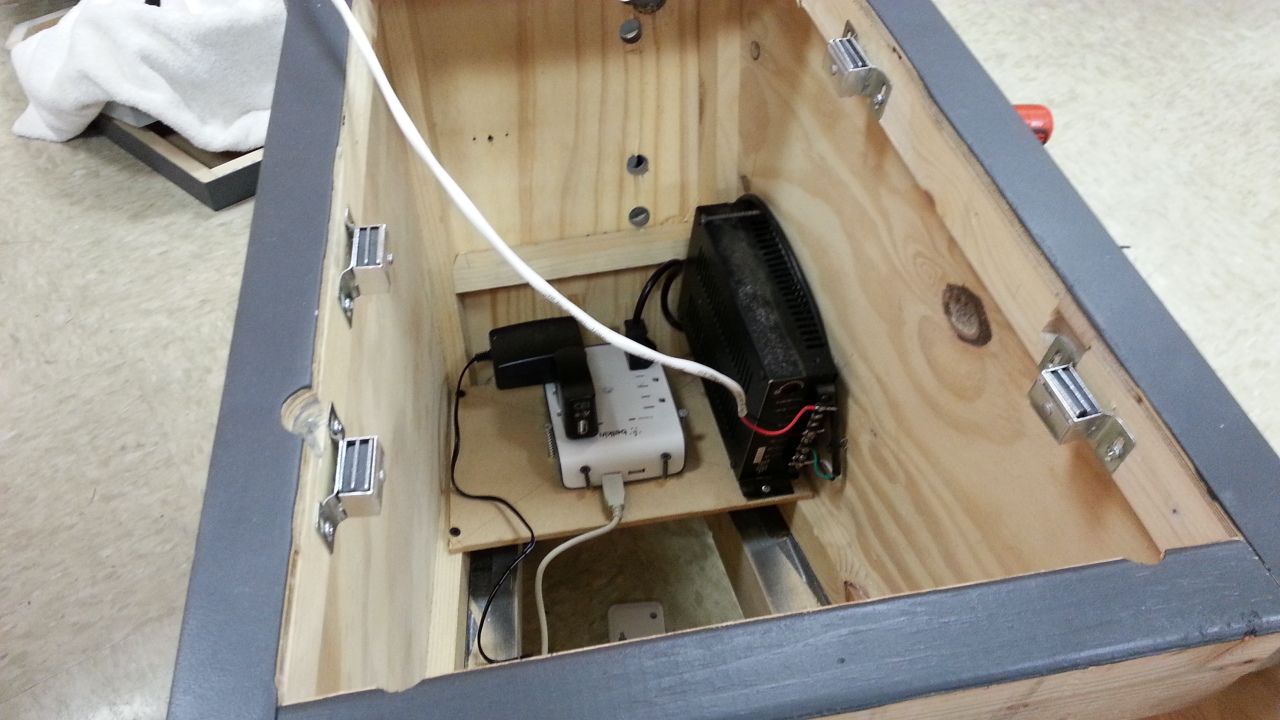
Inside the console
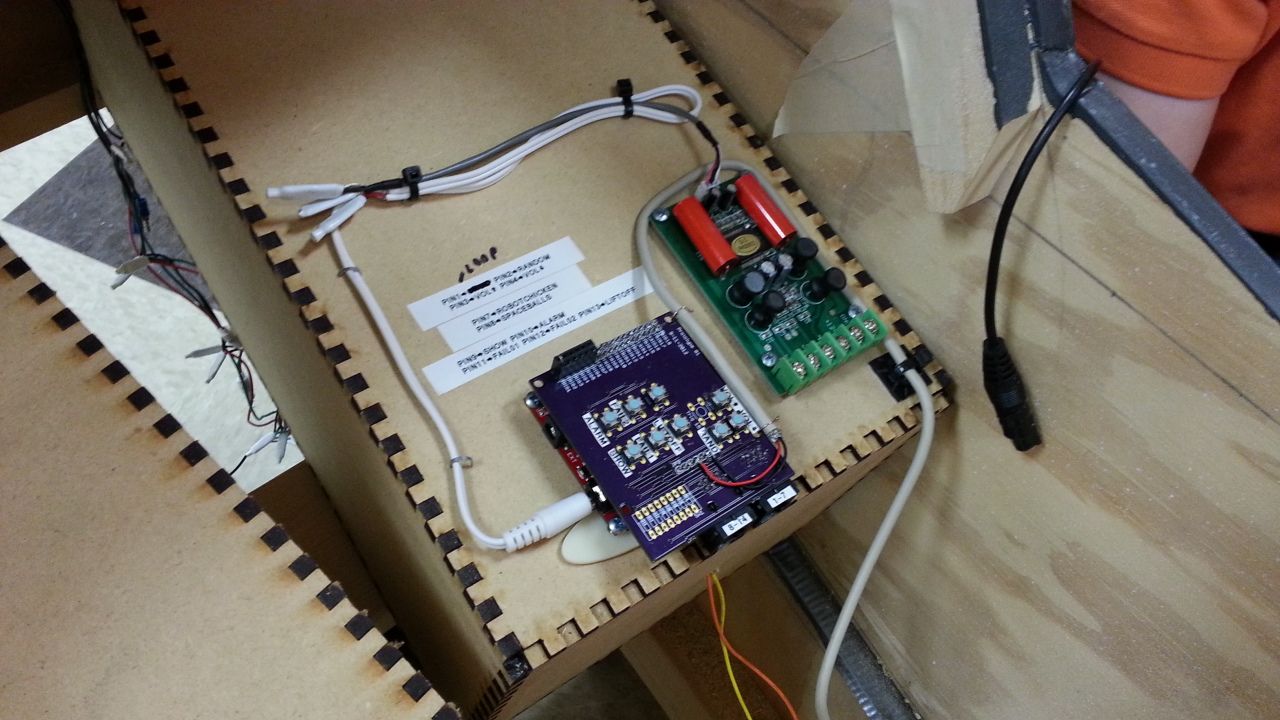
Jake and Daniel's handiwork
Armrest panel getting its final coat before adding the LED holders and the greeblies

And last but not least... The newest Video: Showing the wiring and the basic MF engines and various cockpit sounds set on a loop - imagine how this would sound sitting in the cockpit?
It's going to be a SUPER HAPPY BUSY CRUNCH TIME next couple of days! So Stay Tuned!
It was another BUSY night at the lab. Not too many pics but we do have a NEW vid... We also have another volunteer helping Daniel and Jake with the soldering and wiring! Enjoy!
Daniel working his MAGIC!
Mike sanding the other armrest lever greeblie
Our newest team member Doug soldering away
I then started back on the throttle housing
Holes cut and primered - need to straighten up those center lines - maybe the laser cutter can work it's magic?
Inside the console
Jake and Daniel's handiwork
Armrest panel getting its final coat before adding the LED holders and the greeblies
And last but not least... The newest Video: Showing the wiring and the basic MF engines and various cockpit sounds set on a loop - imagine how this would sound sitting in the cockpit?
It's going to be a SUPER HAPPY BUSY CRUNCH TIME next couple of days! So Stay Tuned!
Engelnicht
Well-Known Member
This thing just gets cooler and cooler every day.
Hi P,Ha! The new button text is cracking me up (and testing my decoding skills)! Seriously, you are a machine! That progress is amazing! I always think it cannot get any better and then I see an update and I am proven wrong. Again and Again and Again!!
Thanks so much! Equal credit also goes to Mike, Daniel, Jake, Stinson and our newest recruit Doug! And of course Mind Gear Labs. We're going to try to raise the bar with the next console, canopy and the lighting/sound effects for the cockpit.
- - - Updated - - -
So awesome! Any plans to weather it up a bit? Almost seems like it just came off the lot!
Hi T,
Thanks! I haven't really thought that far. Since the console we're working is merely a stand alone piece and we're rushing for the Mar 22 TEDx in Nashville, we probably won't get to it... After TEDx we then switch gears to the new ESB console and start thinking about wiring the rest of the cockpit.
- - - Updated - - -
I can't read Aurebesh worth a damn. Anyone care to translate? I've already got an Aurebesh to Roman letters alphabet chart, so I'll get cracking. Hal is misspelled as Hall.
Hey Red,
Thanks for pointing out HAL to me... I'm going to blame Autospell?
You've nailed most of them- - - Updated - - -
Loving the progress of this! Excellent work
Hi PB,
Thanks for the kind words! The guys have really added life to the build. I cannot wait for the cockpit to light up! Stay Tuned!
- - - Updated - - -
This thing just gets cooler and cooler every day.
Hi E,
Thanks! Speaking of cool... the first thing Daniel and Jake did was get the MF engine/cockpit sounds to loop. We had that running almost the entire time we were working. It was really cool!
crystaloftruth
Member
To quote Captain Solo "I like the sound of that"
Similar threads
- Replies
- 2
- Views
- 861
- Replies
- 6
- Views
- 611
- Replies
- 8
- Views
- 552
- Replies
- 4
- Views
- 777
- Replies
- 4
- Views
- 2,307