Let me know if mine doesn't go though. My bank checked with me to make sure it wasn't a fraudulent transaction. But I didn't see it post on your gofundme page.
You are using an out of date browser. It may not display this or other websites correctly.
You should upgrade or use an alternative browser.
You should upgrade or use an alternative browser.
My BTTF Inspired Bag V2 Page 4
- Thread starter cavx
- Start date
cavx
Master Member
Ok, well I am still willing to send it to you directly.
ETA -PayPal sent!
Got that, thank you.
Let me know if mine doesn't go though. My bank checked with me to make sure it wasn't a fraudulent transaction. But I didn't see it post on your gofundme page.
Looks like it came through.
cavx
Master Member
UPDATE.
I have the chamber back from the plastics workshop.
Originally, this large chamber was to sit on top of my current vacuum chamber, then this happended...
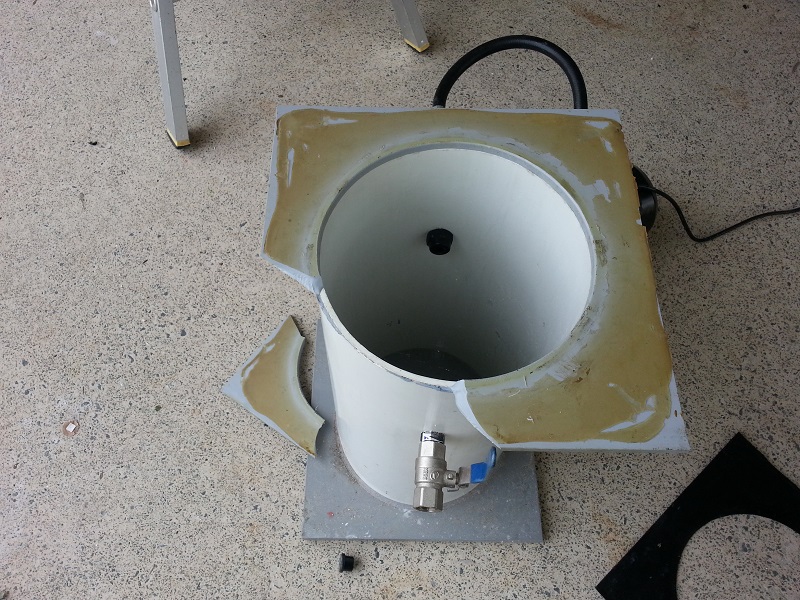
So lucky that has now been welded up and I have had 100mm tall ribs added to base under the big chamber as well as a 1/2 tapped hole in the base.
So next is to source a connecting hose with the correct fittings and a Tee piece dual valve set up.
I have the chamber back from the plastics workshop.
Originally, this large chamber was to sit on top of my current vacuum chamber, then this happended...
So lucky that has now been welded up and I have had 100mm tall ribs added to base under the big chamber as well as a 1/2 tapped hole in the base.
So next is to source a connecting hose with the correct fittings and a Tee piece dual valve set up.
Attachments

cavx
Master Member
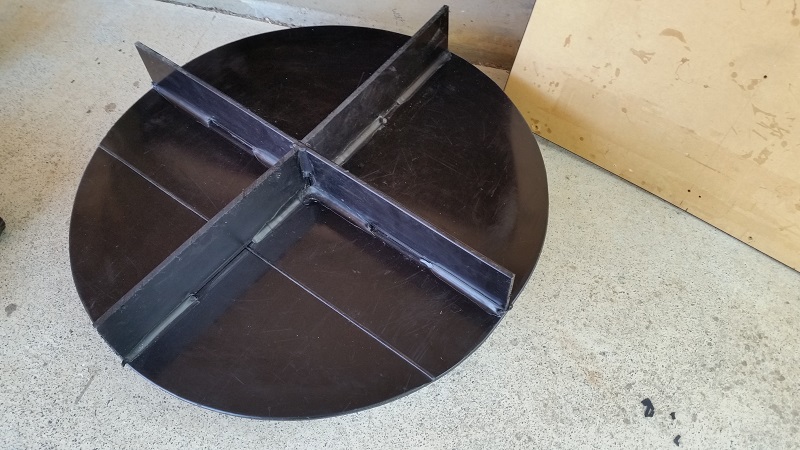
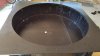
This is the under side of the big chamber.
Today I started work on the main tool for the vacuum form.

The expanding foam I used did not expand anywhere near the volume I needed (it rose about 1.5"), so either my I didn't mix it right, or i just stuffed up on the math. Anmd looking at this again, I stuffed up on the math.
If the volume of a cylinder is Pie x R^2 x D, then 3.14 x 353^2 x 150 will give cubic mm or mm^3. Divide that by 4 to work how much foam i need.
The foam I used expands 4x, and I just worked it out again, and I would need 46 litres of foam. I had just 2ltrs. EPIC FAIL. Lucky I didn't pay for the product, it was gifted to me but at $80, not buying this again.
So it looks like I will have to make a top plate from MDF that fits into this chamber, have a rectangle cut out the same size as the pipe and then split that pipe in two. Something I didn't want to do. I'll also need two side panels, but at they can be cut as rectangles and will add to holding up the top plate.
More to come.
Today I started work on the main tool for the vacuum form.
The expanding foam I used did not expand anywhere near the volume I needed (it rose about 1.5"), so either my I didn't mix it right, or i just stuffed up on the math. Anmd looking at this again, I stuffed up on the math.
If the volume of a cylinder is Pie x R^2 x D, then 3.14 x 353^2 x 150 will give cubic mm or mm^3. Divide that by 4 to work how much foam i need.
The foam I used expands 4x, and I just worked it out again, and I would need 46 litres of foam. I had just 2ltrs. EPIC FAIL. Lucky I didn't pay for the product, it was gifted to me but at $80, not buying this again.
So it looks like I will have to make a top plate from MDF that fits into this chamber, have a rectangle cut out the same size as the pipe and then split that pipe in two. Something I didn't want to do. I'll also need two side panels, but at they can be cut as rectangles and will add to holding up the top plate.
More to come.
Attachments

cavx
Master Member
Hi,cavx, just wondering how much you will charge for one of your bags
At this stage, I have guesstimated at about $500. P&H will be close to $200 of that due to the size of the bag. Material costs are pretty much the rest as I want to use high quality plastics (Perspex?) if I can. I want this bag to be practical (though the design itself may not be), so you take this around with you.
You won't charge extra for the blood, sweat, and tears? 
cavx
Master Member
You won't charge extra for the blood, sweat, and tears?
At this stage, I just want to get the vacuum former up and running. I can re-coupe "effort" later when I make armor parts.
edwinfabian
New Member
This is great! I haven't checked this thread in a while and recently re-discovered it. cavx, I'd defininitely be in for a run when it's all ready!!!
How are you planning on getting the lettering on it? Paint or decals?
How are you planning on getting the lettering on it? Paint or decals?
cavx
Master Member
This is great! I haven't checked this thread in a while and recently re-discovered it. cavx, I'd defininitely be in for a run when it's all ready!!!
How are you planning on getting the lettering on it? Paint or decals?
Decals for sure. If it was possible to make the letters hollow into the tool, they could be formed on the surface of the plastic which would actually reinforce the lids. But that then takes away from the screen look.
heartlikewar
New Member
I am excited for this project I would definitely be interested in purchasing one for my shoes
cavx
Master Member
Tomorrow I get the new parts cut up and i hopefully found some cheaper hardware to get this up and running.
Gut feeling tells me I am going to have attach the base clamping plate to the chamber.
Gut feeling tells me I am going to have attach the base clamping plate to the chamber.
Attachments
cavx
Master Member
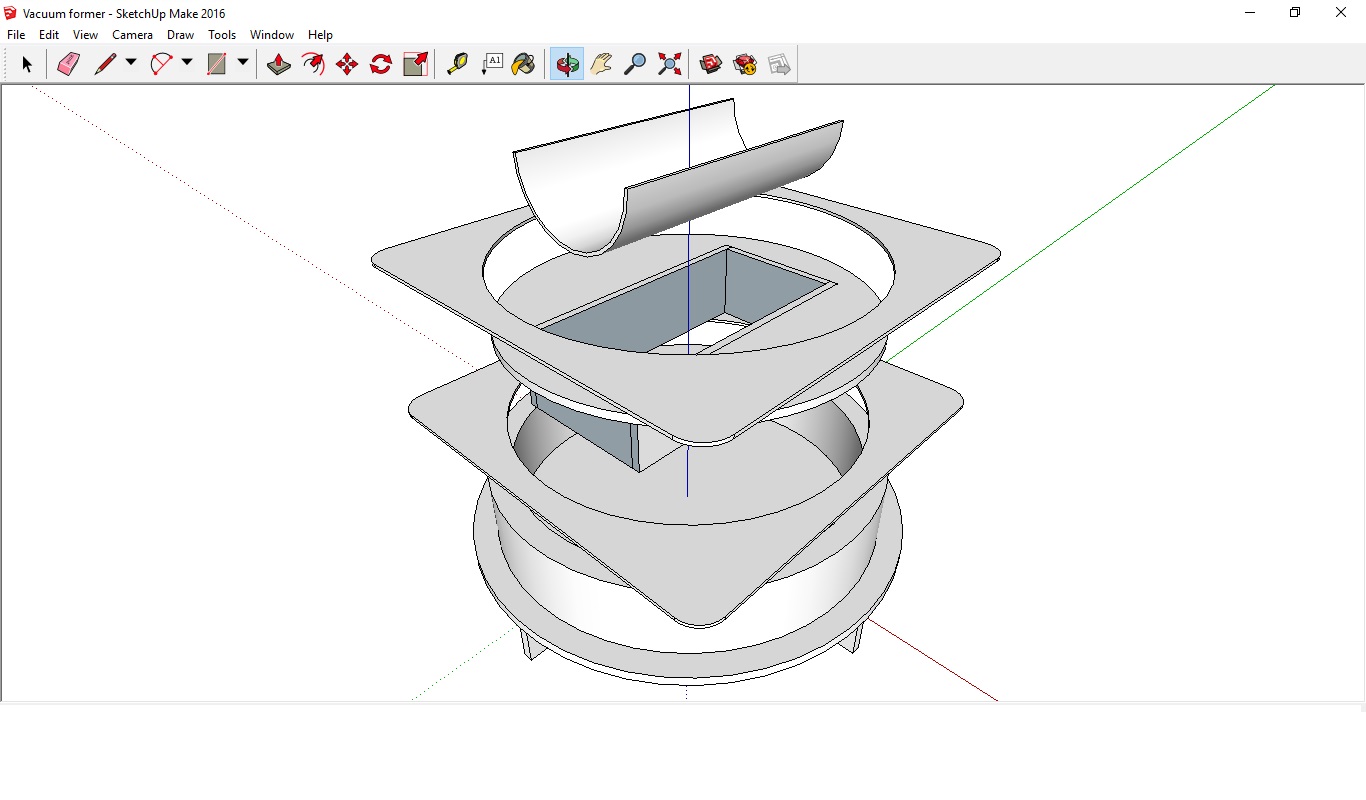
OK got a heap done today
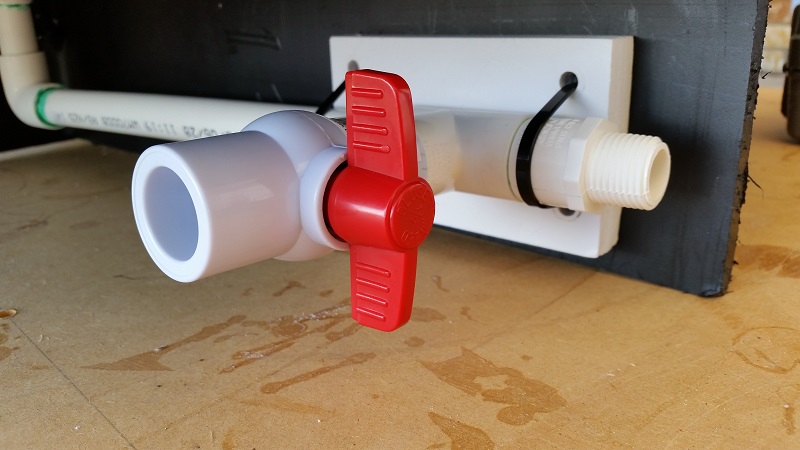
Starting with the plumbing.
Then the seals and clamping frames.

Then how it would look with plastic and tool in place.

The actual tool is still being made and probably won't be ready until mid-next week. So in meantime, I will be testing with this sheet of plastic to make sure I have full seals and can get at least 15"Hg.
Starting with the plumbing.
Then the seals and clamping frames.
Then how it would look with plastic and tool in place.
The actual tool is still being made and probably won't be ready until mid-next week. So in meantime, I will be testing with this sheet of plastic to make sure I have full seals and can get at least 15"Hg.
Attachments


cavx
Master Member
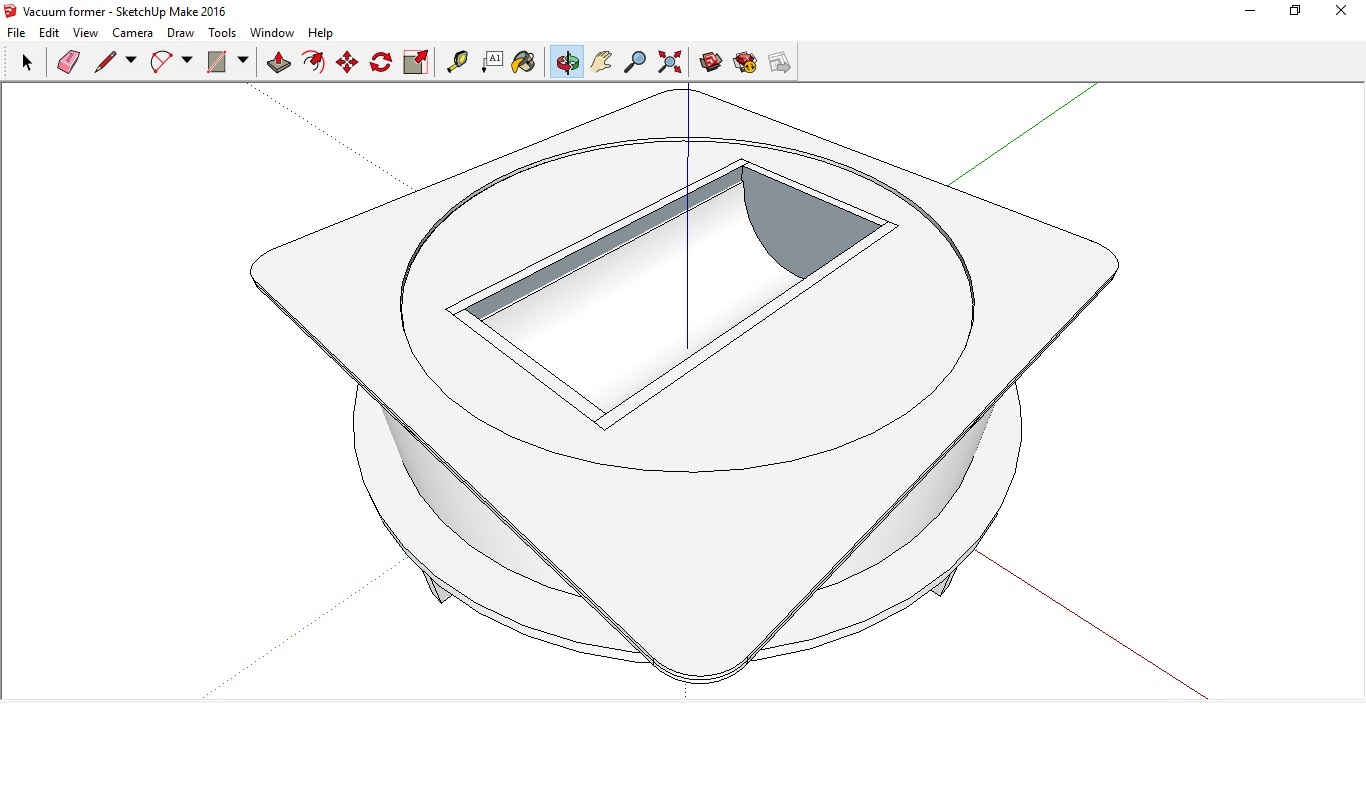
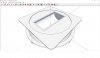
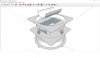
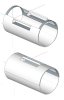
The end caps have not been drawn yet, but this is how the main body and lids should look.
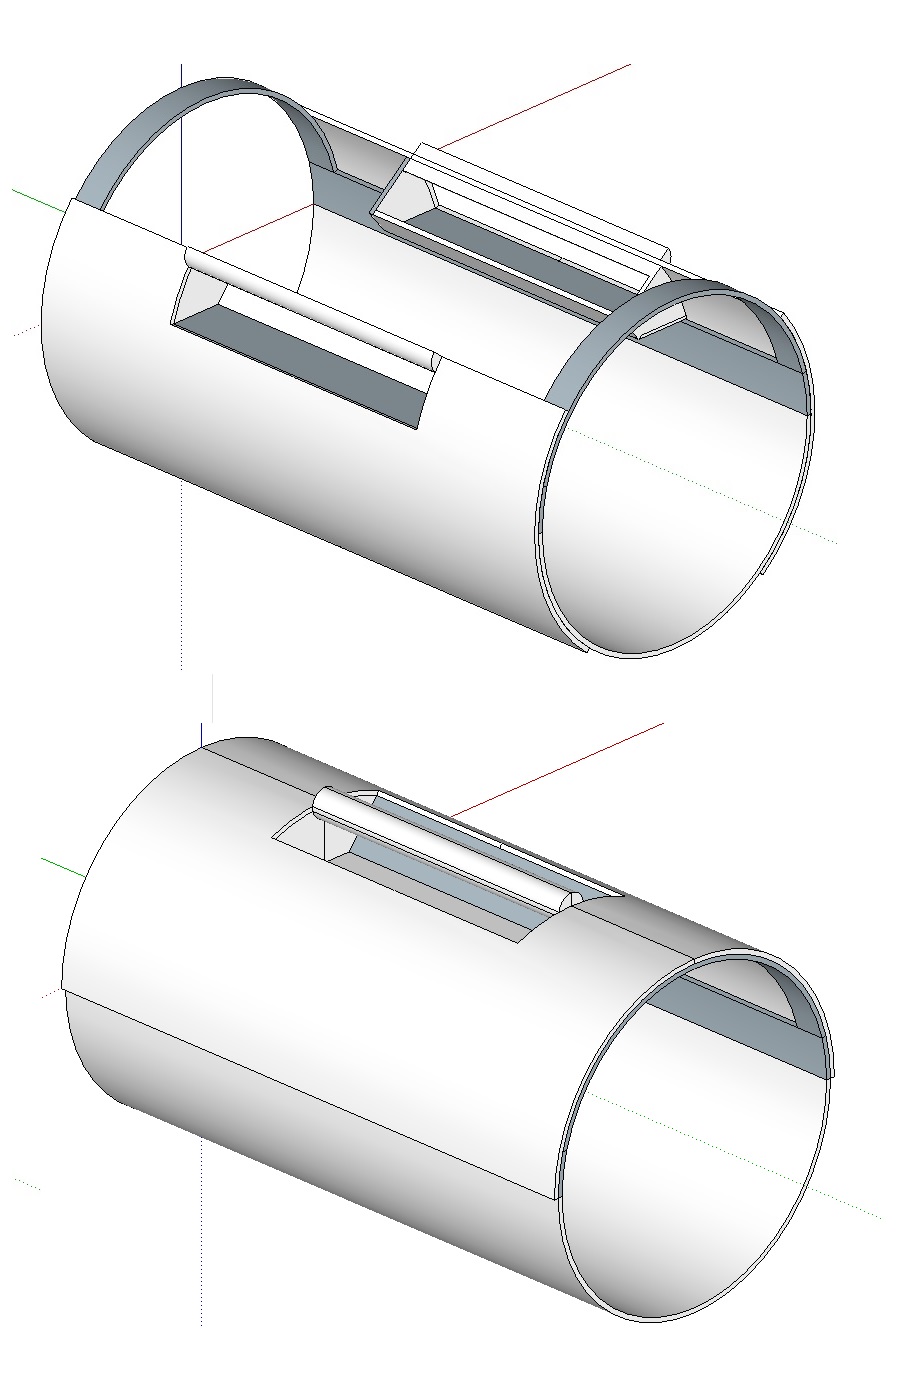
The problem is, each part is half a cylinder with each lid being 1/4. Something needs to be more than 180 degrees of you have a weak point.
Because I am vacuum forming this, each part can only be a max of 180 degrees for the round parts. The lids of the tube bag need supports at the ends, or the lids fall in. Originally I was thinking about rings that go on the end of the body. But the issue of the making the lids longer than 90 degrees each either meant a full sheet per lid or re-think the supports. I chose the latter.
Now that I have created this model in 3D space and each component is a separate part, I can move the parts (how I was able to capture the images) and duplicate each part as required.
Attachments
heartlikewar
New Member
loving the design!!!
I really enjoy reading your progress. Mostly because it's way beyond what I'm capable of! :thumbsup
Similar threads
- Replies
- 3
- Views
- 356