Han Solo In Carbonite prop… going under cover...

I just purchased a front panel on ebay a month ago, also just purchased a side panel that I will be making 7 copies from and I also have the water jet cut box. All I need now are the pieces for the side panels. Im glad you have this post on here as I am about to strip my front section as well. Good thing I worked in a body shop 18 years ago. Does anyone know where I can find the sidepanel Greeblee parts?

Thanks
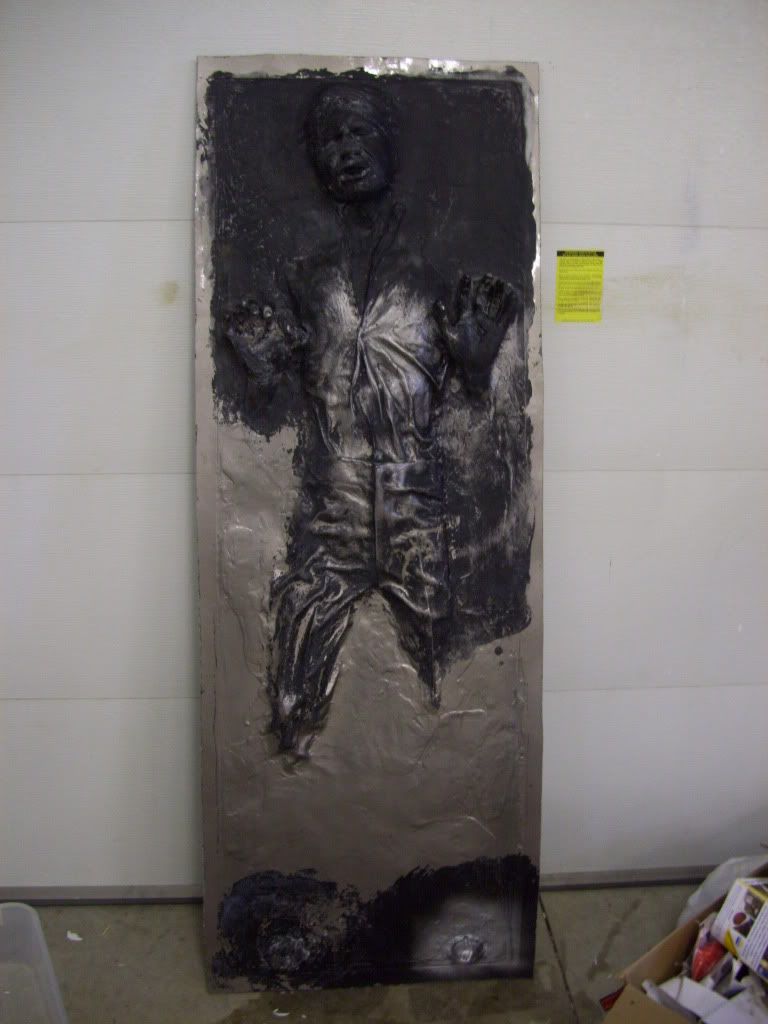
CW, I make all the parts necessary for the panels, see my threads in the Junk Yard.

http://www.therpf.com/f13/han-carbonite-panels-greeblees-99552/

http://www.therpf.com/f13/han-carbonite-hero-panel-electronics-kit-117629/
 
Well, back for another update. I've started the strip down. I wanted to see what was going on with the hand first. You can see the bondo that was used to try and make this one "sellable".


100_7921.jpg


Close shot of the hand repair.
righthandpaintremovedandICBondoworkexposed.jpg


Stripped
100_7927.jpg


It very difficult to see the details in the black so I sprayed a light coat of silver on the hand after I cleaned all the bondo out. We get a good look at the problem cast that was under the patch work. The main structure of the hand and original wrinkles were still there. This will be a great guide when I start to sculpt the details back in.
Righthandafterbodostripped.jpg


75% stripped down to the black gel coat.
Strippingprocesssofar.jpg


Face stripped and silver applied for visuals. lots of issues here unfortunately. This will require most of the face to be re sculpted.
012.jpg

I pulled a big chunk of bodo out from inside his lower lip, like a big wad of chew. Curious why they filled in this area with bondo.
013.jpg


Next, the re sculpting begins!
 
Last edited:
BTW, DS Yes I will be making a mold when finished before I send this back to the owner so I can have one for myself. I MAY do a very limited run in the Junk yard but I just don't have the time it takes to pump these out in mass like Lonestar. He would be the man for IC copies.

Sculpting the left side face.
029.jpg


022.jpg

Starting the rt side face.
startingrightside.jpg


021.jpg

Smoothing in the wrinkles on the rt hand.
019.jpg
 
Last edited:
Antwayne, I'll have some pic's soon (work has kept me extremely busy)

I have the entire piece stripped now. I have been working on the right hand when I can, cutting back all the extra carbonite IC added to the back and reworking the fingers more. I'm pretty close to being done with the resculpting for the body. I will tackle the carbonite edges around the complete perimeter next, where IC had spliced the seam to the box.
 
Thanks Lewis, Yeah I know, but for the betterment of the rework it should be well worth it. I'm glad Jeff trusted me to do this work for him.

I was going to start back on it this week but, then your water main breaks and well, 3 days of digging and you realize your not in your 20's anymore can put a world of hurt on your body. :facepalm Too much do it yourselfer in me I guess. I'll jump back in next week.
 
I was finally able to jump back on this project. I actually finished the restoration of it. It was quite more than I expected, but was really fun redoing the details. I have done a few projects in the past and I definitely don't consider myself in the ranks of most of the sculptors here in the RPF. I hope I did this prop justice. If there is anything you guys see that I missed please let me know. I will be ordering the materials to make a mold of this so I can send the original back to Jeff. There will be time to make changes/adjustments. I'm sure I'll find something.

BEFORE and...
100_7813.jpg


AFTER
IMG_8728.jpg


IMG_8753.jpg


IMG_8754.jpg
 
Last edited:
Left hand repair was not as bad as the right hand. There was just a little re-sculpt to the top palm and lower inner fingers.

IMG_8722.jpg


IMG_8731.jpg


I removed the extra material behind the fingers that Illusive Concepts added to help them with the demold process. Trying to take it back as close to original as possible.
IMG_8732.jpg


IMG_8743.jpg


IMG_8744.jpg


IMG_8747.jpg


IMG_8748.jpg
 
Last edited:
Have to say I love the rework.. I'm not sure if it's just me or if it was like that with the original screen used prop, but something just looks weird with the right thumb and pinky to me.
 
Have to say I love the rework.. I'm not sure if it's just me or if it was like that with the original screen used prop, but something just looks weird with the right thumb and pinky to me.

True, I may have to revisit those a bit. But the original is pretty rough there. It's a dilemma I found a lot, redoing this prop. Do I make it better than it was, or keep it closer to original? here is a pic that Loanstar had posted of the original.:thumbsup
hic-righthand.jpg


Another before and
100_7808.jpg


after.
0152.jpg


I smoothed out the left and right edges of the carbonite to get it back to original. When IC spliced the body/carbonite area to their frame they sloppily roughed in the seam area. On the original prop the carbonite "poured in plaster area" never touched the frame.
0112.jpg


015.jpg


This is interesting, the feet on the IC differ from the one's on the tour block.
0162.jpg


Stripping this prop sure brought out some great fine detail that will transfer to the castings.
IMG_8726.jpg


I had reshaped the teeth a few times but it looked like Han had dentures so I pretty much left them alone
IMG_8729.jpg


IMG_8735.jpg


Harrison's scar
IMG_8736.jpg


IMG_8734.jpg
 
Last edited:
Thank you very much VaderD! I already see a couple of things on the face I'm going to fix, now that I am looking at my pic's I posted a little closer. lol
 
Its the attention to details... Adding the scar... Beautiful work! :)

The drips out of the mouth are actually VERY VERY creepy looking...
 
Last edited:

Your message may be considered spam for the following reasons:

If you wish to reply despite these issues, check the box below before replying.
Be aware that malicious compliance may result in more severe penalties.
Back
Top