ESB AT-ST Turkey Walker (Chicken to the talented)

Status
Not open for further replies.
Niels,
when you say short, are you speaking of the templates for making the vac-buck? if so, thats true, they are short and supposed to be. review joe's pics in post #31. (when the head is upside down, the back plate sits on top of the top plate
if you're speaking about the head shape itself, ...well i'm surprised (it worked for me). joe, did you get this coming up short?

Hey Quincy

yup I meant the headshape .. I'm scratching the head in styrenesheet .. it's actually pretty evident, that the top plate is shorter ... the distance from the dashed line (indicating the backwall) to the rear of the top and side plates doesn't match
 
Hey Quincy

yup I meant the headshape .. I'm scratching the head in styrenesheet .. it's actually pretty evident, that the top plate is shorter ... the distance from the dashed line (indicating the backwall) to the rear of the top and side plates doesn't match

i've remeasured (from CAD) and everything matches up pretty close (nowhere near 3-4 mm bust you're speaking of).
i wonder if you've misinterpreted how each of the pieces go together (as illustrated by the different dashed lines at each edge of the head)?
anyway you can provide a picture to show which dimension you're finding the difference?

i measured (both top plate and side plate) the distance from the back plate location (longer dashed line) to the back edge of the top and side plates - and there only a 1/16" difference.

are you just measuring straight lines on the templates or have you actually glued it all together? there are compound curves on this head that making measuring flat plate a no-no.
 
if you're speaking about the head shape itself, ...well i'm surprised (it worked for me). joe, did you get this coming up short?

Even though I made a slight mistake assembling the black art board mock-up (I didn't follow the dash lines properly), I didn't run into any panels being short. The aft end of the side panels line up almost perfectly with the aft end of the top panel. However, if going the vac-buck route, it really doesn't matter since you'll be in control of cutting out the parts.

Just to note, the art board is .060" just like the stock used on the original, which is correct, right?


Cant recall if i took the dims from the M5A1 cut as it should be on the prop or not, looking at Joe's plate, it hasnt had the cuts made at the front anlges yet?
As i said, i went my own kinda way on this part with sheet, its still not 100% on the money, but as close as i could muster at the time.

lee

Yeah, I haven't made any cuts to my donor parts yet. Which is going to suck for some of the test placements. I plan on molding every part like Jestefarean so that I can make two models. I just can't bring myself to use most of those original donor parts. I'll use easier-to-get original parts on my (hopefully) metal armature model but the static model will sport all resin.

So until I make copies, I'll have to work with whatever parts I can for taking measurements and aligning over the art board cut outs.

BTW, Lee, I remember having that PM conversation about vac-form vs. plate head. I think your's looks just like, if not, really close to the original. Therefore, I will also make a plate version head. It' won't be hard to laser etch a seam line down the middle.

Joe
 
Joe, bud i forgot about that, do you want me to take a load of pics of this head?
May help, as i said, i wont cry out mine is spot on, but its damb close to my eye, so it may help you sheet styrene boys.

Lee
 
More pics would be awesome!!!! I've Scrapbook'ed just about every major SS Star Wars thread here but more info is always better! I'll PM you my email address...

Joe
 
Just to note, the art board is .060" just like the stock used on the original, which is correct, right?

great point..
can't remember if its spelled out on the drawing, but 0.06" is what the vac head was pulled from, thus what the buck shell should be also. i'm afraid that may not help Niels much though (if we're talking alignment issues with the aft lines).
 
So it appears that the sag in the vac-mold top panel might have been caused by the summer heat in the garage after all. I massaged one of the molds back to the right shape. I'll be pouring a new mold tomorrow.

Joe
 
Whoops .. my bad .. turned out.. that the length difference was closer to 1mm than 3-4 mm ... but there is a small difference in the drawings

But nothing that ain't easy to fix
 
I know this is maybe of topic but could anybody here point me in the right direction of finding the decals used on the head of esb AT-ST.
I am talking about the red"bullskull"decal as seen on the picture above posted by Lee.
I have read, i think all the threats about building this version but nobody seems to mention where the decals come from.
Thanks.
 
Drawn by Rolando "the man" Guiterrez, printed by, anybody with an inkjet lol.
Think i got a sheet of them somewhere, cant recall.

Lee
 
Apologies Allan, yes you did brush your marking, fine job too.
Never could figure if the marking was in fact a kit decal, or painted like Allans.
I did run through so many aircraft thinking it was a fin logo, never could find its true origin.

Lee
 
Its great reading through al the info and opinions, keep em all coming. I think as I nearly have all the kits now I'm going to start the head next week. I'm going down the route that Lee and Julien have gone and have a crack t scratching the head.

Just a few kits to go


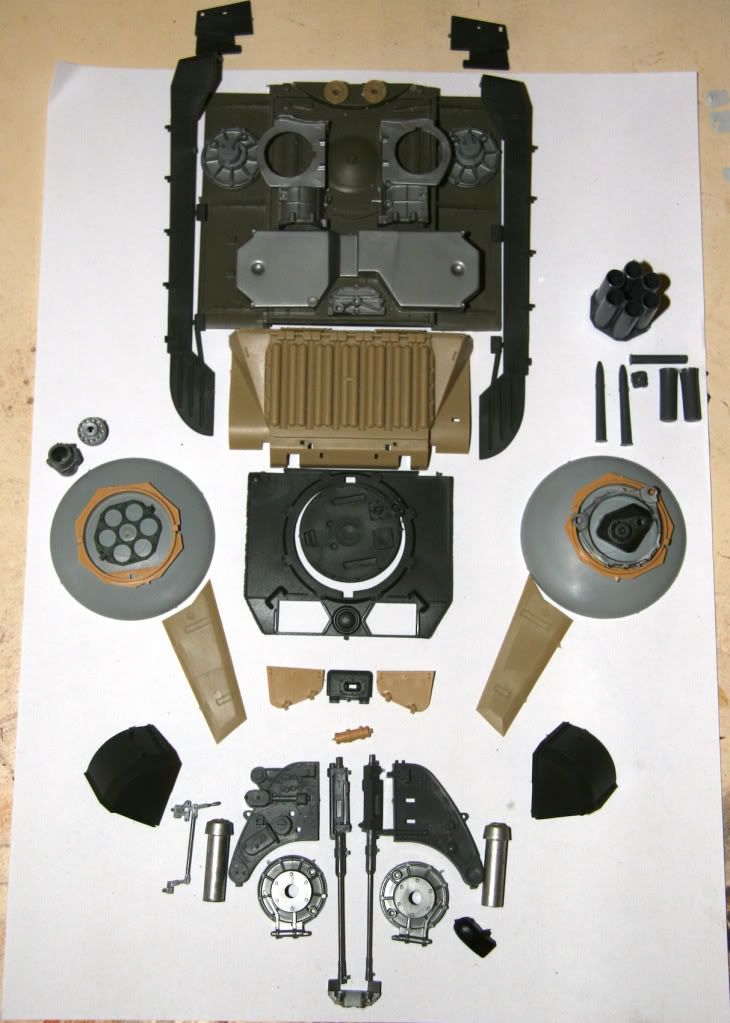
I very nice array of parts.
IMG_0043-4.jpg
 
Nice 'blown apart' kit donors pic Guy, looking forward to you tackling this one mate.
Stu
 
Thanks Stu, I doubt it will have the flair and quality of some of the builds we've seen already but I'll have a good go.

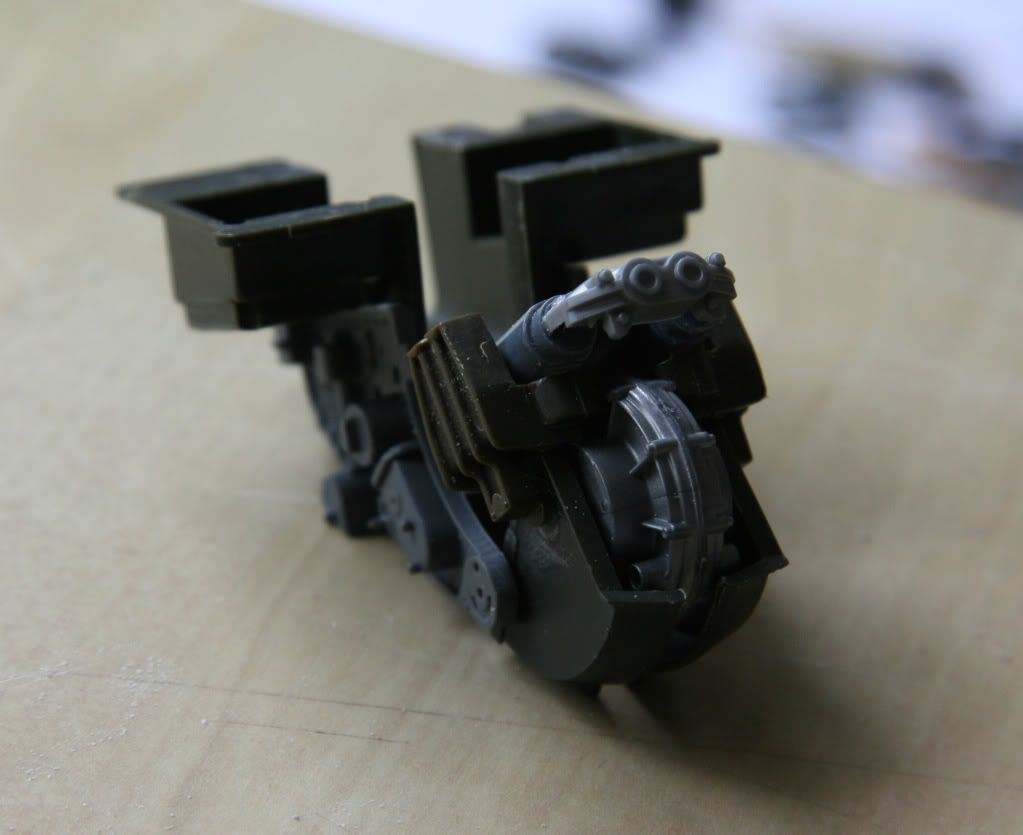
At last, rather than just spending money on kits I've managed to get a start on the chin gun. Hoping to get this wrapped up today and then move on to the head.

ChinGun1.jpg
 
v'nice guy.
said it before...the chin gun and the port cheek gun are prob the toughest parts. just a bunch of small parts attached together that don't feel altogether "sturdy".
 
Good start Guy, its eaier doing it, than explaining it, im sure you have realised that now buddy lol.

Its a delicate prop all round TBH, the ILM model is so different to ours, its gobbed with hotglue etc, to making it stop mo savvy, we tend to refine and neaten everything, and that makes is all the more dainty IMO.

Id say the chin gun is easier than the left cheek, thats really fiddly, but so cool when all assembled, Allans guide really helped us all no end!

lee
 
Thanks guys, I have to say it went together quite well aside from I cut the wrong nebel parts at first. I cut out 2 hollow pipes instead of the blocked pipes, sadly this meant my blocked pipes where pretty rough at the rear and aren't that neat. I dont think its something that will be seen once its all together though.

One thing I had noticed is the 2 36/37 wings that glue to the fenders are slightly wider than the built chin gun part, I'll have to bend them in slightly to attach it all together, is this standard or have I made a big bollox of something?
 
Status
Not open for further replies.
Back
Top