You are using an out of date browser. It may not display this or other websites correctly.
You should upgrade or use an alternative browser.
You should upgrade or use an alternative browser.
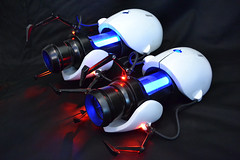
Daft Punk Thomas Helmet -- Skipped a few chapters
- Thread starter tekparasite
- Start date
tekparasite
Member
I hope you don't mind me asking, but it looks like the helmet has misshapen in the back a little bit. Could you elaborate on what happened?
I don't mind at all. There is a small nick in the back and overall, it looks like the back part curled a bit after chroming. It was hard to tell at first; but after looking at pictures prior to chroming, it definitely curled to the inside.
I remember thinking (and posting) that I was going to re-enforce that area with fiberglass cloth because someone posted that the back area was thin.
Well, I didn't.
So, if I were to do it again, I would definitely beef up the back side.
At first, I thought beefing up the back was to prevent from cracking, but in reality it was more for preventing flexing during chroming.
I can tell that it was simply the weight of the helmet and the chemicals (I guess) that made that part flatter. I have taken pictures and looked in the mirror wearing the helmet to see if the appearance changed, and it didn't. The only way to tell is if I take of the helmet and flip it upside down.
Last edited:
tekparasite
Member
FYI: After wearing the helmet for some time now, I have realized that even though there is complete blockage of the light directly into my eyes, it's hard to focus when all LEDs are lit up under low lighting conditions and moving.
Only under these conditions visibility is at risk. Other than that, visibility is awesome.
So, my plan of having a multi-position switch was a success (whether planned or not).
If I'm walking around, I'll select a less intrusive animation. If I'm standing still, I'll blast it full force!
Only under these conditions visibility is at risk. Other than that, visibility is awesome.
So, my plan of having a multi-position switch was a success (whether planned or not).
If I'm walking around, I'll select a less intrusive animation. If I'm standing still, I'll blast it full force!
tekparasite
Member
Hey guys!! Sorry, I'm doing this backwards, but it's late, and I have a business trip that I need to get ready for. So, I'll be putting notes and pictures later.
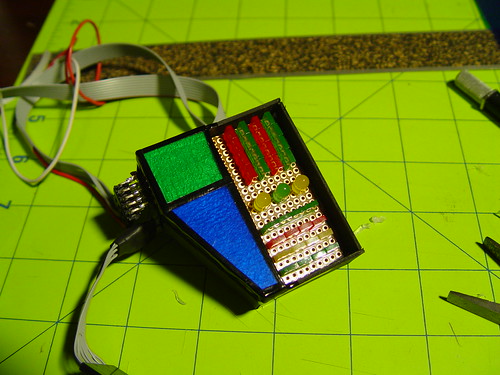
I just finished mounting the side boards. I'm just testing placement as wires are still a mess inside the helmet..etc; however, I wanted to show you what it looks like so far..

I just finished mounting the side boards. I'm just testing placement as wires are still a mess inside the helmet..etc; however, I wanted to show you what it looks like so far..
Agent RayBans
Sr Member

Volpin
Sr Member
I wanted to show you what it looks like so far
hm. I mean, its okay.
I guess.
You know, good effort and all
(damn you for doing this so much faster and beautifully!)
tekparasite
Member
hm. I mean, its okay.
I guess.
You know, good effort and all
(damn you for doing this so much faster and beautifully!)
:confused
Volpin
Sr Member
:confused
Sarcasm never translates well on forum posts, does it?
Agent RayBans
Sr Member
")
tekparasite
Member
I imagine he thinks you're going to go to his house and cut him, Volpin.
He does know my address you know ... so he can show up with anyone of these
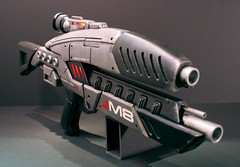
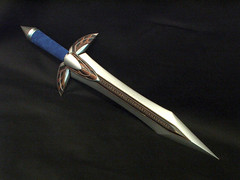
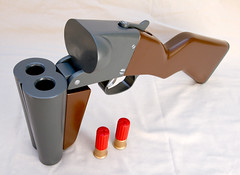
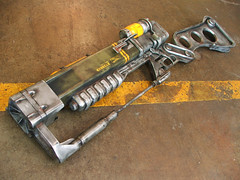
and disappear using one of these
....and I'm history. :cry
tekparasite
Member
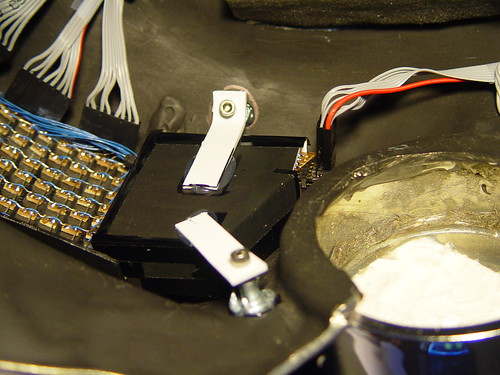
... here is how I finished the chassis for the side boards
However, before starting on that,I quickly realized that the male pins were hitting against the ear preventing a good fit. So, I had to make another 90 degree turn using the same angle male headers.
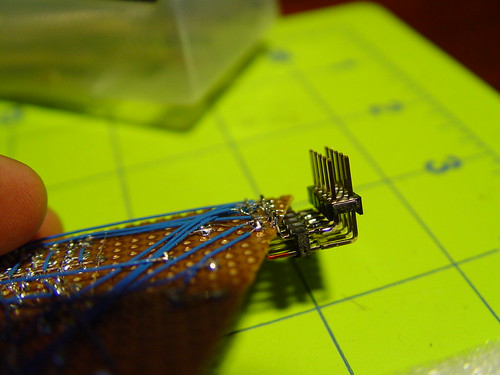
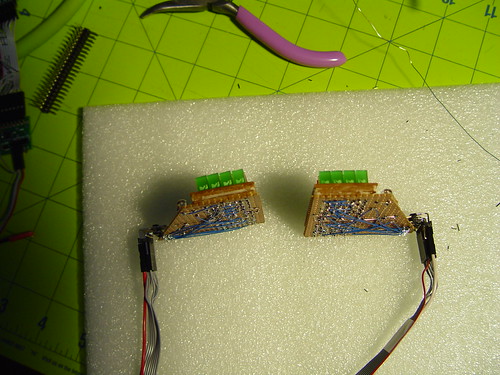
Then, I started to build the chassis
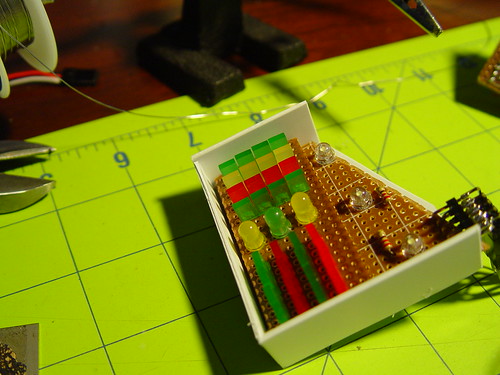
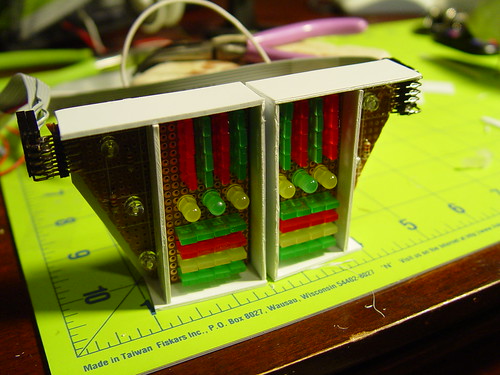
Now notice in the picture below that I only did 2 partitions for the area where the color gels go. This was done on purpose because after mounting these by hand, I realized that the bottom LED was hardly visible through the visor.
So, I decided to join the middle LED area and the lower LED area that way, at least I can show the pulse of that secondary LED.

I couldn't decide on color gels, but I opted to go with blue and green just to mix in the colors a little bit. There is already enough RED in the helmet.
Painted the chassis black color, added some thin packaging material to diffuse the LED hot spot a little bit, and mounted the color gel.
Finally, I added pinstripe to give it a finished look.
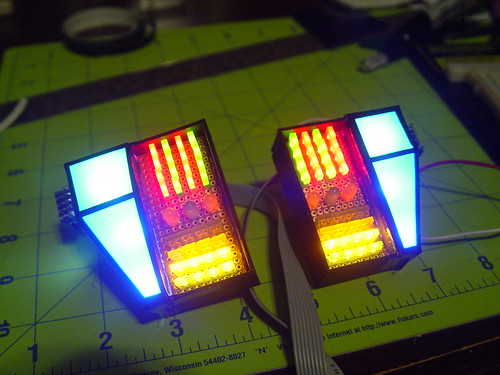
Gave it a test run..
However, before starting on that,I quickly realized that the male pins were hitting against the ear preventing a good fit. So, I had to make another 90 degree turn using the same angle male headers.
Then, I started to build the chassis
Now notice in the picture below that I only did 2 partitions for the area where the color gels go. This was done on purpose because after mounting these by hand, I realized that the bottom LED was hardly visible through the visor.
So, I decided to join the middle LED area and the lower LED area that way, at least I can show the pulse of that secondary LED.
I couldn't decide on color gels, but I opted to go with blue and green just to mix in the colors a little bit. There is already enough RED in the helmet.
Painted the chassis black color, added some thin packaging material to diffuse the LED hot spot a little bit, and mounted the color gel.
Finally, I added pinstripe to give it a finished look.
Gave it a test run..
tekparasite
Member
The next step was to get the controls under control.. get it.. ??
CONTROLS under CONTROL... :unsure... <<< crickets >>>
Anyway, the control box plus battery compartment was next.
When I did my Guy Manuel, I used a project box with battery holders to fit 6xAA batteries for a +9V system. Like this
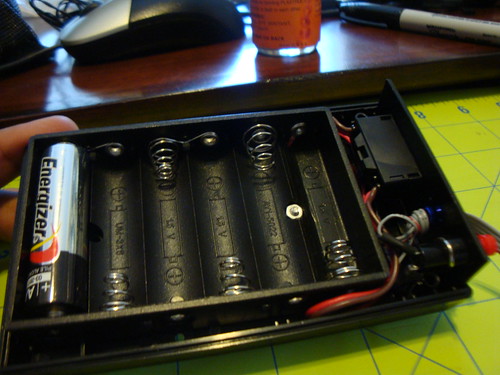
However, AA batteries (rechargeable or not) are bad in the following areas:
I like these packs because they have integrated female bullet connectors and they have a hard case.
So my challenge is to rig something that will integrate easily to this pack.
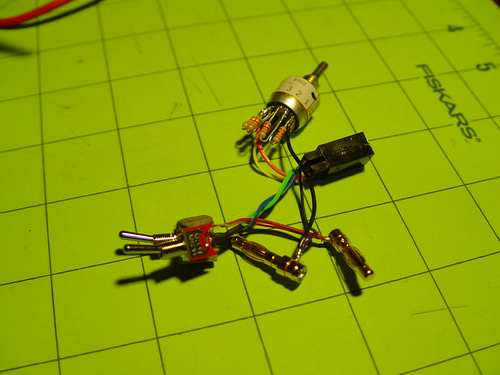
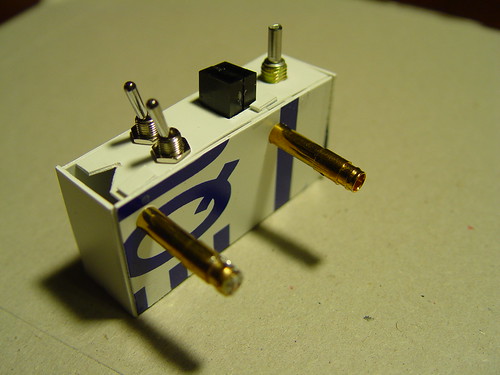
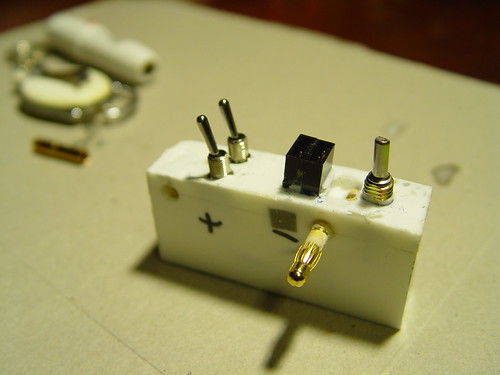
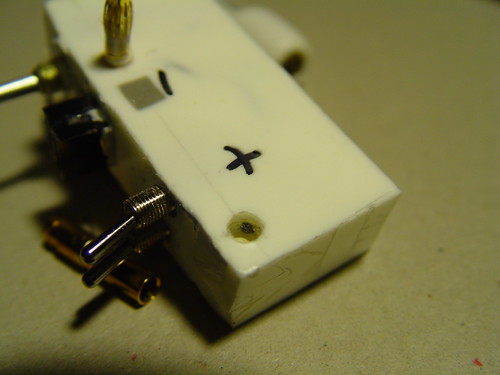
Here are all the controls and components used for this adapter.
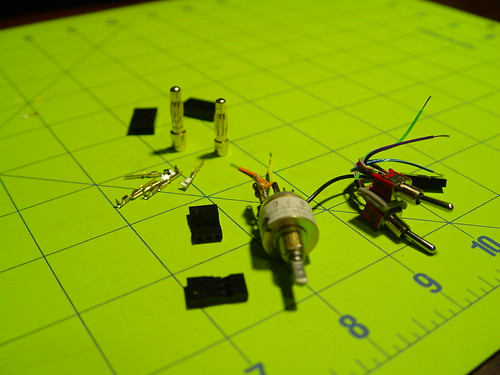
So, I have the multi-position pot switch, 2 power switches (one for the LED Matrix and one for the side boards), male bullet connectors and female headers.
Firs step was to connect everything to make sure it worked!
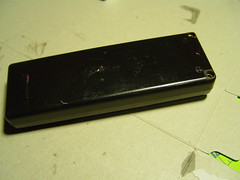
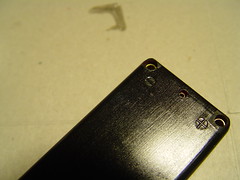
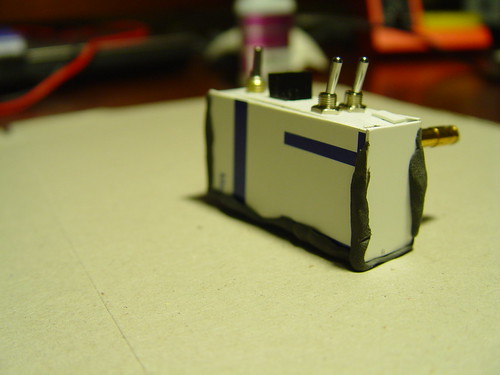
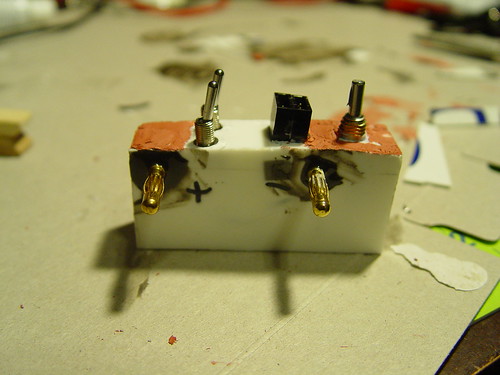
Then I started working on the case.
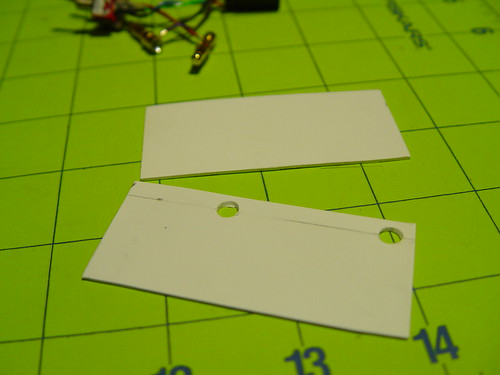

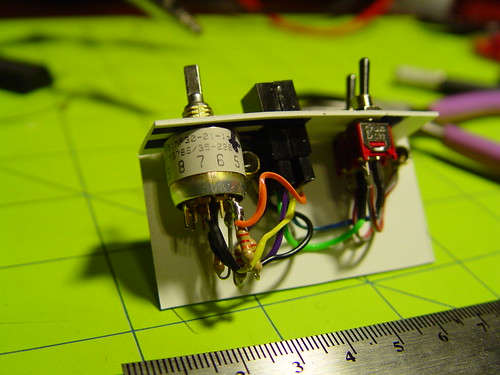
I made sure that the wires did not touch the walls of the casing.
In the picture above, you can see how I used spare female connectors to hold the male connectors in place.
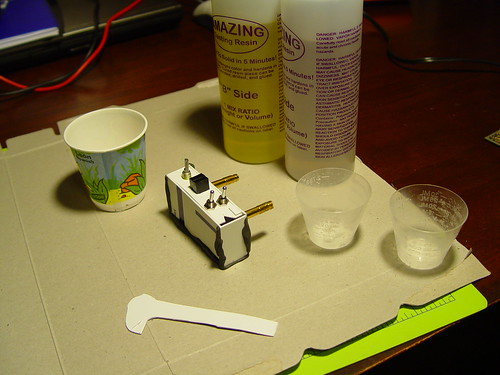
I used this putty to seal the corners. I didn't want all the liquid resin to leak before curing.
Now, prepping for the casting resin
... poured the 'good stuff' through the opening. Wow! this thing gets hot while curing.
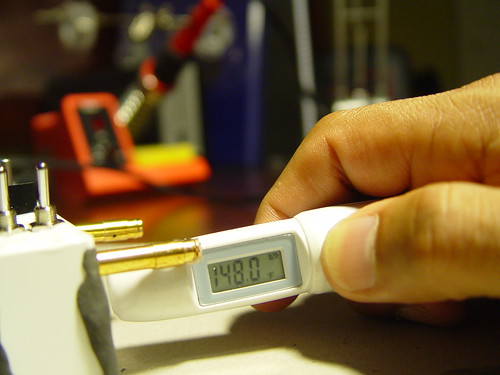
Did a quick continuity check to make sure all components survived the casting resin and they did. :thumbsup
However, I did not pull the female connectors soon enough, so they bonded somewhat to the male connectors. One of them was so welded that I eventually pulled the entire connector out. :angry
Luckily, i could see where the connecting wire was
I re-solder the connector and using JB Weld placed the male bullet connector back in its spot.
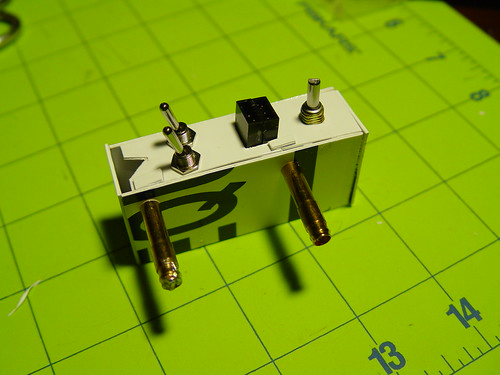
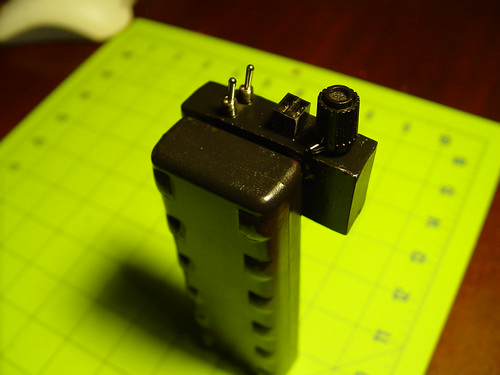
After sanding a bit and a coat of black paint, my adapter control unit was fully functional AND more aesthetically appealing.

Trust me.. changing batteries is a 2 second operation.
I also sandwitched a piece of styrene between the battery pack and this control box and used it as a belt clip for a very slim design.
:love
CONTROLS under CONTROL... :unsure... <<< crickets >>>
Anyway, the control box plus battery compartment was next.
When I did my Guy Manuel, I used a project box with battery holders to fit 6xAA batteries for a +9V system. Like this
However, AA batteries (rechargeable or not) are bad in the following areas:
- High self discharge rate,
- accelerated voltage drop under load, and
- expense of batteries.
I like these packs because they have integrated female bullet connectors and they have a hard case.
So my challenge is to rig something that will integrate easily to this pack.
Here are all the controls and components used for this adapter.
So, I have the multi-position pot switch, 2 power switches (one for the LED Matrix and one for the side boards), male bullet connectors and female headers.
Firs step was to connect everything to make sure it worked!
Then I started working on the case.
I made sure that the wires did not touch the walls of the casing.
In the picture above, you can see how I used spare female connectors to hold the male connectors in place.
I used this putty to seal the corners. I didn't want all the liquid resin to leak before curing.
Now, prepping for the casting resin
... poured the 'good stuff' through the opening. Wow! this thing gets hot while curing.
Did a quick continuity check to make sure all components survived the casting resin and they did. :thumbsup
However, I did not pull the female connectors soon enough, so they bonded somewhat to the male connectors. One of them was so welded that I eventually pulled the entire connector out. :angry
Luckily, i could see where the connecting wire was
I re-solder the connector and using JB Weld placed the male bullet connector back in its spot.
After sanding a bit and a coat of black paint, my adapter control unit was fully functional AND more aesthetically appealing.
Trust me.. changing batteries is a 2 second operation.
I also sandwitched a piece of styrene between the battery pack and this control box and used it as a belt clip for a very slim design.
:love
Last edited:
Volpin
Sr Member
Functional and beautifully elegant. Translation: I'm stealing this idea.
Do you happen to have any shots of how the side lights are rigged into the corners of the helmet? I've been struggling with this lately as they won't go in while built into my chassis rig. I've considered just building a cavity inside the helmet corners for them to mount to, similar to the styrene box around yours, but I don't know if just epoxying this chassis in place will be sturdy enough...
Don't know if i should be excited or petrified?? I'm still along way off, but all these electronics still make no sense to me. I'm highly impressed, amazing work to say the least. thankfully i've got some time to continue my studies.
Thanks for posting in such detail.
Thanks for posting in such detail.
tekparasite
Member
Do you happen to have any shots of how the side lights are rigged into the corners of the helmet?
Here's a shot of how mine are currently mounted.
As you can tell, it's just a piece of styrene with t-nuts and cap screws. Not very fancy, but it works. I'm using this approach for the final setting but with a better bonding material for the styrene and t-nuts.
Surprisingly, my enclosures seem to fit well and not want to move (even without these styrene support tabs). I'm assuming it has to with their overall shape, size and natural supports (i.e. bottom base of the matrix..etc).
On a different note, do you know what I can use to permanently bond the foam padding to the helmet? I used an "All Purpose" spray adhesive, and it seemed to grasp well, at first.
After a week, it has started to come off. I know they sell adhesive spray specifically formulated for foam, but maybe you (or anyone out there) know of a good adhesive material for foam.