Upgrading MPC/ertl Return Jedi Millennium Falcon kit

Weezer

Well-Known Member
Hi everyone. This is going to be long winded, but...

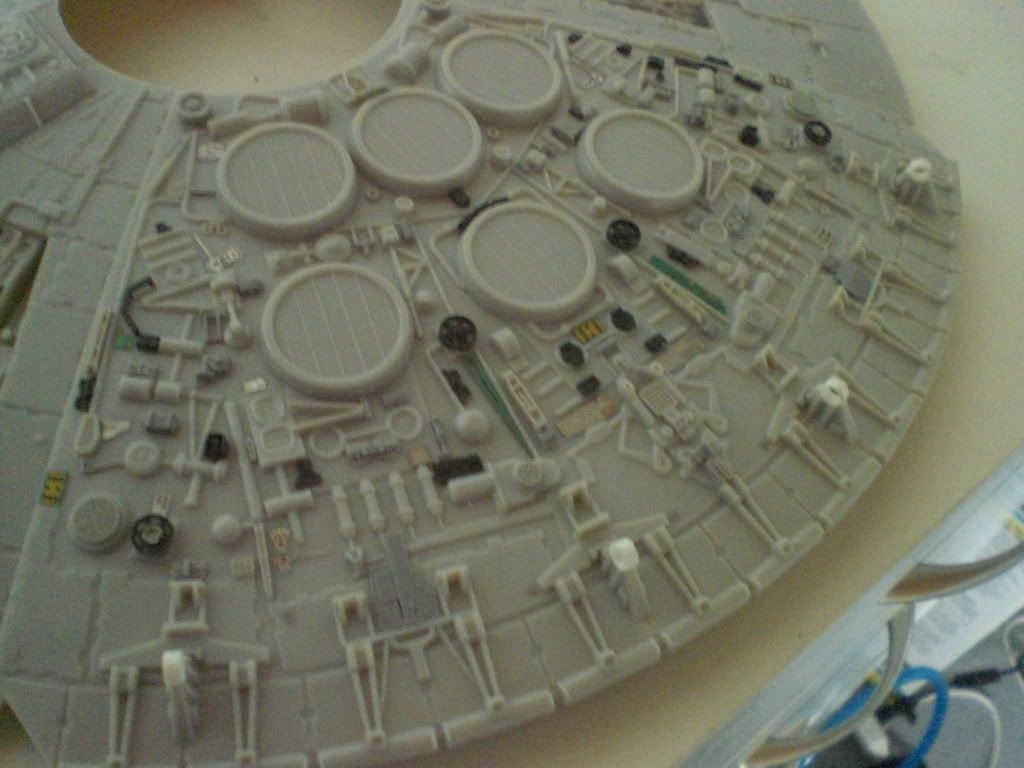
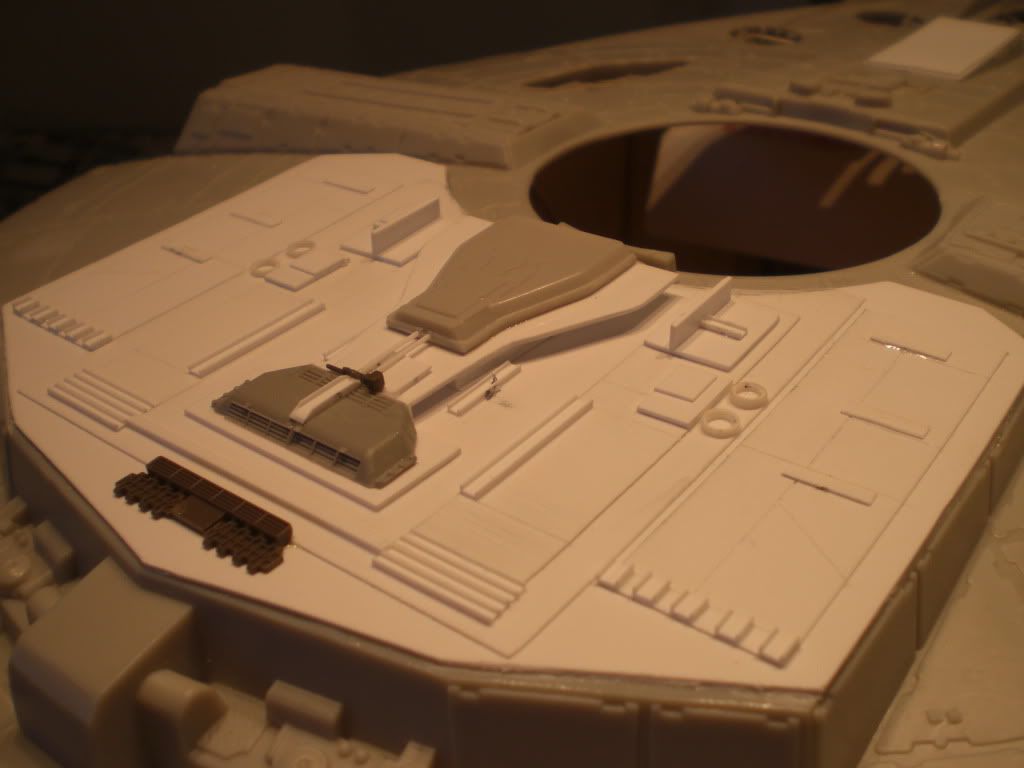
Every time I go into my office closet I end up staring at a MPC/ertl Return Jedi Millennium Falcon kit. I picked it up about 4 years ago for a really good price. I actually have two (I'll keep one sealed).

This all started when I was 12 (I'm 34 now). I built the same kit using all the parts that were included and in the end I hated it (which was disappointing considering I used all my hard earned lawn mowing money to buy it).

Anyway - - I always thought I could do a better job with the kit but wanted to try it when I had a few tips and tricks under my belt. I already have a set of Falcon kit's side-walls in hand, although I might start from scratch????

I've read a number of blogs/threads about this subject and would like to give it a shot... OKAY I can hear everyone groaning and I know that a few of you want to shake me and say... "You can't make a silk purse out of a sow's ear! Get a Fine Mold."

My answer to that is I like a challenge and I owe it to myself to try.

The main reason for this post is I'd like members who know what I'm up against to please give me a check list of things (within reason to the scale) to improve on and if possible a list of some small donor kits (if any) I could use to add proper detail.

Some of the things I'm looking to change right now are listed in John Martin's write up on another modeling site.
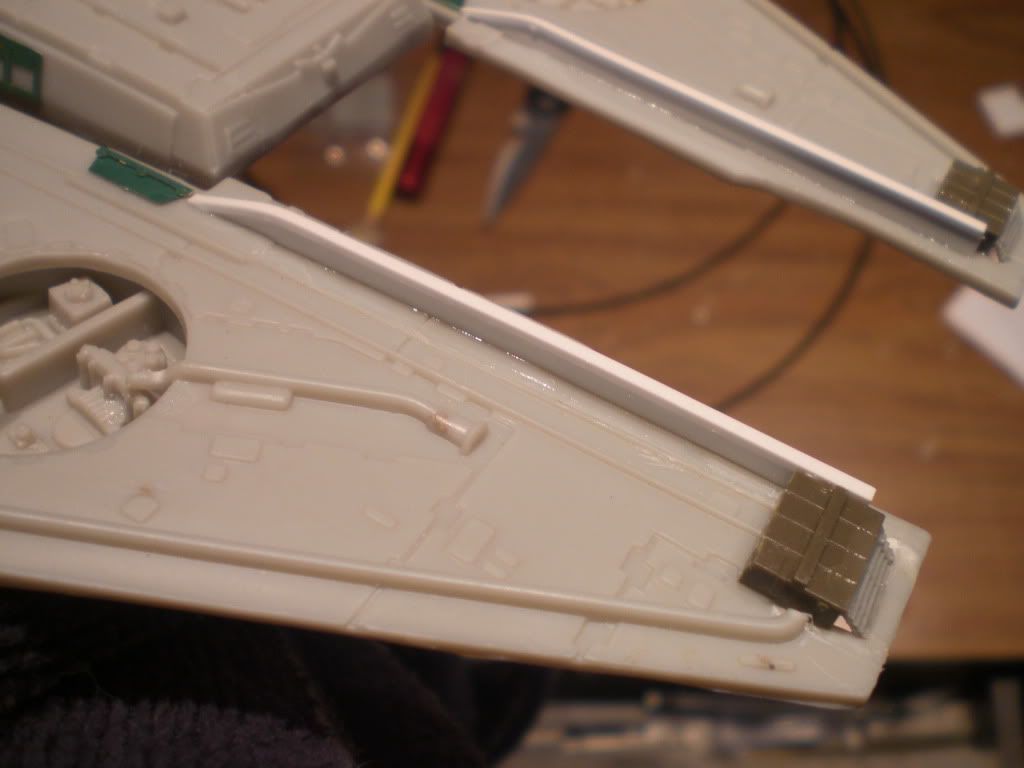
-side-walls
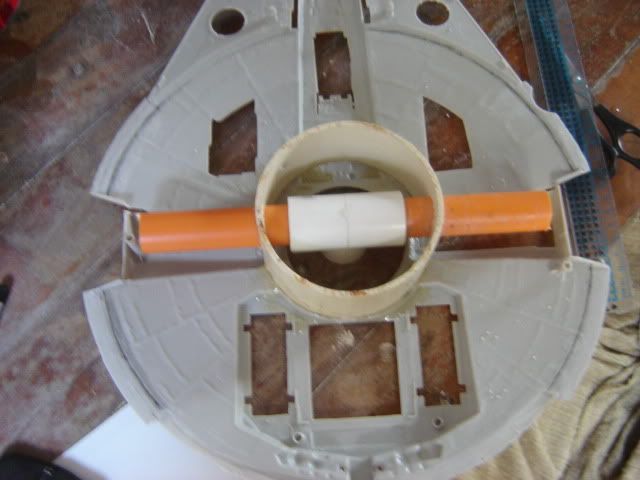
-cockpit and cockpit tube
-overall shape of the falcon... (too flat)
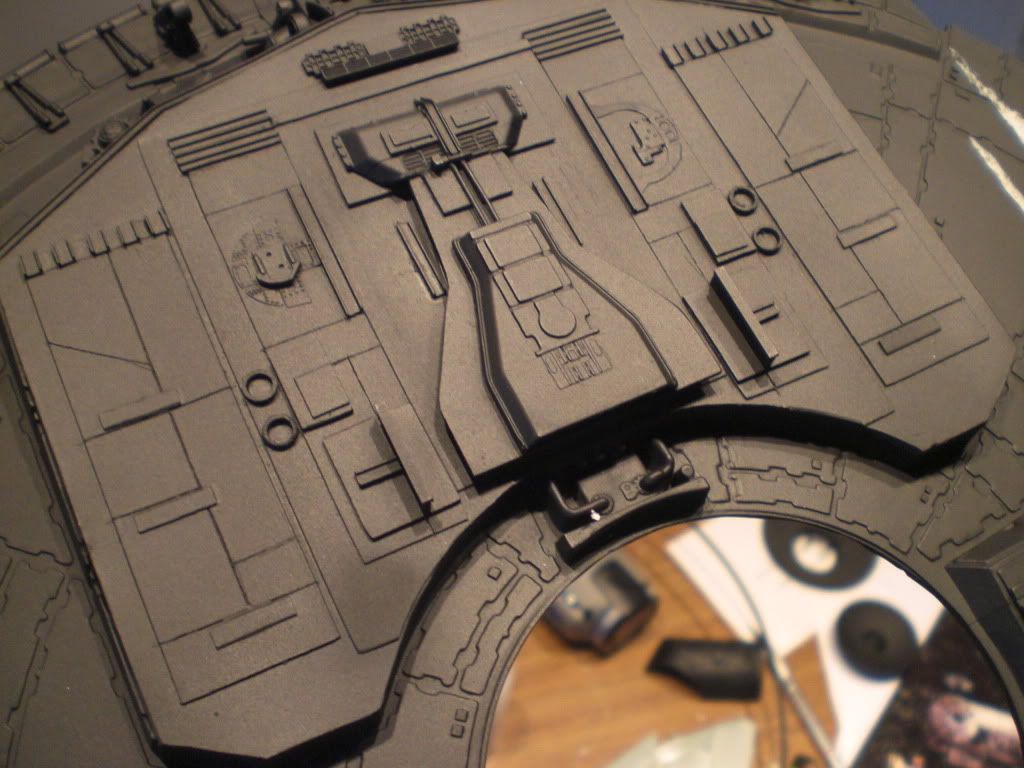
-back engine deck
-dish size

The engine grill I have yet to decide on. CGI or the original bare bone SS curved plexi?

I'm also not sure which version of the ship I should depict ANH or ESB. Suggestions?

Anyway I hope some of you are willing to help me out.

BTW - - most likely this build will be a side project, so it won't be a speedy one (they never are for me).

Thanks.
 
Hi Weezer, I think it's a great idea to upgrade a MPC Falcon! I did a couple of ones when I was younger and own another unopened one for years. It really is a big challenge, it took me months to finish it, but I ended up loving it and I really enjoyed it!
It took me back into modelling, and the Falcon was a good way to restart after long years...
falcon155m.jpg

Even now I'm tempted to do another one more accurate (since I'm into a 32" scratch and have a lot of pics and so that I didn't have back then).
It's going to be great to watch this thread! :)

PS: I did mine with the CGI engine grill, looked better 'cause it wasn't lit!:rolleyes
 
Last edited:
That's what I'm talking about. That's one nice looking ship borgisbor!

Did you scratch build the detail or buy some upgrade kits? Do tell.
 
Last edited:
Thanks, Weezer. I made it a few years ago and was my first attempt to upgrade a model. There is a lot of scratch in her (of course not even close to accuracy) and the resin side walls and PE grill from starship modeler.
I'm waiting to see your Falcon started!
 
I want to undertake the very same thing!

I recently completed a Fine Molds Falcon(still fine tuning it), But,I Like the look of the 5' Falcon from ANH. ...

Which is what the old MPC kit is based on!

I didn't like the additional landing gear used in Empire or Jedi, and prefer the Falcon as she looks in ANH.

Our Friend Ozzy had a Beautiful re build of a MPC/ Ertl Falcon.

Currently, I am in the hold Position(due to funds),(In fact one of the members here is Holding parts for me) But hope to get going soon.

Perhaps when I do get going, we can prepare notes.
 
borgisbor: it looks like you used the Blue Moon conversion kit from Starship modeler. I was struggling with what kit to buy Falcon kits' or Blue Moon's. I may pick up Blue Moon's kit later down the road. I like some of the features it offers.

tek2graphics: No progress yet. Unless you count cutting the plastic off the box and purchasing a few kits.:lol

BEATLEPAUL: I saw your Fine Mold build, it looked great! By all means feel free to post any bits of Falcon info here... This goes to anyone interested in building one.

I'll let you know now that I'm a slow worker... due to being a bit of a perfectionist. I'm kind of in a gathering mode. I'm collecting photos/reference, scrap styrene and other bits. I'm going to take my time with this one.

I still need to get my work station back up and running. My wife and I just had our basement dry walled. So I have to get that mess cleaned up and painted. Then I'm free to spend late nights in my man-cave.:thumbsup

I'm going to try and find some time to scale an image of an actual Falcon and compare it to the kit's body.

I'd also like to get in depth with available conversion kits but I don't know if I'll be treading on any toes starting a discussion like that? I'm also not sure what images are okay to post and what aren't. I don't want to start any hard feelings or "pop corn" sessions for the other members.


By the way does anyone know if it would be to my advantage to fabricate an aluminum interior frame/armature for a model this size? (following 32" SS builders' and Ozzy's approach)
 
Weezer, I wanted to chime in as I've got the same model kit that's been looking at me longingly begging to be built. When you say ANH vs ESB version you're referring to the landing gear boxes on the 5-footer right?

Neither the Blue Moon nor the Falcon kits are accurate but at least you'll be able to get the sidewall height right. Scratchbuilding accurate sidewall and mandible guts can be a bit of a hassle because of the small size. The dome is too shallow, but try comparing the docking arm, mandible, and jawbox details to the 5-footer prop's and you'll notice MPC at least tried to capture them as best they could. Compare the engine deck to the prop and you'd think another team designed it without even looking at the prop. The mandibles are a bit too long compared to that famous top-view photo in Chronicles, but the mandible top details are pretty good and the toe-in is nicely done. The jawbox is a bit too pointed but all in all well represented.

You won't be able to build a 32-inch Falcon using the MPC unless it's just the paintjob you're after.
 
I take back what I said, you CAN build anything out that MPC. Scale modelers are known for accomplishing things beyond wit - almost anything they can envision.
 
I started one of these earlier this year, I think. I had a build thread at SSM, but I guess when it became inactive, it was deleted. Here's a link to a somewhat abbreviated build thread at Z-5:
Millennium Falcon--Sci Fi at Z-5??? - Zone-Five Aircraft Modeling Forums
I have 3 FM Falcons, but figured I'd mess around with the cheaper MPC/AMT/Ertl kit first, if for nothing else than to practice the paint job. I too got my first MPC falcon in the 80s with lawn mowing money. I too was terribly disappointed. I'm using the Blue Moon set (there is a rumor that the guy behind Falcon Kits died in Iraq recently, which would mean no more Falcon Kits, but I've not seen this rumor verified). As you can see, I replaced the entire portion of the lower aft hull that extends from the main saucer section. I added lots of little greebly bits to the area of the upper rear hull around the engines. I also added little detail bits inside the various holes in the hull. One thing I realized too late is that the edges of the hull look a lot better when you thin them down. I did this on the top portion, and it really looks much more like metal plates hanging off the end of the hull. But I had already glued the Blue Moon sidewalls to the bottom and the effect is lost there. The same thinning would improve the look of the holes and openings in the hull. For detail parts, I went to local shows and model swap meets looking for kits with the most amount of small detail parts for the least amount of money. The kits at those shows are usually open so you can inspect them. This means I was more interested in a detailed look than I was about accuracy. If the SS model used a particular part from a particular model, you're not likely to find most of that in source kits that are available in the perfect scale for the smaller Falcon model. So trying to do that would've driven me nuts.
CIMG2727.jpg

CIMG2799.jpg

CIMG2793.jpg

CIMG2731.jpg

CIMG2644.jpg

CIMG2637.jpg

I did not intend to light it, as I had never lit anything before, but then I decided this would be first lighting project. That got more and more complicated, so I shelved it for awhile. I expect to continue in just a few weeks, but I said that a month ago, too.
 
Last edited:
The MPC falcon takes a LOT of grief but with soem dedication it does really build nicely. But reading your original post I'm not sure you realize how loaded a question you're asking. The way I see it there are about 3 levels of MPC falcon modifications... and which way you go determines how crazy you are... an I oughta know I've gone down all of the roads :eek

Level 1 you decide to buy an upgrade kit and build a darn fine reperesentation of the Falcon. FalconKits or Blue moon make replacement parts for the side walls and a few other bits. Using them will produce a very respectable result.

Level 2 - you decide that you want to try your hand at scratch building and want to partially relive the process that ILM when through when they built the falcon. you purchase some sacrificial, 1/72 tank kits, 1700 (or smaller) battleships, assundry helicopters, jets and cars, and have a go at kitbashing a ton of details that "look functional".
while:
  • Correcting the height of the sidewalls.
  • adding detail to the engine deck area
  • the crossmember pieces missing form the kit cockpit cone
Level 3 - you've decided that while the basic geometry is close you just can't live with what's not right with this model you:
  • correct the diameter of the cockpit tube and cockpit
  • correct the sidewall height
  • correct the diameter of the radar dish
  • correct the curvature of the hull (various methods but the most effective in my erperience is placing a plug in the center, clamp the outer rings, and GENTLY apply heat to soften the plastic enough to "take" the new shape - long slow but effective.
  • research the studio model and get the parts maps form the studio scale guys, then research the same model "subjects" at 1/4 the scale used on the 5 footer or 1/2 the scale used on the 32" (depending on which you're replicating).
  • Buy all said models and try to steal the same/similar bits form the smaller subjects to use on the MPC replicating the studio look as closely as possible
  • scratchbuilding anything that cannot be found by above utilizing the studio scale reference
  • practicing on every scrap piece of styrene or other material to perfect the airbrushing, and weathering techniques to get the "just right" amount of grunge
  • Researching and experimenting with every shade of gray, until you finally realize that you're gonna have to learn to mix paint and airbrush if you're ever going to be satisfied with the end color. This will include the obligatory appeal to every modeling and prop board for the "what is the right color for the Falcon thread". To which they will reply a variety of colors and paint mixtures that will be "close" but never to your satisfaction.
  • messing up several paintjobs (that everyone else thinks look perfect)
  • redoing several odd bits that you just aren't happy with because your scratching kitbashings skills have imporved greatly from when you started.
  • Repainting "again"
  • finishing the project and thinking Damn I could do that so much better now...
  • Wash, rinse, repeat... Welcome to our world of Falcon insanity...:lol
Enjoy,
Jedi Dade
(I just couldn't resist :D)
 
You guys are inspiring! Thank you for sharing all your hard work... keep it coming.

Jedi Dade... I'm not afraid.:lol
 
I just came accross this today, missed it when it was posted.

Describes the last four years of my falcon to a "T".

And thats why it still aint finished. LOL.

It is nice to know we are not alone though.

Ozzy

The MPC falcon takes a LOT of grief but with soem dedication it does really build nicely. But reading your original post I'm not sure you realize how loaded a question you're asking. The way I see it there are about 3 levels of MPC falcon modifications... and which way you go determines how crazy you are... an I oughta know I've gone down all of the roads :eek

Level 1 you decide to buy an upgrade kit and build a darn fine reperesentation of the Falcon. FalconKits or Blue moon make replacement parts for the side walls and a few other bits. Using them will produce a very respectable result.

Level 2 - you decide that you want to try your hand at scratch building and want to partially relive the process that ILM when through when they built the falcon. you purchase some sacrificial, 1/72 tank kits, 1700 (or smaller) battleships, assundry helicopters, jets and cars, and have a go at kitbashing a ton of details that "look functional".

while:
  • Correcting the height of the sidewalls.
  • adding detail to the engine deck area
  • the crossmember pieces missing form the kit cockpit cone
Level 3 - you've decided that while the basic geometry is close you just can't live with what's not right with this model you:
  • correct the diameter of the cockpit tube and cockpit
  • correct the sidewall height
  • correct the diameter of the radar dish
  • correct the curvature of the hull (various methods but the most effective in my erperience is placing a plug in the center, clamp the outer rings, and GENTLY apply heat to soften the plastic enough to "take" the new shape - long slow but effective.
  • research the studio model and get the parts maps form the studio scale guys, then research the same model "subjects" at 1/4 the scale used on the 5 footer or 1/2 the scale used on the 32" (depending on which you're replicating).
  • Buy all said models and try to steal the same/similar bits form the smaller subjects to use on the MPC replicating the studio look as closely as possible
  • scratchbuilding anything that cannot be found by above utilizing the studio scale reference
  • practicing on every scrap piece of styrene or other material to perfect the airbrushing, and weathering techniques to get the "just right" amount of grunge
  • Researching and experimenting with every shade of gray, until you finally realize that you're gonna have to learn to mix paint and airbrush if you're ever going to be satisfied with the end color. This will include the obligatory appeal to every modeling and prop board for the "what is the right color for the Falcon thread". To which they will reply a variety of colors and paint mixtures that will be "close" but never to your satisfaction.
  • messing up several paintjobs (that everyone else thinks look perfect)
  • redoing several odd bits that you just aren't happy with because your scratching kitbashings skills have imporved greatly from when you started.
  • Repainting "again"
  • finishing the project and thinking Damn I could do that so much better now...
  • Wash, rinse, repeat... Welcome to our world of Falcon insanity...:lol
Enjoy,
Jedi Dade
(I just couldn't resist :D)
 
You'll never be alone as long as the RPF is around.:lol

I had to put this project on hold. Last fall we needed to do some home renos and my wife is ready to give birth to our 2nd any day now. Then I've got a lot of house painting to do.:unsure

I really appreciate the stuff people are sharing. I'm taking note of what can be done, so please keep sharing.
 
WOW, I am tired just reading about the work that goes into this thing to make it somewhat accurate. I thought about getting the upgrade kit form Starship modeler but they are always out of stock.

Those builds are great guys. Thanks for sharing!

Kenny
 
Hey there,
I've been seeing some of the Falcon builds going on here and at SMA. A lot of people seem to be chopping the MPC kits up to get the shape right.

I'm not able to invest the time and money into a 32" build. Plus there is no room here for a ship that size. I'm wondering if it would be better to just scratch build the initial shape of the ship like the 32" builders do (in the MPC kit's scale)? Then I could use some of the after market kits, 1:144 - 1:72 donors and a few of the MPC's parts to detail it. At least I'd get the right shape for the hull, mandibles and jaw box?

Is this too crazy of an idea?

Glad to see your still going to have a go at it!

I am personally having a blast working on my MPC Falcon.

Why not just get either the small Finemolds Falcon or the 1/72 Falcon?

Those kits will save you a lot of grief! LOL!
 
Hi Weezer,

If its the shape your after and you dont need to fix the docking rings then just space the center of the ship. Like this.

DSC00313.jpg


You dont have to cut the ship up. It will work fine with scratch built walls or upgrade kits.

When your done with that, just cut down the side walls to the size you need and then, (as you suggested,) greeble them up with some kit bits. 1/144 tank kits dont have many parts to use other than the decks, but you can find some bits from 1/72. Or do as I did with my first build and just find things around the house that have the shape your looking for and glue the bugger on.

Ozzy
 
Last edited:
This thread is more than 3 years old.

Your message may be considered spam for the following reasons:

  1. This thread hasn't been active in some time. A new post in this thread might not contribute constructively to this discussion after so long.
If you wish to reply despite these issues, check the box below before replying.
Be aware that malicious compliance may result in more severe penalties.
Back
Top