How would YOU mold / cast these parts?

zorg

Master Member
RPF PREMIUM MEMBER
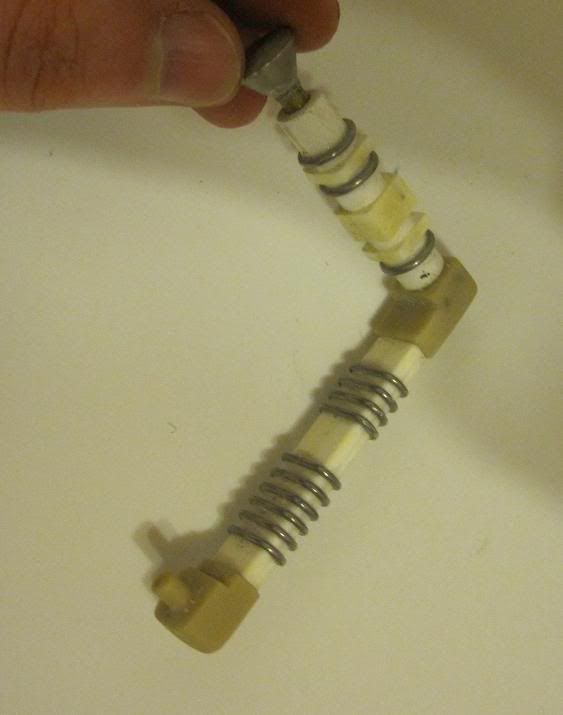
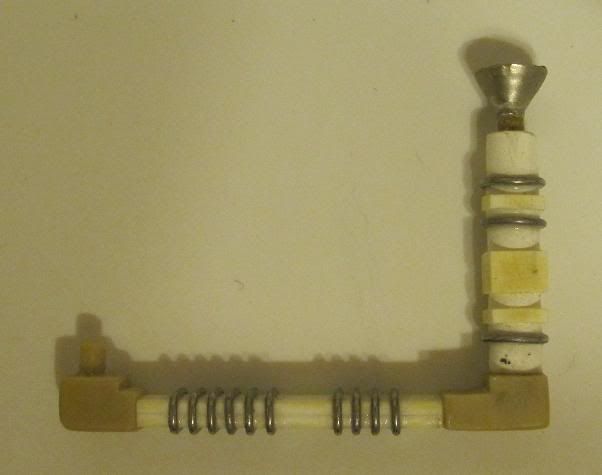
these are the handle parts of my fifth element glove/hand kit, probably the biggest reason for not redoing the kit before now was the casting up of these parts which i found to be a complete PITA.

the main issue is the amount of ridges and corners to trap air.

so before i start to mold these parts up again and go through the slog of trying to get decent casts how would you do it?

there is no other equipment apart from a pair of hands, fast cast resin and some silicone.

please help to make my molding / casting life a bit easier :thumbsup

handl2.jpg

handl.jpg


-z
 
This is just MO but pressure casting would be the best way. ;)

But since you say you don't have any other tools. I have a sword handle that has a huge amount of detail and little ridges etc that trap air regardless of how you pour slush whatever. The way I got around this is a 2 part mold, paint the resin into each part of the mold before placing them together. Kind of like a gelcoat for fiberglass, I use quick resin (pot life of 3 min) paint the 2 parts wait for it to start gelling. Put your mold pieces together and fill with resin. I get a perfect piece everytime with this method.

thats more or less the way i did them, however i let the resin set in each half then "glued" them together with a skim of resin when putting the mold halves together. time consuming and frustrating.

i was also thinking about using some talc powder this time to make sure the resin gets in all the nooks and crannies.

-z
 
please help to make my molding / casting life a bit easier :thumbsup

Invest in the proper tools and equipment and the easier part will magically appear... A pressure pot will make all the difference...

Some people punch and kick their way through a wall, others use the door...
 
There's one other option, find someone willing to cast em with a pressure pot. ;) It really is the best way, after setting mine up I can't beleive how easy it is to get perfect castings every time. :)
 
Talc will certainly help with reducing air bubbles.

Or, you could just send me your parts and I'll cast up a batch for you....it's what I do ;-)
 
The talc decreaes the surface tension on the silicone allowing it to flow into the nooks and crannies of the peices being molded better.

Richie
 
The talc decreaes the surface tension on the silicone allowing it to flow into the nooks and crannies of the peices being molded better.

But trapped air is still trapped air, it will help but it won't solve the problem with that piece IMO, there is simply too many places for air to get trapped no matter how you rotate it...

You could vent the heck out of the mold at every location air gets trapped but you are back at kicking and punching that wall, but now you have gloves on, better to look for the key to the door... :angel
 
Does using slower kicking resin help at all with air bubbles?

And doesn't lining the mold with talc soften the details?

I'm in the same position as Zorg, and have a lot of problems ith micro-bubbles.
 
Do a two part mold with your pour spout at one end and a vent spout at the othe end. Both holes at the top of the mold should be narrow and close together.

When you have your mold, dust it with talcum powder and pour into the pour spout until it comes out the vent (or better yet, inject the resin with a catheter syringe). Then cap the spouts with your finger (you should be wearing rubber gloves) and rotate the mold in every direction while you tap it against the bench to dislodge air bubbles.

IE: Rotate the mold to the side and tap it against the bench, then tilt it on its end with the vent tube at the highest point and tap so the air can vent upwards. Rotate to the other side and repeat. Turn upside down and repeat.

The key is that after each rotation you want to tilt the mold so that the vent spout is the highest point and tap so that the dislodged air can work its way out. You also may need to top off the resin as you will probably lose some in this process.

It isn't foolproof and won't do anything to help micro bubbles, but it should help get rid of the big voids. Resins with longer pot lifes help with this as it gives you more time to work out the bubbles. With a bit of practice you should be able to get decent results.
 
chris, i would do a standard 2 part mould. for casting without a pressure pot, i would suggest a slow cure epoxy casting resin. mix the resin, then leave it to naturally de gas, then pour and rotate the mould. you should get nice bubble free castings which are very strong. the down side is that you will only make 1 casting a day
 
chris, i would do a standard 2 part mould. for casting without a pressure pot, i would suggest a slow cure epoxy casting resin. mix the resin, then leave it to naturally de gas, then pour and rotate the mould. you should get nice bubble free castings which are very strong. the down side is that you will only make 1 casting a day


hmmmmmm, one a day isn't really an option.

but thanks guys for the advice so far :thumbsup
 
Good job on snagging the pot.
Just a head's up for ya.....if your molds aren't made from de-gassed silicone...you may have some issues using pressure.
Any air bubbles at the mold suface will show up as small 'BB's on your castings.
 
This thread is more than 13 years old.

Your message may be considered spam for the following reasons:

  1. This thread hasn't been active in some time. A new post in this thread might not contribute constructively to this discussion after so long.
If you wish to reply despite these issues, check the box below before replying.
Be aware that malicious compliance may result in more severe penalties.
Back
Top