You are using an out of date browser. It may not display this or other websites correctly.
You should upgrade or use an alternative browser.
You should upgrade or use an alternative browser.
1:1 Millennium Falcon Cockpit Replica - Group Build
- Thread starter SteveStarkiller
- Start date
Loosebruce704
Member
In terms of holding the lids up a simple push lock is all you need give it a push and it releases push it back up and locks back in place.
As for hinge could you mount a second layer inside which the hinge is attached to via small bolts and then join the 2 panels together the internal one could technically fit inside the box as a plug would help hold it up and give something for the push lock to lock against.
I hope that makes sense.
And sofa ive got the pics for you I just got to upload to photobucket.
Loosebruce
Or you can make a groove in each panel, (on the flat part where the hinge is suppose to sit) the thickness of the hinge of course and screw it on the inside?
Hey J,
I haven't really looked at the hinge since the weekend - I've avoided the shop after the disastrous weekend. I think you might be correct from your earlier post. I might have to countersink the hinge just a bit in order for the hinge to lay flat on the panel. I'm going to look more at the panels this weekend and try to figure out how to move forward. It really shouldn't be this difficult, I might be thinking too much! lol
In terms of holding the lids up a simple push lock is all you need give it a push and it releases push it back up and locks back in place.
As for hinge could you mount a second layer inside which the hinge is attached to via small bolts and then join the 2 panels together the internal one could technically fit inside the box as a plug would help hold it up and give something for the push lock to lock against.
I hope that makes sense.
And sofa ive got the pics for you I just got to upload to photobucket.
Loosebruce
Hey LB,
I thought about the push locks as well. Since the lids are so high and the hinge is located at the bottom I really want to make sure the lid doesn't come crashing down on people's heads. I thought about using a filing cabinet lock that secures the lid from both sides but I don't know how much room I have within the box itself - space has quickly become an issue.
I really didn't think this part of the build through - shame on me. There is a VERY good chance that I might have to rebuild both boxes or simply turn the entire panel into the actual box instead of creating a separate box that slips into place.
Looking forward to seeing those struts!
SK,
I just installed a medicine cabinet this week that the push lock magnet wouldn't hold shut. I had some countersunk Neodymium magnets for attaching tools to vertical surfaces. I epoxied one to the end of the lock and replaced the piece of steel on the door with another one. My magnets are about 10-12mm in diameter and they are tight. Larger magnets of the same type are available from many retailers. I hope this helps!
I just installed a medicine cabinet this week that the push lock magnet wouldn't hold shut. I had some countersunk Neodymium magnets for attaching tools to vertical surfaces. I epoxied one to the end of the lock and replaced the piece of steel on the door with another one. My magnets are about 10-12mm in diameter and they are tight. Larger magnets of the same type are available from many retailers. I hope this helps!
Hey LB,
I thought about the push locks as well. Since the lids are so high and the hinge is located at the bottom I really want to make sure the lid doesn't come crashing down on people's heads. I thought about using a filing cabinet lock that secures the lid from both sides but I don't know how much room I have within the box itself - space has quickly become an issue.
I really didn't think this part of the build through - shame on me. There is a VERY good chance that I might have to rebuild both boxes or simply turn the entire panel into the actual box instead of creating a separate box that slips into place.
Looking forward to seeing those struts!
HiPo
New Member
Another thought about screws and keeping the reverse side smooth: One could use something self-tapping (like a sheetrock screw), which may partially poke through the reverse side of the MDF. That end of the screw could then be ground off with a dremel tool or angle grinder, even a little below the surface of the MDF. The resulting divot can then be covered up with filler. I hope this idea helps.
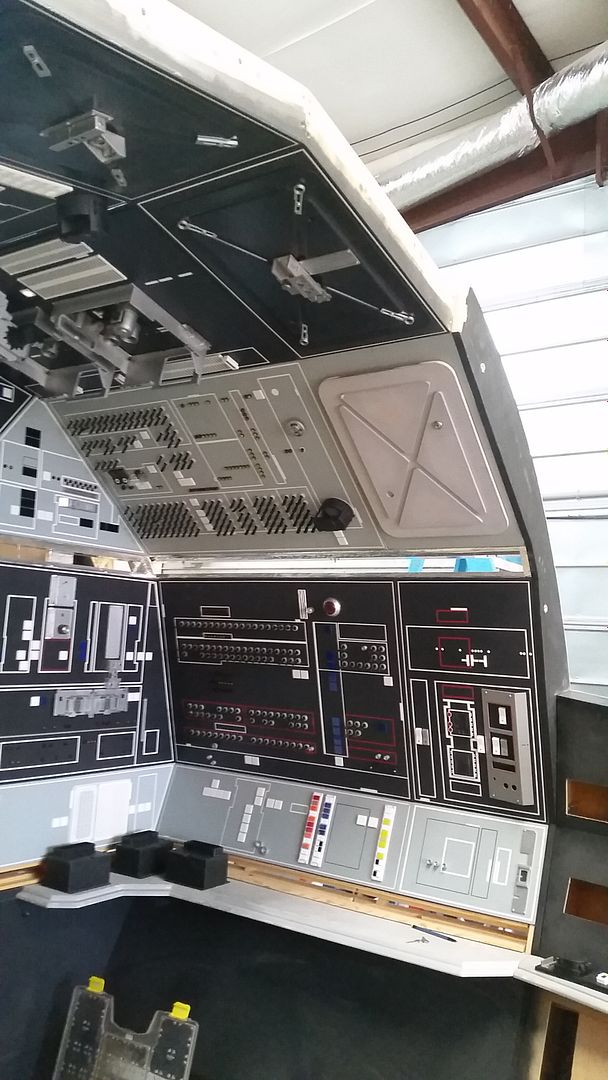
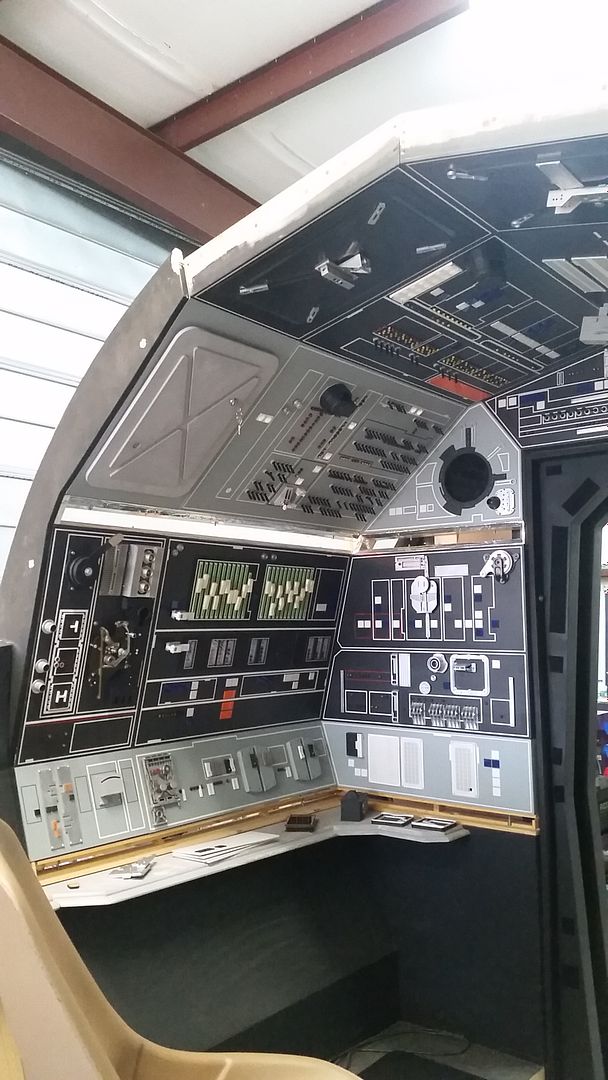
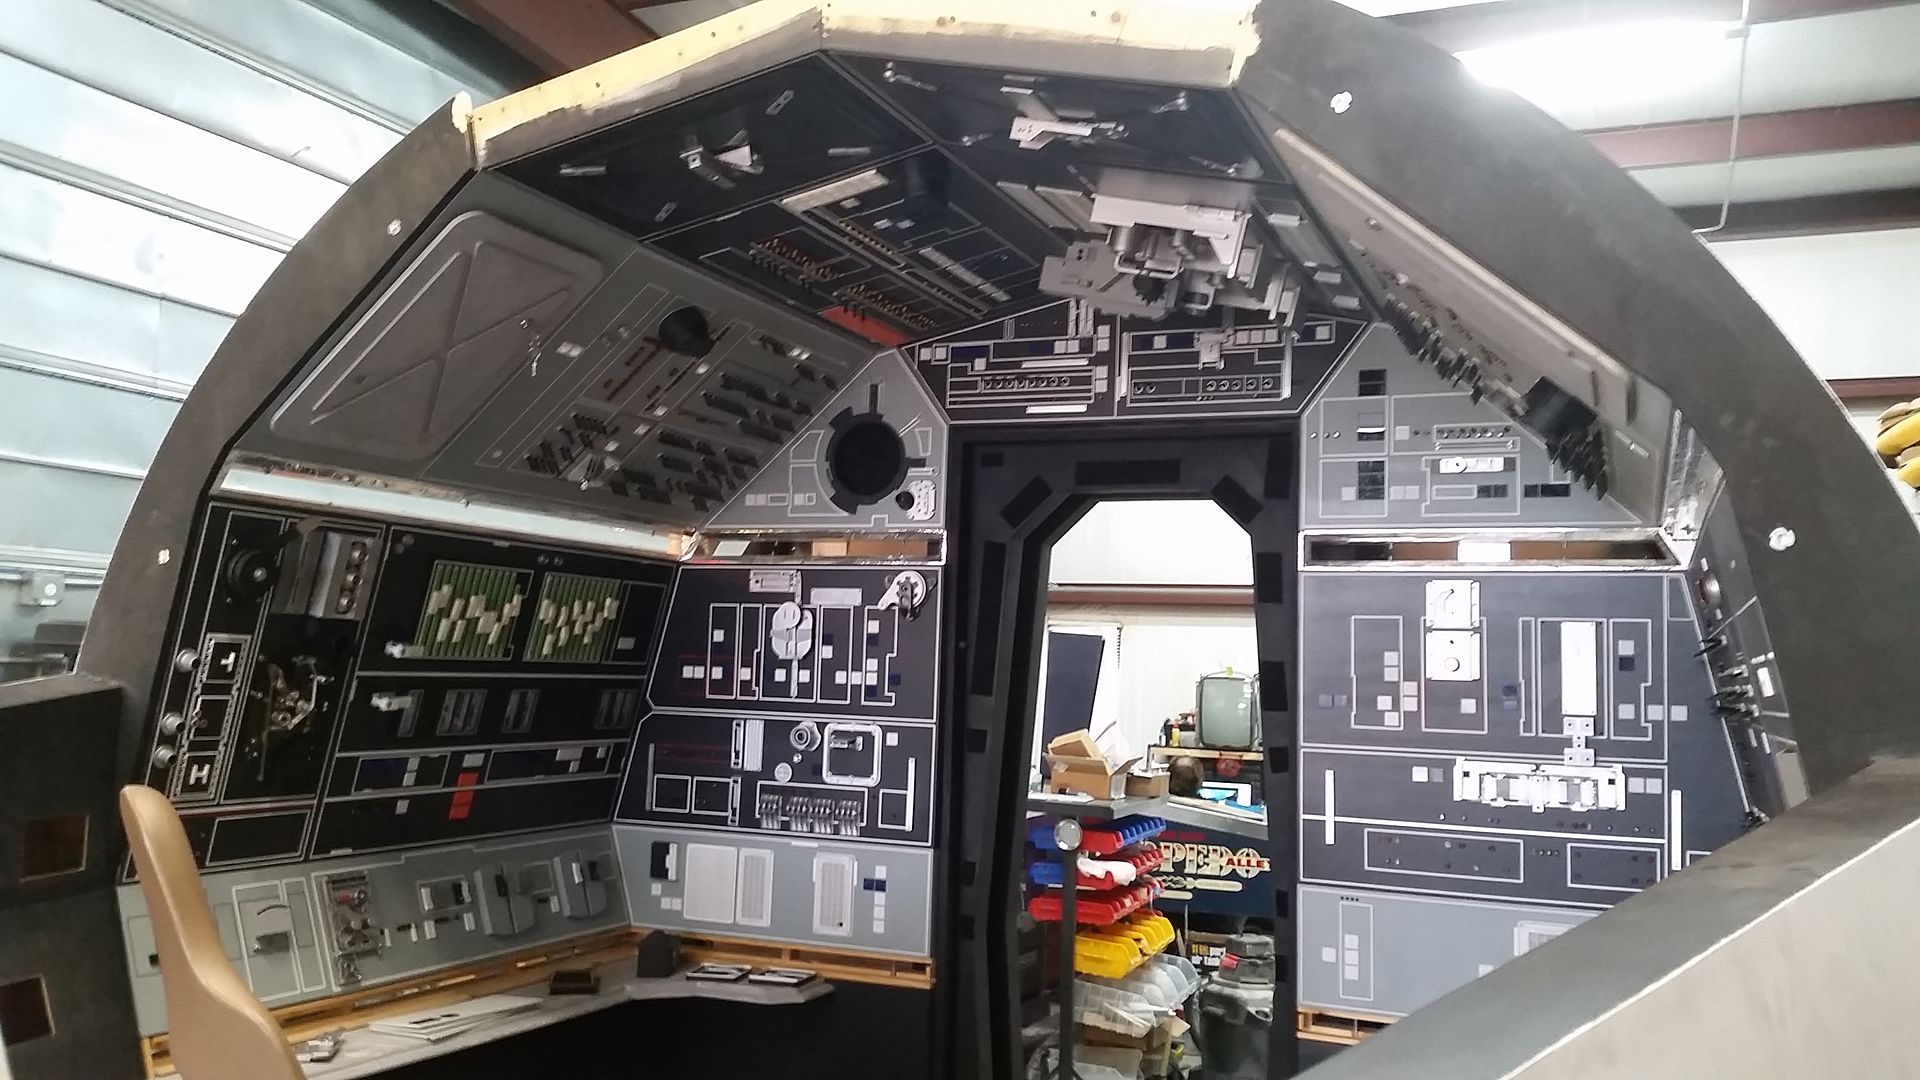
Hi Gang,
Time for an update!
I was finally able to get my head wrapped around these extension panel boxes and lids! Sadly, I had to take apart the existing boxes in order to make the new ones... ENJOY!
Let's start by removing the extension panels
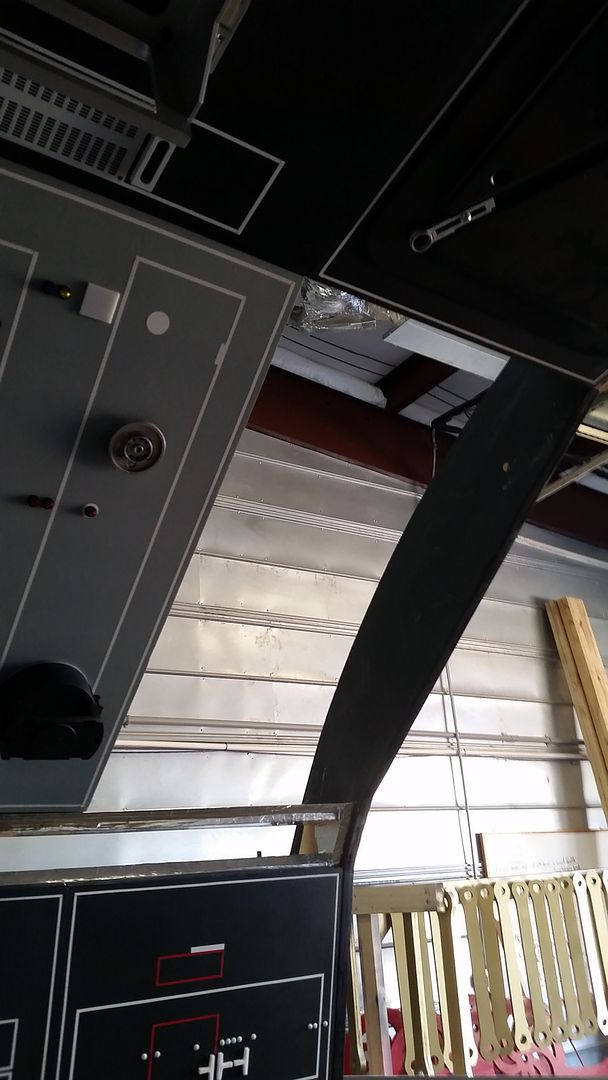
Then remove all the greeblies from the old boxes
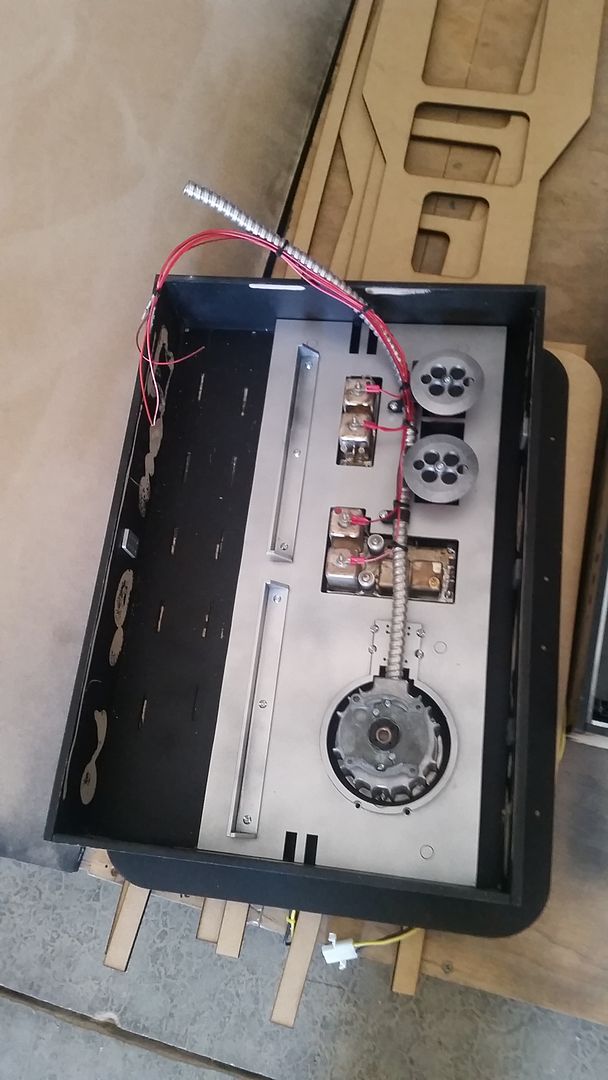
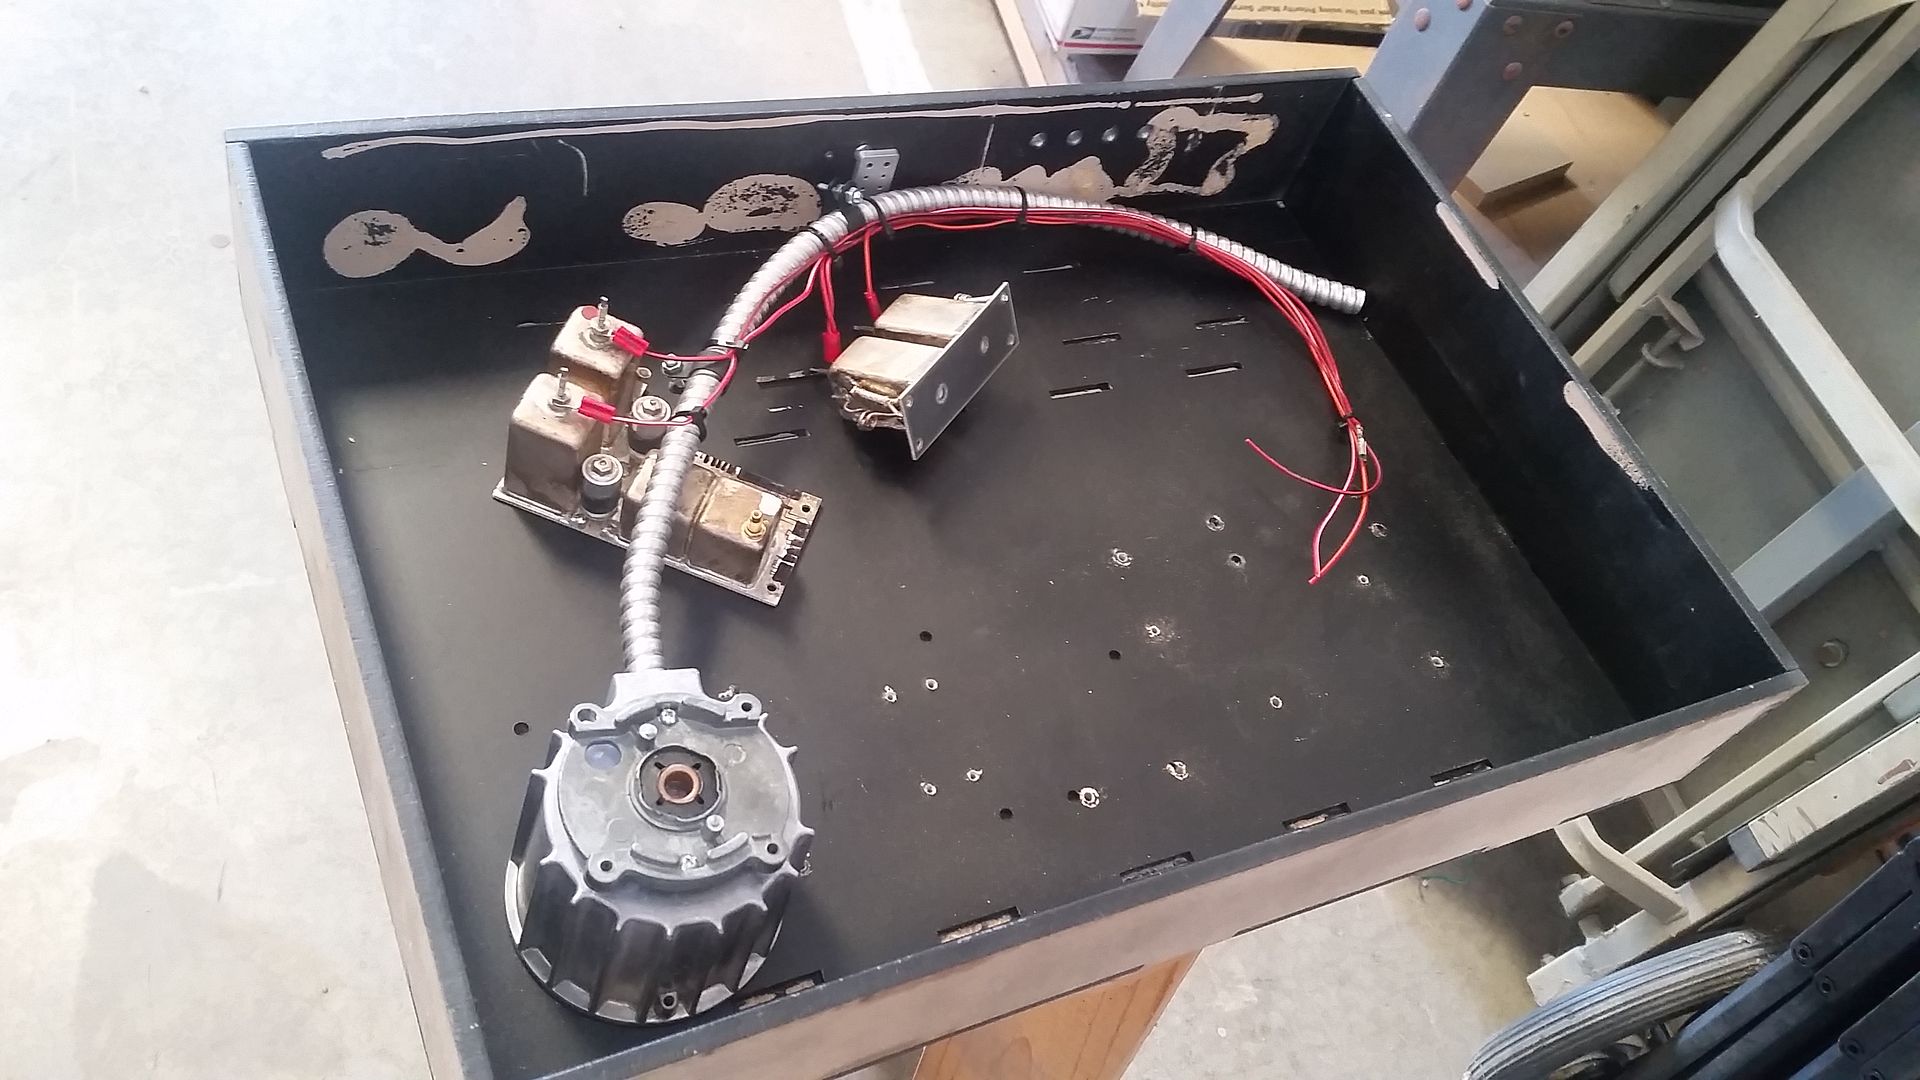

OUCH!
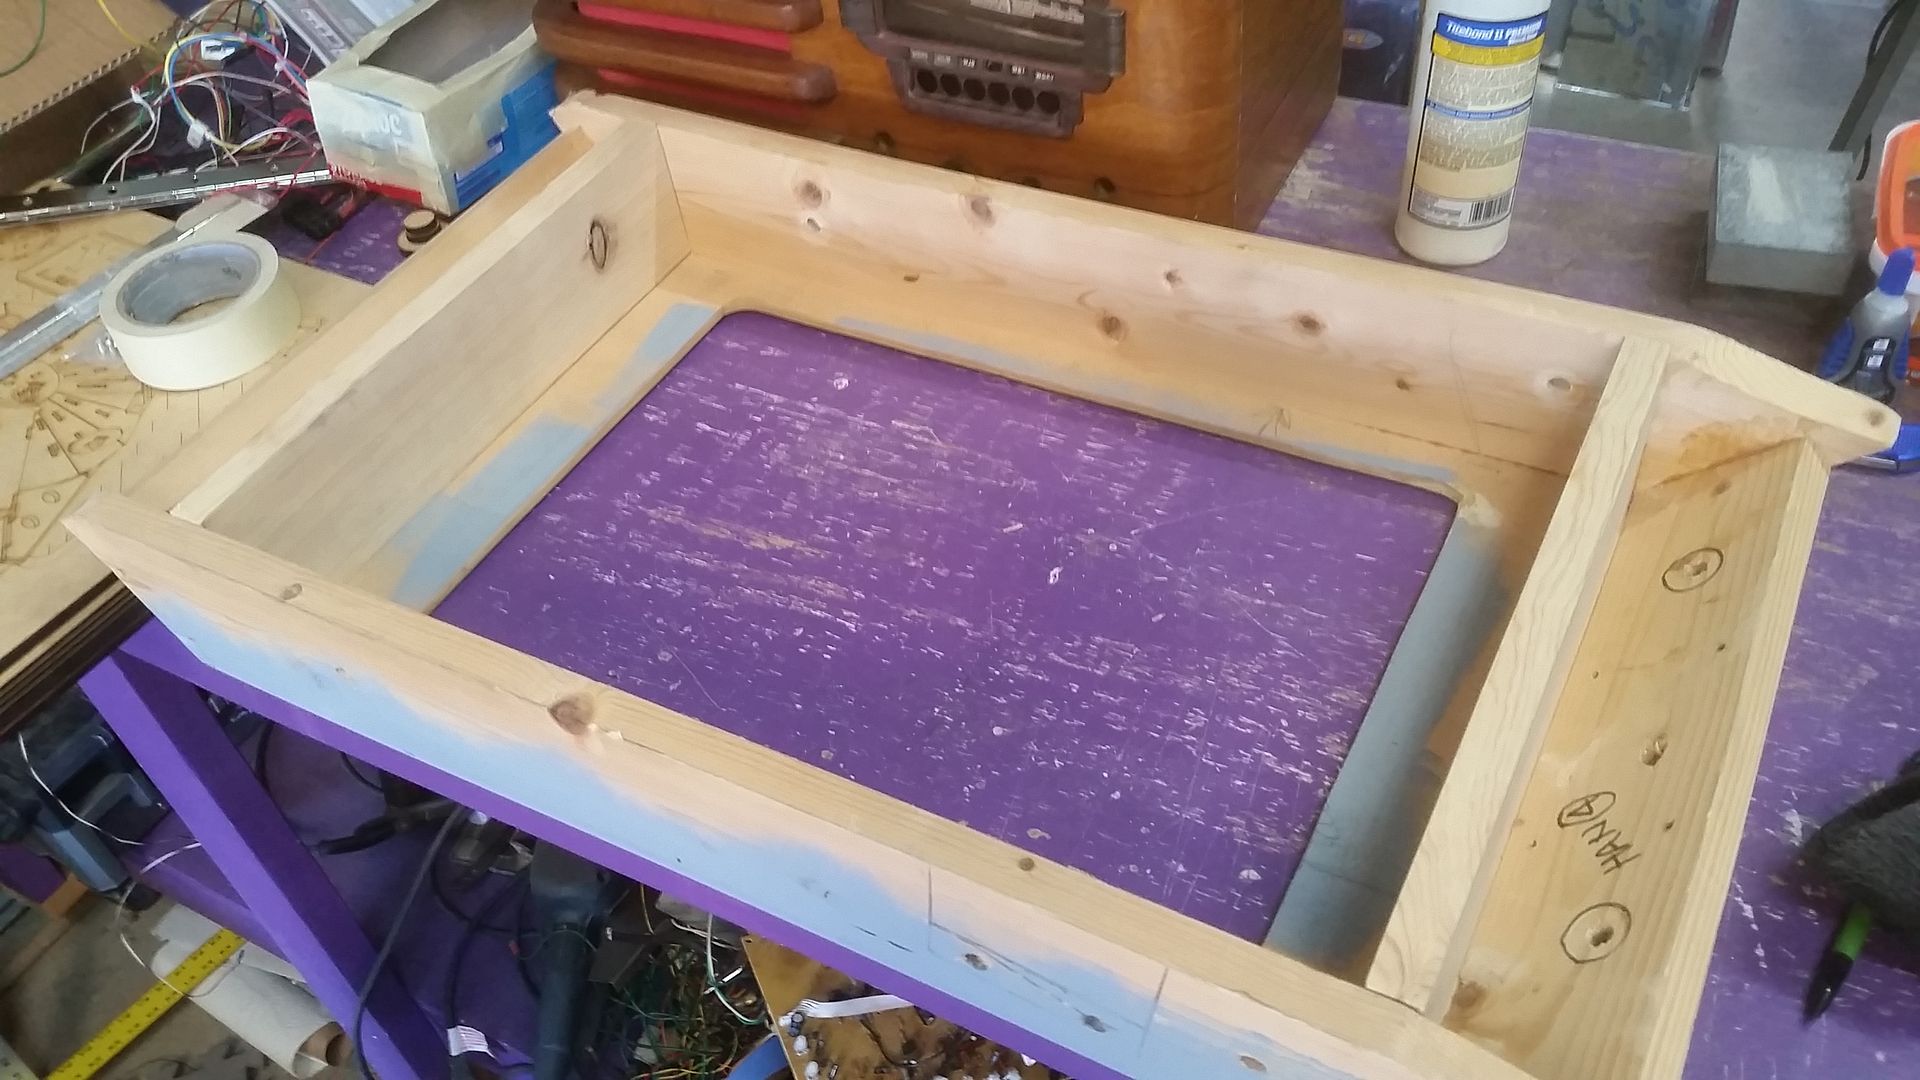
I started by adding the two shorter interior 1x4s - these serve as the "new" side of the boxes
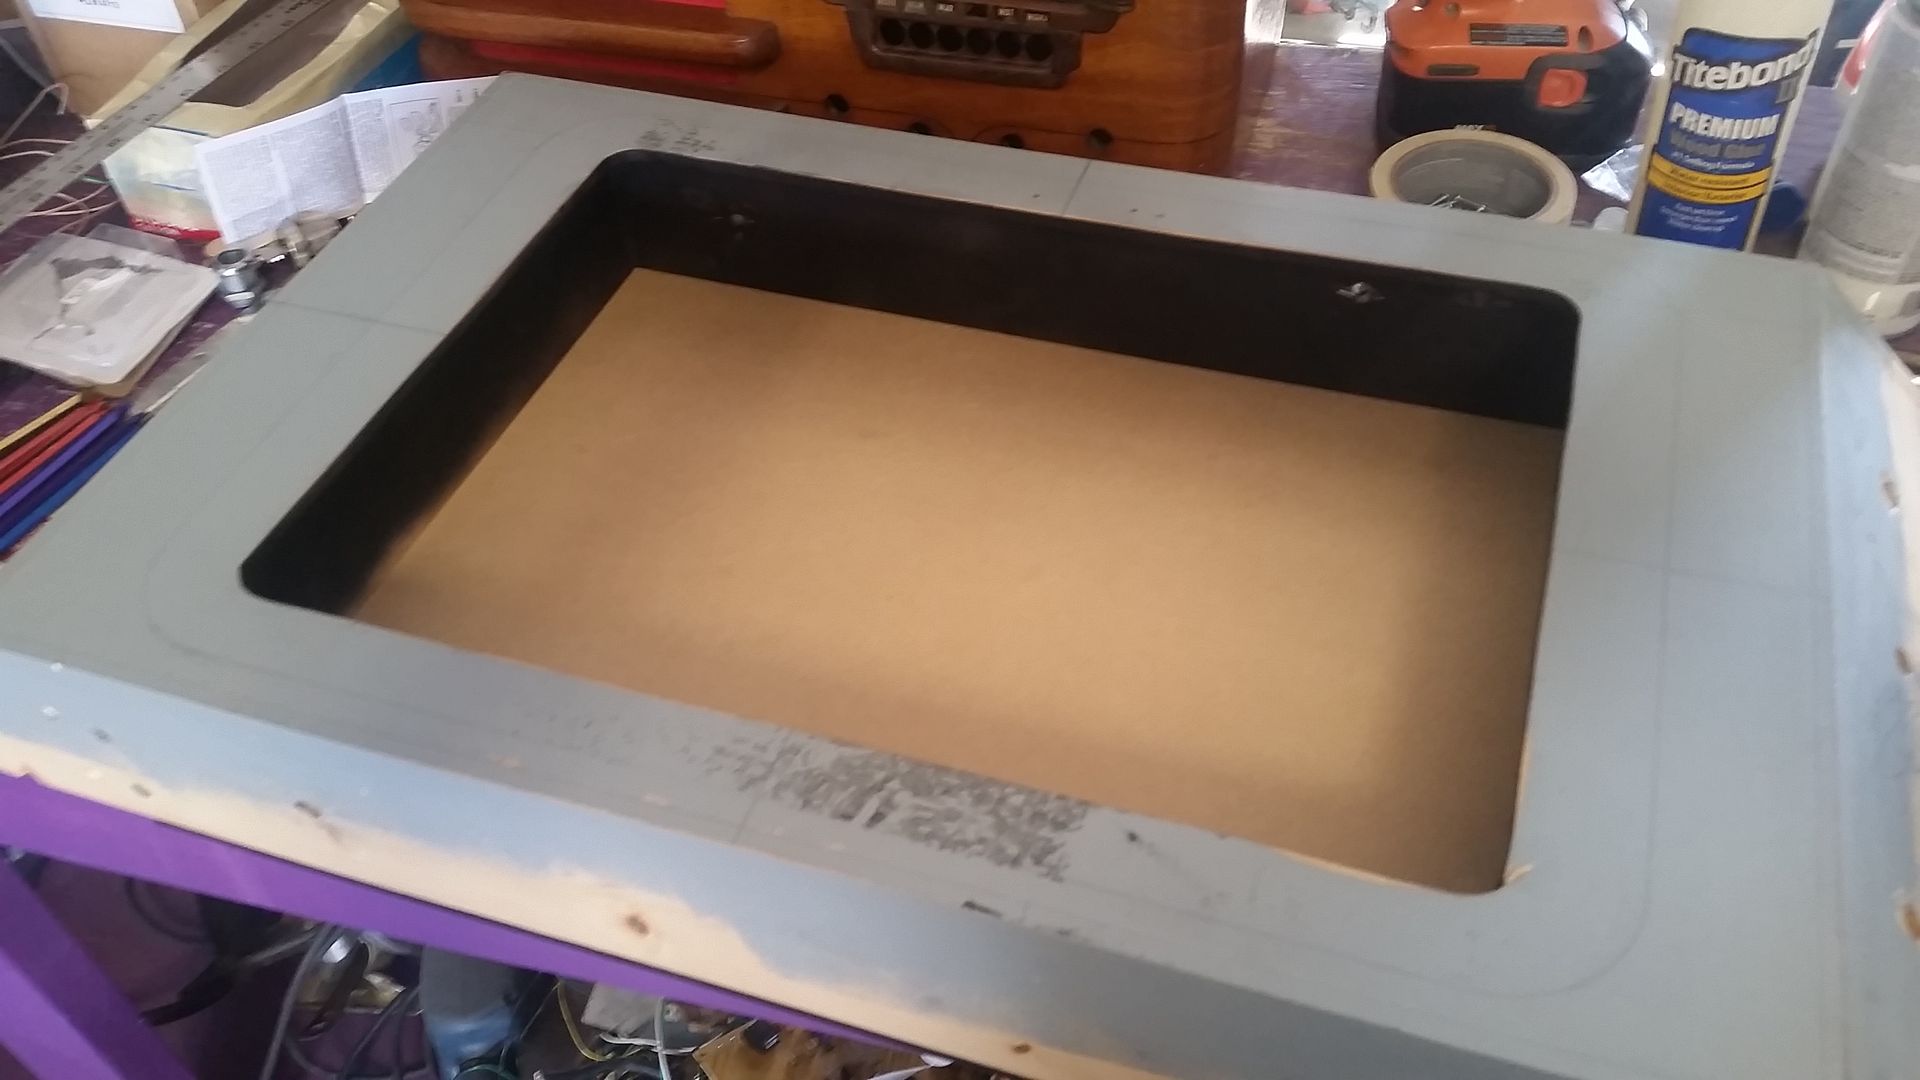
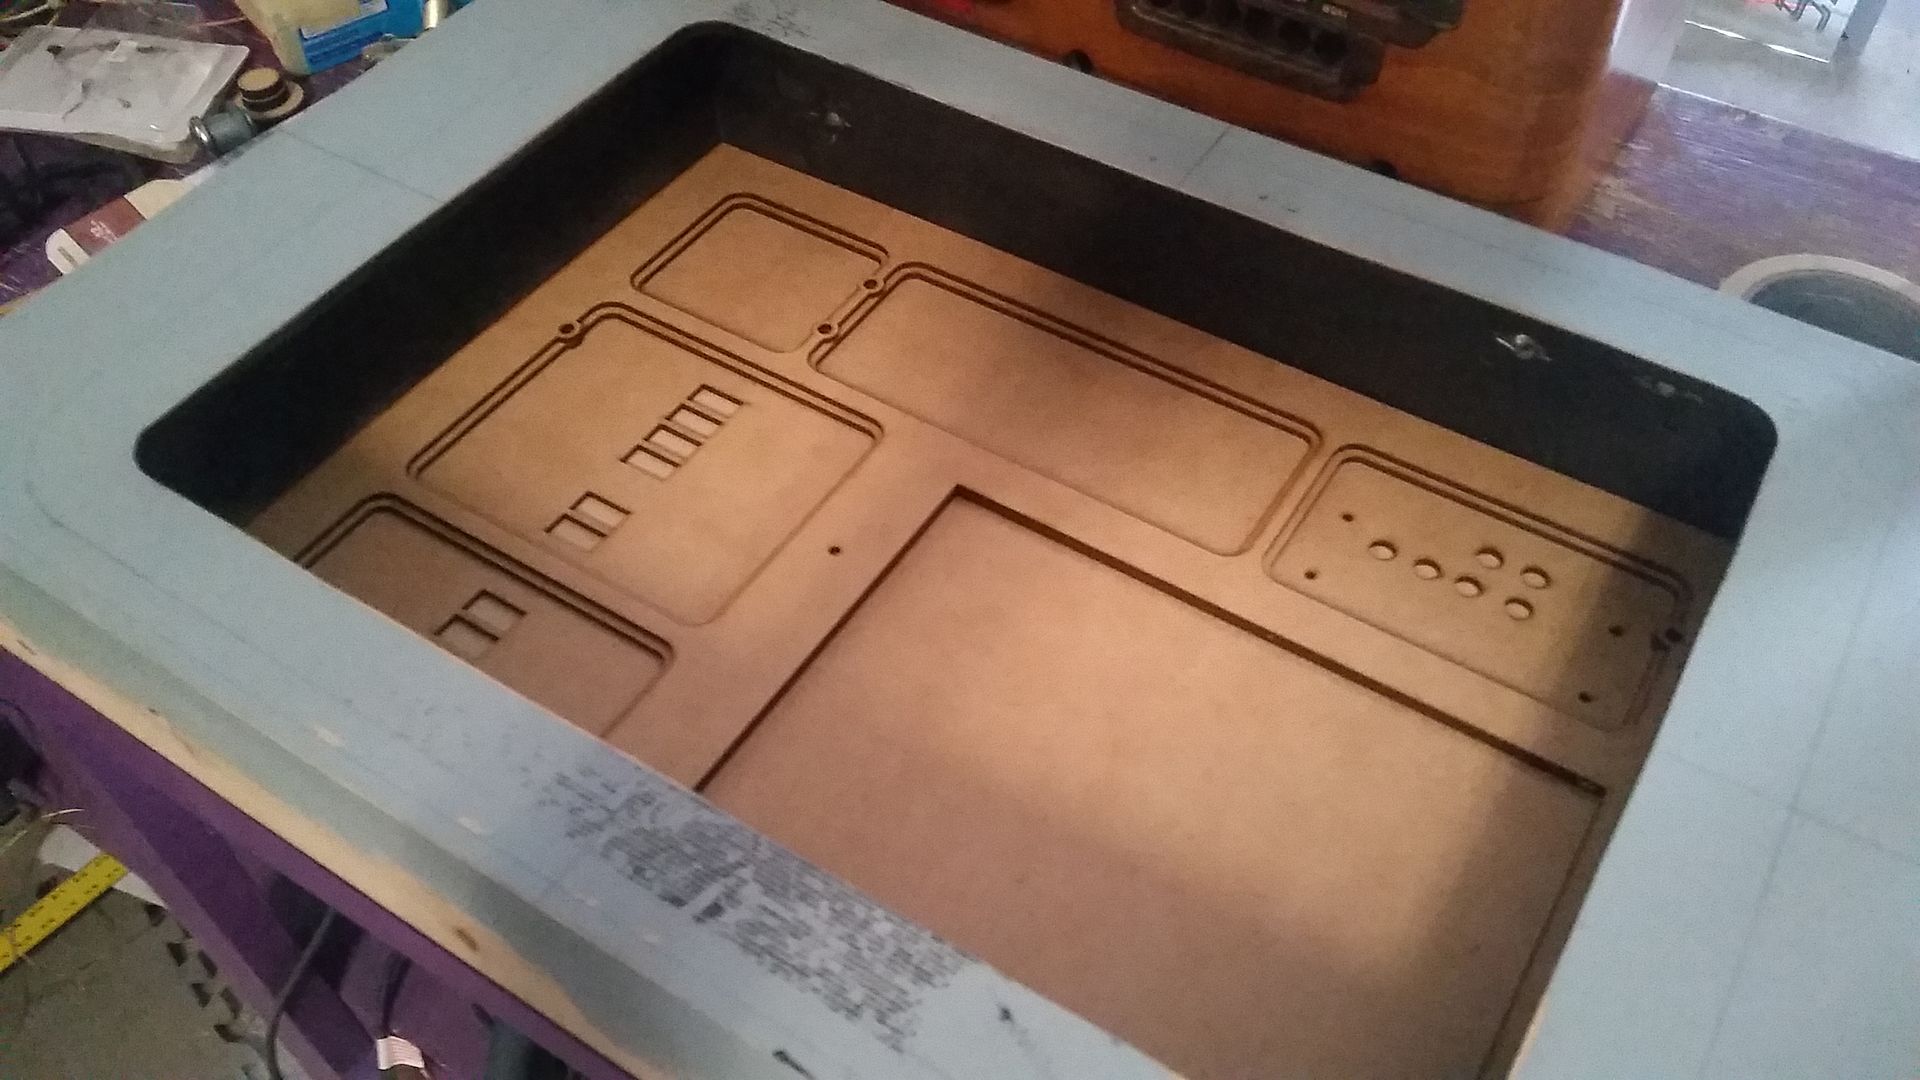
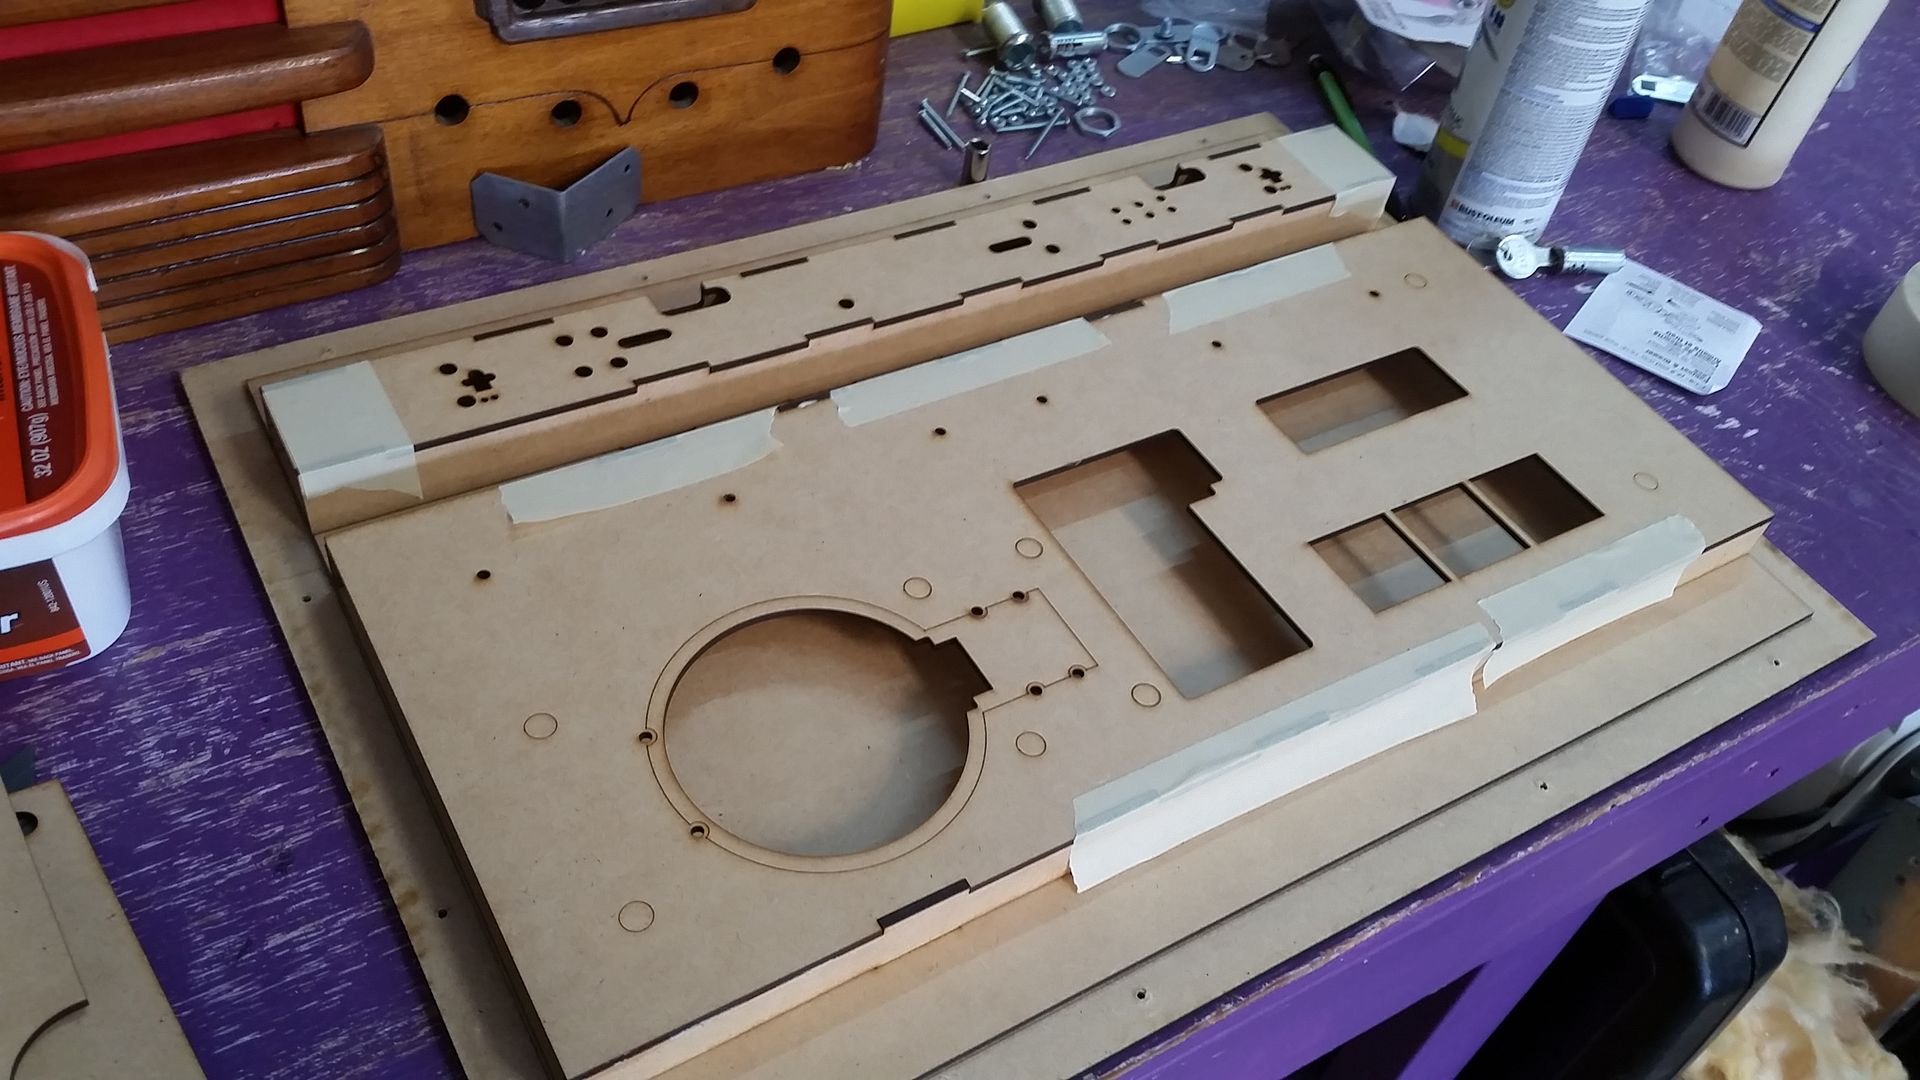
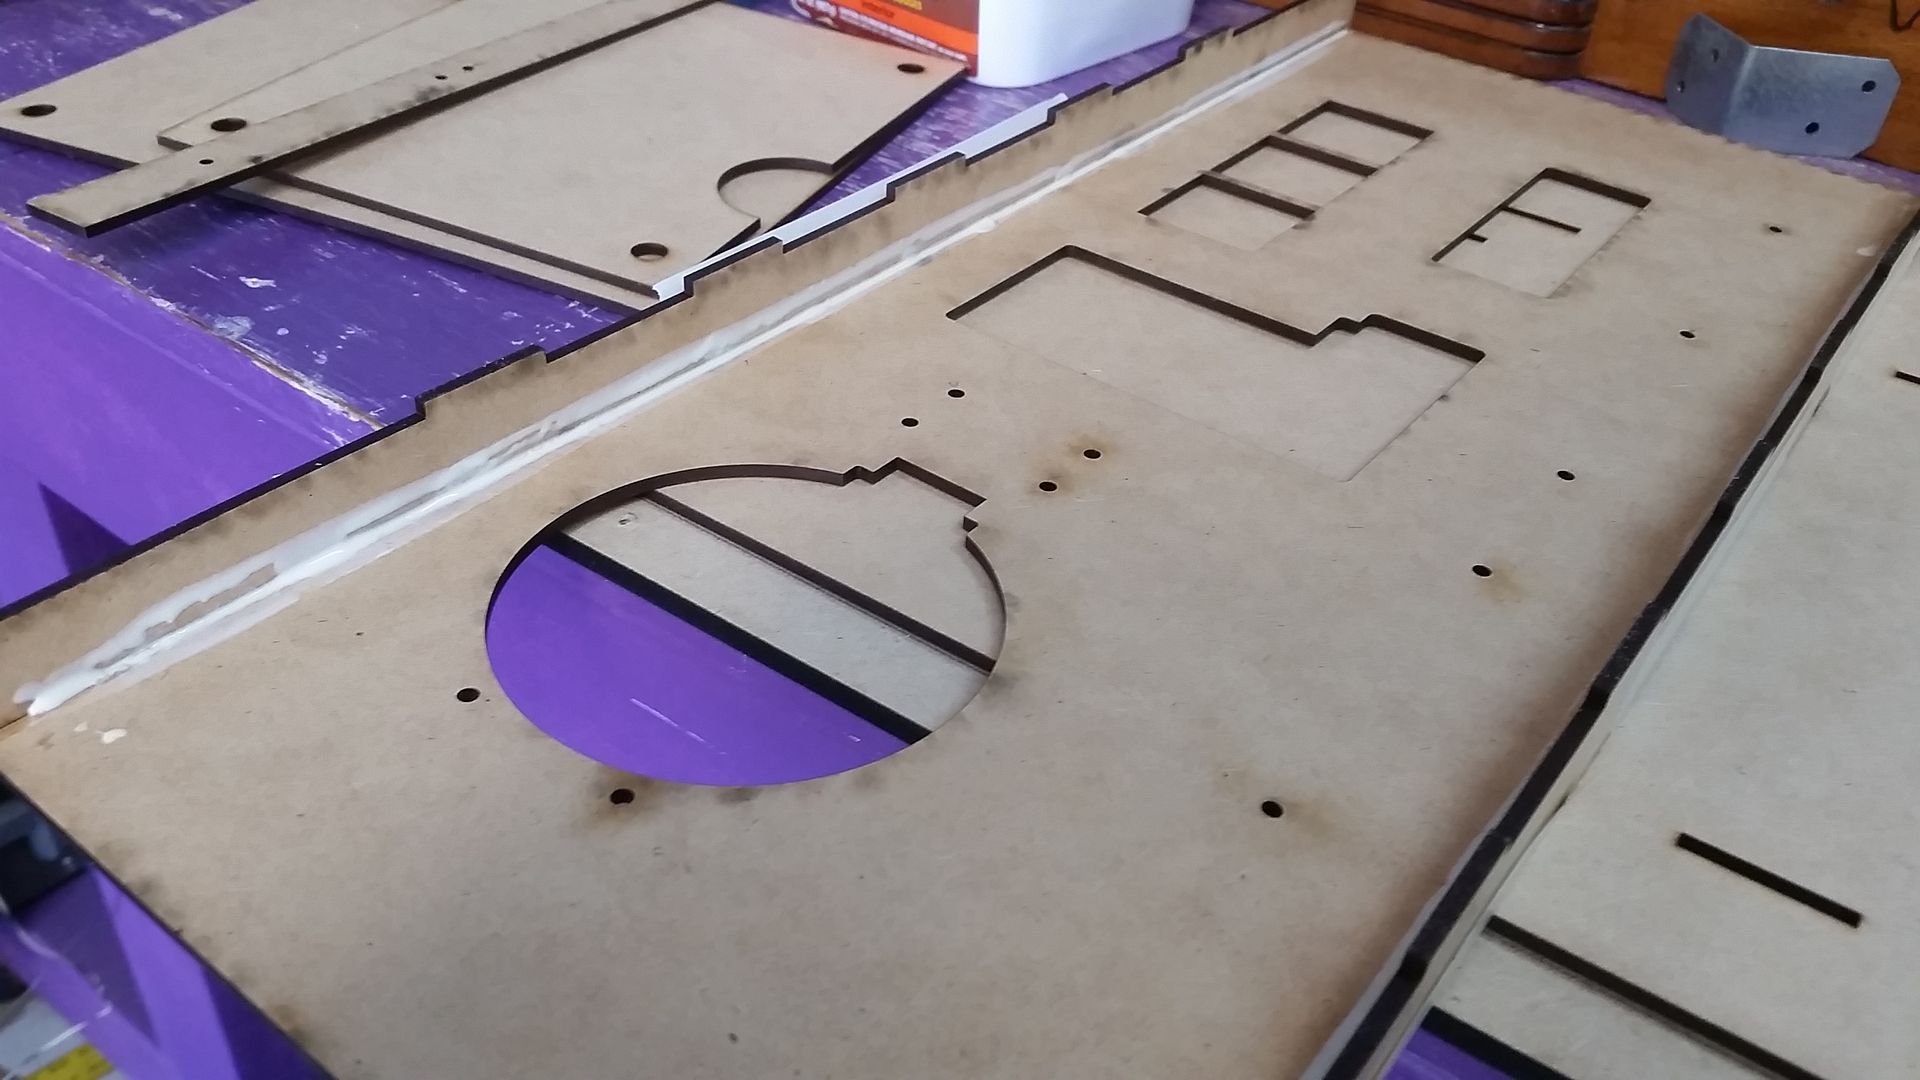
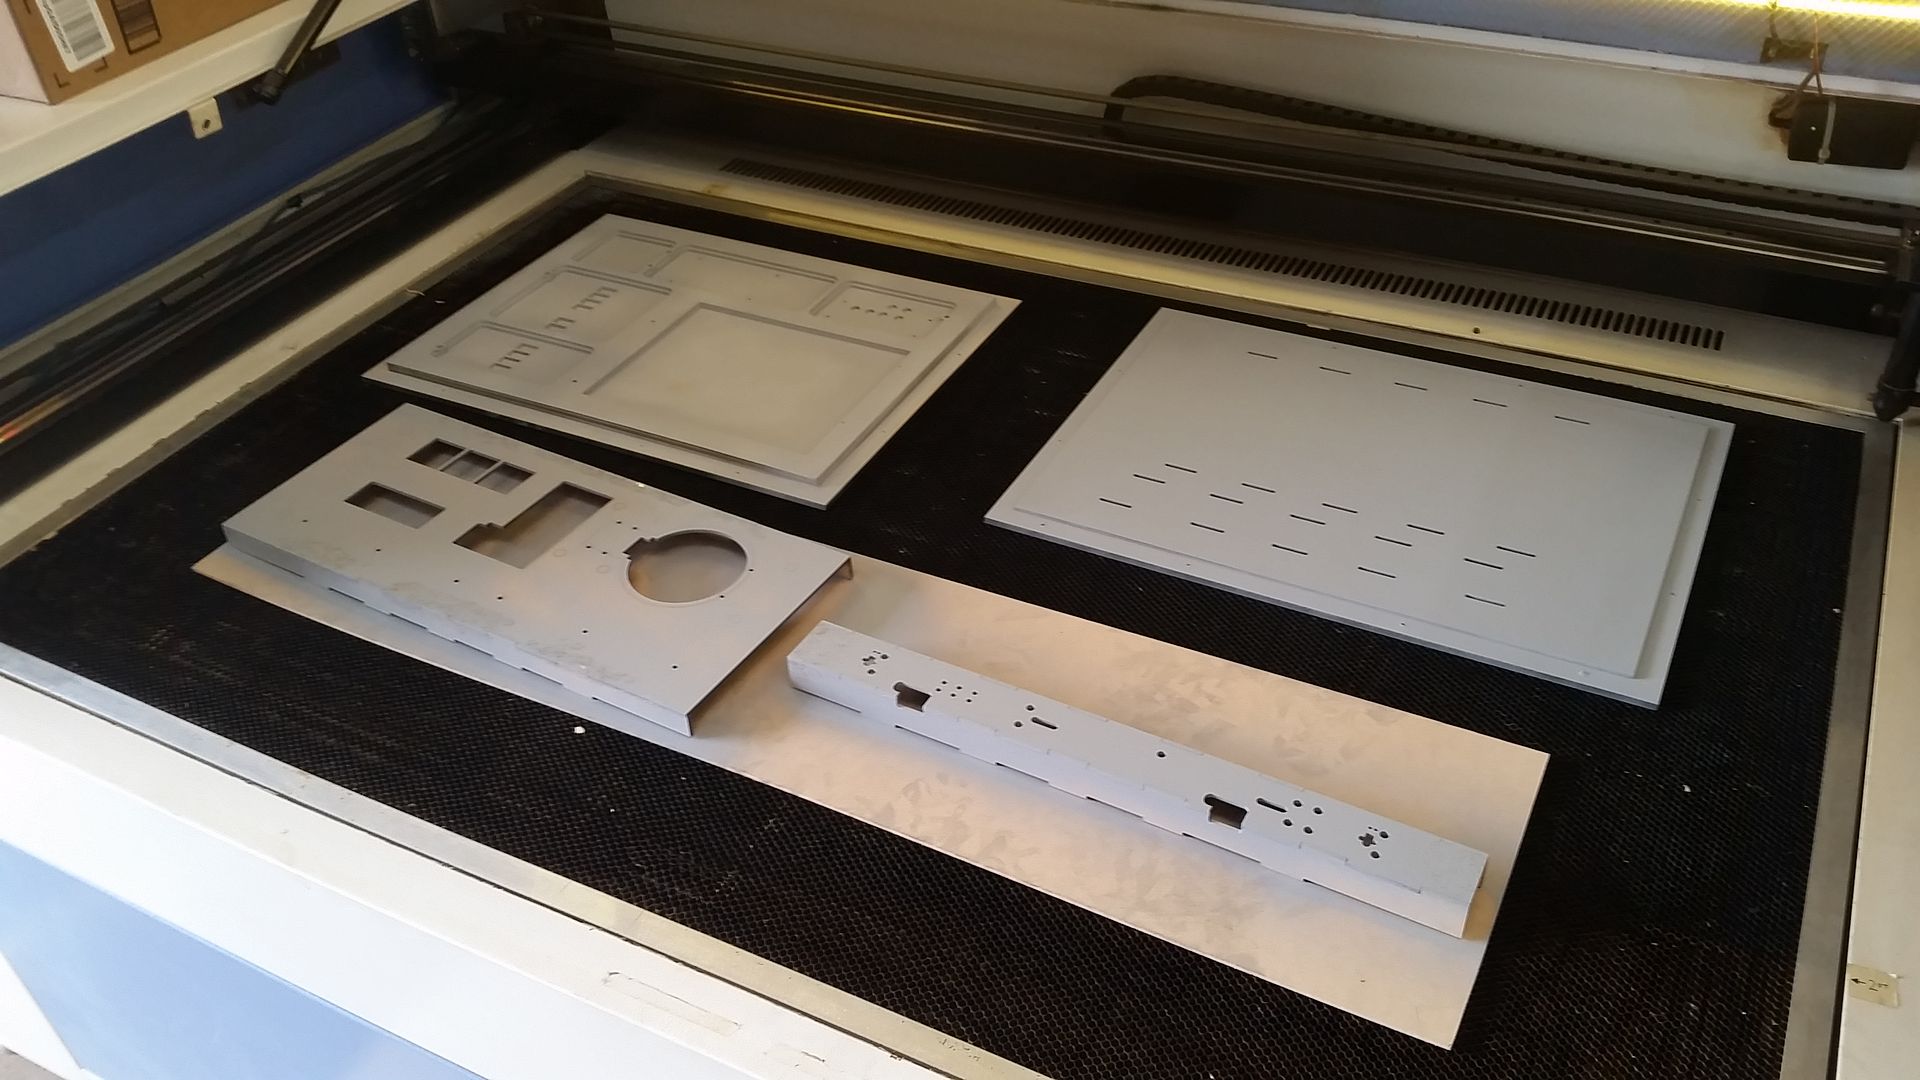
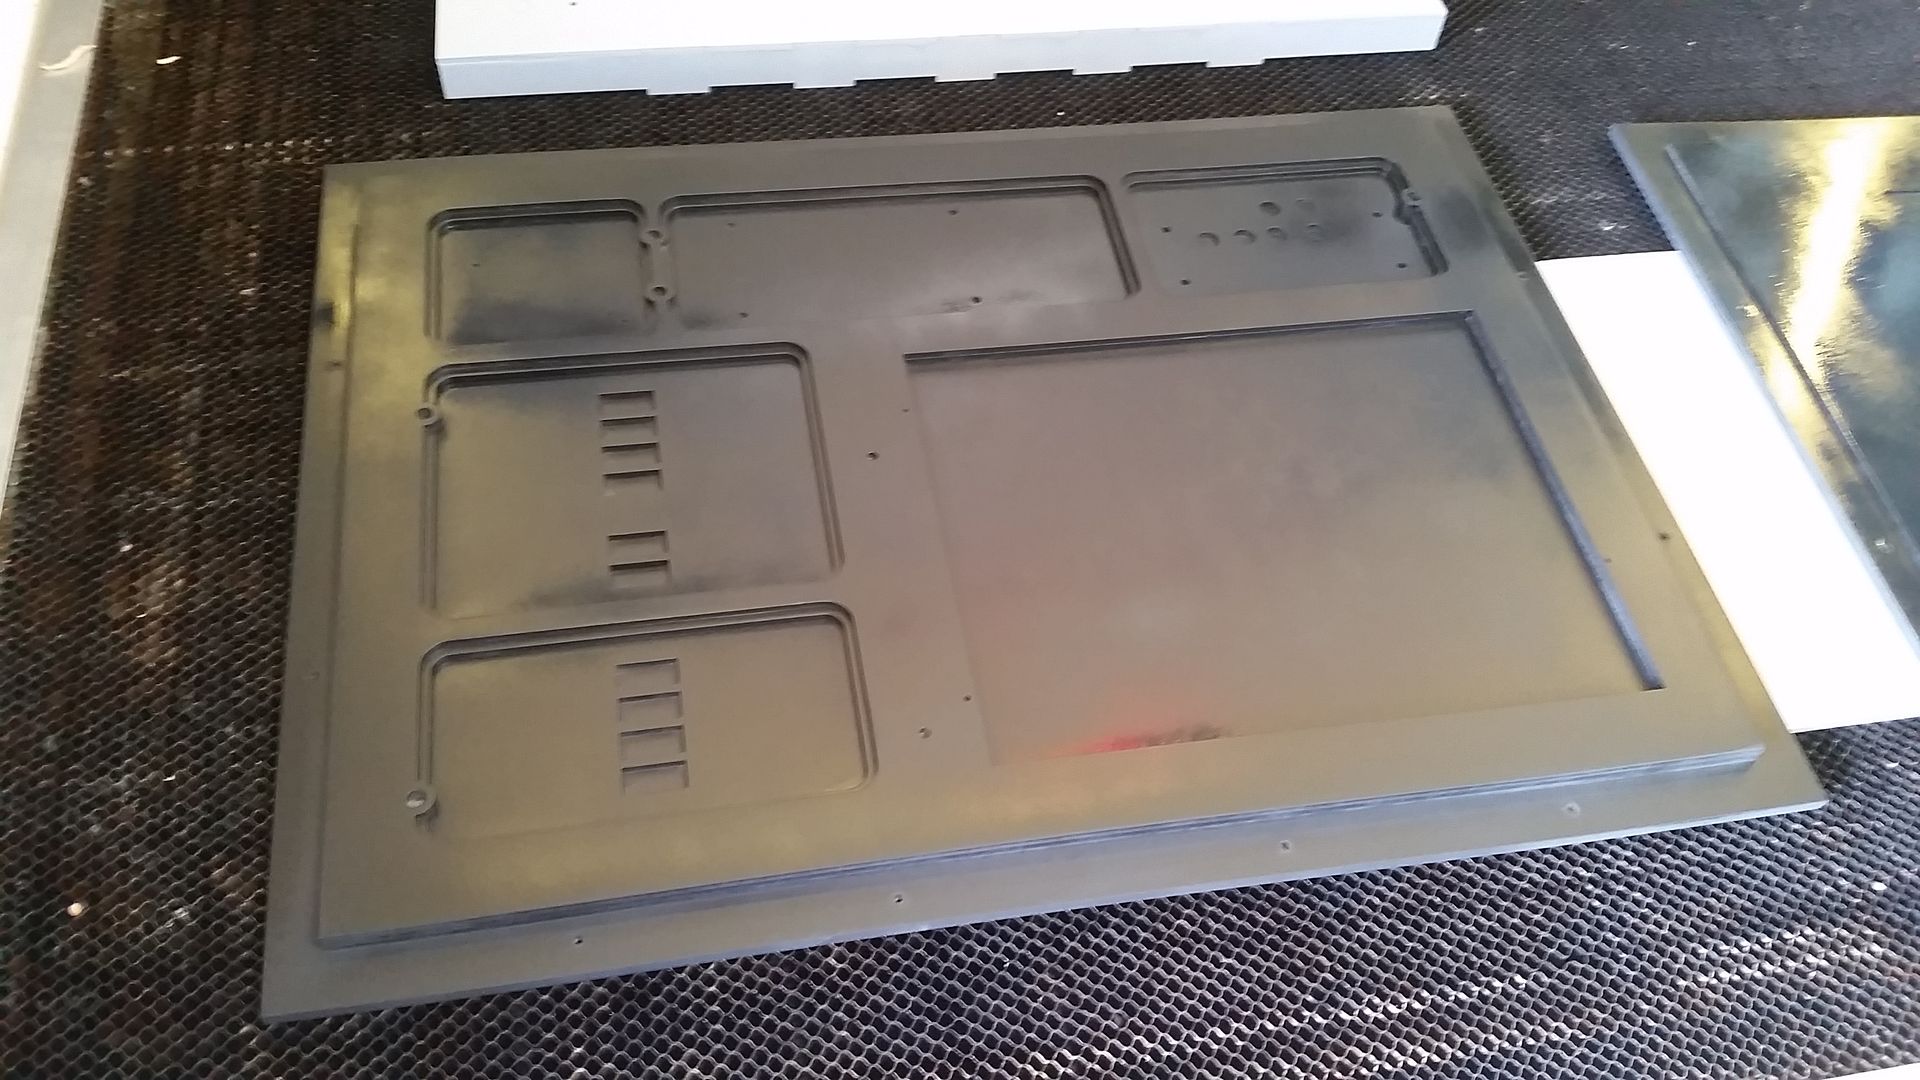
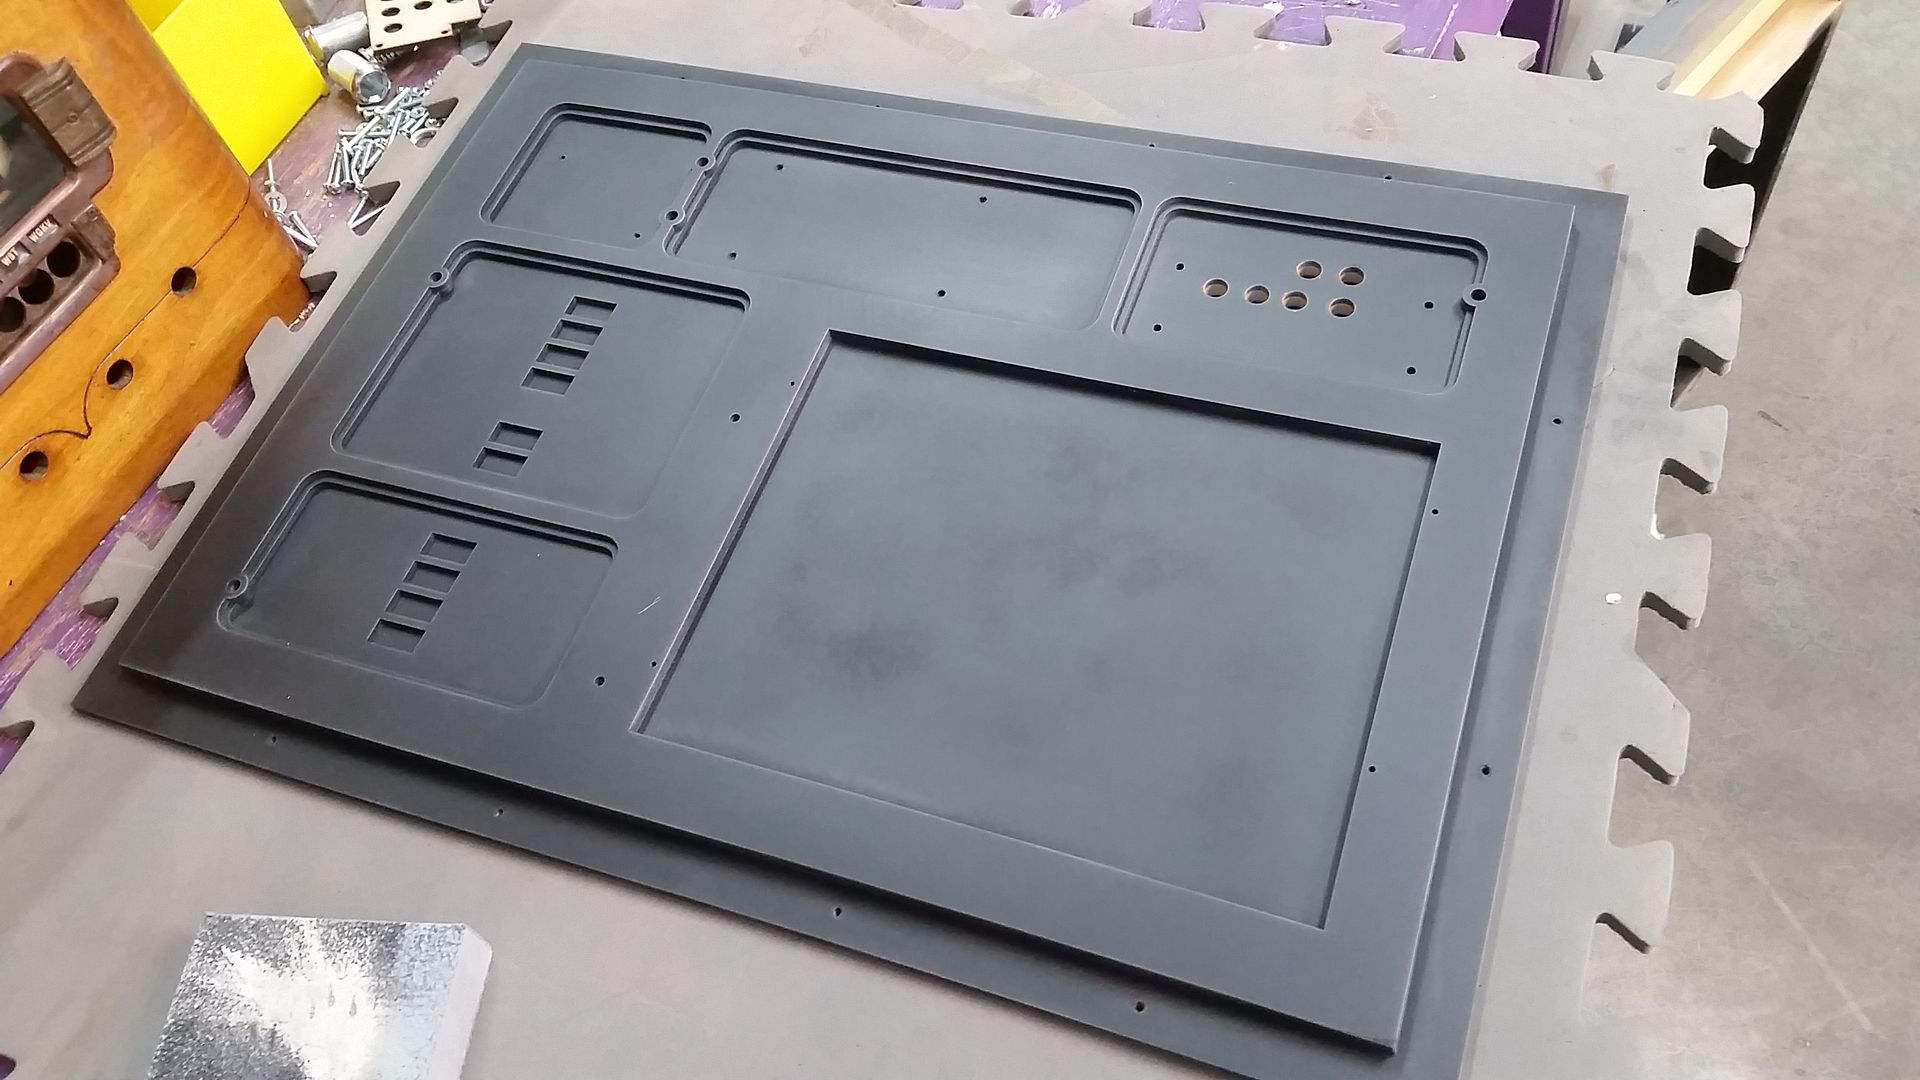
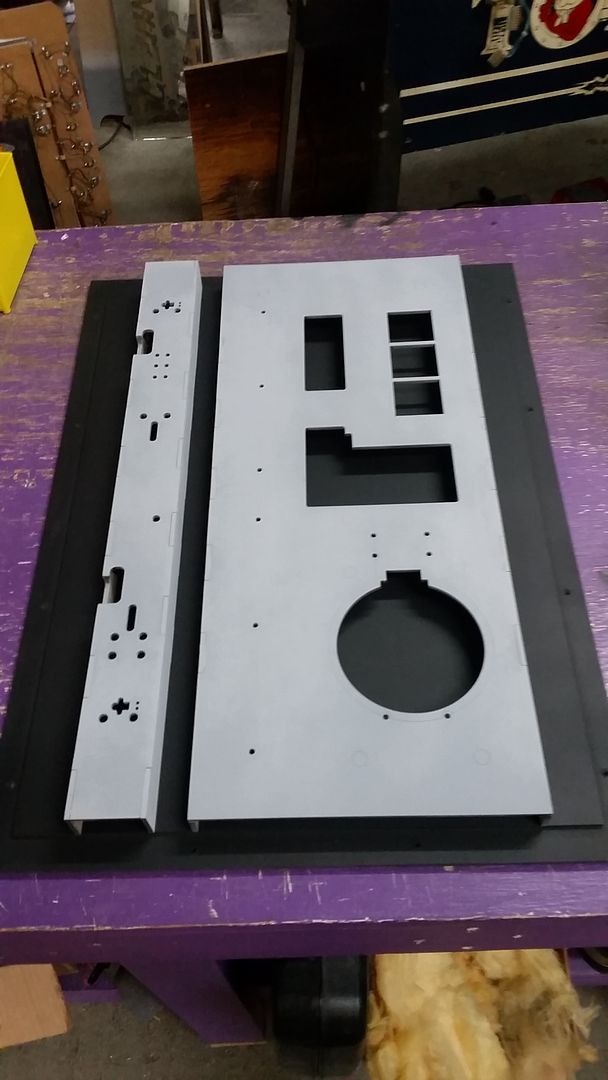
I designed and laser cut a new mounting surface for the greeblies
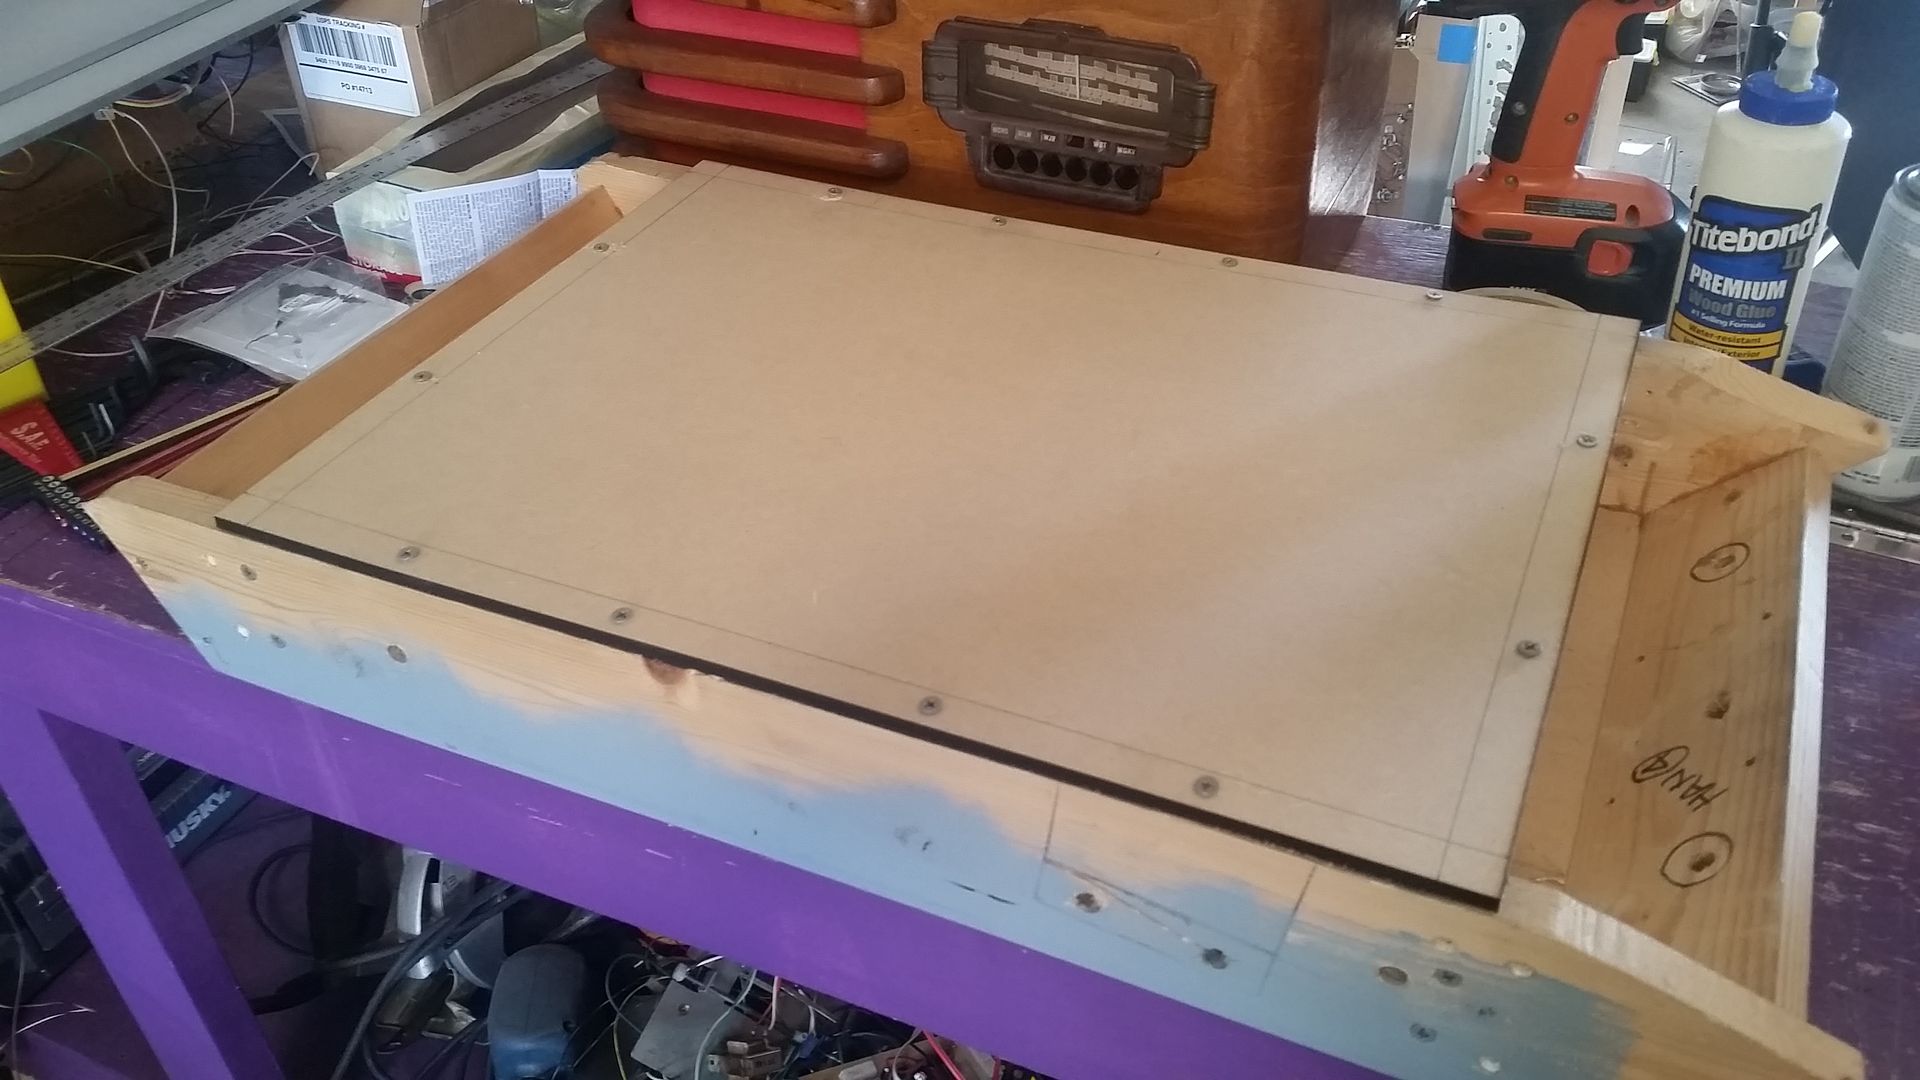
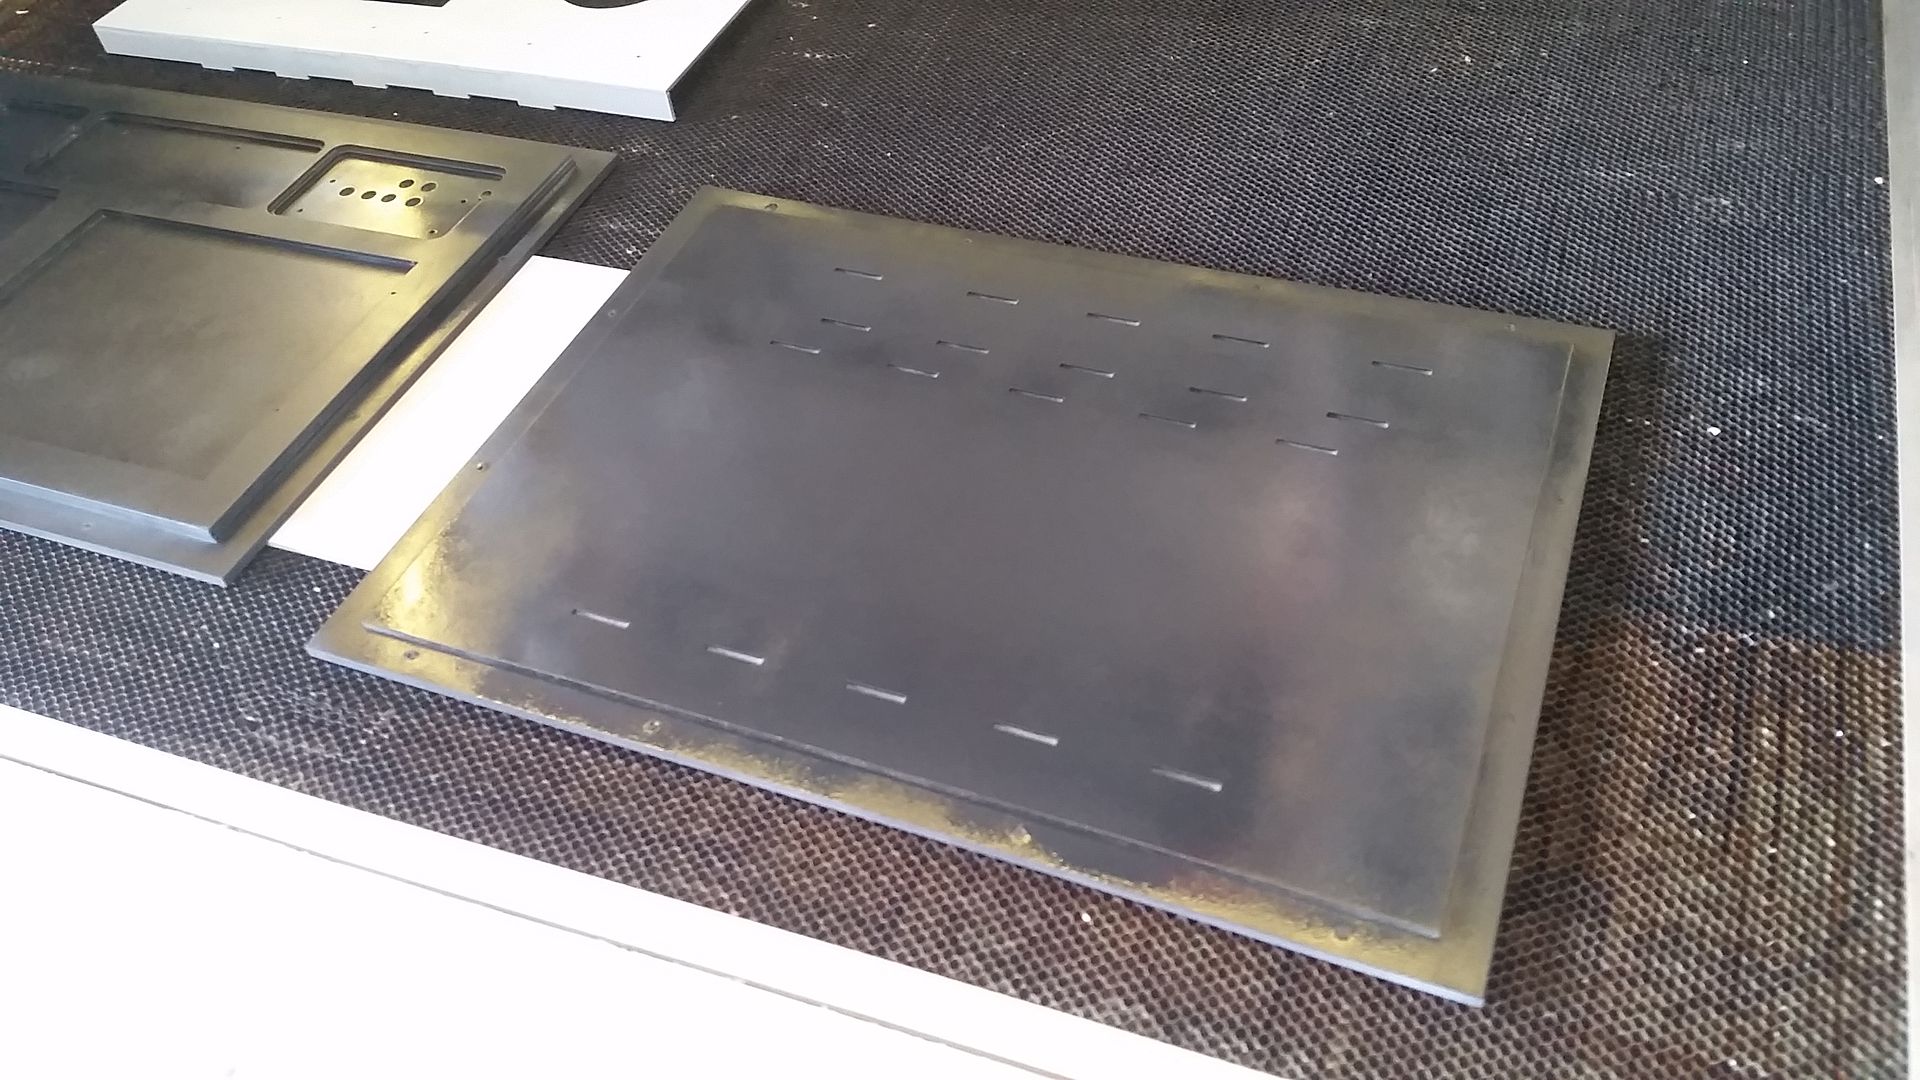
Using all the old files I then recut all new resized panels that will simply adhere to the above panel
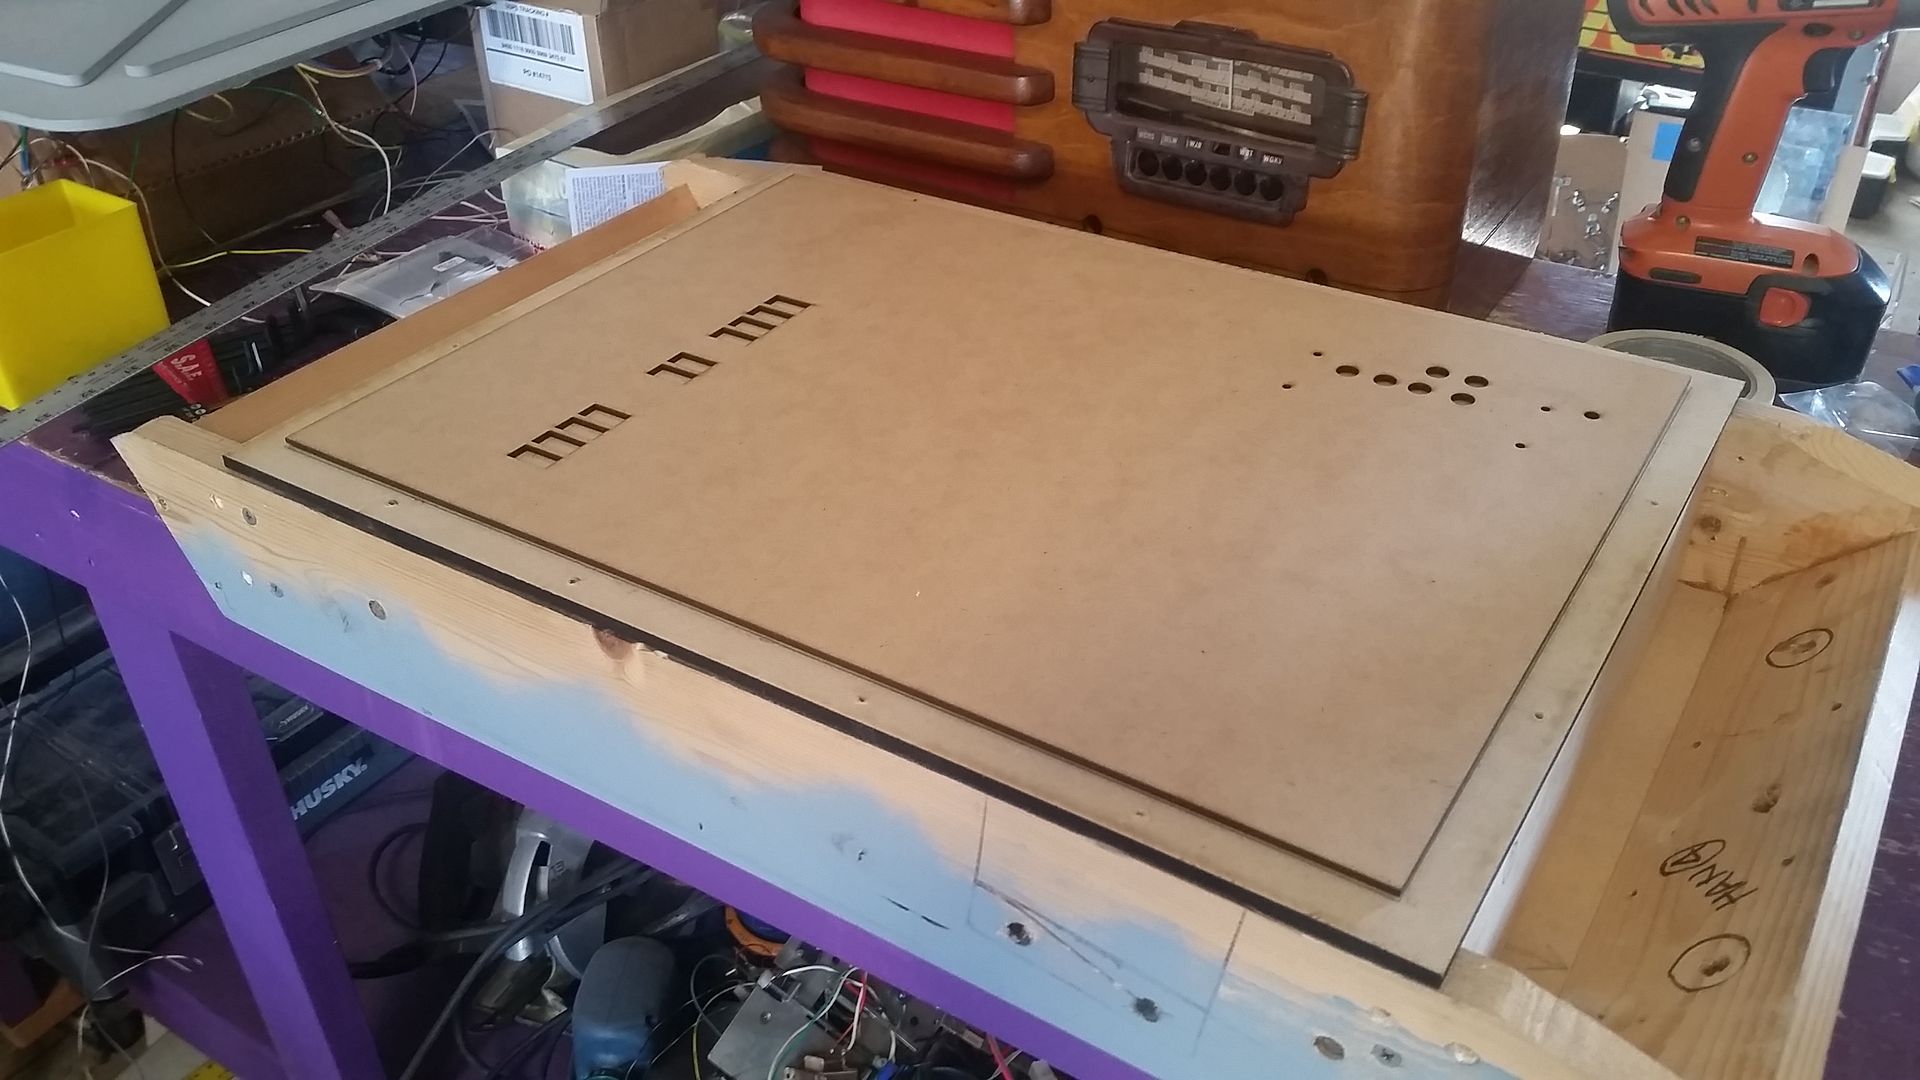
PERFECT FIT!
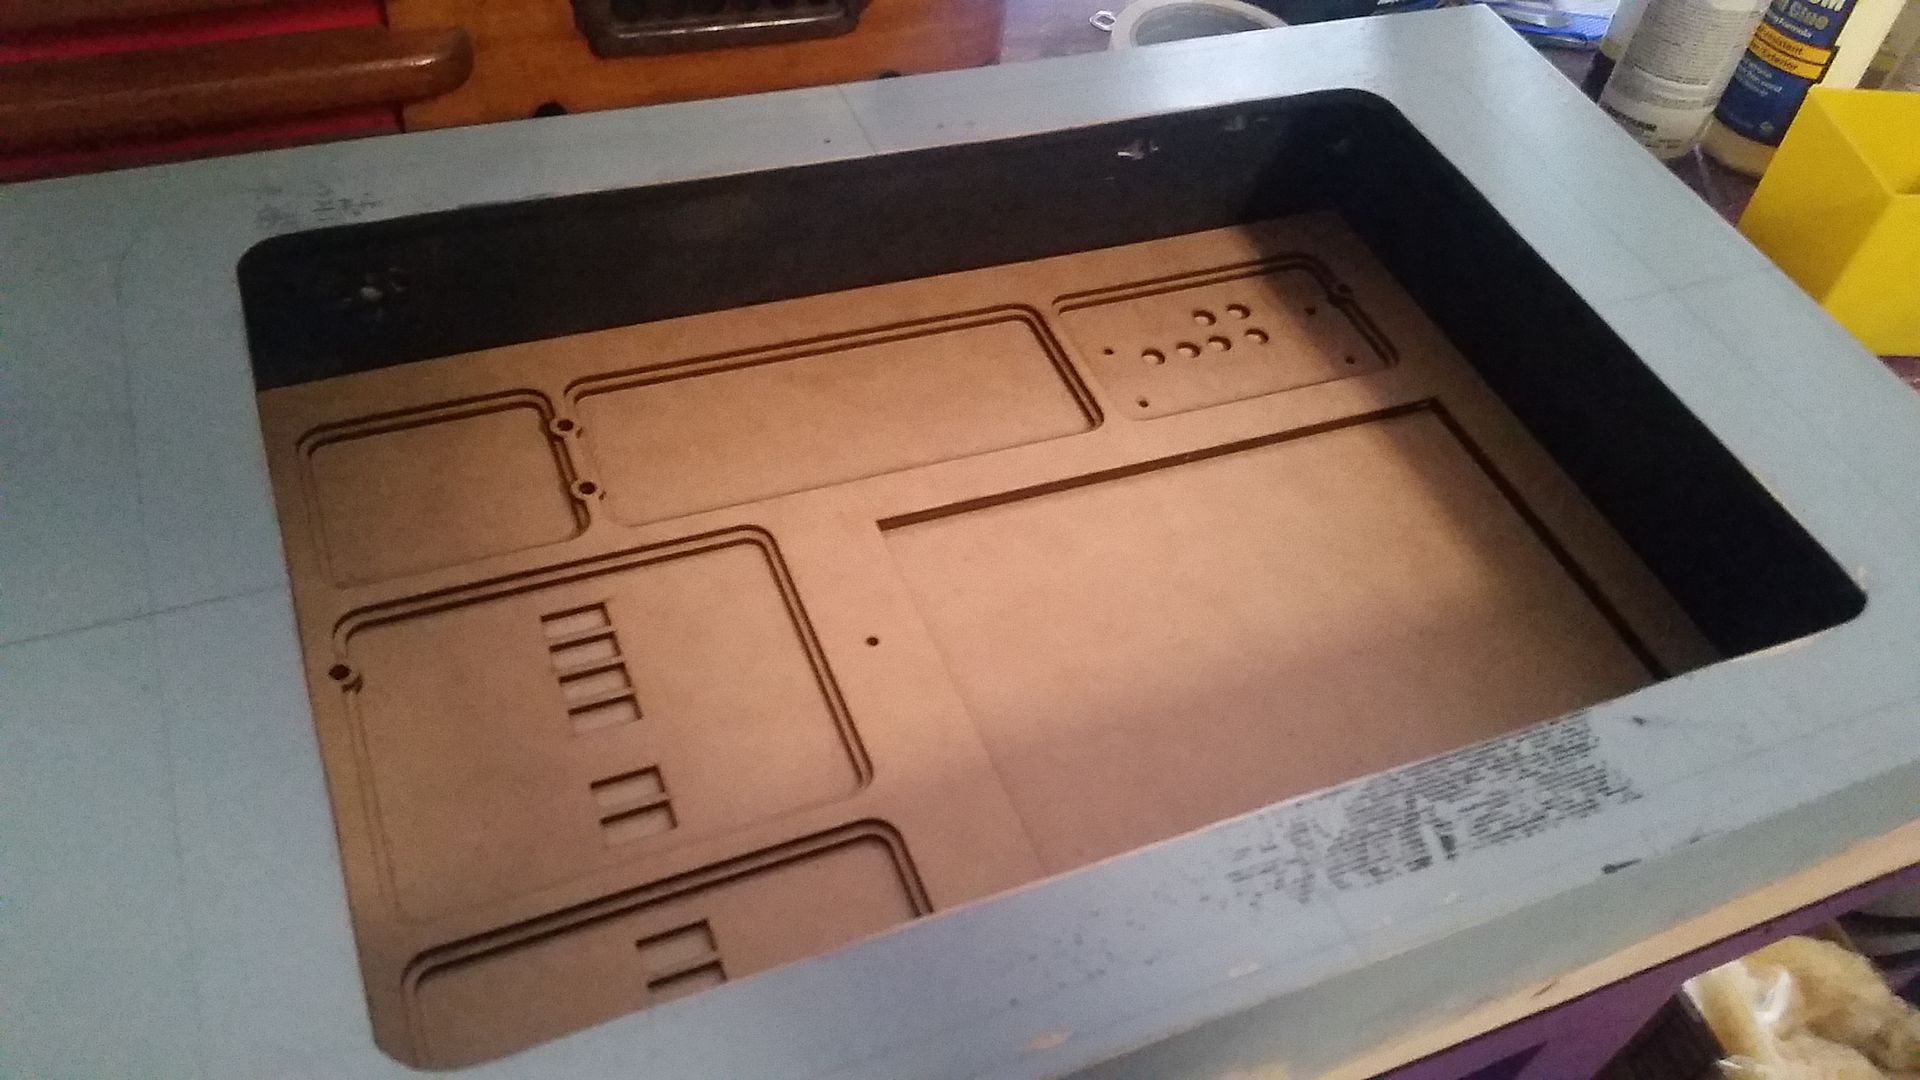
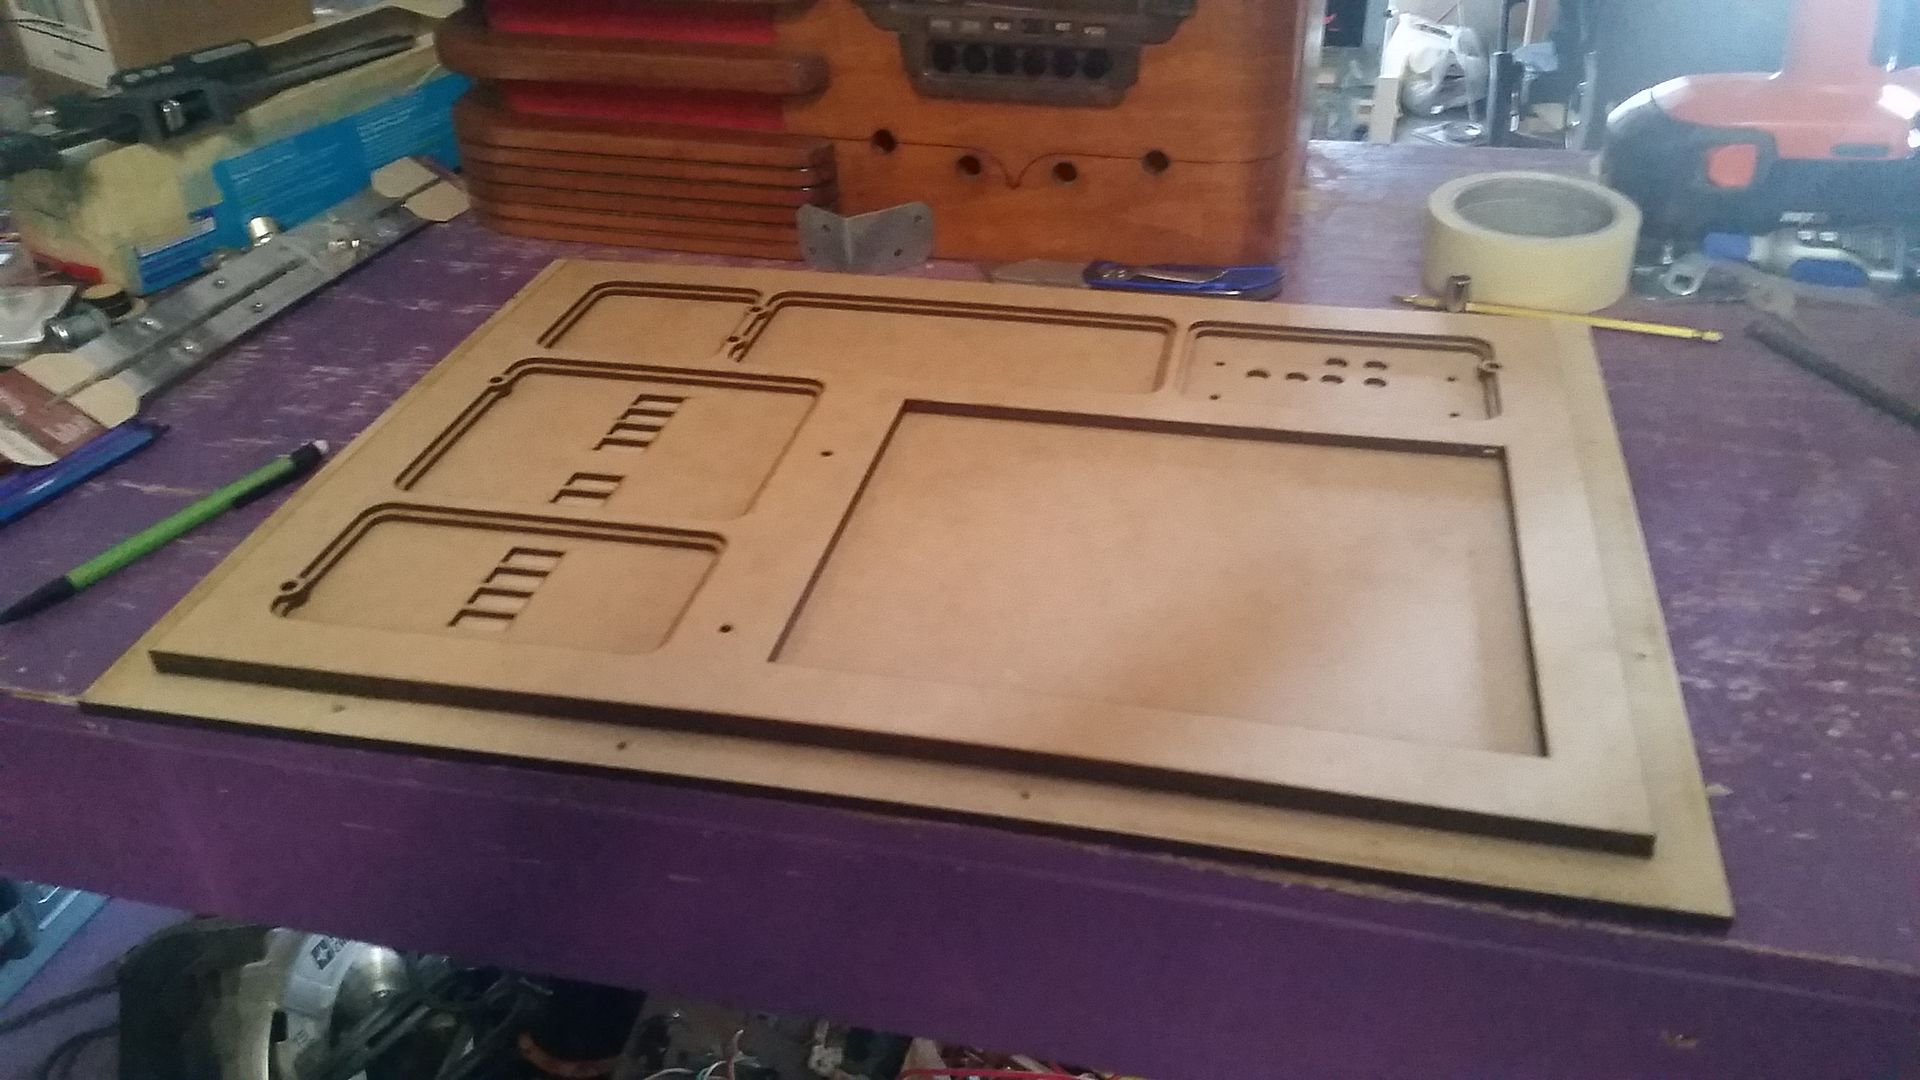
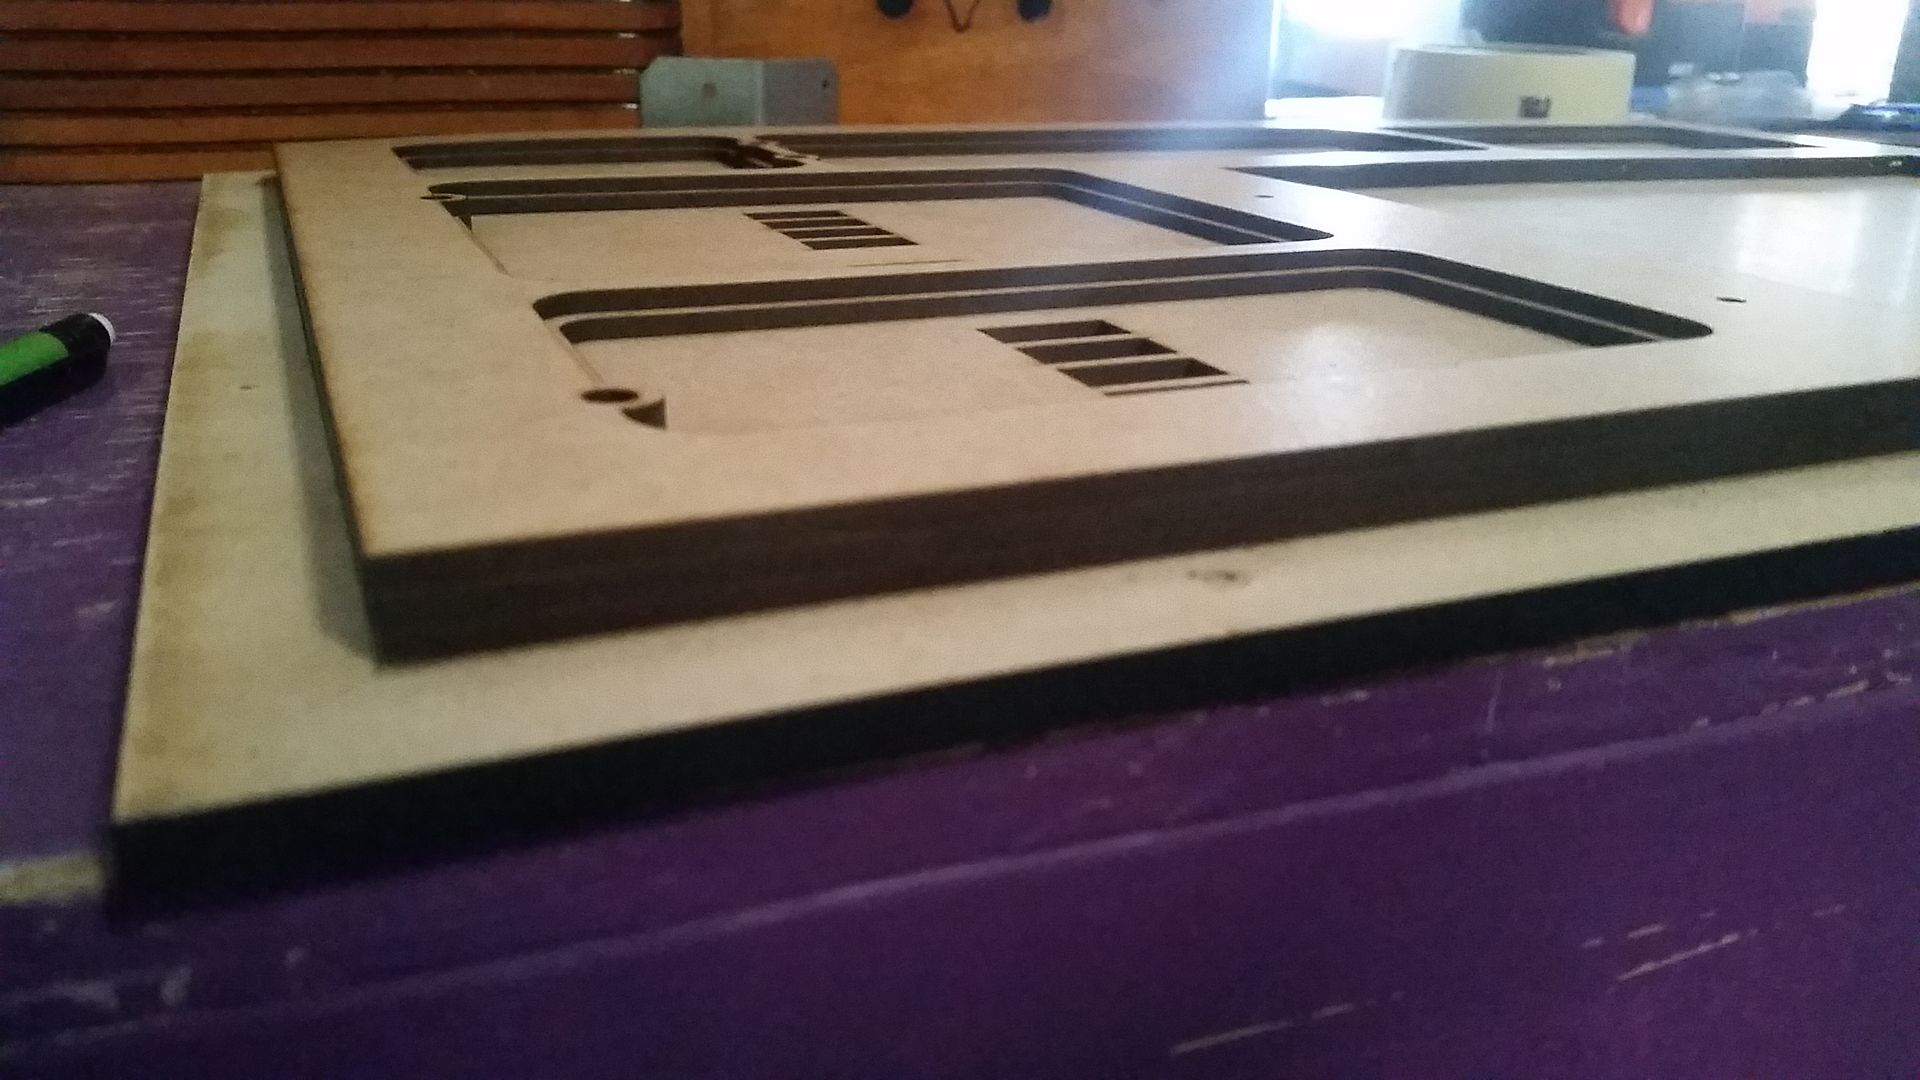
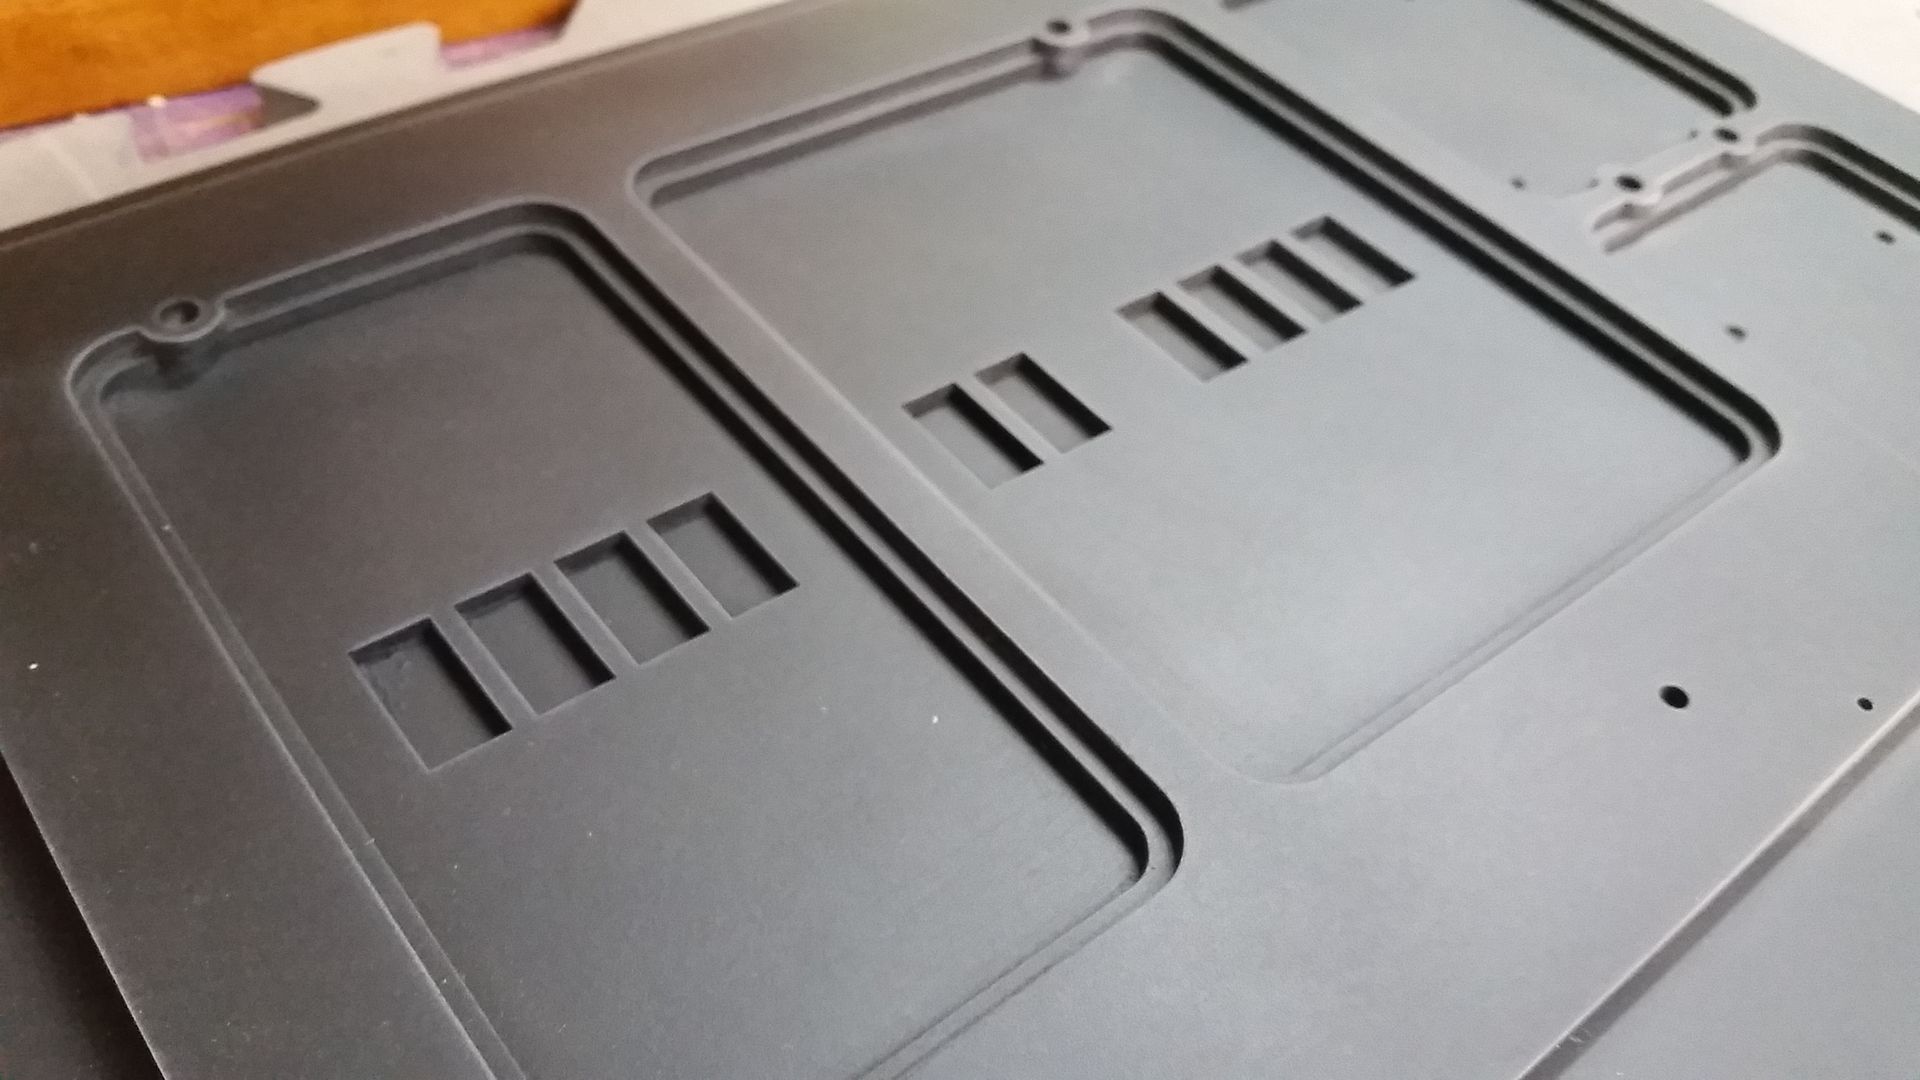
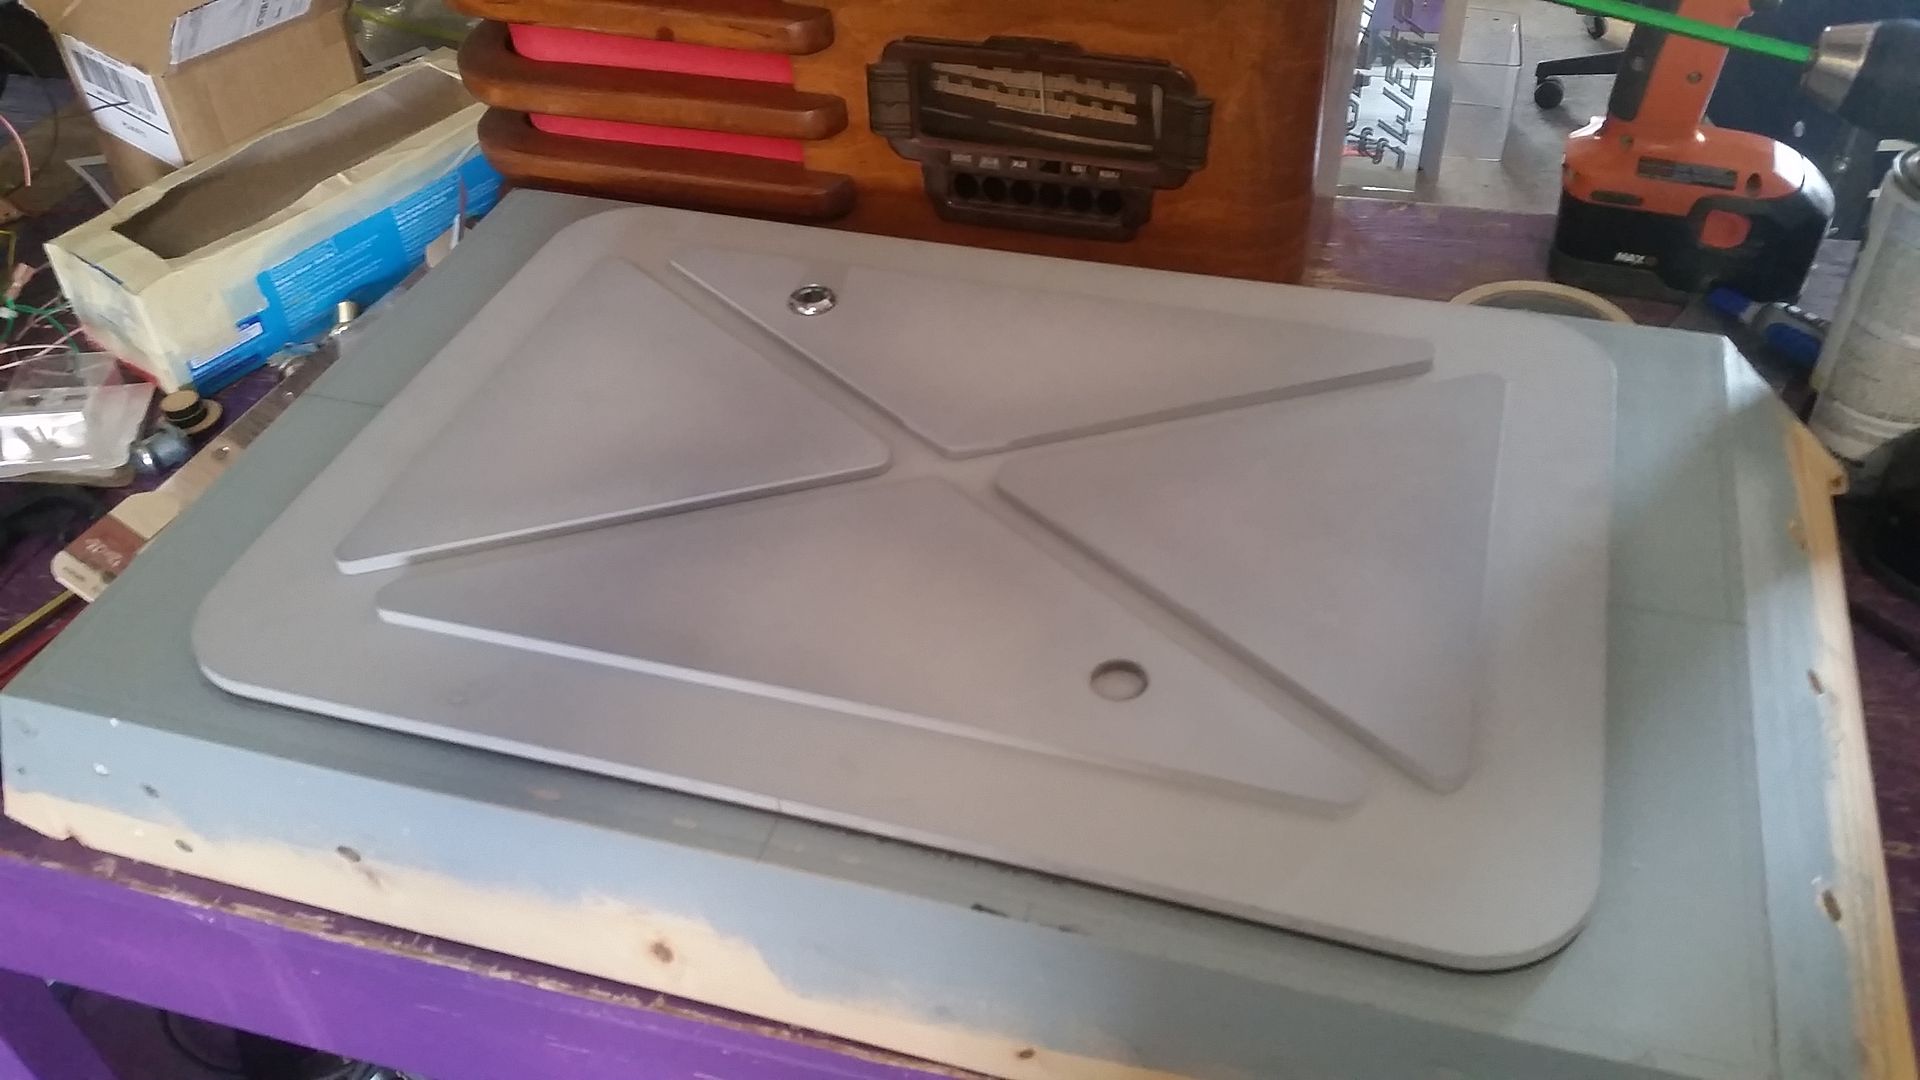
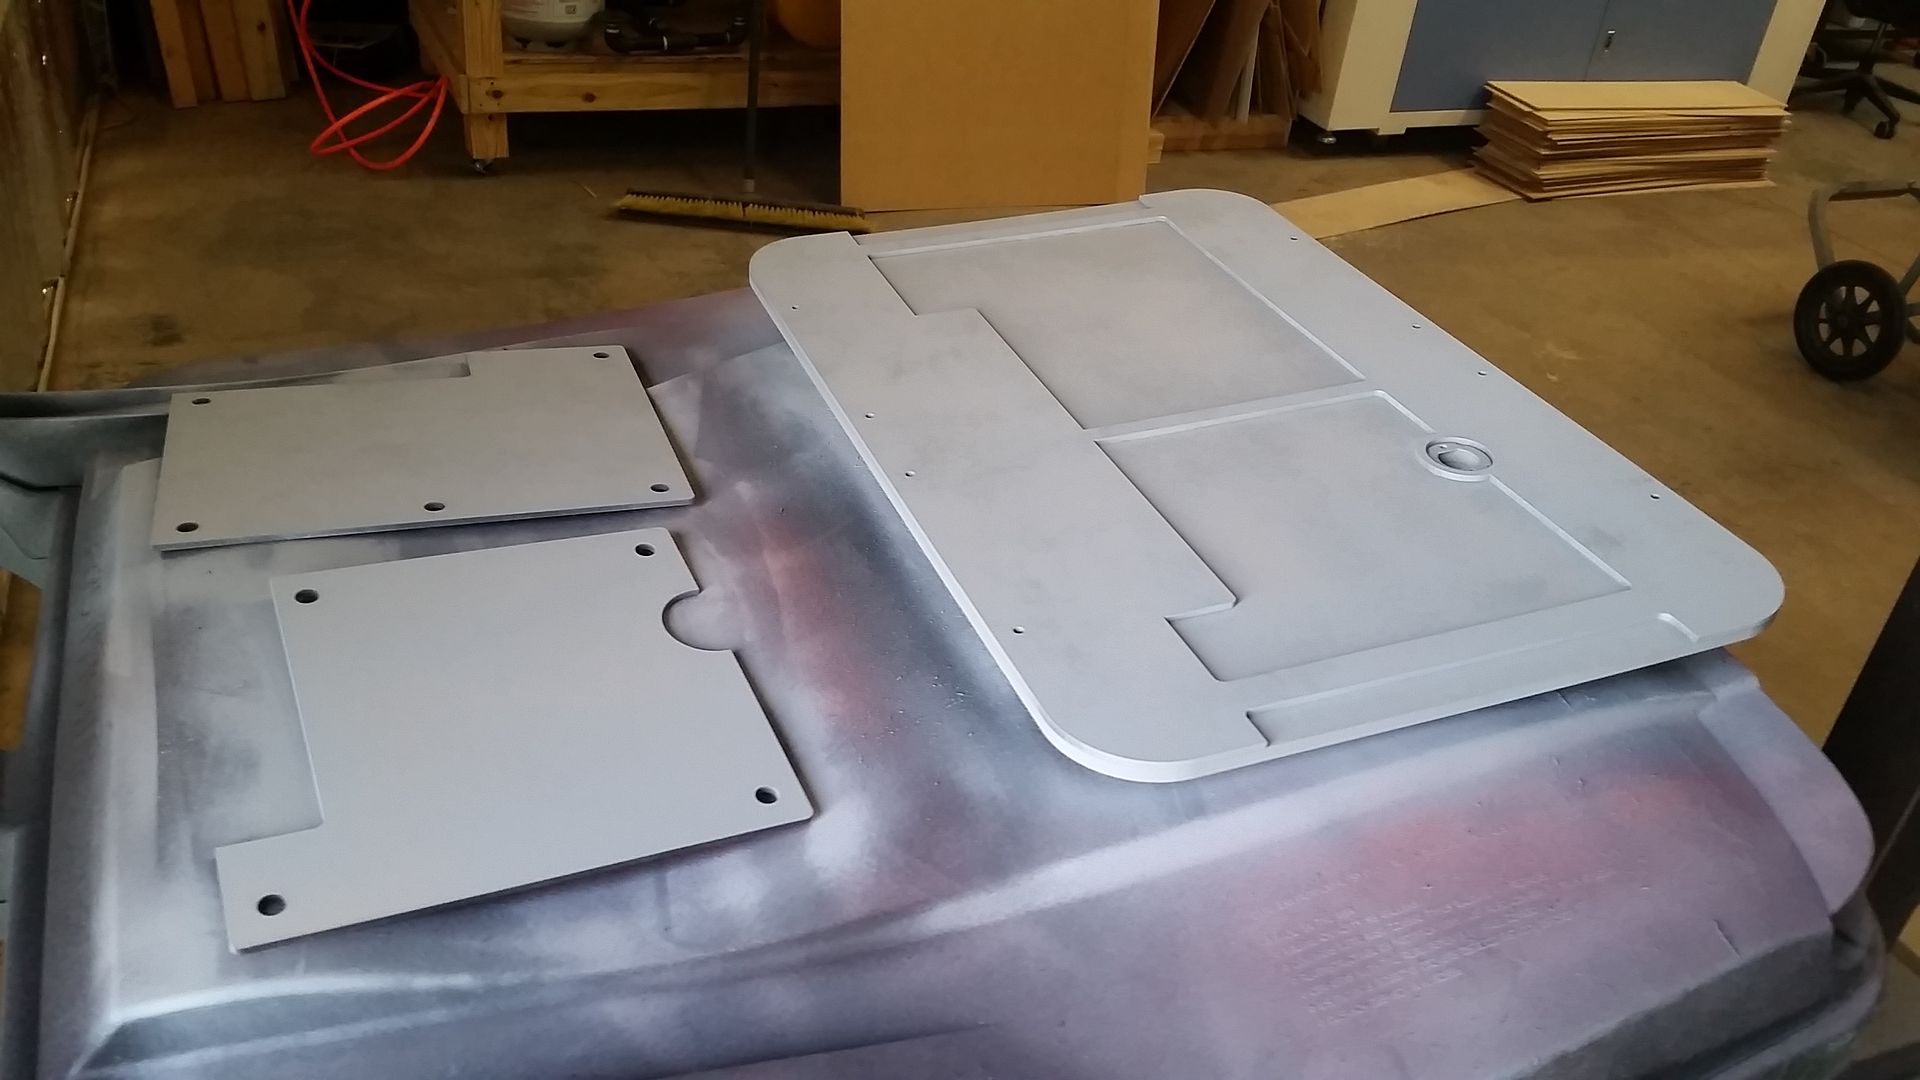
I then redesigned and laser cut these new interior pieces to fit the new box
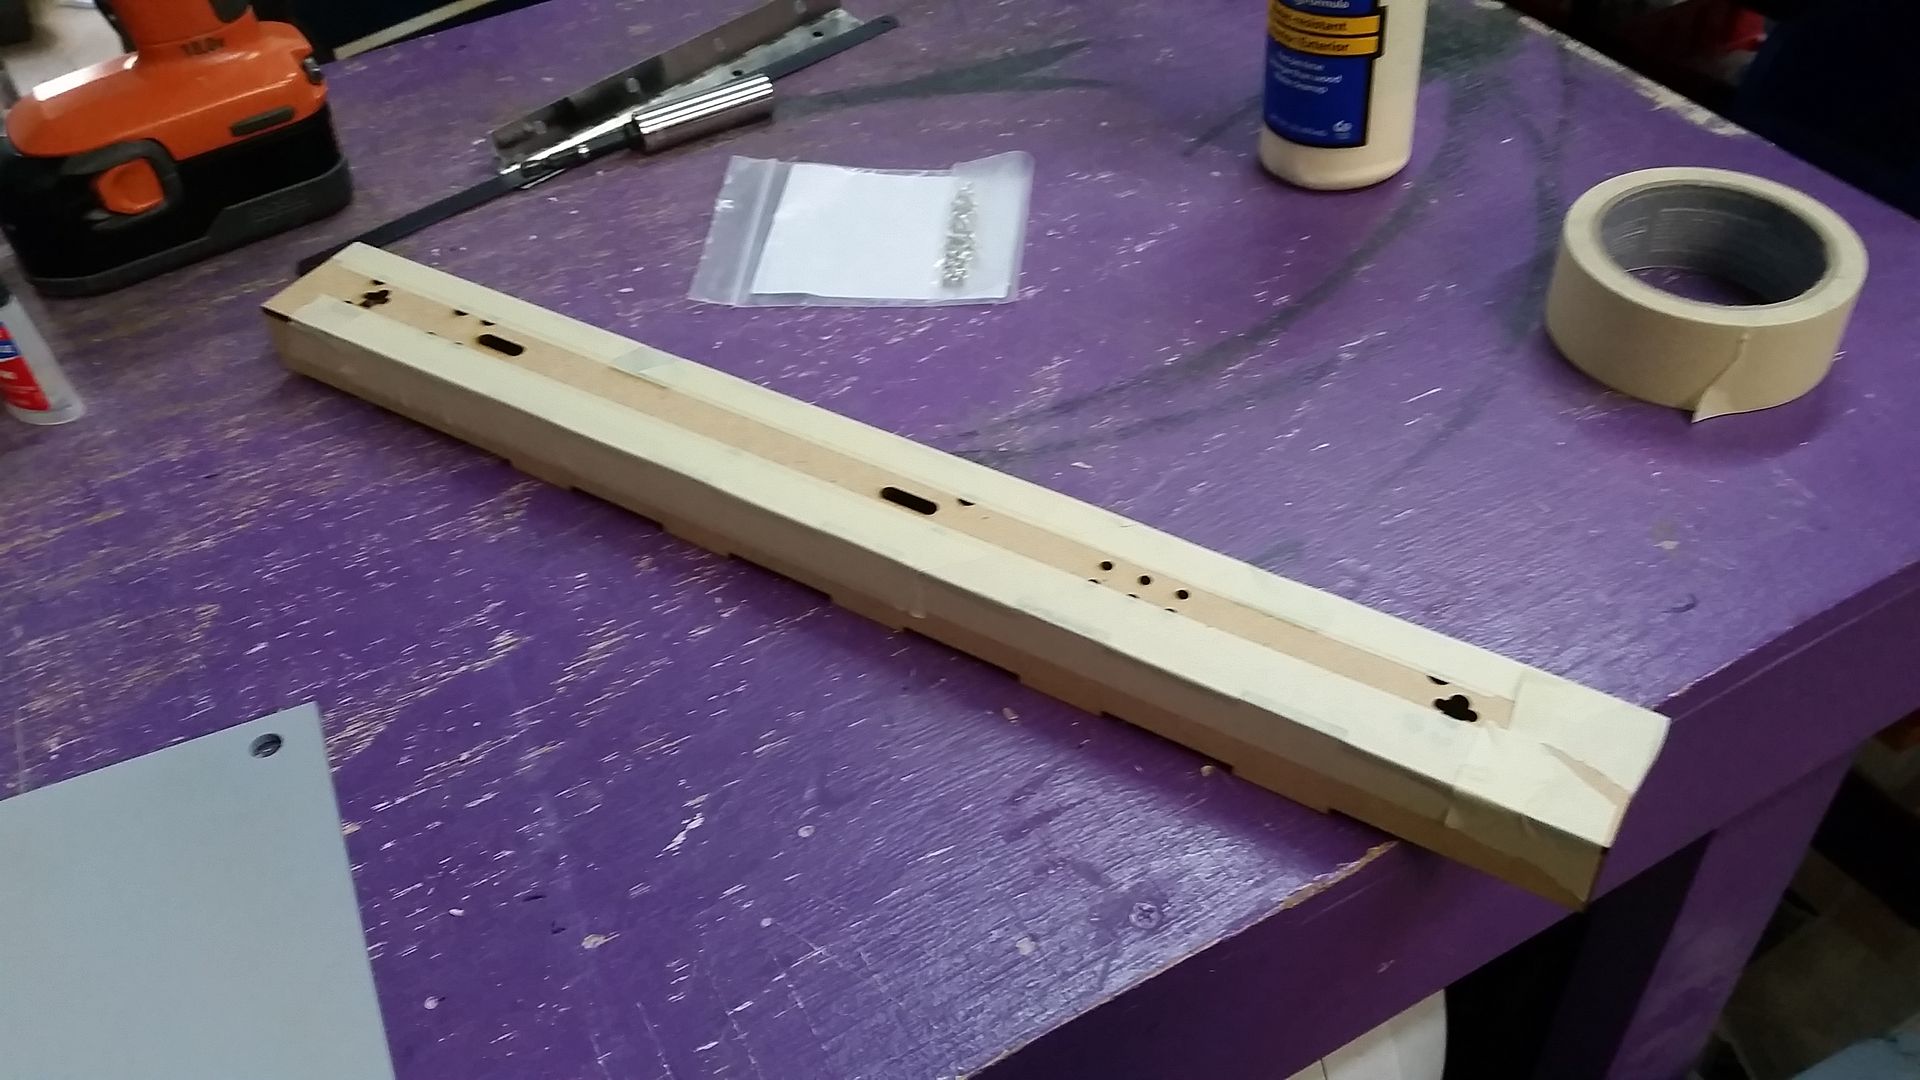
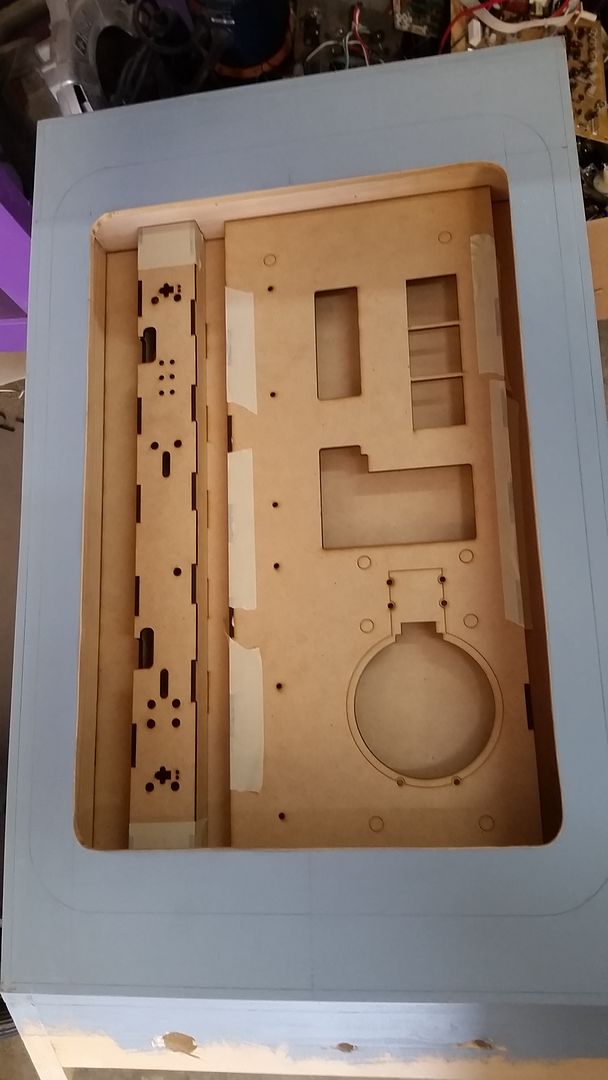
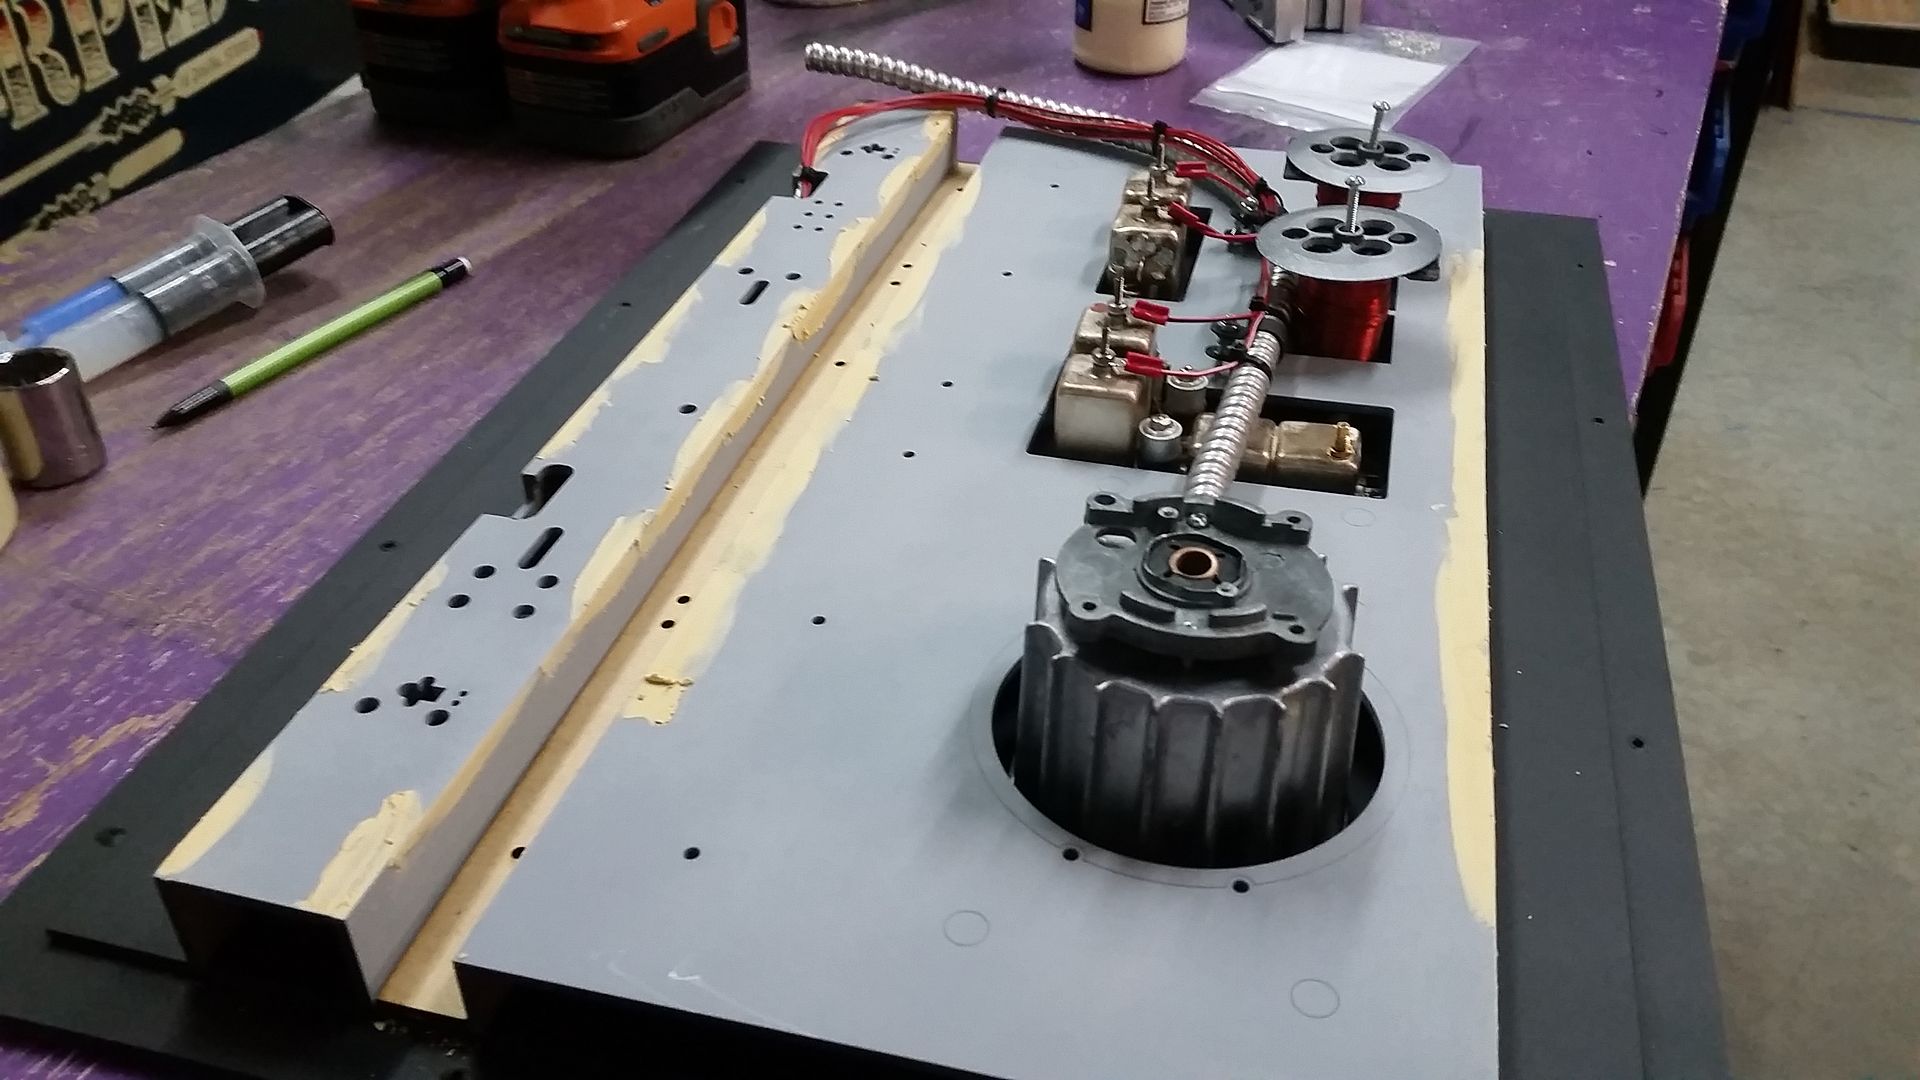
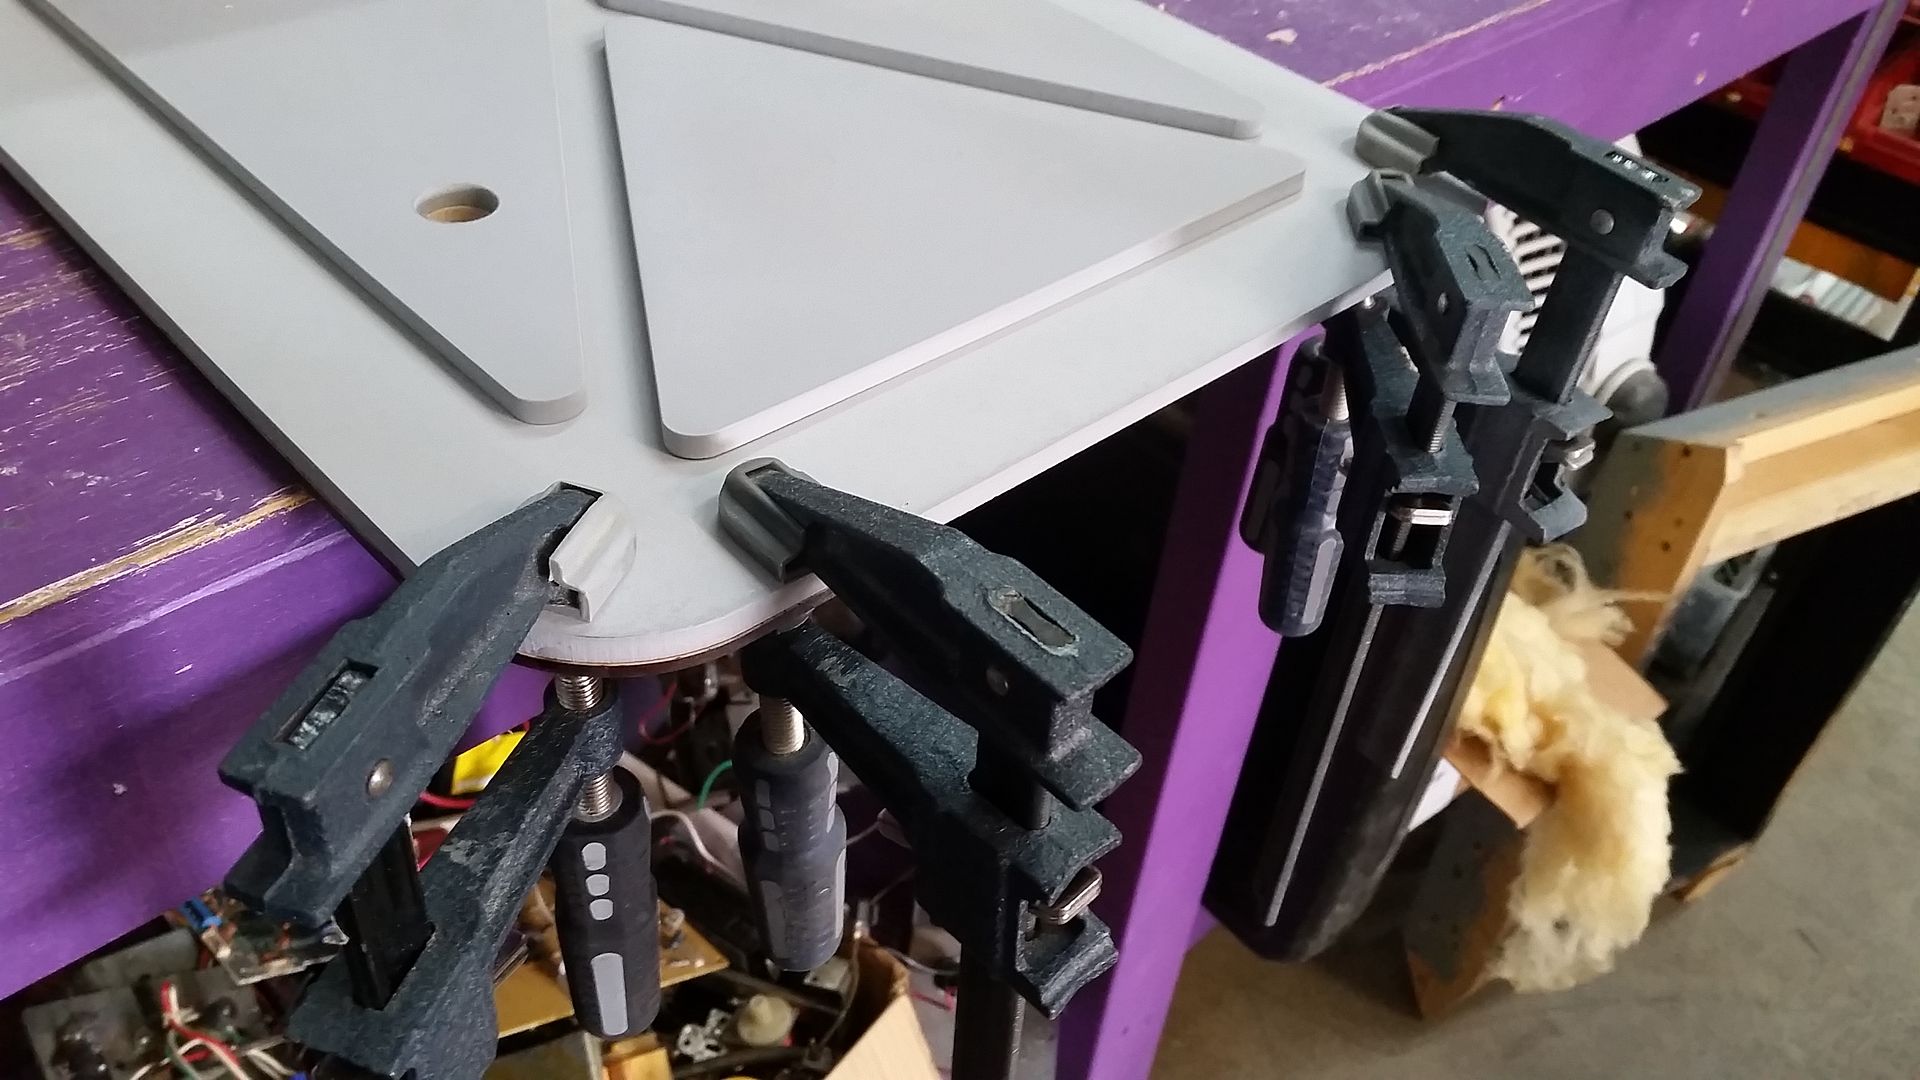
OK... let's get everything back together and start drilling some mounting holes!
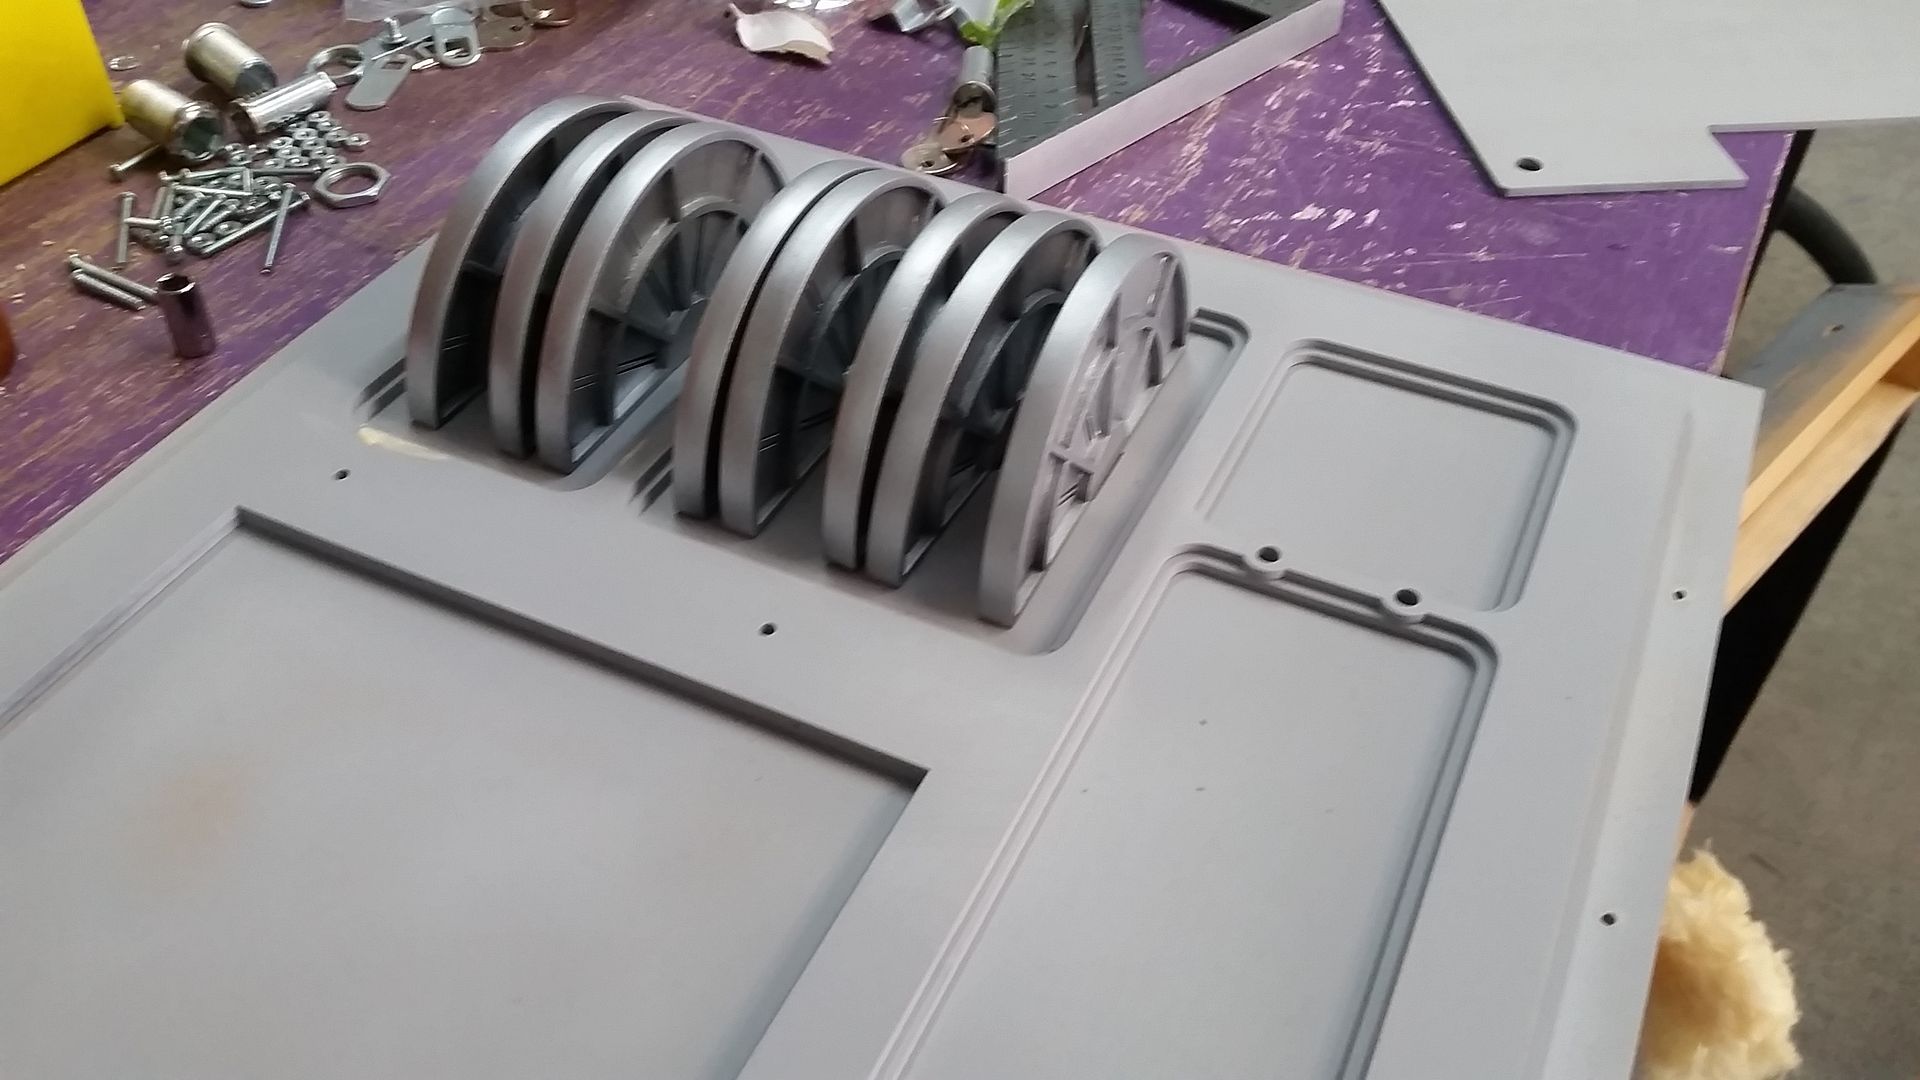
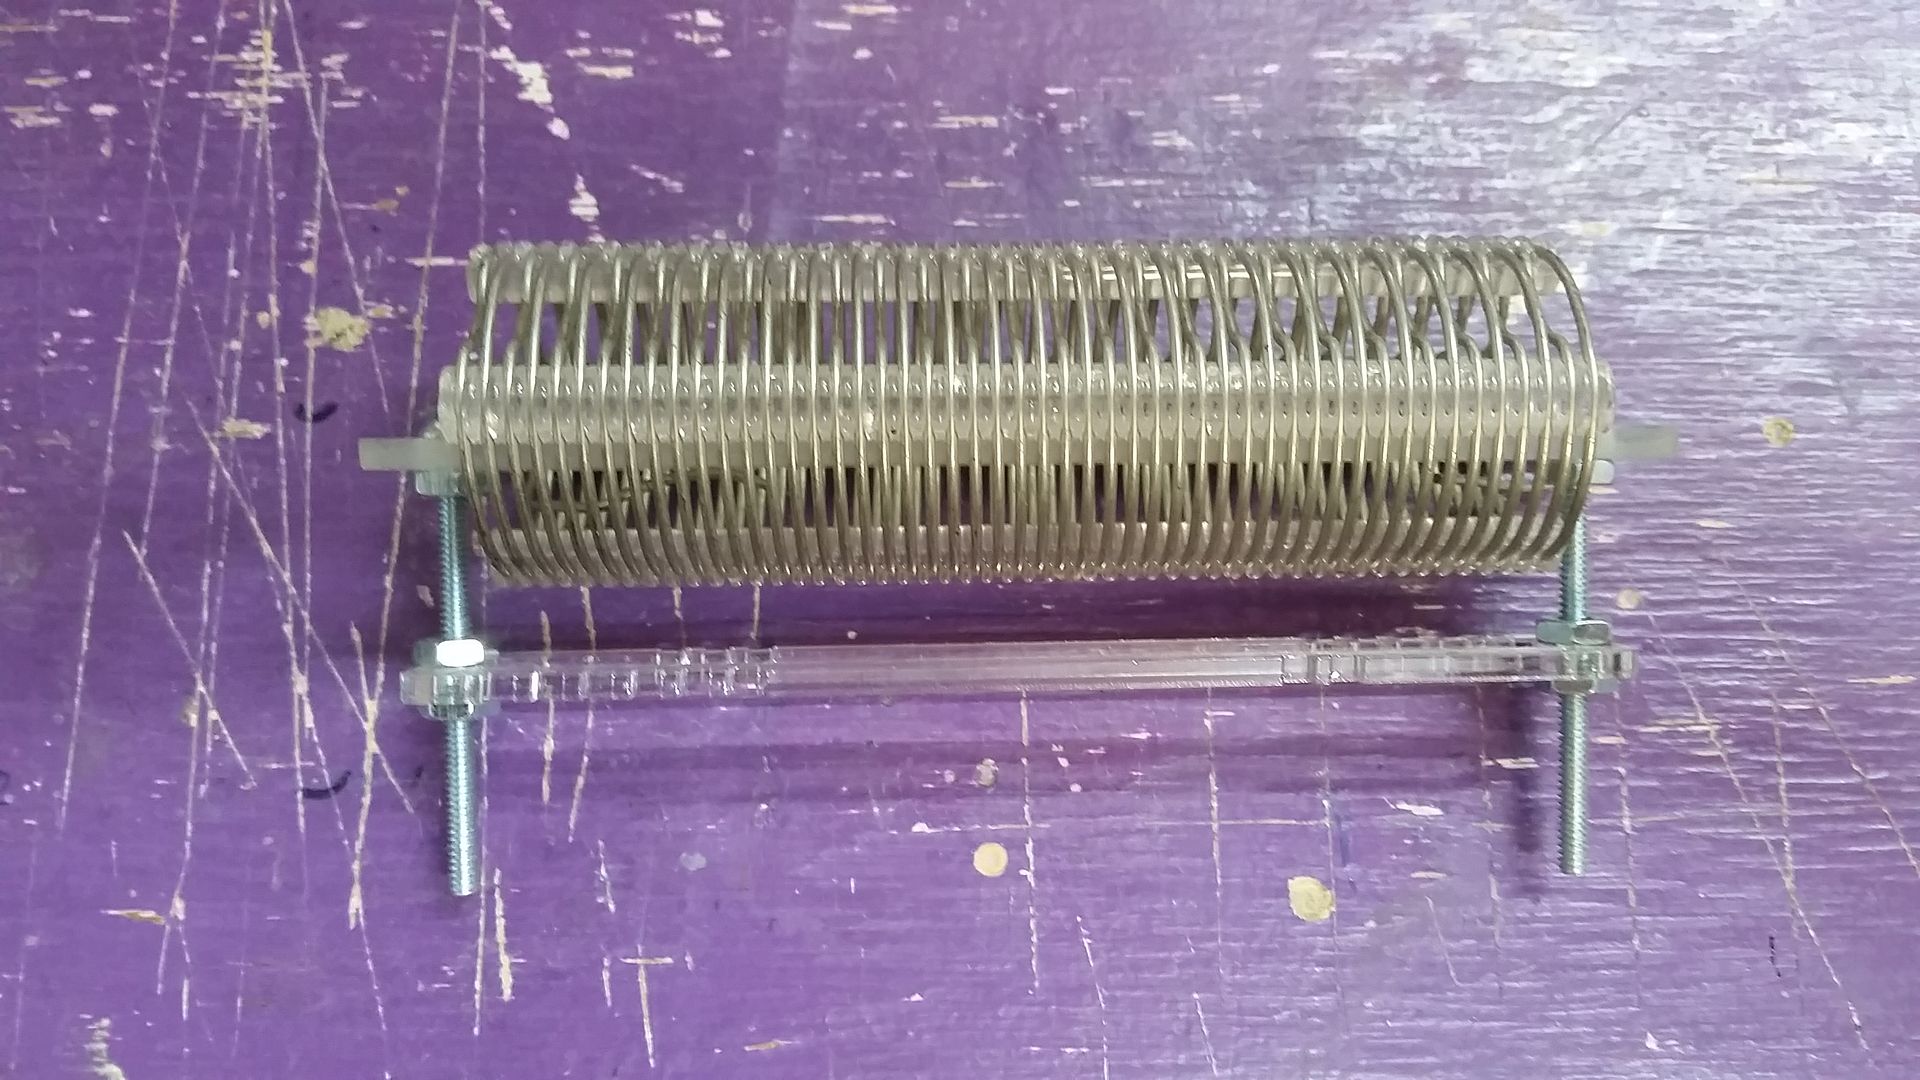
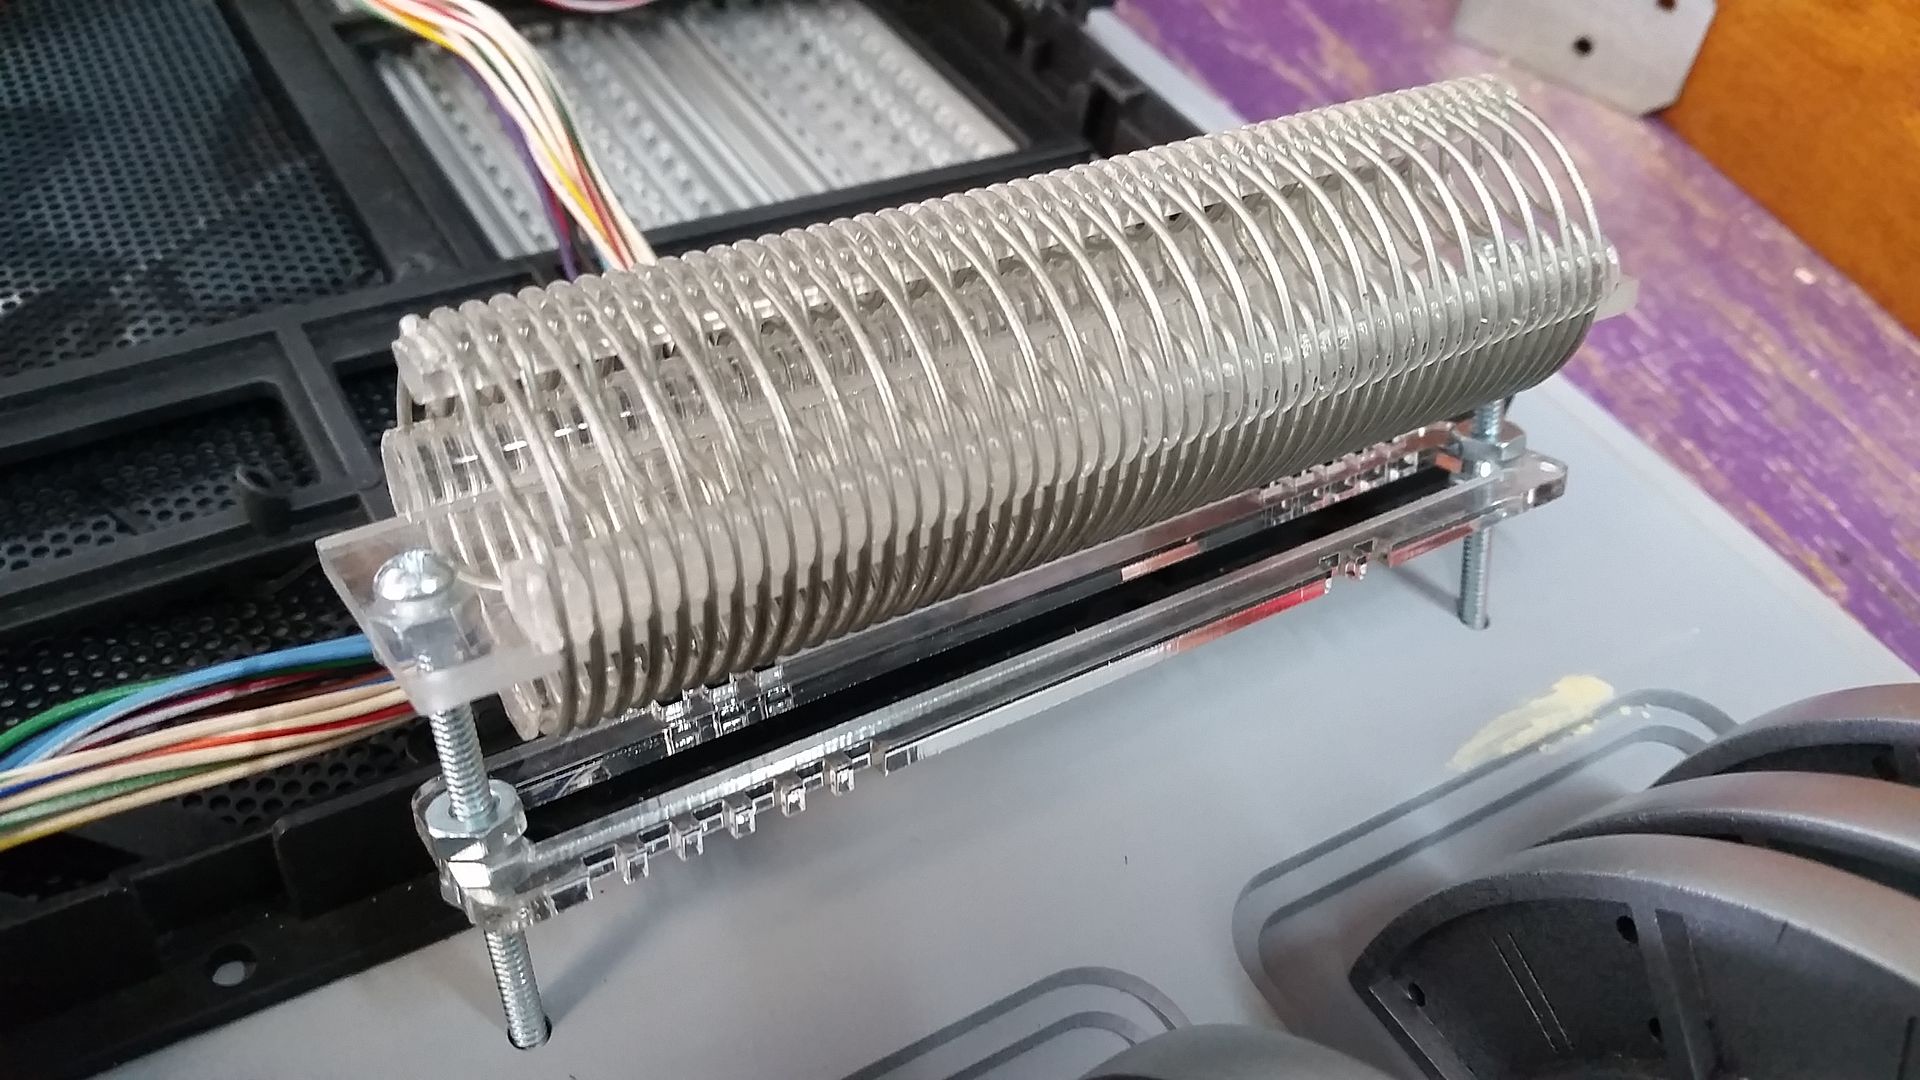
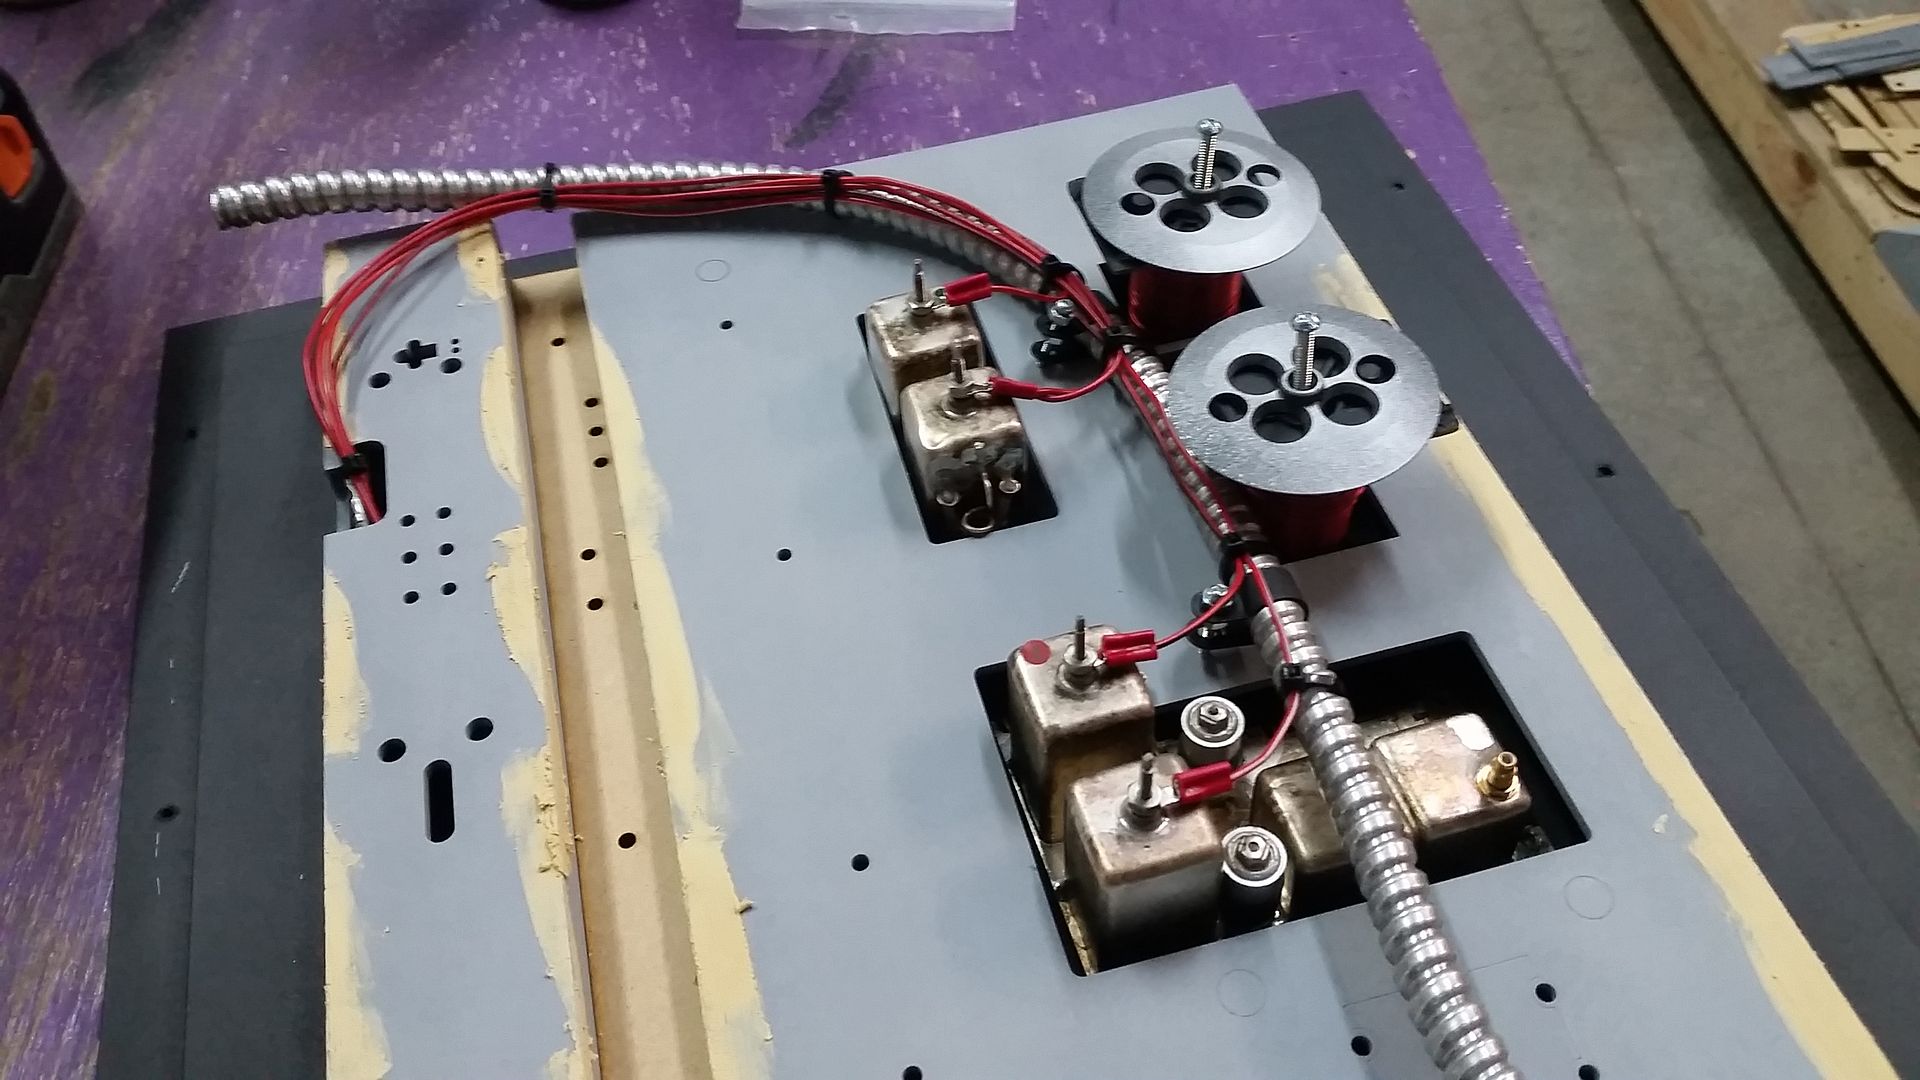
I wanted to raise this coil greeblie up a little higher and show the clear cut acrylic
Adding more primer and filler
PAINT!
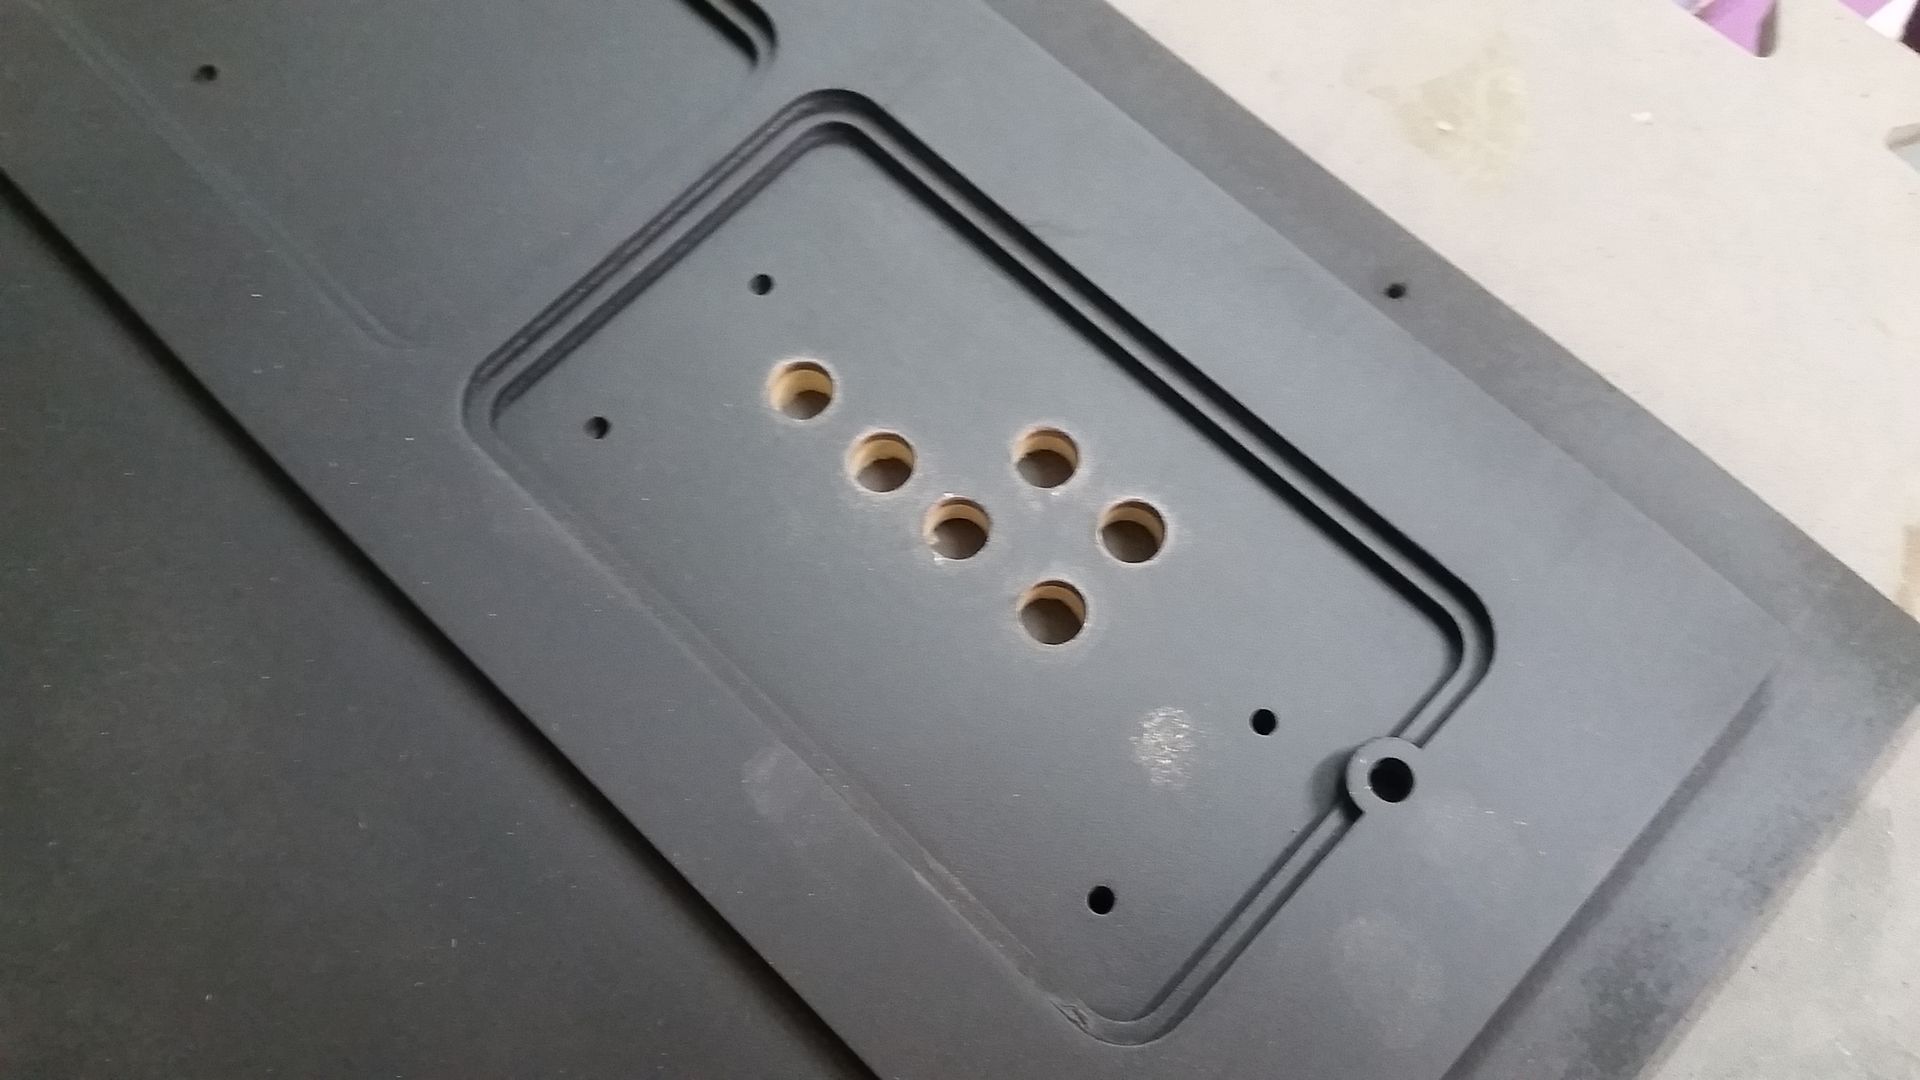
Drilled the LED holes
Weathering
This all looks familiar!
More primer!
And more filler of course...
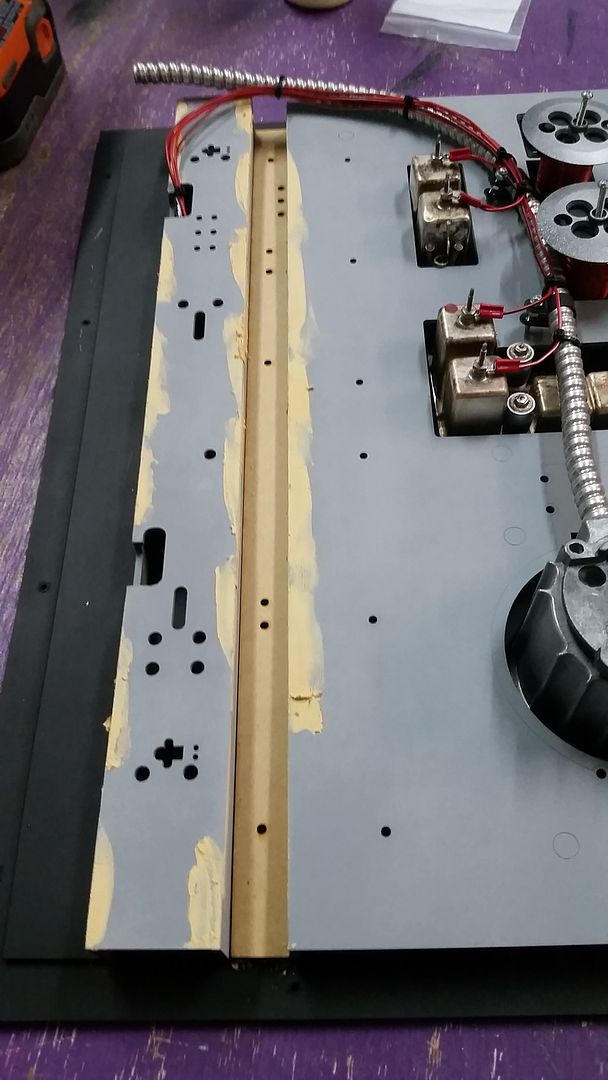
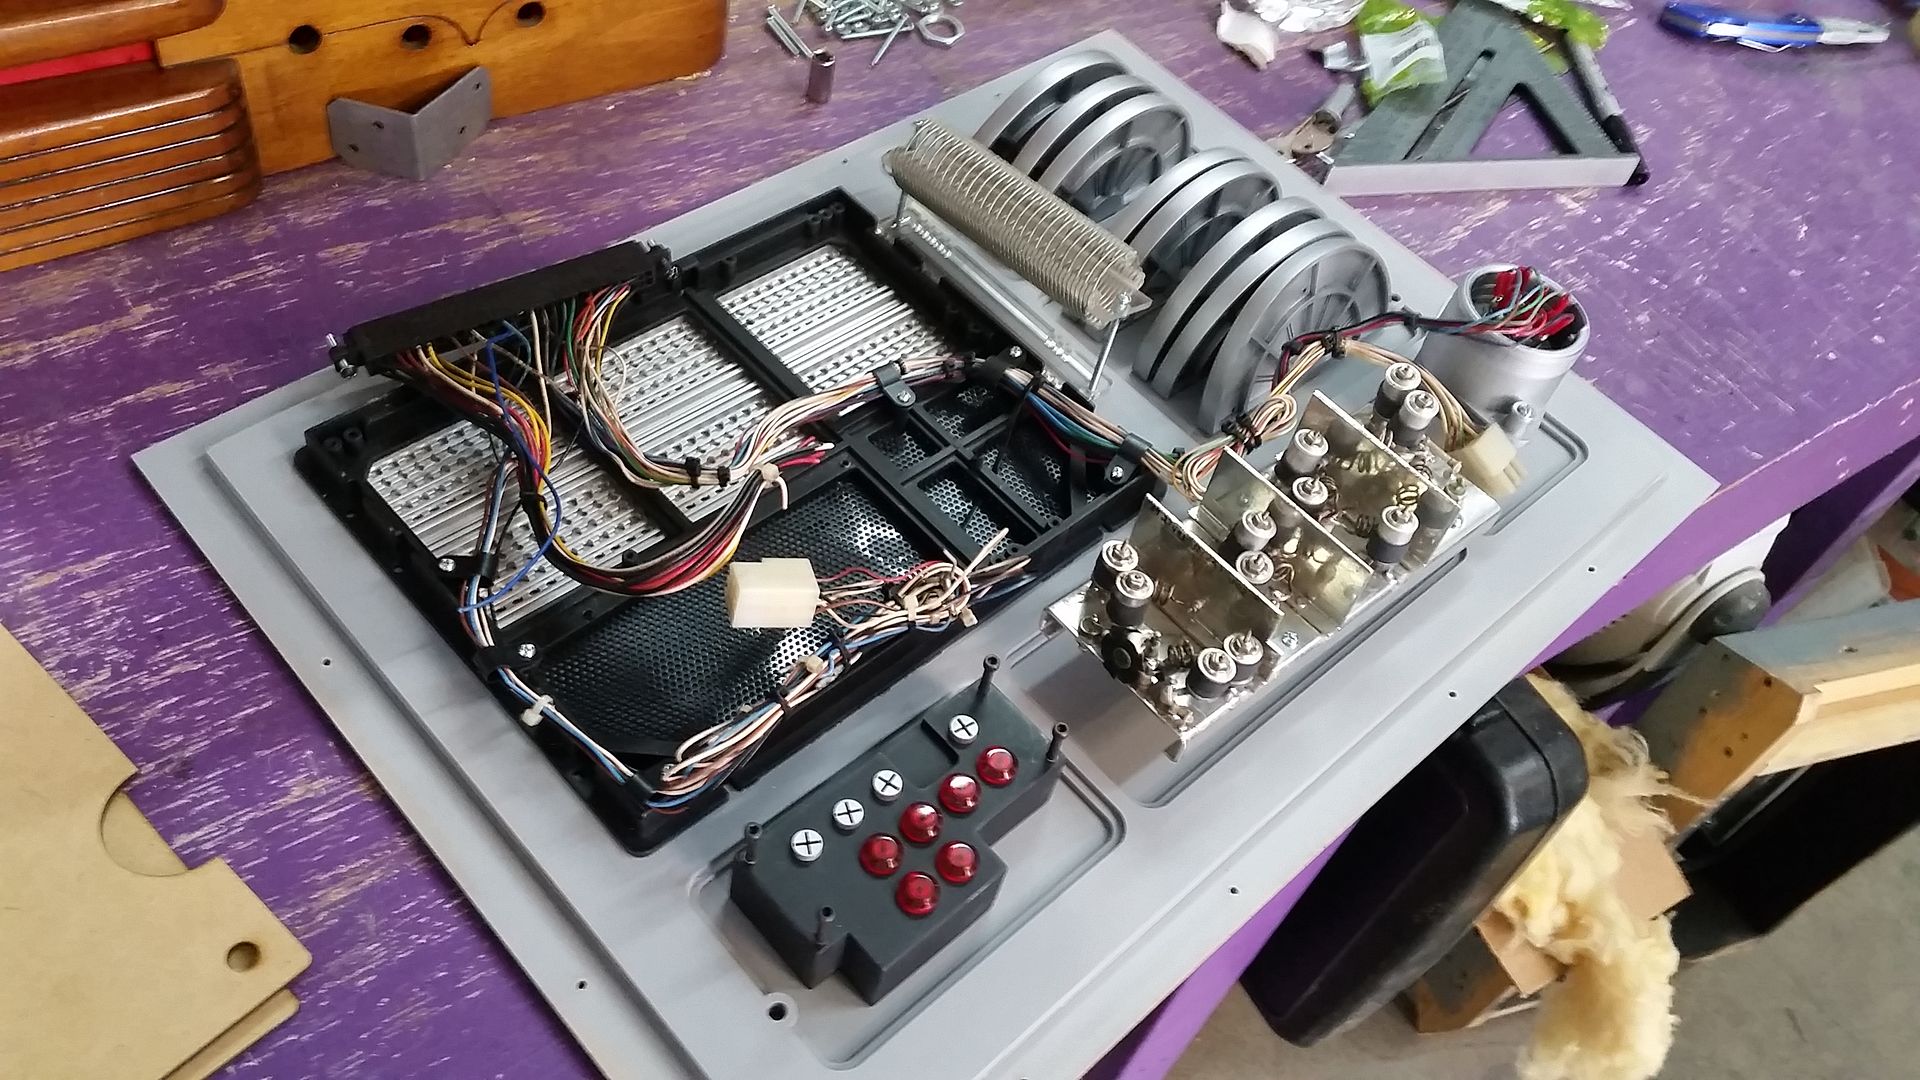
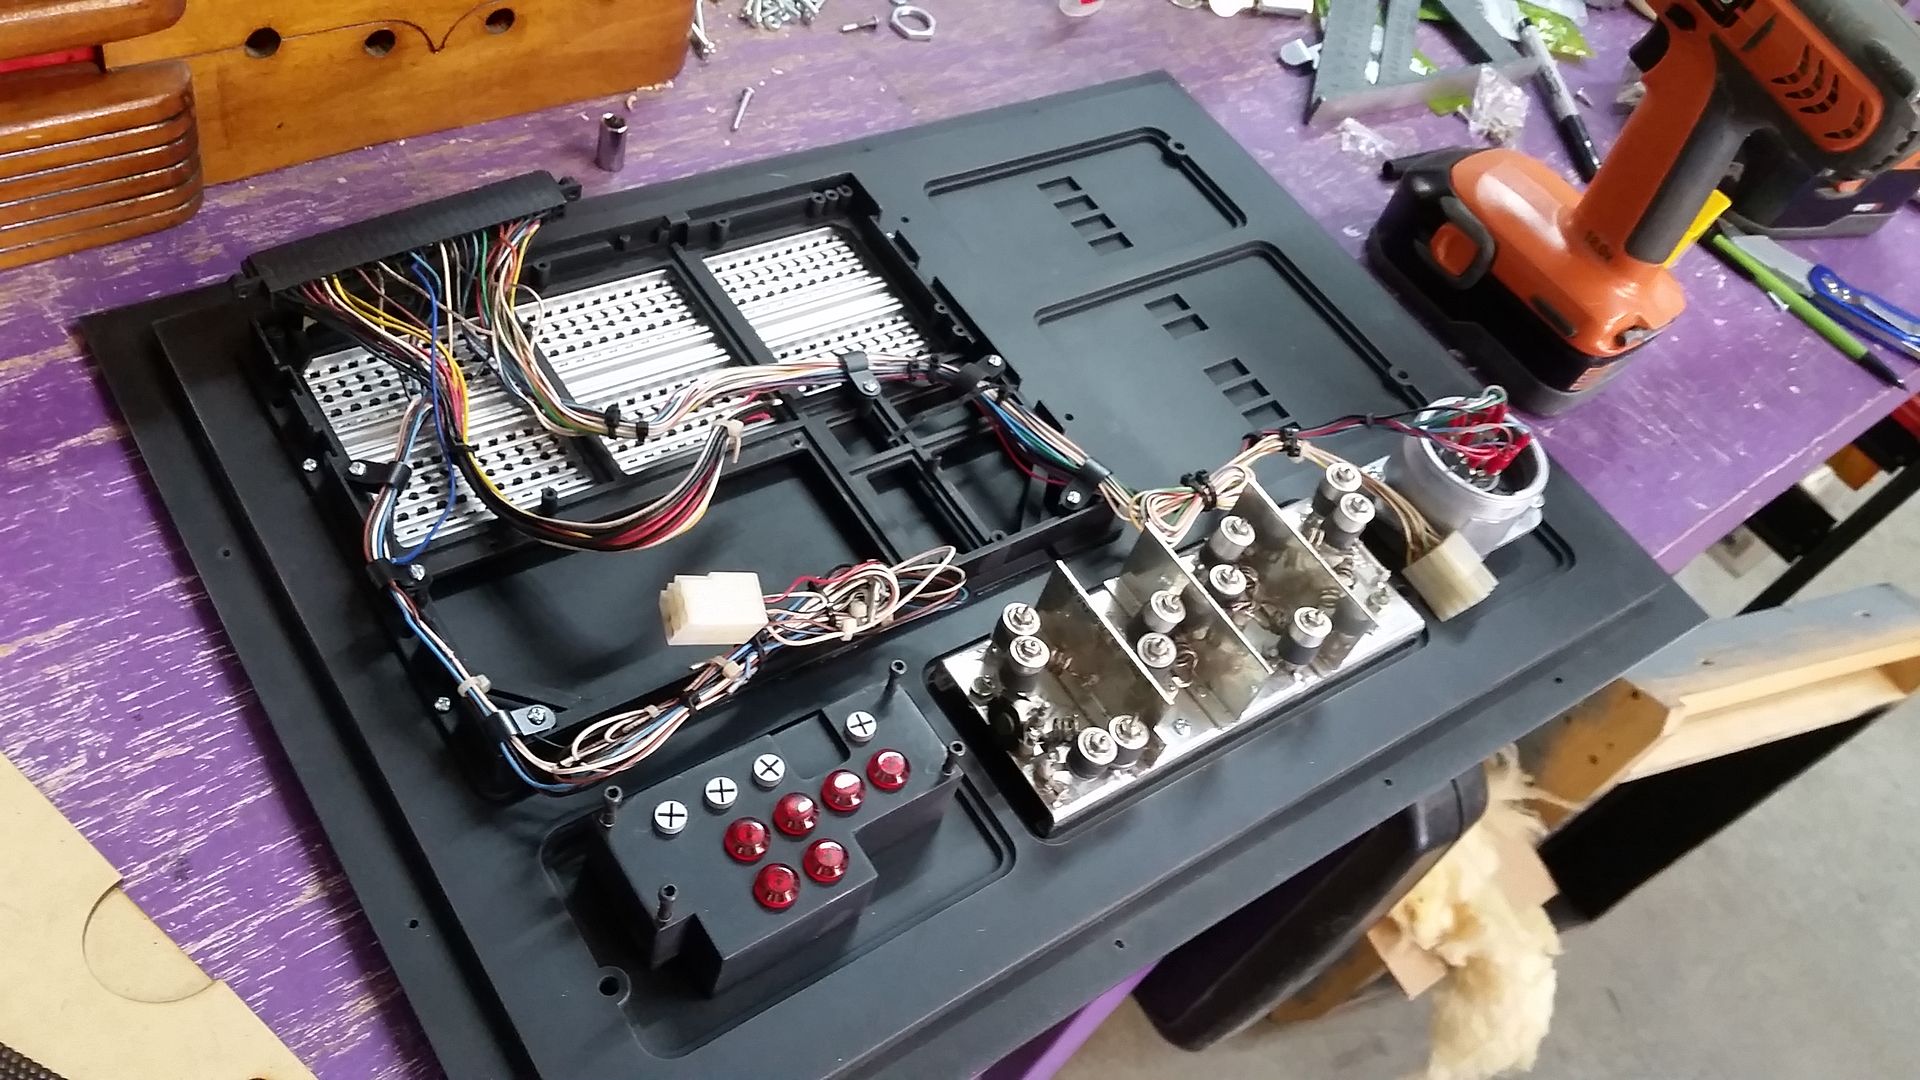
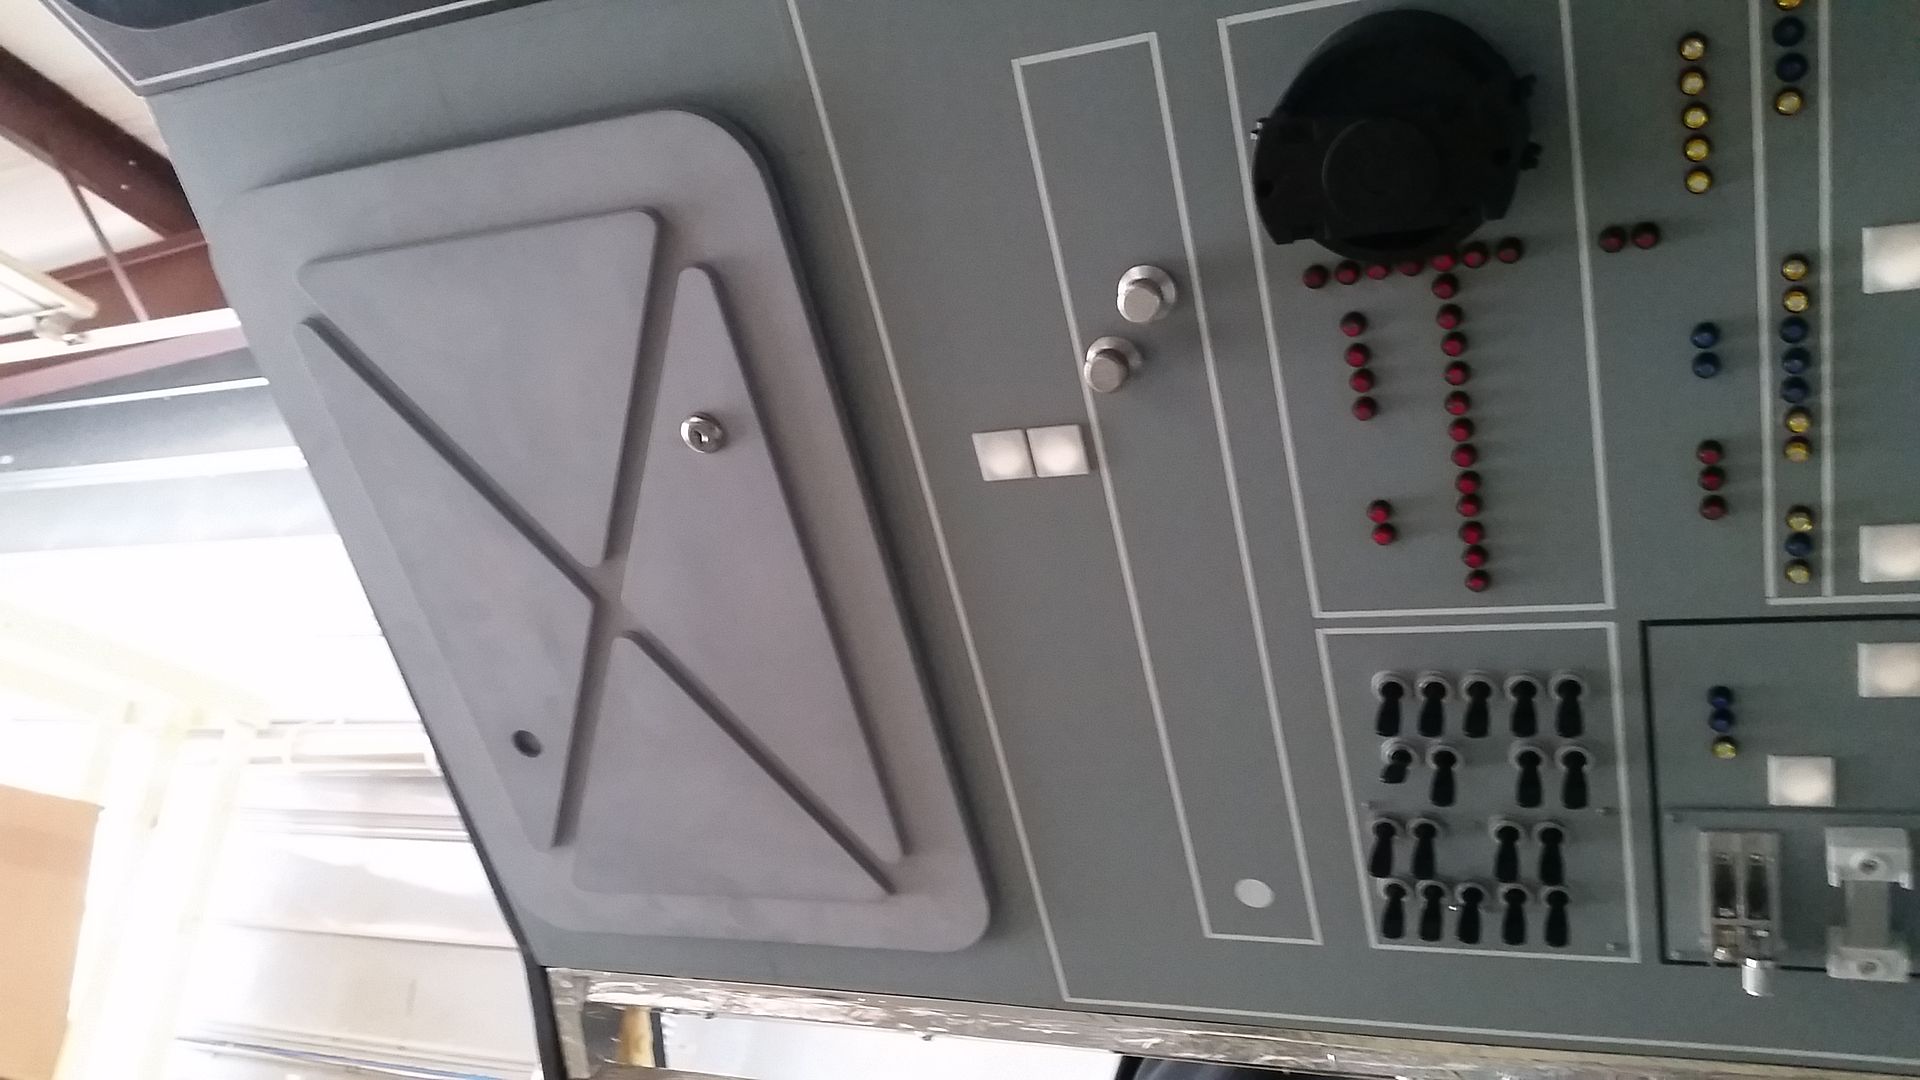
Getting all the greeblies in their basic configuration
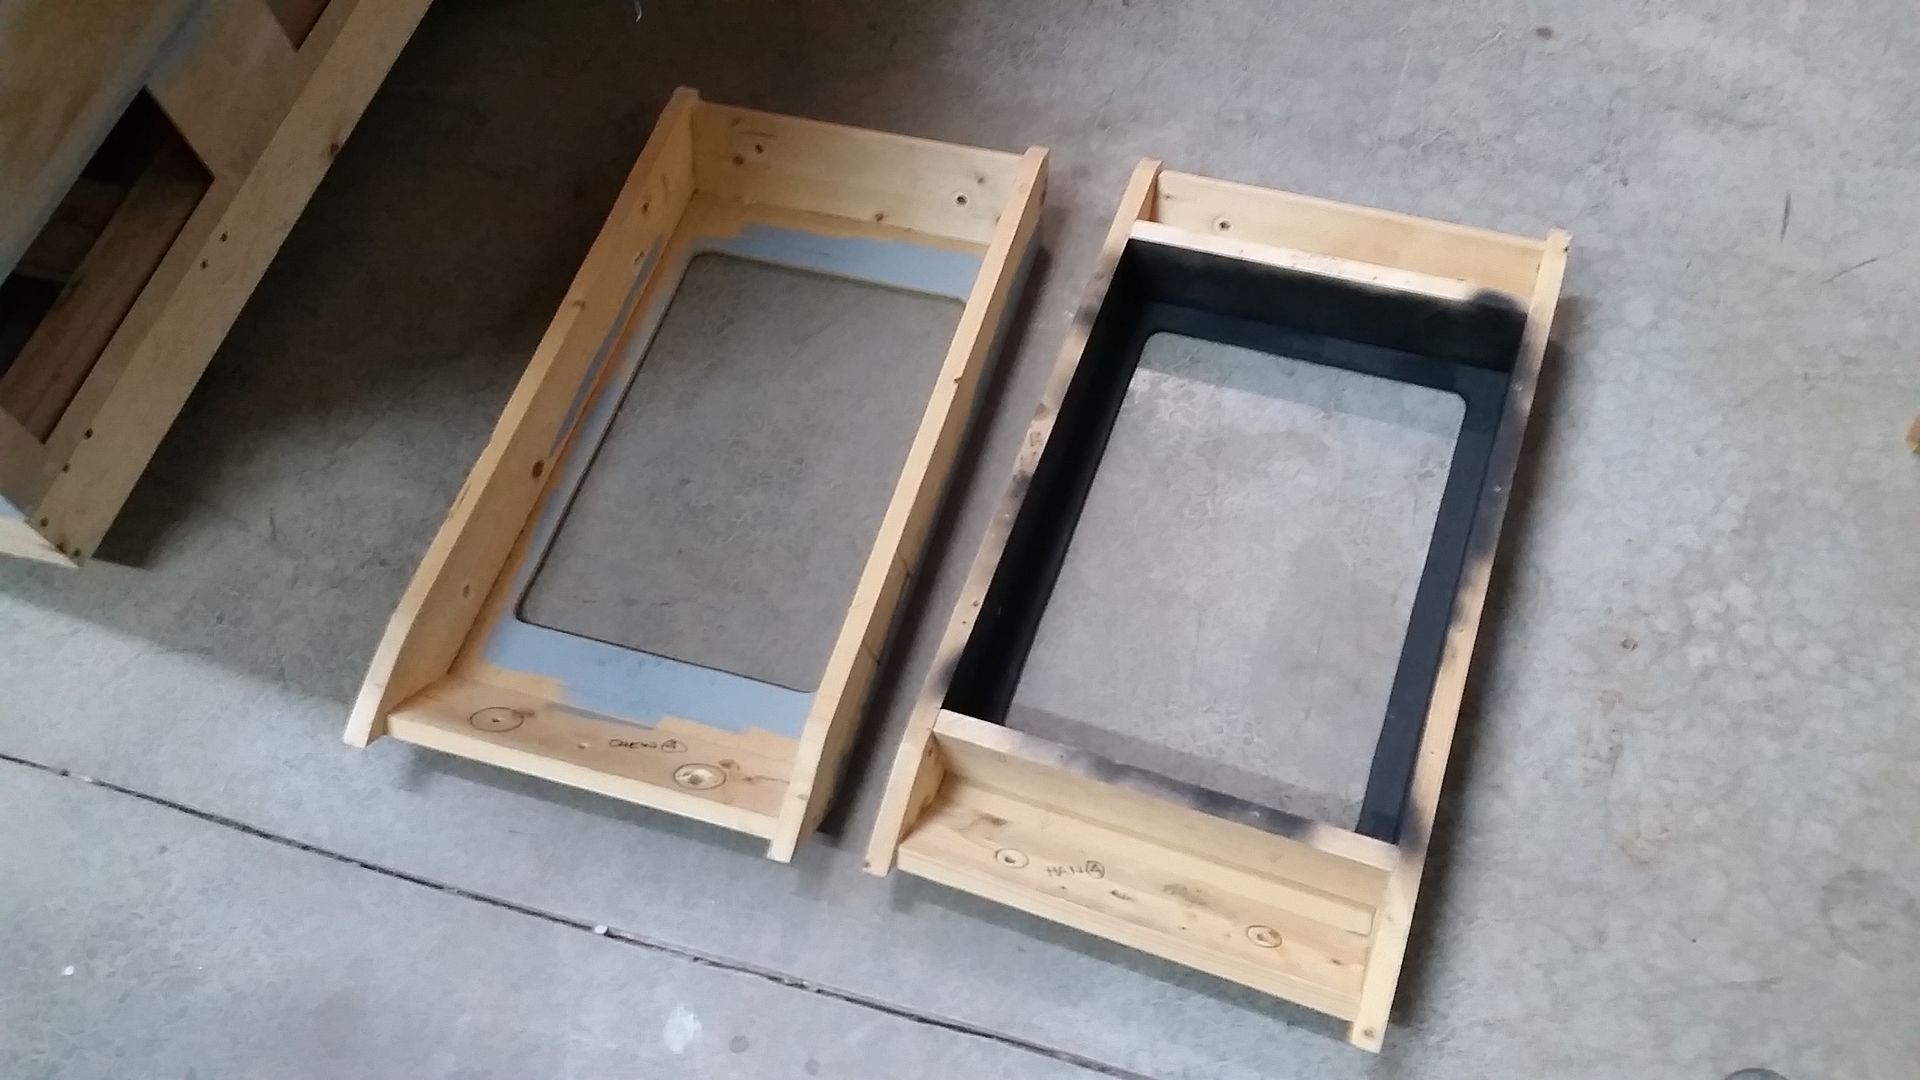
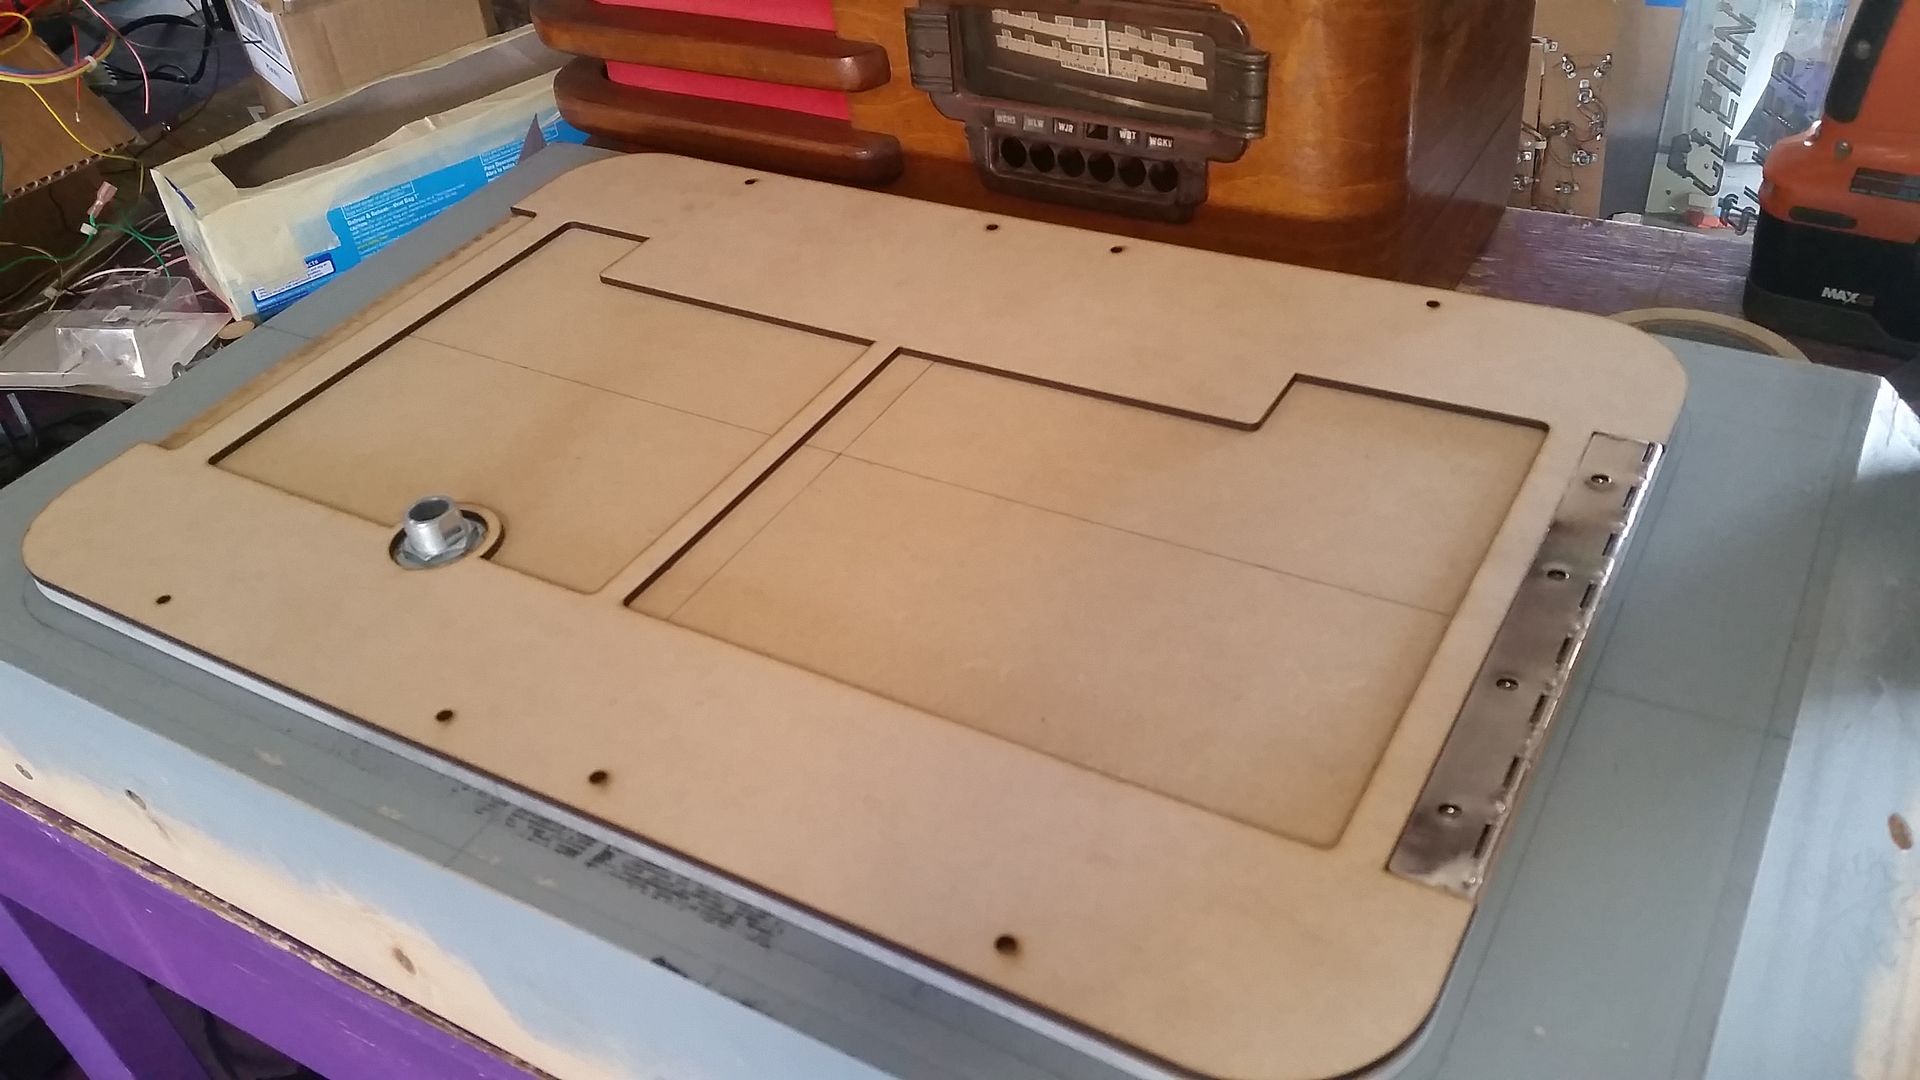
With the interior greeblies almost finished it was time to tackle the lids!
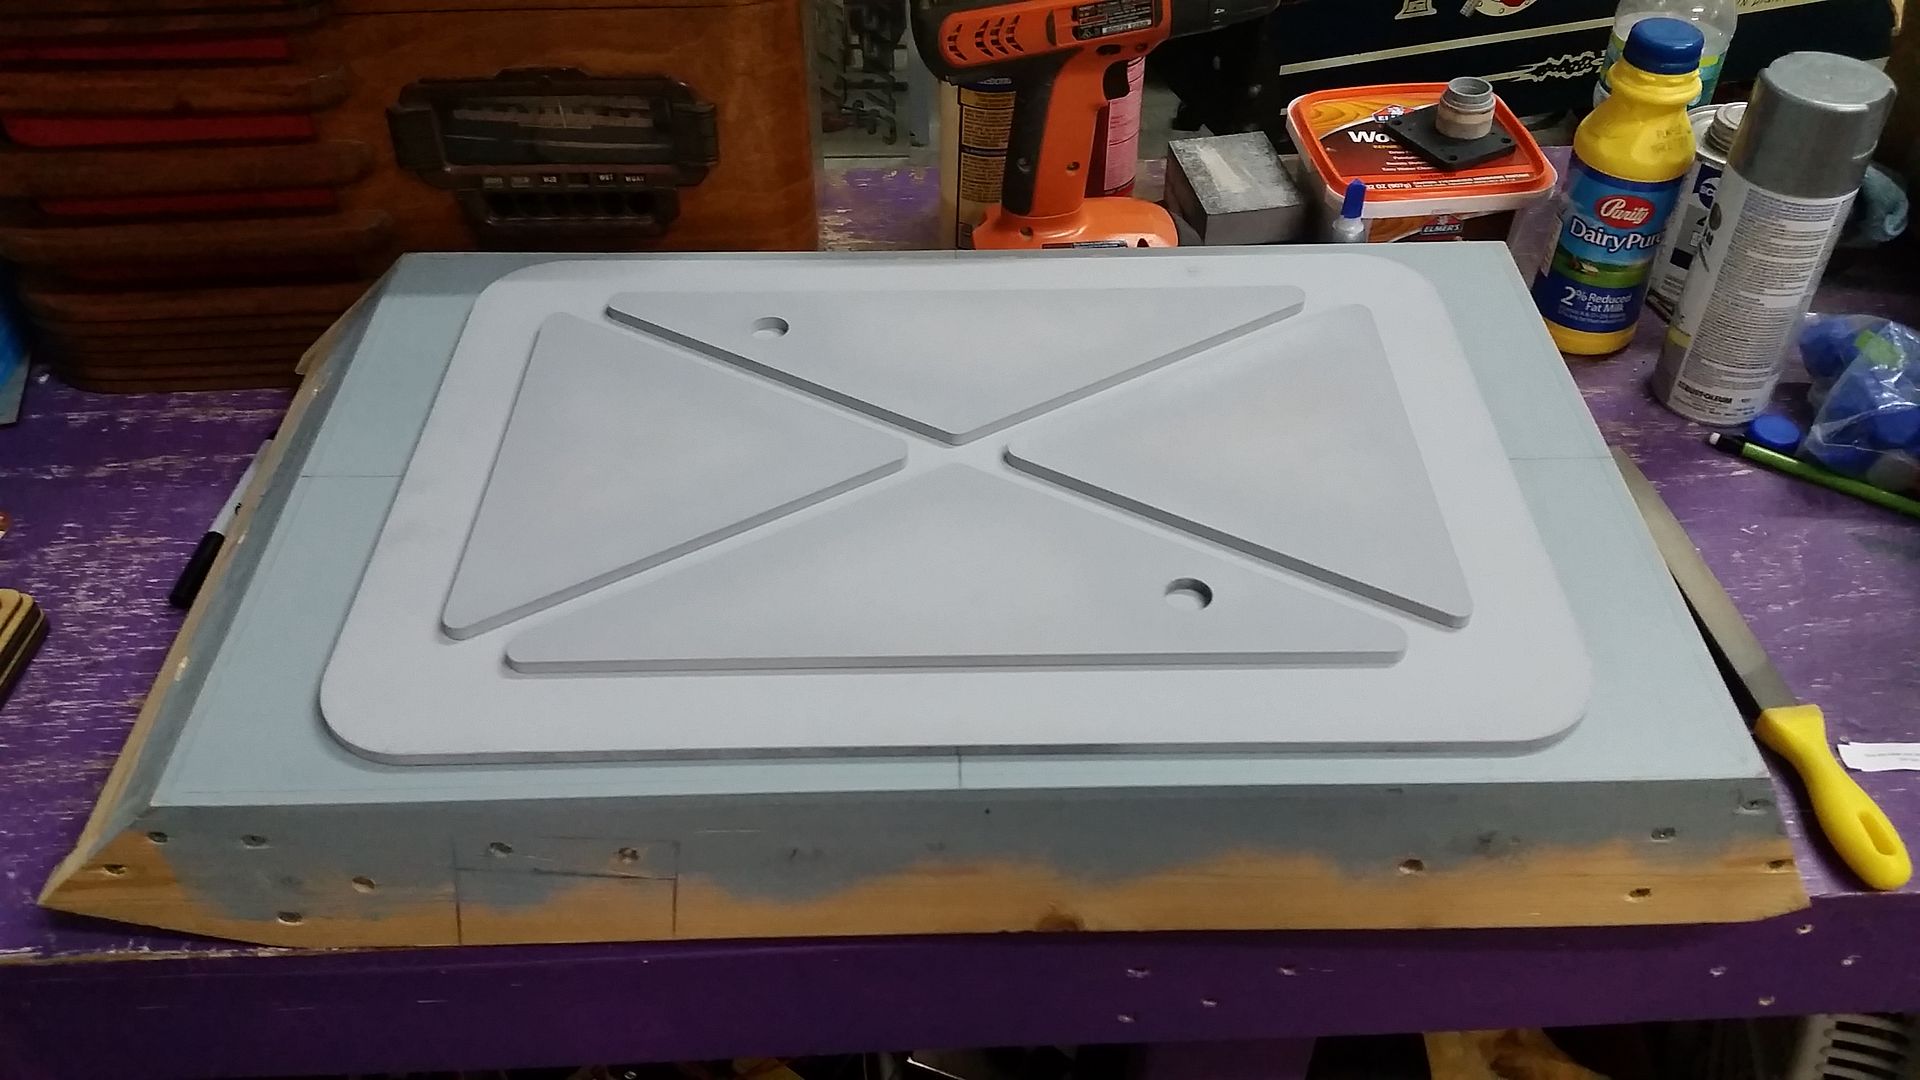
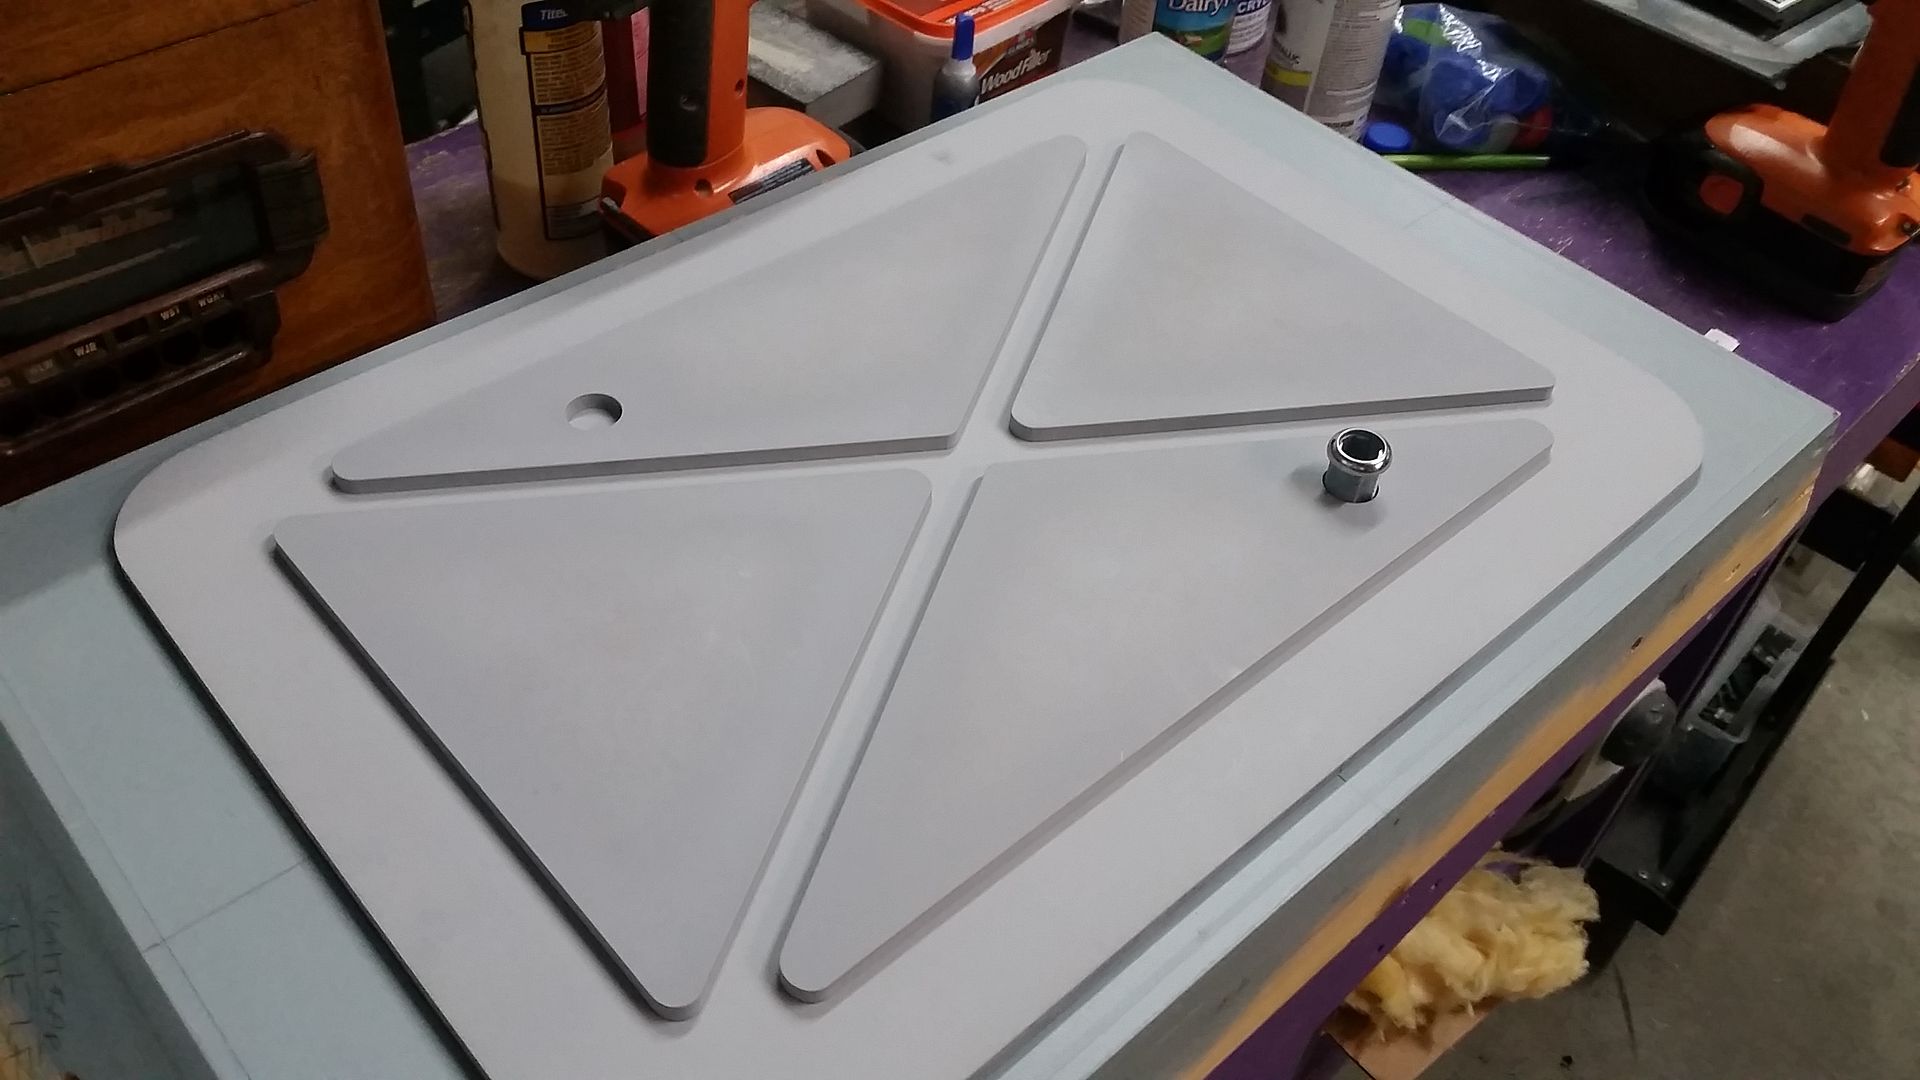
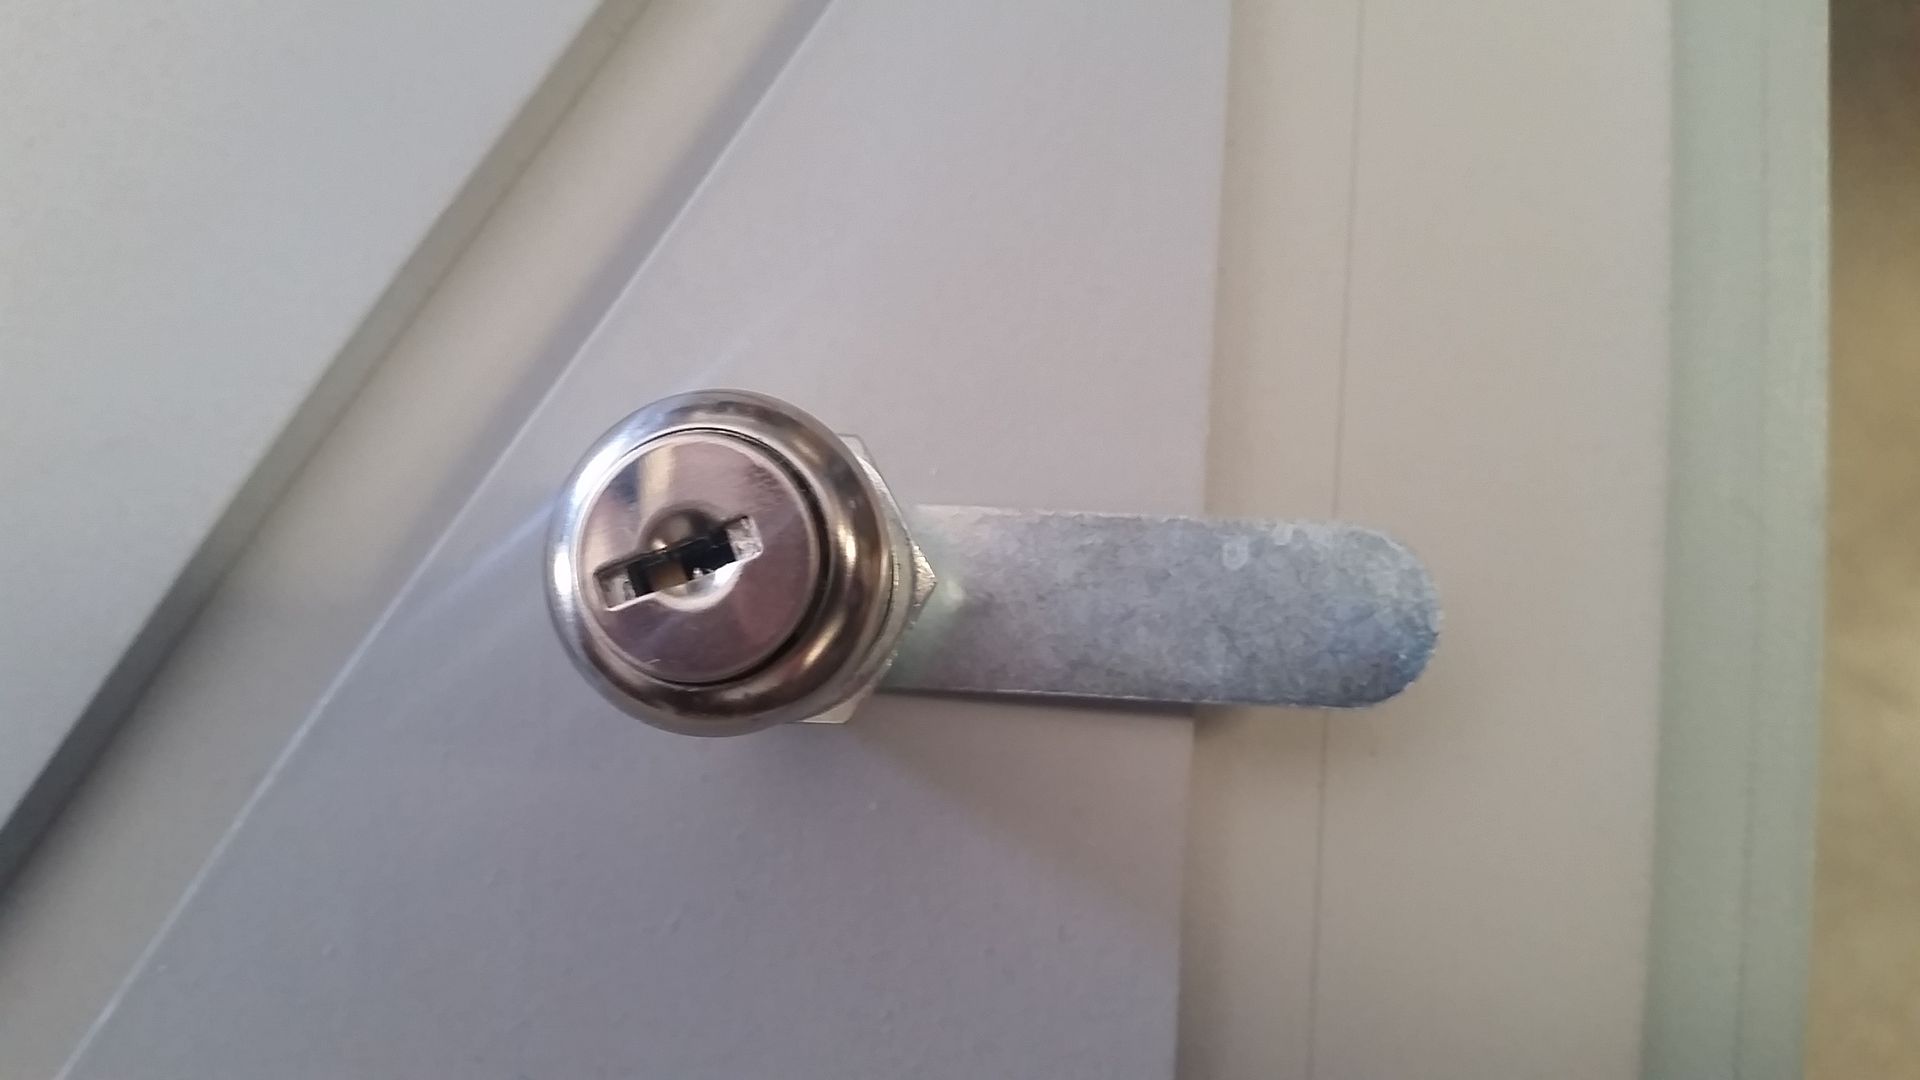
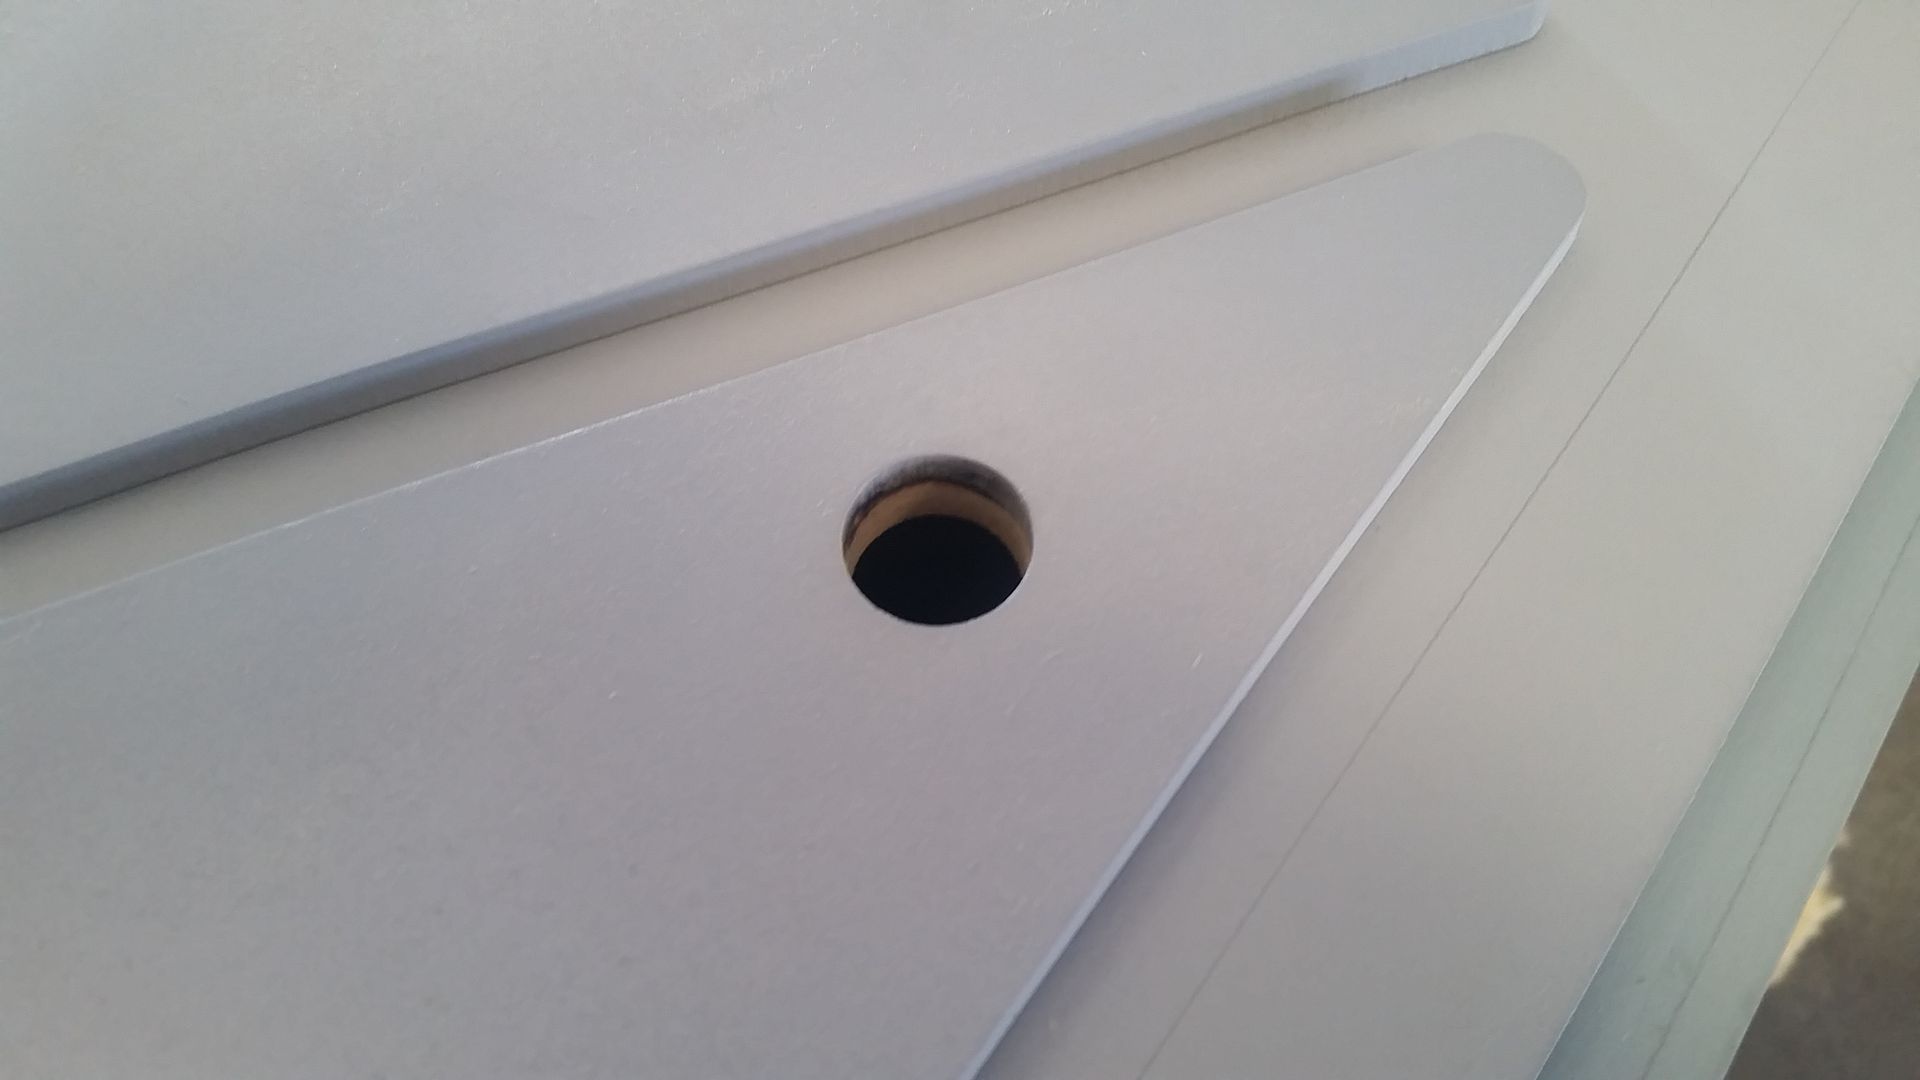
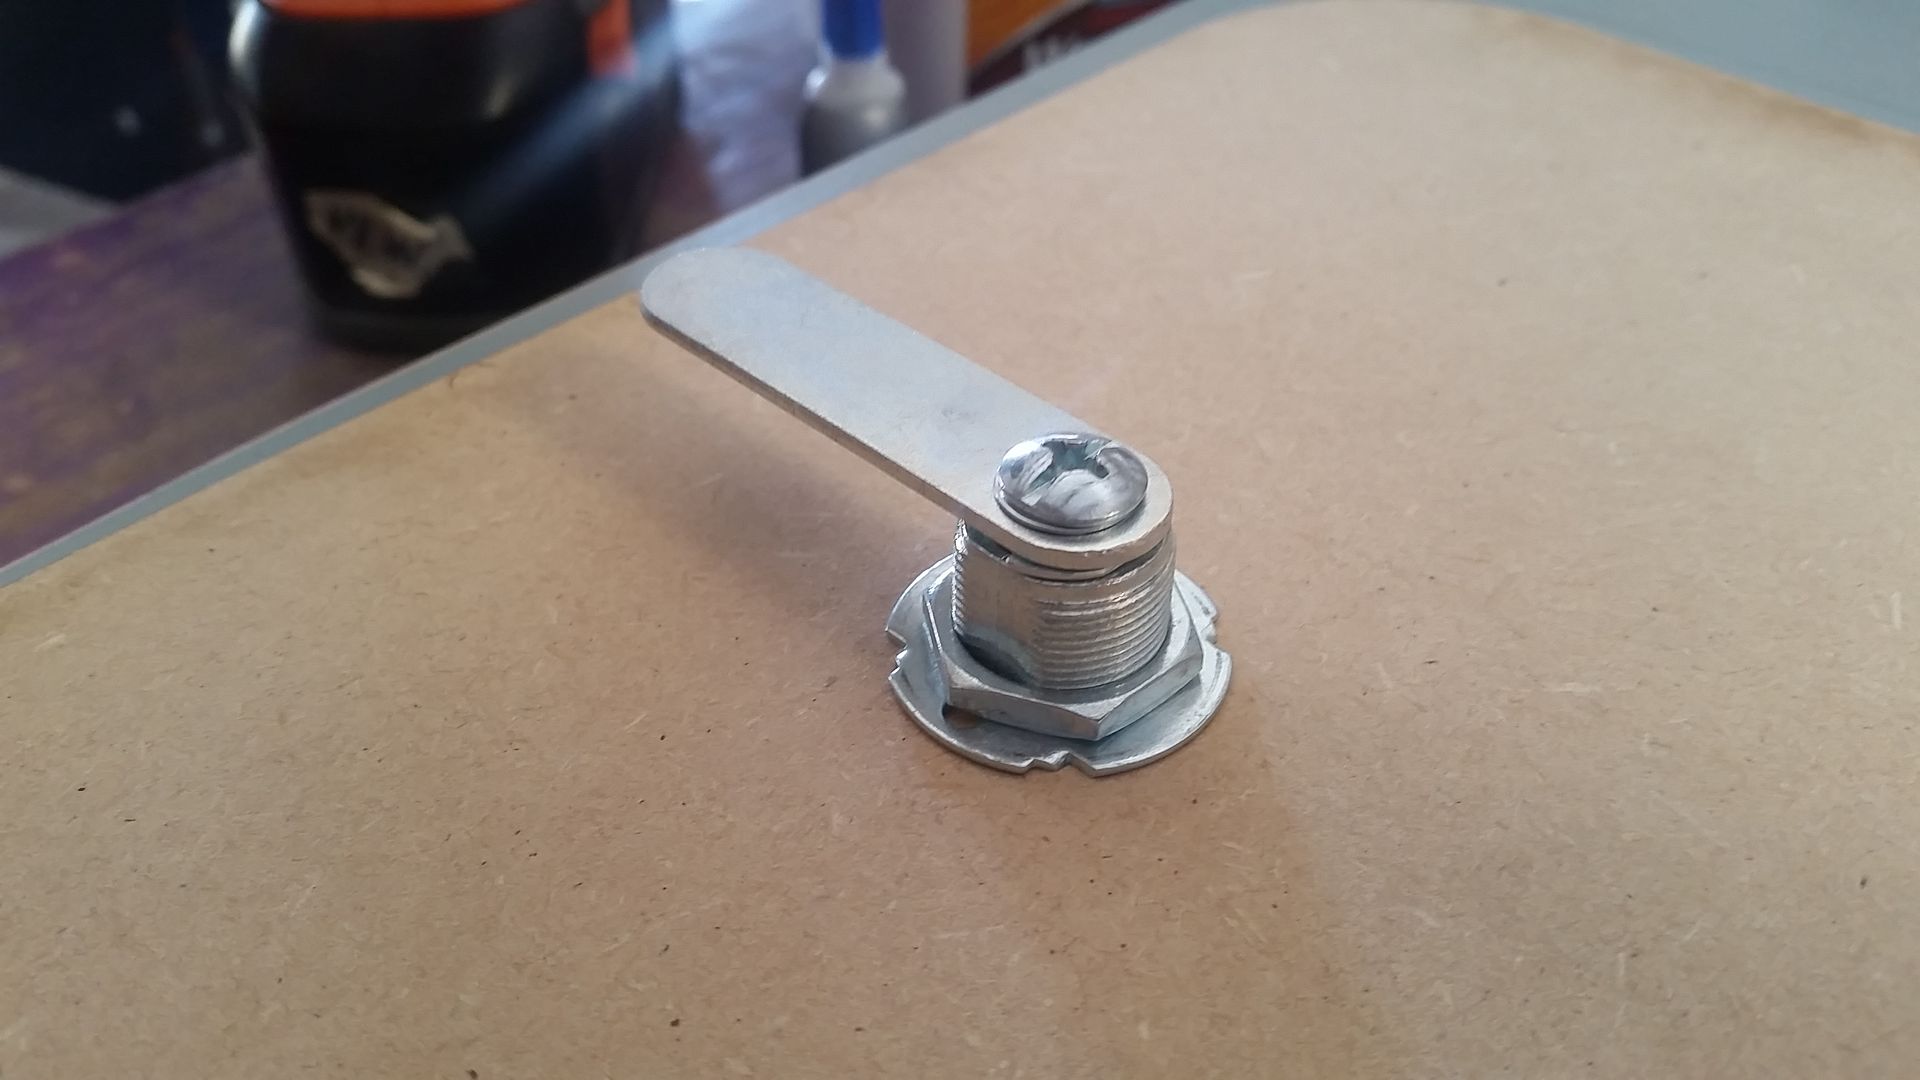
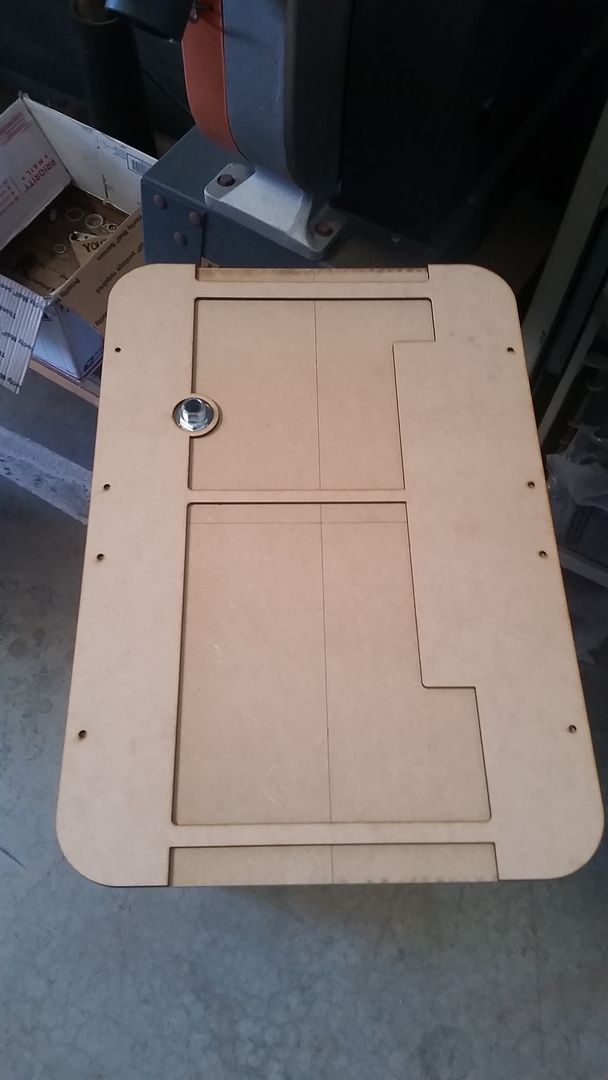
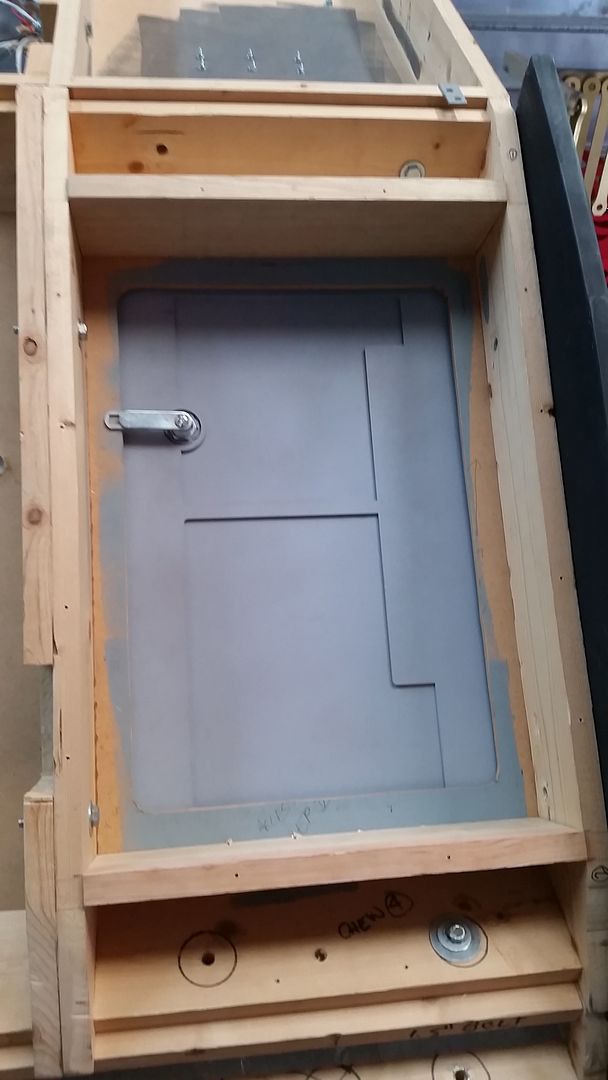
I decided to go with an actual lock and key setup and the holes in the lids were PERFECT!
I hope the arm reaches!
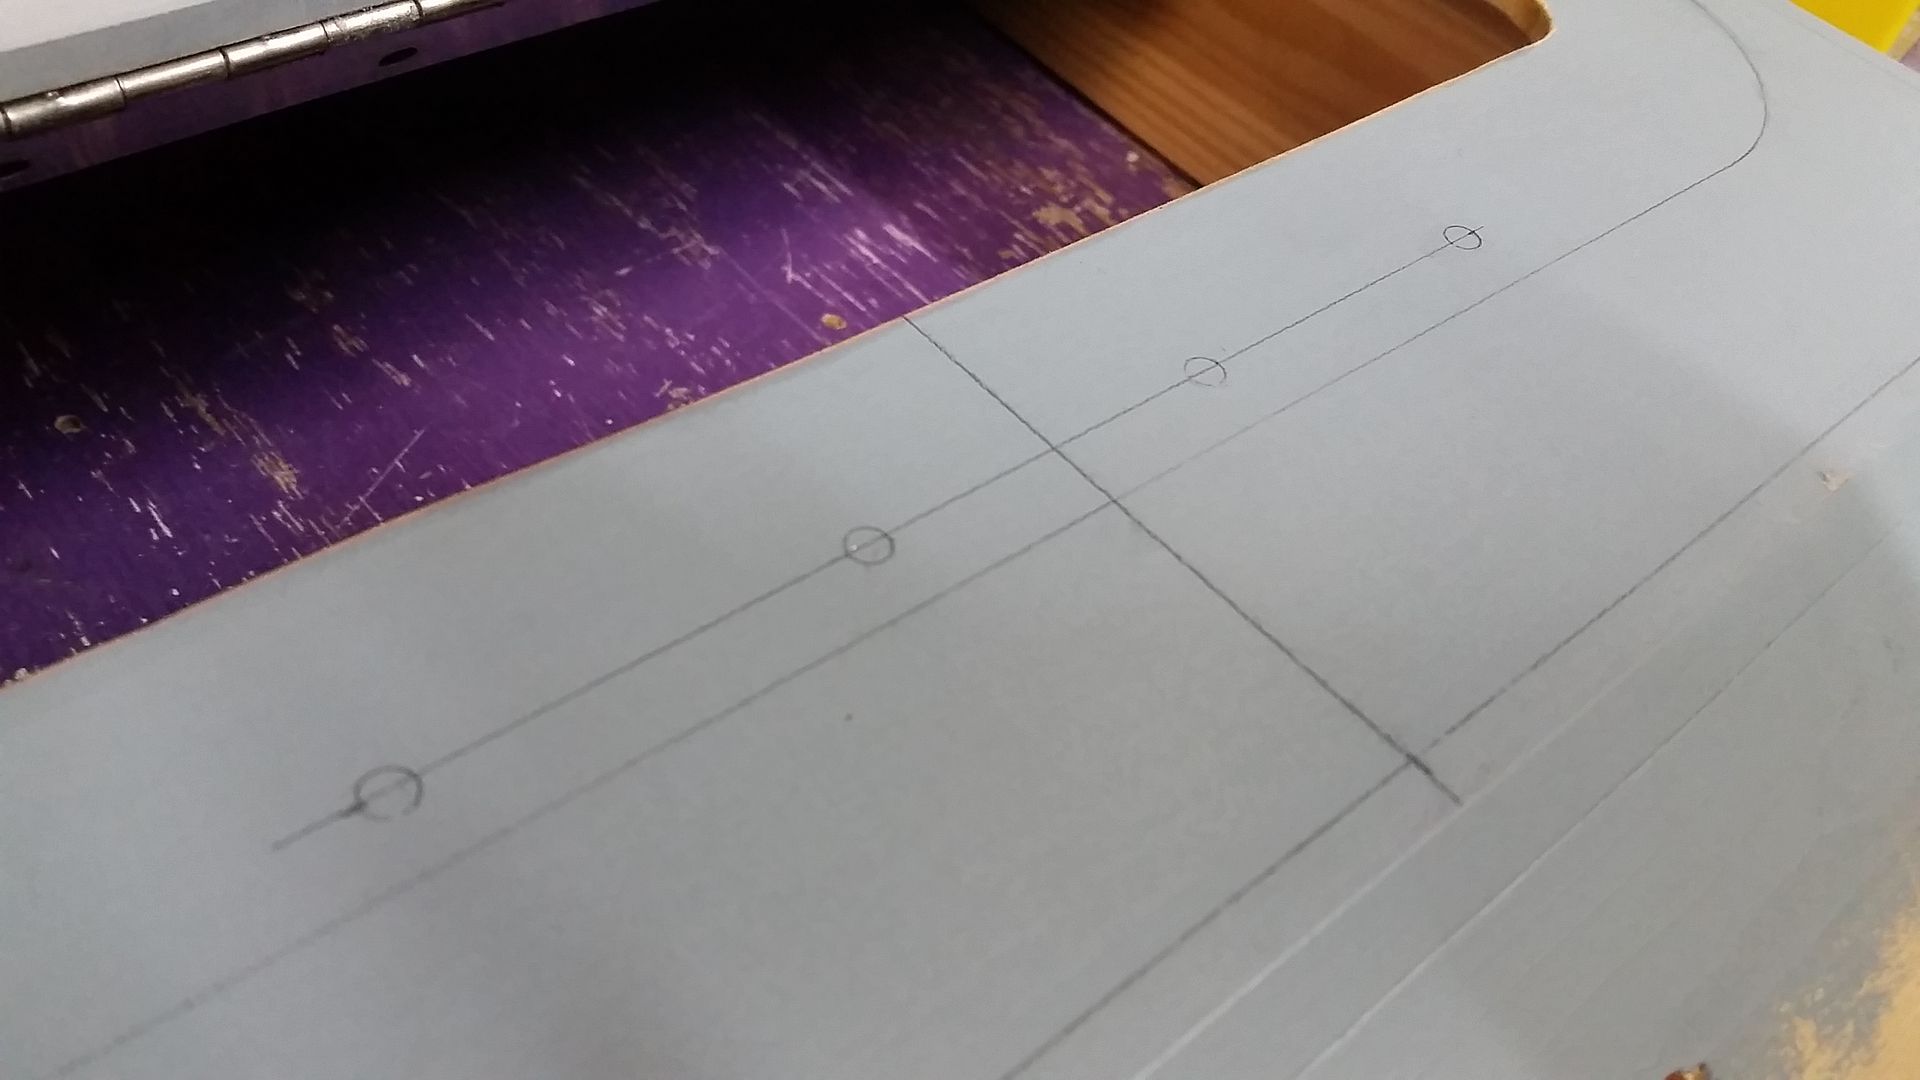
Drilled the hole all the way through the lid
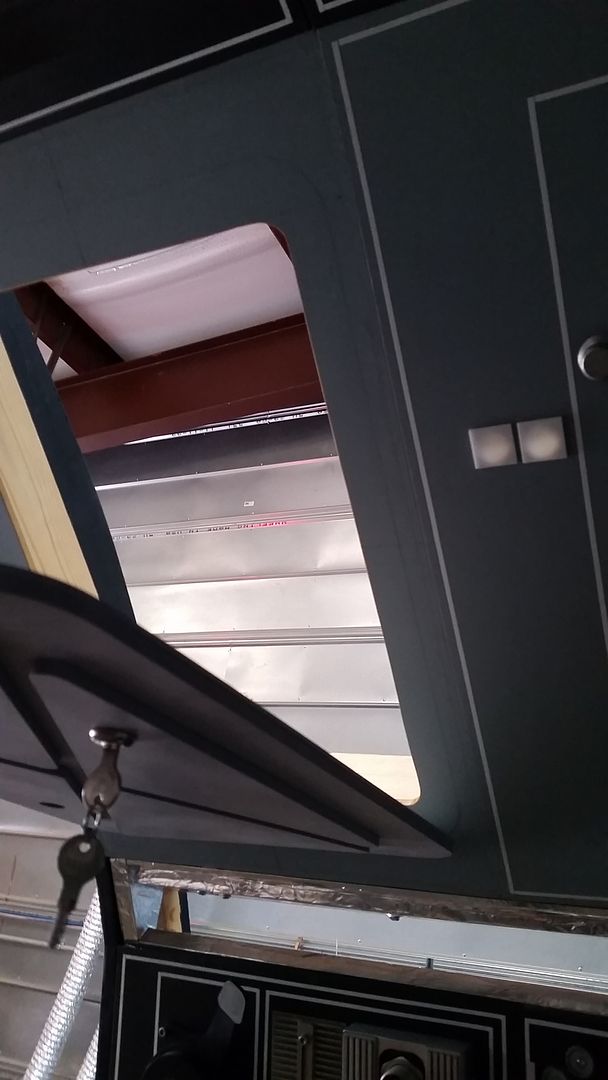
Mounted in place
I then designed and laser cut the interior skin of the lid

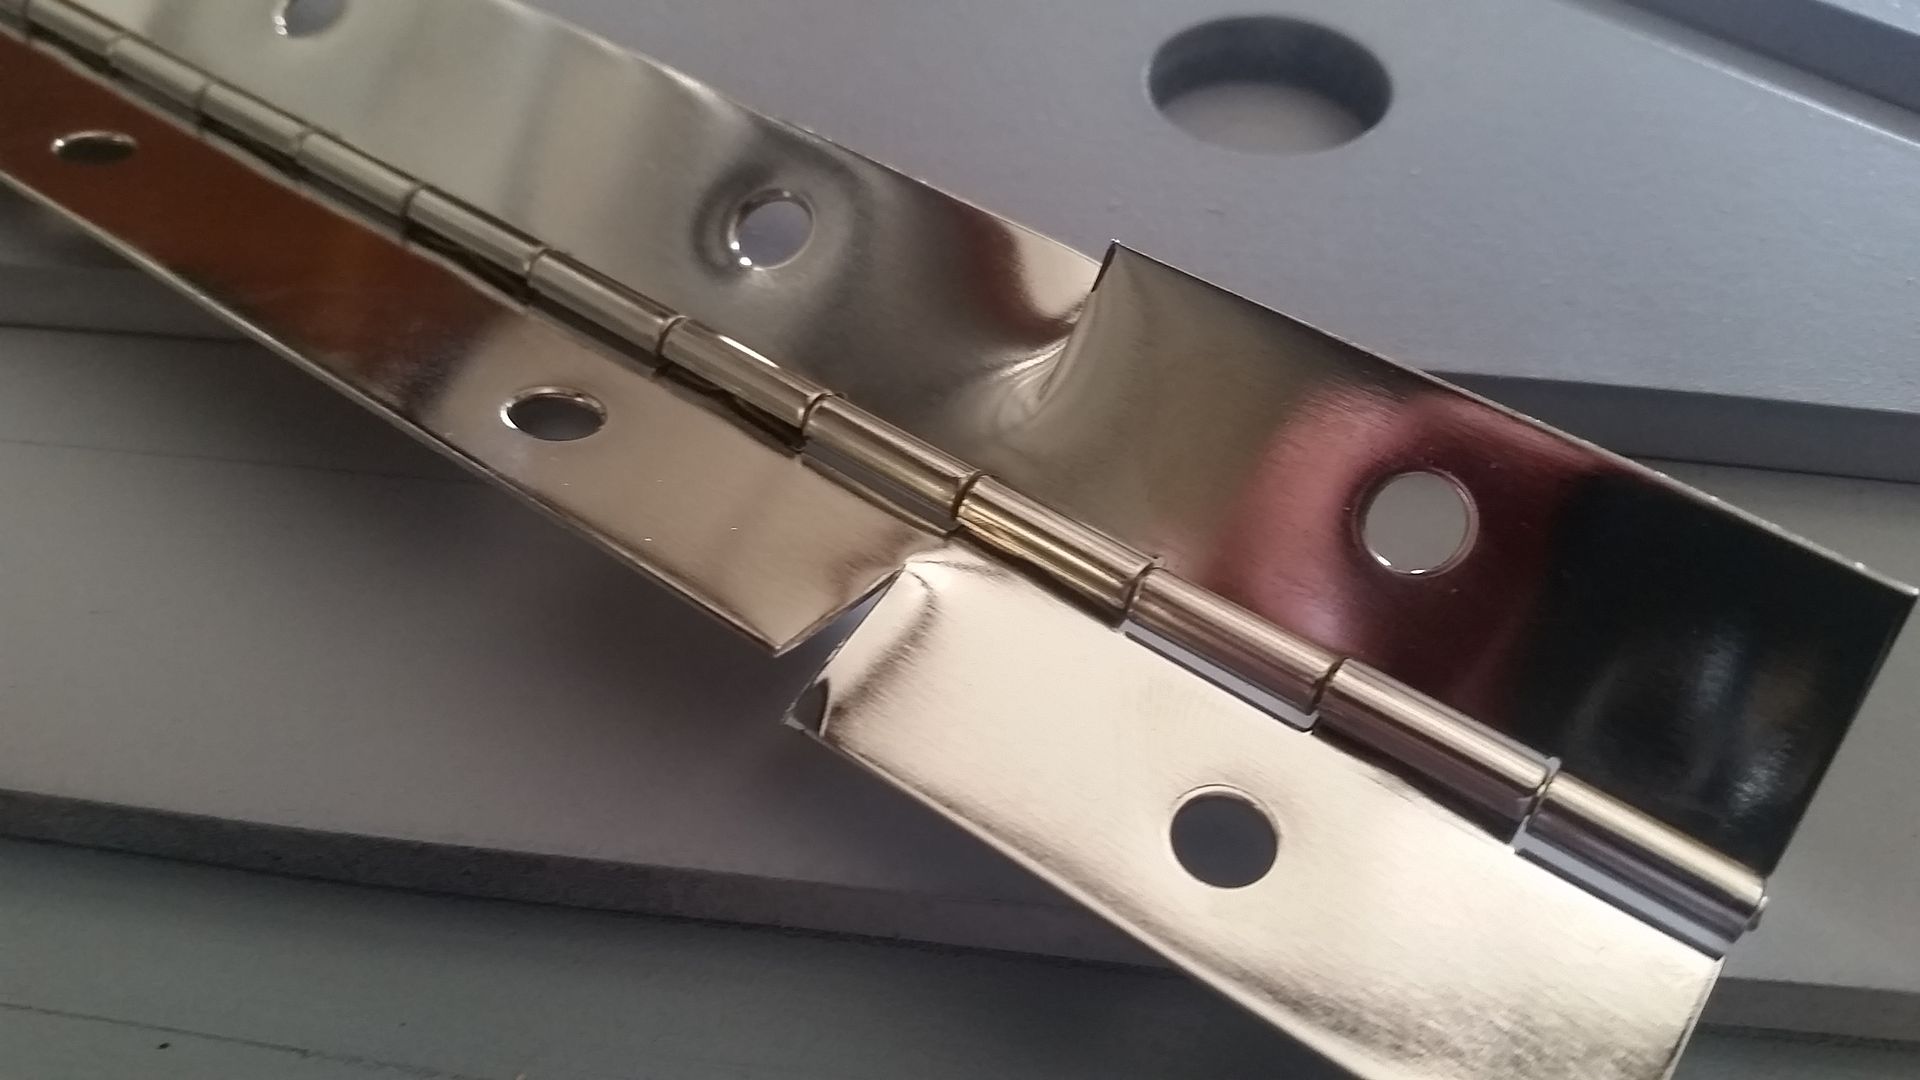
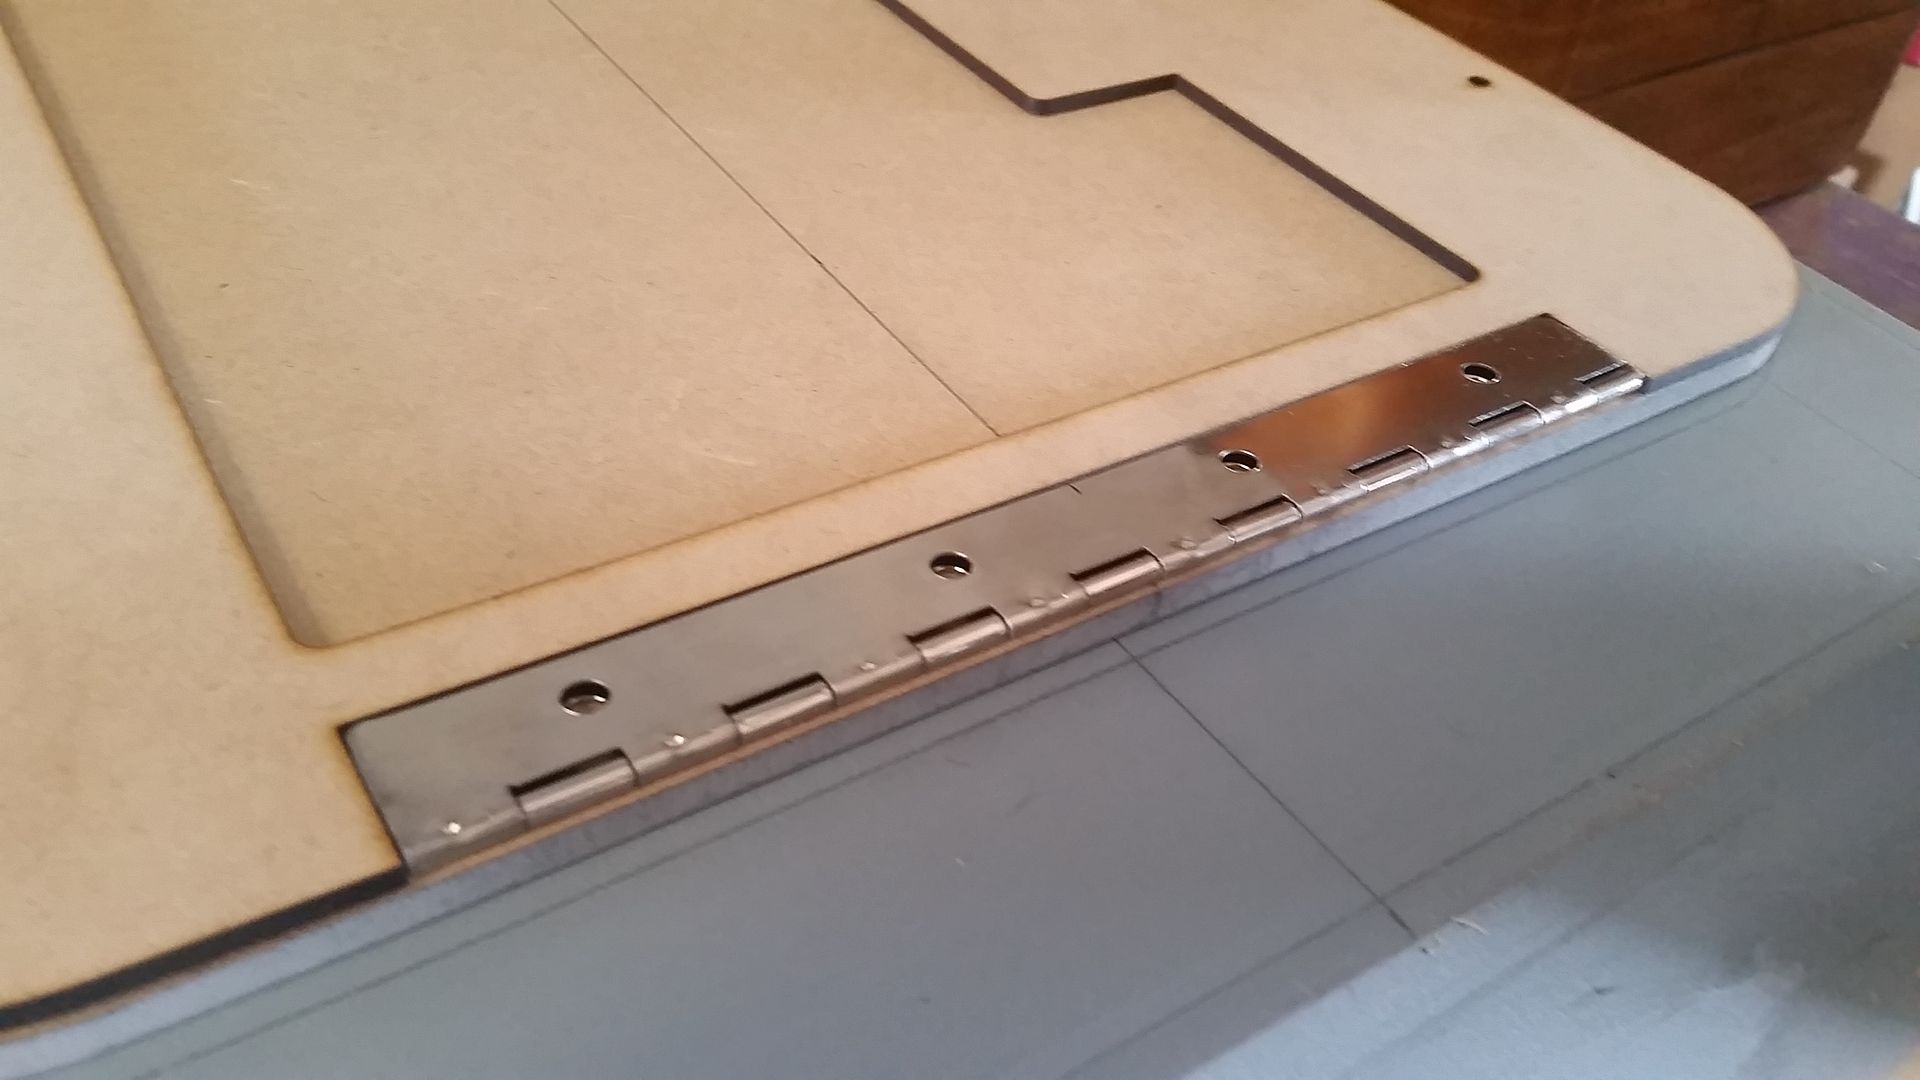
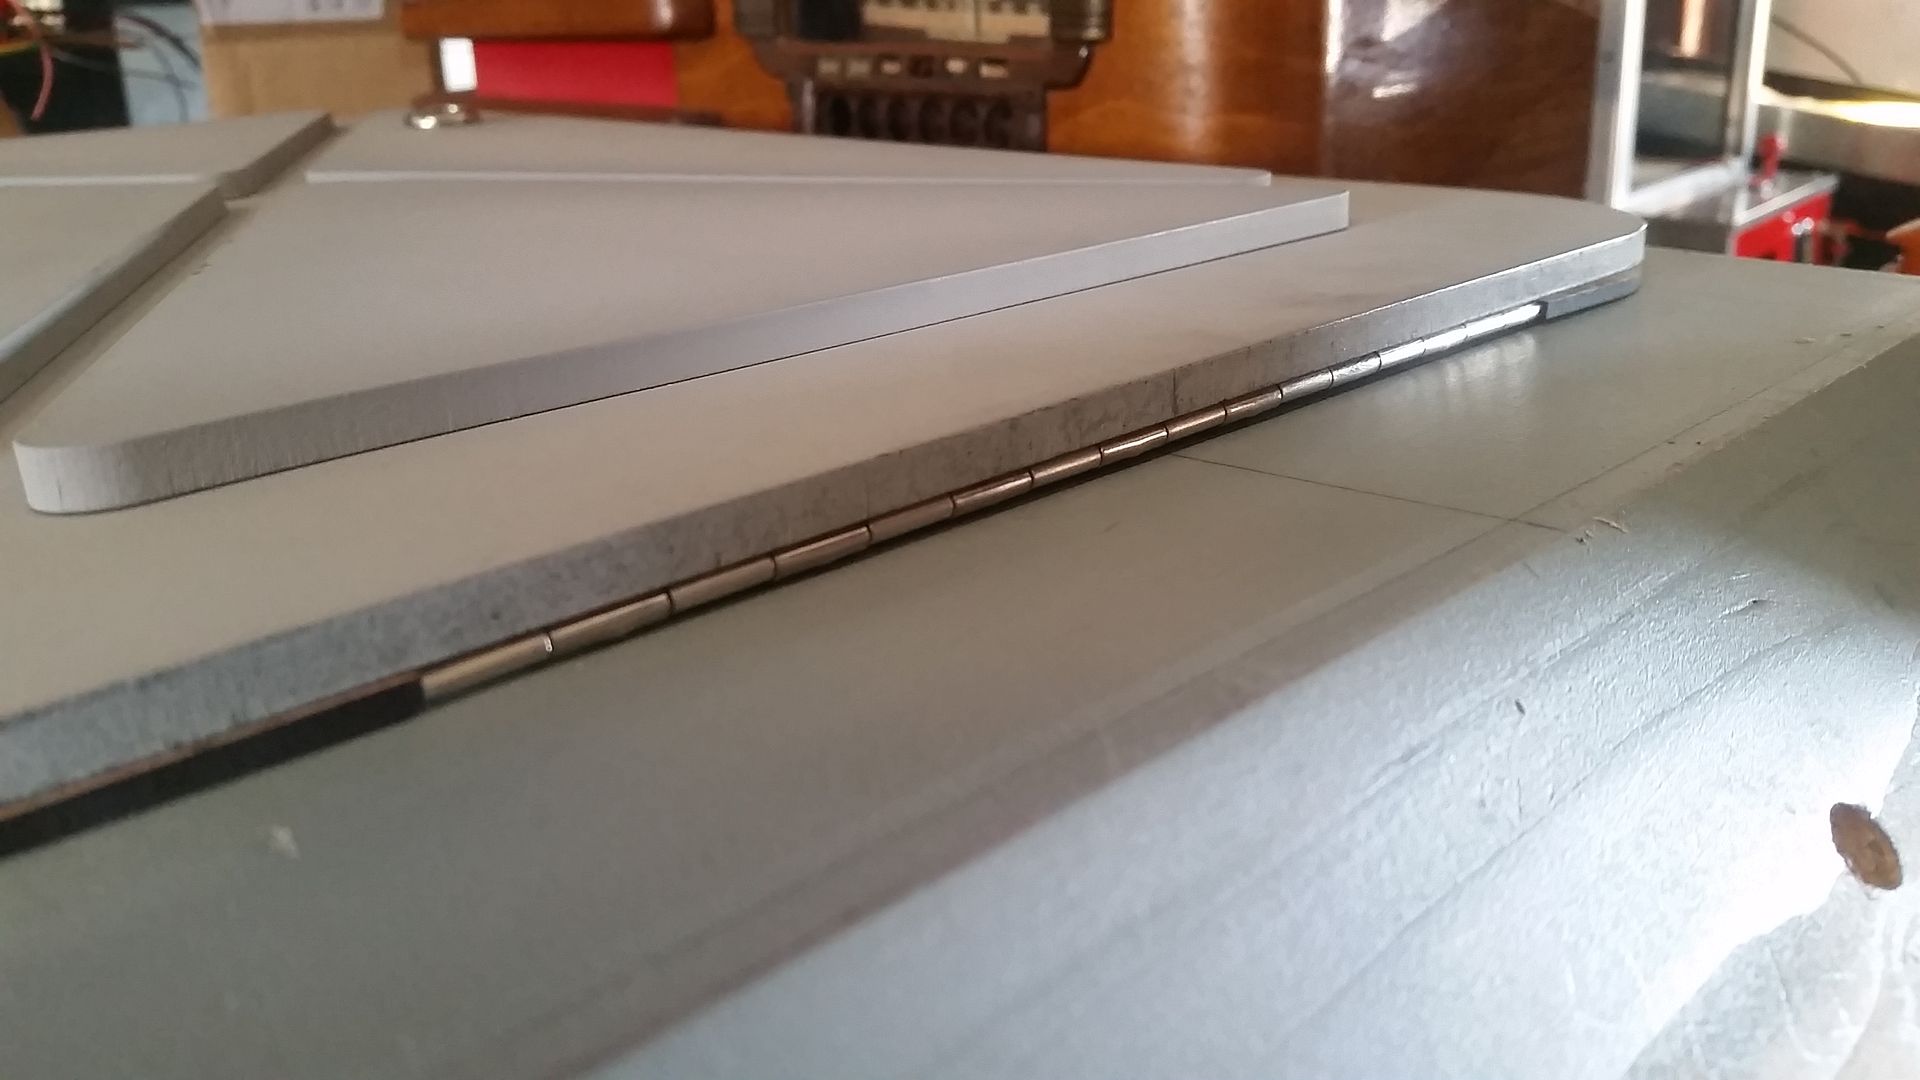
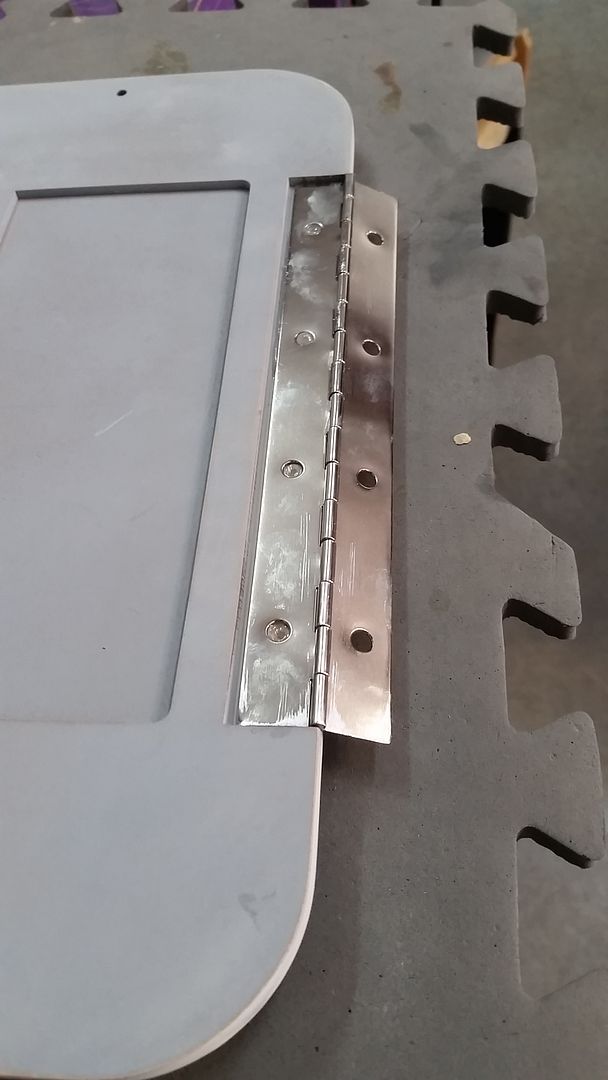
I then cut the piano hinge to fit the newly cut interior side
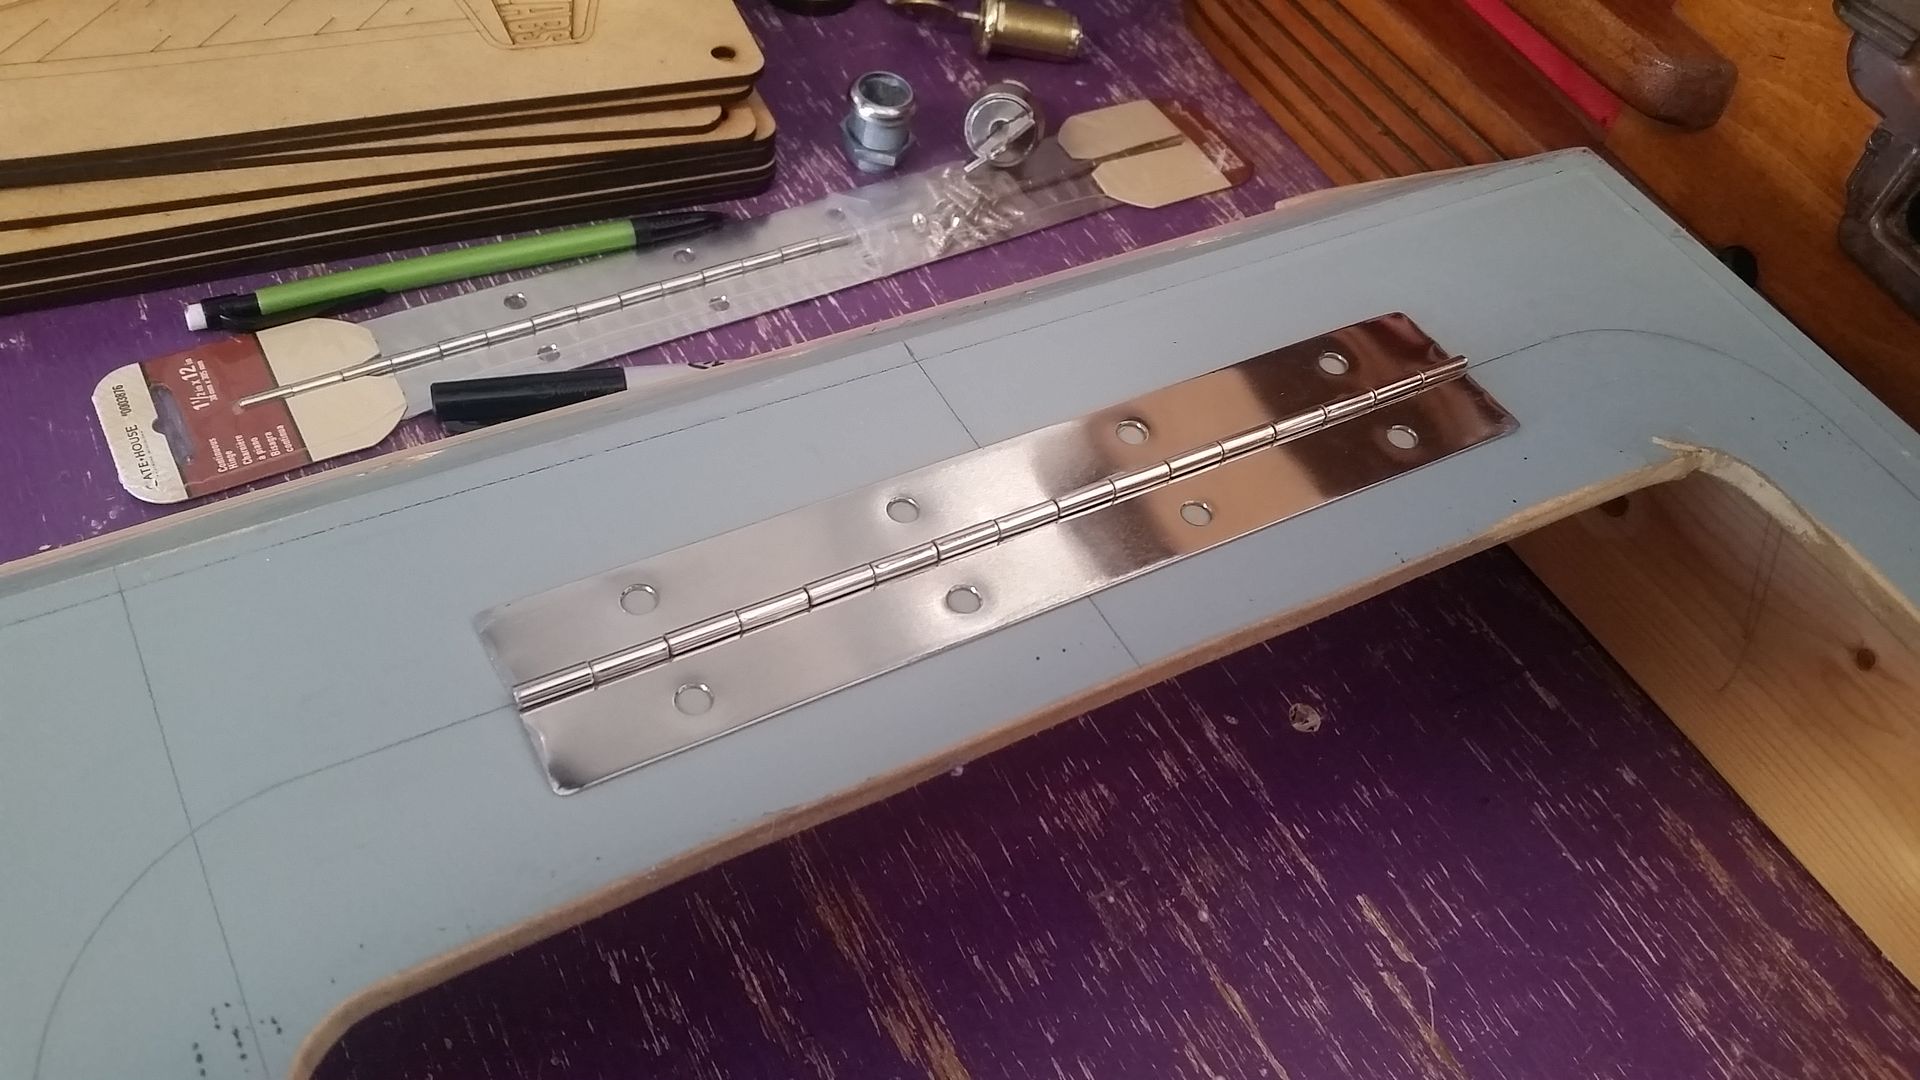
Basic layout
I then adhered the interior skin to the lid and added primer and filler
Come on... adhere already!
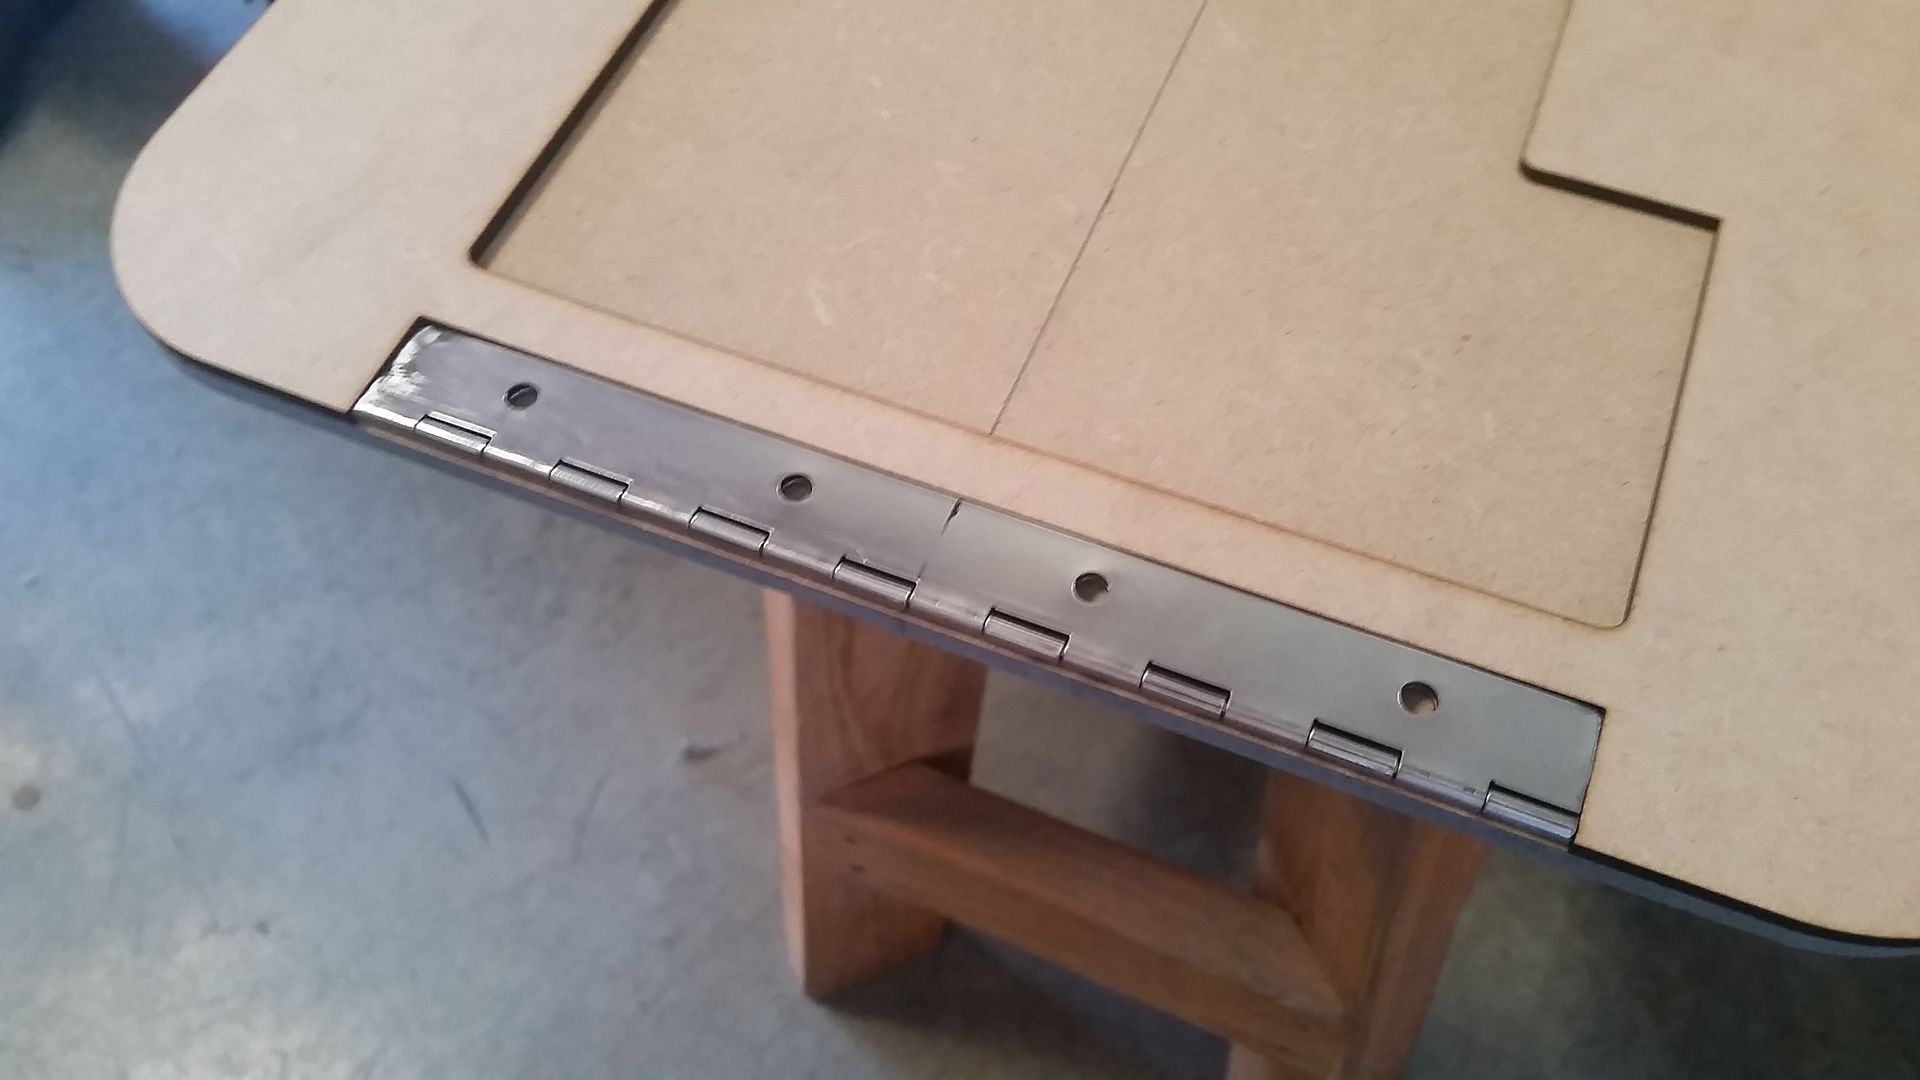
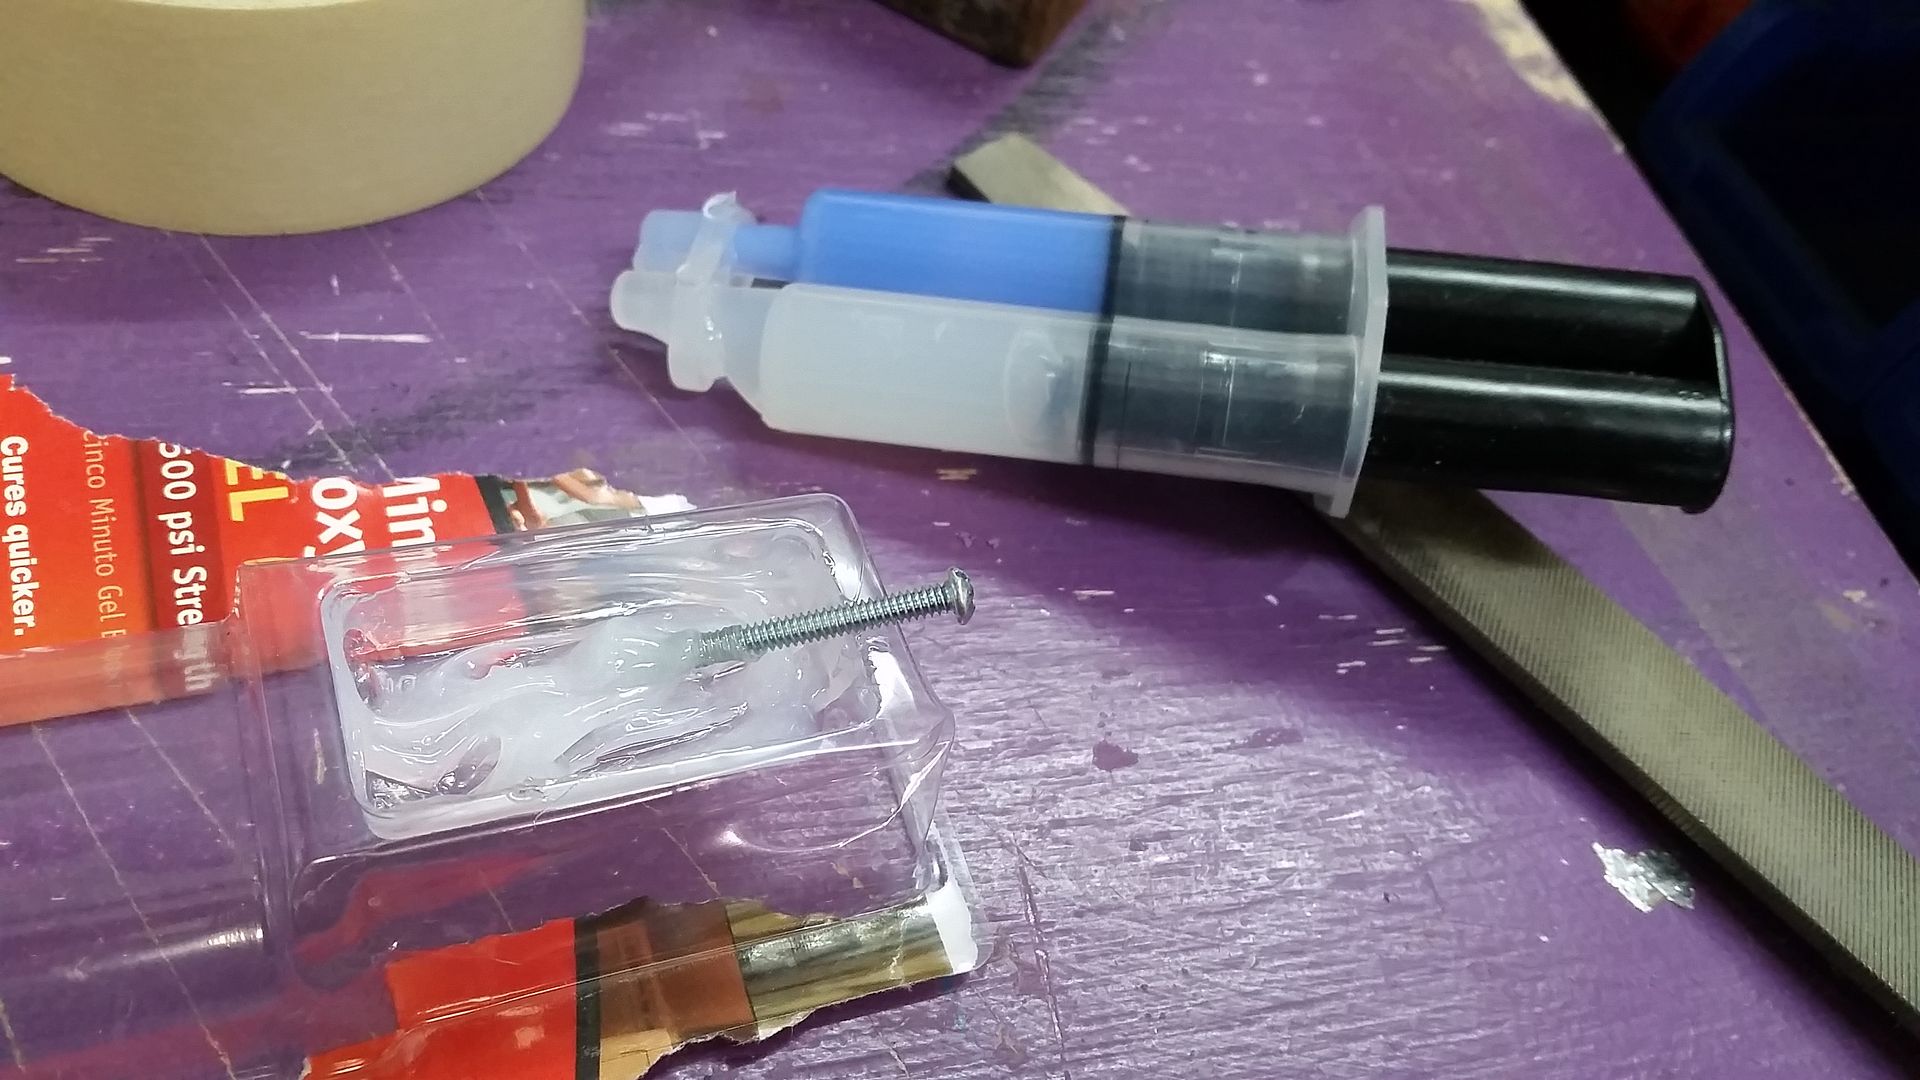
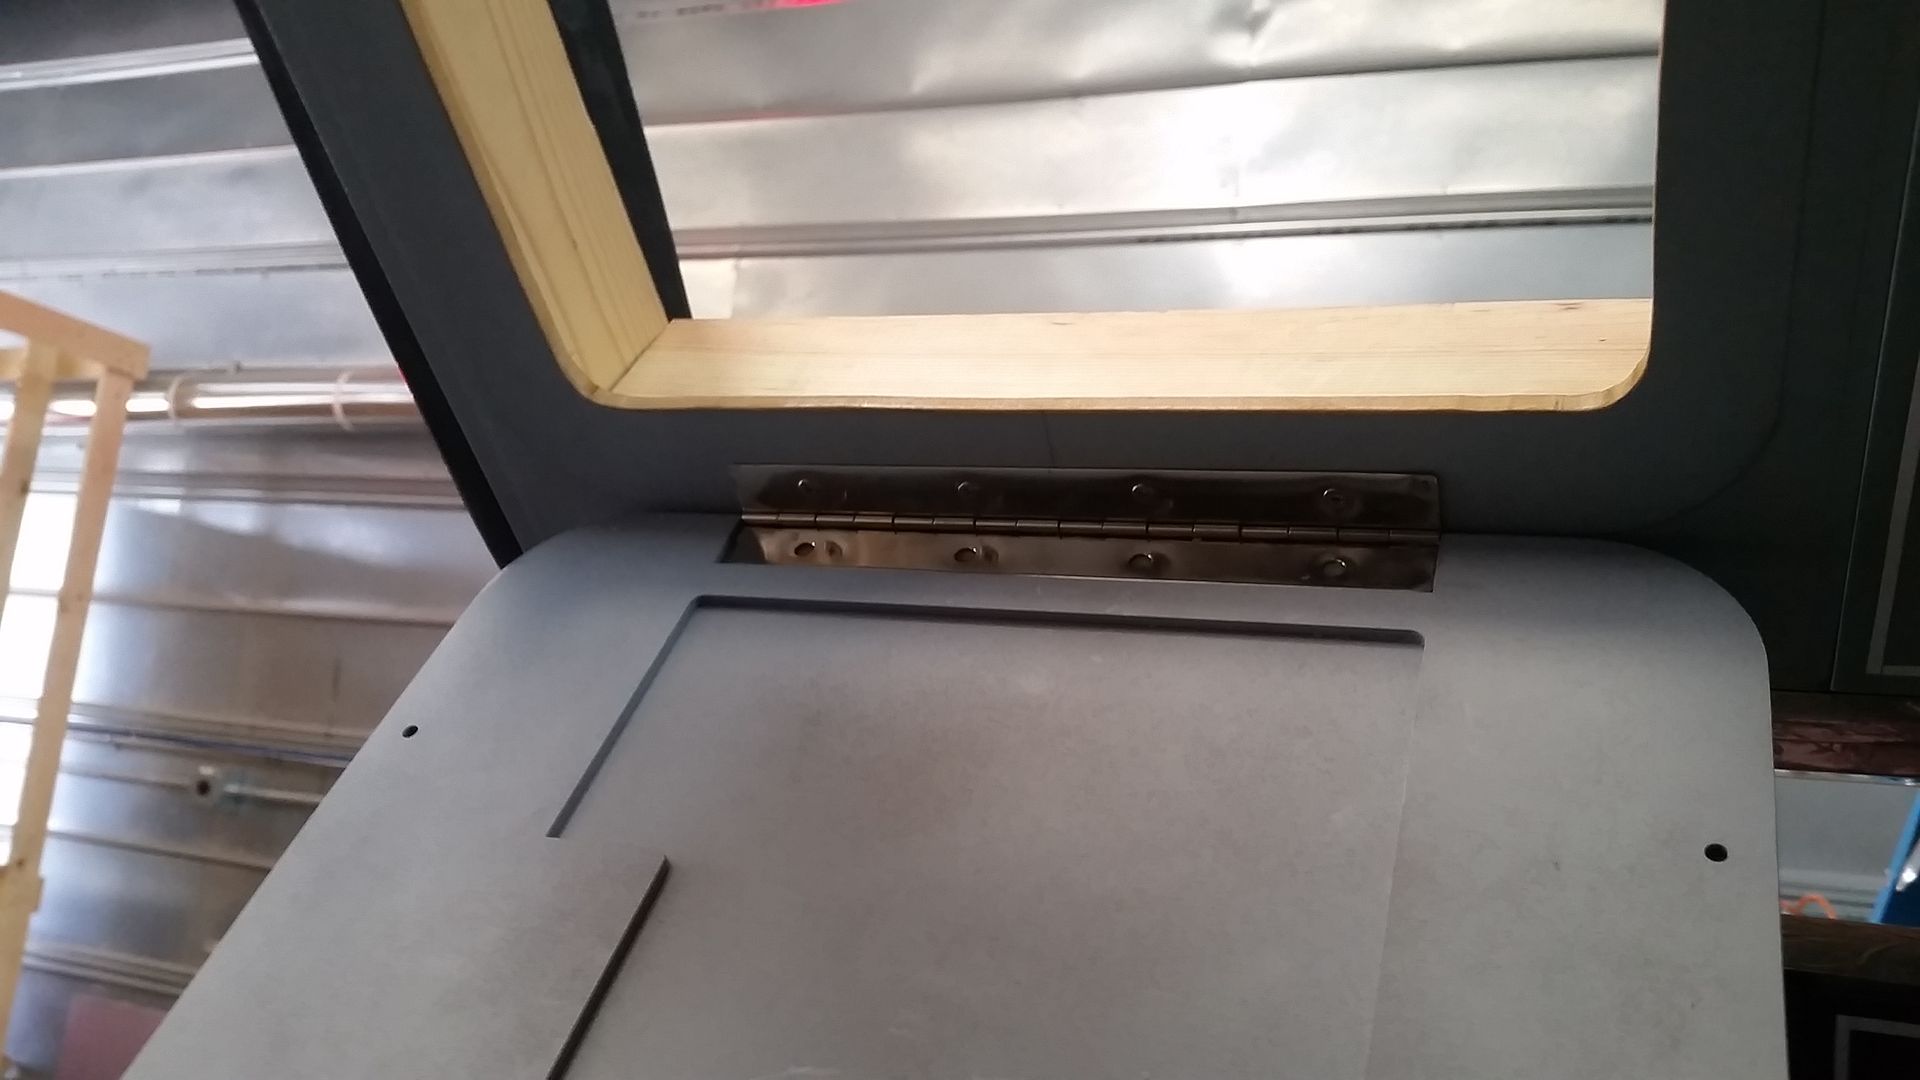
I then broke out the epoxy and jumped in head first to get this piano hinge in place!
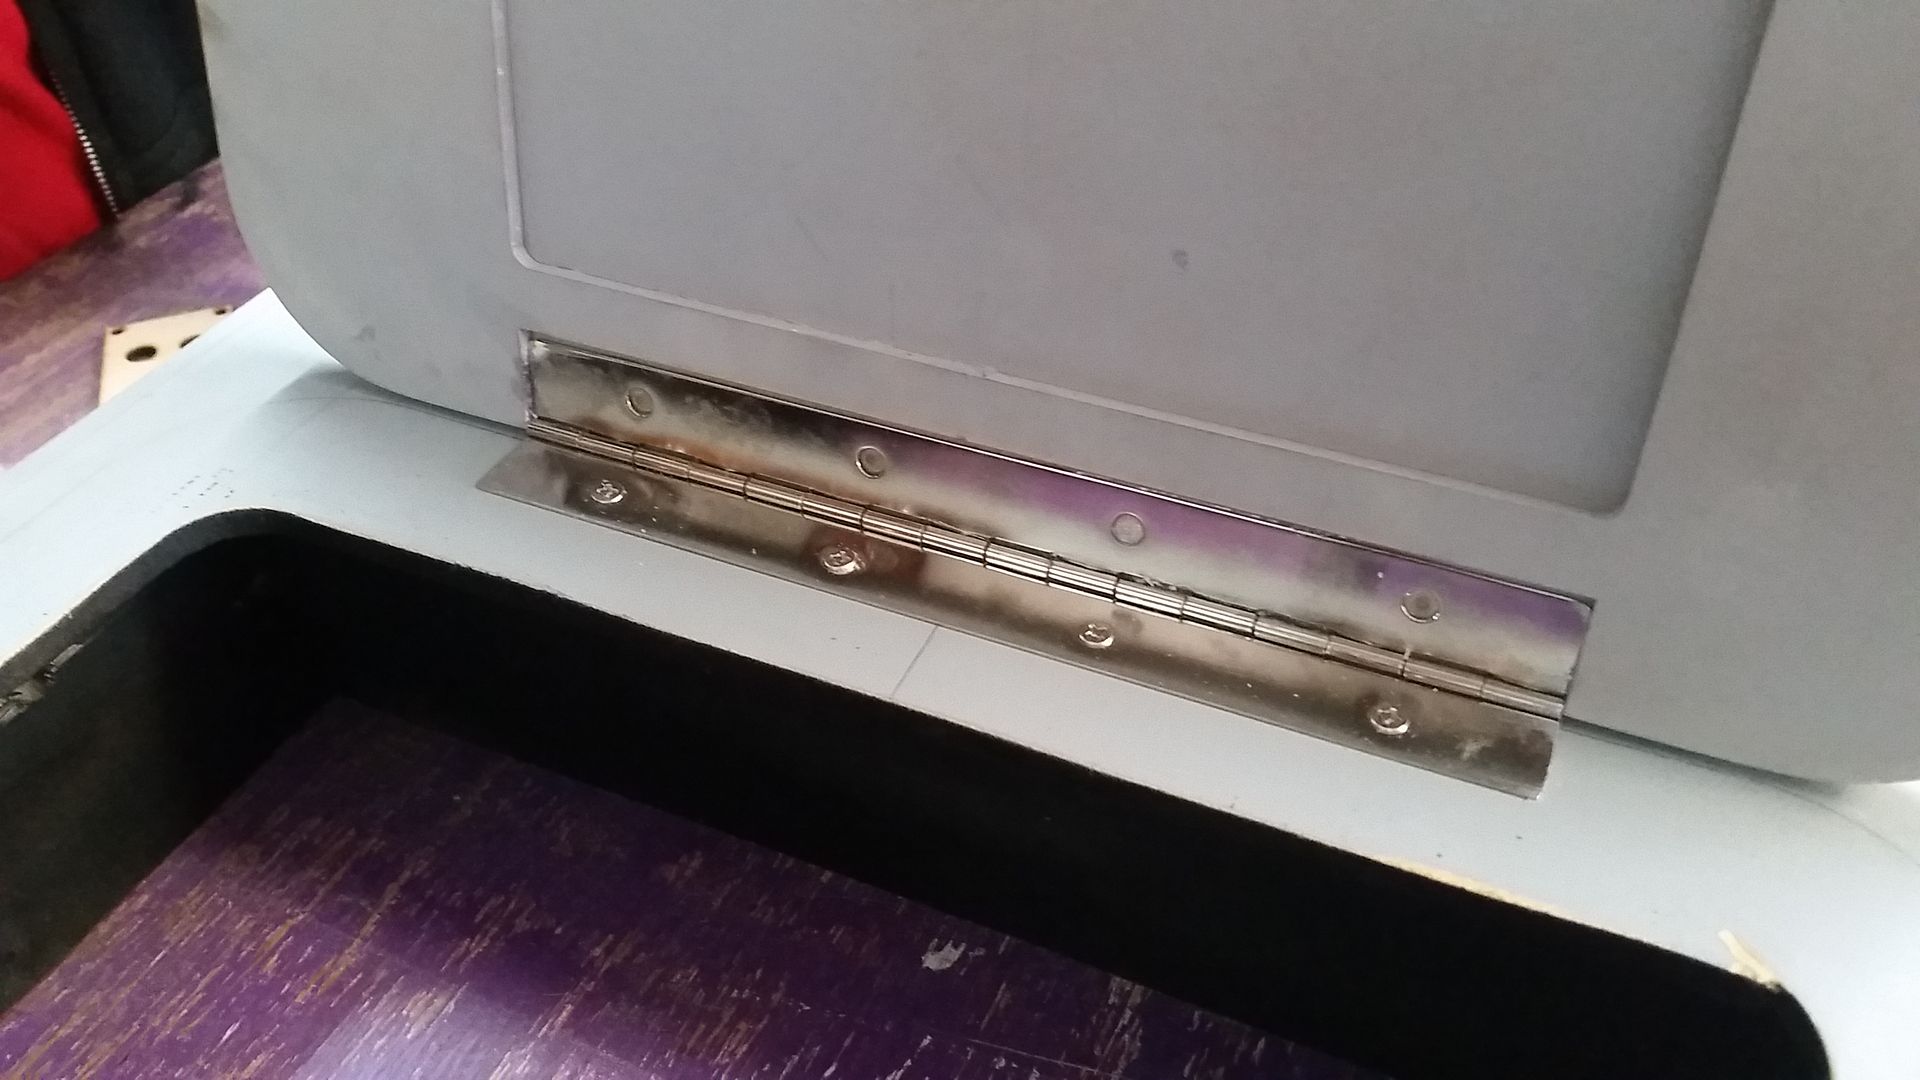
I let the hinge cure for 1/2 hour then screwed the other side of the hinge into the actual panel
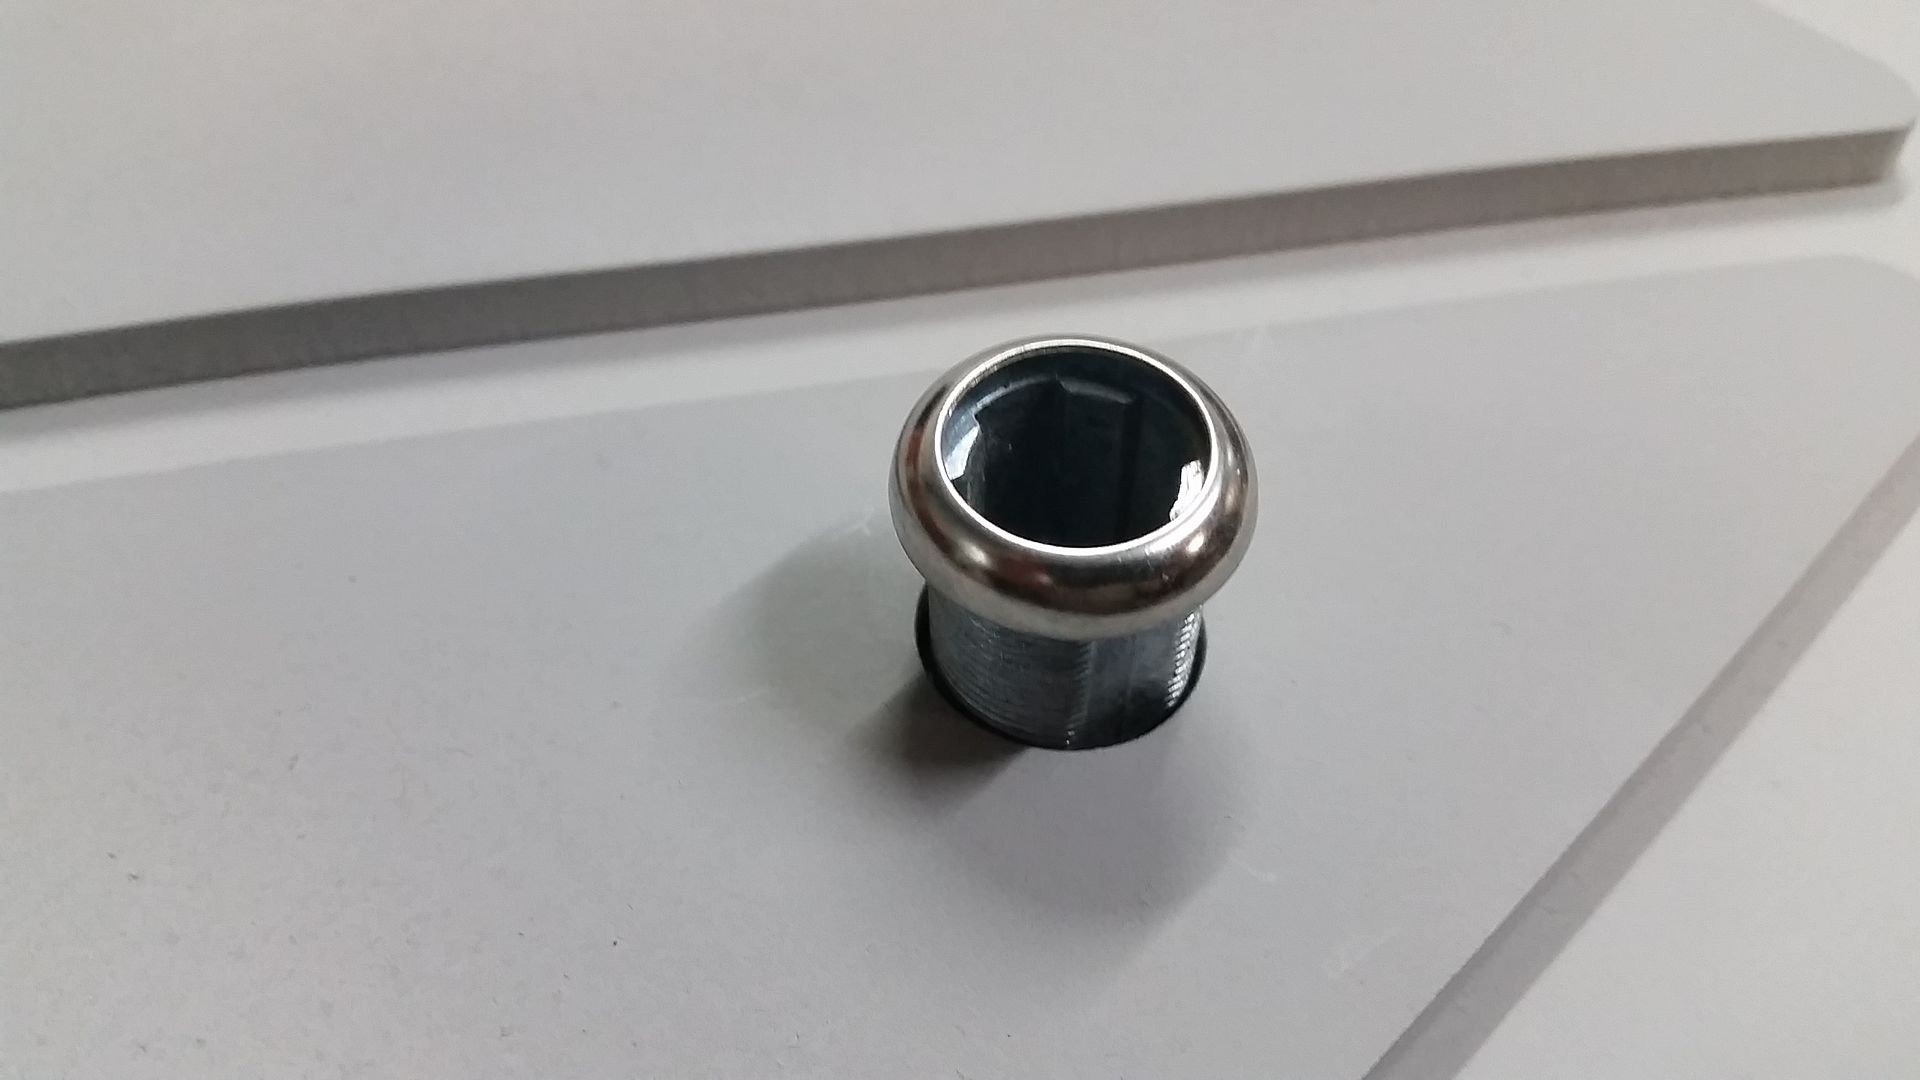
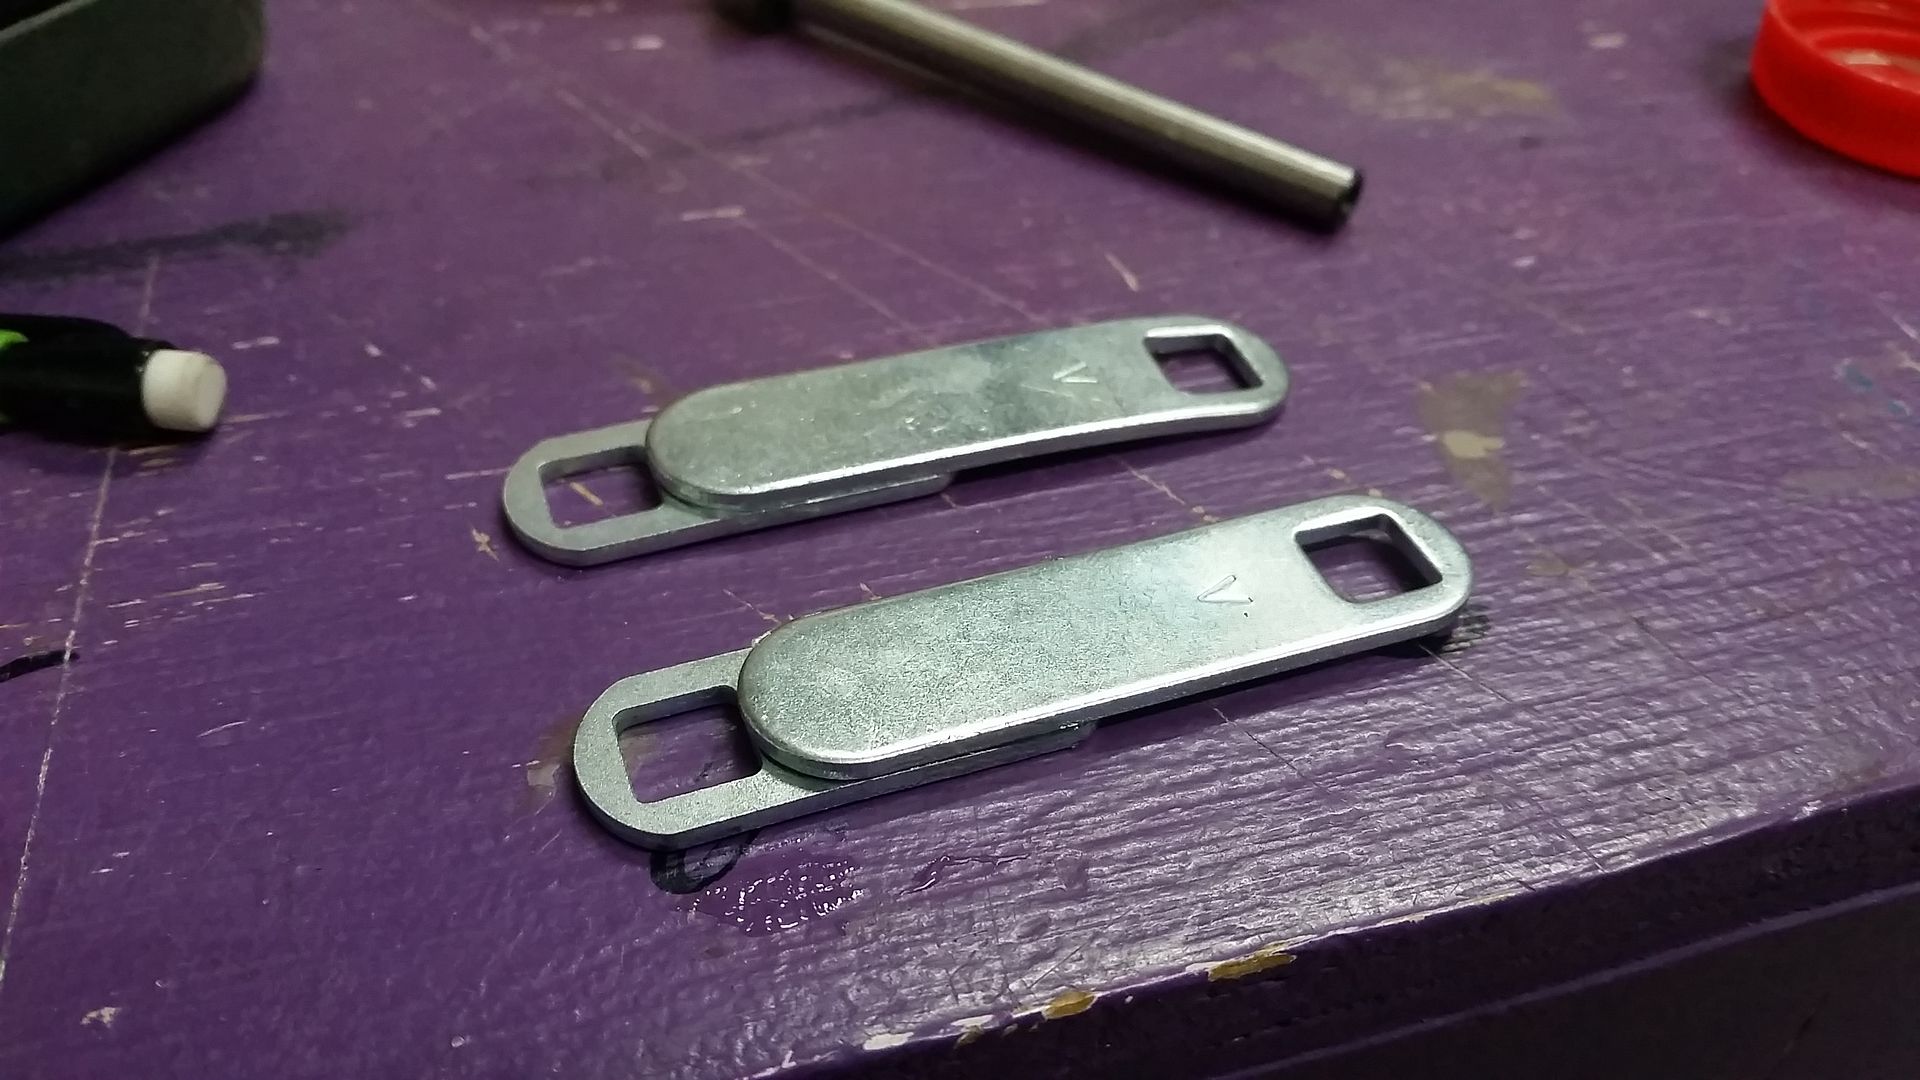
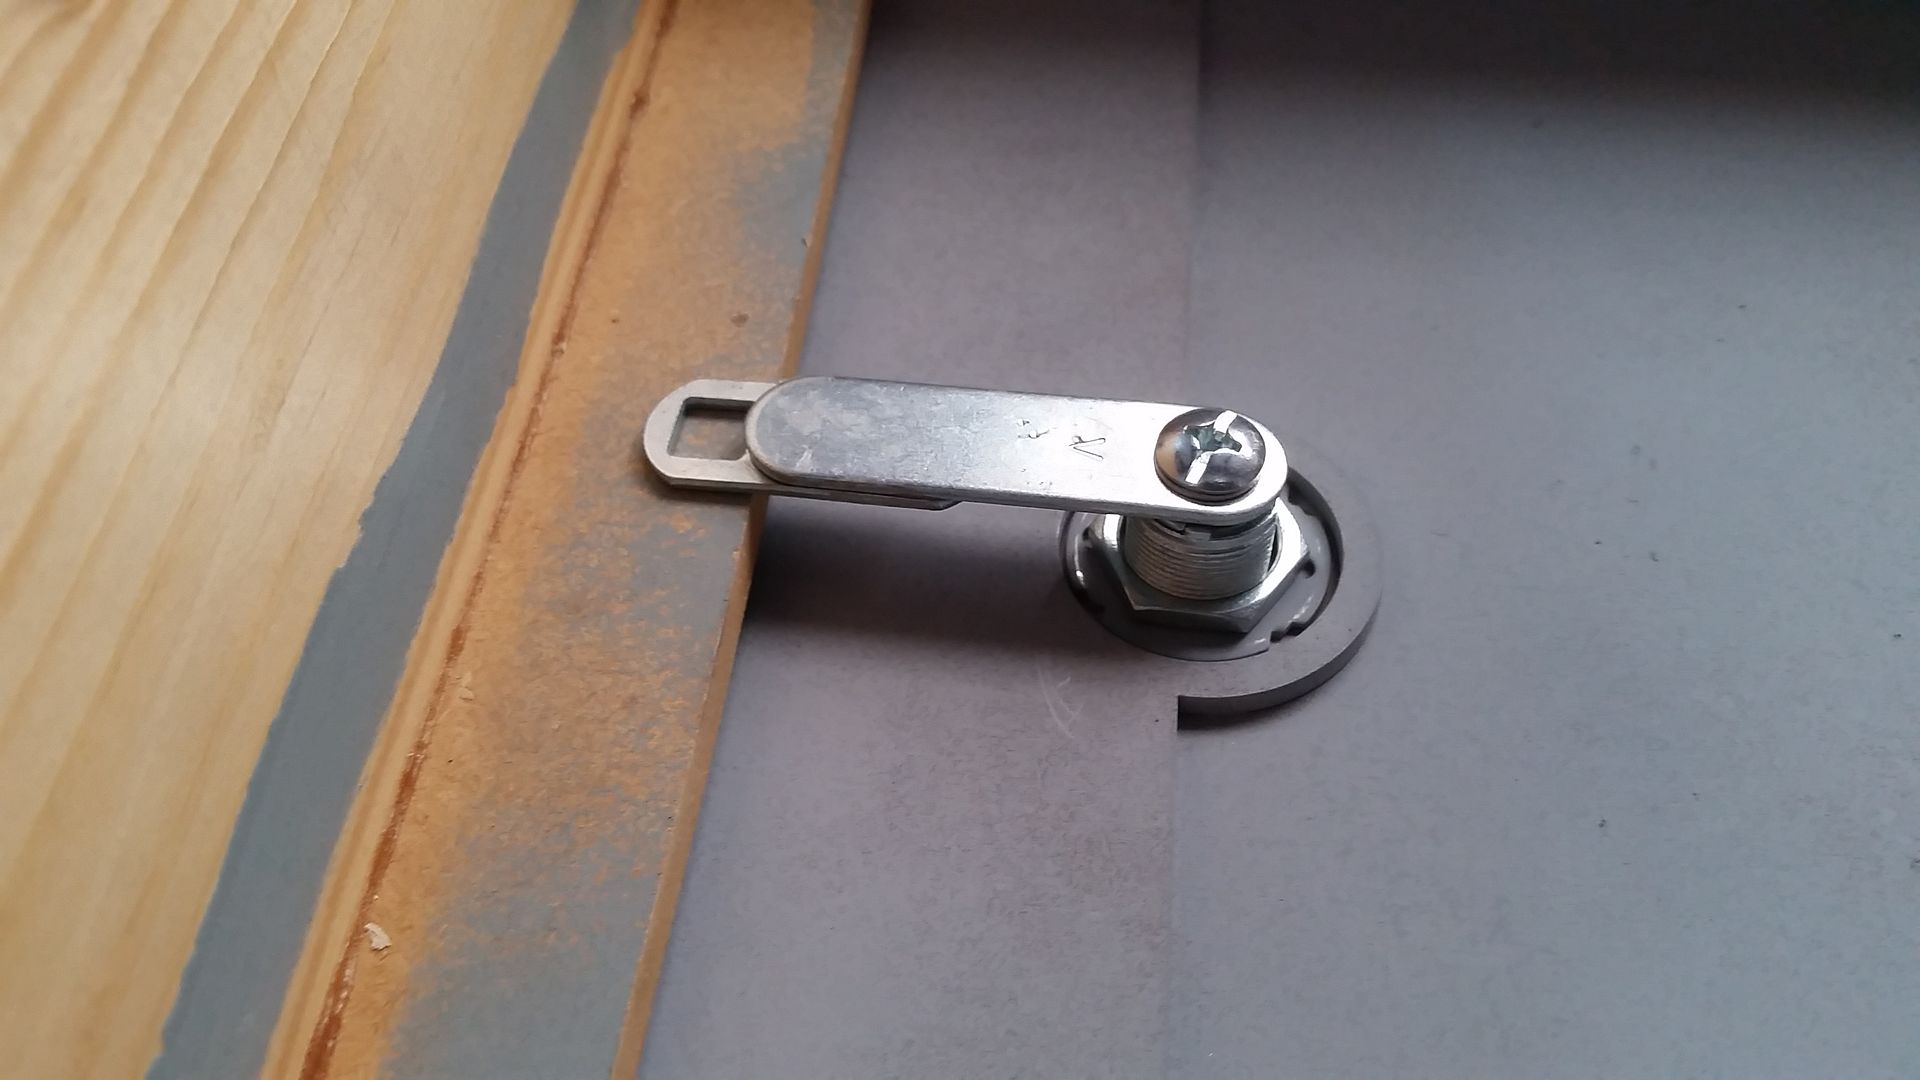
Installed the lock
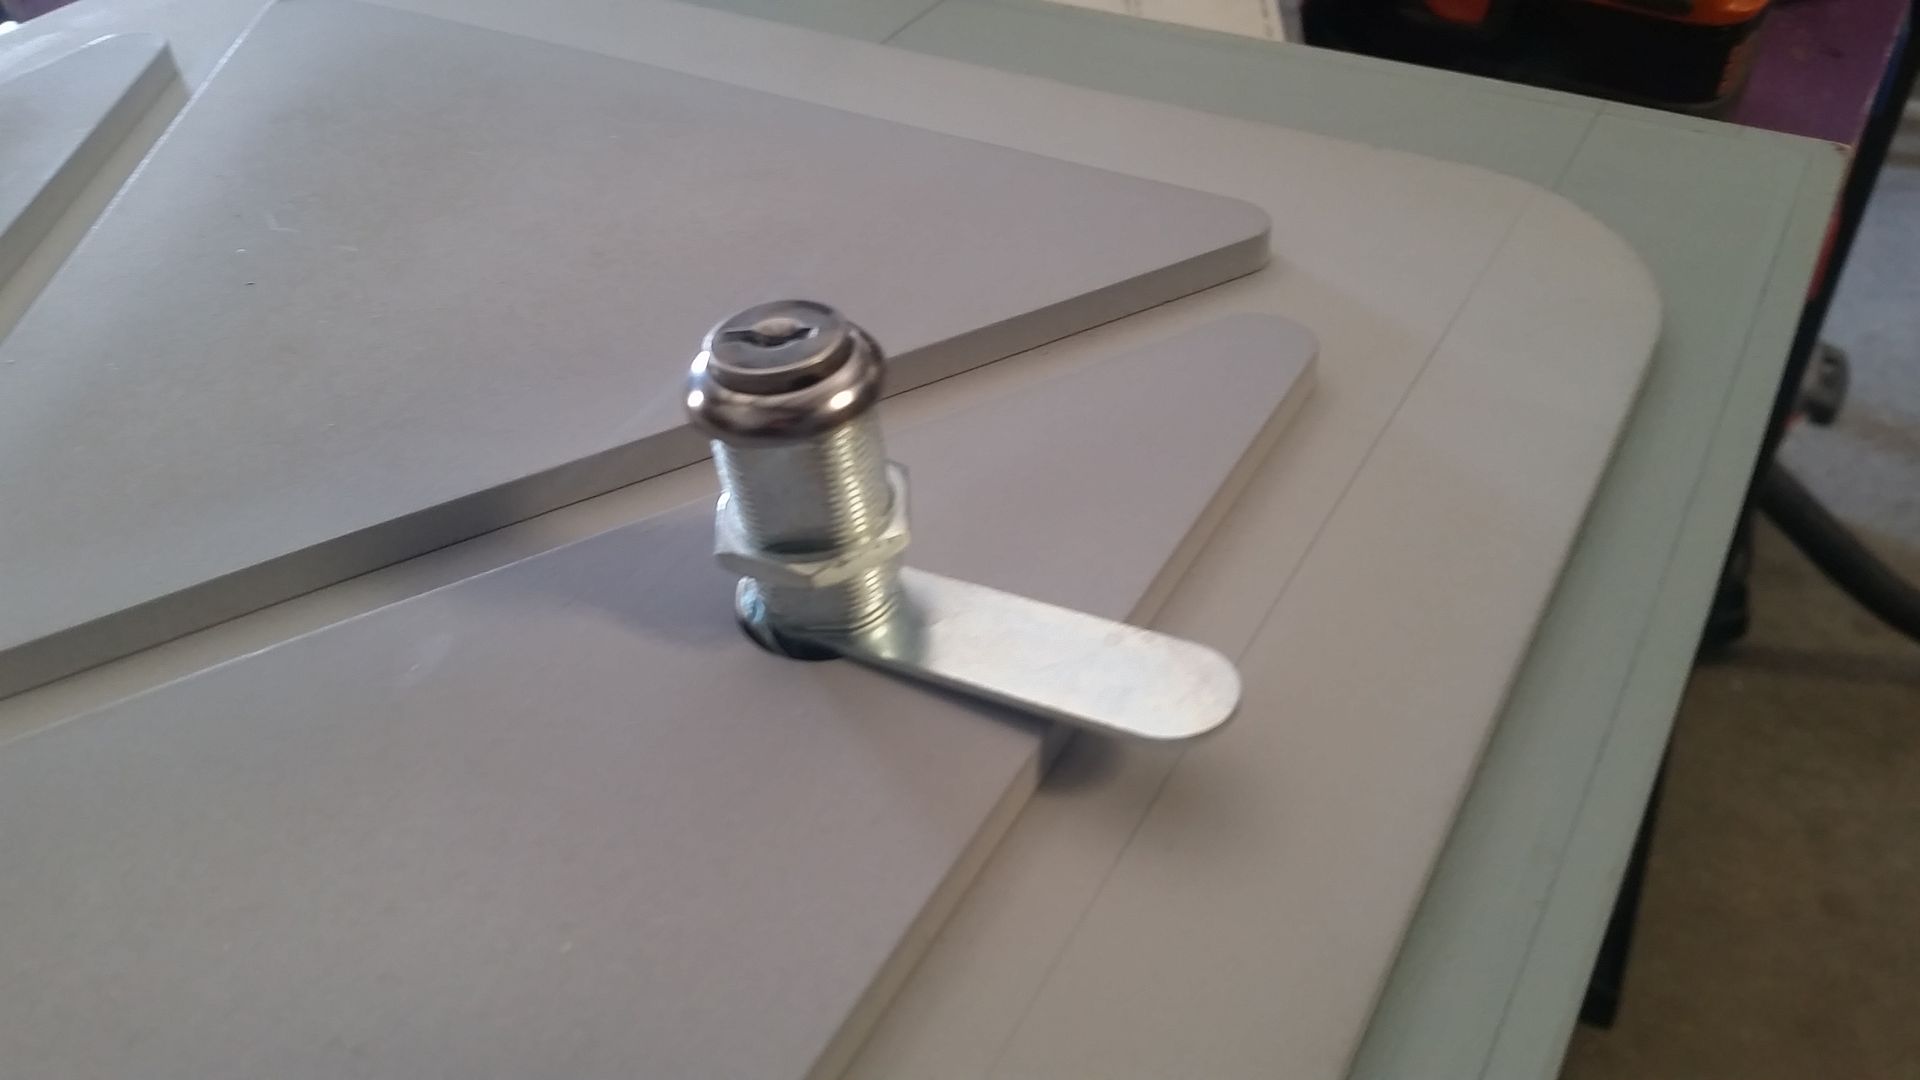
The lock worked but I wanted it to be just a bit longer so I used the epoxy to extended the arms
Drilling holes into the second lid
MOUNTED!
But do they work? BINGO!
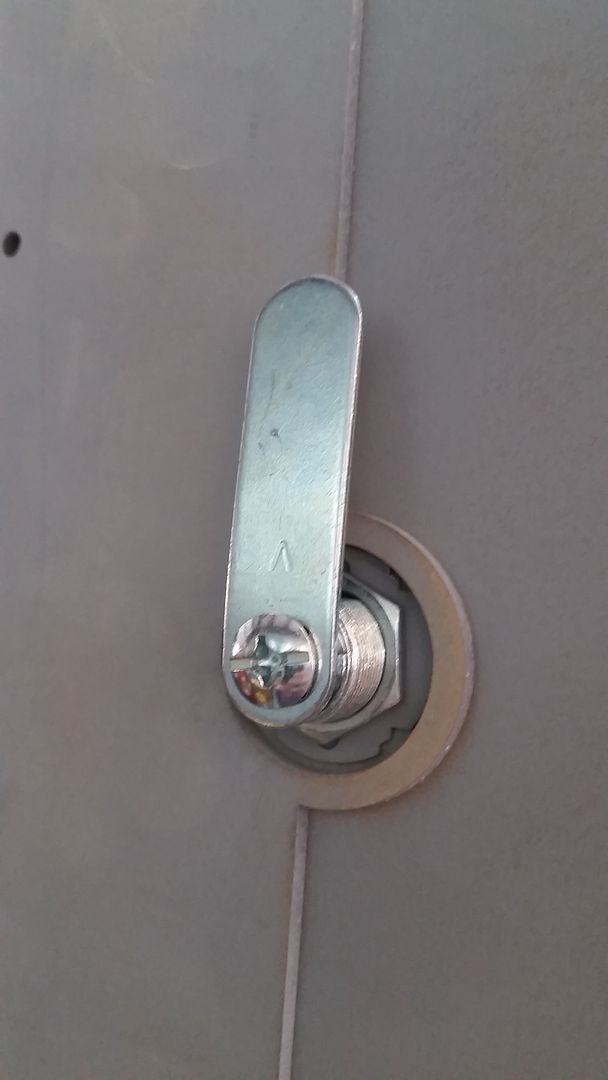
Yes... the key looks a little out of place")
Interior side
Close up
Han's side
But do the interior greeblie panels fit?
The sides of the interior still need to be designed and laser cut

And this is where are!
Just need to add filler and paint to the lids, finish up the interior panels and then replace the two upper panel lids... Then we can check this task off the list!
WHEW... A HUGE thank you to Scott for his help over the weekend!
More detailed pics of the lids coming! Can't wait to finish up and add all the greeblies back on!
More to follow!
Time for an update!
I was finally able to get my head wrapped around these extension panel boxes and lids! Sadly, I had to take apart the existing boxes in order to make the new ones... ENJOY!
Let's start by removing the extension panels
Then remove all the greeblies from the old boxes
OUCH!
I started by adding the two shorter interior 1x4s - these serve as the "new" side of the boxes
I designed and laser cut a new mounting surface for the greeblies
Using all the old files I then recut all new resized panels that will simply adhere to the above panel
PERFECT FIT!
I then redesigned and laser cut these new interior pieces to fit the new box
OK... let's get everything back together and start drilling some mounting holes!
I wanted to raise this coil greeblie up a little higher and show the clear cut acrylic
Adding more primer and filler
PAINT!
Drilled the LED holes
Weathering
This all looks familiar!
More primer!
And more filler of course...
Getting all the greeblies in their basic configuration
With the interior greeblies almost finished it was time to tackle the lids!
I decided to go with an actual lock and key setup and the holes in the lids were PERFECT!
I hope the arm reaches!
Drilled the hole all the way through the lid
Mounted in place
I then designed and laser cut the interior skin of the lid
I then cut the piano hinge to fit the newly cut interior side
Basic layout
I then adhered the interior skin to the lid and added primer and filler
Come on... adhere already!
I then broke out the epoxy and jumped in head first to get this piano hinge in place!
I let the hinge cure for 1/2 hour then screwed the other side of the hinge into the actual panel
Installed the lock
The lock worked but I wanted it to be just a bit longer so I used the epoxy to extended the arms
Drilling holes into the second lid
MOUNTED!
But do they work? BINGO!
Yes... the key looks a little out of place
Interior side
Close up
Han's side
But do the interior greeblie panels fit?
The sides of the interior still need to be designed and laser cut
And this is where are!
Just need to add filler and paint to the lids, finish up the interior panels and then replace the two upper panel lids... Then we can check this task off the list!
WHEW... A HUGE thank you to Scott for his help over the weekend!
More detailed pics of the lids coming! Can't wait to finish up and add all the greeblies back on!
More to follow!
Last edited:
Wonderful job SK -I know it was hard to jump back in to it after the prior frustrations, but the new boxes and lids look fantastic.
Friendly flyer
Well-Known Member
The new boxes look great, and the new lock and hinges look the part!
If you want a lock system not dependent on keys, have you considered quarter turn Dzus fasteners?
If you want a lock system not dependent on keys, have you considered quarter turn Dzus fasteners?
OlivierC
Well-Known Member
yeah, i was thinking the same, with all those buttons around, you could link one to a push-pull solenoid:
https://www.google.be/search?q=push...ved=0ahUKEwjTm5HkrMHSAhUnLsAKHed7AUoQ_AUIBigB
or even better, have an actual servo or dc motor to lower/raise the lid by itself. But I know, easier said than done. But the solenoid thing would not be that hard
https://www.google.be/search?q=push...ved=0ahUKEwjTm5HkrMHSAhUnLsAKHed7AUoQ_AUIBigB
or even better, have an actual servo or dc motor to lower/raise the lid by itself. But I know, easier said than done. But the solenoid thing would not be that hard
Last edited:
Friendly flyer
Well-Known Member
There's always weight to consider, and there's a question of style. The reason I suggested Dzus fasteners is that they are light weight, very durable and also that they would fit into the Star Wars universe style-wise. They are also fairly easy to use and install
Would it be likely a hyper-advanced space vessel would use old-school analogue fasteners? No, but this kind of system was all the rage in the post-war stuff filling 1970s junk-yards the majority of props were drawn from. Seeing the amount of 1950s aircraft parts winding up in the Falcon, the Dzus hatches would be right at home.
Here's what they look like (outside, inside and open hatch):

Still from this instruction video voiced by an extremely patient sounding man:
https://www.youtube.com/watch?v=9wf4j1dnIAw
Would it be likely a hyper-advanced space vessel would use old-school analogue fasteners? No, but this kind of system was all the rage in the post-war stuff filling 1970s junk-yards the majority of props were drawn from. Seeing the amount of 1950s aircraft parts winding up in the Falcon, the Dzus hatches would be right at home.
Here's what they look like (outside, inside and open hatch):
Still from this instruction video voiced by an extremely patient sounding man:
https://www.youtube.com/watch?v=9wf4j1dnIAw
Loosebruce704
Member
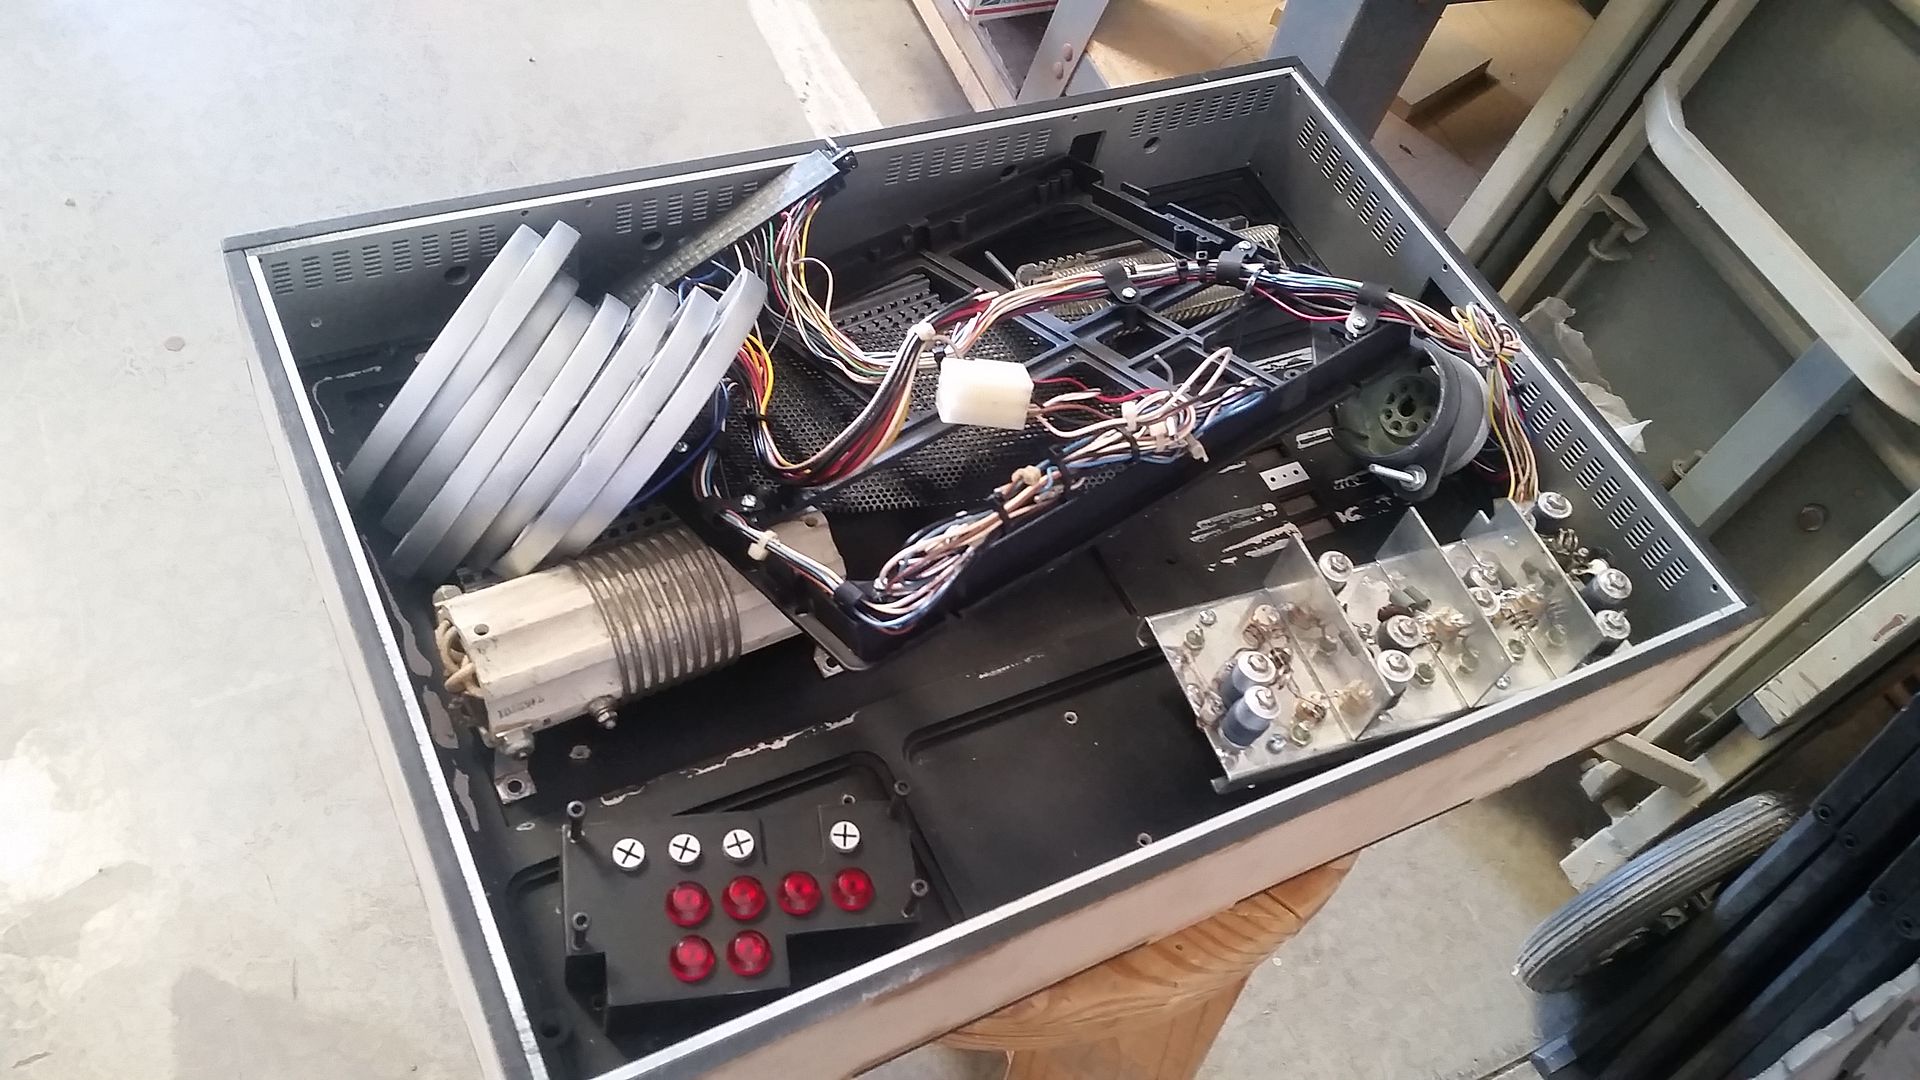
Hi Sofa sorry for delay getting these pics for you had mega trouble logging into photobucket until the point i've had to create a new account!!!!!!.
In terms of the locking mechanism again I might be able to help.
Have a look at:
https://www.caravanaccessoryshop.co.uk/product/push-lock-small-satin/2964
we also do a large one.
also look at:
https://www.caravanaccessoryshop.co.uk/product/button-and-rose-for-push-locks-satin/4915
Would give you a nice simple push lock mechanism losing the key set up.
As for these other bits:
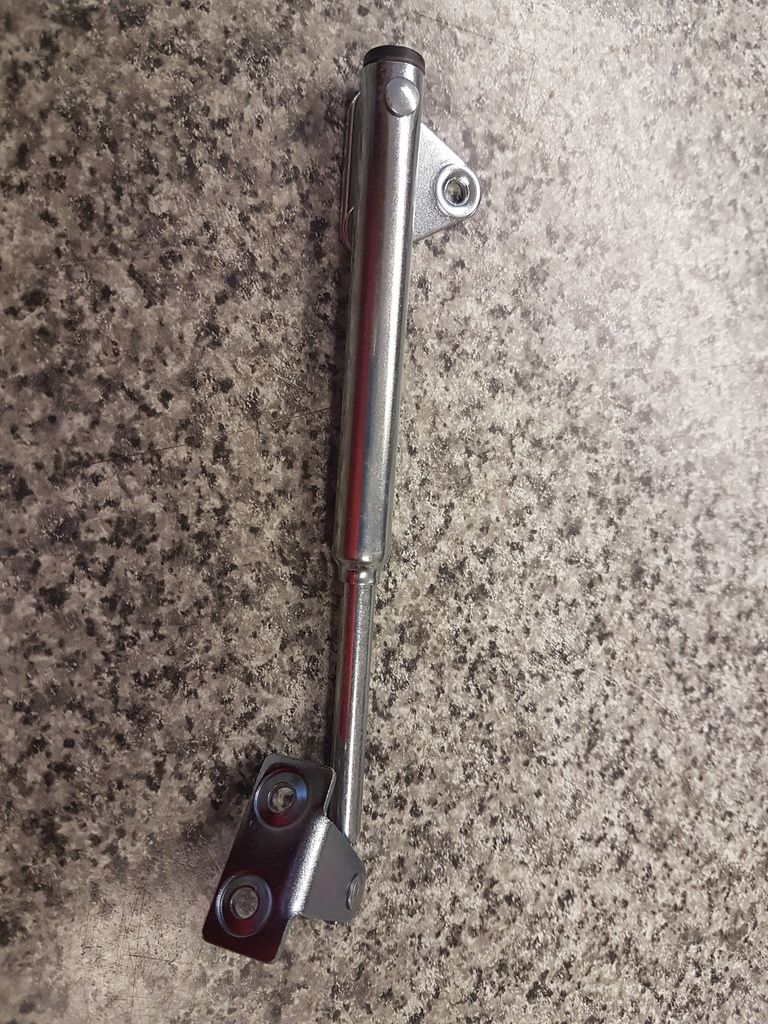
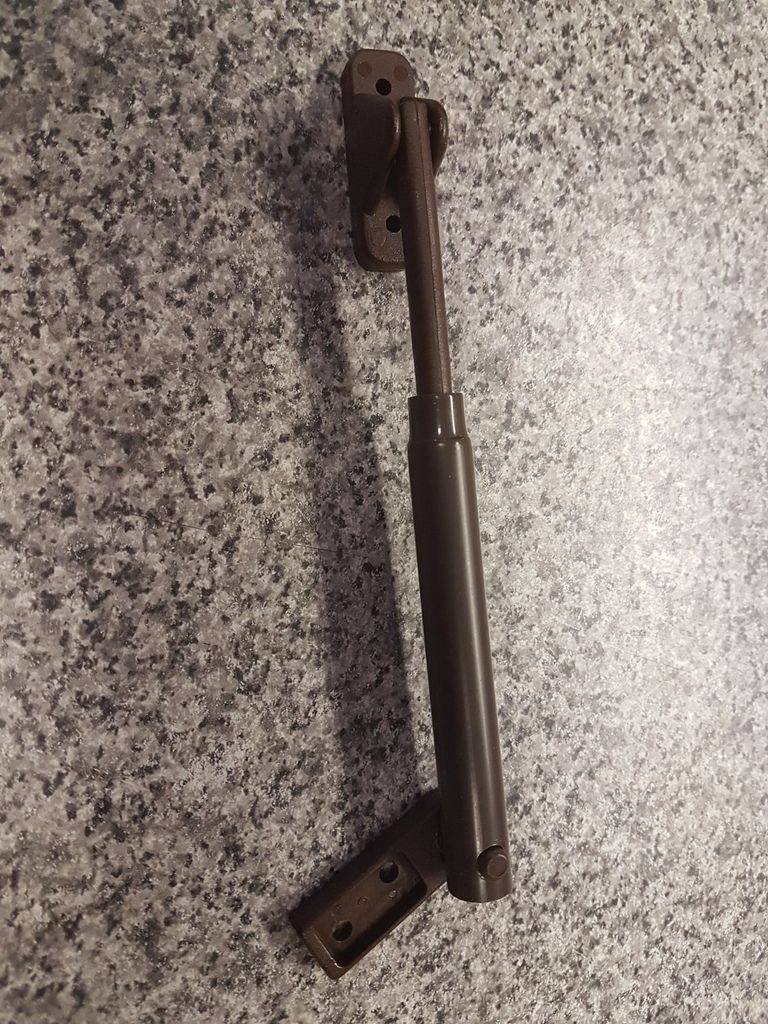
for the different stays
also do any of these look any good

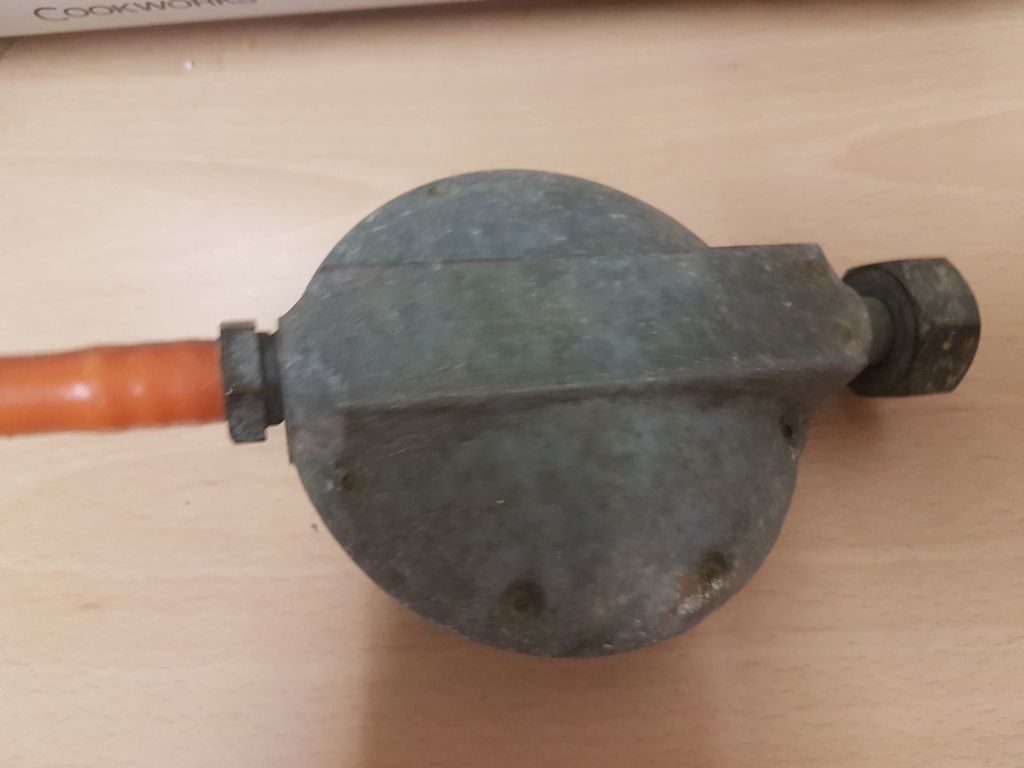
there all old regulators (pics from both sides)
Loosebruce
In terms of the locking mechanism again I might be able to help.
Have a look at:
https://www.caravanaccessoryshop.co.uk/product/push-lock-small-satin/2964
we also do a large one.
also look at:
https://www.caravanaccessoryshop.co.uk/product/button-and-rose-for-push-locks-satin/4915
Would give you a nice simple push lock mechanism losing the key set up.
As for these other bits:


for the different stays
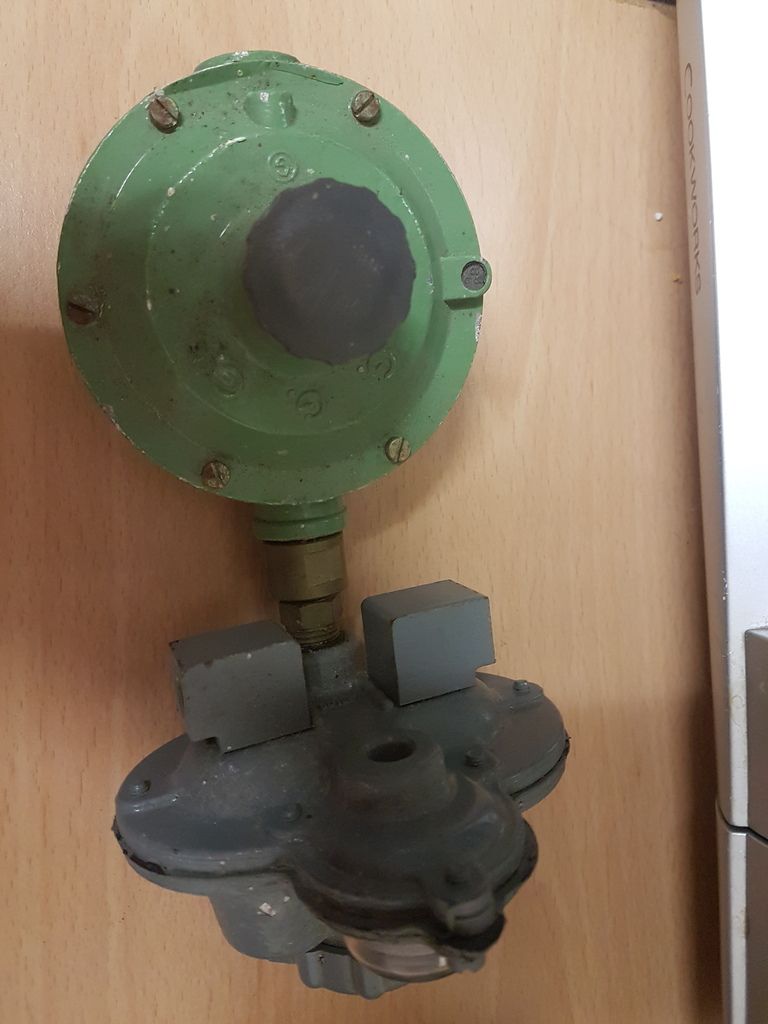
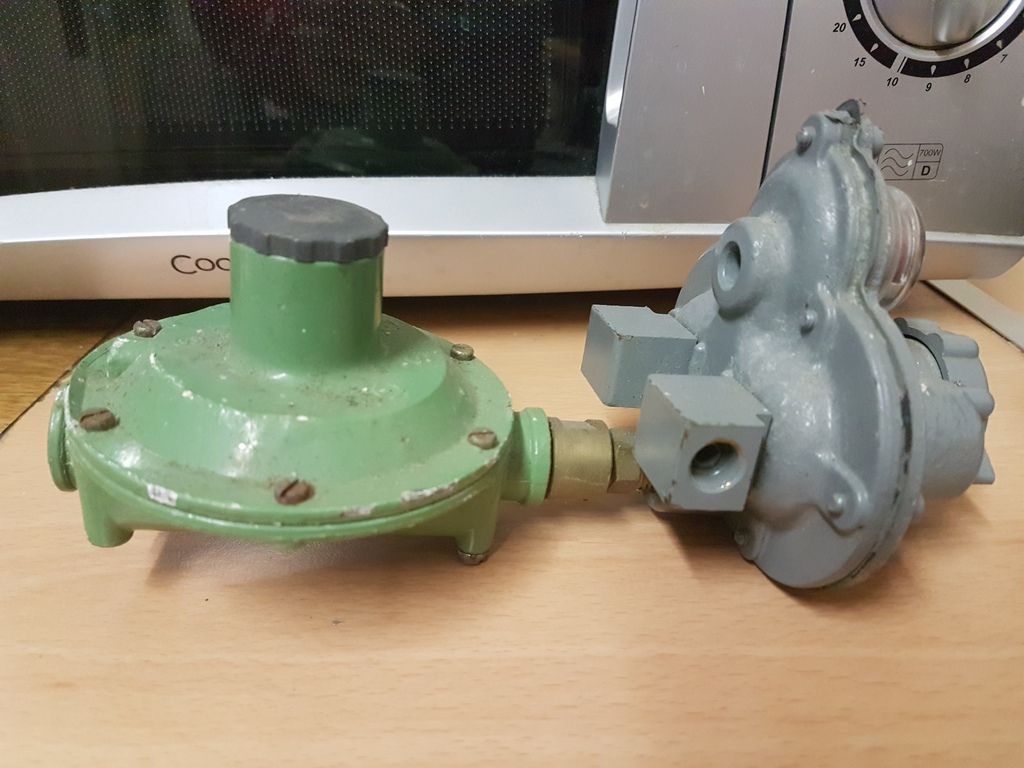
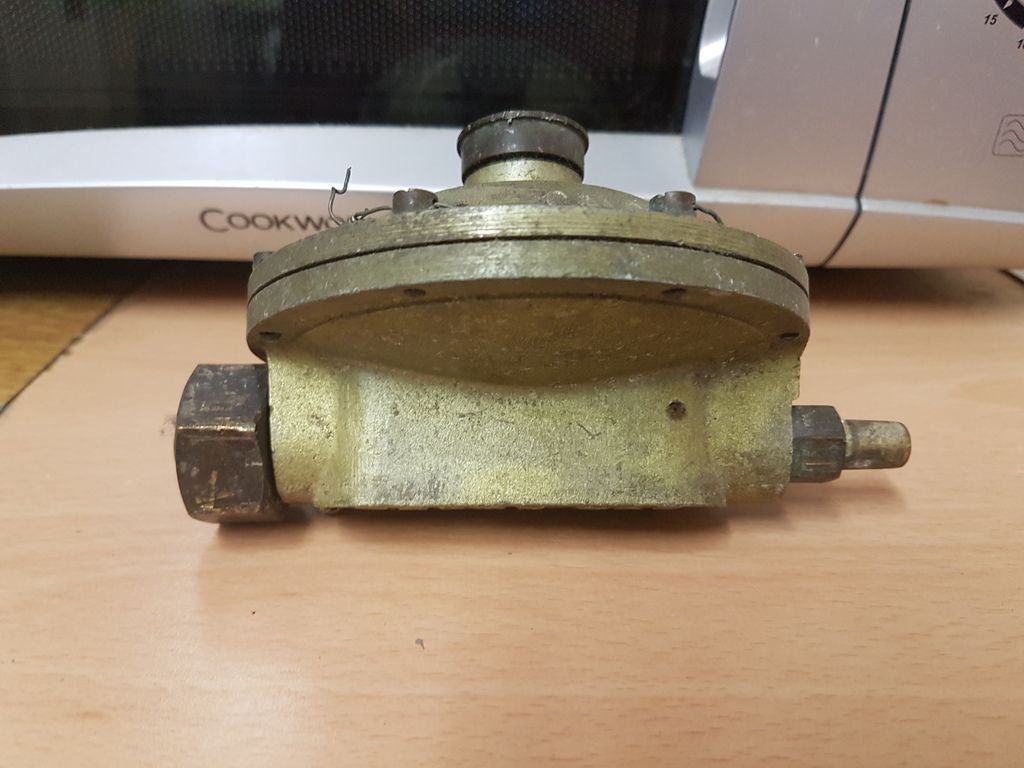
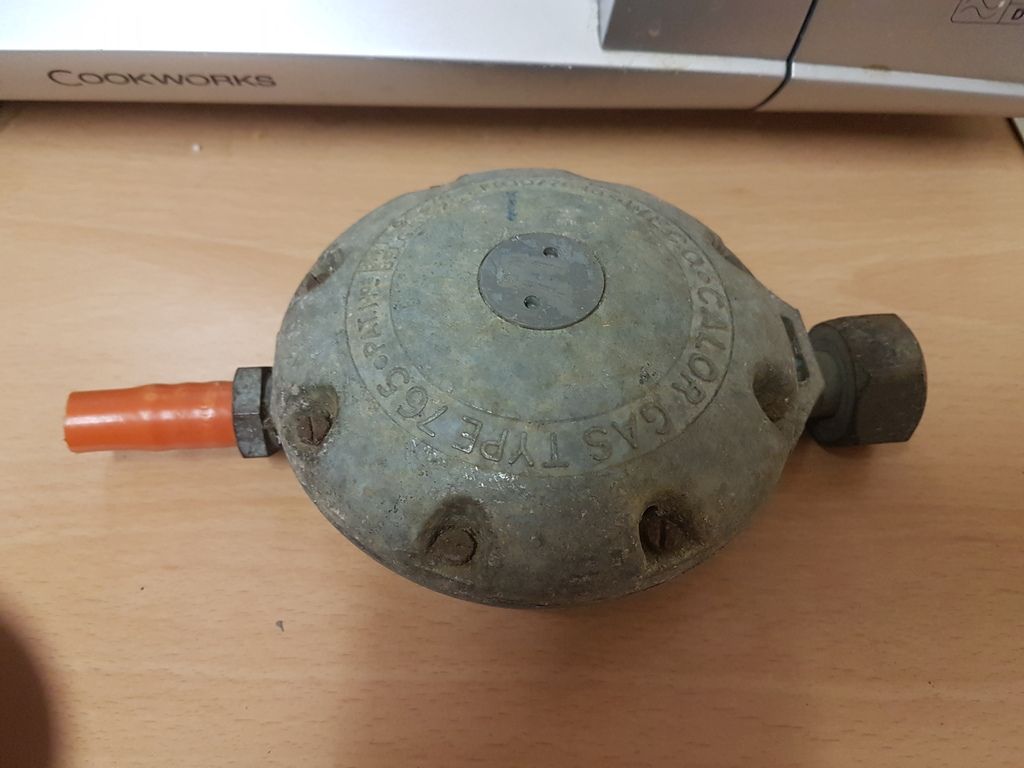
also do any of these look any good


there all old regulators (pics from both sides)
Loosebruce
Or you can make a groove in each panel, (on the flat part where the hinge is suppose to sit) the thickness of the hinge of course and screw it on the inside?
Hey J,
You were correct! The hinge is/was the same thickness as the 1/8" MDF I've been using. I created an interior skin for the lid with a recessed area for the hinge and she sat perfectly after mounting!
- - - Updated - - -
Wonderful job SK -I know it was hard to jump back in to it after the prior frustrations, but the new boxes and lids look fantastic.
Hey SB,
Thanks so much! I'm really happy! I designed and built those original boxes months ago so my head was still wrapped around that particular axle. The nice thing is that I can still remove the actual greeblie panel if I want to change / update the greeblie configuration.
- - - Updated - - -
The new boxes look great, and the new lock and hinges look the part!
If you want a lock system not dependent on keys, have you considered quarter turn Dzus fasteners?
Thanks, FF! It's nice seeing them finally mounted and working. I'm open to any all suggestions to replace the lock and key.
I was looking at the TFA lids and it would appear they used an Allen Head bolt to keep the lid in place so it wouldn't fall - unless they changed the lids during filming. I can't remember, but I don't think we actually see Rey pull the lid away from the panel?
- - - Updated - - -
yeah, i was thinking the same, with all those buttons around, you could link one to a push-pull solenoid:
https://www.google.be/search?q=push...ved=0ahUKEwjTm5HkrMHSAhUnLsAKHed7AUoQ_AUIBigB
or even better, have an actual servo or dc motor to lower/raise the lid by itself. But I know, easier said than done. But the solenoid thing would not be that hard
Hi OC,
WOW! Now you guys are getting fancy! I LOVE IT! I'll DEF look into this option and see what the electronics goobers think!
There's always weight to consider, and there's a question of style. The reason I suggested Dzus fasteners is that they are light weight, very durable and also that they would fit into the Star Wars universe style-wise. They are also fairly easy to use and install
Would it be likely a hyper-advanced space vessel would use old-school analogue fasteners? No, but this kind of system was all the rage in the post-war stuff filling 1970s junk-yards the majority of props were drawn from. Seeing the amount of 1950s aircraft parts winding up in the Falcon, the Dzus hatches would be right at home.
Here's what they look like (outside, inside and open hatch):
View attachment 712180
Still from this instruction video voiced by an extremely patient sounding man:
https://www.youtube.com/watch?v=9wf4j1dnIAw
Hey FF,
OH YES! Weight has ALWAYS been a concern especially after we displayed the cockpit at the Space and Rocket Center. But the vertical frame braces alleviated most of my worries about any more sagging or flex.
The Dzus fasteners are cool! DEF lends to the SW look. DEF something to consider as we march toward cockpit V2!
Hi Sofa sorry for delay getting these pics for you had mega trouble logging into photobucket until the point i've had to create a new account!!!!!!.
In terms of the locking mechanism again I might be able to help.
Have a look at:
https://www.caravanaccessoryshop.co.uk/product/push-lock-small-satin/2964
we also do a large one.
also look at:
https://www.caravanaccessoryshop.co.uk/product/button-and-rose-for-push-locks-satin/4915
Would give you a nice simple push lock mechanism losing the key set up.
As for these other bits:
http://i1339.photobucket.com/albums/o717/Bruce_Peck/20170227_161955_zpsl5yavpbs.jpg
http://i1339.photobucket.com/albums/o717/Bruce_Peck/20170227_162005_zps1musy7yw.jpg
http://i1339.photobucket.com/albums/o717/Bruce_Peck/20170227_162025_zps5z7nzoxk.jpg
http://i1339.photobucket.com/albums/o717/Bruce_Peck/20170227_162048_zpswab9jvup.jpg
http://i1339.photobucket.com/albums/o717/Bruce_Peck/20170227_162052_zpstpgb9ji6.jpg
for the different stays
also do any of these look any good
http://i1339.photobucket.com/albums/o717/Bruce_Peck/20170227_162409_zps0wtyzf5v.jpg
http://i1339.photobucket.com/albums/o717/Bruce_Peck/20170227_162414_zpssz9gbhha.jpg
http://i1339.photobucket.com/albums/o717/Bruce_Peck/20170227_162421_zpsz0bjktoy.jpg
http://i1339.photobucket.com/albums/o717/Bruce_Peck/20170227_162425_zpsl6koy8kp.jpg
http://i1339.photobucket.com/albums/o717/Bruce_Peck/20170227_162430_zpskf35wrdi.jpg
http://i1339.photobucket.com/albums/o717/Bruce_Peck/20170227_162435_zpsc0t2ff38.jpg
there all old regulators (pics from both sides)
Loosebruce
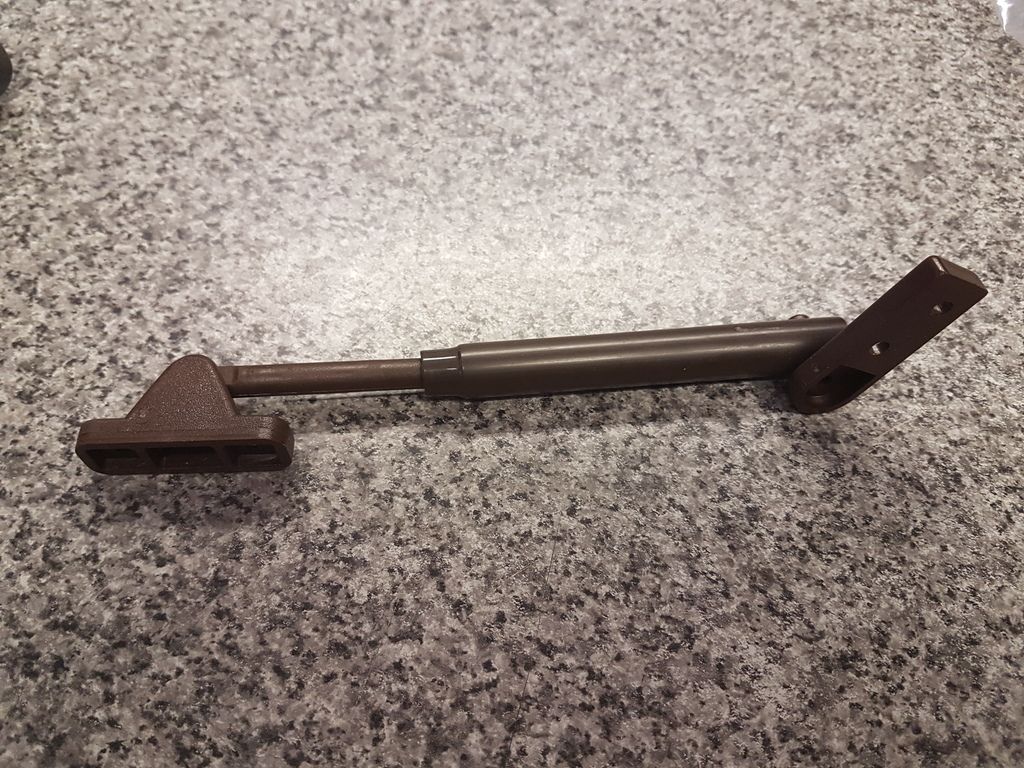
Hey LB,
LOVE IT!!! Those struts just might work. I'm not sure what the correct terminology is but are those "Return" struts - pull the strut and it returns back to its original closed position?
Those are AWESOME greeblies! I would DEF hang onto them. If we ever to get to building the exterior those would be a great addition!
Thanks for posting!!!!
Loosebruce704
Member
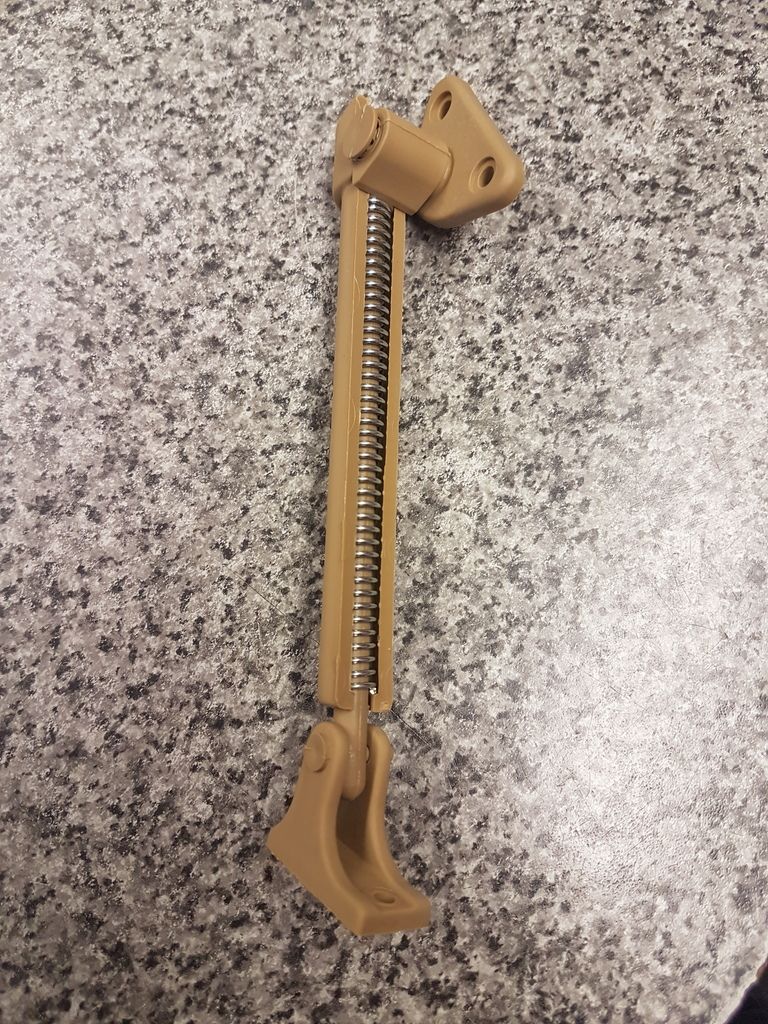
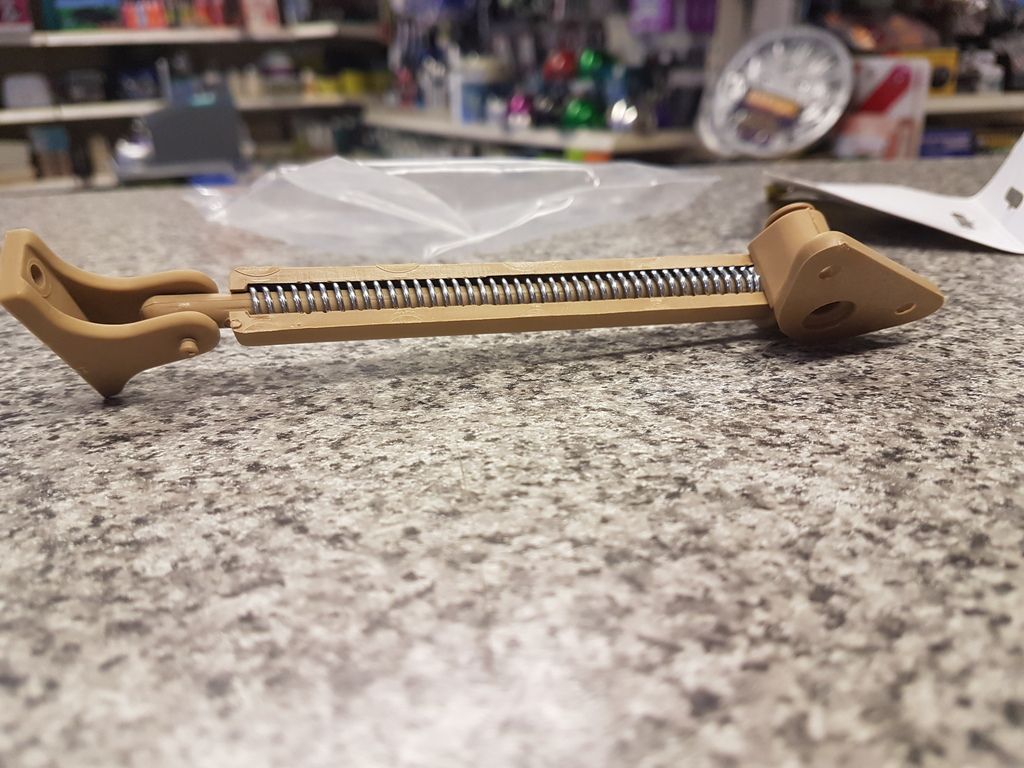
Hi Sofa
Ive pulled the stay (the beigey one with the spring in) about and the pic is of its longest length the end that is attached to the spring slides down as it compresses the spring (I can't get a pic of it compressed as quite strong and i can't compress it that far by hand and hold it to demo in photo) I hope what i'm saying makes sense.
loosebruce
Friendly flyer
Well-Known Member
HI can't remember, but I don't think we actually see Rey pull the lid away from the panel?
I think we see her stretching her hand up and out of the frame, and then the cover comes crashing down (to my memory it sounds like a surprisingly heavy metal hatch falling open with much rattling). Considering the rest of the cockpit is MDF and small laser-cut bits of plastic, I don't think that would be adviceable
The hatch certainly falls open though, so something to stop the hatch from banging into the panel below wouldn't be a bad thing. The stays posted by Loosebruce704 is a possible solution.
The Dzus-locked hatch I posted pictures of would perhaps be a relevant solution for access hatches in the outer skin? I imagine you'd want access to nuts and bolts holding things together from the outside without letting the audience see all the decidedly non-spacy wood.
Last edited by a moderator:
BigBigDave
Active Member
Yes... the key looks a little out of place
What if you did something Star Wars-ish TO the key? Like if you bent the big round part we hold on to at a 90 degree angle and weld/epoxy some kind of greebly onto that so it still functions correctly but has a bit cooler look to it? That way you still get the head-saving security of a locking panel but you make the key part a bit more in-universe?
I think we see her stretching her hand up and out of the frame, and then the cover comes crashing down (to my memory it sounds like a surprisingly heavy metal hatch falling open with much rattling). Considering the rest of the cockpit is MDF and small laser-cut bits of plastic, I don't think that would be adviceable
The hatch certainly falls open though, so something to stop the hatch from banging into the panel below wouldn't be a bad thing. The stays posted by Loosebruce704 is a possible solution.
The Dzus-locked hatch I posted pictures of would perhaps be a relevant solution for access hatches in the outer skin? I imagine you'd want access to nuts and bolts holding things together from the outside without letting the audience see all the decidedly non-spacy wood.
Hey FF,
A "strut" or cabinet door "stay" would DEF keep the lid from slamming down to far. However, the struts I've found have all been rated at least 5-10lbs and think that might be a bit much for the MDF and piano hinge. Whether the strut pushes or pulls, I really dont want to stress the hinge mounting points. I did find a simple lid "stay" that folds at the center and is mounted to the lid and the panel giving the exact support needed without adding any pressure a gas strut has.
Fortunately, ALL the nuts and bolts are either hidden or will be covered by the exterior skin frame we're planning to make. BUT, I DEF like the access panel and the Dzus latches. I think it's DEF meets the SW look and feel!
- - - Updated - - -
What if you did something Star Wars-ish TO the key? Like if you bent the big round part we hold on to at a 90 degree angle and weld/epoxy some kind of greebly onto that so it still functions correctly but has a bit cooler look to it? That way you still get the head-saving security of a locking panel but you make the key part a bit more in-universe?
Hey BBD,
I LOVE THAT IDEA! And this is exactly why I love you guys/gals! Now you have me thinking!
Thanks for the input!
Last edited by a moderator:
Similar threads
- Replies
- 2
- Views
- 865
- Replies
- 6
- Views
- 628
- Replies
- 8
- Views
- 559
- Replies
- 9
- Views
- 1,002
- Replies
- 4
- Views
- 2,329