Horizon DC Comics "Two Face" 1/8 vinyl kit

Nm1cciola

Active Member
I recently attended the Jersey fair Model show and this is the last model that I picked up. This is one that I have been searching for for a very long time and haven't been able to find it on either google not ebay. The Horizon DC COMIC's "Two Face" 1/8 vinyl kit. this has an amazing head sculpt as well and great diorama accessories.
IMG_1574.jpgIMG_1588.jpg
here are some unclose shots of the kit:
IMG_1597.jpgIMG_1595.jpgIMG_1594.jpgIMG_1593.jpgIMG_1592.jpgIMG_1591.jpgIMG_1590.jpgIMG_1598.jpgIMG_1604.jpgIMG_1603.jpgIMG_1602.jpgIMG_1601.jpgIMG_1600.jpgIMG_1599.jpgIMG_1605.jpg
(what I really love about this kit is the name plate suing the indebted name tag on the 2 line in order to shadow to give the name more depth, AWESOME!)
Did some work on this kit as well
IMG_1621.jpgIMG_1622.jpgIMG_1623.jpgIMG_1624.jpg
I Plan on painting him the style of his animated series counterpart
 

Attachments

  • IMG_1596.jpg
    IMG_1596.jpg
    1.1 MB · Views: 146
  • IMG_1589.jpg
    IMG_1589.jpg
    1.4 MB · Views: 157
  • IMG_1625.jpg
    IMG_1625.jpg
    1.1 MB · Views: 132
Last edited:
I'm always amazed how many Horizon kits are still floating around, I really wish I still had my Battletech Madcat kit so i could redo it the right way. He's going to look great with the animated series paintjob.
 
I'm always amazed how many Horizon kits are still floating around, I really wish I still had my Battletech Madcat kit so i could redo it the right way. He's going to look great with the animated series paintjob.
Same here I assumed it would be super difficult to acquire these kits once I knew they existed especially this one, found a few days ago that the bat suit from knightfall they made into a kit as well so obscure but yet awesome. Some of the battletech kits they produced look amazing but they cost an arm and a leg to get now. Yeah I think he's going to look great in the animated style as well just need to think of the paints I'm going to use so he not totally flat.
 
UPDATE TIME:
So I found some time to work on this kit since I have purchased it. I cut of all the flashing on this kit and Have kept for sketch and as a way to test painting techniques.
2016-09-04 19.32.22.jpg
Next you'll see some unclose pictures of the flashing cut off
2016-09-04 19.33.09.jpg2016-09-04 19.33.07.jpg2016-09-04 19.32.57.jpg2016-09-04 19.32.54.jpg2016-09-04 19.32.48.jpg2016-09-04 19.32.46.jpg2016-09-04 19.32.38.jpg2016-09-04 19.32.33.jpg2016-09-04 19.32.29.jpg2016-09-04 19.33.24.jpg2016-09-04 19.33.26.jpg

I plan on fixing the base that this kit came with I m planning on cutting a piece of wood and then putting it into the hollow of the base. ( I plan on making a mold of this base and treating it like a normal base for some of the model I paint.)
2016-09-04 19.34.48.jpg2016-09-04 19.35.21.jpg
On to part 2
 

Attachments

  • 2016-09-04 19.34.13.jpg
    2016-09-04 19.34.13.jpg
    1.1 MB · Views: 123
  • 2016-09-04 19.35.43.jpg
    2016-09-04 19.35.43.jpg
    1 MB · Views: 164
  • 2016-09-04 19.33.56.jpg
    2016-09-04 19.33.56.jpg
    866 KB · Views: 126
  • 2016-09-04 19.33.42.jpg
    2016-09-04 19.33.42.jpg
    932.7 KB · Views: 130
  • 2016-09-04 19.33.40.jpg
    2016-09-04 19.33.40.jpg
    895.8 KB · Views: 114
  • 2016-09-04 19.33.38.jpg
    2016-09-04 19.33.38.jpg
    860.7 KB · Views: 116
  • 2016-09-04 19.33.28.jpg
    2016-09-04 19.33.28.jpg
    899.4 KB · Views: 111
UPDATE TIME PART 2:
Also glued the head and hair together using insta glue and it's holding pretty well but as seen in the pictures there is a gap where the head meets the hairs what I plan on doing is filling that up with Aves Apoxie and once the head is all done I plan on filling the head with resin to help it keep it shape
2016-09-04 19.33.42.jpg2016-09-04 19.33.56.jpg2016-09-04 19.33.38.jpg2016-09-04 19.33.40.jpg

And lastly as I was putting this kit together and I found that it fits pretty well. I plan on heating this part up and just tucking the coat inside the body of this kit so it fits better. (also plans on filling the top of the body of this kit with SMOOTH ON expanding rigid foam already tried this on a test and what I found is that as long as there is a skeleton in there it won't expand the kit as well, I plan on cutting holes in the neck joint and arm joints so that the expansions of the foam is even). I plan on filling the legs with resin.
2016-09-04 19.32.33.jpg2016-09-04 19.32.38.jpg2016-09-04 19.32.29.jpg2016-09-04 19.36.20.jpg2016-09-04 19.35.43.jpg2016-09-04 19.36.36.jpg2016-09-04 19.35.47.jpg2016-09-04 19.35.51.jpg

See you next update.
 
Last edited:
UPDATE TIME:
I was able to find time to work on this kit. Here are the final results of what I was able to accomplish:
2016-09-09 12.31.50.jpg2016-09-09 12.31.52.jpg
also the table that came with the kit
2016-09-09 12.25.01.jpg2016-09-09 12.25.04.jpg2016-09-09 12.25.11.jpg
Here are some in progress shots:
2016-09-09 12.02.22.jpg2016-09-09 12.02.18.jpg2016-09-09 12.02.58.jpg2016-09-09 12.03.06.jpg2016-09-09 12.02.12.jpg2016-09-09 12.02.04.jpg2016-09-09 12.02.46.jpg2016-09-09 12.02.36.jpg
also some in progress shots of the head
2016-09-09 12.29.53.jpg2016-09-09 12.29.43.jpg2016-09-09 12.30.08.jpg2016-09-09 12.29.45.jpg2016-09-09 12.29.38.jpg2016-09-09 12.30.09.jpg2016-09-09 12.29.48.jpg2016-09-09 12.29.41.jpg
On to Part 2

Don't why the pictures are coming in sideways... weird tried fixing wasn't able to.
 

Attachments

  • 2016-09-09 12.25.18.jpg
    2016-09-09 12.25.18.jpg
    866.4 KB · Views: 150
  • 2016-09-09 12.02.27.jpg
    2016-09-09 12.02.27.jpg
    1.1 MB · Views: 103
  • 2016-09-09 12.02.14.jpg
    2016-09-09 12.02.14.jpg
    1.2 MB · Views: 130
Last edited:
UPDATE TIME:
Part 2
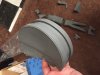
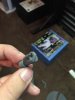
Some explanation as to what I did with this kit as you can see in the pictures I posted on the first part. The head I puttied the seam between the head and the hair sanded it down a bit and drilled a small hole in so that the resin I purchased will be able to fill in the head. The resin I used is was Fabri-Cast 50 Casting Resin (1 Gallon) as well as CRC 03300 Silicone Mold Release Spray, (Net Fill Weight 12 oz) 16oz Aerosol can. I hit the head with the mold release so that any reason that fell out of the hole and on the face was easy remove. This was my first time doing any of this and I was very happy the end result on thing I will say that this has me excited branching into molding and casting.

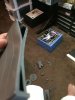
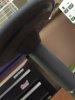
Then I did go on to filling the table that came with kit filled the bottom of the table and the top of the kit also filled in the recess area on the underside of the table. I then drilled a hole in the keys of the table and installed a still rod to add some stability the used insta glue and accelerator to increases the strength and time it was taking for the glue to cure.

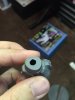
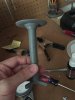
One thing I did learn was which resin to use and how much time to work it the resin I was using has a working time of 2 minutes, and in order to fill in models or molds you need to be fast. I did some tests to see how to work this resin. Here are some pictures:
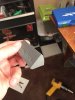
-The first att
2016-09-09 12.30.30.jpg2016-09-09 12.30.32.jpg2016-09-09 12.30.09.jpg
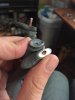
As you can see I used a plastic cup and I didn't work the resin enough it came a little too clear it's still strong but not mixed enough as you can see in the had the way it dried. The chemical reaction was a little slow.
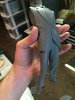
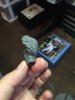
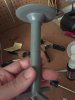
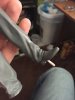
-The 2nd att
2016-09-09 12.30.40.jpg2016-09-09 12.30.38.jpg2016-09-09 12.29.23.jpg
This was my second att and I mixed for a minute I of course had to be quick in filling the head of the Penguin vinyl head. and it seems a bit more strong and not translucent, complete solid.
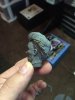
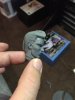
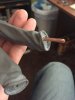
-The 3rd att
2016-09-09 12.30.49.jpg2016-09-09 12.30.52.jpg
The resin here was Zap's finishing resin it's the one I tried first but what stopped me from using this to fill this kit because it has a 20-30 min working time and there is a 6-8 hour curing time. I wanted it to dry as fast as possible. but one thing I did notice is that as it was curing I saw that it was eating the plastic of the cup and was immediately put off by this I didn't want this to eat the vinyl.
See you next time!
 
Last edited:
Update time:
I was able find some time in the previous weeks to work on this kit and I go farther along than I though I would. I first purchased a scratch kit in order to try out some new ways of building a vinyl kit as well as filling the kit.

1) I purchased a Storm trooper "recast" vinyl kit in order to test some ways of how to strengthen the interior of the model as well as fill in the model. {See Pictures}:
2016-10-12 21.46.39.jpg2016-10-12 21.47.25.jpg2016-10-12 21.47.28.jpg2016-10-12 21.47.48.jpg2016-10-12 21.48.39.jpg

2) I then applied the same technique I sued on the trooper it with filling in the arms and torso with foam and filling most of the legs with resin and living a little bit at the top to fill with foam so that it would be easier to peg this guy together.
2016-10-11 11.30.30.jpg2016-10-11 11.30.34.jpg2016-10-11 11.30.37.jpg2016-10-11 11.30.51.jpg2016-10-11 11.34.30.jpg2016-10-11 11.33.41.jpg2016-10-11 11.34.05.jpg2016-10-11 11.32.32.jpg2016-10-11 11.34.19.jpg2016-10-11 11.33.26.jpg2016-10-11 11.26.41.jpg
* Now as you can see I kinda ****ed up on this kit the arm with the pattern when I was filling it with Smooth on expanding foam it got on the arm and I didn't get to in enough time and well some of the pattern was lost I I had to rebuild and gauge it. I did my best you be the judge.

2016-10-11 11.29.55.jpg


On to Part 2 where I painted and primer the Body boy

edit* also I don't know what but the pictures that I post which are right side up show update as sideways IDK why also for some reason some images I post show up in the actul post but some post in the attached thumbnails, if anyone reading this know why would be helpful.
 

Attachments

  • 2016-10-11 11.35.39.jpg
    2016-10-11 11.35.39.jpg
    979.4 KB · Views: 132
  • 2016-10-11 11.35.20.jpg
    2016-10-11 11.35.20.jpg
    1.1 MB · Views: 125
  • 2016-10-11 11.35.18.jpg
    2016-10-11 11.35.18.jpg
    1.1 MB · Views: 104
  • 2016-10-11 11.34.59.jpg
    2016-10-11 11.34.59.jpg
    1 MB · Views: 102
  • 2016-10-11 11.34.33.jpg
    2016-10-11 11.34.33.jpg
    1.1 MB · Views: 132
Last edited:
UPDATE TIME PART 2:
ON the the priming of this guy so After he was all pinned together and glued and what not I decide to start the painting process.

View attachment 672148

ON TO PRIMING
View attachment 672149View attachment 672150View attachment 672151View attachment 672152View attachment 672156View attachment 672155View attachment 672154View attachment 672153View attachment 672157View attachment 672156View attachment 672155View attachment 672154View attachment 672153View attachment 672157View attachment 672160View attachment 672159View attachment 672158View attachment 6721612016-10-12 19.31.47.jpg2016-10-12 19.31.26.jpg2016-10-12 19.31.02.jpg2016-10-12 19.30.33.jpg2016-10-12 19.31.39.jpg2016-10-12 19.31.23.jpg2016-10-12 19.30.55.jpg2016-10-12 19.31.44.jpg2016-10-12 19.31.24.jpg2016-10-12 19.30.59.jpg
There still more that needs to be done on this after this step but it's big step up.
Also worked on a base for this ket created master using the base that was included in this kit and using some plumbing supplies as way go heighten the base
2016-10-11 11.42.23.jpg2016-10-11 11.42.27.jpg
 
Last edited:
This thread is more than 7 years old.

Your message may be considered spam for the following reasons:

  1. This thread hasn't been active in some time. A new post in this thread might not contribute constructively to this discussion after so long.
If you wish to reply despite these issues, check the box below before replying.
Be aware that malicious compliance may result in more severe penalties.
Back
Top