N2darkness
Sr Member
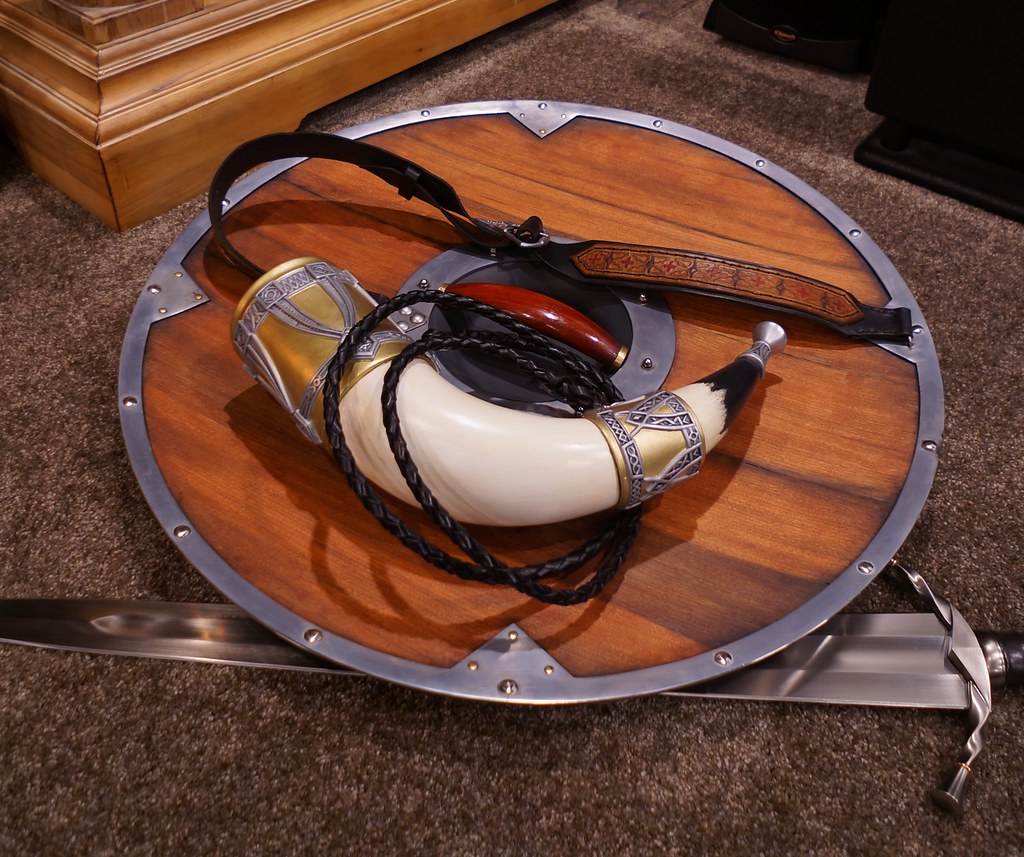
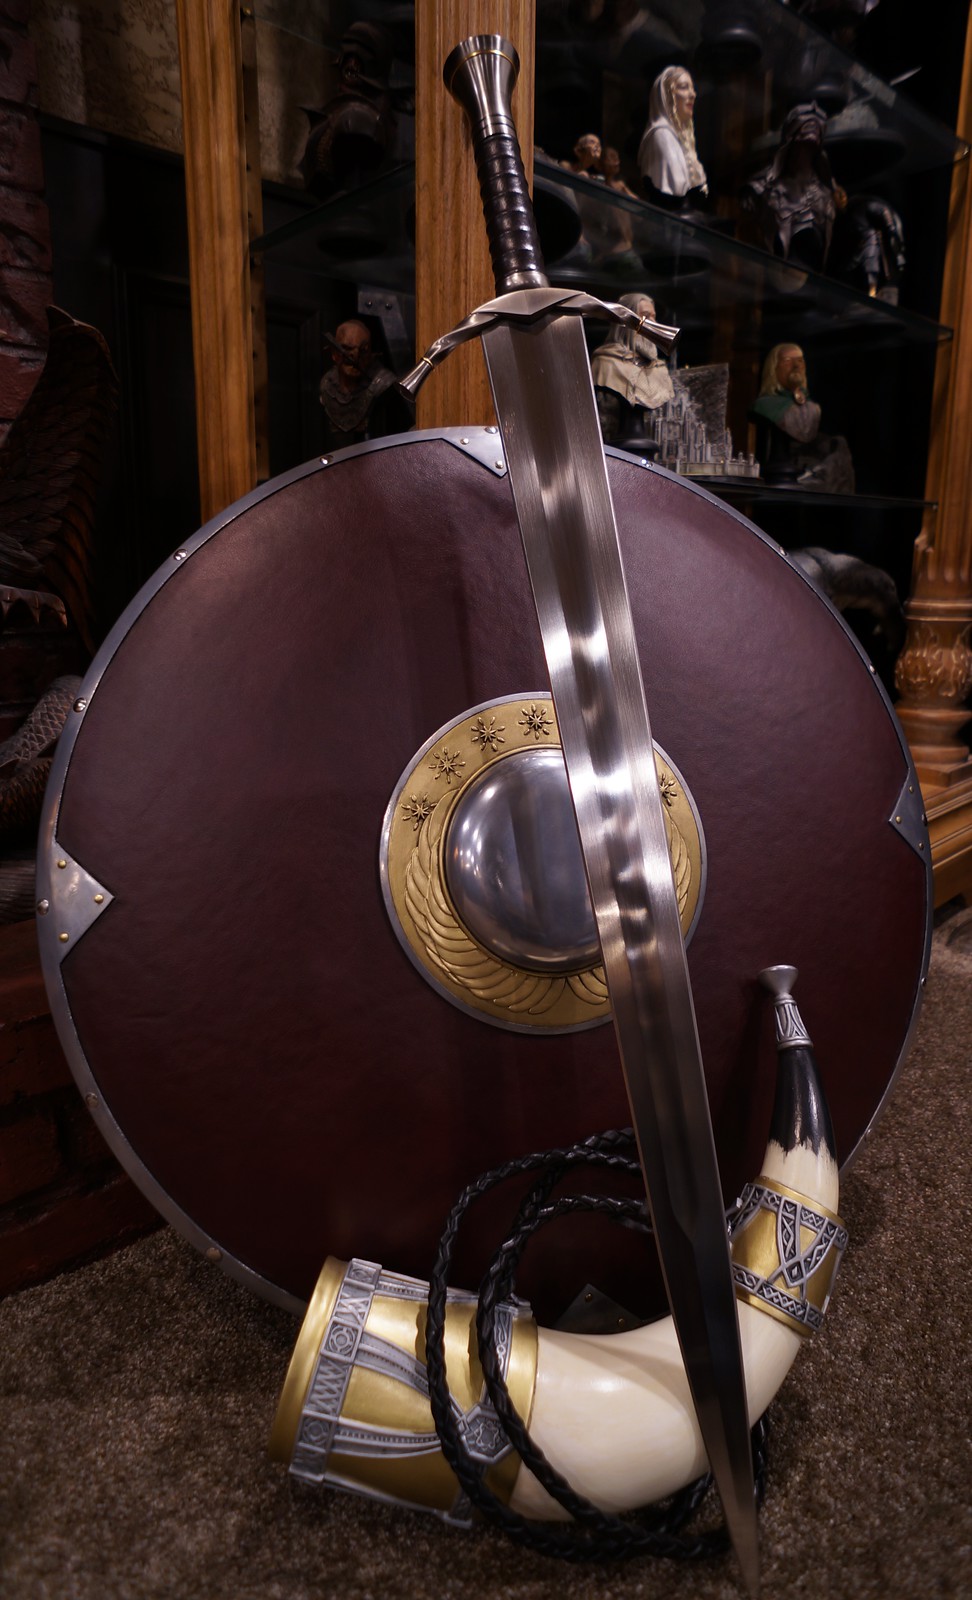
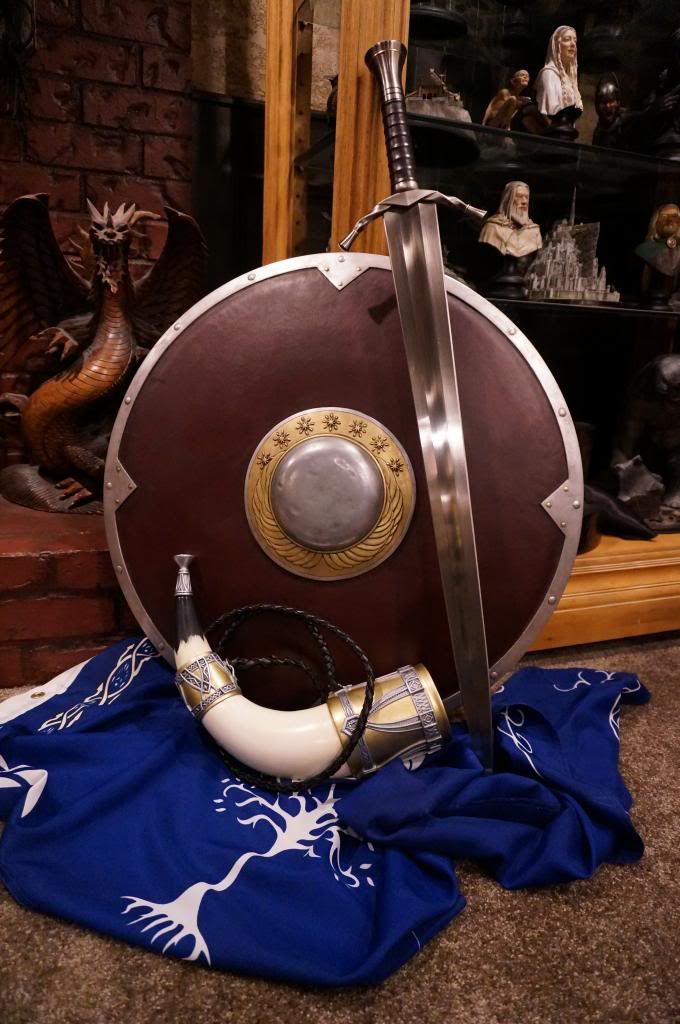
As I have always wanted the shield of Boromir and nothing has ever been commercially available, I stumbled upon Blindsquirrel's blog (Blind Squirrel Props )and found he had kits available along with his builds. I first found his Horn of Gondor which you can see my finished piece here N2Darkness's Dungeon - Page 25 - The Shadow and Flame then I also found his build for the shield of Boromir along with the center boss for sale. I had bought both at the time, but had some issues coming up with a shield blank.
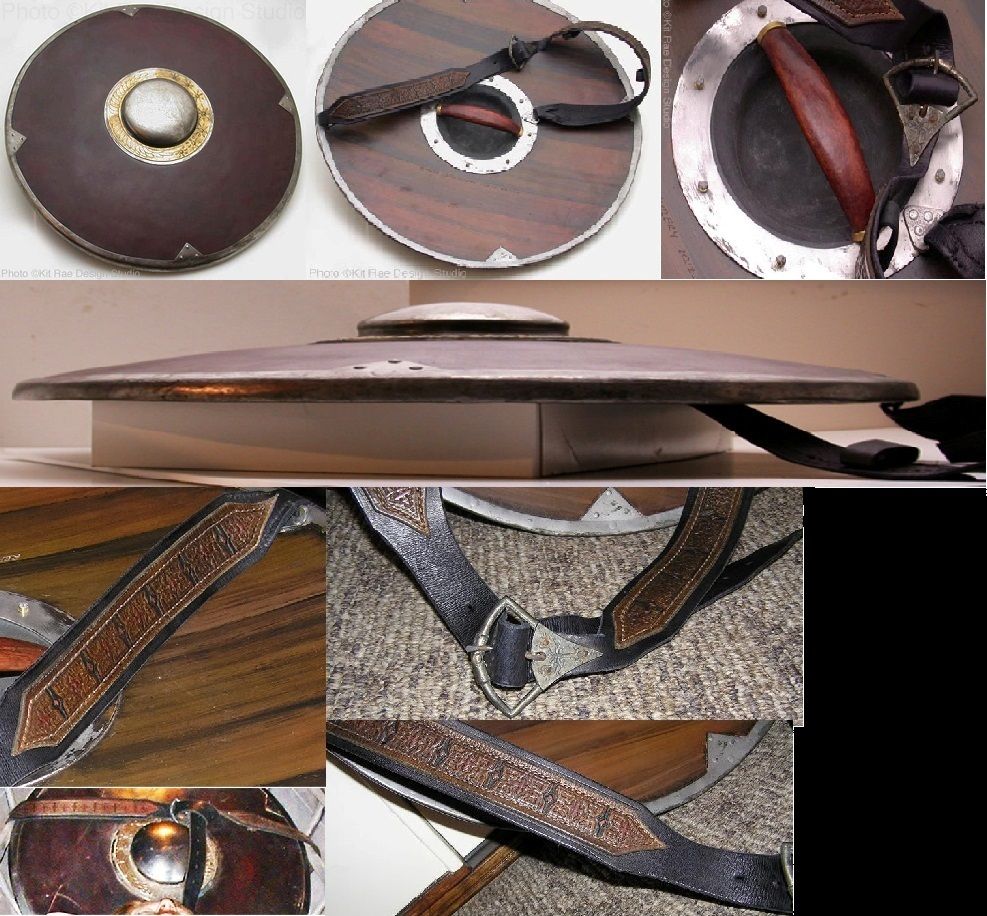
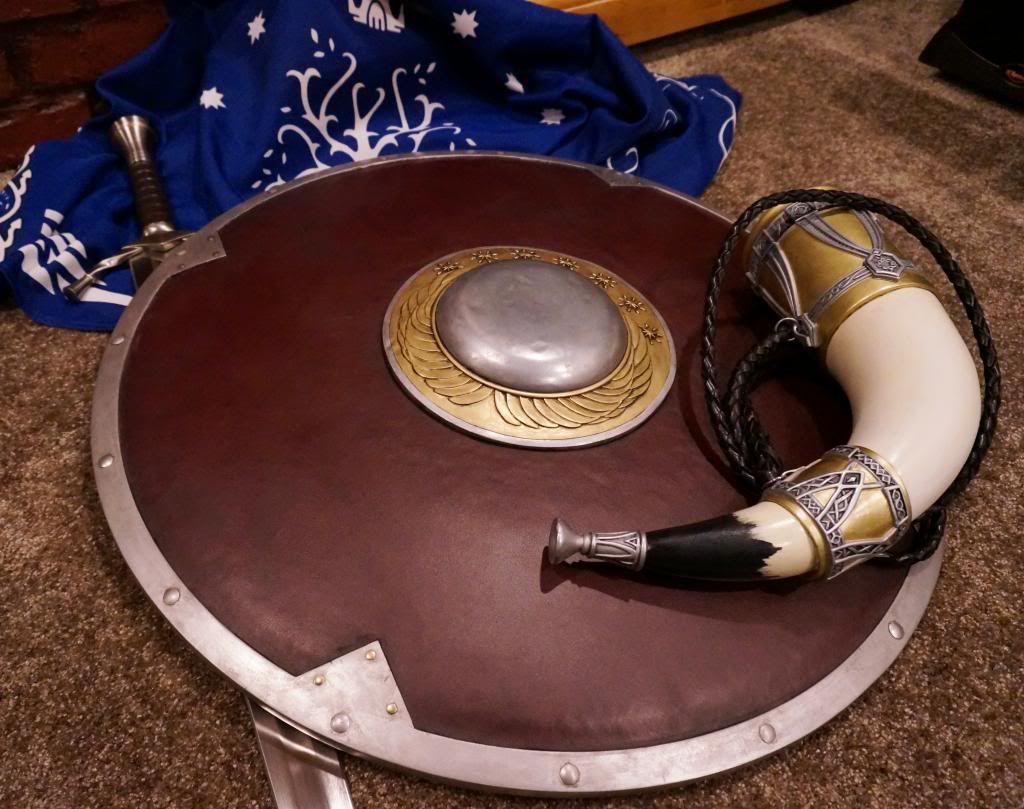
Here is some of the reference pictures I have gotten and some from Kit Rae himself of an actual Weta prop sent to UC and others are from fellow member Arwyniel who actually owns the Weta/UC prop she bought from Kit. Thanks to both!
I first came up with the idea of using a metal snow sled and even bought 2 and cut one to see if it would work.
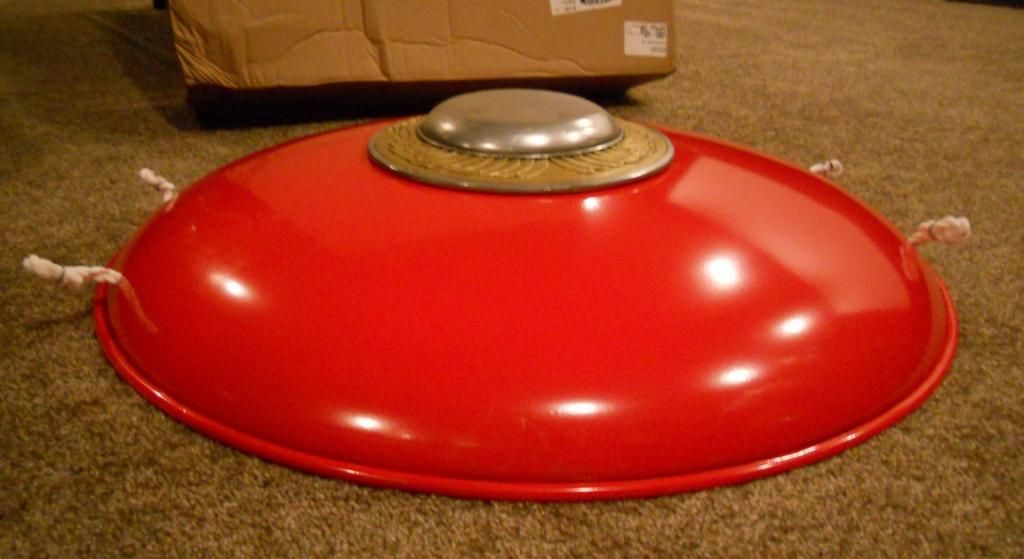
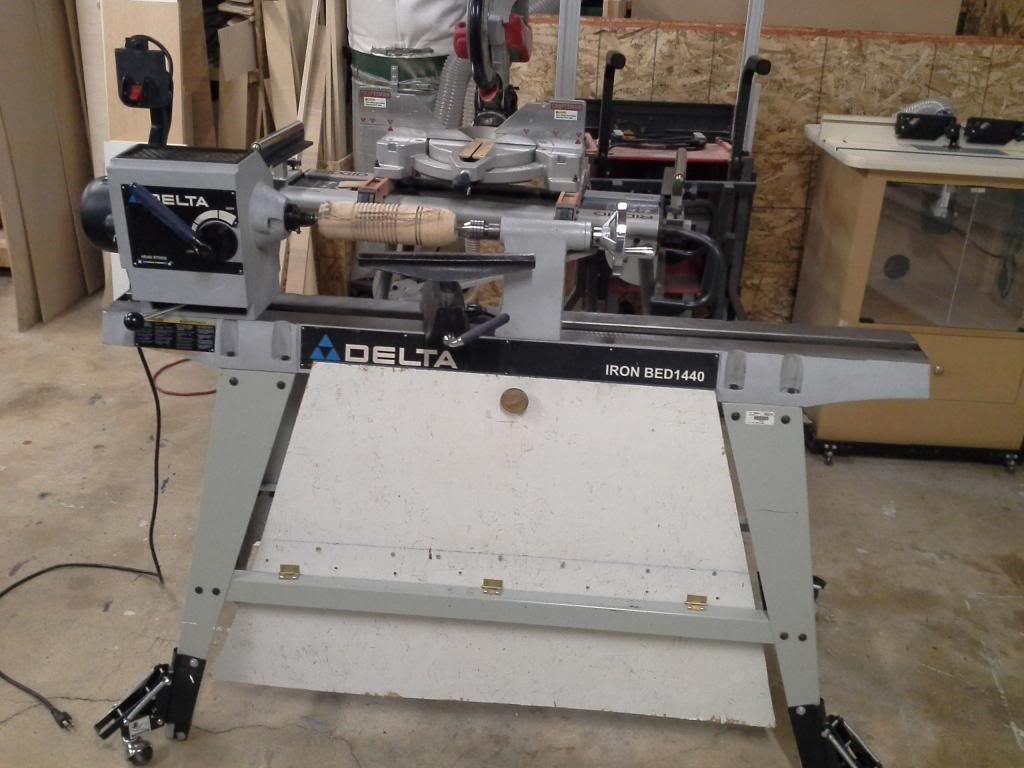
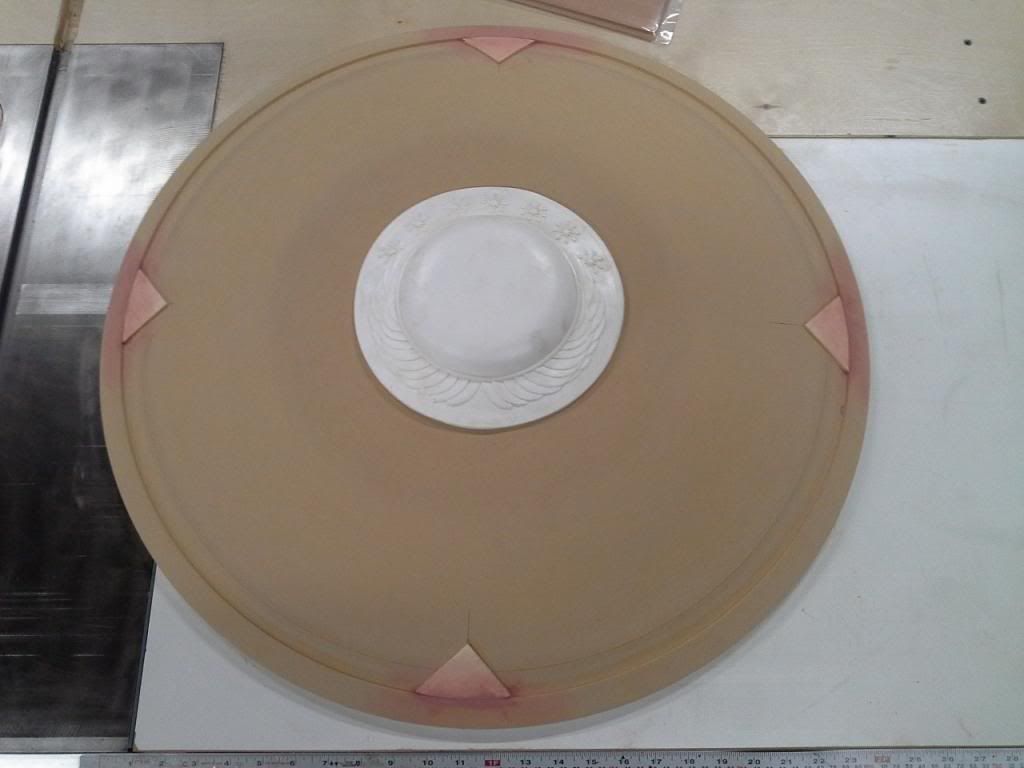
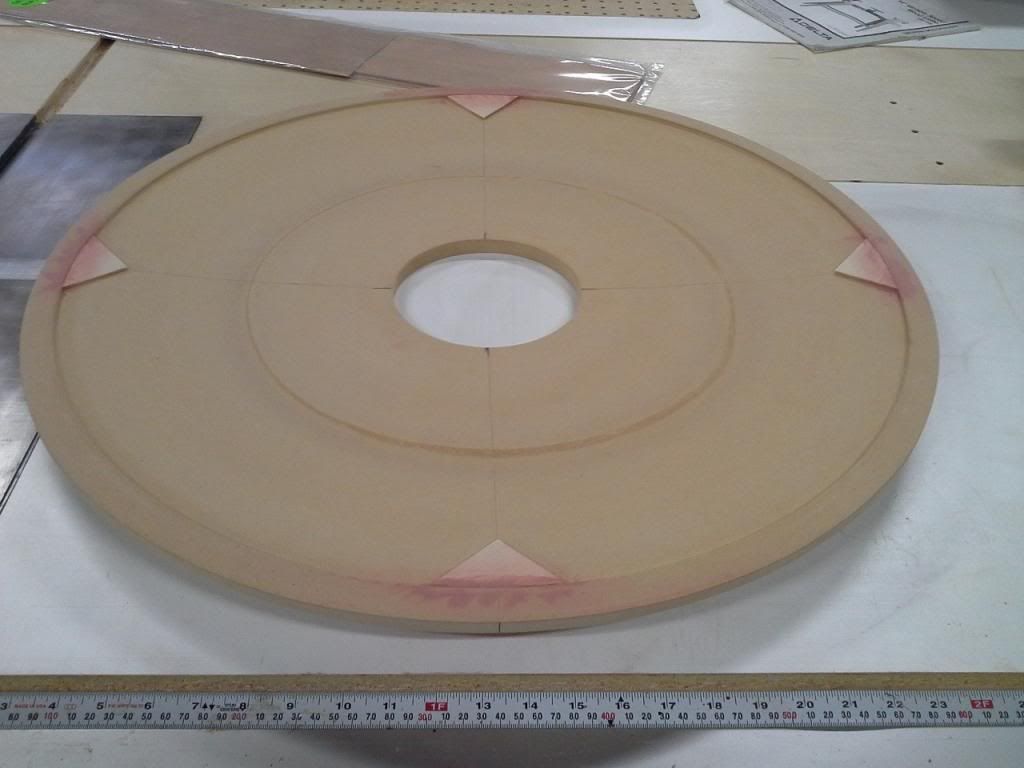
The dome was too high and caused to many issues with the wood veneering I wanted to do on the inside, so that idea got scrapped. I eventually bought a used wood lathe off craigslist that would be able to do what I wanted. So following Blindsquirrel's build I started with 2 pieces of MDF glued together and rough cut the circle and went to town shaping (I can't even begin to tell you how messy this is to do. My garage had dust and shavings from one end to the other.) and ended up with this


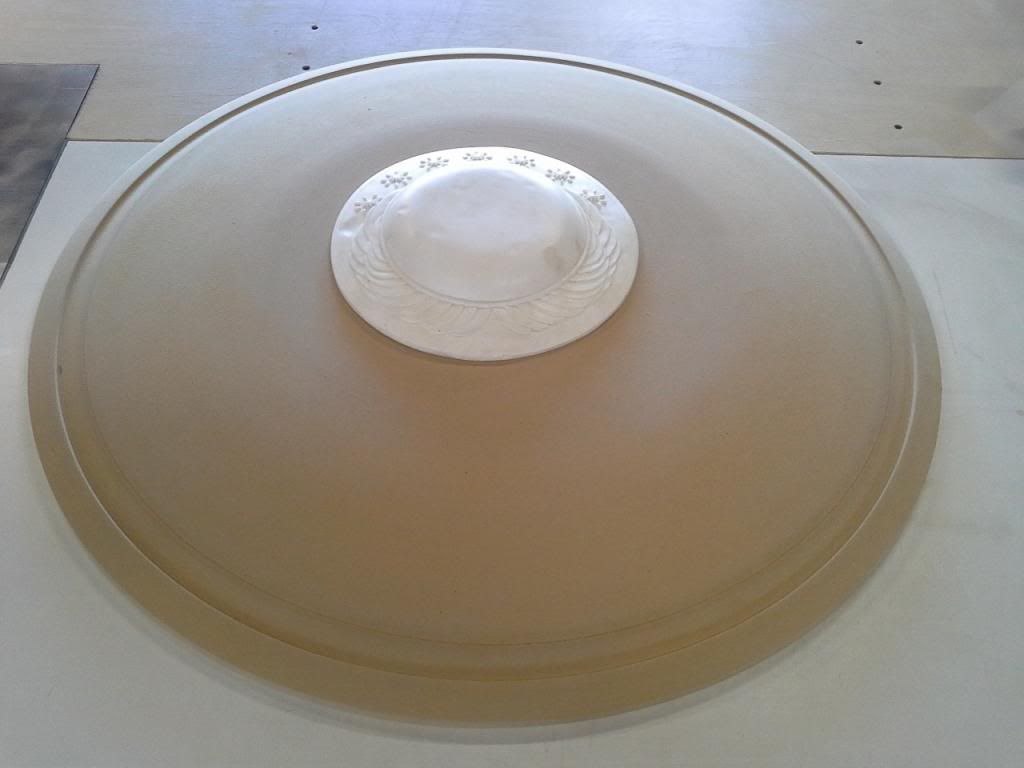
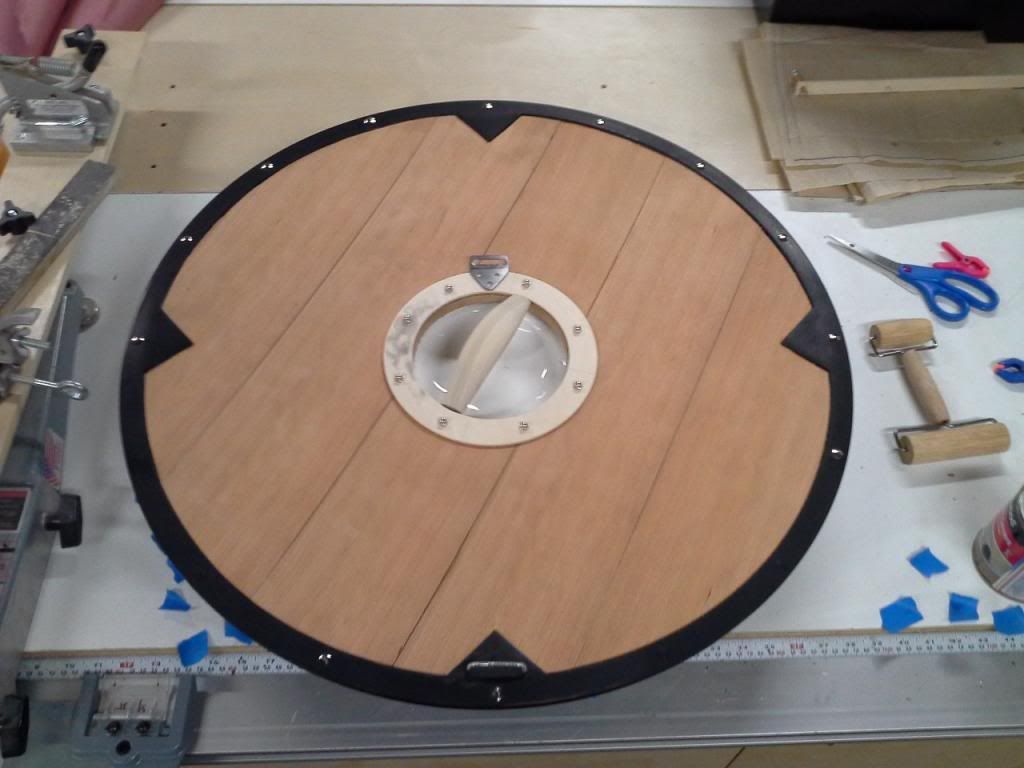
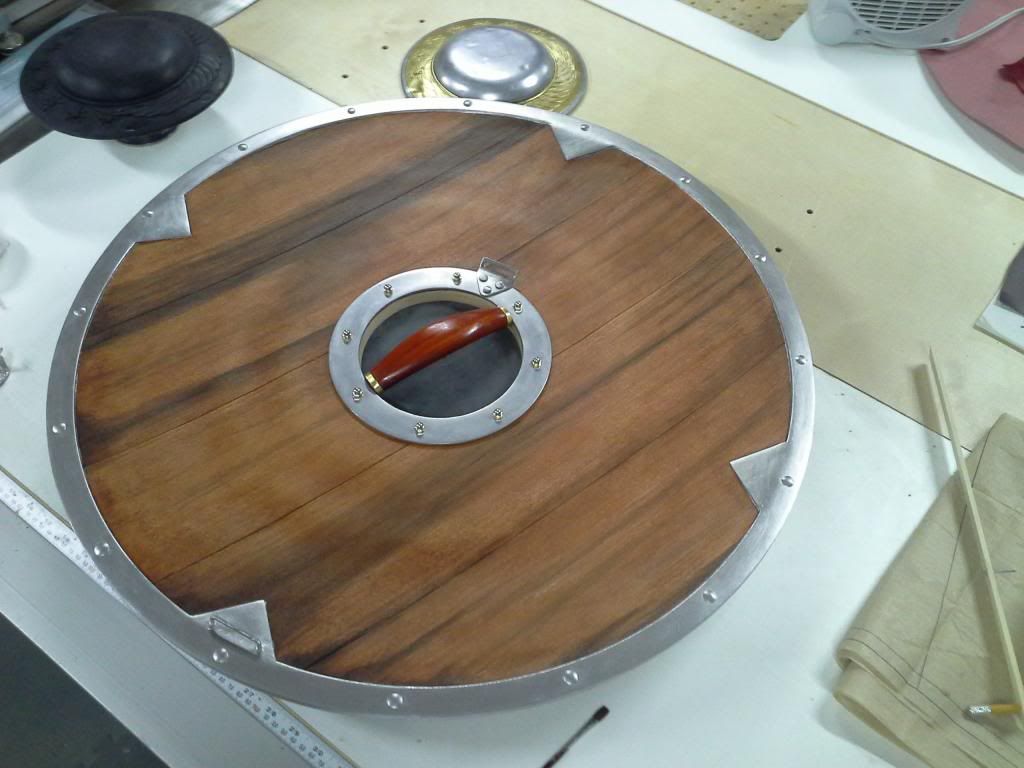
I next started on the 8 triangles that are on the front and back on all 4 sides, I made these with layers of basswood glued and clamped
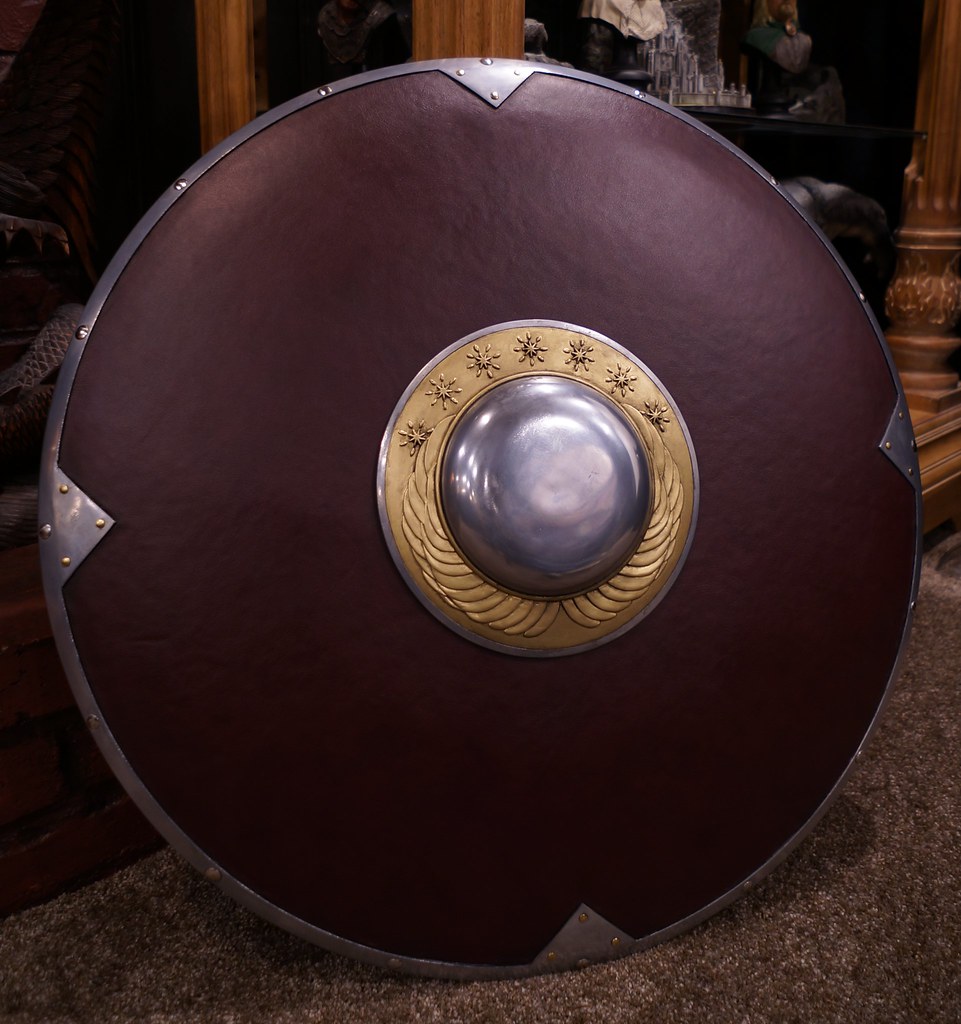
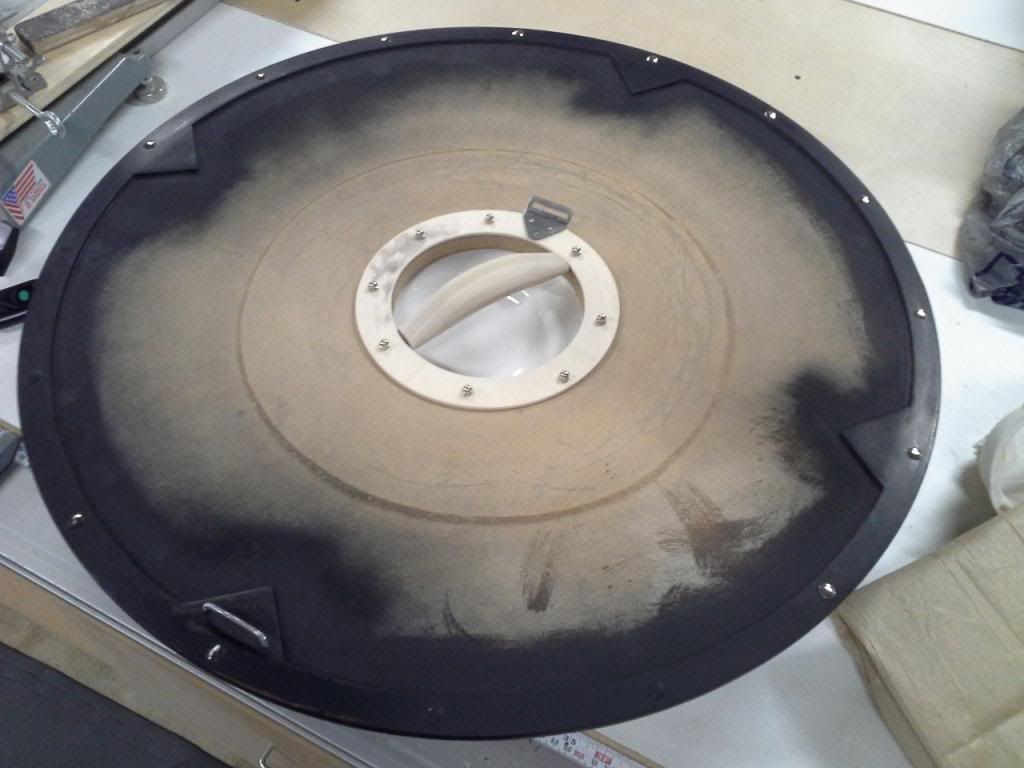
After that was done I covered the entire outer ring with fiberglass resin as I wanted it hard as its suppose to be metal, but that would have been very difficult as I have limited metal fabricating abilities.

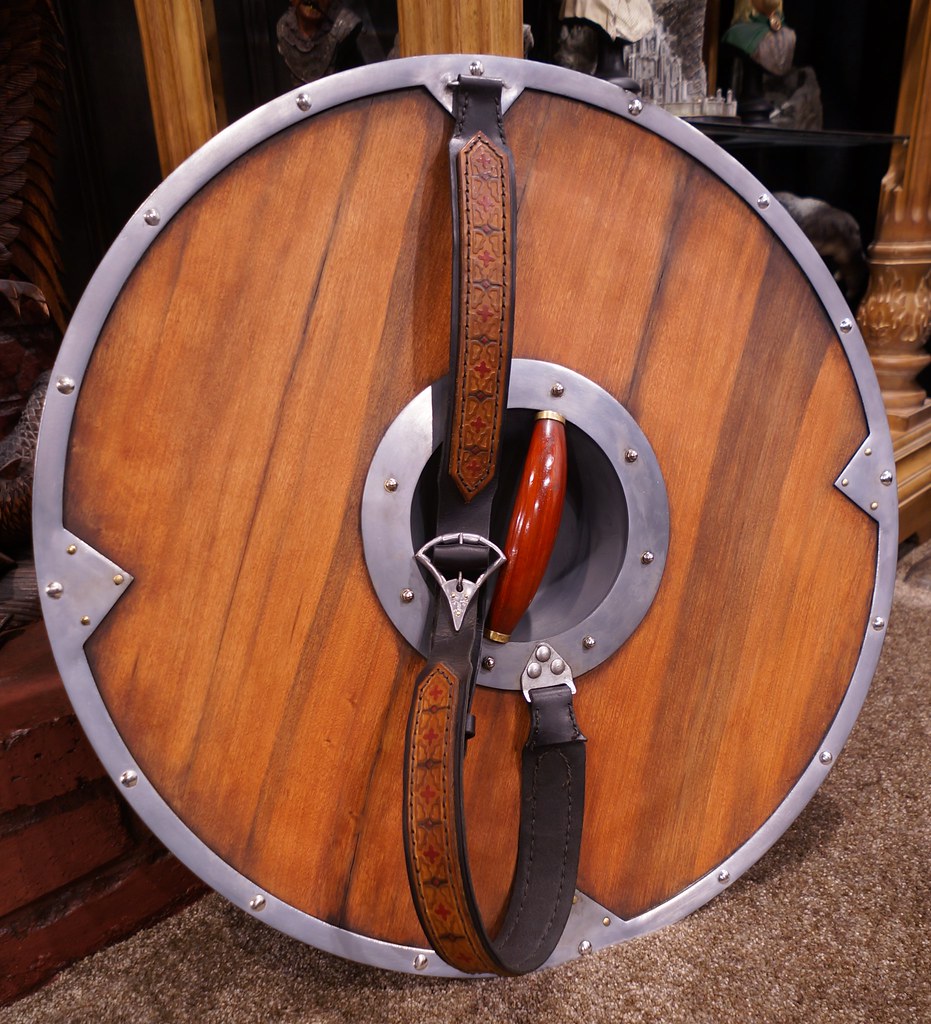
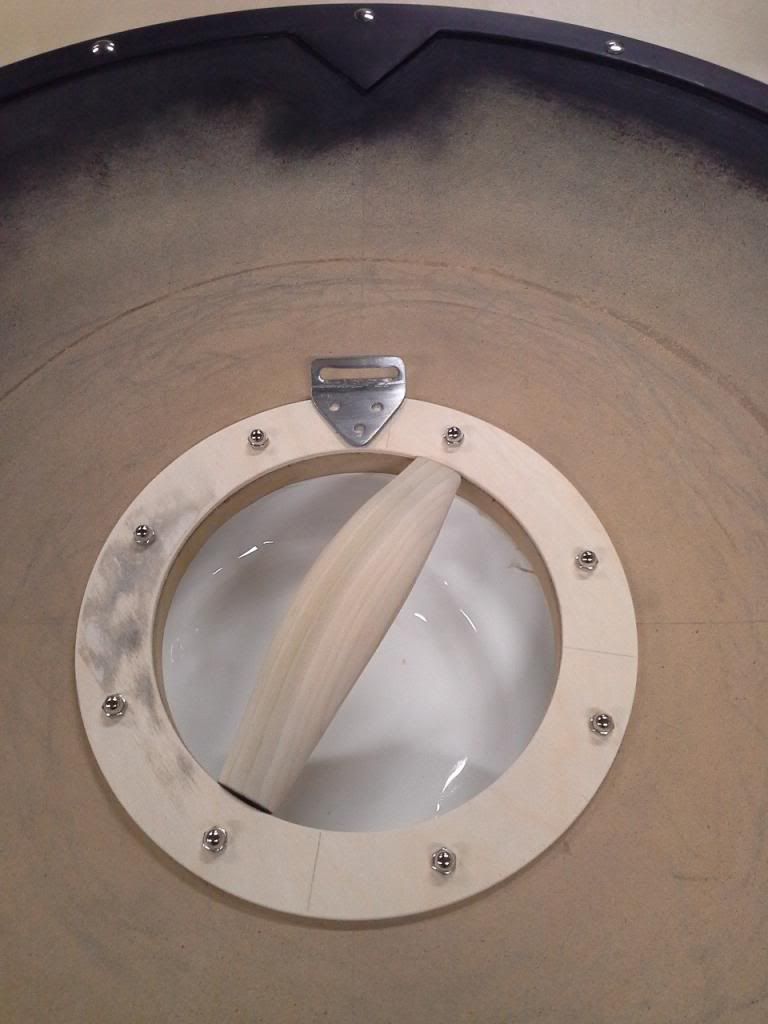
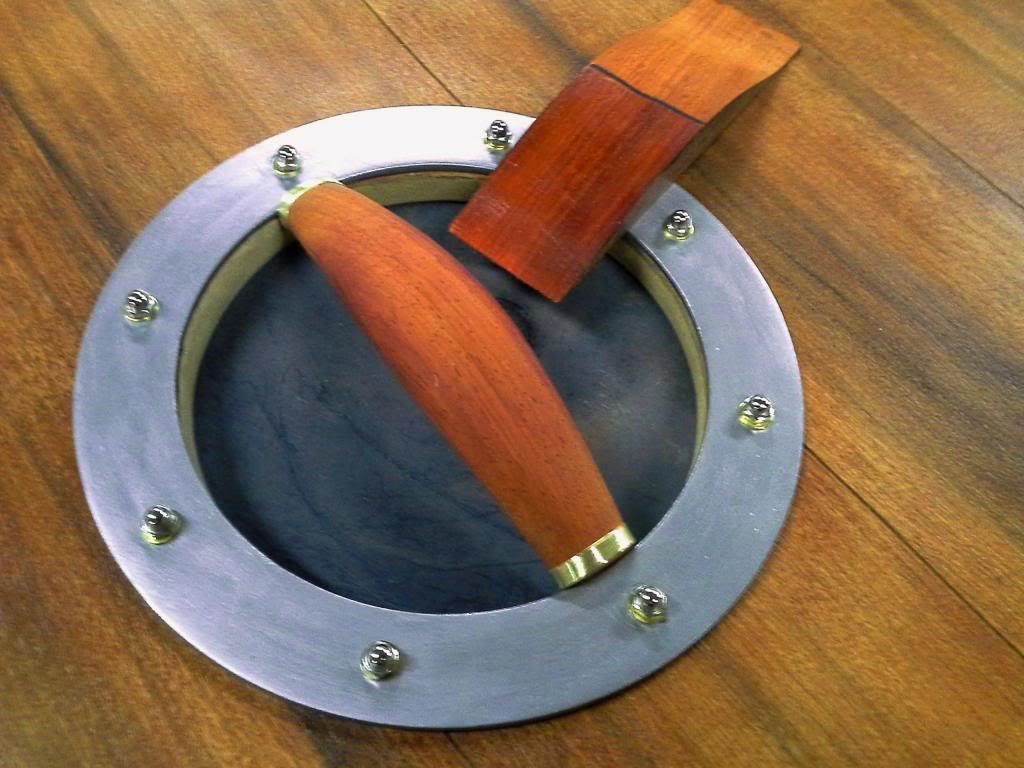
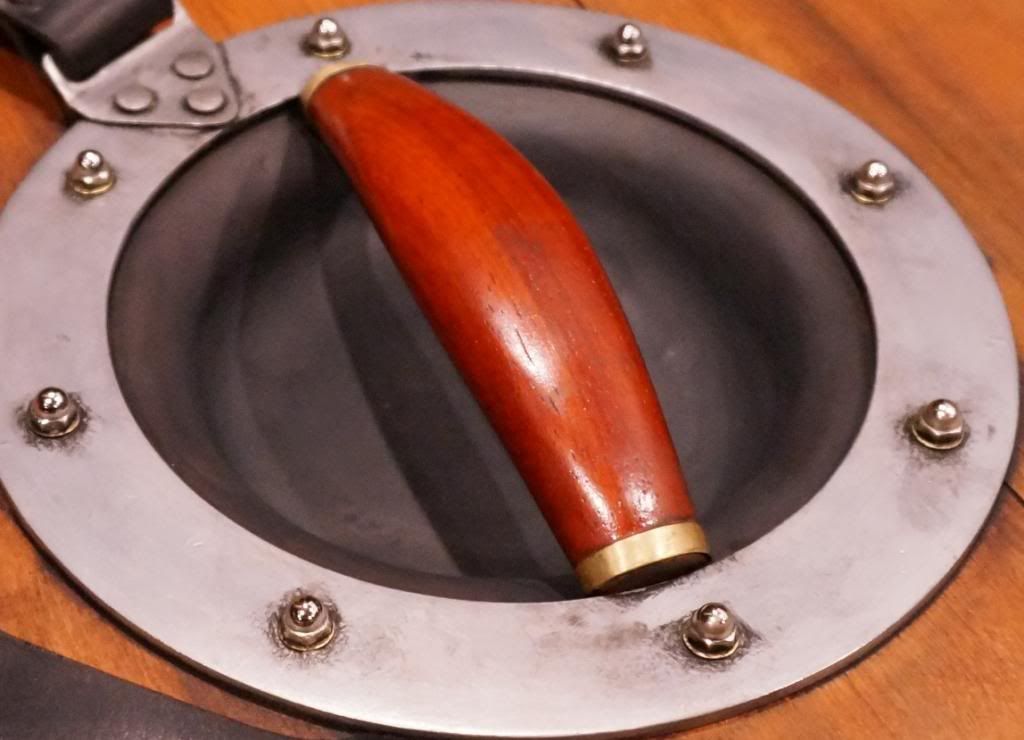
From there I put on the metal rivets (tacks) and sanded, primed and started on the center inner ring and handle. I made the ring out of 1/8 birch ply and the handle was made out of poplar over an 1/8 mild steel bar which I bent and epoxy'd onto and shaped with my belt sander. I also made the metal bracket out of a piece of galvanized hardware and cut and shaped with a bench grinder and Dremel. I also made the other metal bracket and pretty much followed blindsquirrel's directions exactly using threaded stock and nuts to secure, filled in with epoxy.
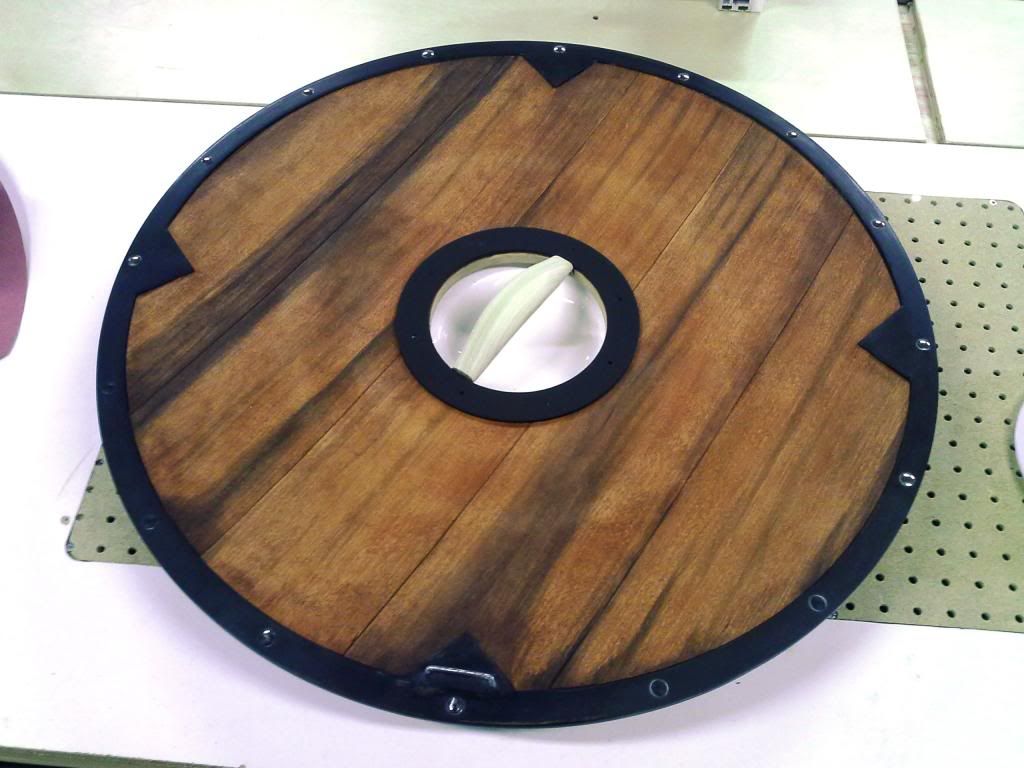
Next I moved on to the veneering. I found some cherry veneer that I though would work pretty good and eventually found some stain that got close (minwax gunstock)
I then took some water color paints and added the darker grain and clear coated with a matte poly.
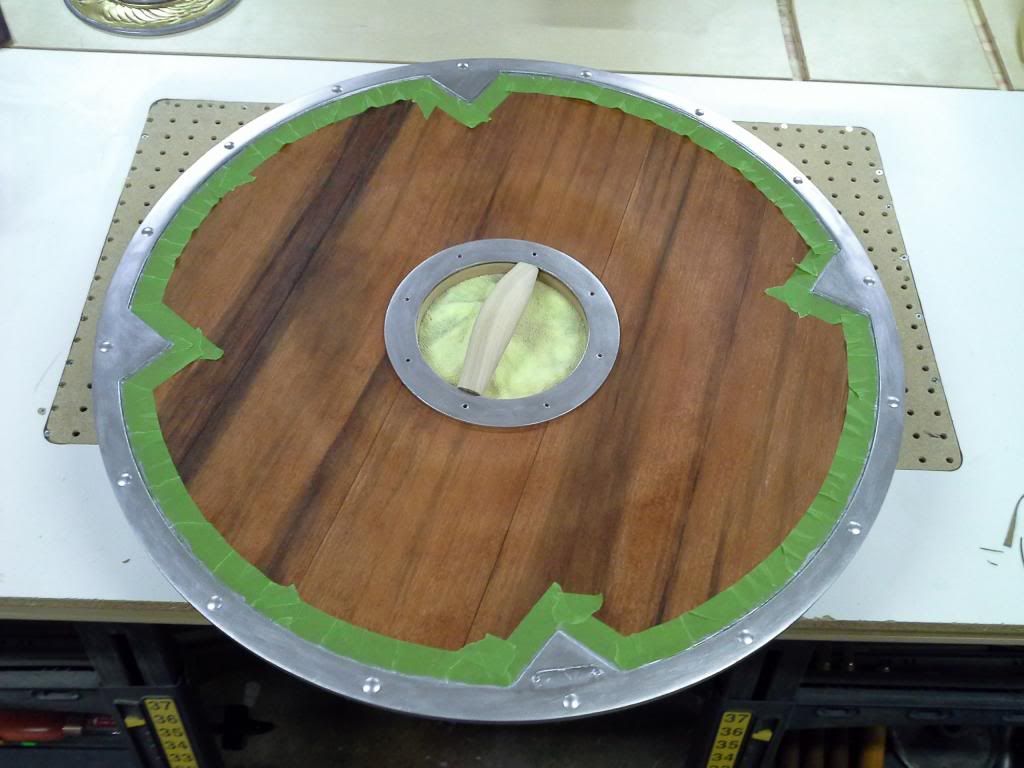
I masked off the inside and painted the outer ring with liquid leaf silver
As I wasn't 100% sure on the handle color or if it was wrapped or not, I tried to do a leather wrap, but due to the convex shape I found it difficult to do so I opted to redo the handle in a different wood (paduk) as once it was finished it would be much closer to the actual prop. I also spent a fair amount of time soldering the brass rings and fitting them on the ends.
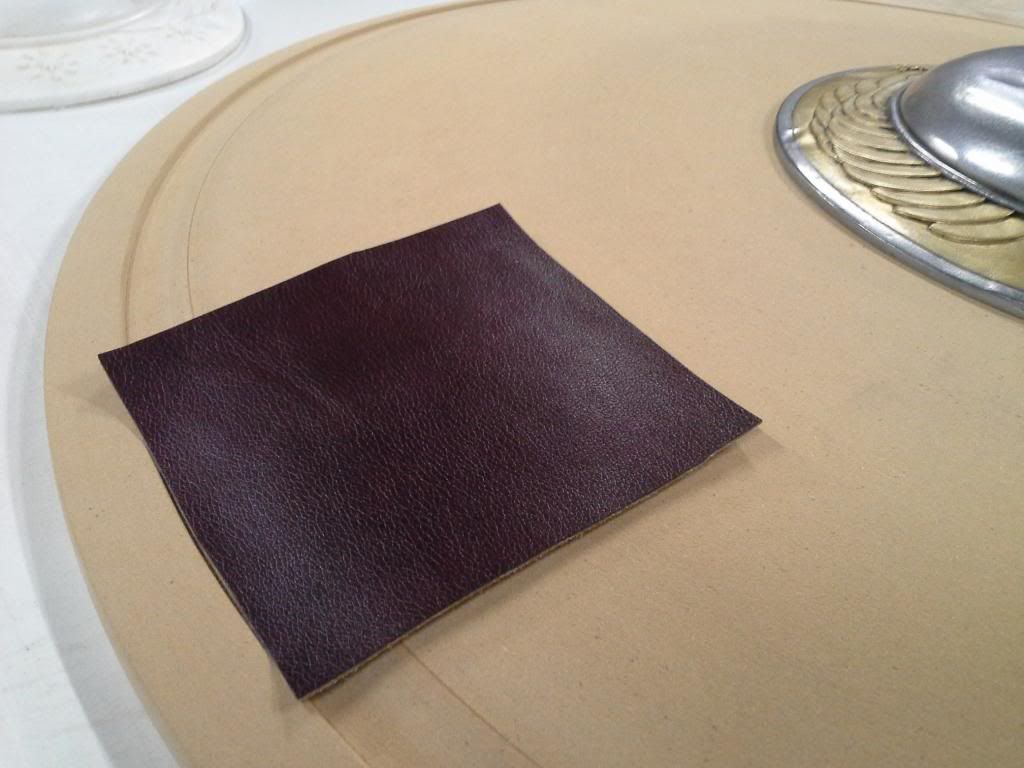
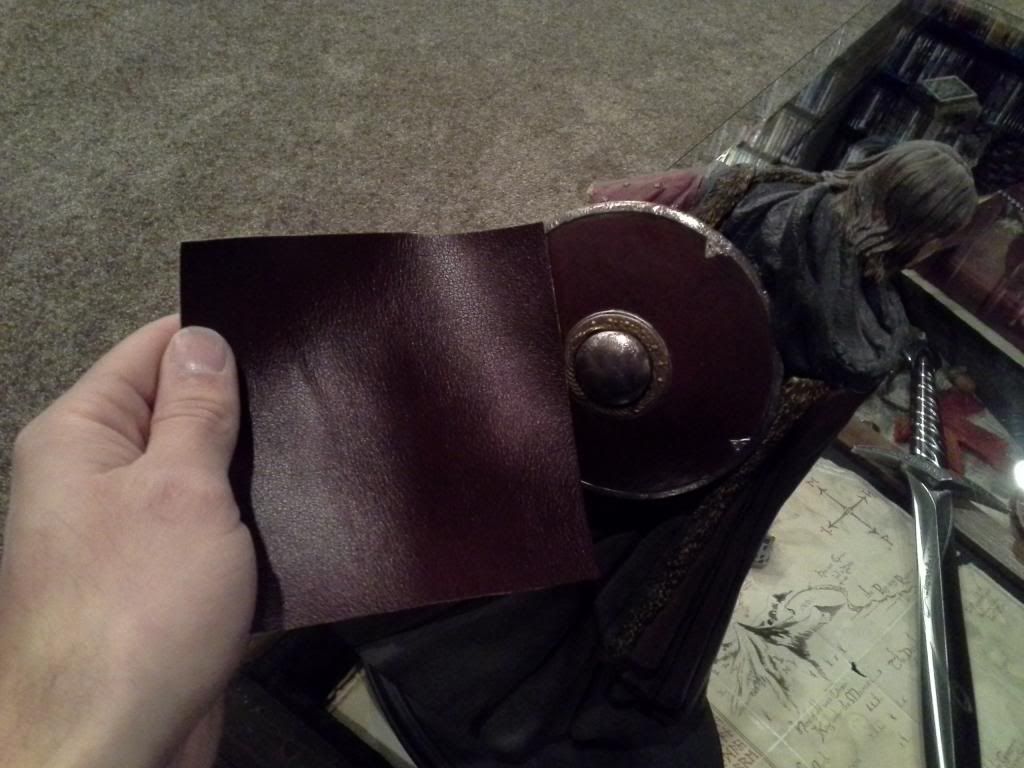
As for the front, I'd been searching for some either leather or vinyl that was the right color. I found what I thought would look good and ordered a sample of recycled leather from ebay. And its pretty close to the pictures as well as the Weta statue.
Next was the difficult task of the applying the leather, I used spay adhesive and trimmed (not easy at all and had a few mishaps, but was able to fix rather well.)

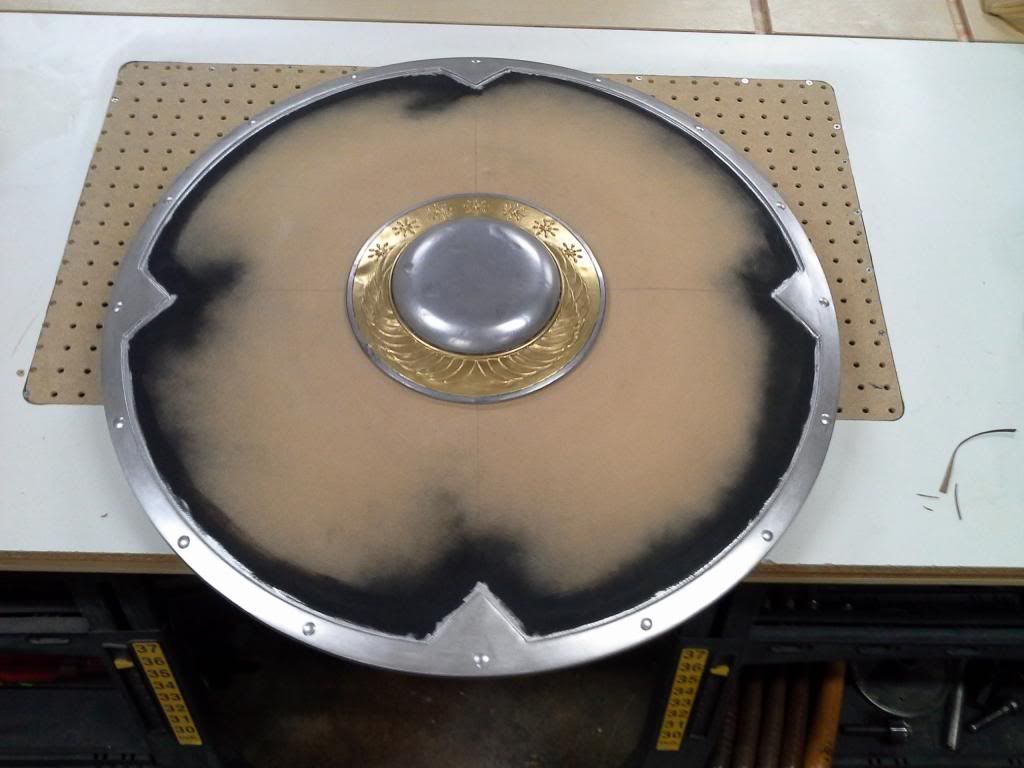
The last piece of fabrication was to fill in between the center bass after it was epoxy'd onto the front and the inner ring on the back. I used expanding foam and Bondo. Sanded and painted charcoal grey.
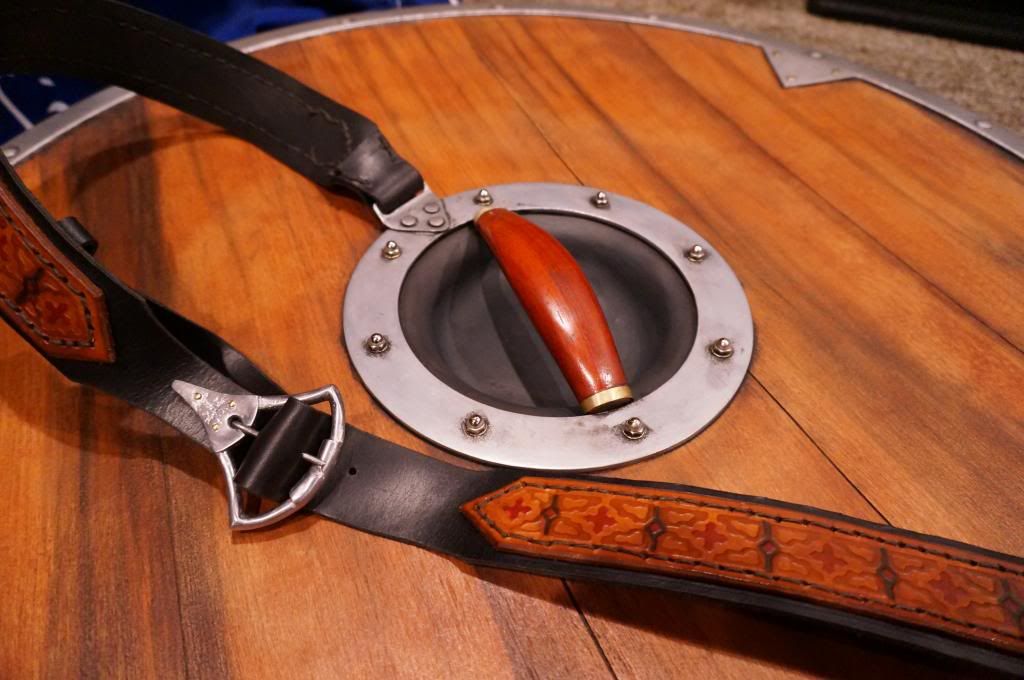
I had the leather strap custom made by a member of the UC collectors forum, Rick Cottontree and he did a fantastic job. He even sculped and cast the buckle. They fit great after being sewed on and really help bring the piece together.
Only thing left was to lightly distress and age (used a antique medium and paint washes) and the final piece.
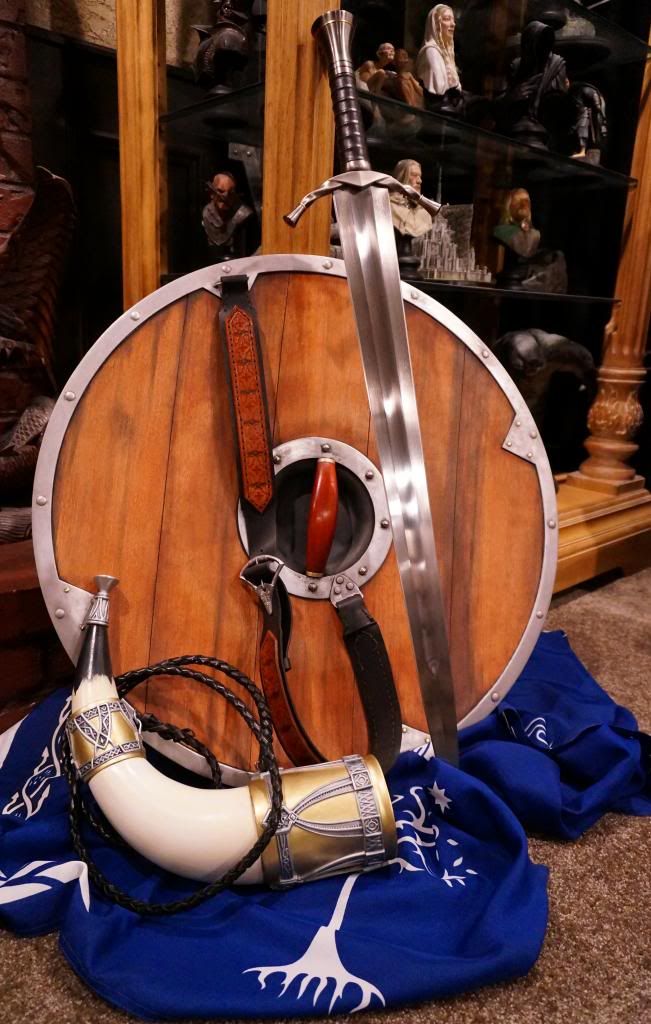
I had planned on making 2 of these together as I bought most of the material one for myself and another for a member on the UC forum. This one will be leaving here shortly. I'm going to be sad to see this one go. I'll be starting on mine spring of next year.
Here is some of the reference pictures I have gotten and some from Kit Rae himself of an actual Weta prop sent to UC and others are from fellow member Arwyniel who actually owns the Weta/UC prop she bought from Kit. Thanks to both!
I first came up with the idea of using a metal snow sled and even bought 2 and cut one to see if it would work.
The dome was too high and caused to many issues with the wood veneering I wanted to do on the inside, so that idea got scrapped. I eventually bought a used wood lathe off craigslist that would be able to do what I wanted. So following Blindsquirrel's build I started with 2 pieces of MDF glued together and rough cut the circle and went to town shaping (I can't even begin to tell you how messy this is to do. My garage had dust and shavings from one end to the other.) and ended up with this
I next started on the 8 triangles that are on the front and back on all 4 sides, I made these with layers of basswood glued and clamped
After that was done I covered the entire outer ring with fiberglass resin as I wanted it hard as its suppose to be metal, but that would have been very difficult as I have limited metal fabricating abilities.
From there I put on the metal rivets (tacks) and sanded, primed and started on the center inner ring and handle. I made the ring out of 1/8 birch ply and the handle was made out of poplar over an 1/8 mild steel bar which I bent and epoxy'd onto and shaped with my belt sander. I also made the metal bracket out of a piece of galvanized hardware and cut and shaped with a bench grinder and Dremel. I also made the other metal bracket and pretty much followed blindsquirrel's directions exactly using threaded stock and nuts to secure, filled in with epoxy.
Next I moved on to the veneering. I found some cherry veneer that I though would work pretty good and eventually found some stain that got close (minwax gunstock)
I then took some water color paints and added the darker grain and clear coated with a matte poly.
I masked off the inside and painted the outer ring with liquid leaf silver
As I wasn't 100% sure on the handle color or if it was wrapped or not, I tried to do a leather wrap, but due to the convex shape I found it difficult to do so I opted to redo the handle in a different wood (paduk) as once it was finished it would be much closer to the actual prop. I also spent a fair amount of time soldering the brass rings and fitting them on the ends.
As for the front, I'd been searching for some either leather or vinyl that was the right color. I found what I thought would look good and ordered a sample of recycled leather from ebay. And its pretty close to the pictures as well as the Weta statue.
Next was the difficult task of the applying the leather, I used spay adhesive and trimmed (not easy at all and had a few mishaps, but was able to fix rather well.)
The last piece of fabrication was to fill in between the center bass after it was epoxy'd onto the front and the inner ring on the back. I used expanding foam and Bondo. Sanded and painted charcoal grey.
I had the leather strap custom made by a member of the UC collectors forum, Rick Cottontree and he did a fantastic job. He even sculped and cast the buckle. They fit great after being sewed on and really help bring the piece together.
Only thing left was to lightly distress and age (used a antique medium and paint washes) and the final piece.
I had planned on making 2 of these together as I bought most of the material one for myself and another for a member on the UC forum. This one will be leaving here shortly. I'm going to be sad to see this one go. I'll be starting on mine spring of next year.
Last edited:
")