Rey's Gun TFA

Pity these are quite expensive, as it may be a good base for the body:

Capture.JPG

Dimensions: 6.25 in x 5.25 in x 2 in
 
With regard to the centre section I saw this the other day and immediately thought it would be a good base for Rey's Blaster. What does everyone else think? The plates at either end look spot on and space inside for electronics and it would be easy to bolt the handle and barrel sections on. I'm definitely getting one or one like it for my cheap build I'm just not sure if it's the right size...
http://www.ebay.co.uk/itm/Aluminum-...263979?hash=item43df9aa9ab:g:3MAAAOSw9N1Vo0rD
 
Last edited by a moderator:
With regard to the centre section I saw this the other day and immediately thought it would be a good base for Rey's Blaster. What does everyone else think? The plates at either end look spot on and space inside for electronics and it would be easy to bolt the handle and barrel sections on. I'm definitely getting one or one like it for my cheap build I'm just not sure if it's the right size...
http://www.ebay.co.uk/itm/Aluminum-...263979?hash=item43df9aa9ab:g:3MAAAOSw9N1Vo0rD

That looks pretty darn good! You could even mill or cut it down to the right size if it's too long. Cool that they've posted the dimensions as well.
 
Last edited by a moderator:
I took this pic last weekend at Hollywood Studios. I agree the grips look backwards, especially next to my toy Mauser from the 70's. The top of the grip on that gun is horizontal. It looks like the action figure Rey gun above and the model in California are the same,as this model so the real prop must be that way.

https://www.instagram.com/p/BAaK_70mAuQ/?taken-by=zxkuqyb

Here is the same pic without the Instagram filter and my 3-D print.

Rey_gun.jpgrey_print.jpg
 
Last edited:
Just finished my Rey Blaster. It is 3d printed on my Robo3d R1. I started with what I thought were the best parts of each of Lilykill and Greggo's models (available on thingiverse.com). Mixed, Matched, Remixed, and added some parts of my own. The main frame is three parts with a working trigger. I used 6-32 and 8-32 button head tamper proof torx machine screws as well as a couple of 3mm cap screws. I still think that it is a little too big and I really want to remodel the grips to be more broomhandle accurate. Let me know what you think. Here are a couple of dimension:
1. Diameter of Barrel - 33mm
2. Total Length - 310mm
3. Frame Width - 13mm (Center 7m, each side 3mm)
4. Body Width - 35mm
IMG_9277.JPGIMG_9272.JPGIMG_9273.JPGIMG_9274.JPG
 
vader1974 Brian what pieces did you use from each model? I printed the lilykill model the other night, and I'm about to reprint using stainless steel PLA, so I might alter a few things before doing so
 
Last edited by a moderator:
@vader1974 Brian what pieces did you use from each model? I printed the lilykill model the other night, and I'm about to reprint using stainless steel PLA, so I might alter a few things before doing so

So, I downloaded both models (Lilykill and Greggo) from thingiverse. Both models are very well done in my opinion and a super big thanks goes out to both of them for sharing!

I started by trying to scale both models to roughly the same size based on my real broomhandle. I ended up scaling the Lilykill by 126.32% and Greggo by 2908.4% (The greggo model was super small for some reason). I think my scaling was still a tad big.

Here is a list of my parts:

Inner Barrel - Lilykill (Made the barrel hollow)
Barrel Shroud - Lilykill (Added a hole for Barrel Setscrews)
Lower Barrel - Greggo (Cut Lower Barrel off of existing front body plate, then added an extension for mounting)
Barrel End Body Plate - Greggo (Flatten exterior surface and added pass through holes for Upper and Lower Barrels)
Top Body Section - Greggo (Cut into two sections to avoid excess supports, inserted a key to reattach, added female key holes for upper barrel and interior frame)
Lower Body Section - Greggo (Added female key holes for lower barrel and interior frame)
Body Side Plates - Greggo (Removed black square section and added an inset area from the back so I could add a good flat piece of plastic)
Frame End Body Plate - Greggo (Added pass through for interior frame)
Main Frame - Greggo (Cut Frame into three parts, 2 Exterior and 1 interior)
Interior Frame (Extended a male key to connect frame to body sections, built a spring loaded sliding trigger, created a void for possible battery compartment under grip)
Exterior Frame (Created a void for possible battery compartment under grip)
Grips - Greggo
Safety Switch - Greggo (I cut the Knurled section off Greggo's model,then modeled the rest)

I started working on Model 2.0 this afternoon.
1. Reduce Size
2. New Grips more accurate to broomhandle (I liked Lilykill's grips better than Greggo, but she had 12 grooves)
3. Add a key to top barrel section to improve alignment
4. Resize holes for screw sizes.
5. Pivot style trigger for interior frame

Kevin - Love to see and hear how the Stainless PLA does!
 
Alright, here's my print in Proto Pasta Stainless Steel PLA. Printed on a Taz 5 at .1mm

The main body has been sanded a little to bring out some shine, and all the other pieces are straight from the printer. This stuff looks fantastic right off the bed as far as print lines go. Once I get everything sanded and polished I'll report back on how well it takes to shining.

Denix grips just for the look. I'll be printing the actual grips in some wood filament

20160118_110049_zpskpfv3q4m.jpg


20160118_110131_zpsw0zupkai.jpg


You can see a slight shine on the body just from sanding, so I'm hoping steel wool and polishing compound will bring out the rest
 
Alright, here's my print in Proto Pasta Stainless Steel PLA. Printed on a Taz 5 at .1mm

The main body has been sanded a little to bring out some shine, and all the other pieces are straight from the printer. This stuff looks fantastic right off the bed as far as print lines go. Once I get everything sanded and polished I'll report back on how well it takes to shining.

Denix grips just for the look. I'll be printing the actual grips in some wood filament

http://i60.photobucket.com/albums/h33/wkevingossett/20160118_110049_zpskpfv3q4m.jpg

http://i60.photobucket.com/albums/h33/wkevingossett/20160118_110131_zpsw0zupkai.jpg

You can see a slight shine on the body just from sanding, so I'm hoping steel wool and polishing compound will bring out the rest
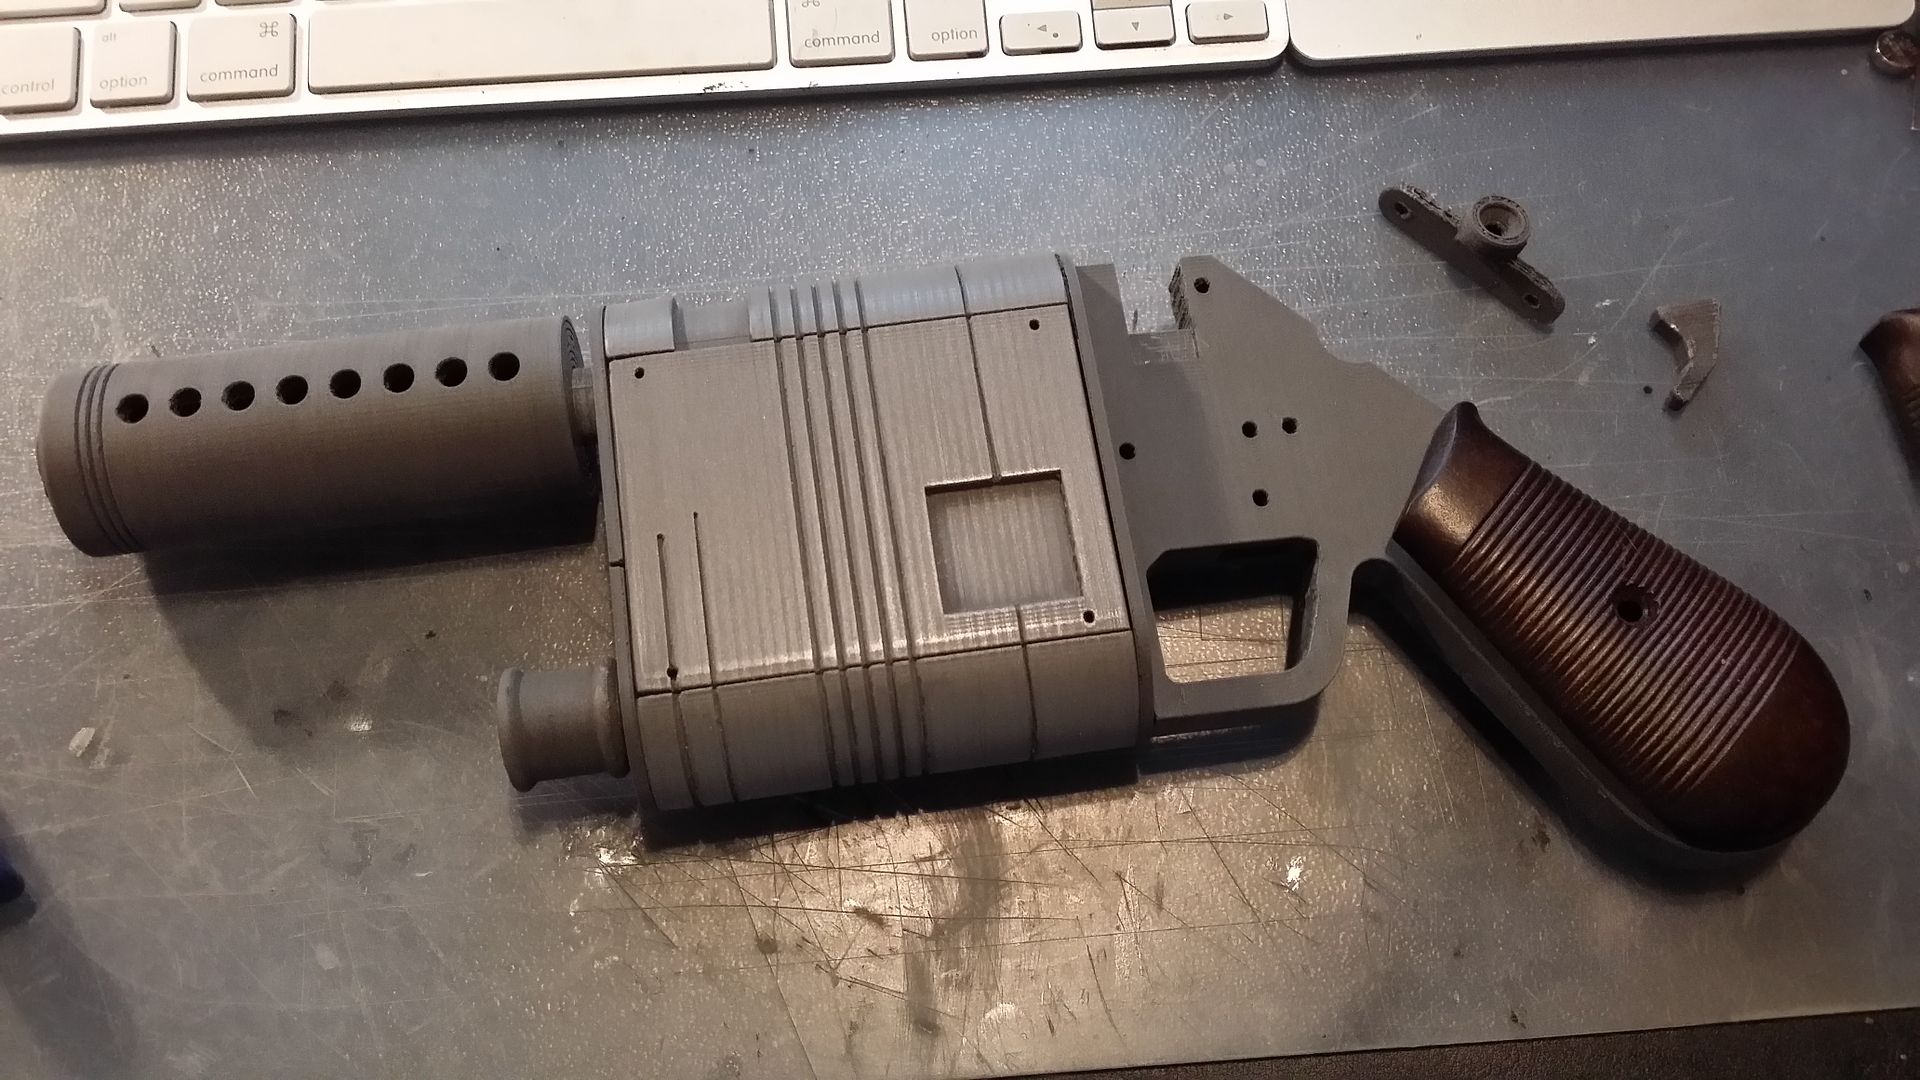
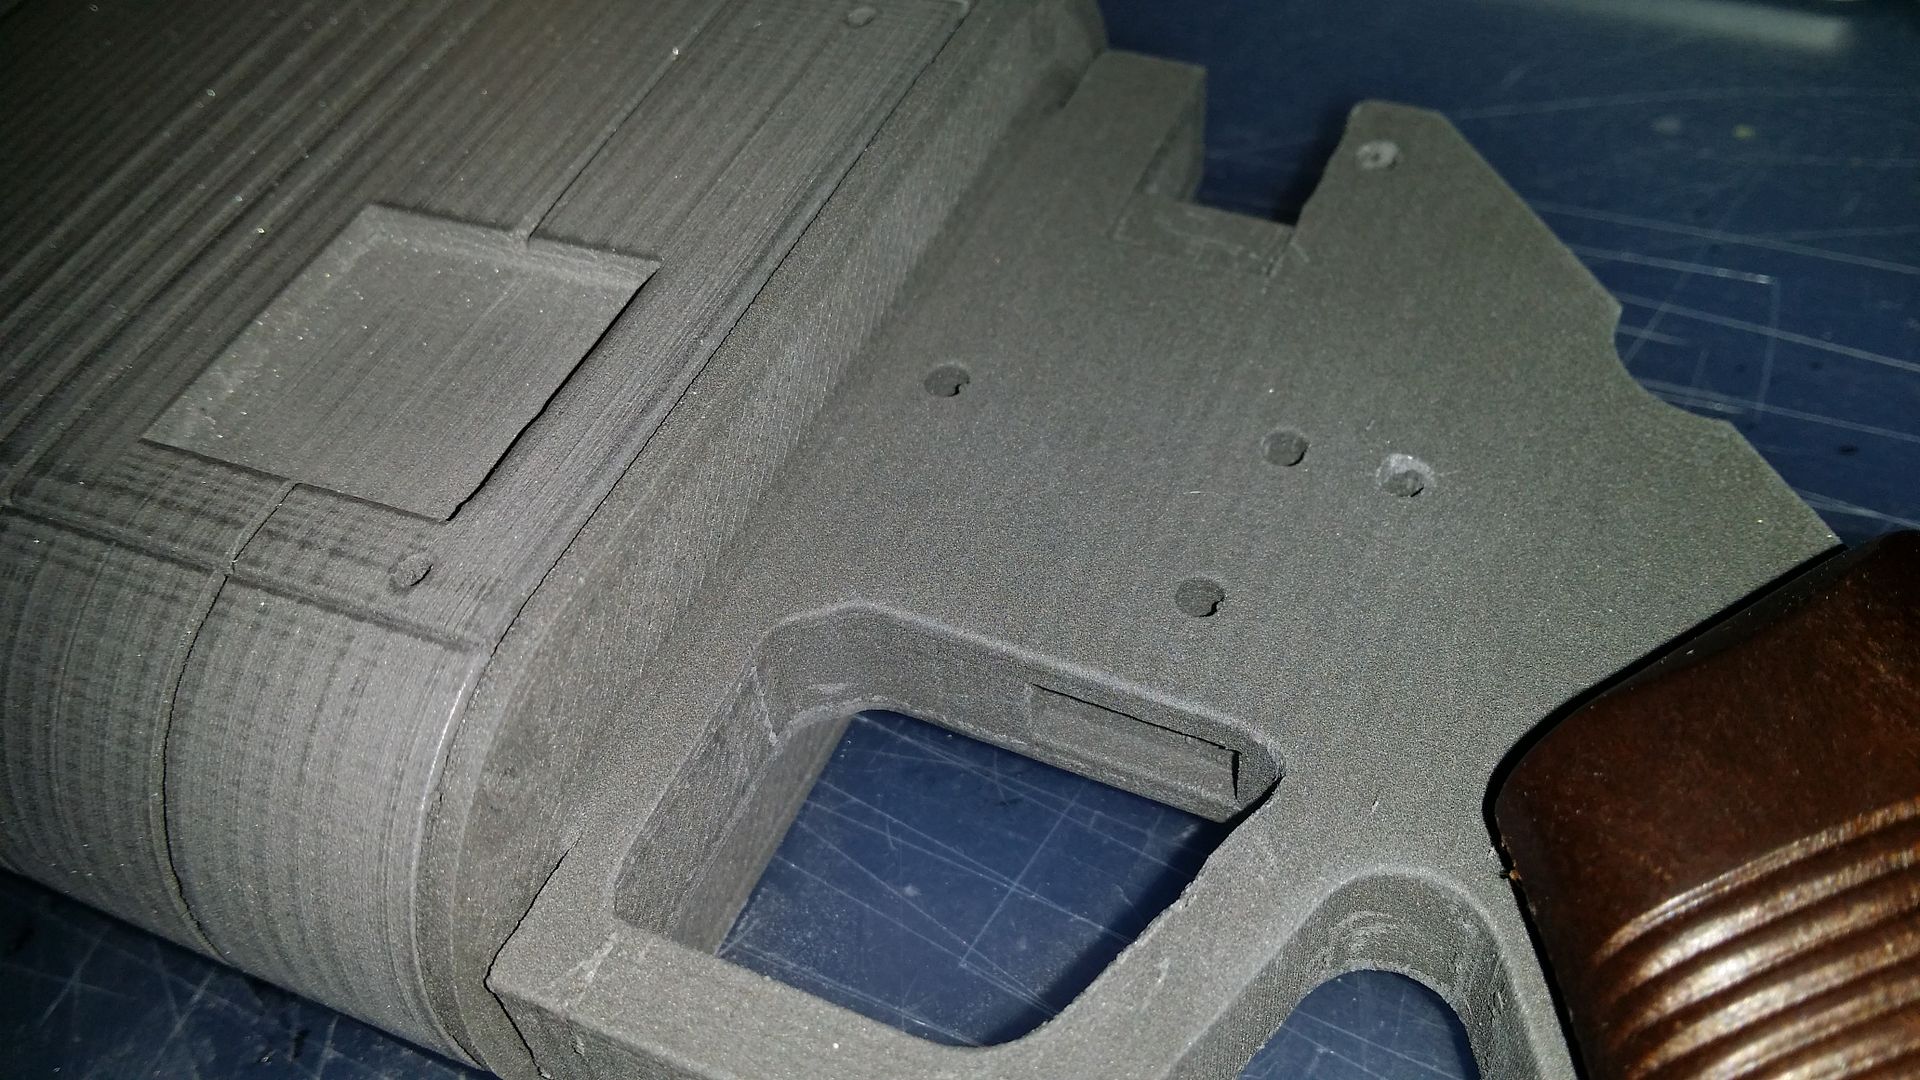
That's gorgeous. I just painted my ABS version with Duplicolor chrome but can't get it to take a clearcoat without dulling to gray. Looking forward to your polishing results.

In the meantime, I'm shopping for these advanced filaments. So much win. Well done

Sent from my XT1585 using Tapatalk
 
This thread is more than 6 years old.

Your message may be considered spam for the following reasons:

  1. This thread hasn't been active in some time. A new post in this thread might not contribute constructively to this discussion after so long.
If you wish to reply despite these issues, check the box below before replying.
Be aware that malicious compliance may result in more severe penalties.
Back
Top