You are using an out of date browser. It may not display this or other websites correctly.
You should upgrade or use an alternative browser.
You should upgrade or use an alternative browser.
New Zvezda Star Destroyer Model kit
- Thread starter Richard Baker
- Start date
JeffBond
Well-Known Member
I've been building the sub-assemblies on mine. Part fit and detail is excellent, except for two tiny forward faces of one of the superstructure which I had to trim to fit. The only other criticism I have of the kit is for the insets in the hull (like the one where the Hammerhead hits the hull in Rogue One), there are just single flat pieces but nothing to cover the actual angled-in, shorter walls on the sides. Those areas are naked, seams and all, so you'll definitely have to find some tiny greeblies to add in there to make it look complete.
Timmythekid
Sr Member
Jeff bond - those tiny little trapezoid that slot in behind the little triangular roofs? If so, yeah, I was going to mention it, but figured it was just me - anyone who has t started building yet, plan to use a slower setting glue with those little pieces - they DO fit, but they're really, really tight, and need to seat perfectly in their groove or the wall beside them won't sit right. Using CA, one of mine went in perfectly, the other was slightly tighter and the glue set up before I could get it seated. Impossible to get it out after.I've been building the sub-assemblies on mine. Part fit and detail is excellent, except for two tiny forward faces of one of the superstructure which I had to trim to fit. The only other criticism I have of the kit is for the insets in the hull (like the one where the Hammerhead hits the hull in Rogue One), there are just single flat pieces but nothing to cover the actual angled-in, shorter walls on the sides. Those areas are naked, seams and all, so you'll definitely have to find some tiny greeblies to add in there to make it look complete.
If you have parts that form a corner, attach them at the same time. That way you can line up the corner joint for a tight fit. If you add them separately, one panel may be too far back (I'm talking fraction of a mm) and may result in the corner pieces not touching/lining up right. I switched to using Model Master liquid cement to get a little more working time.
Timmy, I had that happen on the port side roof. Looking at it looked seated. Looking at it from behind, you could tell it wasn't. Luckily I was able to pop it in place. I made sure the starboard side was fully seated before moving on.
Timmy, I had that happen on the port side roof. Looking at it looked seated. Looking at it from behind, you could tell it wasn't. Luckily I was able to pop it in place. I made sure the starboard side was fully seated before moving on.
Scarecrow Joe
Sr Member
Just drilled out the holes for the engine lights!!
 20170117_182351 by Oscar Baez Soria, on Flickr
 20170117_182333 by Oscar Baez Soria, on Flickr
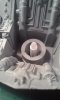
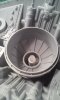
I'm mounting my LEDs in tubes to insert them into the bells.
I assume those are 5mm LEDs? Jeepers that thing is big!
Fett_Ish
Sr Member
I just wanted to let anyone who hasn't received their kit from seller Bentleystanislav on evilbay, that I contacted him to check on mine as it hasn't moved in 3 weeks,his reply, nearly immediately was-
"Hello Tony, I will make a formal request to the head office of Russian Post in Moscow. Do not worry. In recent years, the parcels are not lost. So I put in a request for acceleration of the delivery process. Thank you for contacting. Best Regards. Stanislav"
I hope this reassures anyone who is still waiting. Also shows it never hurts to ask, thank you Google Translate!
Last edited by a moderator:
Robert McLain
Sr Member
Bently is always very quick to respond. I messaged him about tracking info earlier this morning and recieved a reply with the tracking info within minutes. He also apologized for not sending earlier. My kit was just released form Russian customs. Good to see it moving")
Robert
Robert
I'm getting there with my build thread. Running fiber right now. Will take thru this weekend and will then start posting on adding the LEDs themselves. There not much a parts list to light this kit- Fiber optics, Fiber compatible glue, LEDs, wire, on/off switch, power supply, soldering iron/solder, heat shrink tubing, 5mm plastic tubing and a base.
I'll definitely be upscaling my pocket-destroyer lighting module to provide some engine flicker. However I'm unlikely to get hold of the actual SD till Revell rebox them in the springI'm praying that someone puts together a lighting kit or at least a parts list to get one of these lit.
Timmythekid
Sr Member
Engine flicker module would definitely find some love. Been following the Youtube (so far) three part build thread, and it looks like some decent results are to be had with the rest of the lighting by just, in essence, throwing some SMD strips in the hull and letting them bounce around and shine out of a billion 0.5mm holes. Having bought a bunch of resistors and leds, but not yet having tackled actually attempting to put them together in any way, I approve of this message.
Lighting kits are not rocket surgery to make. A few LED's, suitable wire, resistors, and a small breadboard to solder everything to is all you need. Make a parallel circuit, use appropriately sized resistors to balance the load.
Heat shrink the fiber bundles together with the LED's. Not overly difficult.
Parts should cost $10-15 or so. Less fiber, of course.
Heat shrink the fiber bundles together with the LED's. Not overly difficult.
Parts should cost $10-15 or so. Less fiber, of course.
Timmythekid
Sr Member
Lighting kits are not rocket surgery to make. A few LED's, suitable wire, resistors, and a small breadboard to solder everything to is all you need. Make a parallel circuit, use appropriately sized resistors to balance the load.
Heat shrink the fiber bundles together with the LED's. Not overly difficult.
Parts should cost $10-15 or so. Less fiber, of course.
Resistor math is scary.:lol
I buy my LEDs in bulk (50) from China off eBay, pre-wired with resistors already soldered for your choice of power supply. I buy pre-wired 9V LEDs, 50 for under $6. Can't get much simpler than that.
And just a note if anyone suspects the quality of these, I ran my Salzo Galactica for 5 months in a row, non stop, after Wonderfest. Still going strong!
And just a note if anyone suspects the quality of these, I ran my Salzo Galactica for 5 months in a row, non stop, after Wonderfest. Still going strong!
Similar threads
- Replies
- 14
- Views
- 2,402
- Replies
- 6
- Views
- 625
- Replies
- 26
- Views
- 1,795