Doctor who classic Earthshocks cyberman helmet in foam

Uk cave man

Active Member
Hi all, I've been thinking for sometime to try my hand at Foam prop building and also have always wanted a classic cyberman helmet. But have never been able to afford one In fiber glass when one comes up on eBay. So I thought I'd combine the two and try the classic style in foam, I'd seen threads on the new style helmets but no classic yet.


So I grabed A roll of brown packing paper and started drawing out my template. When I had one I was happy with I cut out all the parts and laid them out on a yoga mate that was 5mm EVA foam. Outlined them all with a marker pen and then cut them out. I used 5mm foam and not the 10mm as I felt it would mouled and bend better. That and I could get it a lot cheeper.


image.jpgimage.jpg


Then I started work in the side parts which I call the ears. I needed a angle on the edges So on the backs l marked 5mm from the edge but then thought that was too much so I marked again 2.5 to 3mm from edge. Then with a sharp knife and very carefully cut away the back edge corner.


image.jpgimage.jpgimage.jpg


Once that was done on both sides i glued on the smaller ear middles why I could still apply some pressure to it Then I started adding the side parts around the new cut edge giving me the right shape I was after and then repeated for the sceond one.


image.jpgimage.jpgimage.jpgimage.jpg


I then made the top which was simply two curve parts and a straight part glued round the two curves.


image.jpg


Now it was time to add the ear parts to that, but becouse they now have a angled edge (Which we want) I needed to cut a small part off the edge to keep then straight. The two ears are then glued on the top for it to start taking shape.


image.jpgimage.jpgimage.jpgimage.jpgimage.jpg

I then added the forehead part and becouse of the angled edges If the ears it gives the required bend for the face. Then glued that to the top to give the forehead a opening at the top.
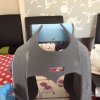
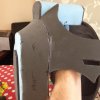
image.jpgimage.jpgimage.jpg
 
Last edited:
Next using scrap lengths of the foam (I don't throw away any of the foam when I cut the parts out as I'll need odd bits for the details.) I glue a long bit down each side of where the face will be. This is becouse the face parts start behind the last and work forward. So once I was ready I used a heat gun on the part for the eyes and bent it into the shape that was needed. Then started by glueing it in place From behind the forehead and worked its way to front. I repeated for the other side then glued it to the forehead part.


image.jpgimage.jpgimage.jpgimage.jpgimage.jpg


Before I completed the rest of the face as I could still get my hand inside easy I started the back of the helmet. I'd cut this out as one part with slit in the top to help with the curve. Having said that I still got the heat gun on it and using one of my daughters toy balls Worked a curve into it that I was more happier with.


image.jpgimage.jpg


I then glued this to the back edges of the ear parts. I worked my way down but as I started to get to the bottom I slowly started to move from glueing the back panel to the edges to the front of the ear sections. This made the neck part flair out a little like I wanted. Of course then repeated for the other side And then glued the top curve to the main top section.


image.jpgimage.jpgimage.jpgimage.jpgimage.jpg


As I could still get my hands easy inside the helmet I Worked on the forehead opening. I got another scrap lenth of foam about 2cm wide and glued it around the inside edge of the opening and the main top part. Then with a larger scrap foam to cover the opening to seal it.


image.jpgimage.jpgimage.jpg
 
With this now done I could continue with the rest of the face. Taking the next part to go in I used the heat gun again to bend the top lip part one way and then the parts for round the neck the opposite way to make the flaired neck. Once this was ready I glued that in place, again starting from behind the eye party and working forward again. As with the back panel I moved from glueing it to the edge to the outer side to join up with the back neck part. Again I did the other side and then glued it to the eyes section. (Yes I'm repeating myself but a lot of this is repeating the steps.)

image.jpgimage.jpgimage.jpgimage.jpg


To compleat the neck the part for that and with the heat gun put a curve in it forwards the opposite way it needs to go so that when it is glued into place it makes a better curve of the neck line.


View attachment 444103View attachment 444104


For the mouth I used the part Of foam that was cut out from the template, heated and curved over the ball again. I then put it into place from the inside of the helmet and glued it in place. I then used a latex filler mix to fill in the parts of the face that had steps when they should be graded. The latex filler works as it bonds to the foam, flexes a bit with the movement of the foam and also can be sanded like a normal filler to get the required shape.

image.jpgimage.jpg
 
Next I made up the part to go in the forehead opening, added the details before glueing it in place. In hindsight I should have left this part off until after the all the helmet gets coated ready for painting. Feel now that would have been easyer. Also made up the parts to go in the ears to hold the handles and put them in the right place all very simple.


View attachment 444125View attachment 444126View attachment 444127View attachment 444128


Using more scrap foam and a very sharp knife I cut small parts of foam at an angle to make the pips that go on the neck. And then glued them in the right places. I also cut out the eyebrow bits and glued them in place too.


View attachment 444129View attachment 444130View attachment 444131View attachment 444135


It was at this point I discovered I had missed something very important at the template stage. I had missed the sections on the side of the ears that hold the tubing when the helmet is finished. So I marked the area and with my sharp knife Cut the parts away. Then with some triangles of scrap foam (told you they come in handy) and bent them tightly before Glueing in behind the new opening. Problem solved (ish)


View attachment 444133View attachment 444132View attachment 444134


Then I used some 2.5/3mm thick foam and cut it into 5mm strips and started glueing them carefully round to ear sections for the detail. If you can't find that thickness of foam just use the 5mm foam and cut it in 2.5/3mm strips and turn them on the sides.

View attachment 444139View attachment 444138View attachment 444137View attachment 444136View attachment 444140
 
Last edited:
Once all the details have been added to the helmet I lightly run the heat gun over the whole helmet to seal in the surface of the foam. I then used PVA to coat the helmet ready for painting. There are other things you can coat the foam with but they cost a lot more. So the PVA is the cheeper option but the coating takes longer. I mixed up to batches of it in sealable tubs and mixed in a small about of my daughters poster paints. One I added blue to it and the other was red, tho it came out more pink as it was only a small about. This wasn't enough to colour the helmet just add a little tint to it, but this was so that with each coat I could see where I had and hadn't been Switching between each coat. The PVA will Take time as each layer will need to dry. I recommend applying thin coats each time coz If you use thick coats it will run off the helmet before it drys and will take you longer and use more PVA. I used 6 coats of PVA on the helmet 3 red and 3 blue


image.jpgimage.jpg


While the helmet was being coated and drying I worked on the handles. I cut some PVC pipping to the right lengths (I measured all to the helmet for right fit) and used some pipe bends and fitted them together. When I cut the pipes I cleaned up the ends with sandpaper And lightly sanded the outside of the pipes to remove the shiny surface and help take the paint. I had some foam matting that had a plastic backing on it, I used this to cover the bottom part and a small but at the top. I glued them onto the Handles with the plastic facing out. I then used a black PlastiKoat spray paint to make them black as I'm going for a cyber leader helmet. Once they was dry and I was happy with the coverage I cut strips of plumbers sliver foil tape to add the details to them.


image.jpgimage.jpgimage.jpgimage.jpgimage.jpgimage.jpg


Once the coating on the helmet was where I was happy with it I then spray coated the whole helmet in a plastic primer from the hard wear shop. Why you may ask have I just coated it in PVA and then used primer. The primer helps the final coat of paint to look Good and have a pro finish. You can of course just spray paint after the PVA but you can't apply the primer direct to the foam. So I once the primer coat was good I sprayed the helmet again with a Metallic silver PlastiKoat paint. I used two thin coats of this, the coverage and finish was fantastic.


image.jpgimage.jpg


Once the silver paint was dried fully it was just a case of finishing off. I glue in some wire mesh behind the eyes and then the handles in place, and last I just added some clear tubing to the sides to finish off.


image.jpgimage.jpgimage.jpg


And there you have it. One classic Cyberman helmet and a fraction of the price and lots of fun building.


How just got to think of my next project. Maybe a different style cyberman? Build up a full set.
 
That is Awesome work, do you have copies of your patterns available as I would so want to make one of these. It dose all seem to be about the new Cybermen nowadays people tend to forget the classics :(
 
That is Awesome work, do you have copies of your patterns available as I would so want to make one of these. It dose all seem to be about the new Cybermen nowadays people tend to forget the classics :(

I started this project with pencil on paper and not on the computer for once. In the middle of another project but when I get some time I'll move the plans to computer and post them up. Glad you like it.
 
Excellent I look forward to it.

Also where do you get your foam from? I usually use the big jigsaw mats but I have a feeling they maybe a bit too thick for this project.
 
Also where do you get your foam from? I usually use the big jigsaw mats but I have a feeling they maybe a bit too thick for this project.

yes the jigsaw mats are normally 10mm thick you could prob do it with that if it was display only you'd have to use the heat gun a lot. If you plan on wearing it I'd use the 5mm foam its easyer to work with too. You can get the 5mm EVA foam from craft shops or order large rolls online. I found a shop that had EVA yoga mats cheep and I got some of them to work with. Also camping mats can work well but the finishing will need more of the coats (I used PVA but you can get other products) as the surface can not be as good. Hope that helps.
 
I enjoy the build, but the lower part of the mouth was clear, right? Only the nerds will know, but I figure a soda bottle or something like that would work. A nice build, unless you come across a raston warrior robot...doh!
 
I enjoy the build, but the lower part of the mouth was clear, right? Only the nerds will know, but I figure a soda bottle or something like that would work. A nice build, unless you come across a raston warrior robot...doh!

They were indeed! I couldn't remember when that started but found some clips from that episode. Clear chin piece with actors chin/mouth painted silver heh. good times. Though it is hard to beet the 'tomb of the cyber men' magic marker eyes. ooooo scary.

cybermantomb.jpg
 
I sorta liked the goth cybermen. I liked it when they had gun on their heads as well, otherwise you could just long range kite 'em in a fite
 
This is incredible. I've made the occasional thing out of foam, and it never comes out like that! It's a very impressive piece. That happens to be my favorite Cyberman design. I've always wanted to make one, but never got up the nerve to try. Awesome
 
I enjoy the build, but the lower part of the mouth was clear, right? Only the nerds will know, but I figure a soda bottle or something like that would work. A nice build, unless you come across a raston warrior robot...doh!

Yes it should be clear but was mainly built for display but if I did another one I'll do it clear.

- - - Updated - - -

This is incredible. I've made the occasional thing out of foam, and it never comes out like that! It's a very impressive piece. That happens to be my favorite Cyberman design. I've always wanted to make one, but never got up the nerve to try. Awesome

Thank you
 
This thread is more than 7 years old.

Your message may be considered spam for the following reasons:

  1. This thread hasn't been active in some time. A new post in this thread might not contribute constructively to this discussion after so long.
If you wish to reply despite these issues, check the box below before replying.
Be aware that malicious compliance may result in more severe penalties.
Back
Top