Stapleton Tricorder (Mark VII) Question

13doctorwho

Master Member
RPF PREMIUM MEMBER
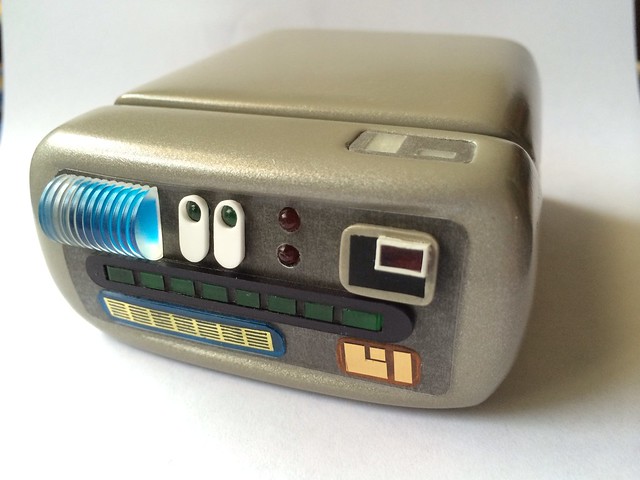
I had a question about painting the Tricorder. I have primed and painted the body including misting it with a metallic paint. I need to paint the sensor head next. My question is do I clear coat it before or after I apply the graphics? It would seal the graphics and act as a kind of glue to really connect them to the body. I'm just not sure how the ink on the prints might react. So I'm looking for opinions. What should I do?
 
Last edited:
Clearcoat before graphics. You don't know what will happen to the graphics with the clearcoat (it may make the ink run, or the clear could bead up if they're already laminated, etc). Even if that were guaranteed safe, you'd be in big trouble if anything goes wrong with the clear on the body and need to do any repainting.

Also, rather than painting it, here's a graphic that you can print on sticker paper and cut out to make a scanner array label. Cut the blue/yellow windows from the paper label before covering it with Con-tact shelf liner, and then cut the remaining holes through the paper/shelf liner. It's sized for the Stapleton Mk VII (need to round the outer corners of the sticker as well).


Thank you so much! That is kind of what I was thinking. Thank you for the graphic as well. That would be easier and more accurate looking than paint. The pictures of screen used ones that have been auctioned appear to have a sticker on the sensor head as well. Did you paint black between the "LEDs" on the center scanning bar. It's a good idea, it makes them look more like individual LEDs like the originals.

Again, thank you for all your advice.

Thanks! Glad to be of help. Yeah, I added some paint in the grooves of the resin light bar piece, and to the red LED piece to make it look more like reference pictures.

Another little tip is to add something to block the light between the individual elements of the scanner head - the surface mount LEDs are very bright and you don't want them bleeding into adjacent lenses. I used self adhesive foam sheets to make a sort of gasket:

 
This thread is more than 8 years old.

Your message may be considered spam for the following reasons:

  1. This thread hasn't been active in some time. A new post in this thread might not contribute constructively to this discussion after so long.
If you wish to reply despite these issues, check the box below before replying.
Be aware that malicious compliance may result in more severe penalties.
Back
Top