I am following the "industrial" version of the investment casting process mixed with some elements of jewelry-making and sclupture/art casting:
http://www.ransom-randolph.com/ceramic-shell.html
http://www.ransom-randolph.com/cs-intro-to-ceramic-shell-casting.html
https://www.youtube.com/watch?v=XJsAFLM0RWk
https://www.youtube.com/watch?v=wMzSS3BnMLs
https://www.youtube.com/watch?v=7mkrY4i3ODU
Going to try Aluminum and Zamack as far as metal:
http://www.budgetcastingsupply.com/category-s/1857.htm
https://www.amazon.com/TEMCo-Alumin...qid=1483330442&sr=8-3&keywords=aluminum+stock
And machinable wax (extra hard so it doesn't break when parts with thin edges are being demolded):
https://www.amazon.com/Grizzly-H903...qid=1483330484&sr=8-1&keywords=machinable+wax

Lastly, the silicone (I get 3 boxes of 1-gallon unit every few weeks):
https://www.smooth-on.com/products/dragon-skin-10-medium/
The basic process is following (to be documented on my website and Github wiki in more detail):
- Create a box mold for the model to be cast. I use wood and children's modeling clay because it holds together well enough for silicone but makes it easy to break apart the box to take out the silicone mold. I usually recover both the wood and the modeling clay, and clean wood with turpentine before using it for another box.
- Drill holes in the box and tap them, to hold the model inside the box. Silicone causes them to float to the surface if not secured, or rotate in ways you don't want.
- Put Vaseline on every inside surface of the molding box so it's easy to demold, as silicone does not stick to it.
- Soften brown micro-crystalline sculpture wax and use it to make sprues for the plastic model. These sprues will create channels in silicone for the wax to go through once the plastic model is removed. Flare the ends of the sprues to create a funnel for the wax to go in:
https://www.amazon.com/Sculpture-Ho...r=8-1&keywords=microcrystalline+sculpture+wax
- Place the model in the box and secure with screws, using threaded holes made earlier.
- Spray model with silicone release agent.
- Pour silicone parts A and B into degassing chamber that's on top of a shipping scale. I measure 1:1 precisely with the digital read-out:
http://www.bestvaluevacs.com/1-gallon-flat-stainless-steel-w-3-cfm-single-stage-pump.html
https://www.amazon.com/Weighmax-282...id=1483331159&sr=1-12&keywords=shipping+scale
- Mix silicone for 3 minutes, as thorough as possible. Use only vinyl gloves as silicone will react badly to other materials.
- Seal degassing chamber and degass for 5 minutes while vibrating the table the vibration tumbler:
http://www.harborfreight.com/5-lb-metal-vibrator-tumbler-67617.html
- Pour silicone into mold after degassing, and leave for the night with the tumbler running.
- Break apart the box, clean all surfaces with paint thinner, and recover both wood and modeling clay for the next box.
- Clean the outside of the silicone mold with goo-gone or paint thinner.
- De-mold the model inside using X-acto knife, taking care to key the mold using zizag cuts.
- Recover & clean the model, and also recover the brown wax from the sprues to use for next cast.
- Melt wax in a wax melting pot:
http://www.ebay.com/itm/PRESTO-WAX-...069171?hash=item4d03d98673:g:gLAAAOSwCGVYBmNR
- Pour wax into silicone mold, using holes on the top where the sprues ended. If the ends of the sprues were flared, they will create several small funnels at the top where wax can be poured. This is for one-part molds, which most of mine are.
- Place the silicone mold with wax still liquid into a degassing oven, already pre-heated to 480 F. Degass the wax while liquid at 29 Hg to get the air bubbles out.
- After 10 minutes of degassing, take the silicone mold out and set to cool. Wax takes about 20-30 minutes to cool enough to prevent deform. Take the wax model out of the silicone mold.
- Soften sculpting wax and use to make sprues, this time for the wax model.
- When completely cooled, wash the wax positive with de-ionized water.
- Prepare primary slurry by mixing it with a dual propeller mixer for 10-15 minutes.
- Measure slurry viscosity with #4 Zahn Cup. If contents of the cup leak out in less than 15 seconds, add de-ionized water to slurry.
- Dip wax positive in primary slurry, and sift Zircon sand on it.
- Set to dry for the night, and repeat the primary coat 2 more times.
- Propeller-mix secondary slurry. Dip wax positive in secondary slurry, and sift sand "A" on it (larger grit). Set to dry for the night, and repeat 2 more times.
- Propeller-mix secondary slurry. Dip wax positive in secondary slurry, and sift sand "B" on it (largest grit). Set to dry for the night, and repeat 2 more times.
- Drill through the sprue ends to open the shell to let wax burn out.
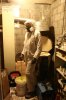
- Place the ceramic coated wax model into burn-out oven, already preheated. Slowly take up to 400-600 F and wait until wax melts out through the sprues.
- After wax melts out, fire the empty shell at 1000 F for the whole night.
- Put the empty shell into a metal or wooden box packed with any cheap sand (just for safety) and pour metal into the main sprue.
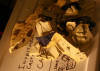
In my case, repeat for each of the 300 exoskeleton parts. Of course I will have to do a batch of 5-10 parts each week, since the entire process takes about 8 days. Rough estimate of 1.3 years to finish casting
")