Walking Dead - Daryl Dixon's New Bike Replica Build

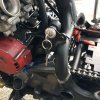
Got some of the wiring done and finished up the seat as far as shaping goes.. looks like the place where I put the electronics is going to be a good place.. from what I can tell the main harness will go around the right side of the frame.. Will have to extend a hot line directly to the starter relay but I should have that mounted way down low in the am behind the kick starter..

I thought there would be more harness modifications but it looks like i'll be able to either double it over under the tank or just sever the harness and put in a quick disconnect for the front end.. been looking at all kinds of connector but radio shack had some basic 9 pin male and female and also 12 pins for cheap cheap... will probably just use them and put some dielectric on the pins and some liquid electric tape in the back and heat shring the whole connector.. It'll be cleaner and will come apart very easily down the road...

Talked to a local today about covering my seat, I've done all the work besides sewing, I had a heart attack when the guy said 400 ish.. no sir.. not happening.. going to try another cat out of town tomorrow and see what he can do.. and give the in frame bag a go myself.. got some cool 'design' paper (can use butcher paper and a stapler just as easily though)

unspecifiedIYRHYFZ0.jpgunspecifiedQRW3F8KU.jpg
 
Do you have a part number for the rear shocks, progressive suspension are not being particularly helpful

Yeah, I actually got kinda po'd at those guys when I spoke to them.. are you aware they will have to be modified? uh no, they shouldn't have to be modified.. then tells me that I have a different ends on the swing arm than what comes on the shock.. uh.. no.. your computer is obviously wrong.. I'm just happy they turned out being the right ones!

They are 13.5 progressive 970-1008's..
 
Wow!! You guys spared no expense getting these bike screen accurate! Those shocks cost almost as much as my entire nighthawk!! I know they're worth the price but dang!

- - - Updated - - -

Got some of the wiring done and finished up the seat as far as shaping goes.. looks like the place where I put the electronics is going to be a good place.. from what I can tell the main harness will go around the right side of the frame.. Will have to extend a hot line directly to the starter relay but I should have that mounted way down low in the am behind the kick starter..

I thought there would be more harness modifications but it looks like i'll be able to either double it over under the tank or just sever the harness and put in a quick disconnect for the front end.. been looking at all kinds of connector but radio shack had some basic 9 pin male and female and also 12 pins for cheap cheap... will probably just use them and put some dielectric on the pins and some liquid electric tape in the back and heat shring the whole connector.. It'll be cleaner and will come apart very easily down the road...

Talked to a local today about covering my seat, I've done all the work besides sewing, I had a heart attack when the guy said 400 ish.. no sir.. not happening.. going to try another cat out of town tomorrow and see what he can do.. and give the in frame bag a go myself.. got some cool 'design' paper (can use butcher paper and a stapler just as easily though)

View attachment 655503View attachment 655504

Howd it go with the other guy!? $400 is crazy! Might be cheaper to go take a sewing class and diy that sucker!
 
Damn Ragtop, you are making me look really bad right now. Really digging the progress and your bike looks great, keeps me motivated on my build.

For everyone else, I will try and get my build sheet that I posted earlier in the thread with part numbers and prices updated and post here. This should help out with alot of the spcific part questions.

I should be posting some progress soon, it's almost time to paint the frame. :)
 
Thank bro, I'm just wanting to ride this beast! Got an email today that Emerald Comicon is in March this next year!

Will tell you this.. the wiring harness is going to take some time and I would definitely get your seat pan squared away as soon as you can! I've been looking high and low for someone to do the seat and found a cat today that seems like he knows what he's talking about and is reasonable priced, said $100 and I told him i'll give hime $200 if he gets it done yesterday and accurate to the stitch.. got my fingers crossed!

Wiring harness is progressing very slowly.. doing the over carb/under tank section now.. repositioned the rectifier to the bracket at the rear of the bike underneath.. happy with the profile so far! but man its tedious! Love these type of enviro splices.. little slower to put on but they crimp tight and they seal up with a heat gun... hoping to work through the night tonight to get the harness right... looking for a good place to mount the starter relay still!

unspecifiedCDJGEO92.jpgunspecifiedE9S1Y3UY.jpgunspecifiedDIL6YZ3H.jpg
 
Last edited:
Awesome!! I'm not building TWD bike but I'm slowly incorporating things I like from the build on my Hawk! Part numbers would help a lot! Would also be interesting to see where you're at parts and cost for the build so far! :D
 
I dont know about Ragtop, but im in at almost $7k including the bike. Part numbers for everything is a few pages back. I will be posting an updated one in a few days.

Sent from my SM-N920P using Tapatalk
 
I think I'm still just over about 5k but I'm not sure exactly.. Once I've got it all buttoned up i'll sit down and do a build list then probably be surprised a bit lol

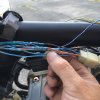
Still playing with wiring a bit, one thing I'll tell you on that is the stocker will get shredded.. I just like things tidy! as your going along the harness the pins in the connectors come out with a scribe and a little patience... DO make a color diagram and definitely take pics just to have the insurance! I screw up one of the lines cause it was late and I started splicing like crazy then realized I should have pulled the pins.. damn. oh well, at that point your commited... see this mess could have been much cleaner: if you do the splice thing, stagger them for a slimmer bundle:
Photo Aug 19, 3 04 06 PM.jpgPhoto Aug 19, 4 40 26 PM.jpgPhoto Aug 20, 7 51 18 PM.jpg
Photo Aug 19, 3 58 22 PM.jpgPhoto Aug 19, 3 58 53 PM.jpgPhoto Aug 19, 3 59 05 PM.jpg

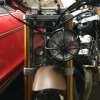
Looked at the bike for a long time trying to figure out where to mount the blinkers, had planned on just replace the pins that hold the support bar on the handle bars and mount them there but went ahead and put them in the stainless punch screen... Not crazy about deviating from original but I think they go well with the look of the bike.. And I definitely like the safety of having them.. Put oil in this a.m. and going to tinker with a couple of straggler wires (and the ignition switch) and should be able to clean the tank and do an op check. OH, something to consider! The universal ignition will make it super easy for the bike to be stolen.. literally in a few seconds.. to prevent this I'm going to put a toggle switch on the circuit and hide it somewhere.. I'm thinking in the forward part of the gas tank just to have a way to kill the circuit.. don't want it to close to the switch or under the seat cause it would be to easy to figure out.. just a heads up on that one! she's starting to look like a motorcycle!

Photo Aug 20, 5 55 06 PM.jpgPhoto Aug 20, 10 59 12 PM.jpgPhoto Aug 21, 11 06 29 AM.jpg
 
FINALLY got the damn seat pan fitted. I probably spent a good couple of days adjusting, cutting, and sanding to get it just right. I ended up going with hooks in the front and a bolt in the rear to hold it down. I thought about being fancy like Ragtop, but in the end I just didn't have an immediate need to have a quick release. Also got the garage door parts cut down and mounted up. I used some socket cap bolts as a place holder until I can find the screen accurate stuff.

20160821_172753.jpg


20160821_172800.jpg


20160821_172813.jpg
 
Whoa, Ragtop that wiring looks like my worse nightmare!

nstevic01, nice work on that seat pan! Rack is coming a long nicely!

looks like you guys got some work done this weekend!!:thumbsup

Well, I finally got around to cutting my exhaust this weekend... Thanks for the tips on the welds Ragtop! I opted to just cut straight through just past the welds, going no baffles.
It was my first time cutting anything metal! Ended up having to move into the kitchen as it was getting late... I went a little crazy and cut through the floor too:lol there goes my security deposit... I got my exhaust wrap getting here on tuesday. What are you guys using for the end caps of the exhaust?? (another parts question, sorry!)
IMG_0745-2.JPG
 
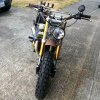
She lives! Have to button up an issue with blinkers in the morning (think I have to use the Mgadget thingy) but once I get that ironed out I'm going to tape up and zip the harness to the frame a little better and give the tank a good flush and hook up the gas tank and see if I can get her to purr! Should get the new brake lines tomorrow while I'm at work.. that's a drag.. may have to play hookey and come home to put them on!

Photo Aug 22, 1 13 59 AM.jpg

Good job on the rack and getting some time to turn a wrench! That seat pan you will adjust at least 2 more times lol, I had three 'final' edges... I'd guestimate from the pics you'll need another 3/16" of an inch off all the way around.. the door edging along the seam eats up about an 1/8" and if the seat guy is good he'll double flap that knife edge too which will had some more side thickness.. I found a sharpie taped to a wooden down to be hella useful for a uniform edge.

Oh! for the outter pipes i'll be using stainless punch screen and 1" x 1/8" stainless trim ring to hold them on... haven't figured out yet how to form them but interesting ideas on youtube!
 
She lives! Have to button up an issue with blinkers in the morning (think I have to use the Mgadget thingy) but once I get that ironed out I'm going to tape up and zip the harness to the frame a little better and give the tank a good flush and hook up the gas tank and see if I can get her to purr! Should get the new brake lines tomorrow while I'm at work.. that's a drag.. may have to play hookey and come home to put them on!

View attachment 656876

Good job on the rack and getting some time to turn a wrench! That seat pan you will adjust at least 2 more times lol, I had three 'final' edges... I'd guestimate from the pics you'll need another 3/16" of an inch off all the way around.. the door edging along the seam eats up about an 1/8" and if the seat guy is good he'll double flap that knife edge too which will had some more side thickness.. I found a sharpie taped to a wooden down to be hella useful for a uniform edge.

Oh! for the outter pipes i'll be using stainless punch screen and 1" x 1/8" stainless trim ring to hold them on... haven't figured out yet how to form them but interesting ideas on youtube!

Burning the midnight oil!!! She's ALIVE!! You'll have to do a video when you get her running!

I'll head over to home depot tomorrow see what I can find for the end cap. Nice job with the exhaust wrap! Did you use zip ties? Cant even see em, I like it!
 
For the exhaust you will need to use stainless steel zip ties. You can pick them up at most auto part stores.

Sent from my SM-N920P using Tapatalk
 
Nstevic01, when before you paint either weld a couple push tabs or line keepers or such along the left side of the rear swingarm on the inside! When you run the brake light lines that is the only real place for it other than through the swingarm itself... I need another one on the bottom that will be easy but there is a litte tab at the very back just below the light itself.. keep that one! Very useful with a rubberized adel clamp to hole the line taught.. I had to drill a pilot hole (cause I wasn't taking the wheel off again! lol) for one of the clamps and barely could maneuver the drill in there.. going to see if I can get away with using two rubberized ones down below for the forward part of the line! ideally two along that inner wall starting high/middle in the back and sloping down towards the front would be best. Found a cool thing in the thrift store to add to my 'zombie' helmet lol... still have to form it and add some punch screen but it will be coolio!

unspecified8X27GJ6O.jpg unspecifiedA93O38TY.jpgunspecified5D2B84CQ.jpgunspecified5FRP0IQX.jpg

Got the new brake lines finally! had to run home and put them on, ended up with a 33 and a 36... doesn't have a lot of slack but I liked how they lay on the front end.. Still trying to sort out blinker situation before I add gas tank back to bike and see what she will do! Went to a thrift store today trying to get a key chain that is right and didn't have any luck! Did manage to get the key switch worked out. AMAZES me at how much time this stuff takes!

unspecified933AU346.jpgunspecifiedB7UR0OIG.jpg
 
Last edited:
For the exhaust you will need to use stainless steel zip ties. You can pick them up at most auto part stores.

Sent from my SM-N920P using Tapatalk

Yep, there's also a YouTube vid on how to go zip tie less for a cleaner look. Not sure how well it'll hold up. Wasn't sure if Ragtop went that route.
 
The thin clamps at the heads slide behind the header clamps and conceal fairly easily.. I had one visible on each side at back of the pipes.. wasn't worried about them down there.. there is just barely enough to wrap them though, have to be really careful cutting them and it's actually best not to if ya don't have to ensure you can get them all done..

Totally digging the blinker action!
unspecified7XZ4VGCV.jpg
 
Last edited:
The thin clamps at the heads slide behind the header clamps and conceal fairly easily.. I had one visible on each side at back of the pipes.. wasn't worried about them down there.. there is just barely enough to wrap them though, have to be really careful cutting them and it's actually best not to if ya don't have to ensure you can get them all done..

Totally digging the blinker action!
View attachment 657592

Nice! I like those lights! Nice and bright!

Got my exhaust all wrapped up! I used way more wrap than I should've but good thing I ordered extra! So tempted to mount it back up but waiting to get some new gaskets.:unsure
 

Your message may be considered spam for the following reasons:

If you wish to reply despite these issues, check the box below before replying.
Be aware that malicious compliance may result in more severe penalties.
Back
Top