Achilla137
Active Member
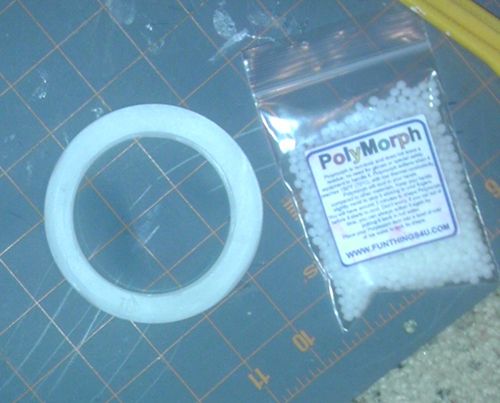
Alright so here goes nothing! I know this is nothing close to movie replica status, but it was cheap and easy to build. Here is my material list:
Polymorph Plastic Pellets - Ebay
Shower Flange (i think it's called that)
Wire (not sure what it is, found it in my garage)
Electrical tape
Card Stock
3 Small Screws
1 Soda Can
9 Prewired LED's
PVC pipe
Black Paint/Black Sharpie
Silver Paint
23A battery
Peanut Butter Jar Lid
Straps
optional: Reflection tape
Tools:
Hot Glue
Scissors/Exacto knife
Wire Strippers
Soldering Gun w/ solder
Frosting/Icing lid
Spice lid
Hacksaw
Small hole punch
All in all it probably cost about $15, simply because a lot of the materials I already had.
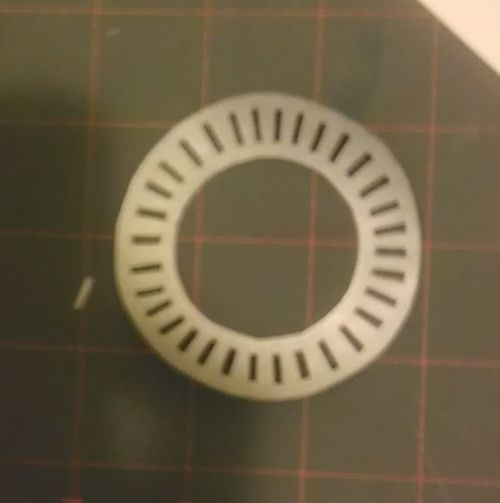
First I started off with the making of the plastic ring which will be the outer part. I molded it by using an icing/frosting lid as the bottom, then a spice lid in the center to act as the inner part.
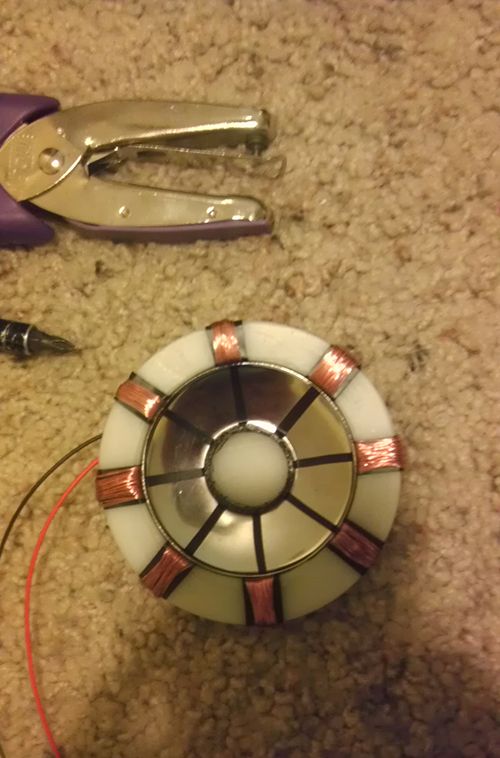
After that I cut up some electrical tape and eyeballed where they should be placed.
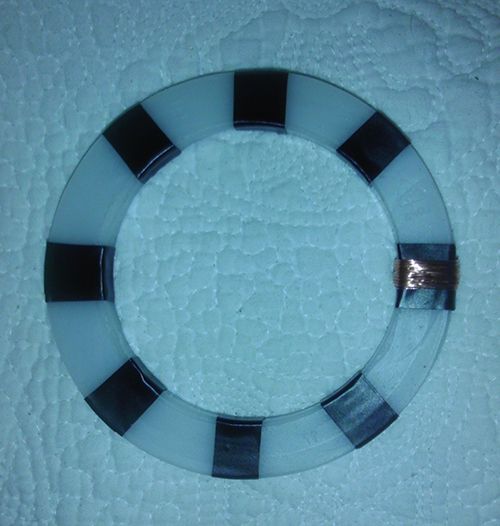
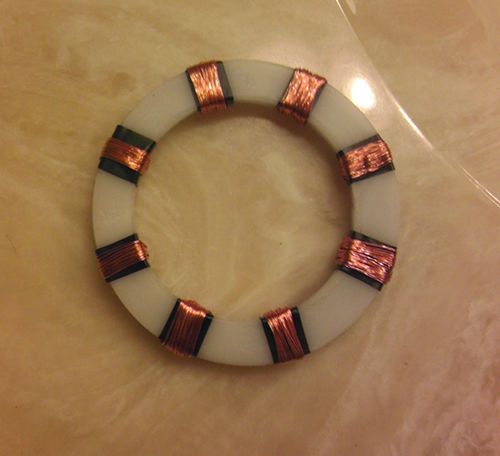
I found some wire on a spool in the garage and decided to use wire strippers and take the copper wire and wrap it around each electrical tape piece.
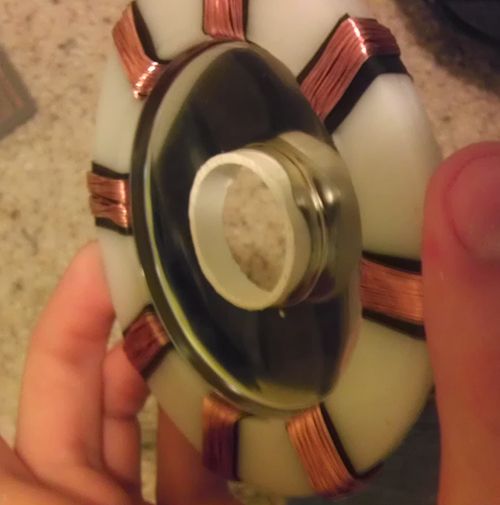
This is where I went to Orchard Supply Co. (you can go to Lowes or Home Depot) and bought a shower flange which I lucked out on because it fit PERFECTLY in the center without me having to adjust anything.

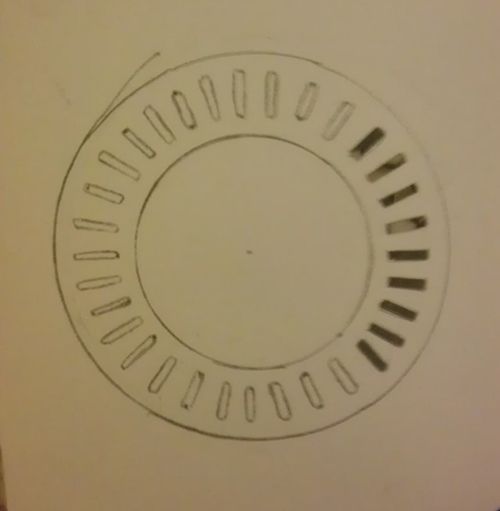
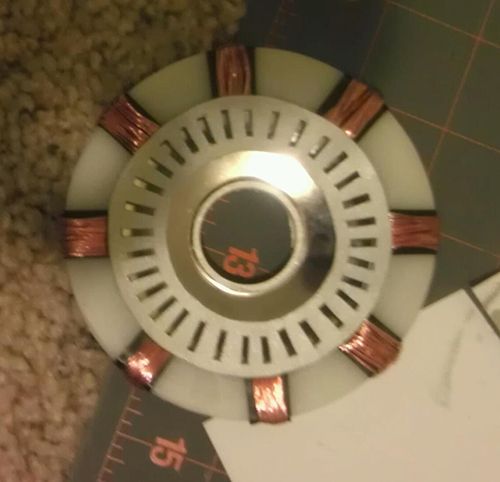
Now I drew the design for the center metal part on cardstock, cut it out, and painted it.
I found some leftover PVC pipe that fit perfectly in the center hole of the shower flange and cut it down to fit right.
Here I set the the silver ring on top to see how it looked, I know it should have been smaller, but I liked it better on top.
I used the PVC pipe as a mold to make the center cover for the light. I used the polymorph once again to create it. I then glued the first LED in place, on its side, and glued reflective tape on top of it much like how a flashlight has reflective stuff on the inside to disperse the light. I also painted the PVC pipe black, and touched up a few areas with black sharpie
Next I cut thin strips of electrical tape and taped it on the inside of the ring
I then hotglued all the LEDs in place
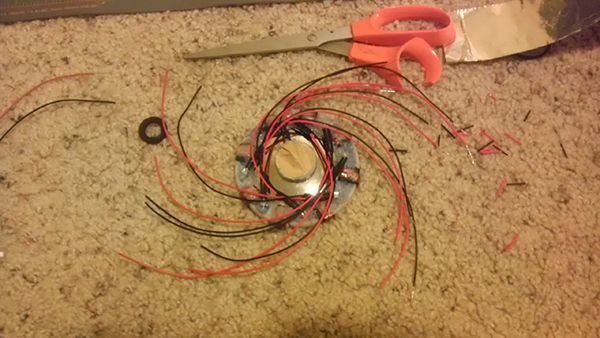
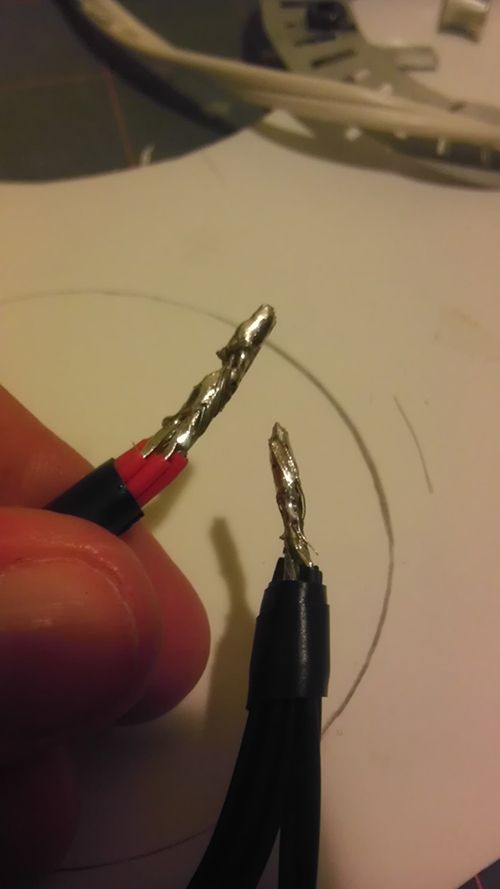
I seperated and gathered all the red wires and black wires together with electrical tape and twisted the tips together...
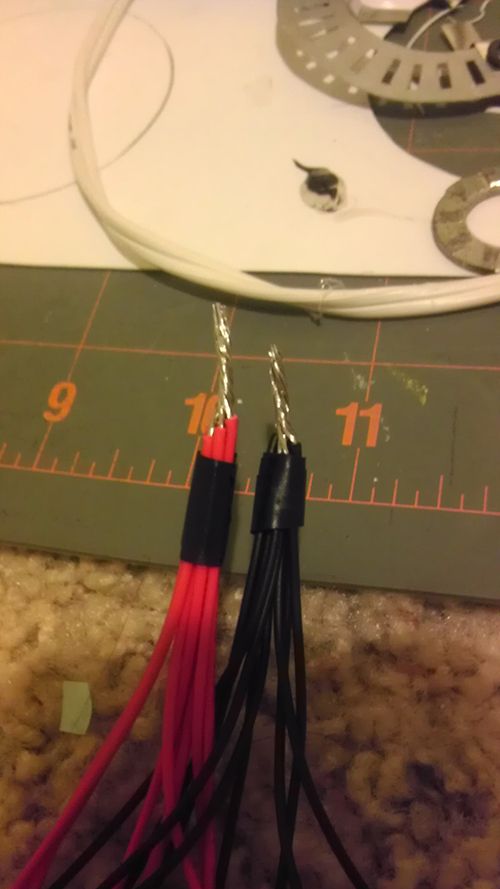
...then soldered them
I lucked out with finding the small screws since my parent's dvd player broke and they were throwing it out. I took off 3 screws and was happy as good be. For the small metal "brackets" I simply cut a soda can (ok it was coors lite, but soda would work too) and bent them to fit where I wanted. To get the screws to go through the metal brackets, I used a SMALL hole punch, NOT a big size!
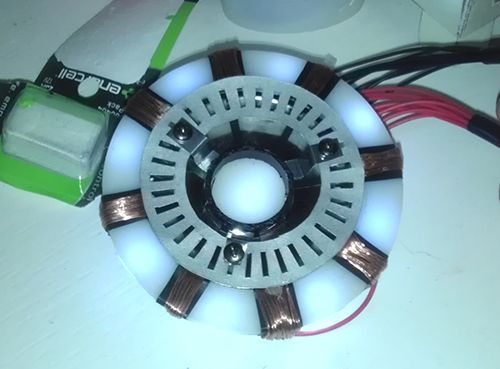
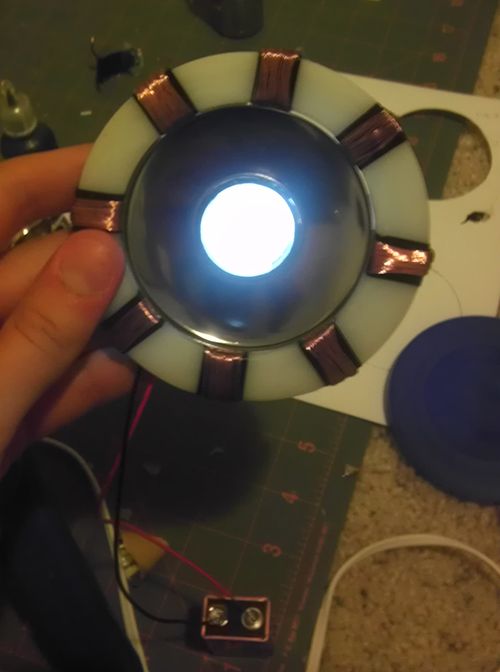
And now it's about 95% complete! Here it is all lit up!
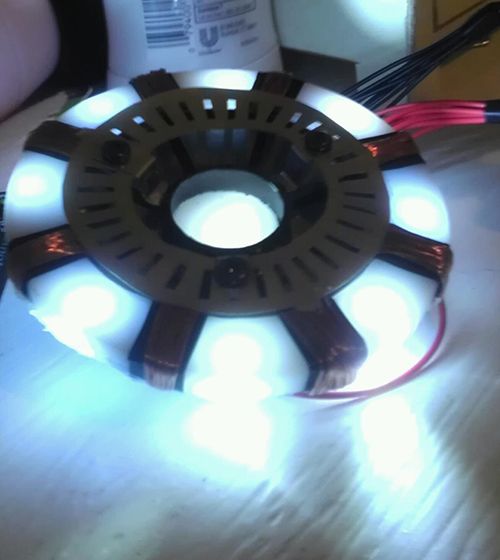
For the final steps I am going to take a Peanut Butter lid and use it for the back to hide the wires and it fits PERFECTLY on the outside. I'll most likely cut a hole in the back to get access to the inside for putting in the battery. The LEDs are 12V, though a 9V battery works, but for the sake of having this as flat as possible on the chest I went with a 23A size battery, which is about the size of a AAA battery only cut in half! I'm going to cut off the adjusting straps of a backpack I hate and use it to create the straps to hold up the arc reactor. First I need to eat the rest of the peanut butter...
If you have any questions or comments feel free to leave them! I might make a second thread for an Ironette costume, if I have time for it.
-Achilla137
Polymorph Plastic Pellets - Ebay
Shower Flange (i think it's called that)
Wire (not sure what it is, found it in my garage)
Electrical tape
Card Stock
3 Small Screws
1 Soda Can
9 Prewired LED's
PVC pipe
Black Paint/Black Sharpie
Silver Paint
23A battery
Peanut Butter Jar Lid
Straps
optional: Reflection tape
Tools:
Hot Glue
Scissors/Exacto knife
Wire Strippers
Soldering Gun w/ solder
Frosting/Icing lid
Spice lid
Hacksaw
Small hole punch
All in all it probably cost about $15, simply because a lot of the materials I already had.
First I started off with the making of the plastic ring which will be the outer part. I molded it by using an icing/frosting lid as the bottom, then a spice lid in the center to act as the inner part.
After that I cut up some electrical tape and eyeballed where they should be placed.
I found some wire on a spool in the garage and decided to use wire strippers and take the copper wire and wrap it around each electrical tape piece.
This is where I went to Orchard Supply Co. (you can go to Lowes or Home Depot) and bought a shower flange which I lucked out on because it fit PERFECTLY in the center without me having to adjust anything.
Now I drew the design for the center metal part on cardstock, cut it out, and painted it.
I found some leftover PVC pipe that fit perfectly in the center hole of the shower flange and cut it down to fit right.
Here I set the the silver ring on top to see how it looked, I know it should have been smaller, but I liked it better on top.
I used the PVC pipe as a mold to make the center cover for the light. I used the polymorph once again to create it. I then glued the first LED in place, on its side, and glued reflective tape on top of it much like how a flashlight has reflective stuff on the inside to disperse the light. I also painted the PVC pipe black, and touched up a few areas with black sharpie
Next I cut thin strips of electrical tape and taped it on the inside of the ring
I then hotglued all the LEDs in place
I seperated and gathered all the red wires and black wires together with electrical tape and twisted the tips together...
...then soldered them
I lucked out with finding the small screws since my parent's dvd player broke and they were throwing it out. I took off 3 screws and was happy as good be. For the small metal "brackets" I simply cut a soda can (ok it was coors lite, but soda would work too) and bent them to fit where I wanted. To get the screws to go through the metal brackets, I used a SMALL hole punch, NOT a big size!
And now it's about 95% complete! Here it is all lit up!
For the final steps I am going to take a Peanut Butter lid and use it for the back to hide the wires and it fits PERFECTLY on the outside. I'll most likely cut a hole in the back to get access to the inside for putting in the battery. The LEDs are 12V, though a 9V battery works, but for the sake of having this as flat as possible on the chest I went with a 23A size battery, which is about the size of a AAA battery only cut in half! I'm going to cut off the adjusting straps of a backpack I hate and use it to create the straps to hold up the arc reactor. First I need to eat the rest of the peanut butter...
If you have any questions or comments feel free to leave them! I might make a second thread for an Ironette costume, if I have time for it.
-Achilla137
Last edited:


