I don't often see thread of people tearing back into a finished prop years later. So, here we go.

I've torn apart my Rocketeer Cirrus X3 in an effort to refine it and improve it's electronics. When I finished it a few years back I was mostly pleased with it, but partly exhausted from the project. Some corners were cut.
I'm also putting together a run of the electronic kits I have installed (here if you;re interested: http://www.therpf.com/showthread.php?t=275164 ... This has me revisiting my own pack's electronics and realizing ... after building an R2D2 ... I've learned a lot.
Upgrades will include:
This is all completely unnecessary, but digging into to it has been like visiting old friend.
Here's the old speaker and electronics set up. It worked but was prone to "misfires" .. the speaker worked well at home, but when I had it out to shows it was a bit underwhelming.


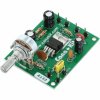
Here's the little amp I'll be installing to pump up the sound.

Here's the old light ring assembly I scratch built. I'm getting larger light rings so I 3D printed a revised frame to hold the rings.


The new Chip terminal that will hold the soundboard more securely. Custom labels on the side keep the wiring easy to remember.

New speaker with more BOOM!


I'm redoing the leatherwork ... I can do better. I am keeping this basic design. I know it's not screen accurate with the buckles. But this works so well and is a breeze to strap on people of different sizes. Sometimes simple is good.

All taken apart. No turning back now.


I've torn apart my Rocketeer Cirrus X3 in an effort to refine it and improve it's electronics. When I finished it a few years back I was mostly pleased with it, but partly exhausted from the project. Some corners were cut.
I'm also putting together a run of the electronic kits I have installed (here if you;re interested: http://www.therpf.com/showthread.php?t=275164 ... This has me revisiting my own pack's electronics and realizing ... after building an R2D2 ... I've learned a lot.
Upgrades will include:
- Completely new wiring, color coded and less of a mess.
- Integrated chip mount for more reliable connection over the breadboard I was using
- A Canakit 7 watt amp and upgraded speaker for "con-ready" volume
- Revised lighting with MORE LEDS!
- New leather harness from thicker leather. Likely redoing the pad out of cowhide as well.
This is all completely unnecessary, but digging into to it has been like visiting old friend.
Here's the old speaker and electronics set up. It worked but was prone to "misfires" .. the speaker worked well at home, but when I had it out to shows it was a bit underwhelming.


Here's the little amp I'll be installing to pump up the sound.

Here's the old light ring assembly I scratch built. I'm getting larger light rings so I 3D printed a revised frame to hold the rings.


The new Chip terminal that will hold the soundboard more securely. Custom labels on the side keep the wiring easy to remember.

New speaker with more BOOM!


I'm redoing the leatherwork ... I can do better. I am keeping this basic design. I know it's not screen accurate with the buckles. But this works so well and is a breeze to strap on people of different sizes. Sometimes simple is good.

All taken apart. No turning back now.


Last edited:


