You are using an out of date browser. It may not display this or other websites correctly.
You should upgrade or use an alternative browser.
You should upgrade or use an alternative browser.
")
iDarkDesign
Member
Man! Acces to a CNC and a 3D printer. That would make for endless cool stuff! This really looks amazing!
iDD
iDD
ZukutoSkyKiller
Member
Man I wish I could come work for you making this stuff lol looks good like all your work
I guess I'm overdue for an update.
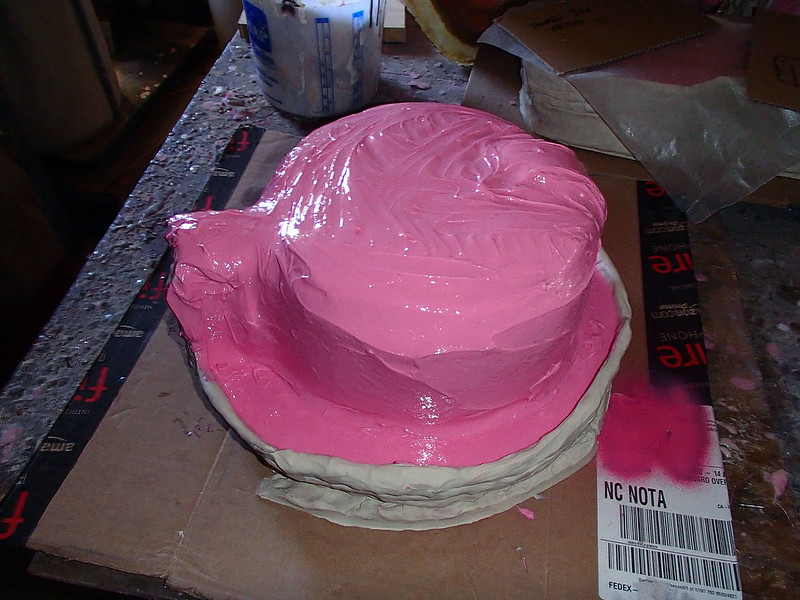
The first half of the mold was filled. Then I screwed a top onto the box, flipped the whole thing over, and removed the bottom of the box:
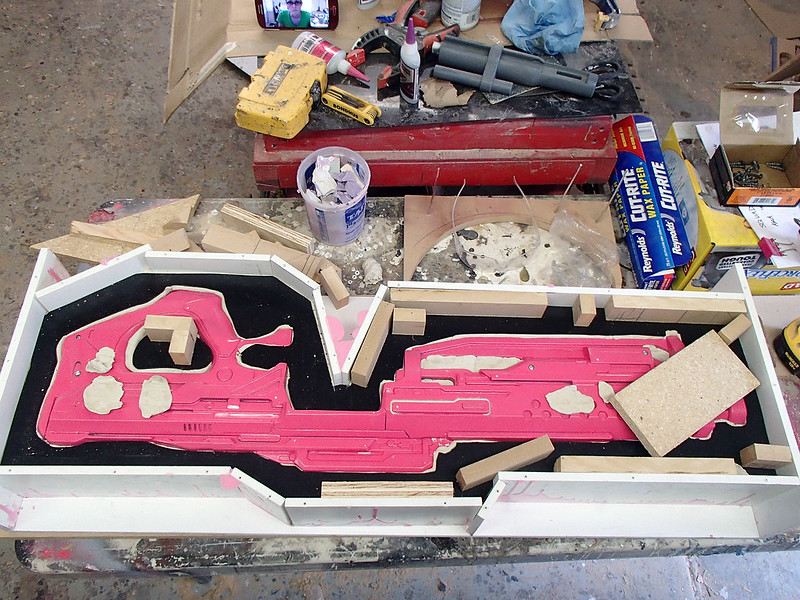
Then the parting wall was removed:
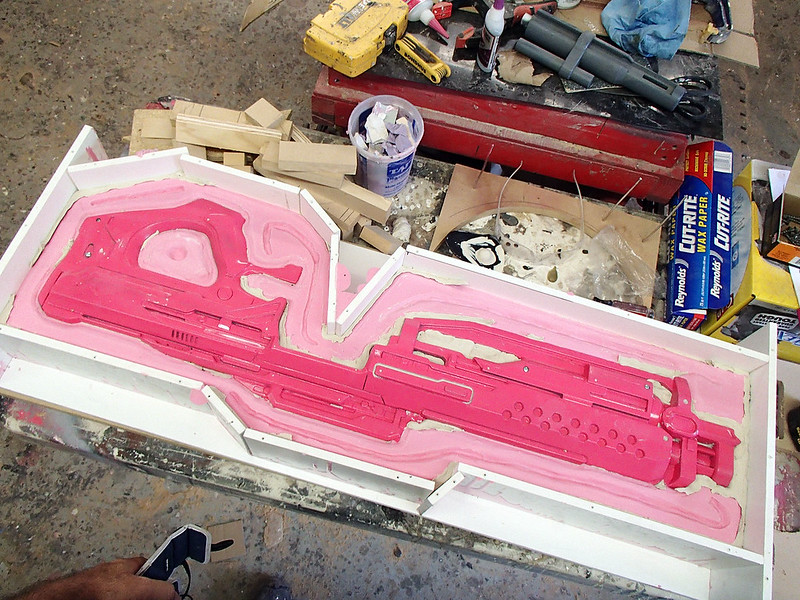
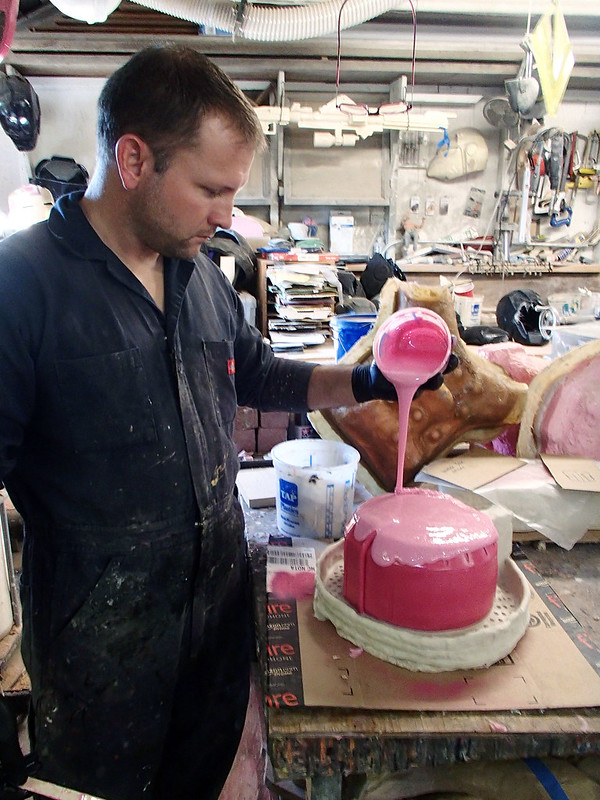
After spraying a lot of release agent to keep the silicone from bonding to the cured first half of the mold, it was time to start pouring the second half:
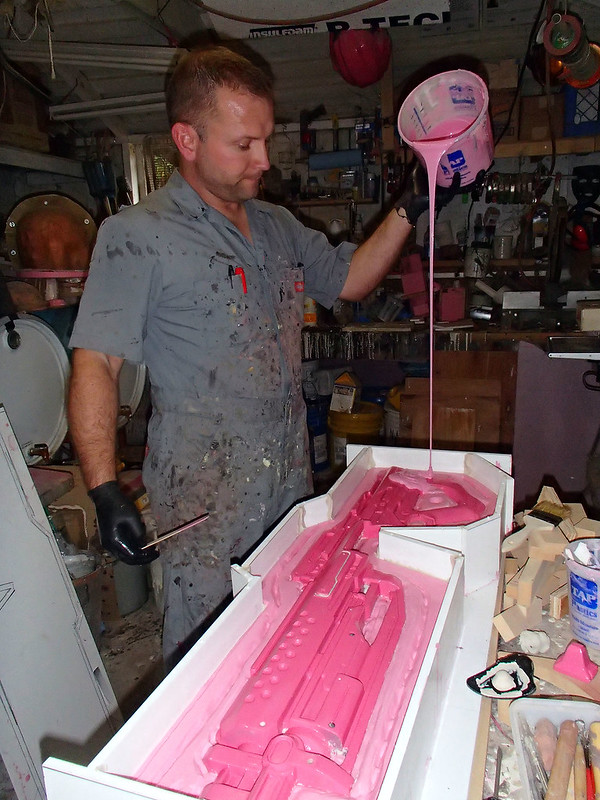
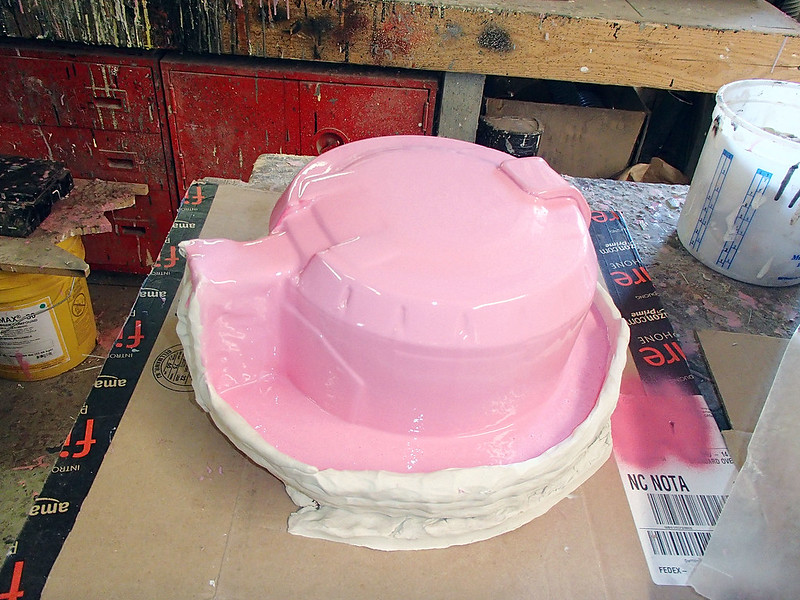
The last thing to do on the main body was to pour a silicone plug so that the castings will have a cutout to fit the separately cast barrel piece:
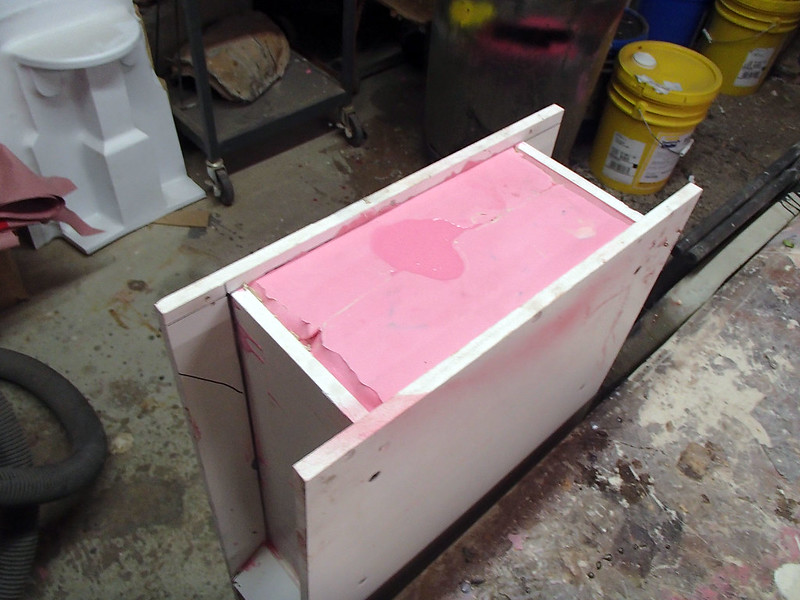
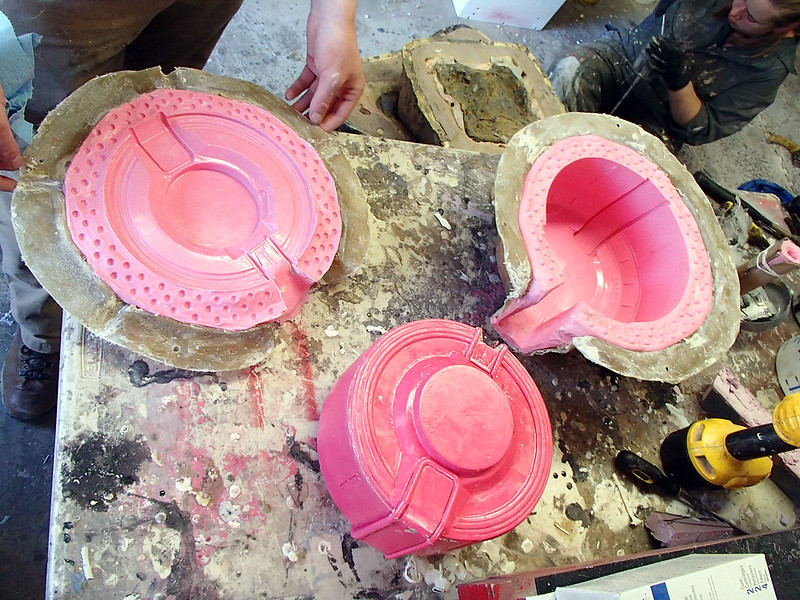
Once that was cured, the next thing to do was to disassemble the mold box. Here it is with the top and bottom removed:
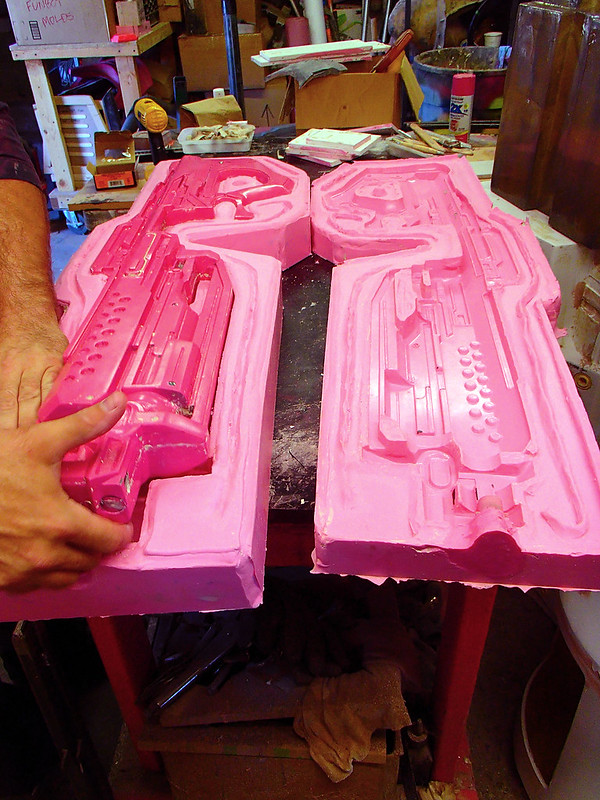
And with the sides removed:
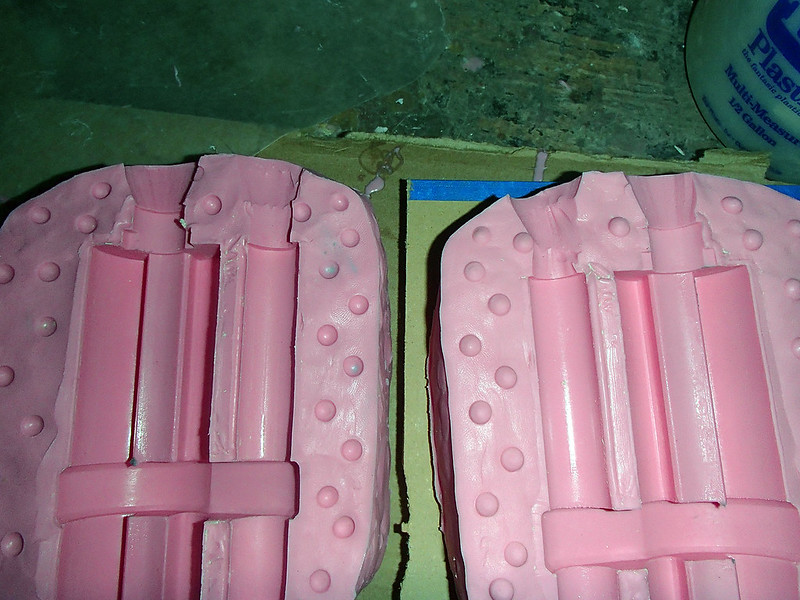
Then I just had to pull the two mold halves apart:
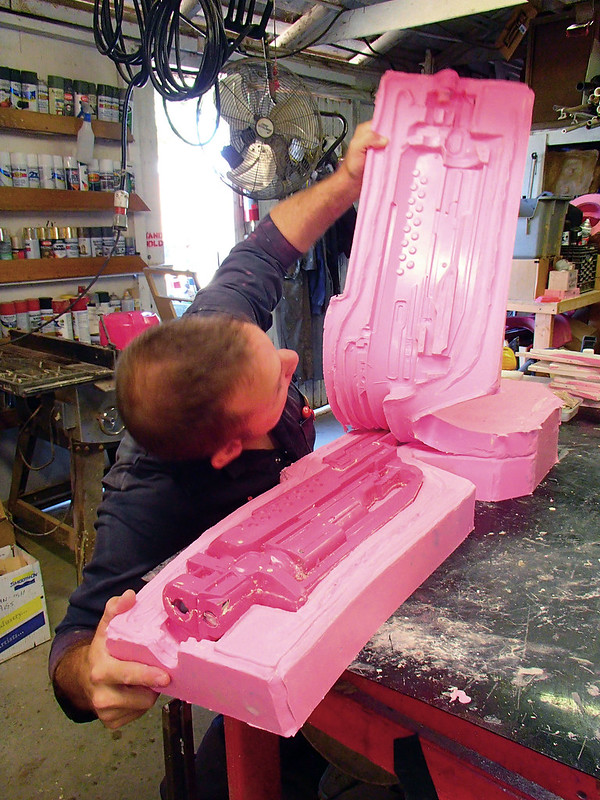
And remove the prototype:
Once the prototype is out of the mold, it's time to rebuild the mold box. I started by taking the wall parts and shaving about a quarter of an inch off of them with the table saw. Once that was done, I screwed them back onto the bottom piece of the mold. Then I fitted the top edge with hanger bolts so I could use wing nuts to hold down the top of the box.
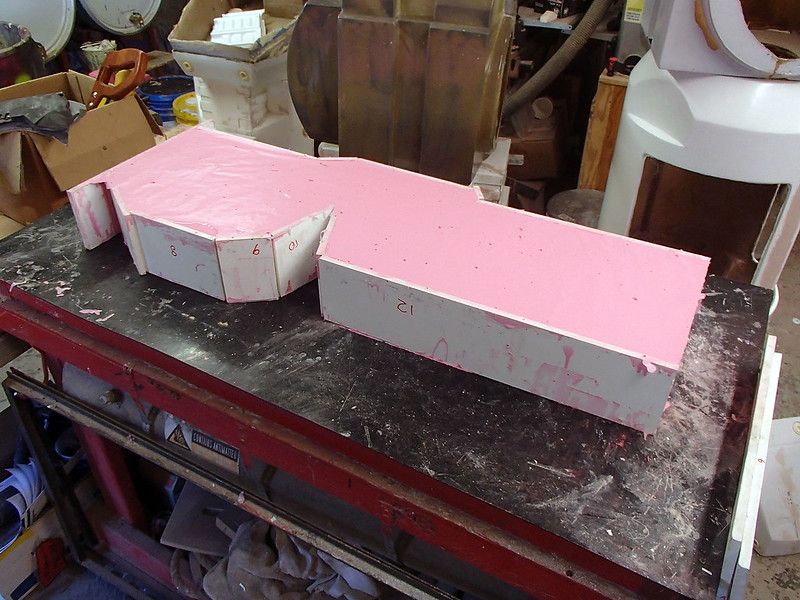
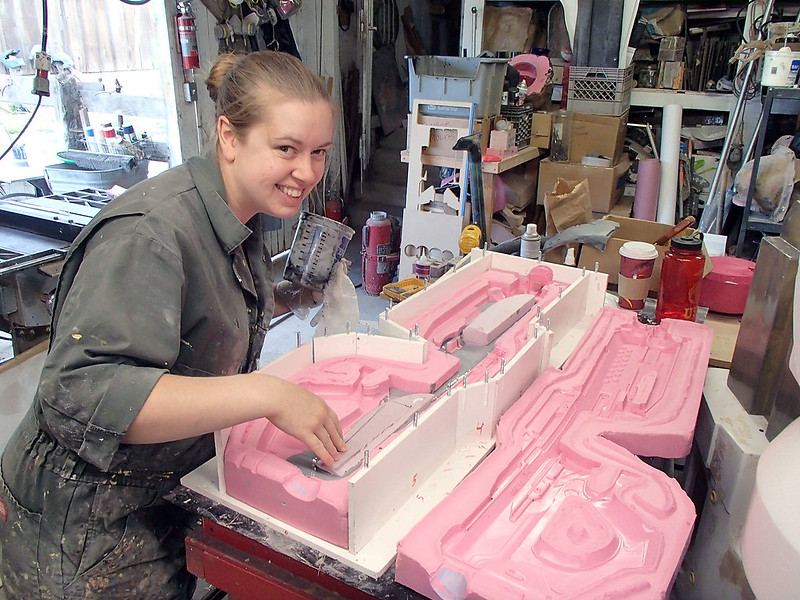
With that done, it was time to pour the first casting. Since the finished casting is going to be huge, I decided to reduce the weight a bit by adding in a couple of foam blocks. To keep them in place, I started by pouring a small batch of resin into one half of the mold and setting the foam blocks on top of it while it was still not quite cured:
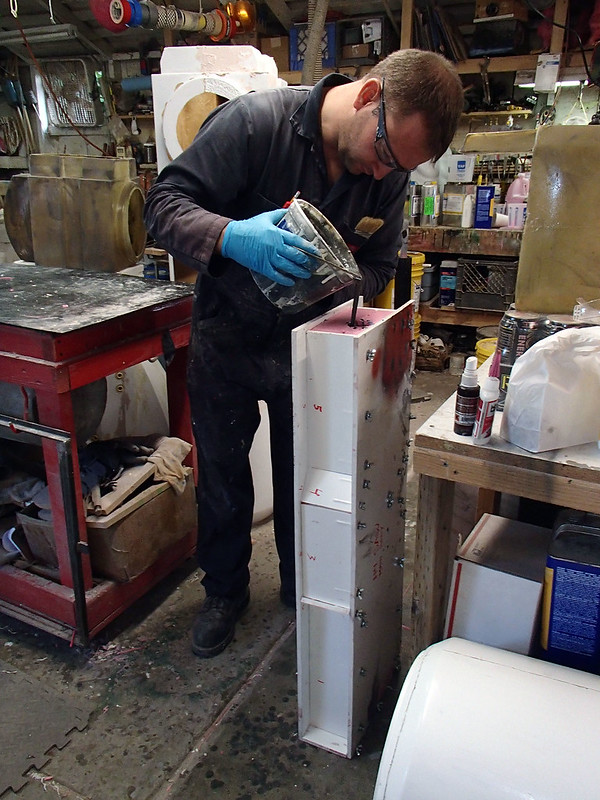
Then I set the other half of the mold into place, screwed down the lid, and stood the whole thing up on end:

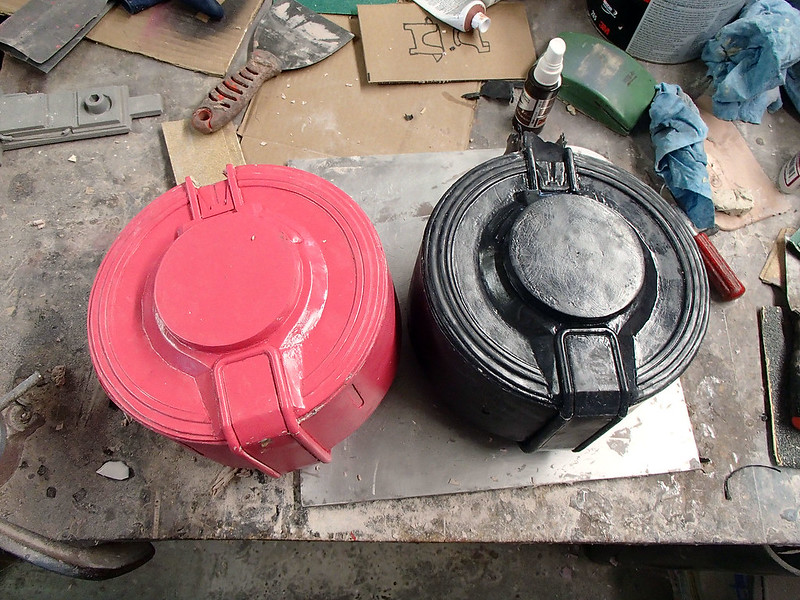
Filling the mold took just under a gallon of resin, even with the foam blocks in place:
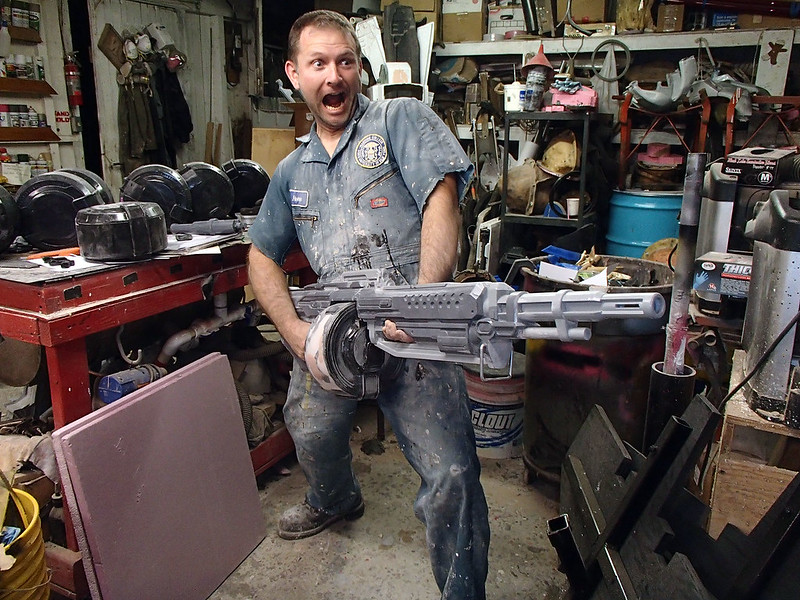
Once the resin had cured, it was time to open up the mold again:

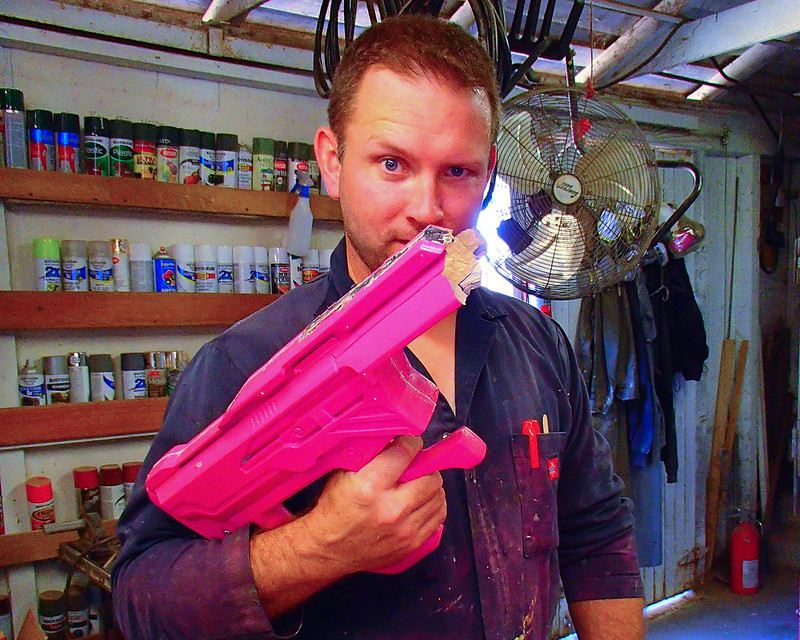
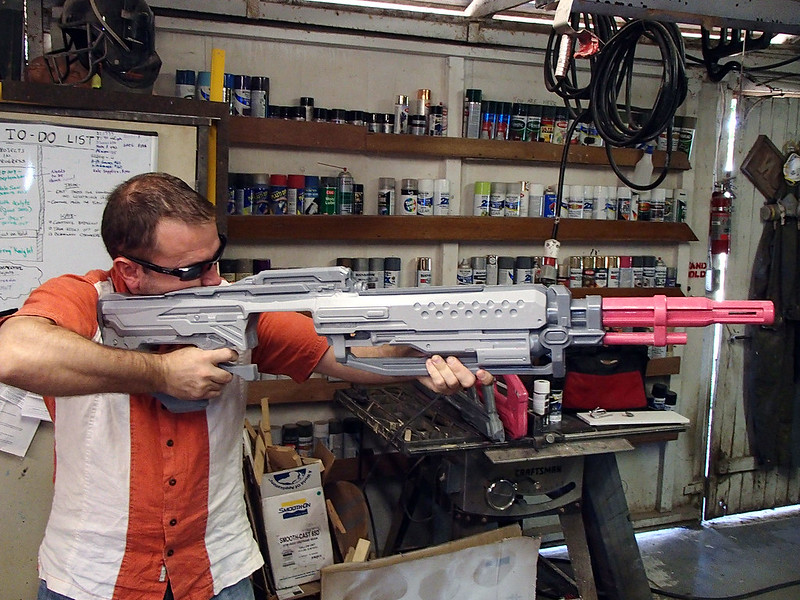
And then goof around for a minute:
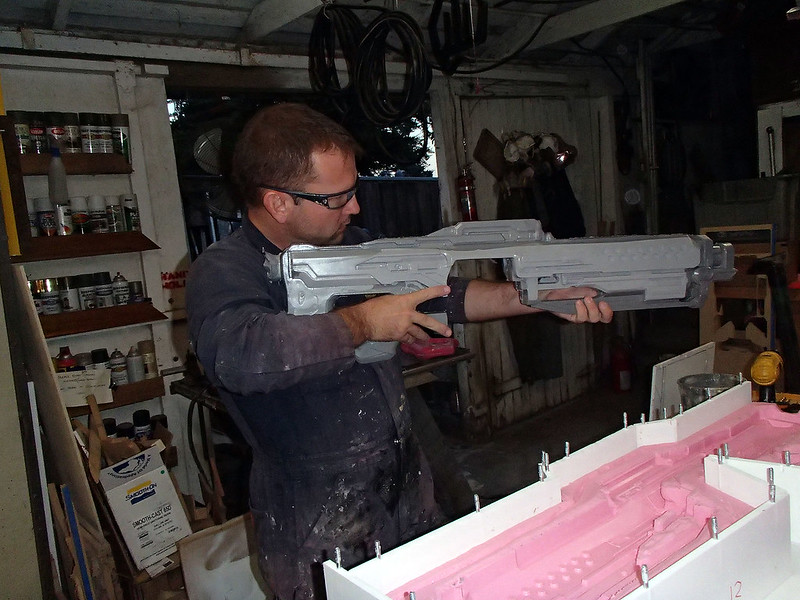
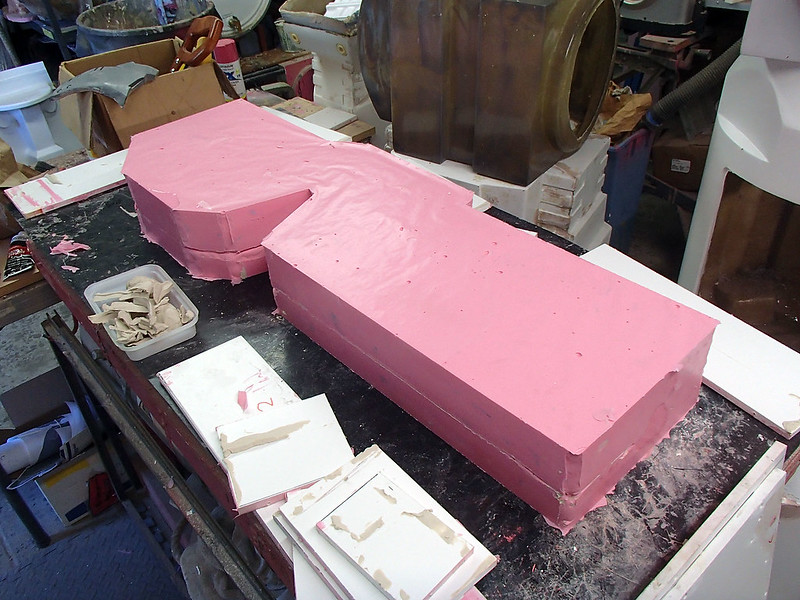
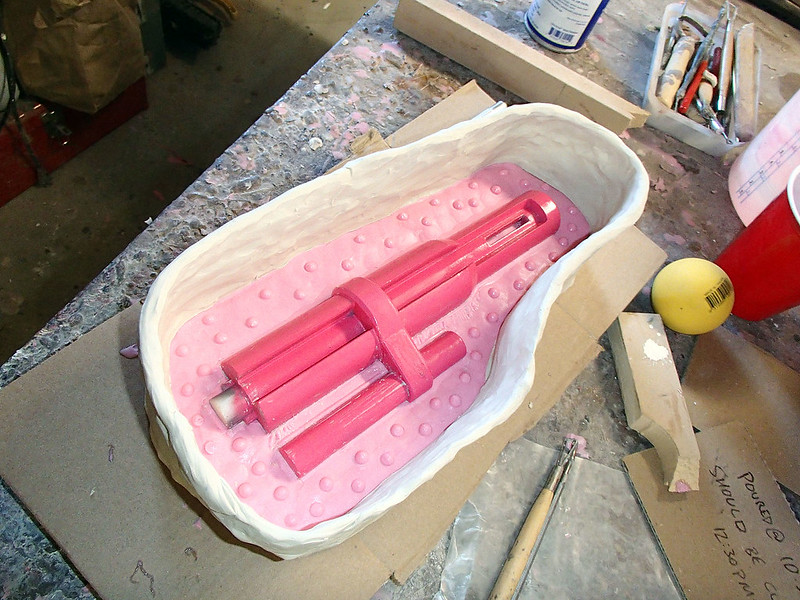
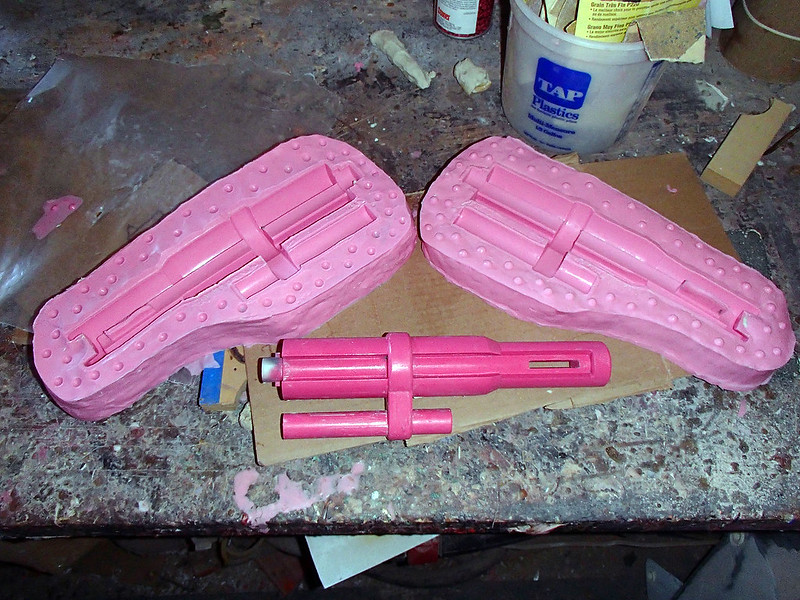
So that's the first casting of the main body. I've still got molds to make for the small parts. Here's the finished prototype for the barrel:
Here it is under the rubber for the first half of the mold:
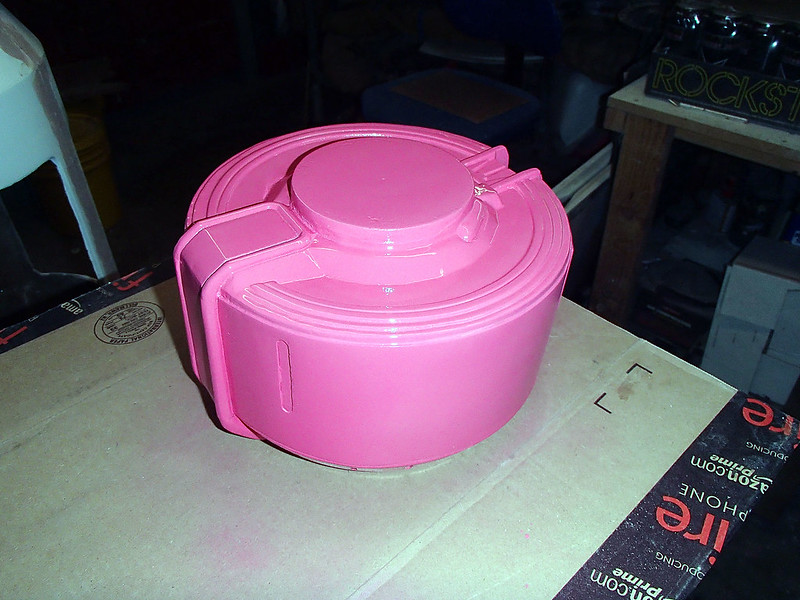
And the finished prototype for the drum magazine:
I should be molding that piece today. Stay tuned...
The first half of the mold was filled. Then I screwed a top onto the box, flipped the whole thing over, and removed the bottom of the box:
Then the parting wall was removed:
After spraying a lot of release agent to keep the silicone from bonding to the cured first half of the mold, it was time to start pouring the second half:
The last thing to do on the main body was to pour a silicone plug so that the castings will have a cutout to fit the separately cast barrel piece:
Once that was cured, the next thing to do was to disassemble the mold box. Here it is with the top and bottom removed:
And with the sides removed:
Then I just had to pull the two mold halves apart:
And remove the prototype:
Once the prototype is out of the mold, it's time to rebuild the mold box. I started by taking the wall parts and shaving about a quarter of an inch off of them with the table saw. Once that was done, I screwed them back onto the bottom piece of the mold. Then I fitted the top edge with hanger bolts so I could use wing nuts to hold down the top of the box.
With that done, it was time to pour the first casting. Since the finished casting is going to be huge, I decided to reduce the weight a bit by adding in a couple of foam blocks. To keep them in place, I started by pouring a small batch of resin into one half of the mold and setting the foam blocks on top of it while it was still not quite cured:
Then I set the other half of the mold into place, screwed down the lid, and stood the whole thing up on end:
Filling the mold took just under a gallon of resin, even with the foam blocks in place:
Once the resin had cured, it was time to open up the mold again:
And then goof around for a minute:
So that's the first casting of the main body. I've still got molds to make for the small parts. Here's the finished prototype for the barrel:
Here it is under the rubber for the first half of the mold:
And the finished prototype for the drum magazine:
I should be molding that piece today. Stay tuned...
Last edited:
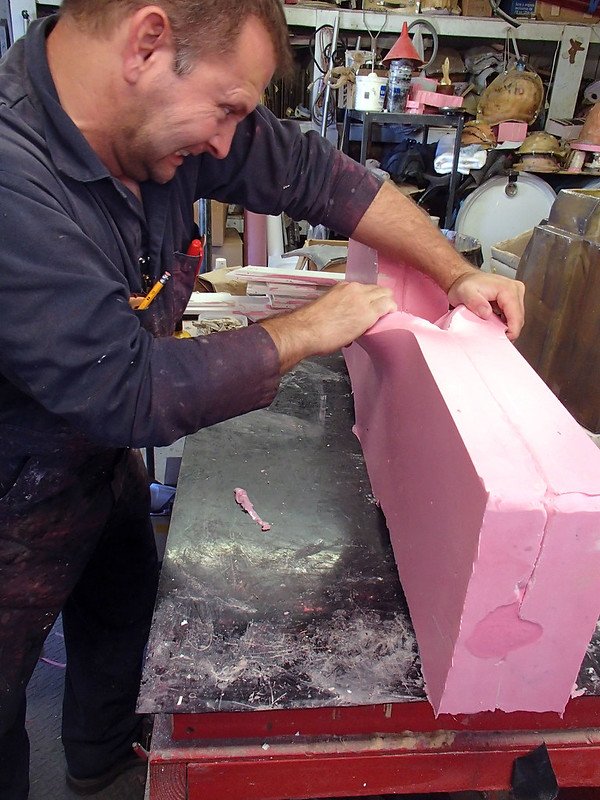
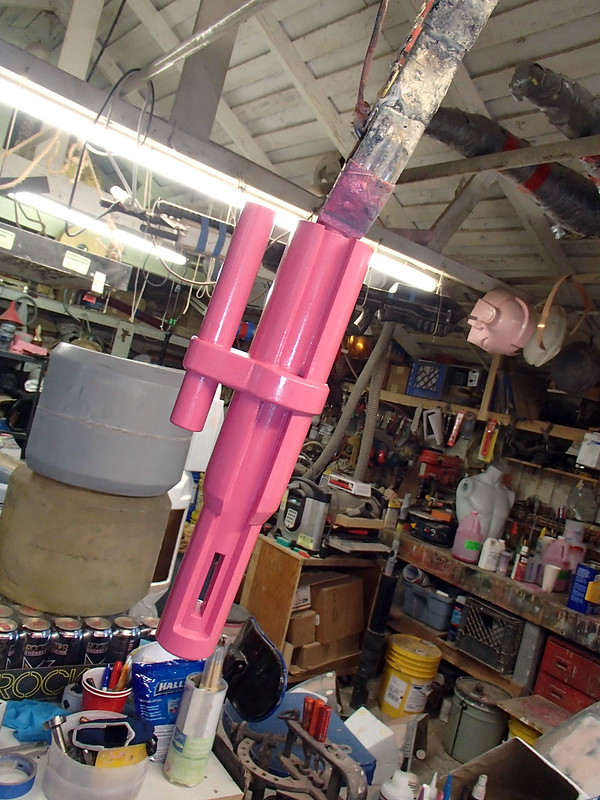
First half of the barrel mold is done. Here it is set up for pouring the second half:
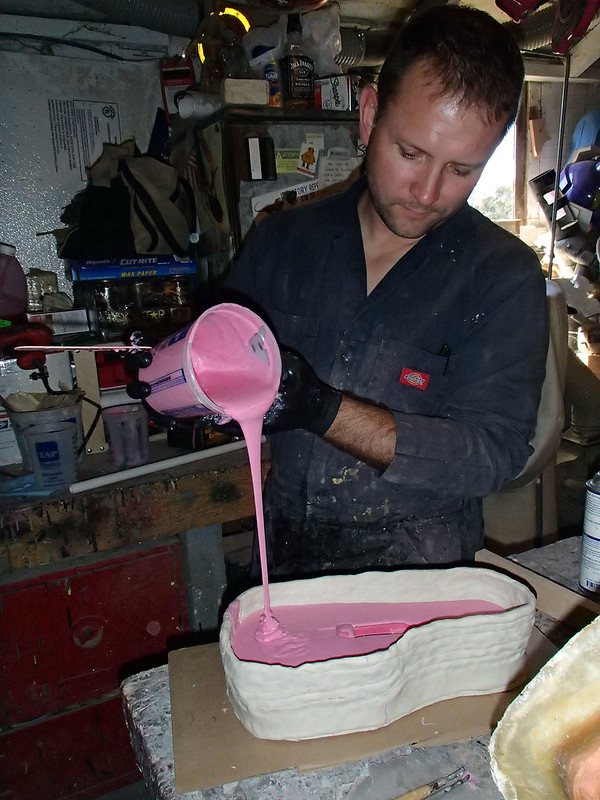
Here I am pouring the second half (after spraying on a copious amount of release agent):
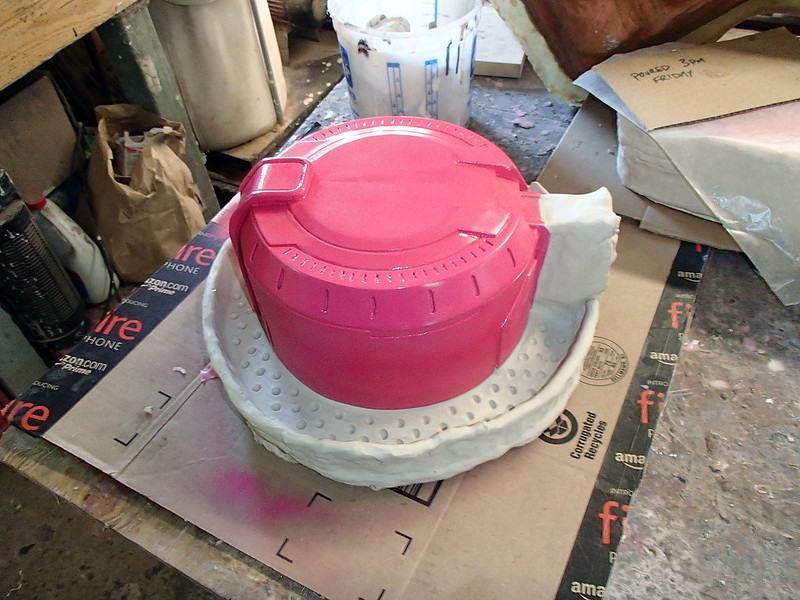
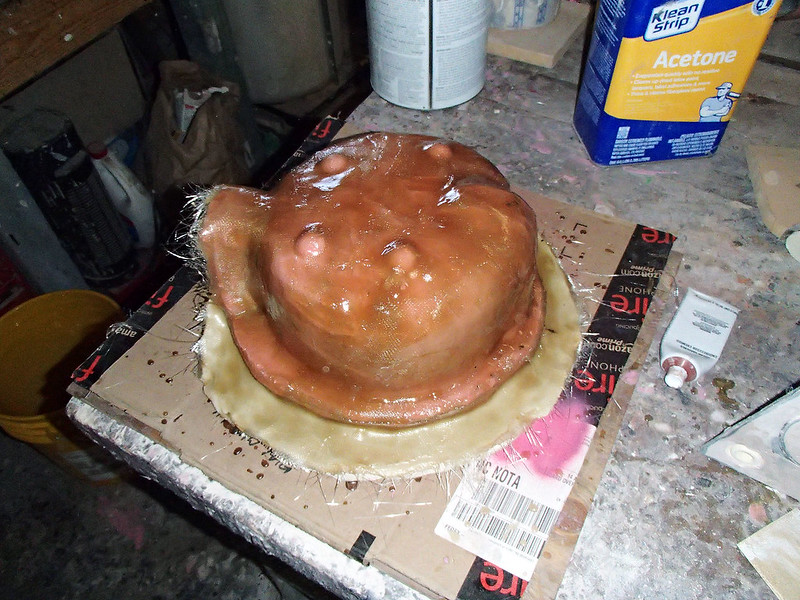
I've finally smoothed out the drum magazine enough to mold. I'll be making a two-part mold and then rotocasting it. Here it is set up with the clay parting wall:
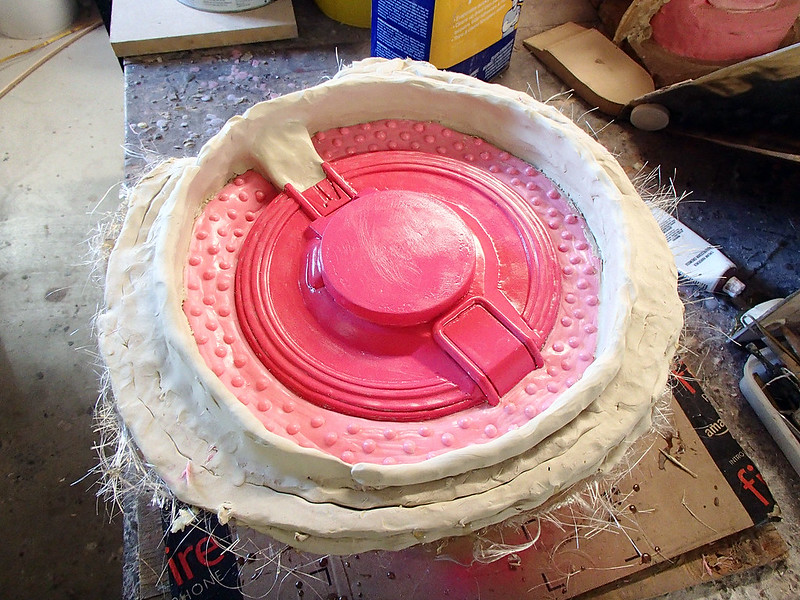
Pouring silicone:
Print coat done:
Today I'll be thickening the mold for the magazine a bit. Stay tuned...
Here I am pouring the second half (after spraying on a copious amount of release agent):
I've finally smoothed out the drum magazine enough to mold. I'll be making a two-part mold and then rotocasting it. Here it is set up with the clay parting wall:
Pouring silicone:
Print coat done:
Today I'll be thickening the mold for the magazine a bit. Stay tuned...
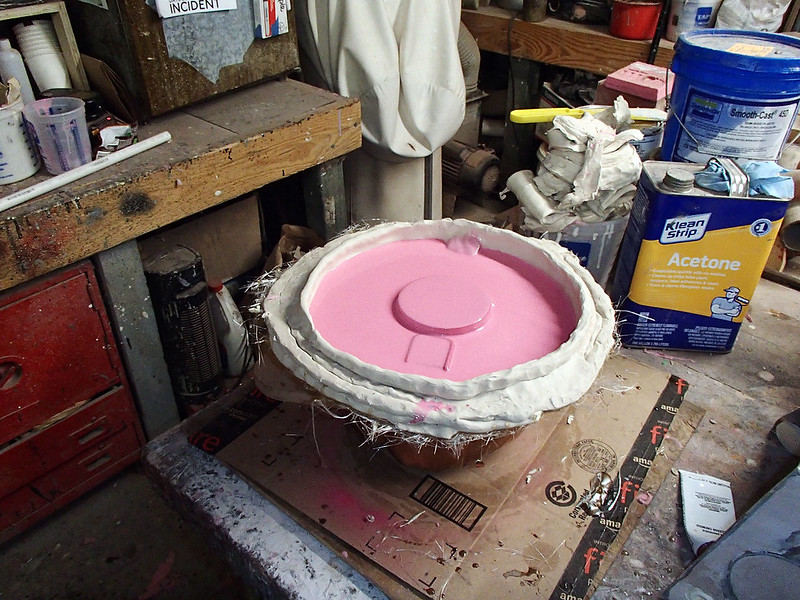
Yesterday I layered on some thickened silicone to build up the rubber jacket mold for the drum magazine a bit more. Here's what it looks like right now:
I still need to add registration keys and a bit more thickness. Then I can build up a fiberglass mothermold, flip the whole thing over, remove the clay parting wall, and make up the mold for the other side.
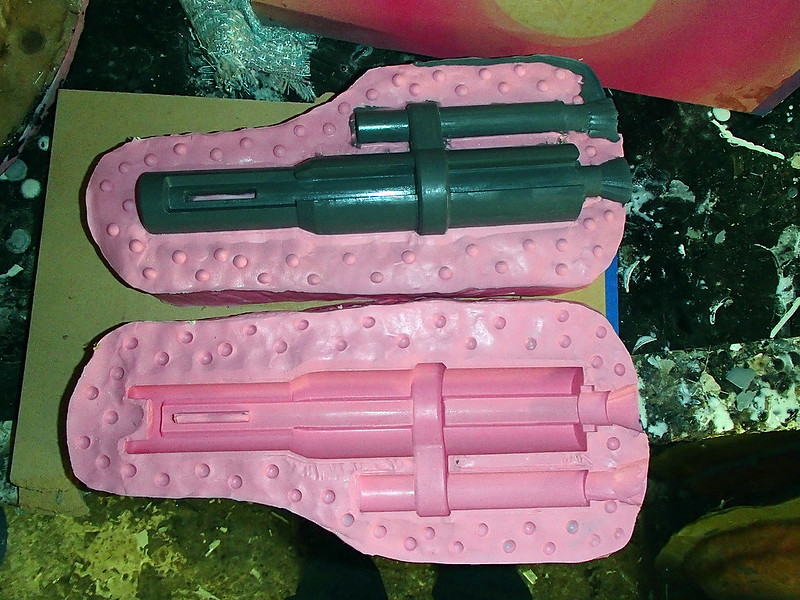
On a similar note, I pulled the barrel mold apart and removed the prototype:
Once that was done, I used a sharp knife to cut pouring sprues and vents into the back end of the mold:
Then I clamped the mold gently between a couple of scraps of wood and filled it with grey-tinted resin. While it was curing, I did some more goofing around with the prototype barrel:
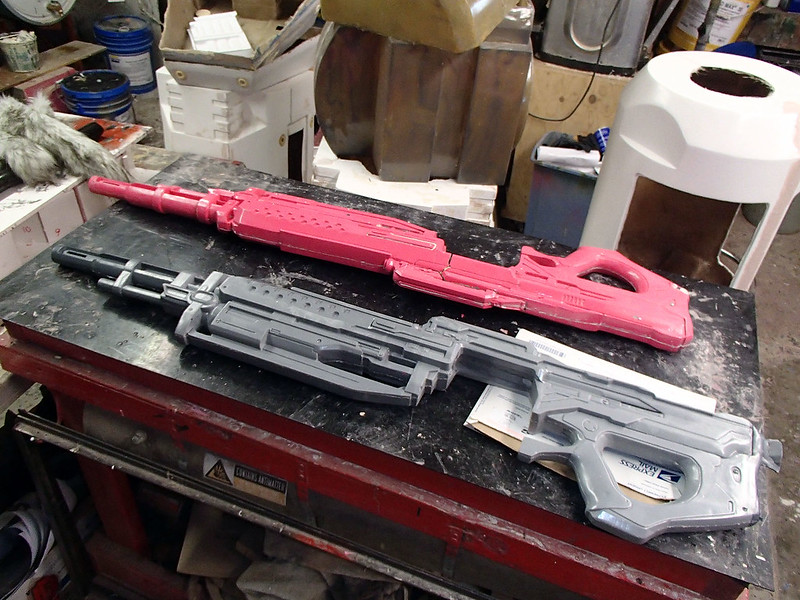
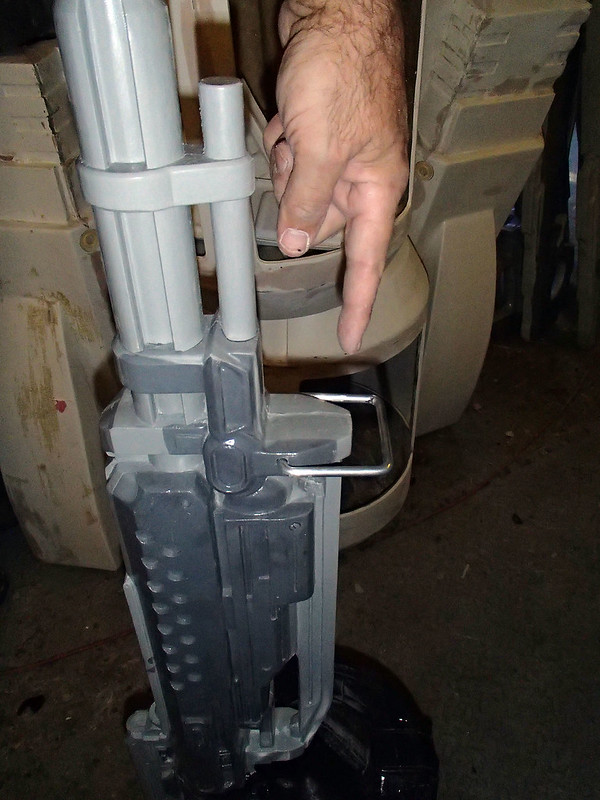
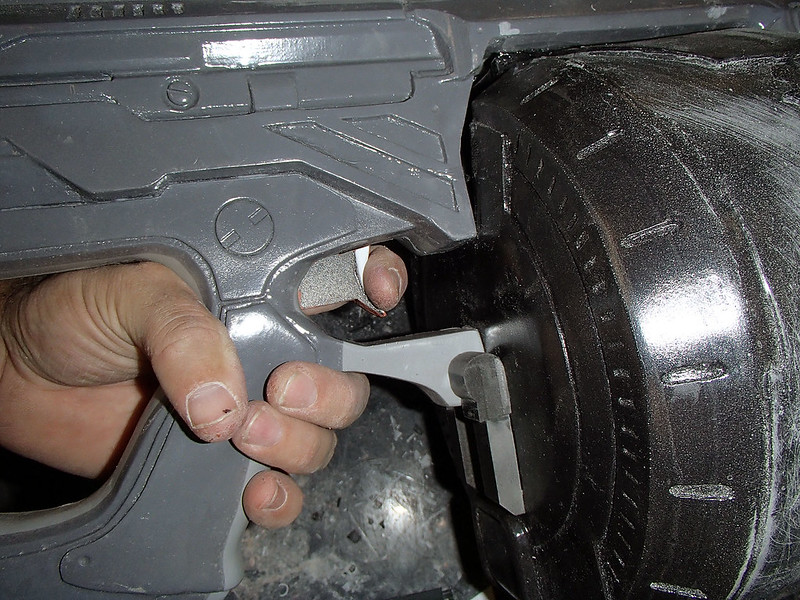
The first barrel cast came out great:
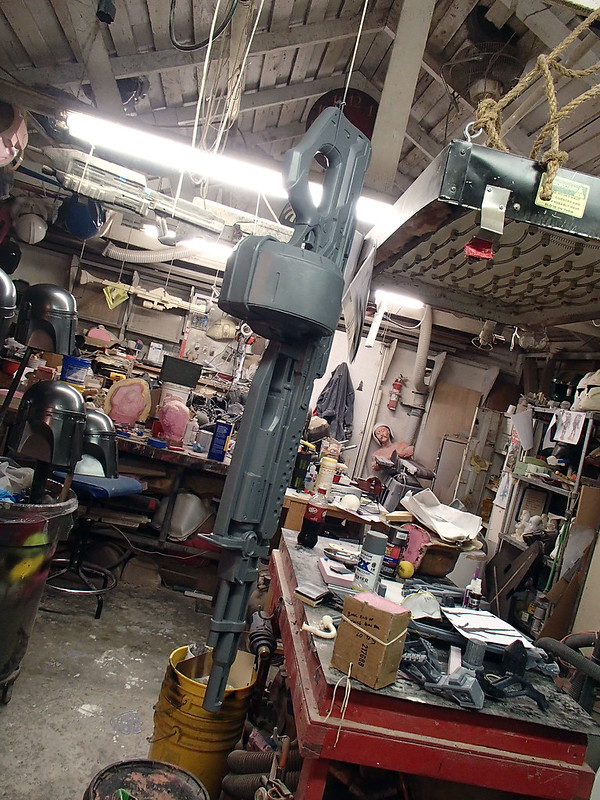
Here it is installed on the first casting of the main body (next to the lightish red prototype):
It's getting close. Stay tuned...
I still need to add registration keys and a bit more thickness. Then I can build up a fiberglass mothermold, flip the whole thing over, remove the clay parting wall, and make up the mold for the other side.
On a similar note, I pulled the barrel mold apart and removed the prototype:
Once that was done, I used a sharp knife to cut pouring sprues and vents into the back end of the mold:
Then I clamped the mold gently between a couple of scraps of wood and filled it with grey-tinted resin. While it was curing, I did some more goofing around with the prototype barrel:
The first barrel cast came out great:
Here it is installed on the first casting of the main body (next to the lightish red prototype):
It's getting close. Stay tuned...
Finished the mothermold for the first side of the drum magazine:
Then I flipped the whole thing over and prepped the other side for molding:
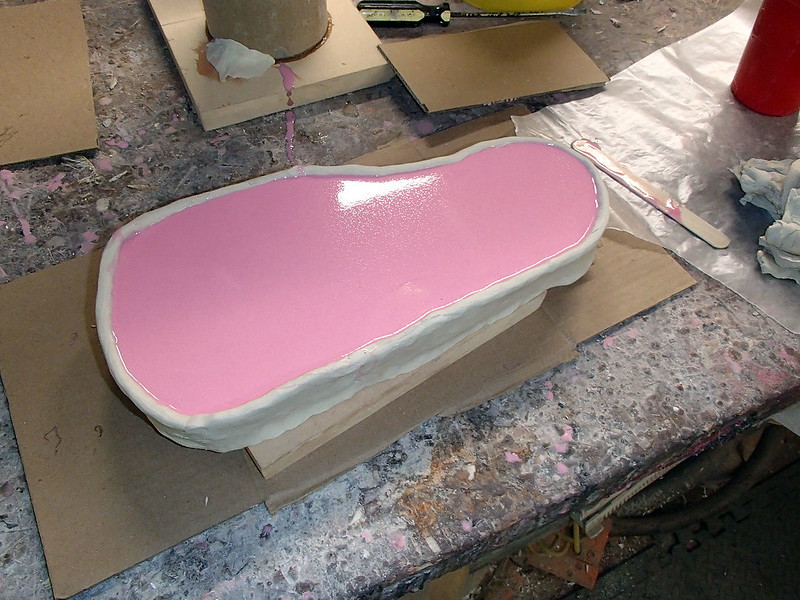
After spraying on a release agent to keep the silicone from bonding to the silicone from the first side of the mold, I went ahead and poured on a print coat:
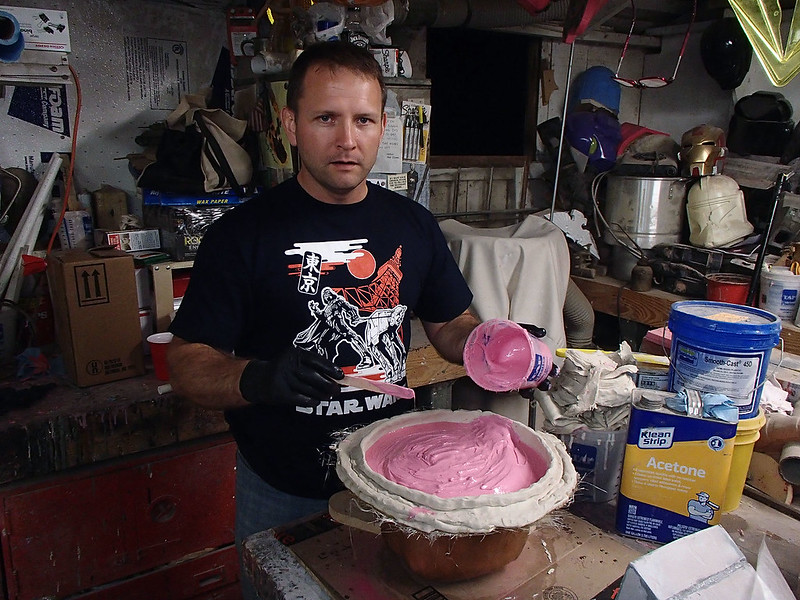
When that had firmed up, I mixed up another batch with some thixotropic additive and layered some extra thickness over the raised parts:
Hopefully I'll have at least one casting out of that mold in the next 24 hours or so.
Stay tuned...
Then I flipped the whole thing over and prepped the other side for molding:
After spraying on a release agent to keep the silicone from bonding to the silicone from the first side of the mold, I went ahead and poured on a print coat:
When that had firmed up, I mixed up another batch with some thixotropic additive and layered some extra thickness over the raised parts:
Hopefully I'll have at least one casting out of that mold in the next 24 hours or so.
Stay tuned...
santiclause
Sr Member
holy crap that's a load of work. Awesome build, I'll be staying tuned in to see how it comes out and to learn lol.
mattrendar
Well-Known Member
Awesome ! Awesome ! Can't wait to see it finished
the timelord
New Member
dude that's awsome i'm a beginer u r awsome
msleeper
Sr Member
thorssoli, I find your mold making technique really fascinating. What is the pot life / cure time for the silicone you use, and do you use the same kind for the poured on print coat and the thicker coats? How many thick coats do you apply?
Can you elaborate on why you made a block mold for the main body of the gun, and did a jacket mold for the drum? I would have thought the reverse would be easier, if not making a matrix mold for the gun body.
Can you elaborate on why you made a block mold for the main body of the gun, and did a jacket mold for the drum? I would have thought the reverse would be easier, if not making a matrix mold for the gun body.
Last edited by a moderator:
@thorssoli, I find your mold making technique really fascinating. What is the pot life / cure time for the silicone you use, and do you use the same kind for the poured on print coat and the thicker coats? How many thick coats do you apply?
Can you elaborate on why you made a block mold for the main body of the gun, and did a jacket mold for the drum? I would have thought the reverse would be easier, if not making a matrix mold for the gun body.
In this case I'm using Mold Max 30 from Smooth-On. I don't remember what the pot life is (probably 40 minutes or so) but it usually cures in 12-16 hours. I can add an accelerator to speed those up if I need to. When I'm building up thickness, I mix in some Thivex thixotropic additive and usually aim to make the mold jacket somewhere between 1/4" to 1/2" thick.
If I was able to pay more attention to it at the time, I'd have probably gone ahead and done the much lighter rubber jacket with rigid mothermold for the main body of the gun. When it was being molded, I just wanted to be able to hand it to one of the other guys in the shop and say "fill 'er up" instead of having to spend a bunch of time coaching them through the whole thickening process. I had other things going on that week (read about some of them HERE and HERE and HERE) so I wanted to keep that part simple. In this case it was a question of spending more money and materials to make up for the fact that I didn't have enough time. Since the main body was just going to be a one-piece casting, the extra weight of the mold really didn't matter all that much.
Later, when the drum mag was ready to mold, I had time to actually focus and make the mold lightweight. Keeping it light was important because it was going to be used for rotocasting.
I've made a few matrix molds here and there. Usually the extra time and effort doesnt' strike me as having a good enough payoff.
Hey thorssoli, do you make all your own 3D models? If not where did you find them? If so what program did you use?
This one was emailed to me by another modeller. I have no idea what program he used. I did have to do a bit of touchup work. For that I use a combination of Blender, Sketchup, Rhino, and Netfabb, depending on whichever one has the exact functionality I need.
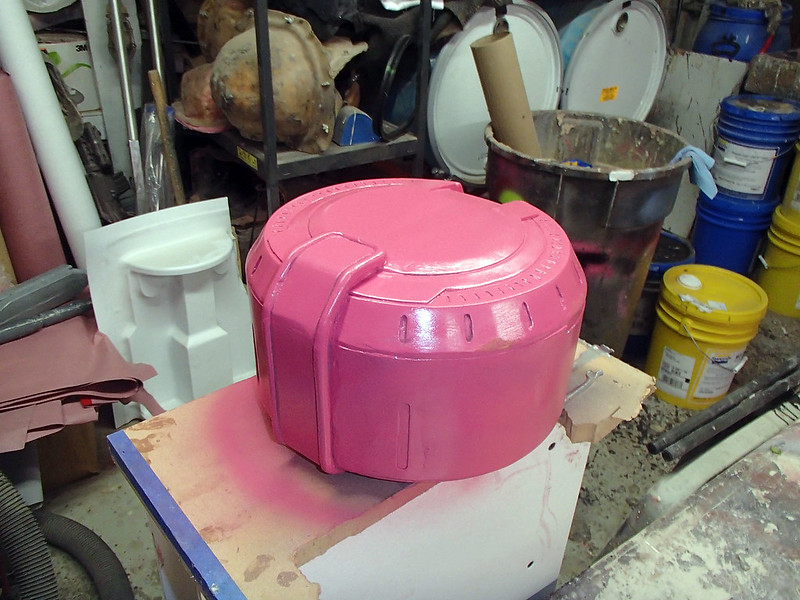
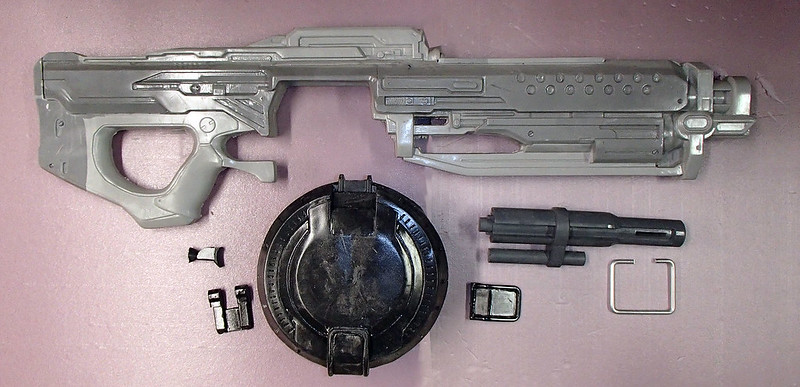
UPDATE:
I've cast a few more magazines:
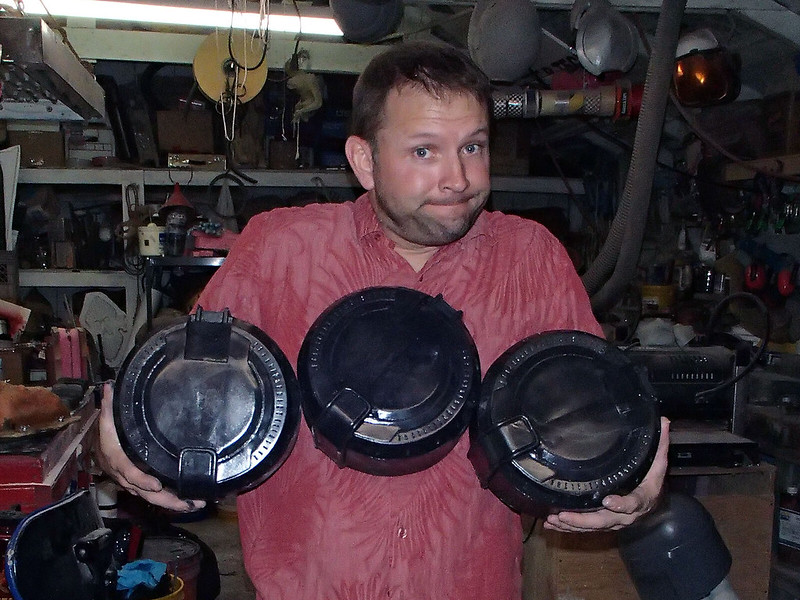
That's all for the moment.
I still need to make a trigger, a couple of brackets, and the loop under the front of the muzzle.
Stay tuned...
Yesterday I finally knuckled down and made the last four pieces that I needed for this thing.
First, I bent a piece of aluminum rod to make the loop under the front end of the main body:
Then I made the trigger:
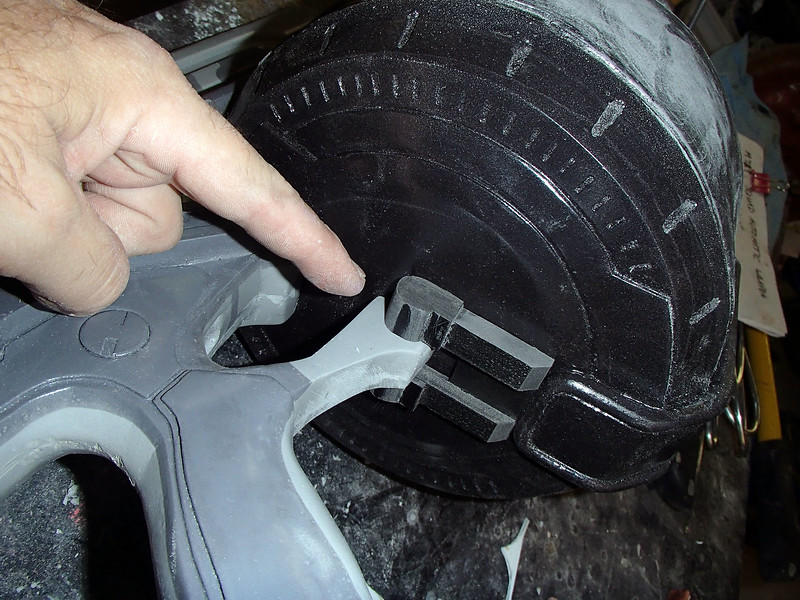
As well as the little notches for the back end of the magazine:
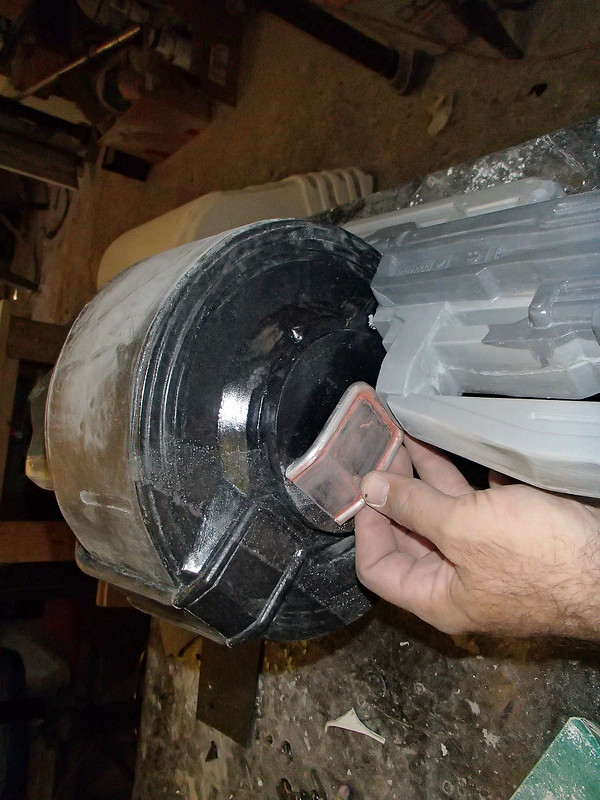
Finally, I made the flap that will go on the front of the magazine:
Then I mounted them to a board and gave them a quick coat of my lightish red prototype color:
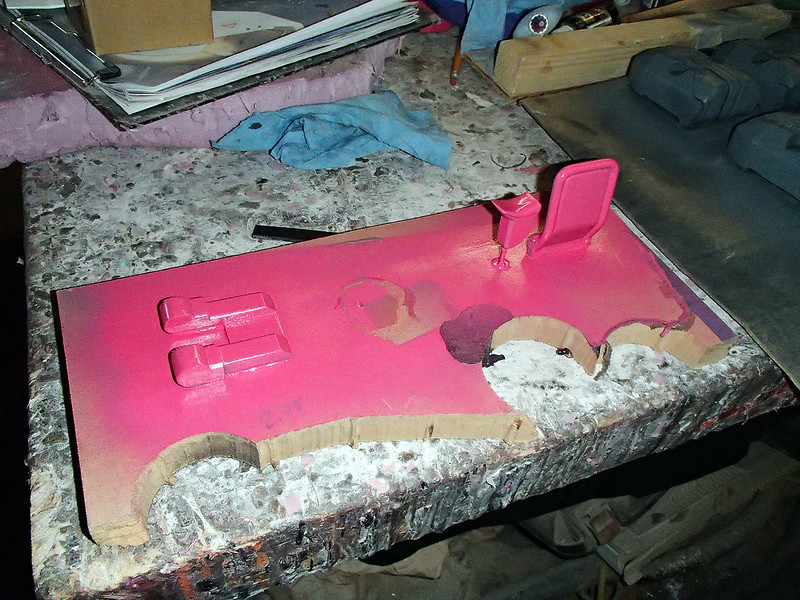
Once the paint is dry, I'll go ahead and make mold walls and pour some silicone on them.
With that done, I glued together the worst-looking set of castings I had and spent some quality time with the beast in the shop:
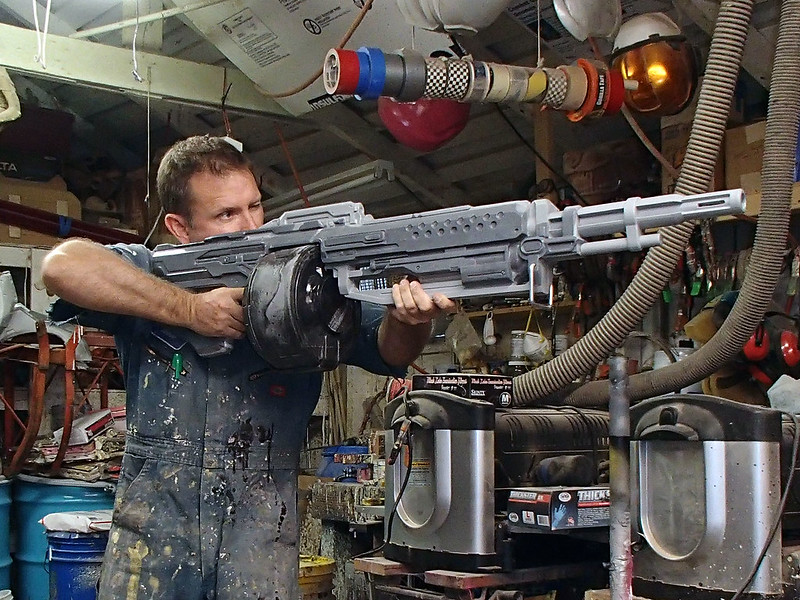
It makes me happy:
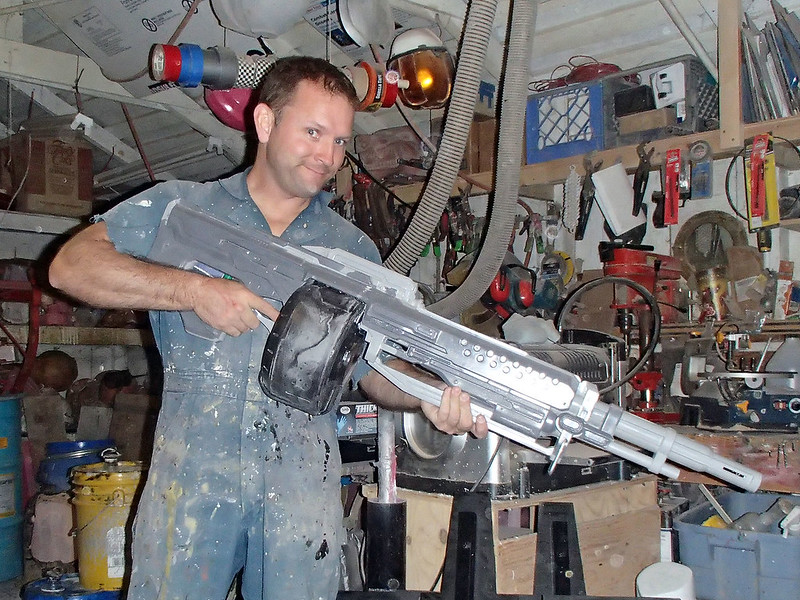
More to come. Stay tuned...
First, I bent a piece of aluminum rod to make the loop under the front end of the main body:
Then I made the trigger:
As well as the little notches for the back end of the magazine:
Finally, I made the flap that will go on the front of the magazine:
Then I mounted them to a board and gave them a quick coat of my lightish red prototype color:
Once the paint is dry, I'll go ahead and make mold walls and pour some silicone on them.
With that done, I glued together the worst-looking set of castings I had and spent some quality time with the beast in the shop:
It makes me happy:
More to come. Stay tuned...
Similar threads
- Replies
- 2
- Views
- 367