The Nylon Gag MK2 F1 Magneto Skimmer

First, I want to thank you Gag, for the inspiration to finish and improve my projects...

I just read through your MK1 thread and caught up on this one. My family and I just spent a week in Orlando and are heading home to Maryland now. So yeah, of course I made the wife drive (in Georgia now) so I can soak up all the technical goodness in your posts....lol

I can't wait to get home and get working on mine !

Your work is absolutely amazing!

Pat
 
A very good evening to you all,
Thanks for your interest my friends
Well, July turned out to be quite interesting,
Firstly, I had a small heart attack, then i won the All Open in the Big Spring Contest on ScaleModelAddict.com

Wow

Spent 4 days in the hospital after i passed out at work.

Have to lay off the salt and work on my cardio vascular fitness and watch my colesterol

I HATE geting old


But anyhoo

What's been happening with the MK2 Magnito Skimmer

Let's have a look.....


So continued with the rear wing

Picture%2520230.jpg


Side vanes

Picture%2520233.jpg


Picture%2520239.jpg


Picture%2520242.jpg


Added the down flaps

Picture%2520247.jpg


Picture%2520249.jpg


Top wing element

Picture%2520254.jpg


Picture%2520258.jpg


Picture%2520261.jpg


Shaped the top element and side elements


Picture%2520267.jpg


Attached everything together

Picture%2520275.jpg


Drilled holes in the main wing


Picture%2520269.jpg


Drilled holes in the external wing element


Picture%2520270.jpg


Pinned with brass rod and dry assembled


Picture%2520272.jpg


Picture%2520274.jpg


Picture%2520278.jpg


Drilled the rear assembly to receive the wing

Picture%2520283.jpg


Picture%2520284.jpg


Picture%2520285.jpg


Then shaped and fitted the floor pan

Picture%2520291.jpg


Primered, Mmmmmmmmm

Picture%2520294.jpg


Filled


Picture%2520298.jpg


Picture%2520301.jpg


Sanded and re-filled


Picture%2520310.jpg


Picture%2520312.jpg


Picture%2520314.jpg


And thats about the size of it
Still alive, just
Still modelling, always
Take care
Gag
 
Last edited:
*****! Glad to hear you're OK.

I thought we were overdue for an update, but you have a good excuse.

Glad to see you're making progress on the Mark II.

...You sure you've got enough fins on there? I think you could fit some on the underside... :lol
 
Sounds like you should ditch your day employment and resign yourself to the relaxing job of building custom model commissions all day, every day. Just pedal a stationary bike at your bench :lol
 
It is very hard to post here in a adequate way.

Sir...this is pure genious! I have learned so much from you in your last thread already and I am still baffled. Not even half through here....but already:

Pure genoius, tremendous talent, what a great build.....the way you use your materials...collect them...the eye for the use of parts. I have never seen something compareable in my whole life!! KUDOS!

...and subscribed! :D

Regards

Wolff
 
Thanks for your support everyone, I appreciate the good wishes, it really means alot to me


Great work! I have a question, what's with the baking soda? What do you use that for?


Brother Gattaca


The baking soda is like a filler, i glue the parts with CA (regular old Krazy glue from the supermarket with a built in brush) then i blob on more glue

in the join and sprinkle with baking soda, this makes the CA set instantly and gives you a very hard sandable filler. You can repeat this process several times if you wish,

Its basically turning ordinary CA into a mega gap filling CA.

One word of warning, if you dab on a second layer and get fresh baking soda on your brush next time you come to use your glue the whole thing will be solid
and your brush will be stuck in the bottle, I only use this method for areas that will be sanded or out of sight.

Hope that answers your question. if you have anymore please don't hesitate to ask mate

Gag
 
So you are using three materials for filling, right? Can I ask you what you use for what materials or gap sizes?? Baking soda plus CA, green stuff and a redish one?!?!? How do the work with the materials and what do you use to prime those??

Thanks a lot
 
Hang on, you've had a HEART ATTACK? Blimey! Well, I hope modelmaking is part of the therapy! Looking fine, keep up the good work, possibly on a treadmill.

;)
 
You, sir, are the Doctor Who of scratch-building. I enjoy your work so much. The only problem is that there isn't enough of it. :) If you had a live feed of your workshop, I would probably subscribe...(my wife would hate me)
 
Thank you so much guys for stopping by


So you are using three materials for filling, right? Can I ask you what you use for what materials or gap sizes?? Baking soda plus CA, green stuff and a redish one?!?!? How do the work with the materials and what do you use to prime those??

Thanks a lot


'G' Master, CA with baking soda is for initial construction, green Squadron fill is for the big gaps and the bondo glazing and spot putty is for the finish layer, but having said that i just ran out of the green stuff so now its what ever i've got left.

Primer is just regular old Rust-oleum ultimate finish sandable from Home depot, nothing fancy but functional, it highlights the areas i need to work on.

Hope this helps, keep those questions coming.

Gag
 
Last edited:
Ello,

Mmmm, primer.

Great work as usual. Glad your still with us!

Your posts are always a treat :thumbsup


Thanks mate :cheers


*****! Glad to hear you're OK.

I thought we were overdue for an update, but you have a good excuse.

Glad to see you're making progress on the Mark II.

...You sure you've got enough fins on there? I think you could fit some on the underside... :lol


Joking aside, there will be wings on the underside buddy ;), stay tuned.......


Whow - glad you made it!
Do what you need for recovering - if it's modelling, we ALL are happy ;)
Great work!

Danke mein friende :cheers


Sounds like you should ditch your day employment and resign yourself to the relaxing job of building custom model commissions all day, every day. Just pedal a stationary bike at your bench :lol

I wish mate, dream job :lol

Holy hot freaking dog

Mmmmmmmmmmmmmm hot dogs :)


Hang on, you've had a HEART ATTACK? Blimey! Well, I hope modelmaking is part of the therapy! Looking fine, keep up the good work, possibly on a treadmill.

;)


Ain't getting younger my friend that's for sure


You, sir, are the Doctor Who of scratch-building. I enjoy your work so much. The only problem is that there isn't enough of it. :) If you had a live feed of your workshop, I would probably subscribe...(my wife would hate me)


If i had a live feed from my shop i think my wife would hate me too.:D

I second that!
This is the scrach build academy for sure.


Yummi-San

My friend, for you to say this to me means a great deal, for in my eyes you will always be the innovation scratch master and you ain't to shabby either Doc


Gag-san


And, a Very good evening to everyone,

Thanks for the well wishes and support my friends, it means a great deal to me that you guys are along for the ride. Doing much better now, visited the cardioligist this week and he explaned what I need to do to improve my health.

No salt, lower my colesterol (no more fry ups and I do love me a good fry up, hey, I'm English OK) and do some of that cardio vascular exercise stuff. :angry

Time to break out the Time Trial Bike again me thinks. It's been a while. In my 20's I could regularly do a sub 23 minute 10 mile time trial, but I ain't 20 no more. :$


But anyhoo, so what's been happening on the bench.
Been a bit distracted these last few weeks planning for my next big project, will tell all soon ;), but as for the MK2, lets have a gander.

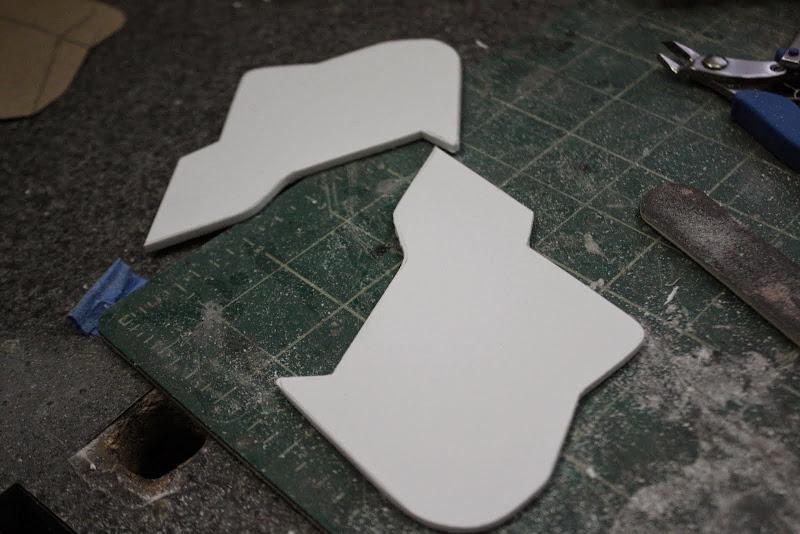
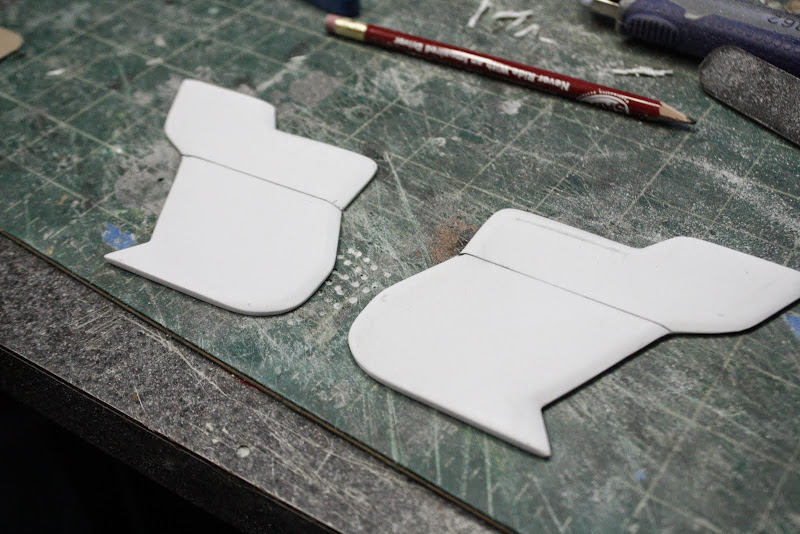
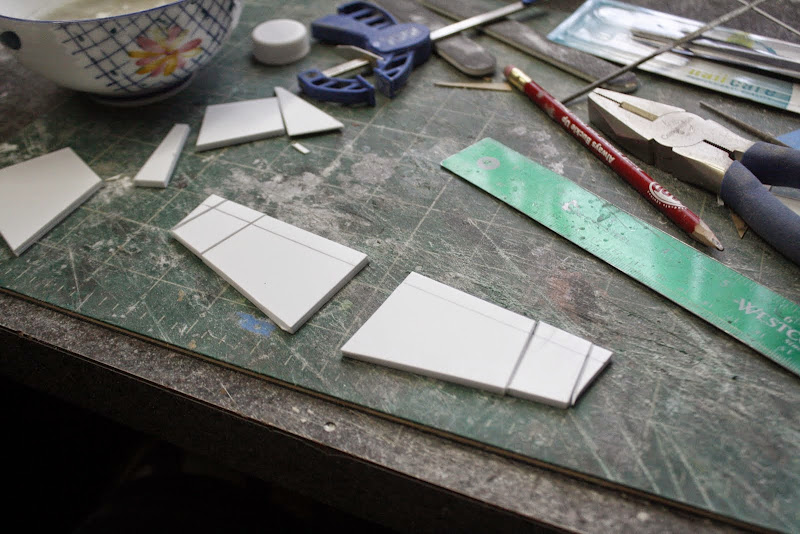
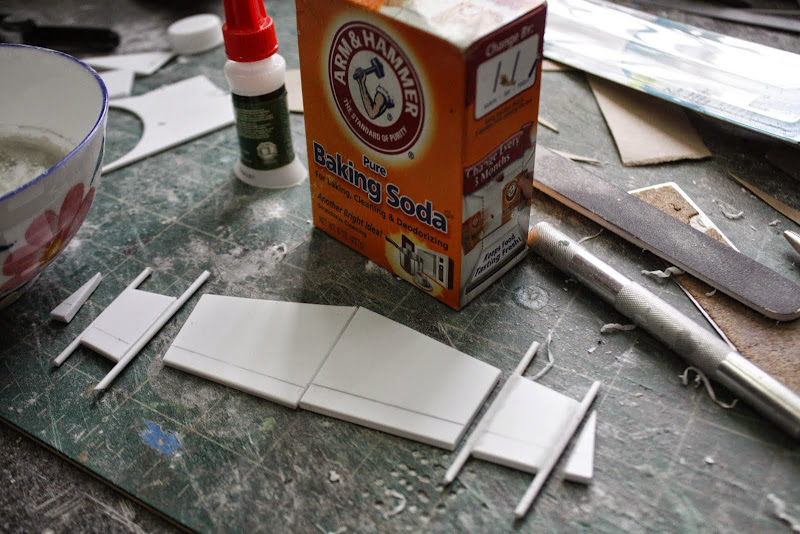
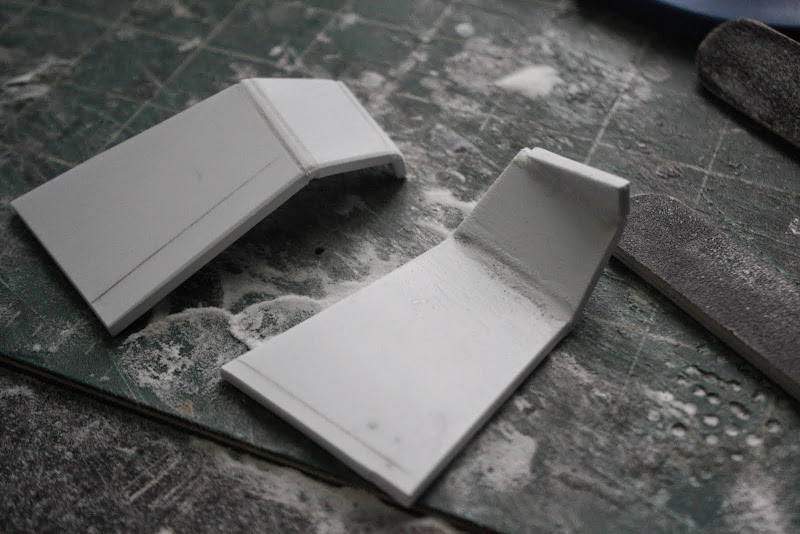
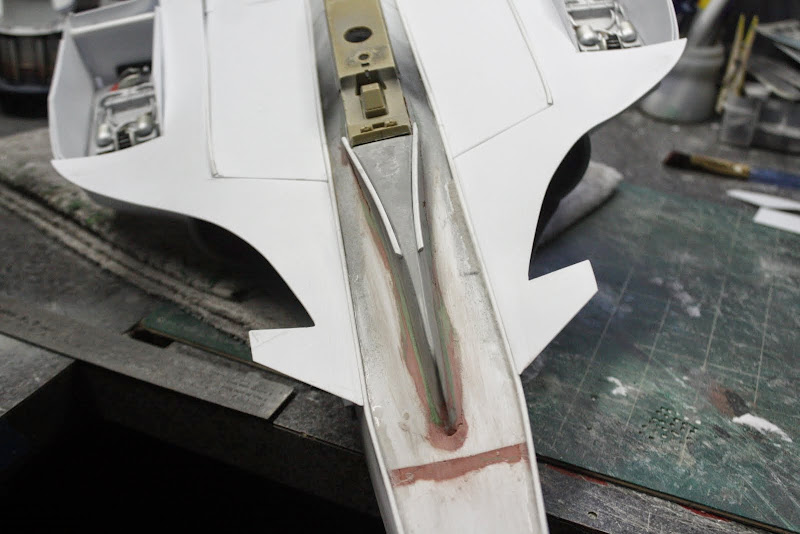
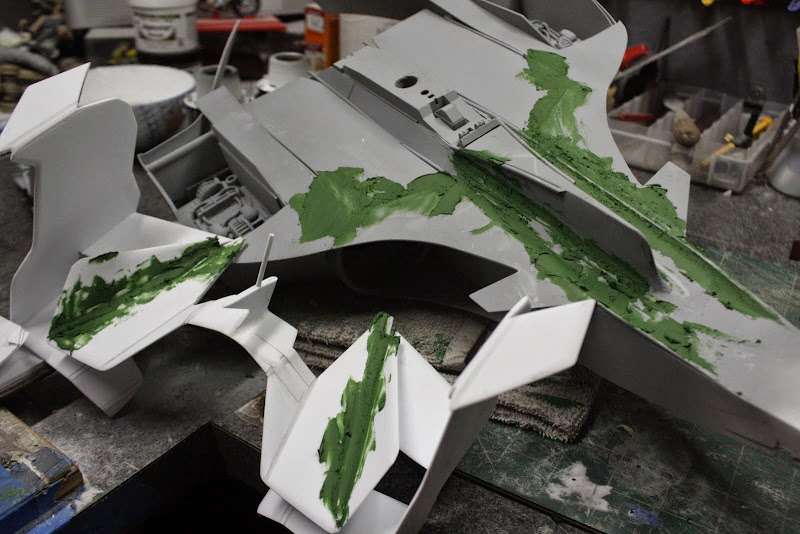
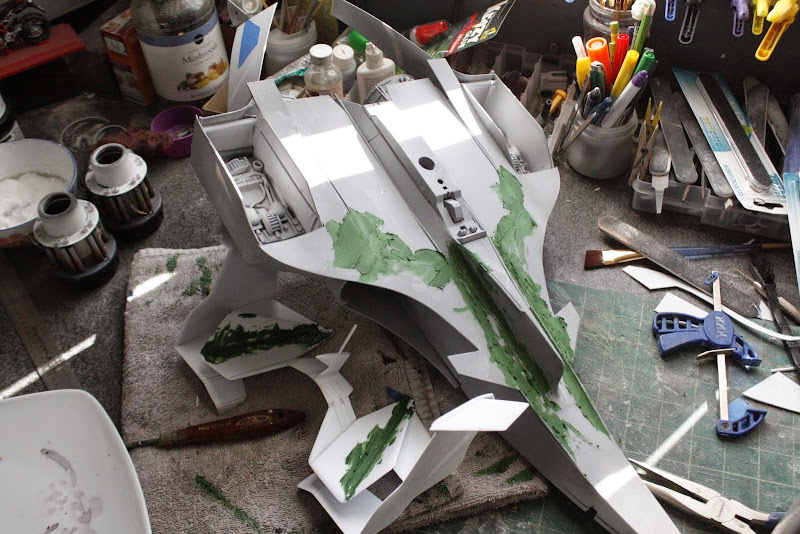
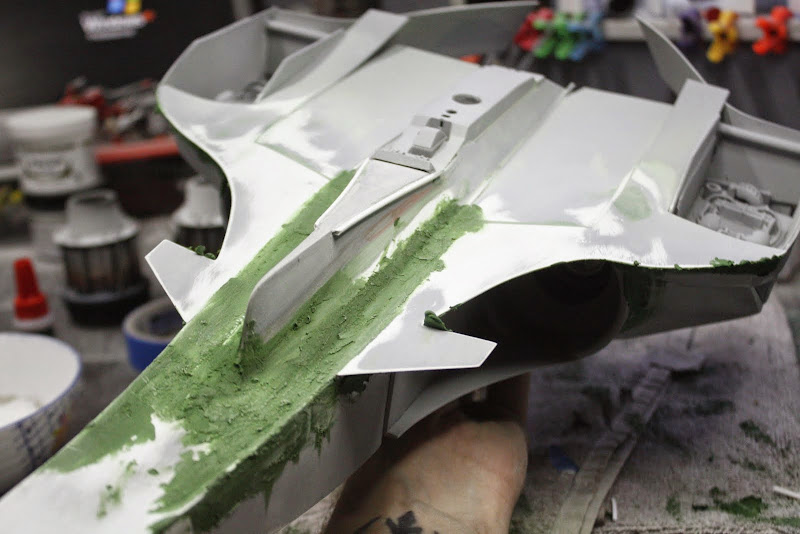
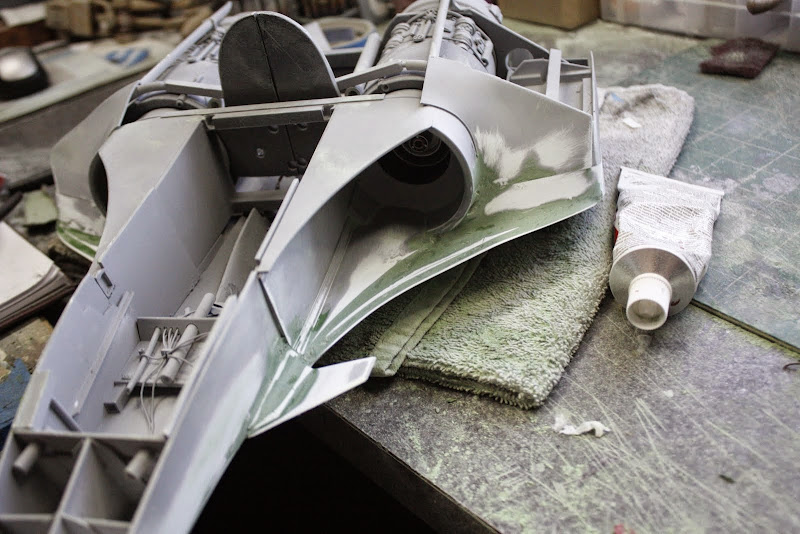
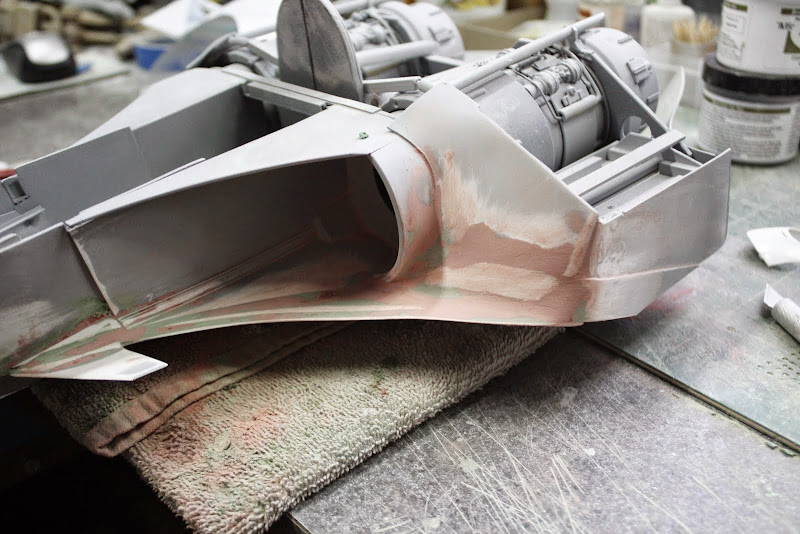
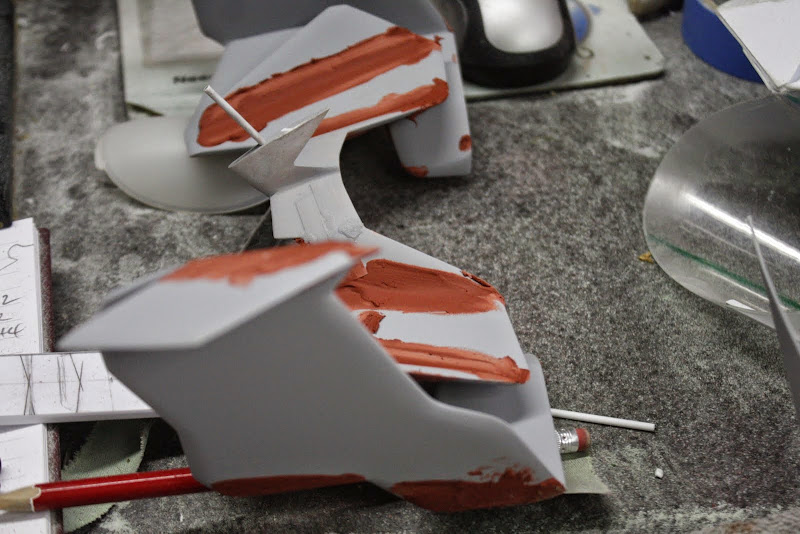
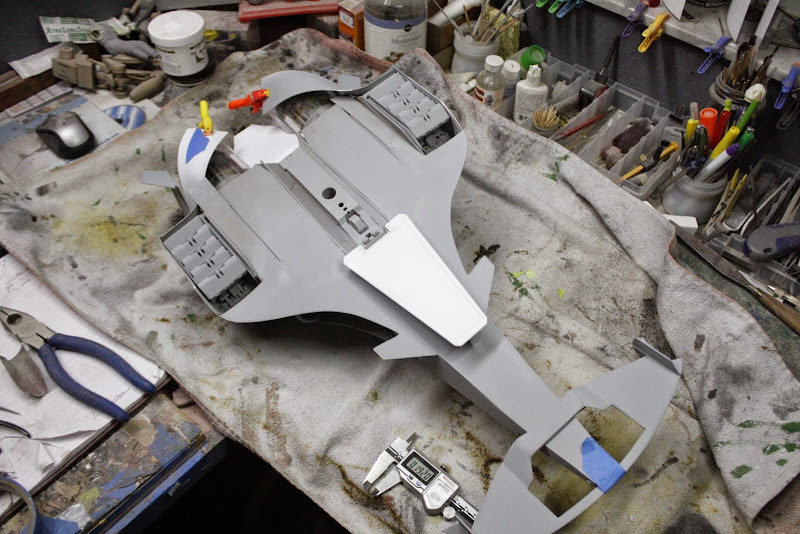
Its been fairly boring, fill, sand, fill, sand ,fill ,sand and repeat

Picture%2520320.jpg


Picture%2520321.jpg


Picture%2520323.jpg


Picture%2520324.jpg


Picture%2520332.jpg


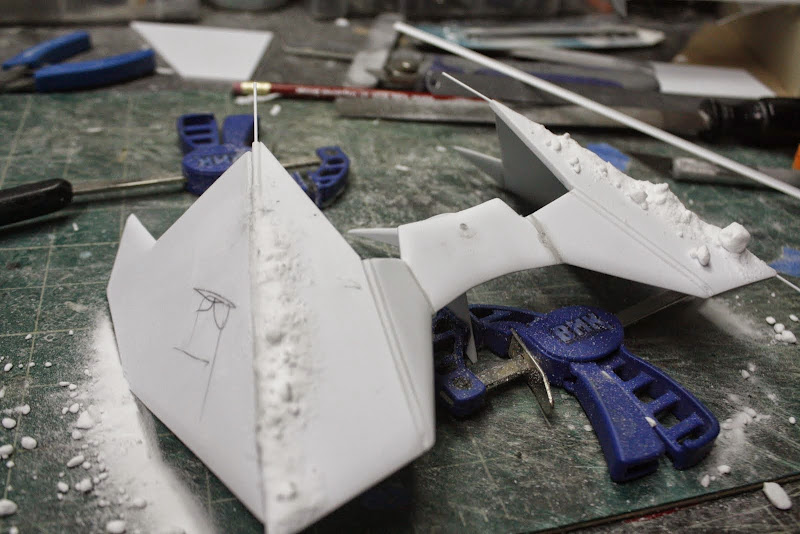
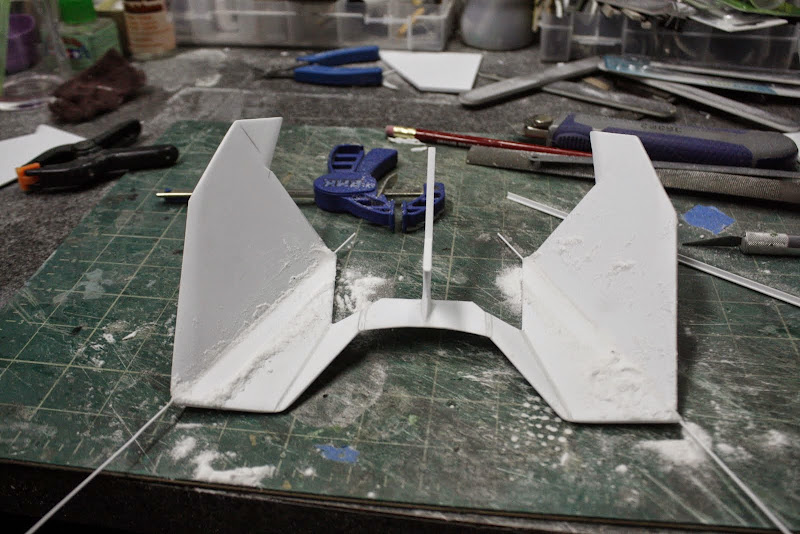
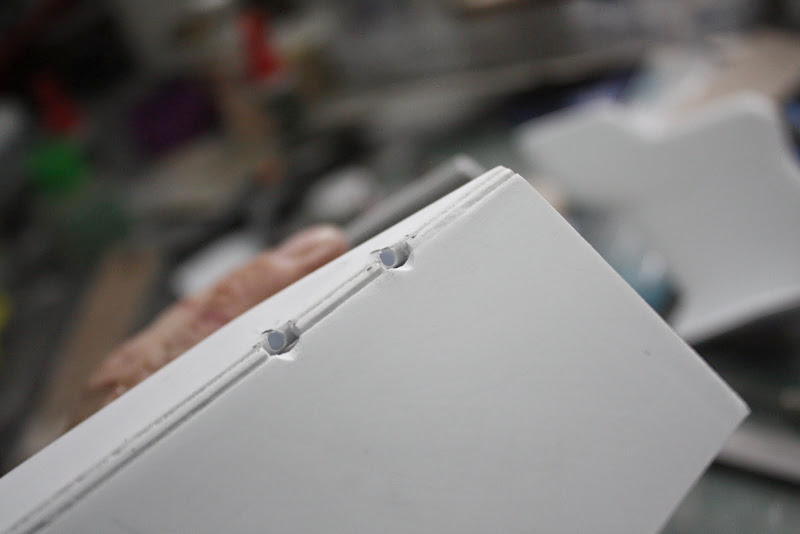
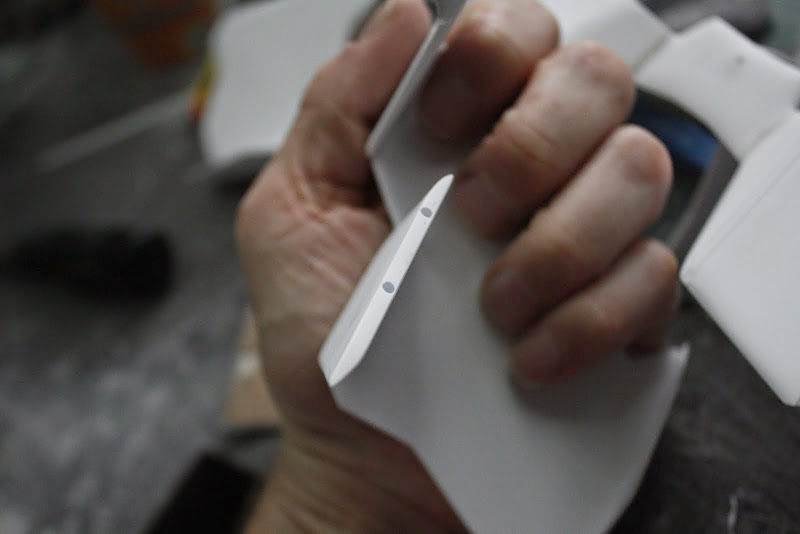
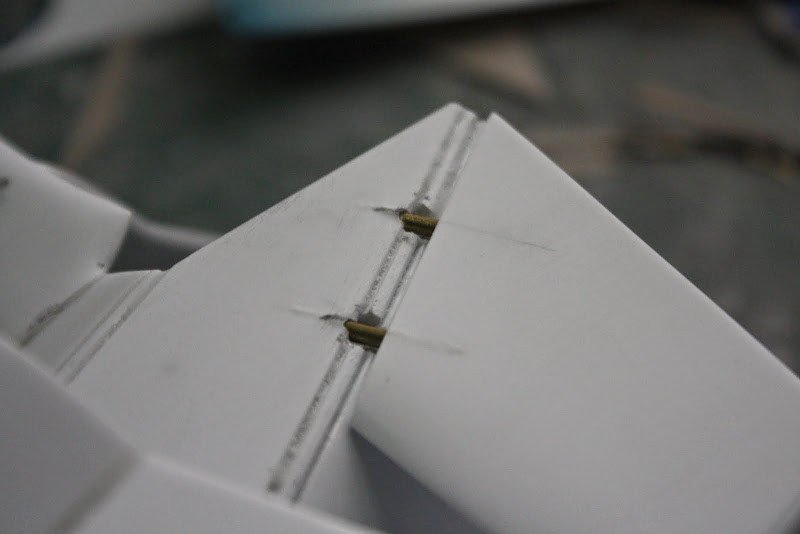
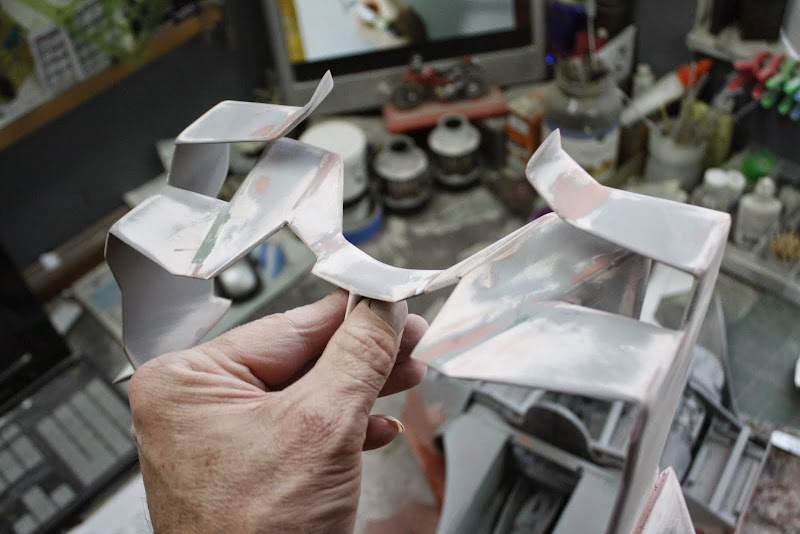
It's been the same thing for the rear wing, fill, sand fill, sand, break, repair, fill, sand, fill, sand,.......etc


Picture%2520318.jpg


Picture%2520330.jpg


Picture%2520335.jpg


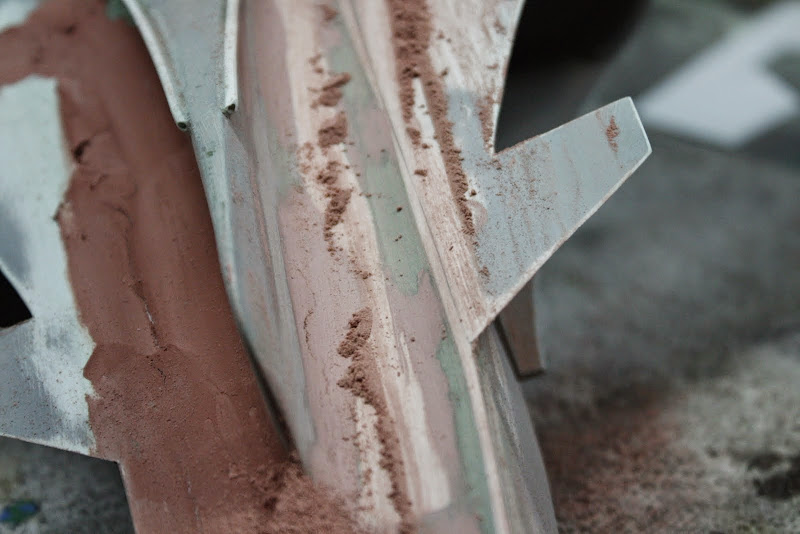
Mmmmmmmmmmmmmmmmmmmmmm
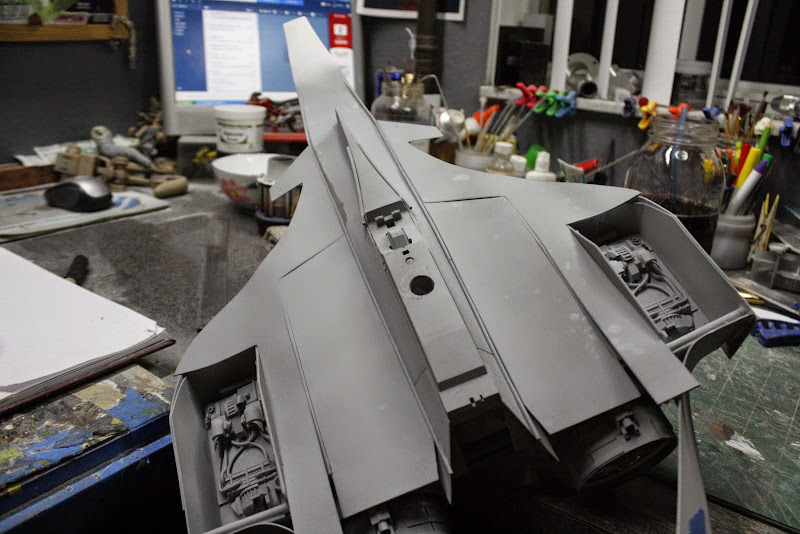
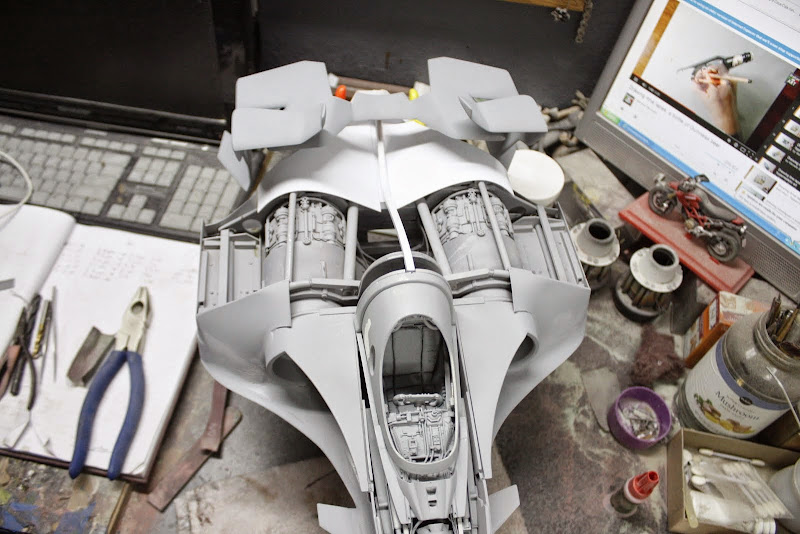
Primer


Picture%2520339.jpg


Picture%2520343.jpg


Picture%2520347.jpg


Picture%2520349.jpg


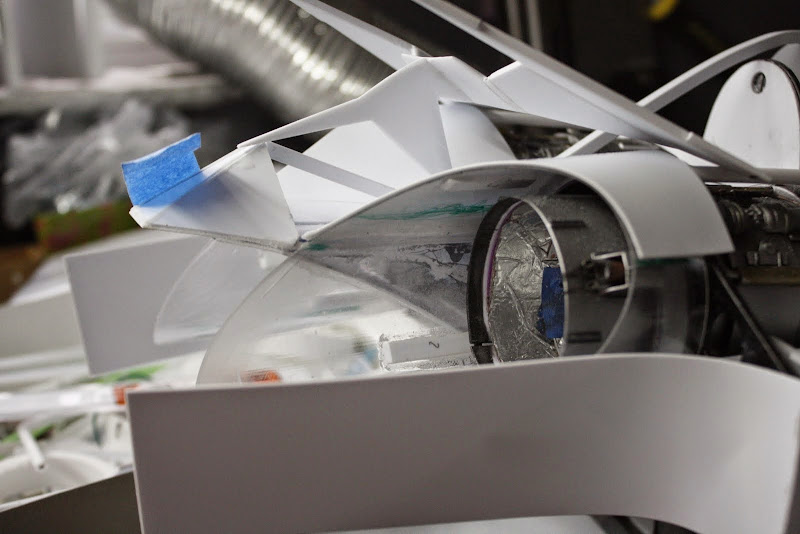
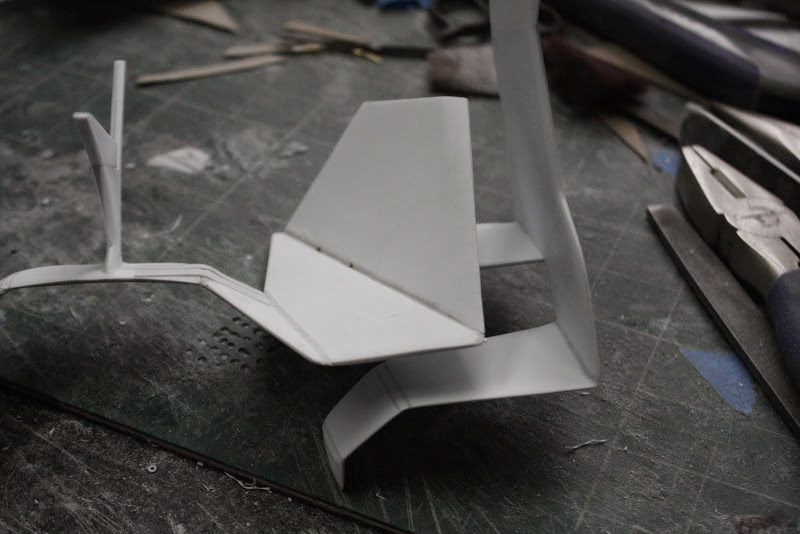
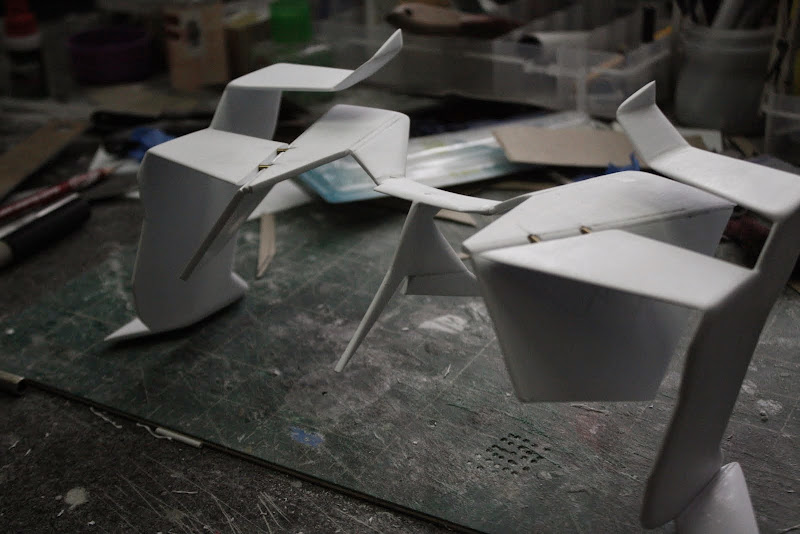
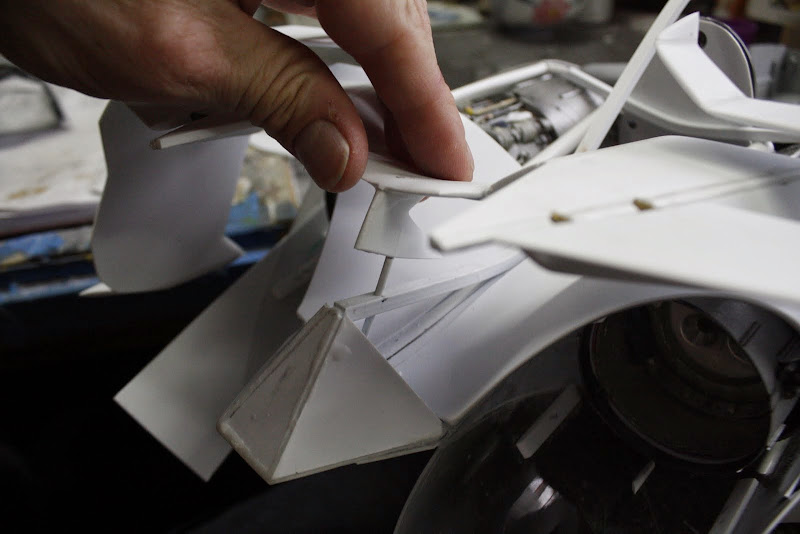
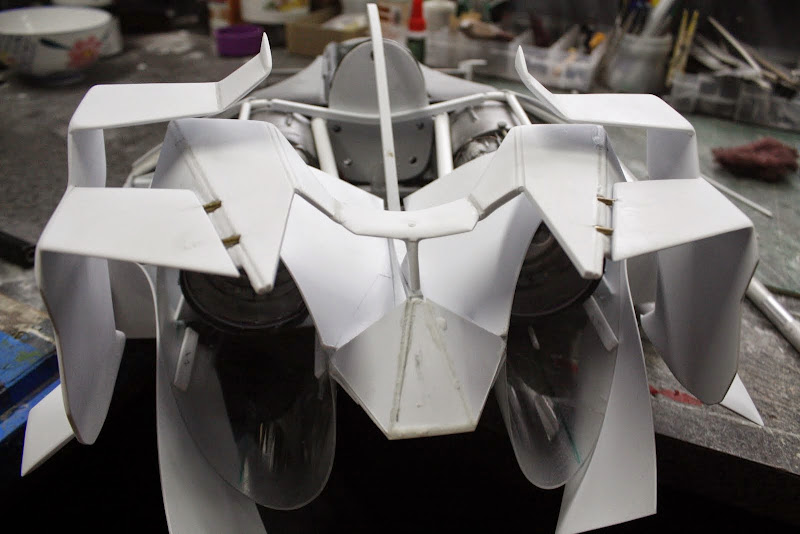
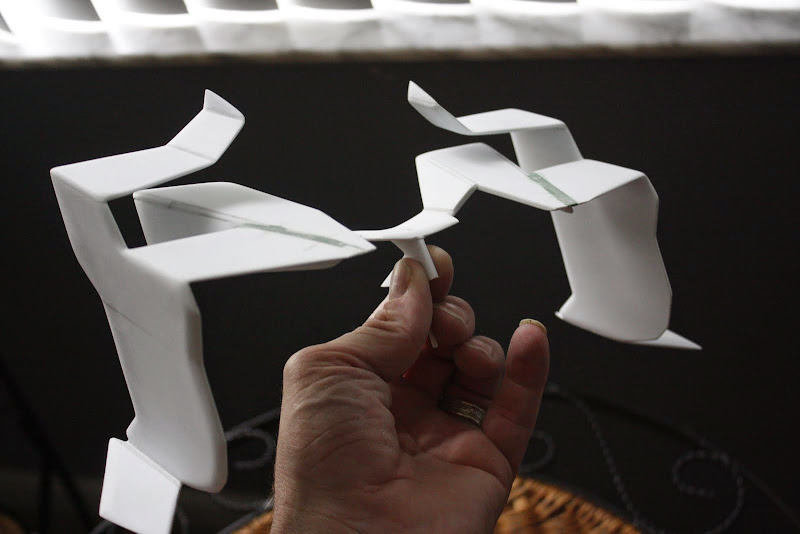
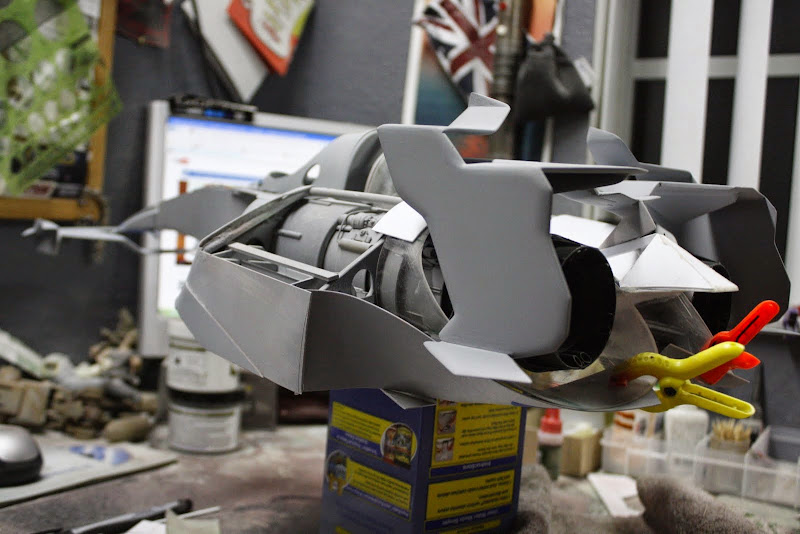
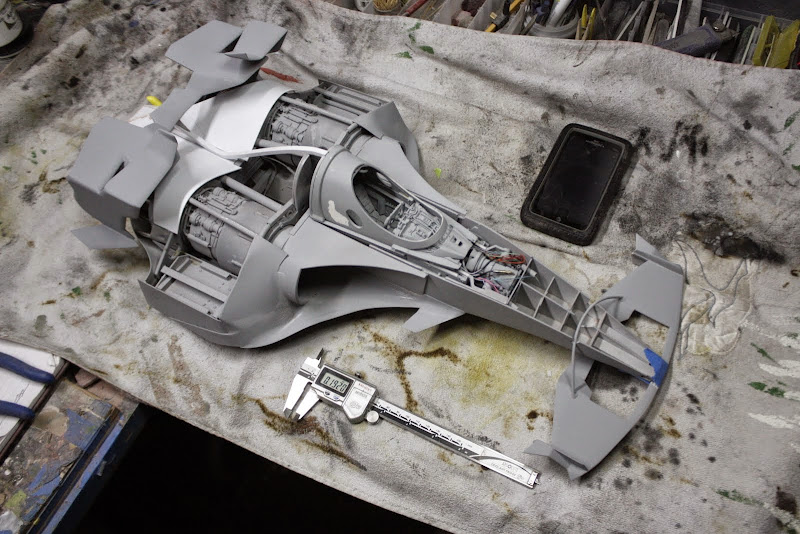
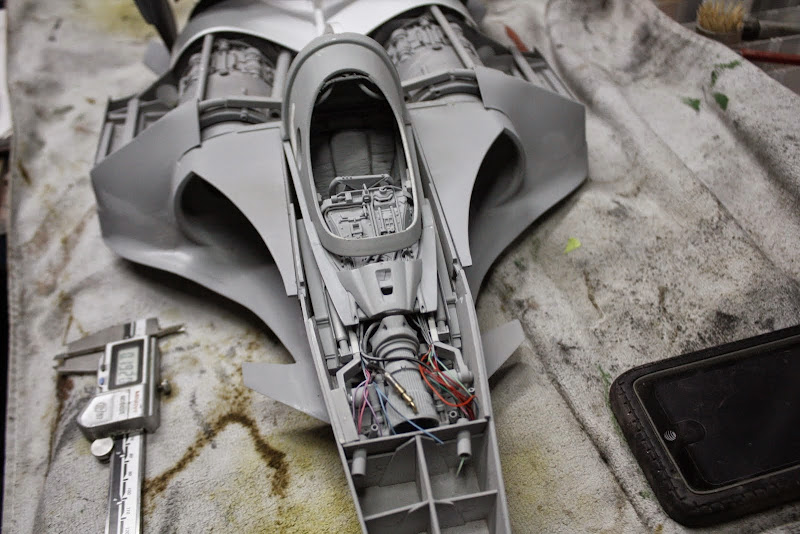
And finally a few dry fit beauty pictures of the story so far.

Picture%2520350.jpg


Picture%2520353.jpg


Picture%2520354.jpg


Picture%2520356.jpg


Picture%2520358.jpg


Picture%2520359.jpg


Picture%2520363.jpg


I'm now working on the top skin around the canopy, trying to get everything to open and close invisibly is prooving a bit tricky

But, that's next time
Stay tuned my friends
Take care


Gagstermansky

RIP
Robin Williams
The world was a better place with you in it :'(
 
Judging from your calipers, that's bigger than I imagined, but probably about as big as I should have expected from you. I remember being surprised at how big the Mark I was. Go big or go home, huh? Do you have a scale in mind for it? Perhaps one of the popular Formula 1 scales? 1/20 perhaps?


-MJ
 
Judging from your calipers, that's bigger than I imagined, but probably about as big as I should have expected from you. I remember being surprised at how big the Mark I was. Go big or go home, huh? Do you have a scale in mind for it? Perhaps one of the popular Formula 1 scales? 1/20 perhaps?


-MJ


The original driver (Colin, RIP) i was going to include was 1/12th.

The whole thing is about 26" long and 12" wide

Nice to hear from you Micky

Toe
 
This thread is more than 7 years old.

Your message may be considered spam for the following reasons:

  1. This thread hasn't been active in some time. A new post in this thread might not contribute constructively to this discussion after so long.
If you wish to reply despite these issues, check the box below before replying.
Be aware that malicious compliance may result in more severe penalties.
Back
Top