Half Life 2 civil protection WIP build - starting the uniform (Page 6)

stitching.jpg


IMG_7621.jpg

(don't worry, the paintjob is still WIP)

IMG_7620.jpg

The jacket is a placeholder. And I didn't want to put on the helmet as it's not really put together at the moment.
 
I ended up using the first ones I got, these.

I liked the newer ones as actual pants too much to sew on the reflective stripe. And these look perfectly fine and are a little bit cooler (temperature-wise). At first I thought they were too baggy, but I think that fits the blousing that the CPs have around the tops of their boots.

This is the tape I bought. I cut it in half lengthwise to make it one inch in width, rather than two.

EDIT:

Holy crap, I just tried making the under-jacket from scratch and sewing is difficult. It turned out pretty terribly. So terribly that I think I might just have to use something pre-made which I was hoping not to have to do. I think the vest will be easier, so I'm still going to try to make that myself, especially because of how distinctive it is.

I'm a little disappointed, but I guess it's the least important part of the costume. As long as I get the vest right, I'll be happy.
 
Last edited:
Holy crap, I just tried making the under-jacket from scratch and sewing is difficult. It turned out pretty terribly. So terribly that I think I might just have to use something pre-made which I was hoping not to have to do. I think the vest will be easier, so I'm still going to try to make that myself, especially because of how distinctive it is.

I'm a little disappointed, but I guess it's the least important part of the costume. As long as I get the vest right, I'll be happy.

Is commissioning it out of the question for you? I can't sew a stitch to save my life so I wind up commissioning almost all of my soft projects. I am not sure if you will be able to find any premade option that is suitable.
 
This seems so much fun! Of course, I can't help thinking if I wore one to a con, I'd spend half the con lying on the floor going "Beeeeeeeeep."

On the other hand, might improve their recycling a little....
 
Unfortunately I'm not able to offer any advice for your build but I just wanted to say it's looking amazing.

This seems so much fun! Of course, I can't help thinking if I wore one to a con, I'd spend half the con lying on the floor going "Beeeeeeeeep."

Dressing as a Metrocop seems to offer as much fun as being dressed as a Stormtrooper, you can really ham up the authoritarian foot soldier personality.
 
Is commissioning it out of the question for you? I can't sew a stitch to save my life so I wind up commissioning almost all of my soft projects. I am not sure if you will be able to find any premade option that is suitable.

I assumed that commissioning would have been prohibitively expensive, but maybe not! Do you have anyone you'd recommend or are they local?

Also it's funny you guys say that because I was originally going to do a stormtrooper, but I wanted to do something not many others have tried!
 
https://dl.dropboxusercontent.com/u/3911100/IMG_7620.jpg
The jacket is a placeholder. And I didn't want to put on the helmet as it's not really put together at the moment.

Just as a suggestion, I've improvised my own Stun Stick and decided to go with a simple rubber handle from a bicycle grip. It could be a simple rubber one that exists on most bikes for children, or you can even get some elongated foam grips and fashion a round cross-guard. Food for thought, just to simplify your search for parts.
 
I was actually looking for a bike grip, but they all seem to have a smaller internal diameter than the pipe I used. The standard bike grip is around 7/8ths on the inside and the diameter of my PVC pipe is just a hair over an inch.

mViUO4h.jpg

Here it is painted.

And if anyone has recommendations for the whole sewing thing, I'd still love to hear them.
 
I hear you, as I had exactly the same trouble. My Stun Stick is actually 1-1/16" in diameter. I had a pair of leftover handlebar grips and they barely made it. The only way I got them on is to apply vegetable oil on it. Not just a little bit, but basically had to cake it on from the outside and inside diameter. Don't worry about over application as you can just rinse it off with water and leave it out to dry. Also It'll be pretty tough to get them to stretch over, but once they are on they're not going anywhere.

... Why did that statement feel dirty? :lol Anyways!

As for sewing, I'm barely even a beginner. However what I do remember is when you do make something you want a two layers for the chest, and two layers for the back because later you can sew them together to piece the entire vest.

Simply put, make the chest with two layers. You place those two layers inside out and you sew the seams. However you leave a hole large enough to pull the chest/back inside out. What does this do? It takes all the sewing seams you've made and pulls them inside of the item itself. Hopefully that makes sense?

If not, grab a pillow case for example and turn it inside out. You'll notice all the sewing/stitching is on the inside. While on the outside, it's a reversed seam and it's clean with no sewing to be seen or frayed ends on the outside which is basically the technique you're going for.

If I explained this poorly, simply click this link "How to Sew a Square Pillow" for example. You'll have to use your ingenuity to determine the best course of action down the road to sew in the details, but I'd do that after you sew the outlines and then turn the vest inside out. I'd recommend leaving the bottom end open (towards your stomach/lower back) and then carefully stuff the vest for that 'ballistic' look then do the final stitch to close it up.

After you've sewn the two layer chest chest and two layer back, you'll want to sew those the chest and back together at the point over your shoulders, like a typical shirt. That'll allow you to stick your head through and then from there it'll simply be draped over you. Then you wanna stitch the left side shut (under your left arm) but you'll want to add nylon snap-buckles on the right side (under your right arm) as that's where the straps are in game.

This is the same thing I'm doing for my vest, but I haven't gotten there yet. Hopefully this helps?
 
Last edited:
IMG_7620.jpg
The jacket is a placeholder. And I didn't want to put on the helmet as it's not really put together at the moment.

Also, as a suggestion for the area between the boots and pants, the in-game model replicates a technique known as "Blousing". If you do a search on YouTube such as "Boots Blousing" or "Pants Blousing" it's the act of rolling your pants up at the end and then using some elastic band to keep them in place on or above the boot. This is common in the military.

he-cpteam.jpg

This'll give your cosplay a more militaristic look which is associated with the Civil Protection from what is seen in game and to avoid tucking them in. Figured as you're getting closer to finishing your suit, that you may wish to know the subtle details to really go for the 'official' look.
 
6pdLmfJ.jpg
Next up I need to make the other parts of the tunic--or whatever you want to call it--that goes under the vest.

Also, I wanted to offer you some additional help regarding fabric. I may not be able to help you with sewing in particular, however I have already purchased the materials that I wanted to use for my vest due to low cost and the general 'texture' of canvas which seems similar to the ballistic vest. With that in mind, I am sure you're probably very cautious on how you're going to go about doing this and may have limited material so this is my suggestion as what I have already done.

Go to Harbor Freight or perhaps a home improvement store such as Home Depot or Lowes and buy the largest painting dropcloth you can find. This is what I did: Harbor Freight - 9ftx12ft Canvas Drop Cloth (for painting) it's cheap, only about $15 bucks or so, there's also smaller sizes like 4ftx9ft, however I wanted the most material I can get.

Now I understand that you may have already began the process, however I feel that if you need to do a lot of 'sizing-as-you-go' but this'll also be a good testbed for ideas down the road and there's plenty of it.

My original idea was to take this canvas, to then dump it into a 5 gallon bucket and pour hot water and bleach into it to whiten it. Then use the 5 gallon bucket again with hot water and mix: Rit Dye - Pearl Grey (What is odd is that picture is someone else using it on canvas to build an outdoor seat. Perfect!) and use it to dye the canvas a grey color for the vest. (My personal opinion is that people who try to use a light blue color for the vest is incorrect.) and all you have to do is if you feel it's too light, is leave it in the bucket with hot water longer and it'll get darker. Of course follow the directions on the dye, and use common sense.

(Note: You may wish to bleach/dye the pieces after cutting/sizing rather than doing the whole drop cloth at once.)

So if you look at an in-game screenshot, you can see the Civil Protection vest actually has a darker collar and back, so all you have to do is take the chestpiece out sooner than the back/neck and you'll get a darker grey color which is associated with the picture.

It's what I currently have on hand I just haven't had the chance to stitch it together. Everything else sounds fine in theory.
______________________________________

Now in regards to the item underneath the vest or the 'undercoat'. From the looks of it, the 'undercoat' looks almost as if it was attached to the ballistic vest, however you may be hard pressed to get a long canvas-like trench coat with what appears to be a zipper. You can fabricate if you truly wish... or you can do what I did: Black 4 Pocket BDU

Simply buy a simple 4 Pocket BDU which is still military in style. After that, then you can go through the process of... trying to figure out where to put those 'white shoulder collars' on the vest or 'undercoat'. :rolleyes But perhaps you'd want to paint the 'white shoulder collars' on the 'undercoat'? I don't know what to say.

Hopefully this helps, or at least food for thought.
 
Last edited:
Loved reading what you wrote, it's nice to see someone has thought about this as much as I have :p

I agree that the vest should be gray, having examined everything closely. For the vest fabric, I looked at a lot of materials to get the right texture, but I decided on a strange one. You know those reusable bags that are showing up everywhere? They're made of unwoven polypropylene, and the appearance is surprisingly close to that of the vest fabric. The good news is that it's lightweight and easy to find, but only in bag form.

The undercoat is a very confusing beast. The arms are a dramatically different material than the part below the vest, which almost looks to me like a synthetic leather of some kind. Meanwhile the arms seem very coarse, almost sweater-like.

Anyway, this is still all theoretical as I haven't made much more progress on this stuff. I'd love to hear more from you, and see pictures when you've got stuff coming together.
 
Hahaha! I'm glad you liked it, honestly for a hot minute I thought I may've been overdoing it as if I was hijacking your thread. :p Certainly not my intention. But I am very enthusiastic on making this cosplay, but unfortunately I simply don't have access to rendering software or a 3D printer. So I just try to make due.

Seeing as we're on the topic of the vest and undercoat, I'll add some pictures here so that we can refer to and others can see for themselves.

Civil Protection:
24.jpg

Rebels:
Rebels_tunnel.jpg

Rebels_trainstation_plaza.jpg

So with these pictures in mind, as often as they're used as references, you can see that the Rebels have clearly taken the ballistic vest from the fallen Civil Protection units. But at the same time, I understand as to why some people put on the 'blue hue' to the vest as the moment they transition from the CP's to the Rebels they do seem to have the illusion of an almost 'denim' like appearance. However I would disregard that, as honestly... most of the models in Half Life 2 are fairly low-res.

(Note: Due to the low-res models. Some people have taken some different perspectives regarding the CP's gloves. Is that a stripe of reflection? Or is it a white stripe similar to the one on their pants? I personally have bought 1-1/2" white electrical tape from a local hardware store, and I have applied it to my gloves. [You would be surprised Rubber Slug, because you bought the same gloves that I originally did.] Honestly, it looks well. Perhaps I'll take a picture of my completed armband and striped gloves in the future for you to see. And of course, you're more than welcome to your own opinion if you feel like there should be a stripe or not. This is simply my take. Work in progress, right?)

Another thing I wanted to point out, at least when using Rebels as a reference, you can clearly see that the undercoat beneath the vest is entirely a different piece of attire. So... perhaps if you truly wish to fabricate an undercoat and you can only acquire small bits of fabric that you've mentioned, you may want to try a canvas drop cloth. Once again, food for thought.

As for the undercoat's white collars... you may want to use Plasti Dip Spray - White? Which is available at Home Depot and Lowes, however keep in mind that they may have Plasti Dip, but it may only be common colors, like black and grey. You may be hard pressed to find white. But, once again, just putting suggestions out there. I don't think that bleaching would be a viable method. Also, some people have decided to take a white t-shirt and simply wear it over the undercoat, but wear it underneath the vest. I don't feel that this will give off the proper look, that is unless... you were to sew the white t-shirt onto the undercoat directly. I think the idea is to make it look like one piece, rather than having the shirt-over-a-shirt look. Ya know?

Anyways, I suppose that'll be all for now. Let me know what you think as I am making my own stuff too and could use your input.
 
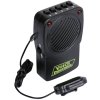
Oh, Rubber Slug I almost forgot! Remember it's October. Make sure you take a trip down to one of those local once-a-year Halloween Costume stores. Find a voice changer if you want. They're cheap, probably between $3-$10 bucks.

Voice Changer 3 Different Eerie Voices Licensed 9291 Fun World
(I use this one, and it's fairly good.)
$(KGrHqZ,!nYE-z7(5Yj2BP4Jthh3nw~~60_57.JPG

There's also this one, I don't know the manufacturer information. However I've seen that this can be a plausible alternative.
You'll most likely be able to find one or the other at a local Halloween store.

67312.jpg

Be sure to try to hit one up, it's not expensive. Heck, you might wanna buy 2 if you like how it works just for backup if it breaks. I personally have gutted the unit and integrated it into my mask at this time. Maybe I'll take a picture of it sometime.

Once again, food for thought. Enjoy!
 
Looking at some concept art (Which I believe to be more canon than the game itself, sometimes), the undergarment may be of one material. The example being the picture of the blue eyed CP.
http://img2.wikia.nocookie.net/__cb20091223234549/half-life/en/images/c/cb/Metrocop_blue_eyes.jpg
The material on the game model just looks like it got stretched, or maybe they changed the design after that concept art. I was thinking a simple black jacket, with a black zipper. Perhaps one of those from walmart, such as this: http://www.walmart.com/ip/36248236
I have one of those laying around in a different color. the Black/grey, and the style seems to match the photos I'm seeing at the moment. The zipper is out of place, as are the cuffs, but neither are visible due to the gloves and vest. The White portions are still a seperate issue.

All that said, that depends on if you want to go with concept art, or if you want the true in game metrocop.

That idea for the vest material is interesting, and upon thinking, sounds very appropriate. I wish you luck with it.
 
Last edited:
So I was toiling about the internet again, I stumbled over yet another Civil Protection cosplay worth mentioning: KaitoraXD

While looking at the vest, you can see that even a black or grey vest is still much better than trying to produce a blue one (which is usually akin to Rebels). All in all, not bad.

What I like about the Civil Protection costume, is that when you're done you can at least use the vest to cosplay a Rebel. Just toss a button-up shirt, some denim pants and a vest and a few EVA Foam pieces and spray paint the Lambda mark on it and pickup your airsoft MP7 and presto! You're now rockin it Rebel style.

Which leads me to another topic: U.S. Army Medic Armband. I've actually bought a few of these armbands, just do a google search to find the one you like as they're fairly cheap. I used one to make my C17:i4o armband after removing the red cross and coloring it. However, if you buy them alone without modifying them you'd find that these are -perfect- to replicate the Rebel Medic
 
This thread is more than 8 years old.

Your message may be considered spam for the following reasons:

  1. This thread hasn't been active in some time. A new post in this thread might not contribute constructively to this discussion after so long.
If you wish to reply despite these issues, check the box below before replying.
Be aware that malicious compliance may result in more severe penalties.
Back
Top