ANH Hero DL-44 Discussion - Three ANH Greeblies Found

Yeah, I think you are all right - just looking at one or two of the photos, I LOOKED lightly painted, although all the rest of the photos looked certainly to be blued. And yes, Pat did indeed mod his MGC VERY well. I'm trying to duplicate his work - the first MGC I have I overdid a touch, so I'm going slower on my second, to make sure I don't screw up.

I'm torn between admitting that move by Pat was either very masterful or very mean... maybe a little of both? :behave
 
It's funny. There was a time in this very thread when painted was the general consensus. As for me, there are some chips on the surface of the blaster in the promo pics that I find difficult to reconcile as wear. Could be some deep gouges, but I go towards painted. I could be wrong, but it is tough to tell for sure.
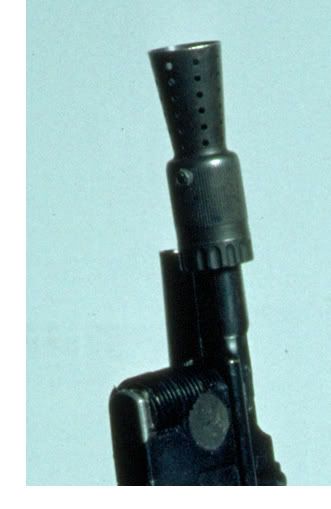
As for Halloween Fools Day, I noticed the bullets in the flashhider too. And, the aft edges of the knurls on the flashhider aren't worn as bad as the hero either. Funny even the dust in the background matches, and the white wedge shaped support looks exactly the same. Must be photoshopped into the original pic? Excellent work though!!
blasterallsidescopy_zps06fb202c.jpgtumblr_lsiep7k1uA1qmnqf0o1_1280a_zps2b0aac11.jpgtumblr_lsiep7k1uA1qmnqf0o1_1280_zpsb047ff62.jpg
 
Now that the secrets out, extremely nice work on that blaster, Pat! She's a beauty. That's certainly one for the record books, all the work you've put into finishing it really shows.

As for the paint, two of the page-5 photos posted by dcarty and lonepigeon seem to strongly suggest painted surfaces in some areas. Notice the chipping and such, the unpainted bull-barrel, and also the texture difference/lack of reflection from the surface of the Mauser when compared to the two color pre-pro photos:

ANHHerostill3.jpg~original


Also note the color/contrast differences between the grill and the paint, possibly suggesting that the grill was put on after and is unpainted. The visible glue under the grill seems to suggest that as well.

anh_underbarrel.jpg


-Carson
 
Here's how to tell: the biggest sign is the holes behind the ejection port scallops - the shaping of them isn't like a real Mauser's, but a heavily modded MGC.
Hmm.. While there are minute differences between different real Mausers, you could be right.
MGCs usually have a thicker wall between the sight rail and ejection port than on most Mausers, but on some Mausers that wall is thicker.
The sight rail looks like a modified MGC sight rail.
 
...so it's not the real one?


Hey, Thanks and sorry guys... couldn't resist the intro. I was thinking that it would be
interesting to see the reactions and observations of the great members here. Hope no one
was too offended... it was done for fun and education.


I did purposely leave some "tells" because I didn't want to purposely mislead you guys. Which is why I chose not to claim they were real, just that I had photos. ; )


The interesting thing was in taking the photos, had to take hundreds to get the angles close enough to the HERO images. Thank goodness for digital, but it is a problem to match
an old 35mm film effect. lighting and focal length. I didn't want to make it so close to the real ones so you could tell them apart.

What I found was that the images vary greatly depending on angle and depth and can really distort the size and scale of the parts which is why this parts replication effort is even more impressive.

Kudos to everyone who participated in the very long thread!

As some know or guessed, this is a heavily modified MGC. I used the MGC so my Nephew could handle it and so there are no Imperial entanglements. ( meaning the govment) I included every mark, scratch and ding , seen or unseen and included the working NR barrel with release latch and threaded barrel for rife extension.

The backgrounds were photoshopped in. Some of the images were taken at different times. I made some more adjustments after Scott posted that amazingly clear big B&W Hero shot. I was too lazy to retake the photos after the fix.

Here is a comparison of the real and replica. The lighting is not exact but you can see the details better.

I will post other images and info about how I achieved the details in case anyone is interested.

Thanks for the kind words and interest in this prop. Could not have done it without you all.


blaster right hero vs replica B&W enhanced.jpg
blaster left hero vs replica B&W best.jpg
blaster top hero vs replica B&W best.jpg
 
Last edited:
Holy shizzle! Those are awesome! Thanks for sharing, kpax!


Well heck. I got mine back out again and ****** the hammer of my MGC forgetting that I replaced the trigger! Anybody know an easy way to get the hammer back down? lol

Try turning the gun upside down and pull the hammer back a bit further then pull the trigger to release the "sear" and let the hammer down...

If the trigger does not release the sear, you can try using a small screwdriver. pull the hammer back a bit further, this should lift the "sear" that sits on top of the hammer above the rounded area surrounding the pin. Just use the screwdriver to lift the sear over the hammer notch and lower the hammer. You will see it through the gap between the upper and lower receiver.
 
Last edited:
And that's what I get for not pulling the Chronicles book out. lol

And my hammer is still stuck. I have a real trigger that connects to nothing. Being one handed doesn't help much either. Grrrr.

Nice job on the gun!
 
And that's what I get for not pulling the Chronicles book out. lol

And my hammer is still stuck!

If the hammer is still stuck, you will have to disassemble it a little. once the MGC bottom is halfway off, you can push up the sear arm to reset the hammer back down. Put the gun back together. Also, if you want to make the real trigger functional, rather than modding the trigger, you can lay recess something on the bottom of the sear arm where the trigger pushes it until its low enough for the real trigger to reach it. I think Scott did that on his MGC Luke ESB.

And please, I knew all along... ;)
 
Last edited:
If the hammer is still stuck, you will have to disassemble it a little. once the MGC bottom is halfway off, you can push up the sear arm to reset the hammer back down. Put the gun back together. Also, if you want to make the real trigger functional, rather than modding the trigger, you can lay recess something on the bottom of the sear arm where the trigger pushes it until its low enough for the real trigger to reach it. I think Scott did that on his MGC Luke ESB.

And please, I knew all along... ;)


unneccessary.
just take a small screwdriver and push it into the recess right behind the trigger against the sear arm.

Markus
 
I used a low melt solder made for pot metal/zinc.

http://muggyweld.com/

Super Alloy 1

Some nice videos there that make it look easier than it is.

I did fill the tops of the receiver rails, ejection scallops, feeder clip notches various holes etc.

The best way to do it I found is to use the cut off barrel material and make a waste mold from plaster or the like to first make cast pieces to dry fit the areas, then use the solder to attach the new metal and blend blend blend.

I attached the unique Carson's lump, - The bolt weld area this way as well. I first shaped the "lump" according to the stunt and production pics and then soldered it in place.

It is not for the faint of heart. Although it melts at a lower temp than the Zamac it is dicy and can warp or damage your frame if not careful.

It does not always stick well if you get it wrong. As with any soldering or welding... clean clean clean...

It does blue as well so that is a plus.

I really didn't want any plastic or filler on this model for some reason... it was a challenge.

Also no glue on this replica at all.

The Hammer is cast off a real vintage C96 hammer. I made a mold and cast the cut off barrel material... very hot casting.
I made a waste mold first and re-sculpted the bottom pivot area to match the MGC mechanism so it works with the trigger and safety and then cast the MGC Zamac. It has the "S" and also the 813 stamp to match the serial number.

The top of the bolt also has the etched "Crown U" markings and 813 serial number.

I tried to make it look old and used and worn.

blaster LEFT REAR for post.jpg
 
Last edited:
Wow... puts my work to shame... got any more of those cast hammers? I'm in need of another MGC hammer, as I overdid one of mine, and now I don't like the look of it. And, as you stated, my real hammer isn't compatible.

Give us more glam pics of it!!! :love
 
I may see if Dave at DEC wants to cast some Hammers for the MGC and Denix if there is interest.

I made one for the Denix I started as well. I am helping my Nephew put that one together, got carried away with the MGC... as you may have noticed.

The Hammers are the worst part of the MGCs as far as being so far from the correct size and shape. Just too short.


I'll post more pics soon...

Thanks for the kind words. Everyone did a great job with their builds.
We are ready to take on the Galaxy...as long as they don't shoot back!
 
I am speechless (which doesn´t happen that often :lol)

Just when I thought that members of this board have reached a level, where you can hardly improve a MGC based build any further YOU post these pictures ...
ABSOLUTELY STELLAR WORK, gives me some inspiration to improve my own build in the future

Thx for sharing!!!

Markus
 
Definitely want some hammers... I actually asked Dave a while back about making a short run of machined Denix or MGC compatible accurate hammers, although he told me that he didn't think there would be enough interest.
 
I'll try that. I remember way back taking it apart with the hammer ******. Something tripped it and it snapped the **** out of my finger lol!

unneccessary.
just take a small screwdriver and push it into the recess right behind the trigger against the sear arm.

Markus
 
Definitely want some hammers... I actually asked Dave a while back about making a short run of machined Denix or MGC compatible accurate hammers, although he told me that he didn't think there would be enough interest.

What I would love to see would be a reasonably accurate back end of the lock frame assembly -- frame, hammer, safety, lock frame stop, and some flavor of spring to put tension on the hammer and lock frame stop. With some sort of easy rigger release. Nothing so complex as sear and all of the other workings of the front part of that frame. Plus a bolt and extractor, both for accurate dimensions and to have them as separate pieces.

Hunting original parts, when the frame is ~$90, the hammer is ~$60, the hammer pin is ~$50... It adds up pretty durned fast. To get an original lock frame assembly, plus bolt (with extractor), that's looking at an outlay of in the neighborhood of several hundred to a thousand dollars.

Since MGCs are so hard to find these days, and none of the other replicas get that area right... *shrug* It'd just be nice to have a movable safety lever on my Denix. *heh*

--Jonah
 

Your message may be considered spam for the following reasons:

If you wish to reply despite these issues, check the box below before replying.
Be aware that malicious compliance may result in more severe penalties.
Back
Top