Another Thorin Oakenshield Costume - The Hobbit

Belt

This belt is great. It's huge and heavy.


Belt of Scraps

For my belt, I raided the leather bin and pulled out scraps and a few hideous pieces of skeevy black leather I wasn't going to use for anything else. Since I want a belt that would support the plates with bending under them and creasing and eventually breaking them off, I pieced together two heavy-weight pieces in brown with some edge stitching and a smooth piece glued on the seam to keep it from flexing too much at that point. The skeevy black leather, which was really thin, needed to be pieced because it wasn't long enough. But the seam falls at the back of the belt where np one looks. The blue leather edging (again - pieced) was sewn on by machine and the diagonal pieces by hand. I wanted that hand-sewn look where it counted.


The black was glued on top of the heavy brown leather. I kept the black suede side out, since that seemed to match his belt best. The blue edging was then wrapped around to the back and contact cemented down.

I was running out of nice belt-weight leather and used some scraps of heavy suede glued in a double layer to make the back belt straps, which were hand sewn on. The one is sewn at and angle because it came up to the edge of one of the blue diagonals and I didn't want to spoil the look. I used a bog-standard buckle, since the buckle was rarely going to be seen.


With the help of a printout of the belt, I planned the placement of the plates, roughed up the backs of them with a wire grinder and glued them with Shoe Goo.
 
Last edited:
Belt Buckle

Inaccuracy note - at the time of making, I couldn't tell what the central gem in his belt was. It was shiny, it had gold. Since the other stones looked like blue gems, I made a guess that the central piece was gold-flecked crystal or something like that. Thus that's not right - it turns out the central piece was simply gold. I also mucked up the shape, but that's more down to me being crap at sculpting. Really bad. Especially with angles.

I decided that since the buckle (not really a buckle at all, it's more like a central decorative plate but we'll go with buckle) wasn't actually a buckle, it wouldn't come under much strain and I could make it from Fimo/Sculpey.

I used the Thorin buckle silver pendant design as my basis for the pattern by enlarging it and sculpting on top.


The Fimo sculpt was done the way a piemaker decorates pies - I rolled out the Fimo, used a craft knife and did it in layers. This is how non-sculptors can do the thing.

Layer one, scored for attaching Layer 2, and Layer 2 attached.


Layer Three, the first of the angle pieces, and some stippling. I used a paintbrush that had old crusted paint on it to stab the pattern in.

Layer Four, more angled pieces. I managed these by getting a plastic box with a sharp angle, rolling the Fimo into a snake and jamming it into the corner to get a sharp 90 degree edge. I used a craft knife to cut the angles and very carefully managed to get them together and onto Layer Two without destroying too many of the nice lines I'd created.


Layer Five - another roll-out and stencil cut of Fimo in a thicker layer. And the wonky jewel shape.

Layer six - the back of the buckle.


Layer 7 - Since the design of the buckle looks as if it's free floating, these bits were added on to go under the other layers and lift them free of the backing. I planned on attaching the buckle with screws and washers, so it added thickness in areas I could drill as well.

Almost ready for baking - I needed to clean up the sides where the layers could be seen better.


Just under 18 cm in length. I don't even know if my face is that big. Also, here are some of the jewels I cast. The blue were a pain, kept bubbling up. I backed them with some silver foil.

The clear ones were a pain also since I'm new at casting and my mold made the surface cloudy. I sanded and sprayed them with clear coat to make them somewhat clear again.

The crystal one with multi-colours was made with some wrapping plastic with a rainbow sheen, shredded and added to the mold. The gold fleck ones were gold foil for crafts, again shredded and mixed in the plastic resin. I believe I wound up using the second gold flecked one from the right.

But, as I said above - the actual belt central piece was just plain gold. Not fancy gold streaked crystal. Such a shame, all that effort I wasted.

 
Last edited:
Buckle - Completed (But not accurate due to central stone)

The Fimo was baked and the buckle sprayed in silver, with black paint in acrylic to age it. I also put a clear coat on top to keep the ageing from wearing away, but that turned out to be a mistake. The clear coat was a cheap brand and it gets tacky in high humidity. Hence, my buckle now isn't as shiny-new as it looks below. It's dull grey and occasionally I have to pick off a piece of lint or fur from the outer robe. I try to do it in a kingly fashion, as one should when fiddling and picking at one's groin area in public. Well, well. Live and learn.


I was pretty chuffed with how it turned out. I in fact cast it in silicon, just in case I ever needed (ha ha) another buckle.

I pre-drilled four holes in the back and attached it to the leather belt with screws and washers to protect the Fimo and keep the screws from pulling through the leather. The diamond pieces on Thorin's belt looked a different tone to the other pieces, gold-ish, and I thought it was likely as a theme for the piece, since the buckle has that central gold piece. I blobbed on some gold paint after I'd glued it down, so it's not nicely painted (was terrified of getting it on the suede), but it works nonetheless.


thorin-costume-close.jpg

And then it was done. And I walked around the apartment for a while holding it over my head like a pro-wrestler. Shouting may have been involved.
 
Last edited:
OMG the work involved in this is mind-boggling! The vest is gorgeous (is it weird that I love the lining almost more than the outside? I can't believe you found such a perfect fabric!), and the belt is seriously impressive. Even if it's not accurate, I really love the gold-fleck look of that central gem. So neat! And I laughed at the line about you poking at your groin in a kingly fashion. ;)

I haven't cosplayed as a truly male character yet (I really don't want to mess around with binding or a muscle suit - yet!) but I will remember your experiences with the bathrooms if I ever do, lol.

No, no, I don't find it weird the lining is as cool as the exterior on the blue vest. It IS a great fabric, I've been very spoiled getting all these traditional japanese pattern fabrics, they suit the dwarf aesthetic perfectly. There was one more that I picked up and dyed but decided not to use, has a kind of simple angular knotwork. And anyway someone ought to love the lining the way I did, thank you!

Turns out I was wrong about all the gems - the blue ones on the actual prop look more like a turquoise sort of thing. It's a bit dull for a king of the dwarves, tbh. But I guess it keeps thieves from grabbing at things that Thorin would not take kindly to. "Whoa, look at THOSE jewels!" Maybe it happened anyway. Maybe that's why he's so grumpy at The Prancing Pony. Poor grumpy king.

I think, re: the cons and changing rooms - the staff probably meant to be kind to the obviously not-Japanese person who seemingly doesn't understand Japanese and hence got in the wrong line. When I was in line for actual toilets, I would just say hello in my non-male voice to the other ladies in line and they would be OH. And think nothing of it. But the poor staff. It happened four times that one day at Comiket, and the last one, the one that drove me to laughter all the way home, occurred when I was actually just inside the change room and looking for a place to sling my gear. Poor tiny lady, wondering how this pervy 'guy' had made it past all the other staff and actually into the change room to ogle the females. Well, Comiket. It's huge and the staff are nice about talking to me, at least.
 
Last edited:
Oak Shield


I was going to post up about the black fur trimmed over robe next, but I actually don't have very many build pics. Later, then.

The oaken shield was built out of interlocked foam floor tiles that were about an inch thick, glued together with a Japanese brand glue called B17 or something, I can't remember. For the rounding at the top, I cut notches into the foam and glued it, used a heat gun to curve the foam, and added on details and bits with more foam and glue. Since the oak is uneven and craggy, extra layers of foam were laid on.

A wood piece is the handle, and some straps which are slightly superfluous were added in.


Carving was done with a craft knife. For the rough bits at the top of the shield, I tore at the layers of foam with needle nose pliers. I used a dremel sanding bit to smooth out the foam. Sword marks and gouges were added with a soldering iron. Black gesso sealed the foam.


The painting isn't sterling, but anyway - I started with dark brown, varied it with some dry brushing of lighter or redder tones, and touched up the gougles with black and dark brown.

The metal tips were done in two layers of Worbla, sealed, painted and aged. They were very firmly attached with the last of my Masters contact glue.

The thing I like about the shield is that unlike so much of the rest of the costume, it's really light.

 
Last edited:
That turned out REALLY GOOD! I love it! I also really like the pic with all the weapons. ;)

Thank you! I'm fond of that pic too, though now I see Kili's ultra pretty bow is kinda obscured by whopping great Orchrist.


Oh, on the note of Orchrist for anyone reading the thread - Japanese cons being what they are, and swords not being allowed in Japan unless registered, and not having the will power or material to do Orchrist myself well, I just bought the LARP verson of the sword. I like it, no one hassles me about it. I did make the scabbard for it in a last minute scrabble, but that'll be a later post.
 
The leather robe

I wish I could say that I had decent pattern pieces of this, since those are most useful to costumers who come after, but I flat don't. At some point during a build, I get too involved to remember to take progress pics, and this was one of those times.

The production piece in all its magnificent hair glory.


The robe has decorative stitching similar to what we have on the under gauntlets, a criss-cross stitch. The ends of the fur collar are a bit ragged. The whole fur collar looks badly pieced. It's nice fur, but that collar says either it was done by a loving amateur (family working with what they had), or it was just what a King with no kingdom could afford. From the few shots we see with it swinging wide, the inside looks grey - either lined, or it's just the rough side of the leather showing lighter than the black exterior.

Your guess is as good as mine on type of fur - the costume book said it was made from several types of pelts and that it was tricky to dye, since the different furs took dye differently.

Mine was made from a decent-weight pleather that had, happily, a nice even coloured grey knit backing. It also was a touch stretchy, which was a pain to sew but gave it the flexibility, stretch and swing of actual leather. I was never going to find enough actual black leather coats to do this, so pleather it was.

The first iteration of the robe I made had a fake fur collar. I was having difficulty finding a really plush fake fur but had some I'd bought abroad, which I sprayed down slightly with my airbrush. And I couldn't find any real fur coats to cut up for a good price. The fake fur wasn't bad.

The inside edge of the fur at the bottom and sides was attached with a blind stitch and the outer edge whip stitched to the edge of the pleather. The collar is backed with more pleather - the edges aren't turned in, just raw edges laid together and whip stitched to keep the edges from being too bulky. One of the draw backs of the fake fur was I couldn't think of a way to give it that really messy and ragged look, though I did try with some hair wax and glue. Didn't really work - nothing clings well to fake fur,


Sorry, those are the only photos I have that'll give an idea about my pattern. The hem edging was just machine stitched on with the blind hem stitch and the outer edges caught with a whip stitch by hand. The seams were done as if for a French seam with the overlap and the decorative stitch held the edge down, and was done in heavy cotton.

Back, sort of side and front views


Inaccuracy note - One thing I discovered after the fact, when all the nice pics came out, was about the collar. From some screen shoots, it look as if there were two extra shoulder piece with fur on that went out over the armour. Turns out, it was just the collar. It was so wide, it was resting on the shoulder epaulettes of the blue velvet robe beneath. Oh well. My design, as you can see, does have these shoulder pieces on, and one thing they did do well was made me look incredible broad side to side. This is no bad thing, though, yeah yeah, accuracy.

But here's the thing - I decided that I wasn't crazy about the fake fur. At the end of this winter, I found some Japanese shops online that were selling off their winter stock of used fur coats. They weren't yard sale specials in price - but on the other hand I got a coat where the condition was stated on the website and the pelt and leather was in reasonable condition and not cracking, dry or losing hair.

So, the next post is about the remake of the collar, and the despoiling of a fur coat.
 
Last edited:
New collar for the robe

I scored for about $70 dollars a coat online from a shop that does used clothes in Japan. It was labelled as Japanese sable, which I suppose explains the different colouring to what I normally see in sable. The only issue was... it was TOO nice. All those pelts, properly aligned so the fur blended beautifully into graded stripes! It had to go.

r

In this pic you can see the original fake fur collar in the upper left, and the sable in front after I'd ripped out the lining. The sable is much nicer and plusher. In the end, it's hard to beat the real thing.

The next issue was just - chop and piece, chop and piece. Every time I cut into that fur and sewed new seams, I knew I was shrinking the overall amount of pelt I had and I was praying I would have enough. I cut pieces at diagonals, triangles, everything, in order to get a variegated look to the fur topside. It took ages, and everything had fine under fur stuck to it. There were fur balls drifting like tumble-weeds on the hardwood floors of the flat, even after vacuuming.

I also did (since I hadn't realized) shoulder wings that made the robe look even broader. Some quilt batting was put under the fur before attaching to the pleather to bulk it up even more. It was crazy.
One cock-up was that I wound up having to add a bit more of leftover pleather to the back of the collar, but since it's the underside, no one will see this. Plus, I could leave bits and bobs of the pelt hanging loose and ragged, and painted the leather side in browns to match.


The end result, and the sad baggy of scraps that remain. I had just enough.
 
Last edited:
So, I guess it was worth it. The real fur looks much nicer. I put an old coat to a better use, and I did eventually recycle the fake fur into another part of the Thorin costume, but more on that later.
YUI_2531.JPG

Urgh, what's left to say about this costume? Can't be too many more posts left to do.

Hm. A little bit about the wig and beard and make-up, Orchrist's scabbard and baldric, and Thorin's man-purse. Accessories brag, maybe, but since I bought his jewellery, it doesn't really count.
 
Last edited:
I'm very interested to hear about the face stuff (beard and makeup) since it looks so amazing!

Argh, I wish I could post loads of pics about the wig and the wefting, but I can't/ I was in stress mode trying to get the costume finished before an event, and pic evidence went by the wayside.

Right. Wig and Beads and Ears.

The wig itself, with practically no style needed, was this one out of China, shop was formerly called V-dress or V Style, but now it's Aliwigs. Maybe a subsidiary of Alibaba, since now they have AliExpress (where feikoi got her Fili wig) which means you aren't obligated to get a wholesale purchase of 100 wigs or something ridiculous. Anyway, I know people can get antsy about buying out of China sometimes, but with Feikoi and I, we had no issues. When I got the wig two years back, it was cheaper but had shipping added on. Now it's free shipping worldwide and the price is up. Ha ha, I see what you did there.

If you search 'Vampire Diaries long wavy wig', this would pop up. Reasons I got this one - it was long, NOT STUPID CURLY, it had good variety of colours, and it had a lace front. I can't find the order form for it, but I think I got the 1b, natural black. Though the dark brown would probably also work. It's quite a good wig! Great style, thick, really nice. I loved it just as it is, it looked like an Albrecht Duhrer self portrait.

For the side braids, Feikoi had some long black Japanese wefts with clips, which we just brute shoved into the wig's weft, and I pulled them over my ears. I later went back and sewed them into place over the bit of the wig that goes in front of the ear, since they kept trying to shift each time turned my head and I was getting tired of dragging them forward and potentially messing up my wig's hair.

The braid itself is a round braid, not a three strand plait.
tumblr_ni33dmEcae1qmr9fvo1_1280.gif
Tutorials on doing them can be found here and here.

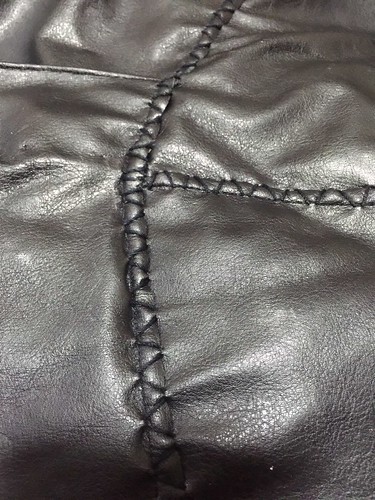
The most important bit was the wefting, since Thorin has streaks in his hair as well as the deep widow's peak. Like feikoi, I used this tutorial on wefting using a sewing needle.
We had hanks of Japan's brand of synthetic hair, Kanekalon. It's a great fiber, since you can style it with curling irons. I deepened the widow's peak with natural black and added in a white that feikoi had kicking around.

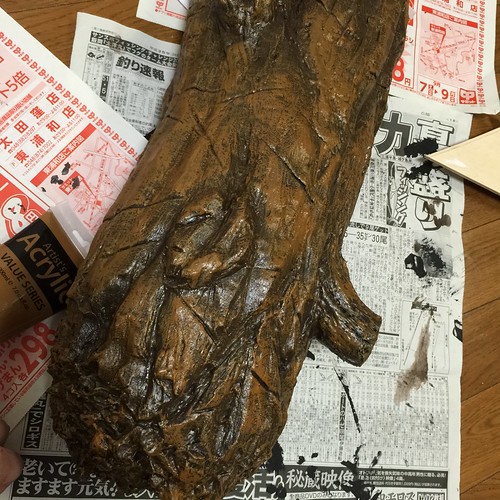
Behold - my sole 'making' photo from that time.

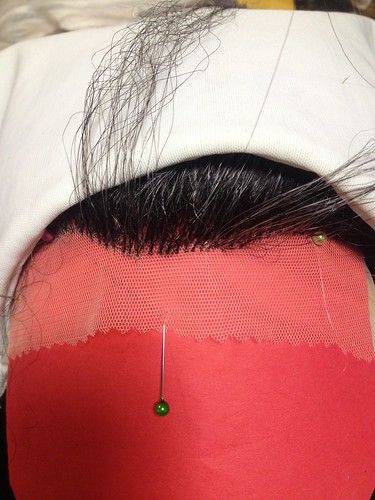
Process - Get Styrofoam wig head and if possible, T-bar headed pins, or something with a big head that won't stress the wig or lace front integrity.
Tack wig down to head firmly.
Put piece of paper under lace front with lines indicating where you are going to weft to, or if you feel lucky, use some kind of washable marker on the lace?
Pin the heck out of the paper as well so it doesn't shift.
Fold several strands of hair in half and thread through your sewing needle.
Pick up a thread of lace and pull hair through until the folded piece is through, un-thread needle, carefully open that loop and pull the rest of the strands through, pull to tighten. But not so hard you stress where you folded that hair and break it or the lace. The white hair in particular was a bear for breaking for some reason.

The white fabric was laid on so I could see the hair as I worked it. I added hair at the temples, widow's peak and the bits in front of the ears. In the centre front I started with five strand wefts, but as I got closer to the new hairline, got down to two or three. Then I cut the lace front about a centimetre or so out from the hair line. I probably could have left more, but I know nothing about properly covering lace fronts with silicon or whatever. Gotta say, spirit gum and make-up made the hairline a mess and it needs cleaning every time.

How long did the wefting take? Well. About three or four movies worth - I sat until my butt was numb with a foam head clenched between my knees (we didn't have a stand or table clamp) and wefted through the extended editions of Lord of the Rings and Unexpected Journey, and maybe parts of the DVD 'Making of the Hobbit". There may have been more movies, but it's all a blur now.

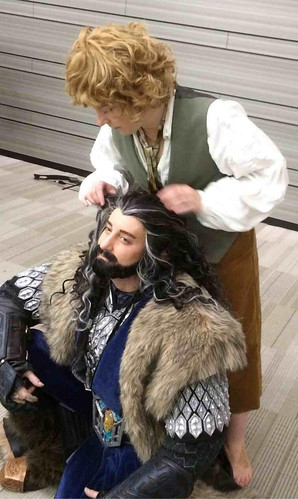
Being crap at actual styling with hair tongs, since I have curly hair and don't need them, feikoi took charge of styling the straight Kanekalon wefted hair into waves to match the rest of the wig.

My first time out, I didn't bother with any beads in the wig aside from some clunky Fimo ones I made for the braid tips. The rest was left loose, and now I know why Thorin had his hair train back. It just got every where and feikoi had to groom me like a monkey. Or an actual top-flight Hollywood star (staring holes into YOU, Richard Armitage!)


The beard and moustache were a set I got from Germany, the Robber Baron set. I'd emailed them to ask about the colour of the beard in the photo on the model, they assured me it was dark brown. It was not. Too light. But it was real hair, so I got some hair dye and fixed that. The moustache wasn't great, though. I wound up getting out another beard I bought on sale in Japan that was ridiculous and too big for my face and chopped new moustaches out of it. The white in the beard was at first just streaked in with white mascara stuff. I had to trim the beard, as well - the beard hair was quite long and I needed it to be closer to my chin. The first time I wore it, I bobby-pinned it. Second time out, I used a curling iron and spirit glue to stick it to the underside of my jaw. Third time, I cut the bugger.

I eventually did the wiser thing and used some more white Kanekalon to weft the white streaks into Thorin's beard, and general thickened it up with black since it was a bit sparse in areas.

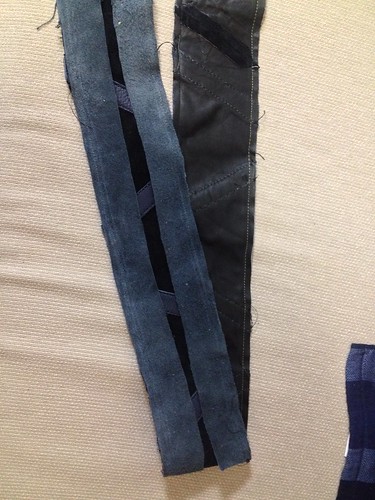
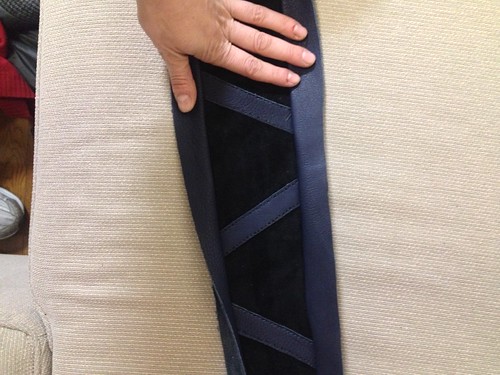
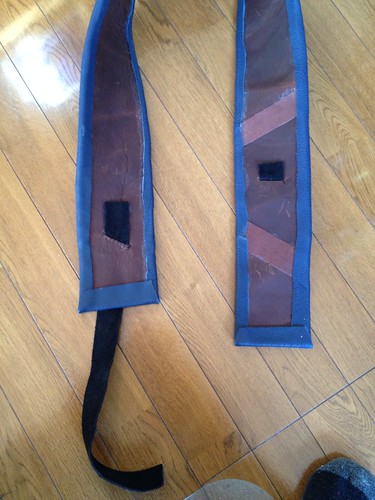
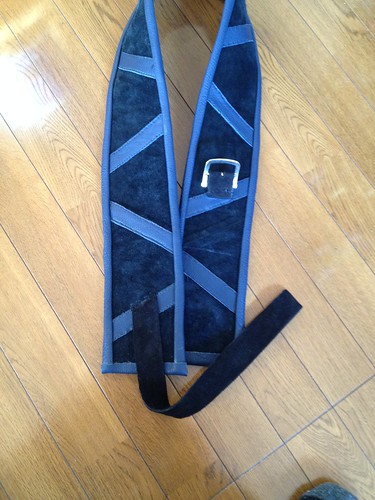
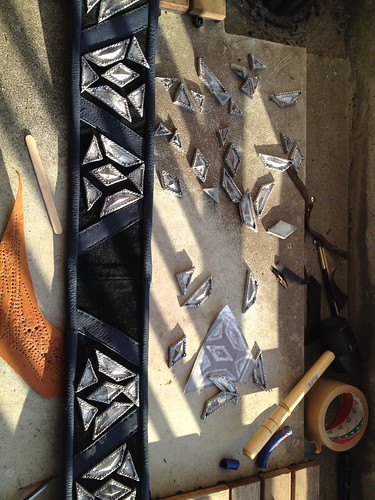
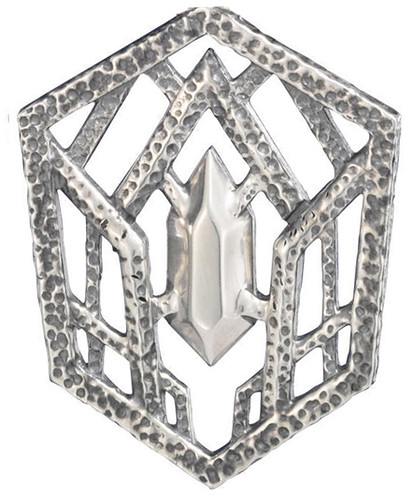
I did make some gold beads from Worbla to pull his hair back on the sides, but I hope to buy some of these from this Etsy seller.

I don't have any prosthetics aside from dwarf ears from Aradani (they do sell large and small dwarf noses and brows, though...). I haven't reached the point of cosplay where I'm going to invest in making my own pieces. YET.

Anyway, what with the massive amounts of hair, hardly anyone notices either the ears or the hair beads, so perhaps I will save my money. That way I don't get cranky if I lose a braid bead the way I have already. (New Worbla set for those as well.)

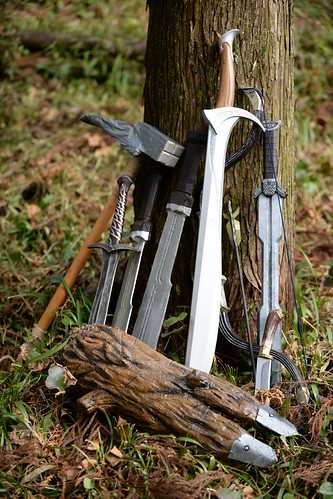
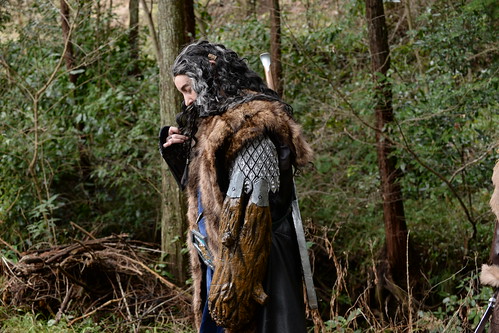
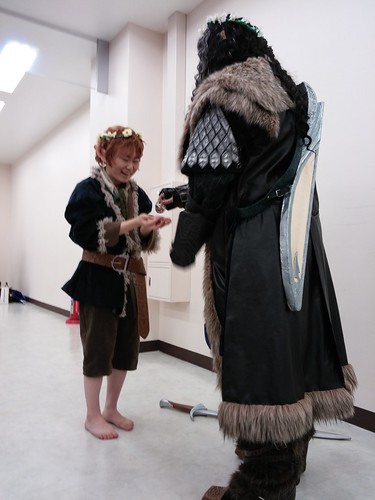
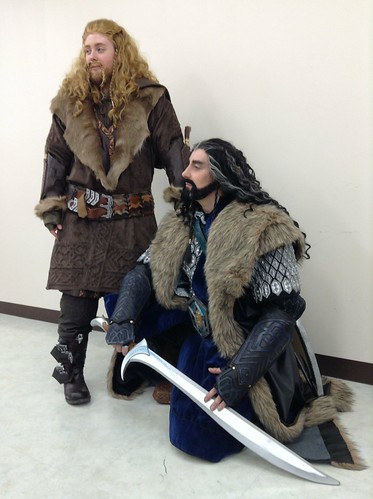
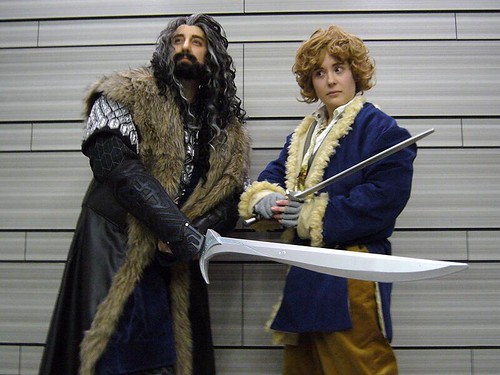
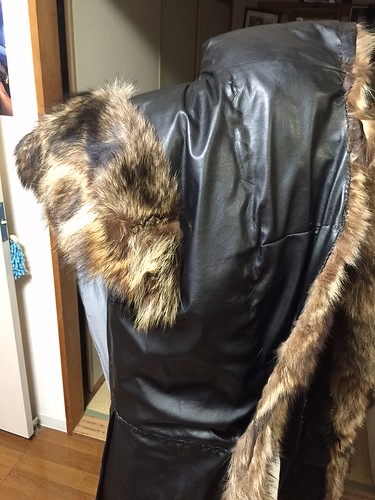
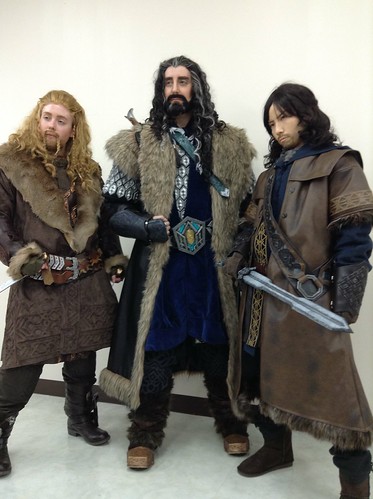
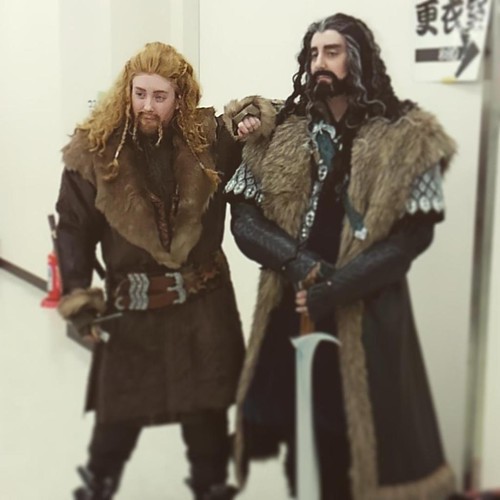
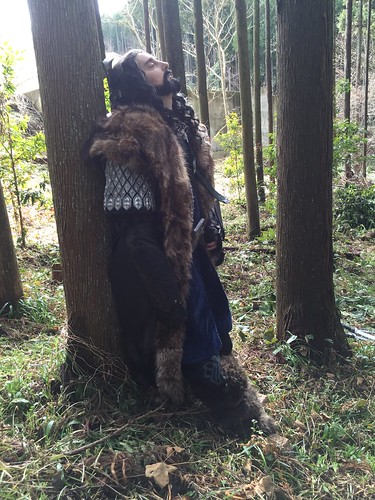
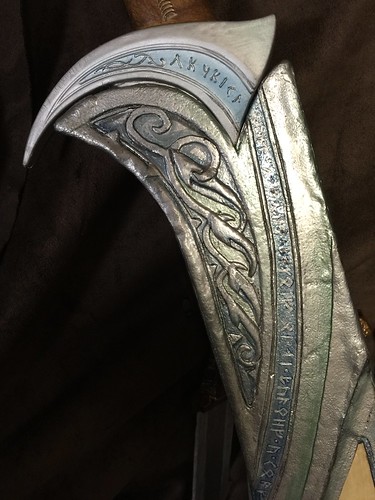
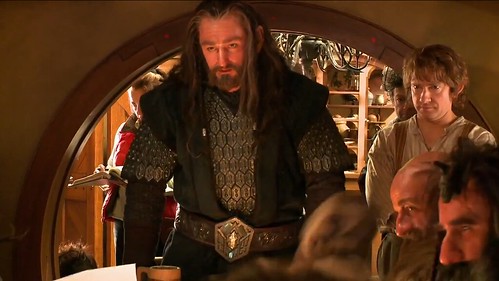
This pic is about the only one I have where you can see the ear clearly. The second is one of the few where you see the side bead. Yes, that Bilbo (yuichiiii) is... pretty much the correct size proportionate to my Thorin, lucky, aren't I?
YUI_2551.JPGB9kPL1uIAAE7QYh.jpg

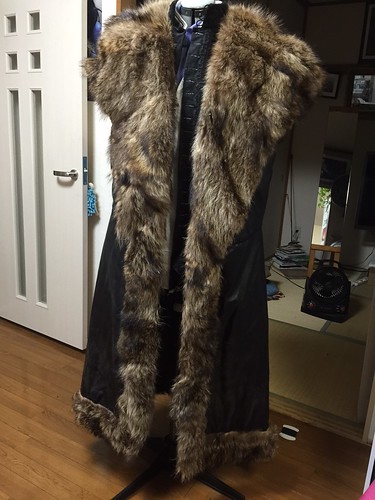
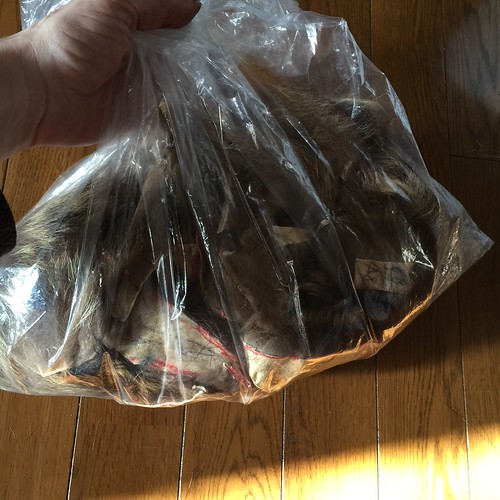
How has the wig held up over several wearings, being stuffed into bags and trotted over Japan? Pretty well. It was getting tangled at one point, especially at the back of the neck underneath. And the curls get snagged on things like Orchrist's baldric buckle, or scabbard. I found out I could jam a wig head onto a dress dummy pole, pinned the wig to it and got to work.

Use loads of detangling spray if you do this, and accept the fact you will lose hair. Start from the ends of the hair with a wide tooth comb, work the tangles carefully out with comb and fingers and spray. Clip the untangled bits out of the way, rinse and repeat going in small sections. Then get out your curling tongs and hey, why not - hairspray. I used a stiff spray, reset the waves, and that was that. Thank goodness, since I was terrified of ruining the wig.

I'll post a little bit more on make-up later, but there's nothing too ground breaking there, since I didn't add on to my nasal proboscis in any way.
 
You did such a good job with the hair parts! I'm not sure I will have the patience for wefting, but I have bought lace and a wefting needle to possibly remake my Bilbo foot pads at some point so I will definitely give it a try (eventually). My Bilbo wig had so much hair in it that I didn't even bother with the Hobbit ears (I couldn't find the correct shape anyways, only very tiny Elf-sized ones).
 
You did such a good job with the hair parts! I'm not sure I will have the patience for wefting, but I have bought lace and a wefting needle to possibly remake my Bilbo foot pads at some point so I will definitely give it a try (eventually). My Bilbo wig had so much hair in it that I didn't even bother with the Hobbit ears (I couldn't find the correct shape anyways, only very tiny Elf-sized ones).

I think we have two or three sets of ears now. We got a set from the place that had my beard set, and another set from the place selling Dwarf ears. I'm sure they are out there, those leaf-shaped hobbit ears.

Wefting takes freaking forever. Maybe if I had that hook...! Good luck with that!
 
Orchrist's scabbard and baldric

As I said upthread, due to Japanese law, I'm not able to buy a metal sword with doing this whole registration process that's convoluted and having it renewed as if the thing were a firearm every two years. And it'd be pointless, since most cons don't allow 'dangerous' props. I got the LARP version of Orchrist and have been pretty happy with it. If anything, my one issue is that I wanted to make a scabbard and the sword is rather thicker than a metal one would be.

So, problem 1 - the scabbard will have to be much wider to accomodate the LARP sword.

Problem 2 is my terror of breaking props. I don't have a car, I put things in suitcases and backpacks and take them on trains. It's not a gentle journey. I had wanted to make one out of foam, but scrapped it for one out of wood and plywood. Out came the jigsaw and my insouciant attitude towards shop safety and neighbouring apartments.

Weta was kind enough to put up lots of nice pics of Orchrist's scabbard, including the art design version.


I used the thinnest plywood I could find and some pine that was about 3/4 or 1" thick to make the scabbard. Glue tests below.


With the top piece of ply, there was just enough clearance for me to add a cloth lining in blue to keep scratching on the LARP sword to a minimum. Glue and finishing nails kept it together.

Next came the Worbla, and I may as well say, I am such an amateur at Worbla. AND I was trying to the get sword done before Winter Comiket in two days. I managed to get the last bits of paint on and attach the fittings the night before the event, as one does. So the Worbla... could have been smoother. I just didn't have time to gesso the heck out of it. So. It's a bit rough and wobbly in places.


So, it's... yeah. I wish I had had more time. It gets the idea across, though. If I had time enough and space...
 
I need to make a scabbard for Sting at some point - carrying it around all day at the con with nowhere to put it was annoying. :p I guess I should start thinking about that soon, if I want it ready for September!
 
I need to make a scabbard for Sting at some point - carrying it around all day at the con with nowhere to put it was annoying. :p I guess I should start thinking about that soon, if I want it ready for September!

You ought to make one, at least Bilbo's is super-convenient! I mean, don't get me wrong, Thorin's back-scabbard looks as hot as, didn't The Highlander have one? It was annoying when I didn't have the scabbard, but... I really strain to pull and sheath the sword and usually just ask someone to put the darn thing away for me.


Anyway - to better topics! What's your scabbard going to be made of? You have a metal Sting? Actual swords make me jealous.
 
Back scabbards look so cool but are so impractical. :p

No, I made a con-safe Sting from foam and worbla. Though I do have a lot of other real swords - I took swordfighting lessons for years. But no movie replica ones (yet).

I haven't entirely decided what I'll make it from yet. I have a friend who made a scabbard for his plastic version of Glamdring so I'm going to pick his brain. I think he used cardboard (lined with felt, covered with pleather), but I could be wrong. It was a few years ago, and I know at one point he was talking about using thin plywood, but I think he ended up using cardboard instead (because he already had it so it was free!). I will have to look at some tutorials and figure out the best method for me.
 
This thread is more than 4 years old.

Your message may be considered spam for the following reasons:

  1. This thread hasn't been active in some time. A new post in this thread might not contribute constructively to this discussion after so long.
If you wish to reply despite these issues, check the box below before replying.
Be aware that malicious compliance may result in more severe penalties.
Back
Top