Carson Dyle
Sr Member
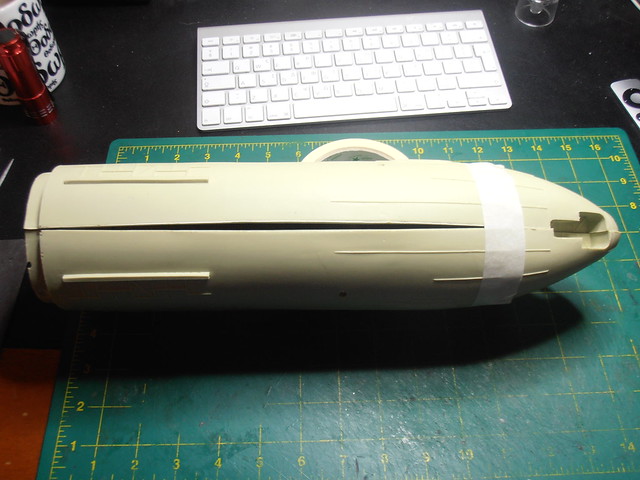
I got this kit several years ago, right about the time Anigrand got slapped with a C&D. I'm not sure if the company even exists anymore.
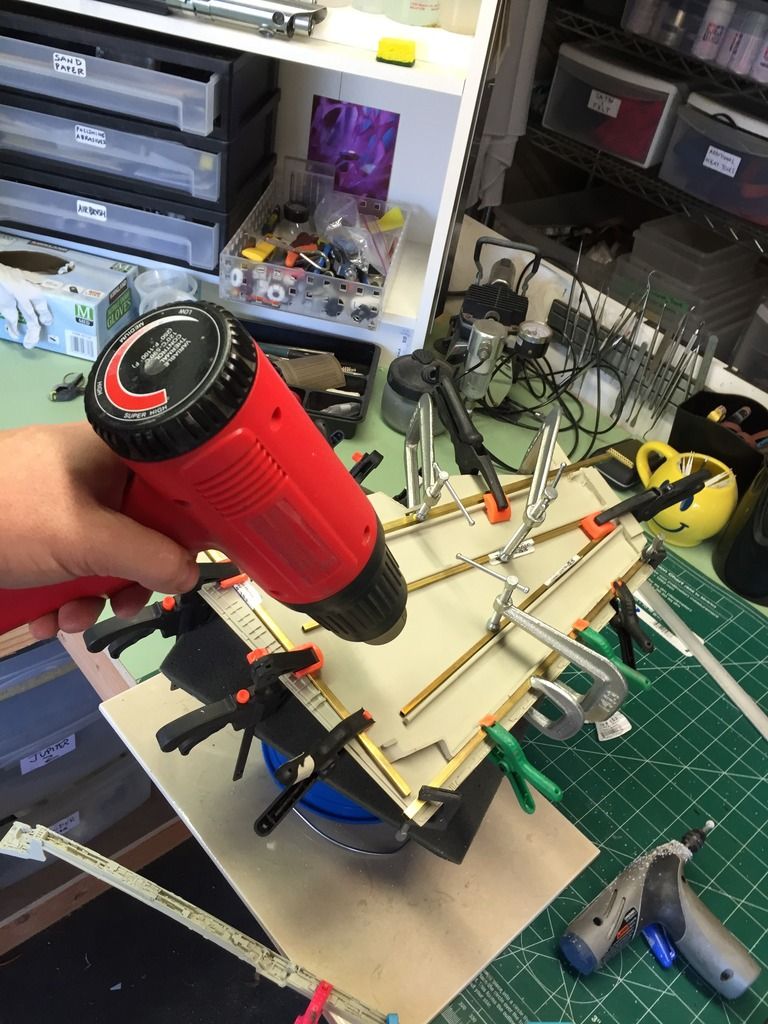
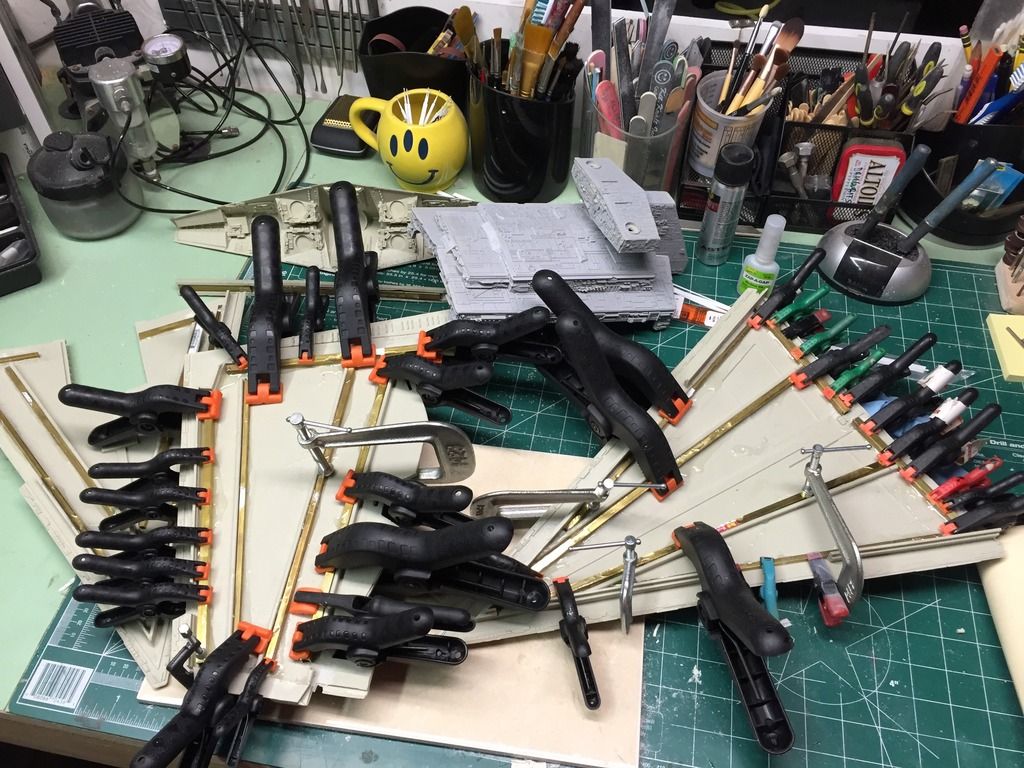
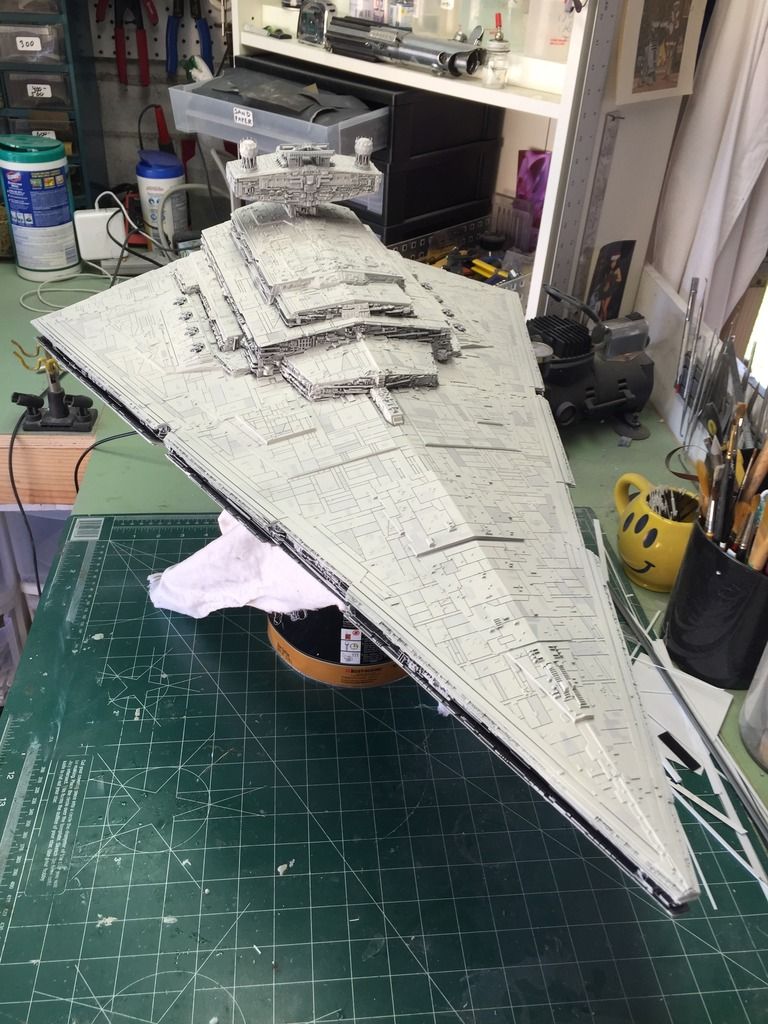
Because I'd waited so long to start construction the resin parts had plenty of time to warp. The single biggest challenge I faced was getting everything straight. Break out the heat gun, brass rod, and clamps!
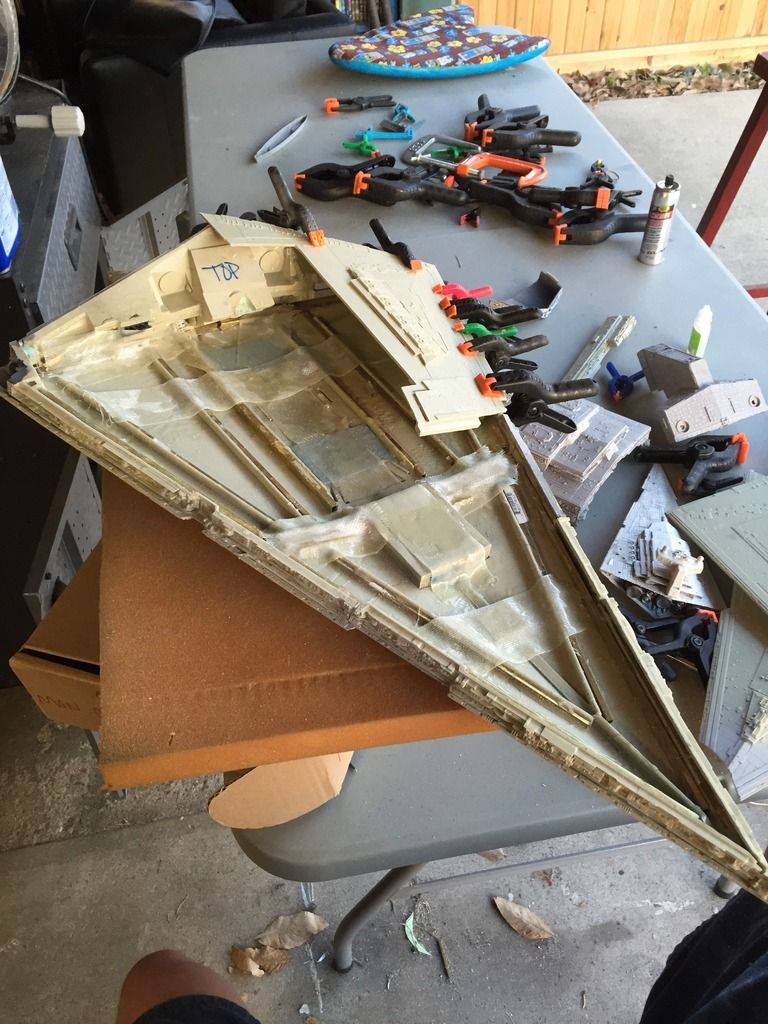
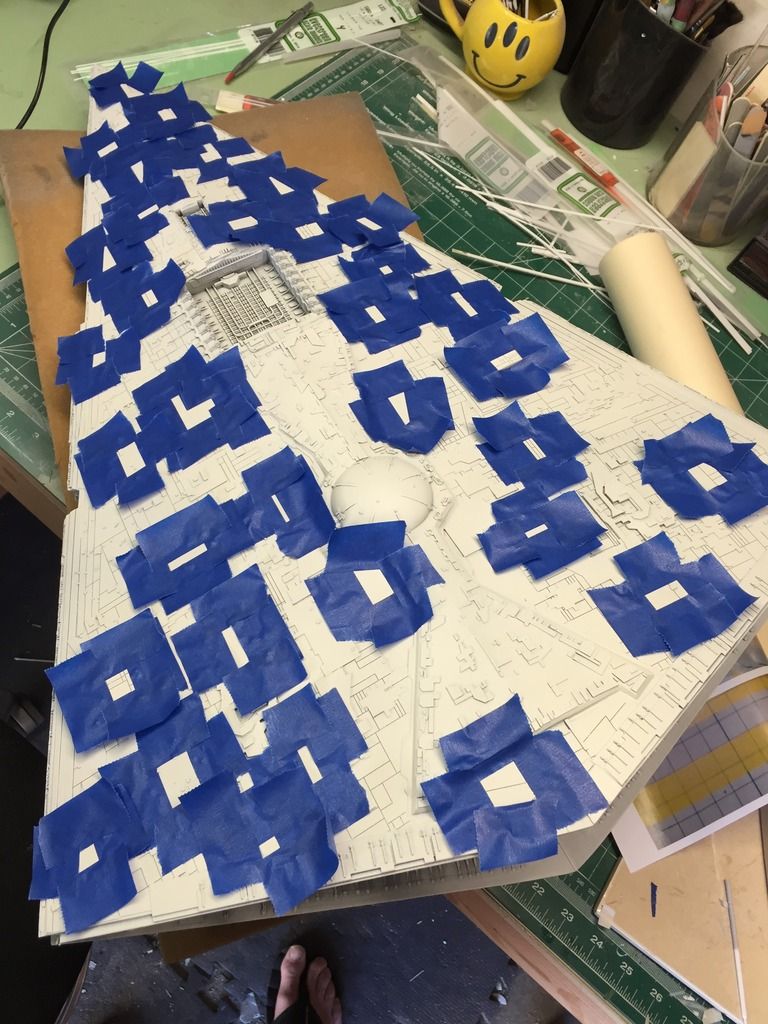
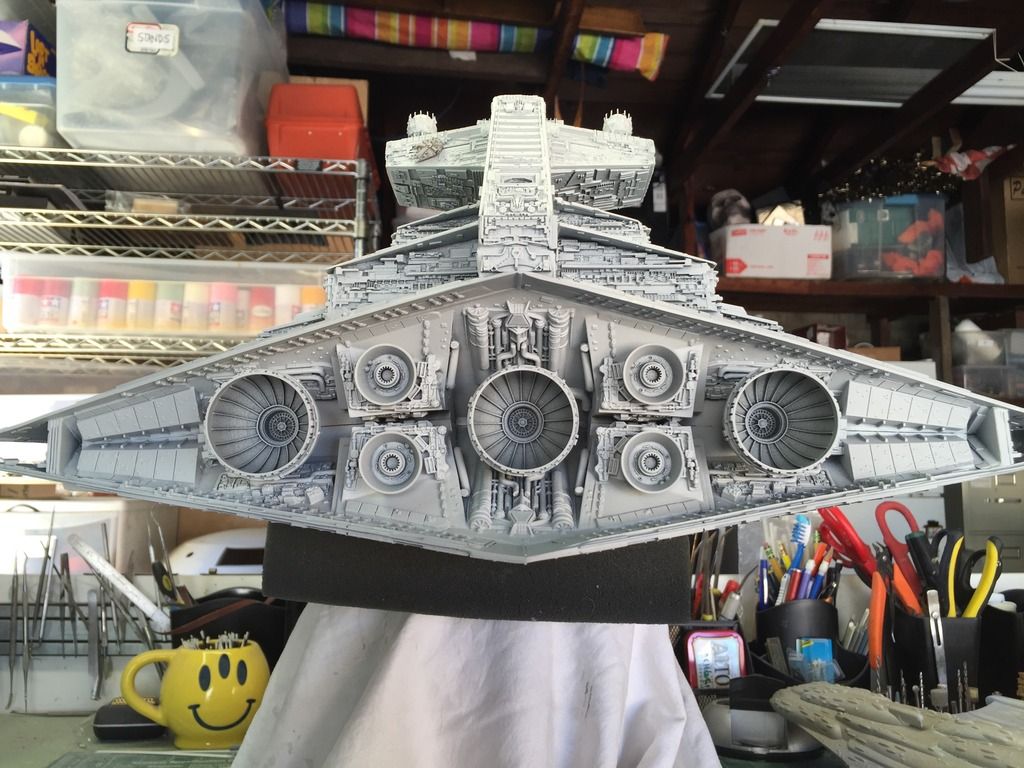
In order to reinforce the hull I used LOTS of fiberglass tape and resin. No eventual hull droop from this baby!
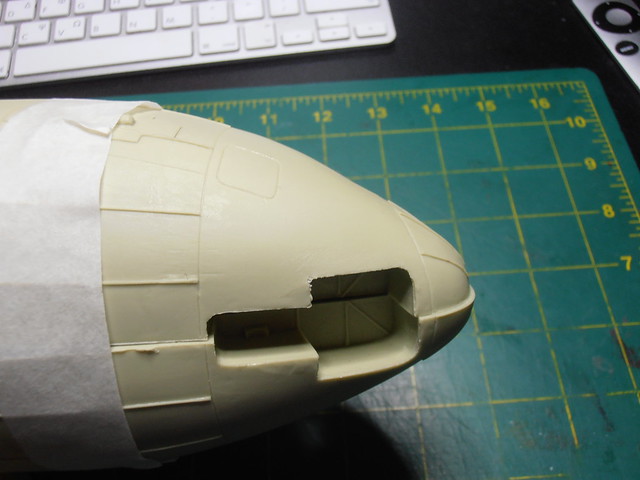
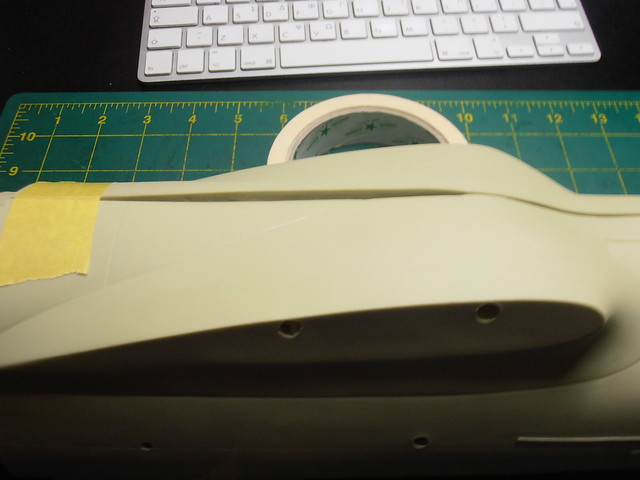
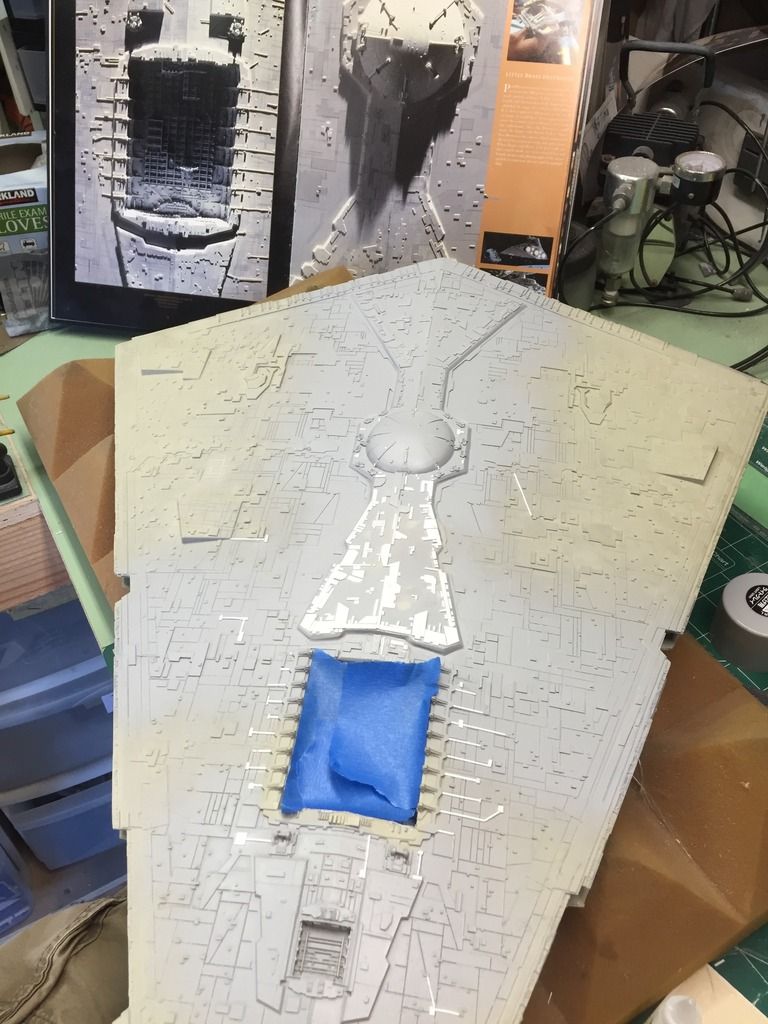
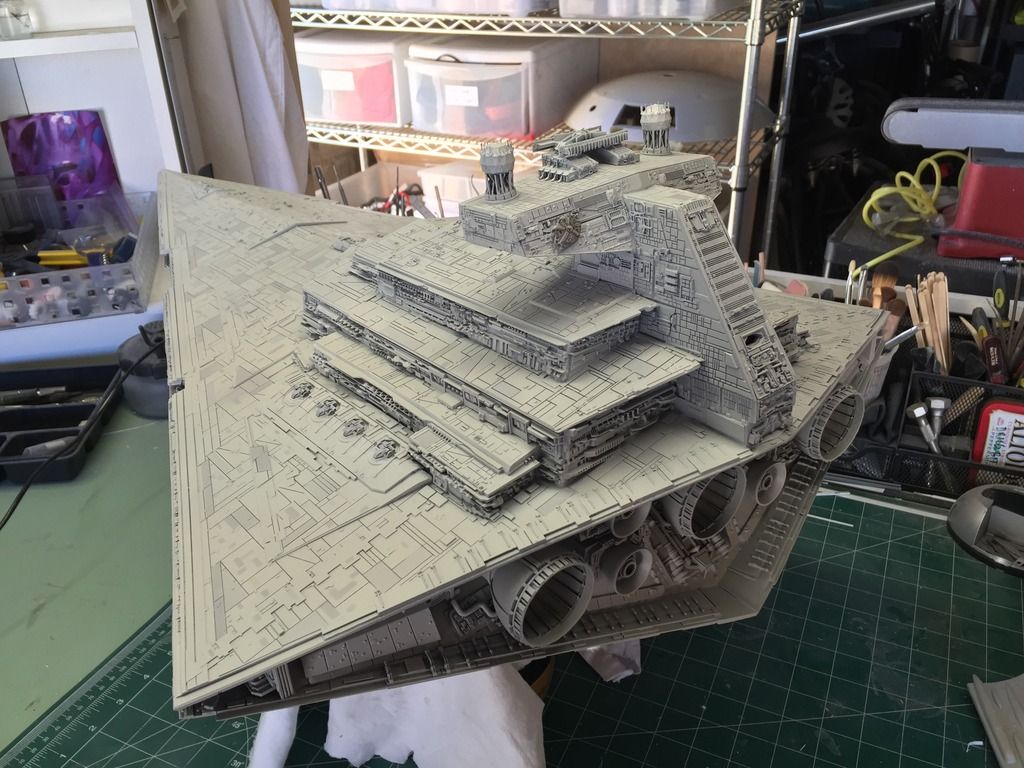
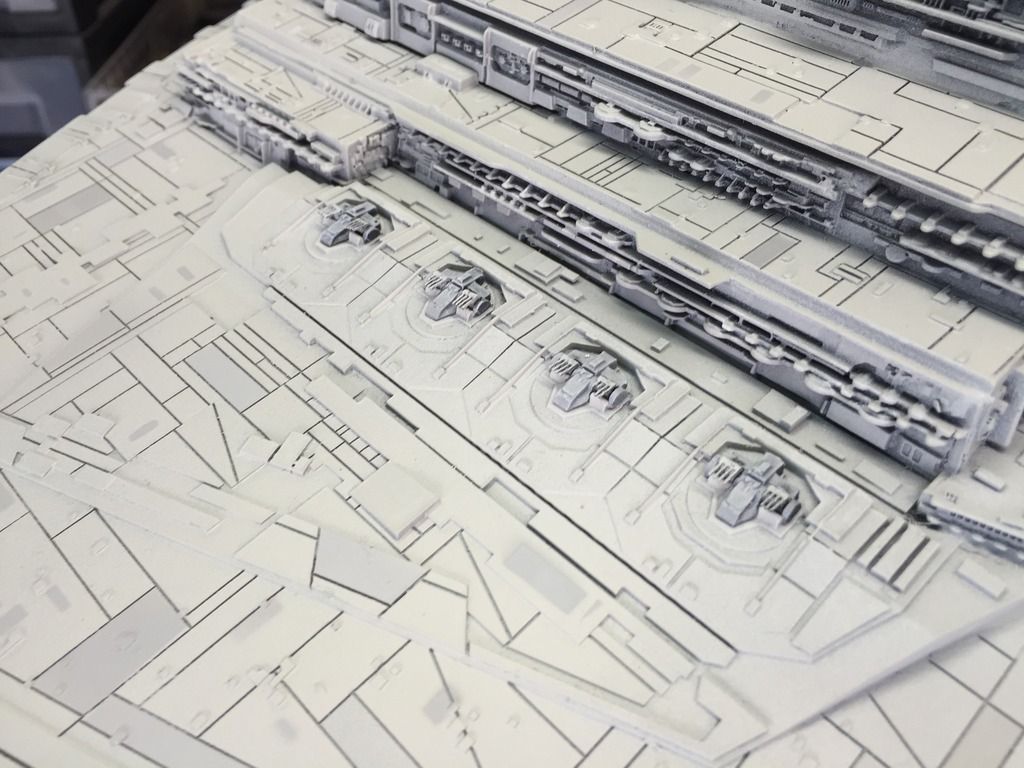
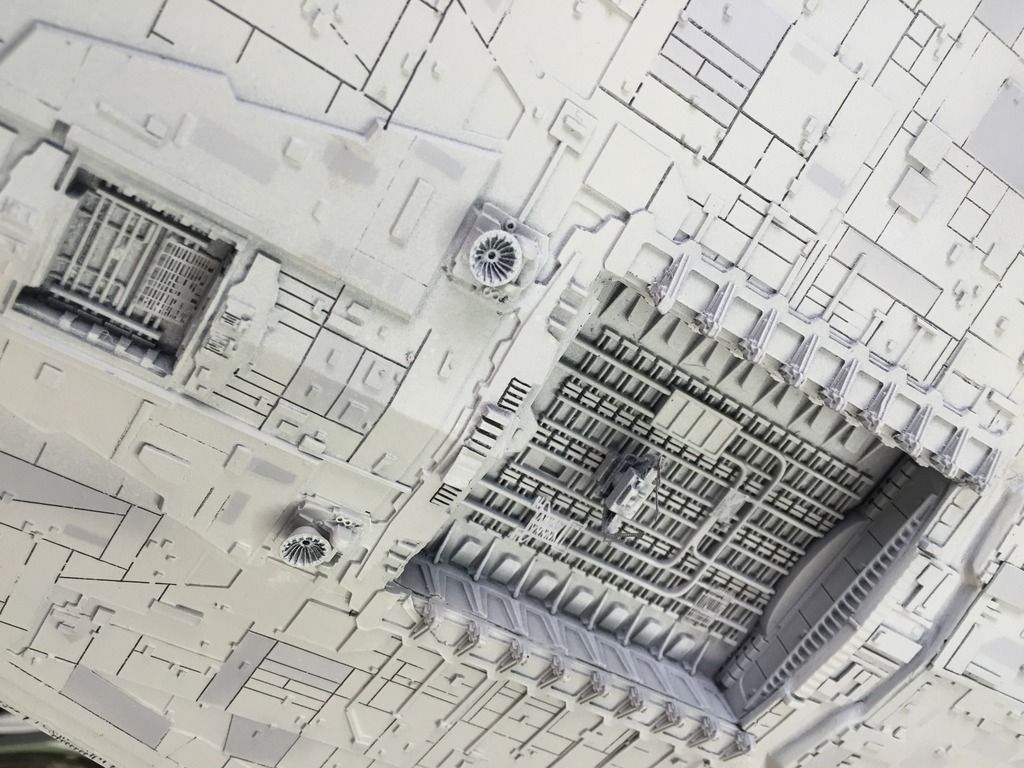
Anigrand did a pretty good job of capturing the look of the 8-footer, but for some reason the "keel" piece was under-detailed and completely inaccurate. Using styrene strip I did my best to correct the problem. The raised hull pattern is far from being spot-on, but it's close enough.
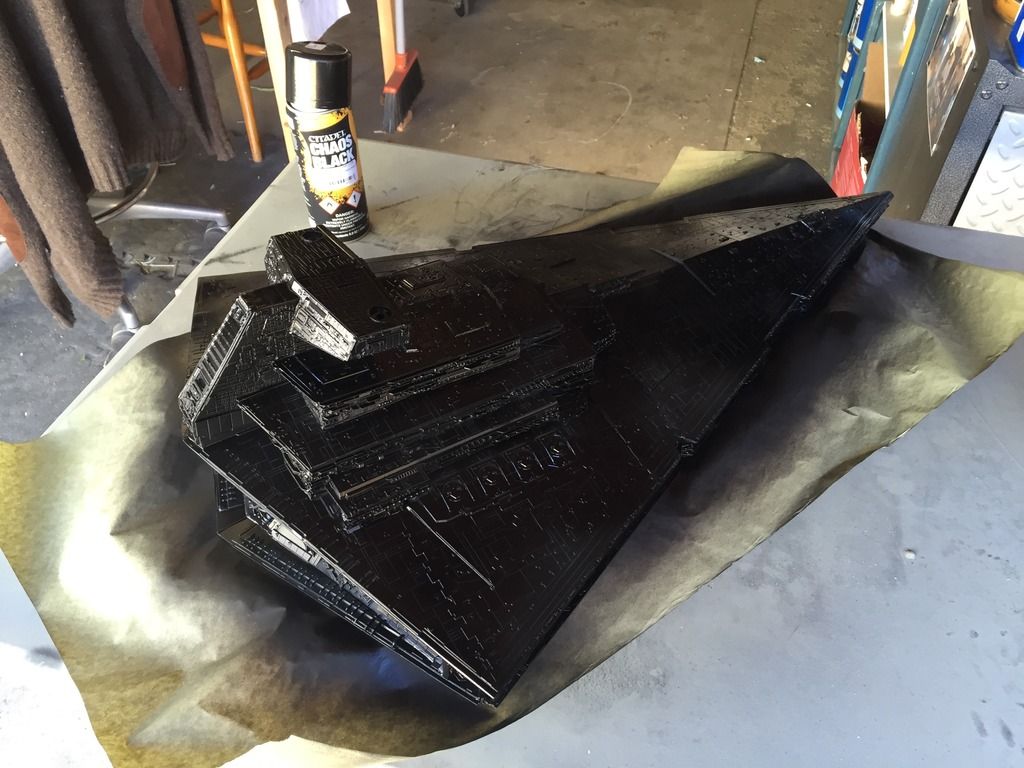
Painting was very straight-forward: Flat black primer, followed by an overcoat of Tamiya grey primer, followed by a top coat of Tamiya AS-20 Insignia White. A mix of white and grey Tamiya primer was used for the darker hull panels. Finally, a light dry-brush pass of white oil paint was used to bring out a few details here and there.
- - - Updated - - -

Others have done a beautiful job lighting this model, but that will have to wait until my next Stardestroyer build (given all the fiberglass reinforcement I crammed into this thing it would have been a nightmare to drill all those little portals). With any luck Bandai or some other company will eventually produce an injection-molded styrene Stardestroyer in a decent scale, and then I'll go to town on the lights.
Only one more chore left to complete: building the display stand.
Because I'd waited so long to start construction the resin parts had plenty of time to warp. The single biggest challenge I faced was getting everything straight. Break out the heat gun, brass rod, and clamps!


In order to reinforce the hull I used LOTS of fiberglass tape and resin. No eventual hull droop from this baby!

Anigrand did a pretty good job of capturing the look of the 8-footer, but for some reason the "keel" piece was under-detailed and completely inaccurate. Using styrene strip I did my best to correct the problem. The raised hull pattern is far from being spot-on, but it's close enough.

Painting was very straight-forward: Flat black primer, followed by an overcoat of Tamiya grey primer, followed by a top coat of Tamiya AS-20 Insignia White. A mix of white and grey Tamiya primer was used for the darker hull panels. Finally, a light dry-brush pass of white oil paint was used to bring out a few details here and there.


- - - Updated - - -


Others have done a beautiful job lighting this model, but that will have to wait until my next Stardestroyer build (given all the fiberglass reinforcement I crammed into this thing it would have been a nightmare to drill all those little portals). With any luck Bandai or some other company will eventually produce an injection-molded styrene Stardestroyer in a decent scale, and then I'll go to town on the lights.
Only one more chore left to complete: building the display stand.
")