Drack
Sr Member
Hi guys I have been lurking about for around a year now and thought that it was time I posted one of my builds here and as the MK VI suit is my latest I should start there. I have been building a Masterchief suit that I have on 405th which some of you may have seen. I started an Ironman MK V custom build too which I will be picking up on after I finish the MK VI so that will be resurrected before the new year hopefully.
My plans for the MK VI suit are to hopefully have a motorised faceplate and film accurate arc reactor. I have read up on the skills needed for the face plate and I doubt I will be able to do this alone so might have to call upon a kind mind to assist me, that was in no way a request as I know peoples time is precious but I will work it all out when the time comes.
So far.

Things needed to make foam armour. Click underlined text for links.
First to read, read and read some more!
Pepakura. You need to download both the viewer and designer.
Tutorial: Simple Armor Scaling
Some tutorials I made on techniques I use. I hope to get some more done as not everything is covered in them. There are many others if you look around.
Dracks Foam Technique Tutorial Part 1 - YouTube
Dracks Foam Technique Tutorial Part 2 - YouTube
Nice set of techniques by JFcustom Here
A great tutorial on using the pep files for foam builds. XRobots - How to modify pepakura templates for foam
If your suit needs some lights in check this very simple guide on lighting.
Electronics Tutorial by Xrobots.
List of materials, links are UK based. I am sure you can find all these things in other countries but I thought it would be good to throw this info in the thread as a guide on what you need to make a suit of your own.
1. Foam Mats 10-12mm thick. I got a better deal than this. They seem to have gone up in price, Camping Mats 5-6mm thick & Craft Foam 1-2mm thick
2. Blades. No.11s. You can get the handles here too. Also you can get cheaper blades on ebay but they snap easy and blunt easy. Swann Morton are the best I have found so far so sticking with them. They are the best imo because they don't blunt as fast as the cheaper options. I can't offer an American alternative because I don't know what is best for you guys but if any one reading this knows of a top quality blade producer let me know and I will add to the links.
3. Glue gun I use & glue sticks.
4. Plastidip. Used for the first undercoat to seal the foam and give it that smooth base ready for painting.
5. Primer car spray and then the spray/paint you want for your finished paint scheme. Finally some lacquer to protect your piece and make it nice and shiny.
6. Webbing & Buckles for strapping.
7. There are many more materials I use/used but as you build your armour you will work out the bits needed for those extra touchs.
8. Moulding Optional but thought an armour moulding link might help people out wanting to have a go.
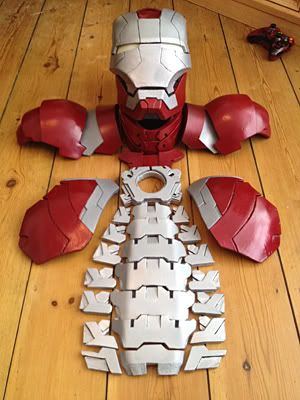
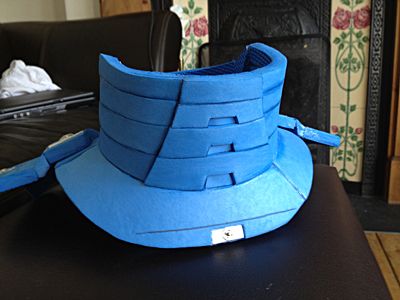
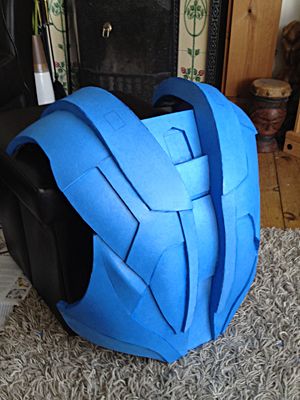
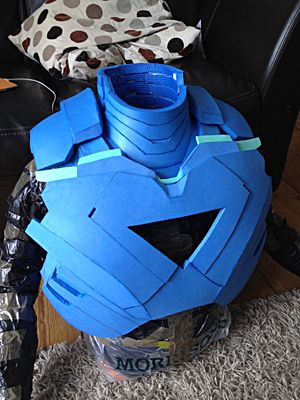
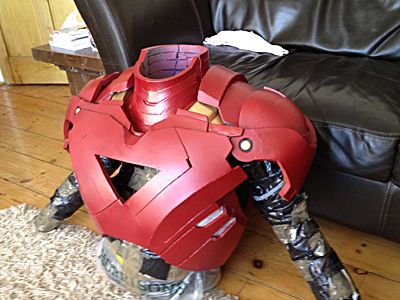
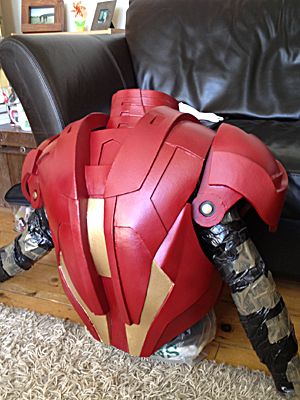
So with out further a due here is my progress so far.
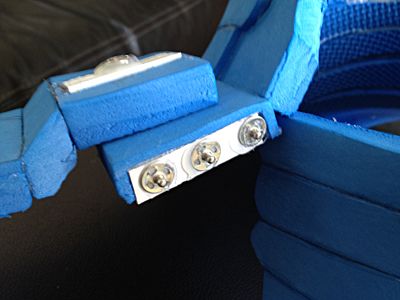
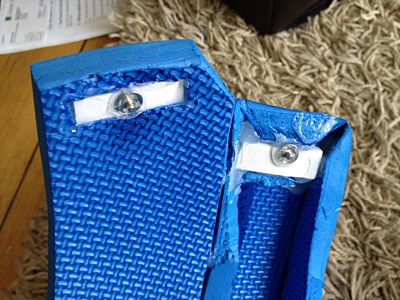
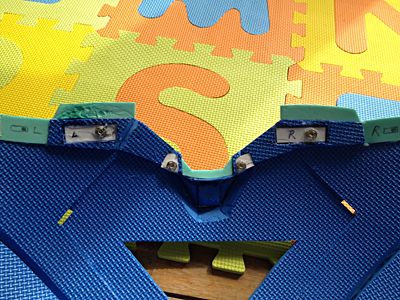
The armour pieces are attached using snap fasters. I made some 3mm thick PVC platforms to mount them on because when you try to push the snaps together with out them the foam is too soft to allow for enough pressure.

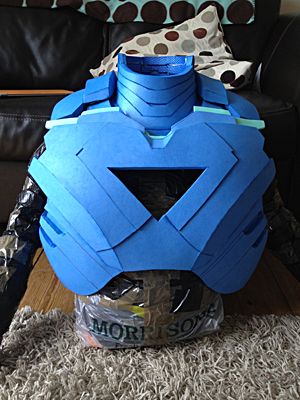
A quick lick of paint.
I do have 2 biceps and a forearm finished too. Once I have the second forearm made and the hinges installed I will post up an update for you all. I am not going to post step by step as there are enough Ironman builds out there but if I use an idea that may benefit people I will post more detailed pics so people can learn from them.
Good to finally be part of this community as there is some amazing work out there and look forward to seeing what all you guys are progressing on.
Tom.
My plans for the MK VI suit are to hopefully have a motorised faceplate and film accurate arc reactor. I have read up on the skills needed for the face plate and I doubt I will be able to do this alone so might have to call upon a kind mind to assist me, that was in no way a request as I know peoples time is precious but I will work it all out when the time comes.
So far.
Things needed to make foam armour. Click underlined text for links.
First to read, read and read some more!
Pepakura. You need to download both the viewer and designer.
Tutorial: Simple Armor Scaling
Some tutorials I made on techniques I use. I hope to get some more done as not everything is covered in them. There are many others if you look around.
Dracks Foam Technique Tutorial Part 1 - YouTube
Dracks Foam Technique Tutorial Part 2 - YouTube
Nice set of techniques by JFcustom Here
A great tutorial on using the pep files for foam builds. XRobots - How to modify pepakura templates for foam
If your suit needs some lights in check this very simple guide on lighting.
Electronics Tutorial by Xrobots.
List of materials, links are UK based. I am sure you can find all these things in other countries but I thought it would be good to throw this info in the thread as a guide on what you need to make a suit of your own.
1. Foam Mats 10-12mm thick. I got a better deal than this. They seem to have gone up in price, Camping Mats 5-6mm thick & Craft Foam 1-2mm thick
2. Blades. No.11s. You can get the handles here too. Also you can get cheaper blades on ebay but they snap easy and blunt easy. Swann Morton are the best I have found so far so sticking with them. They are the best imo because they don't blunt as fast as the cheaper options. I can't offer an American alternative because I don't know what is best for you guys but if any one reading this knows of a top quality blade producer let me know and I will add to the links.
3. Glue gun I use & glue sticks.
4. Plastidip. Used for the first undercoat to seal the foam and give it that smooth base ready for painting.
5. Primer car spray and then the spray/paint you want for your finished paint scheme. Finally some lacquer to protect your piece and make it nice and shiny.
6. Webbing & Buckles for strapping.
7. There are many more materials I use/used but as you build your armour you will work out the bits needed for those extra touchs.
8. Moulding Optional but thought an armour moulding link might help people out wanting to have a go.
So with out further a due here is my progress so far.
The armour pieces are attached using snap fasters. I made some 3mm thick PVC platforms to mount them on because when you try to push the snaps together with out them the foam is too soft to allow for enough pressure.
A quick lick of paint.
I do have 2 biceps and a forearm finished too. Once I have the second forearm made and the hinges installed I will post up an update for you all. I am not going to post step by step as there are enough Ironman builds out there but if I use an idea that may benefit people I will post more detailed pics so people can learn from them.
Good to finally be part of this community as there is some amazing work out there and look forward to seeing what all you guys are progressing on.
Tom.
Last edited:
")