Buck Rogers "The Plot to Kill a City" Blaster Build

Corellianexports

Sr Member
RPF PREMIUM MEMBER
Reference photos:

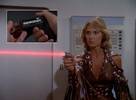
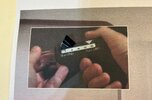
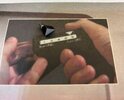
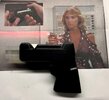
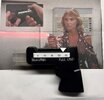
Screen used:
Screen Used Mini Laser.jpg


1595780473046.png
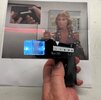
Sherese uses her laser pistol to stop an attacker, so is this the “Sherese Blaster”?

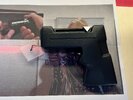
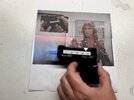
Alternate or fan made version:
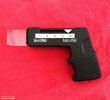
Buck-Rogers-in-the-25th-Century-Buck-Rogers-laser-1.jpg

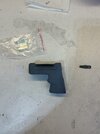
I had some spare time last night, so I decided to start cleaning up the kit. I got this back in 2020.
Ironically, I just happened to be watching the beginning of Season 2. Maybe this prop is used at some point in the season. We'll see. :D

The clear acrylic nozzle needed to be polished, so I thought I would start with that part.
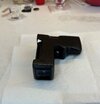
I forgot to take a before shot, but here's the kit with the finished nozzle. I also bought a mini sound card I'm hoping to add to it at some point:
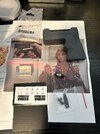
Polished Acrylic.JPG

I wet sanded the acrylic piece with 220, 600 and 1500 grit sandpaper. Then I used some Novus (#2) polish and spent about an hour polishing the part with an old T-Shirt.

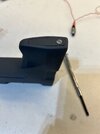
Today I used an X-acto knife to clean up the blaster and found a small, slotted screw for the access panel on the bottom of the blaster. The hole for the screw is too large, so I used some JB Weld to fill the hole for drilling/taping later.
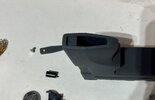
Bolt.JPG

I found a standard size, 5mm white, LED that should do the trick. Mounting it could be difficult. I might use some silicone to keep it in place. I also found a "slide" connecting battery button cell holder that should fit nicely inside the handle:
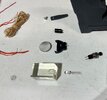
5mm LED.JPG

The two, very small resin parts are actually for the sliding "power adjustor". It's hard to see, but the smaller piece fit's inside. Both pieces needed to be trimmed, but they fit together nicely:
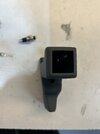
Forward View.JPG

Here's a shot of the larger, triangular part:
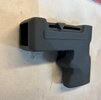
Adjustor.JPG

Here's the two, small pieces. Notice the triangular indentation on the smaller, back piece:
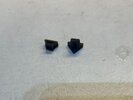
IMG_4529.JPG

And here they are, joined. This is how they appear inside of the blaster:
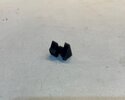
IMG_4528.JPG
 
Last edited:
Reference photos:
View attachment 1711505

I had some spare time last night, so I decided to start cleaning up the kit. I got this back in 2020.
Ironically, I just happened to be watching the beginning of Season 2. Maybe this prop is used at some point in the season. We'll see. :D

The clear acrylic nozzle needed to be polished, so I thought I would start with that part.
I forgot to take a before shot, but here's the kit with the finished nozzle. I also bought a mini sound card I'm hoping to add to it at some point:

View attachment 1711512

I wet sanded the acrylic piece with 220, 600 and 1500 grit sandpaper. Then I used some Novus (#2) polish and spent about an hour polishing the part with an old T-Shirt.

Today I used an X-acto knife to clean up the blaster and found a small, slotted screw for the access panel on the bottom of the blaster. The hole for the screw is too large, so I used some JB Weld to fill the hole for drilling/taping later.

I found 5mm white, LED that should do the trick. Mounting it could be tricky.

The Phaser One of the Buck Rogers universe.
 
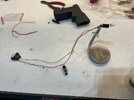
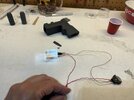
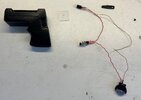
Time to do the wiring. I've roughly measured the wires so that they fit inside of the blaster, but are also long enough so that the LED and the battery holder can be taken out for replacement, etc. I always like to test everything before final assembly. Because I'm using a simple, 3 cell battery with a momentary switch, a resistor won't be needed. I'll use a plastic LED holder to help keep the LED in place against the clear acrylic piece.


IMG_4523.JPG

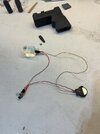
The switch and the LED are working properly, so I've cut out some pieces of shrink wrap and placed them before soldering both ends of the wires. Once soldered, I use a heat gun to shrink the wrap:

IMG_4524.JPG

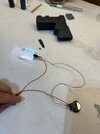
Again, I test the switch to make sure it's working properly:

IMG_4525.JPG IMG_4526.JPG

It looks good, so I'll set it aside and get to work on the drilling/threading the hole for the bolt. The bolt doesn't sit flush, so I use a small counter sink to deepen the hole a bit:

IMG_4527.JPG

So at this point, I'll wash the resin pieces in soapy water and let them dry overnight in preparation for painting sometime this week.
 
IMG_4531.jpeg
I started with some grey primer and then sanded the parts with 600 and 1500 grit sandpaper. There were some tiny bumps left over from the casting but they were easy to remove with a small x-acto knife and some sanding. I then sprayed the parts with flat black paint. It looked good so I lightly sanded the parts with 1500 grit and then assembled the parts, painting the final product with satin black.
 
IMG_4543.JPG

The final coat of paint is dry enough to work with, so I've layed out the wires along with a piece of light diffusion I machined down to a 1" x 1" square with a hole in it for the LED. This will help keep the clear acrylic piece in place as well as help light up the entire back of the piece.
First, I'm going to make some adjustments to the wiring for an optional sound card and so that everything fits snugly.
 
I cleaned up the "laser adjustor" part, first painting it with white primer and then satin black.
It doesn't look like the original was completely white. In fact, it looks a lot like margin adjustor found on an old typewriter and those were basically just bent pieces of metal, so I taped off the white "face" and sprayed the rest of the part satin black:

IMG_4809.JPG

IMG_4810.JPG

Assembled:
IMG_4811.JPG

I glued the LED in place with a little, clear silicon. Now that the adjustor part is in place, I can get the LED with diffusion square installed.
 
The diffusion square was a little tricky getting into place, due to the wires. I used a little clear silicon to help keep it in place (along with a couple of wires) and finished it off with some well-placed contact cement. I used a set of calipers to make sure that the square was an exact distance from the end of the pistol in order to place the acrylic emitter correctly:

IMG_4861.JPG

Once dried, I used a little clear silicon on all four sides of the inside of the pistol and then inserted the clear emitter. I used some painters tape to help keep it straight:

IMG_4862.JPG

Once the silicone had hardened, I removed the tape and used a little lighter fluid to help clean the clear acrylic:


IMG_4863.JPG

The decals were printed on label paper, so that made this part of the project a lot easier. At first I thought they were just plain paper.
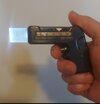
The spacing was a little tricky and I had to cut the last label in half to help with the placement. Here's the finished product:

IMG_4864.JPG

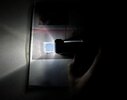
I'm not sure why the white LED appears to emit blue light in these photos, but it looks cool:

IMG_4868.JPG

IMG_4870.JPG

A night shot:
IMG_4866.JPG

This kit turned out to be a fun summer project and a really nice prop, probably nicer than the original. :)
Special thanks goes out to Joatrash FX for 3D printing these kits. He really did a great job with these and I'm hoping he will make some additional Buck Rogers laser pistol kits in the near future. :)
 
Last edited:
White LEDs are made from blue LEDS, I don't remember how, and am too lazy to look it up. That is why some white LEDs have a bluish tinge, and some photograph as bluish.

David.
 

Your message may be considered spam for the following reasons:

If you wish to reply despite these issues, check the box below before replying.
Be aware that malicious compliance may result in more severe penalties.
Back
Top