POTC Compass scratchbuild-COMPASS DIAL IN!

Maelstrom

Sr Member
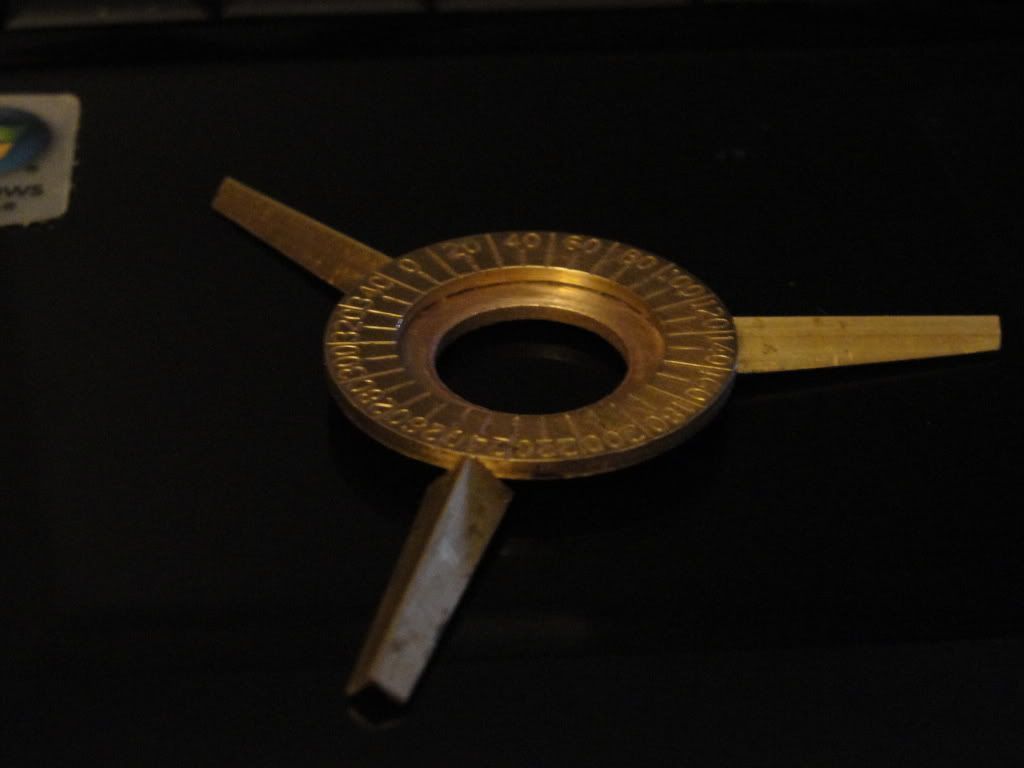
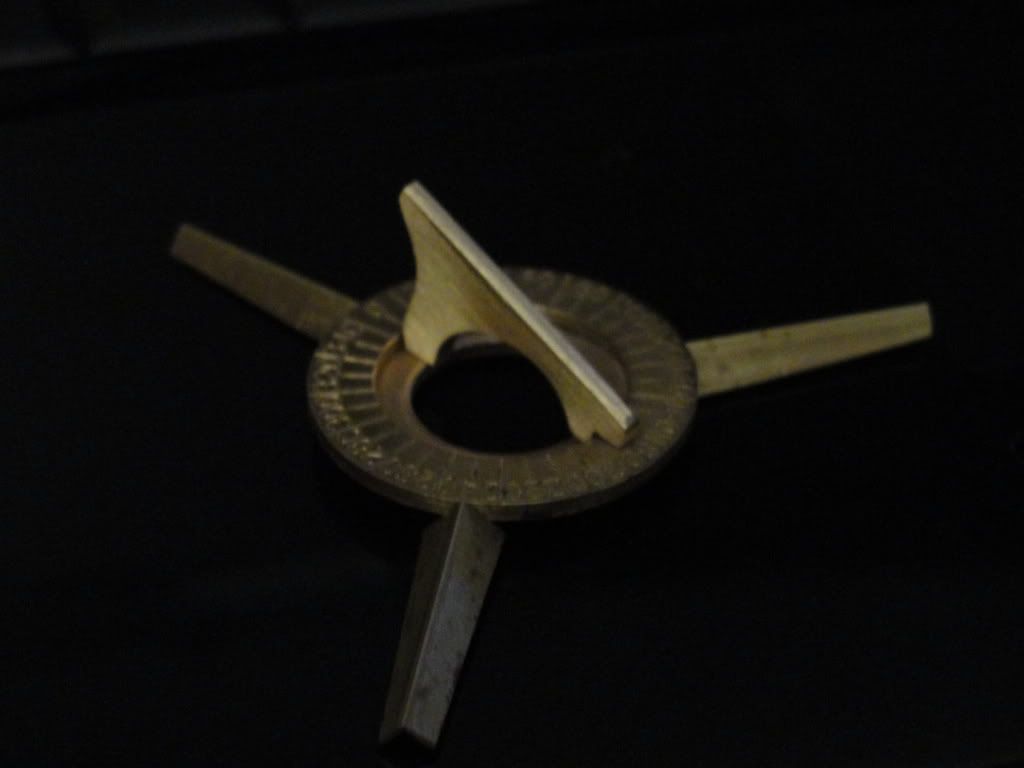
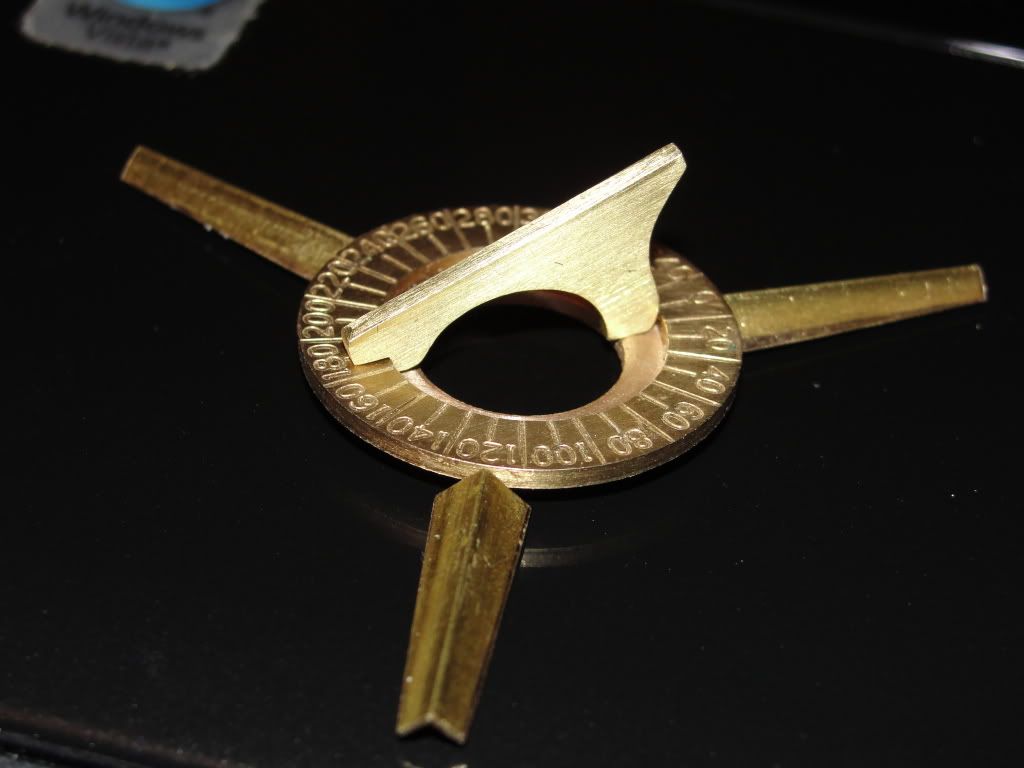
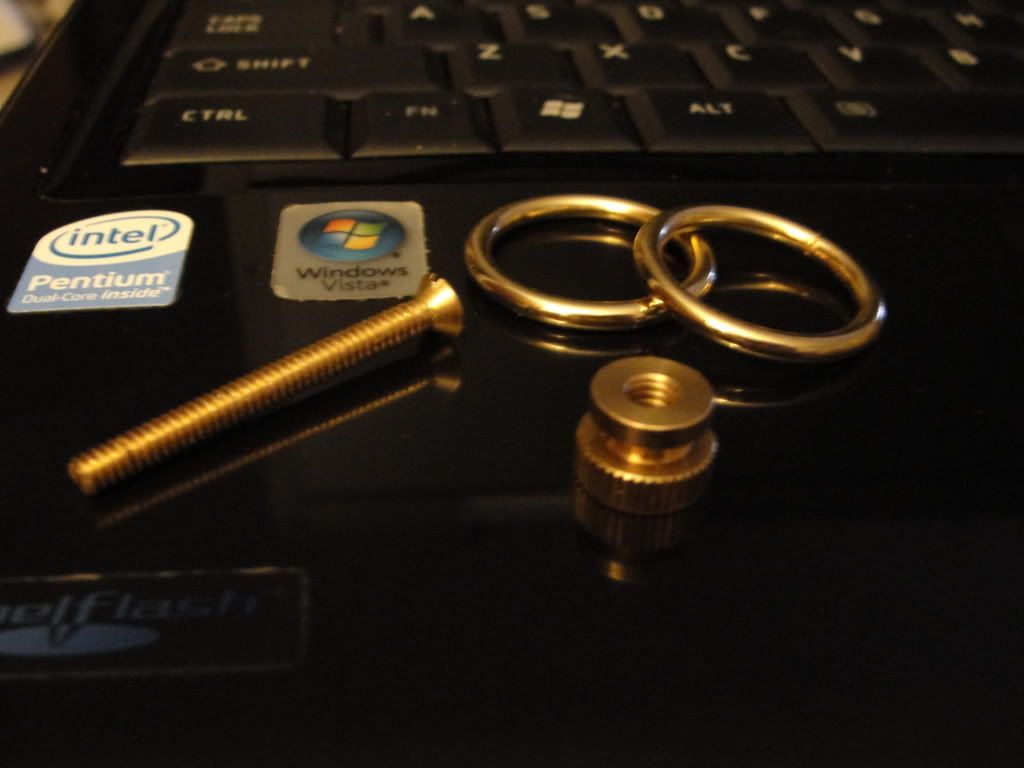
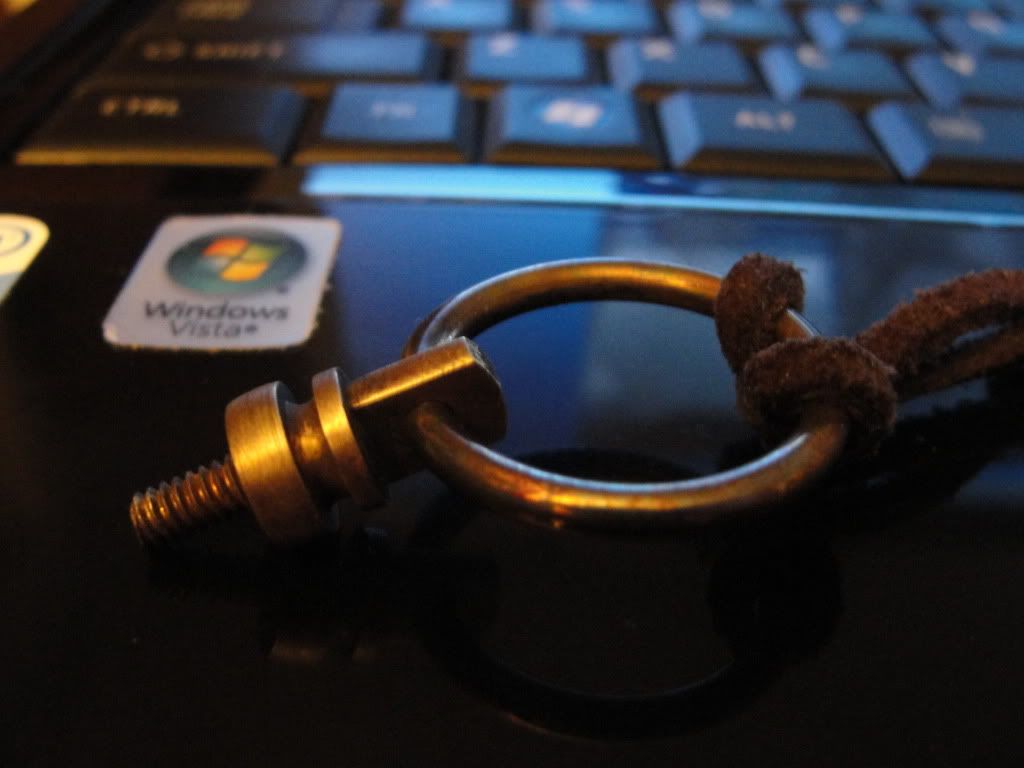
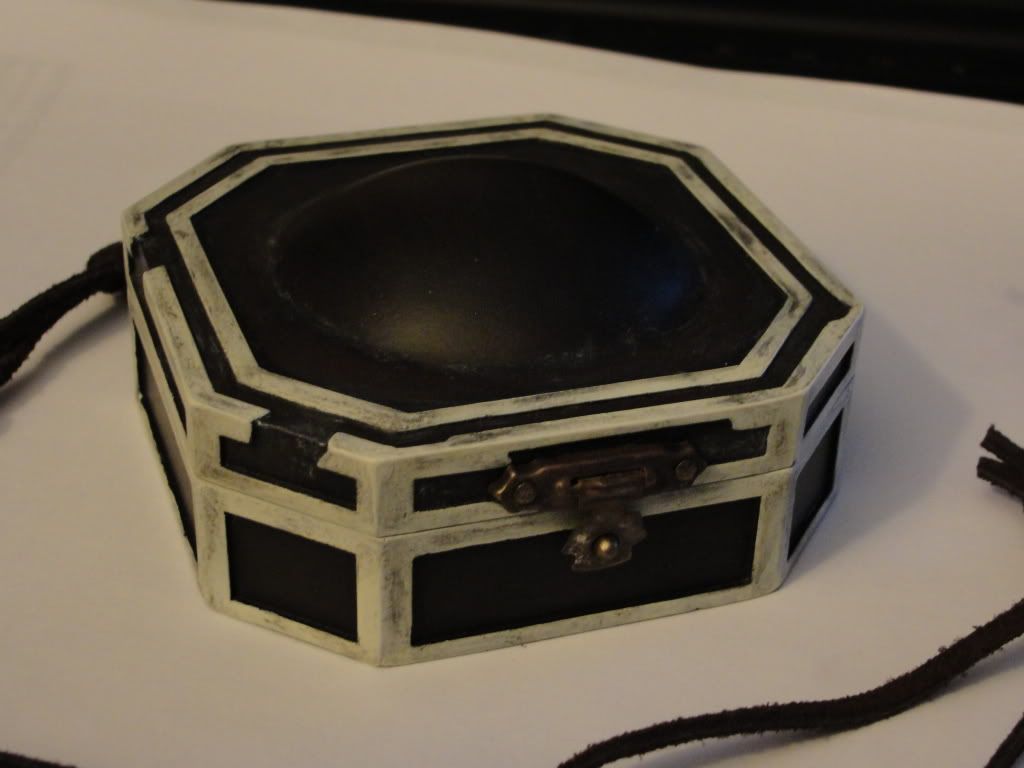
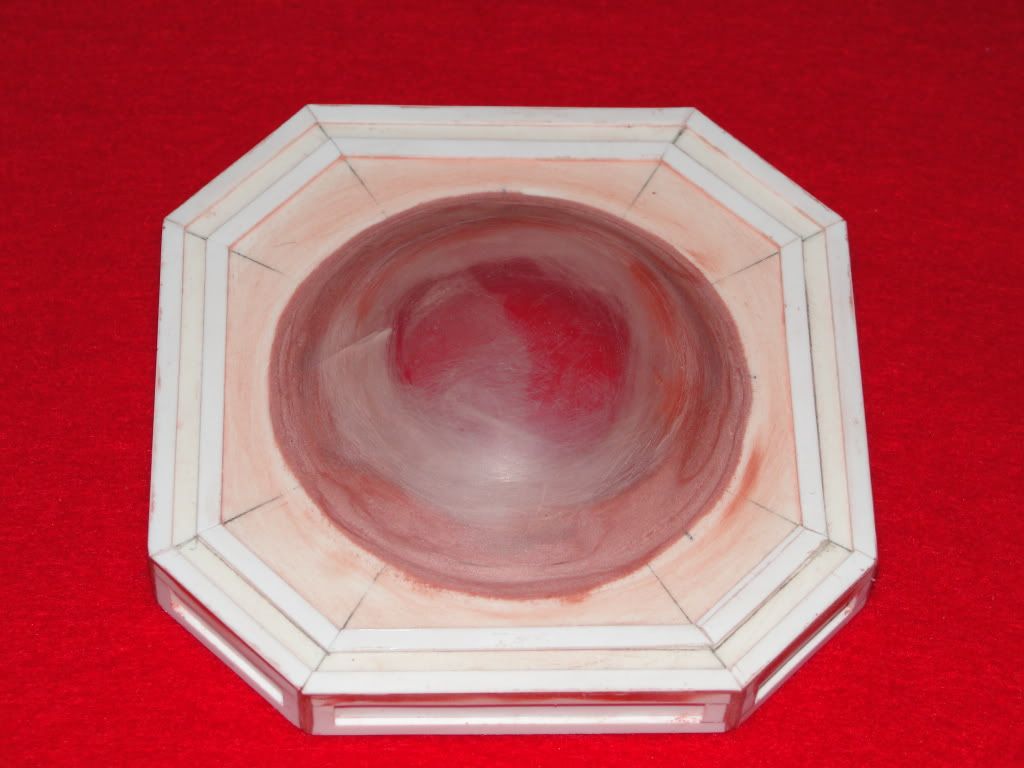
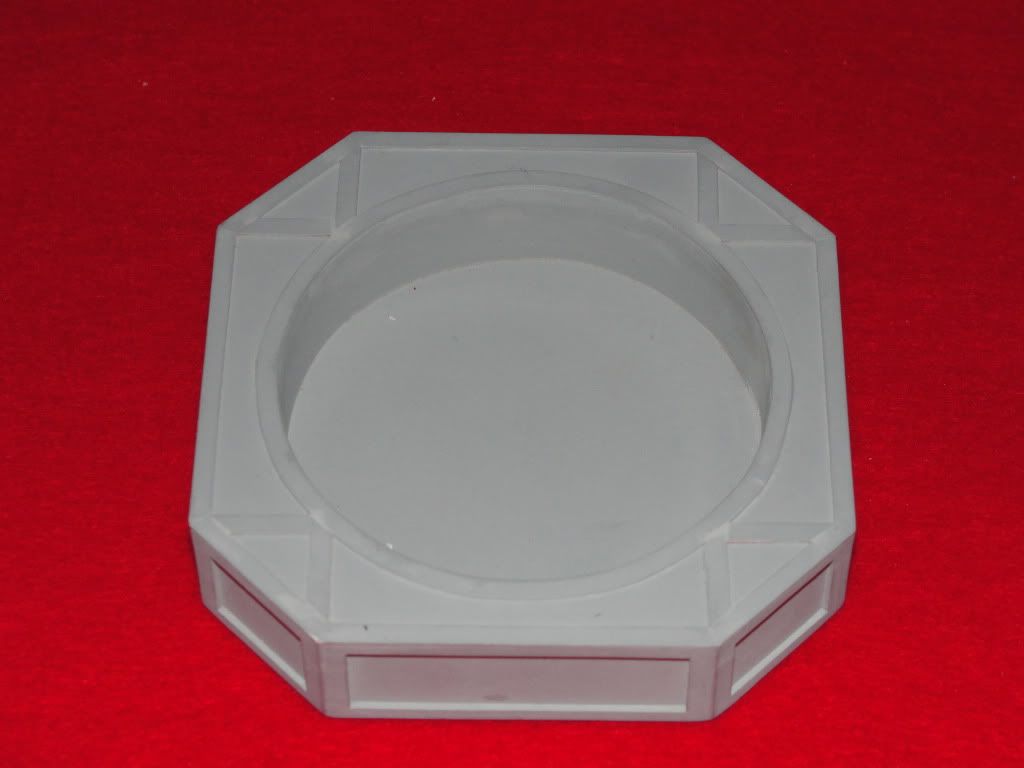
Been working on this for a long time. Kept setting it aside and coming back to it. Finally got the masters done, poured the molds and created a piece to do the damgae to, hinge up, and make the brass bits for. Here's a little teaser of the brass bits before weathering them.

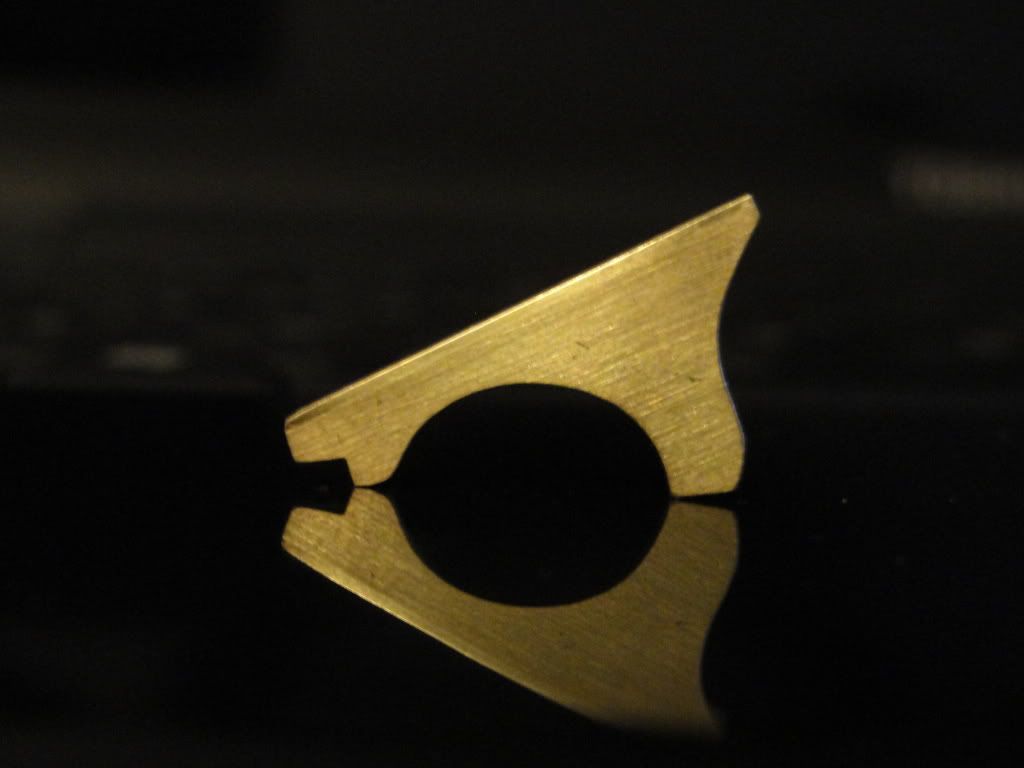
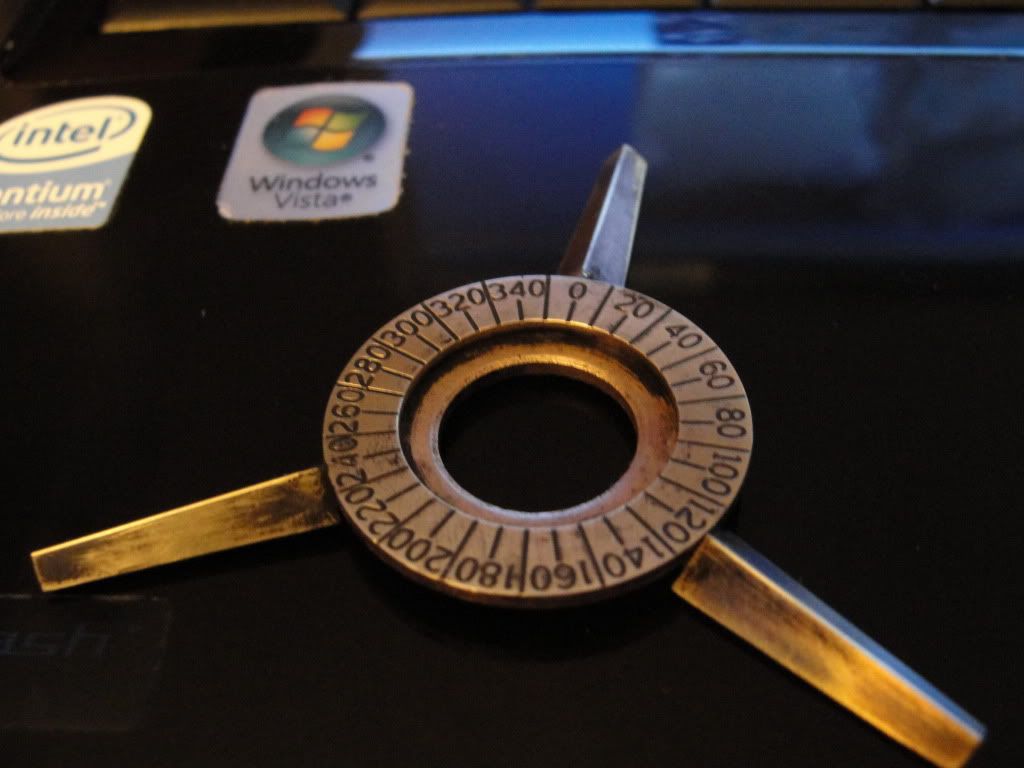
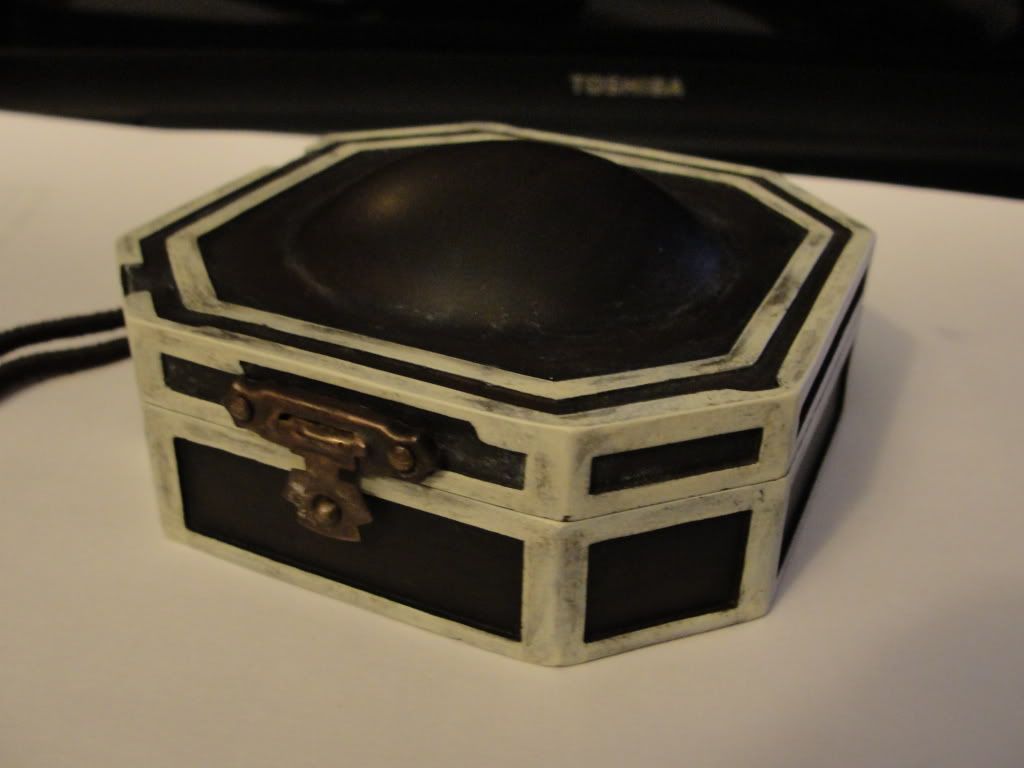
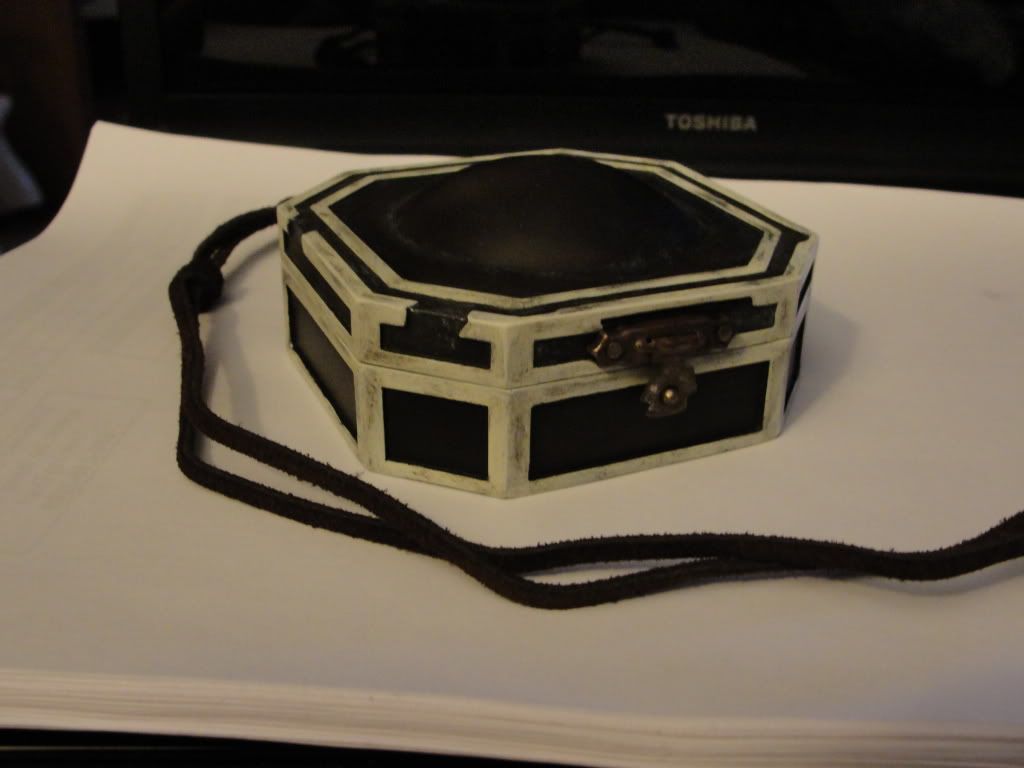
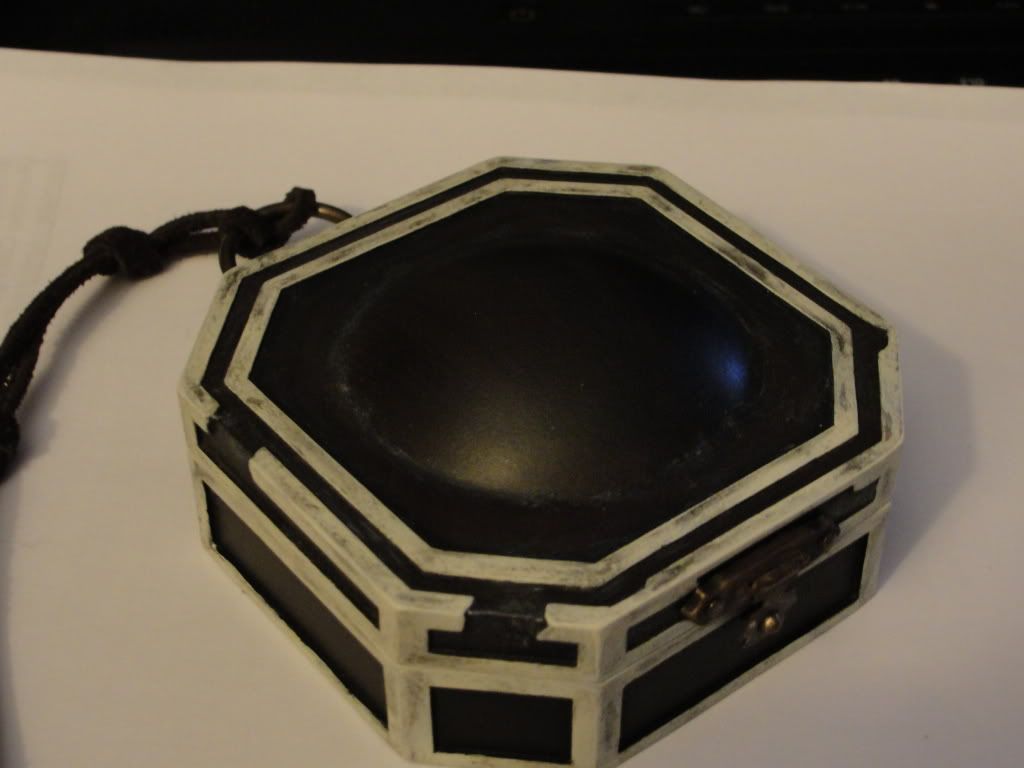
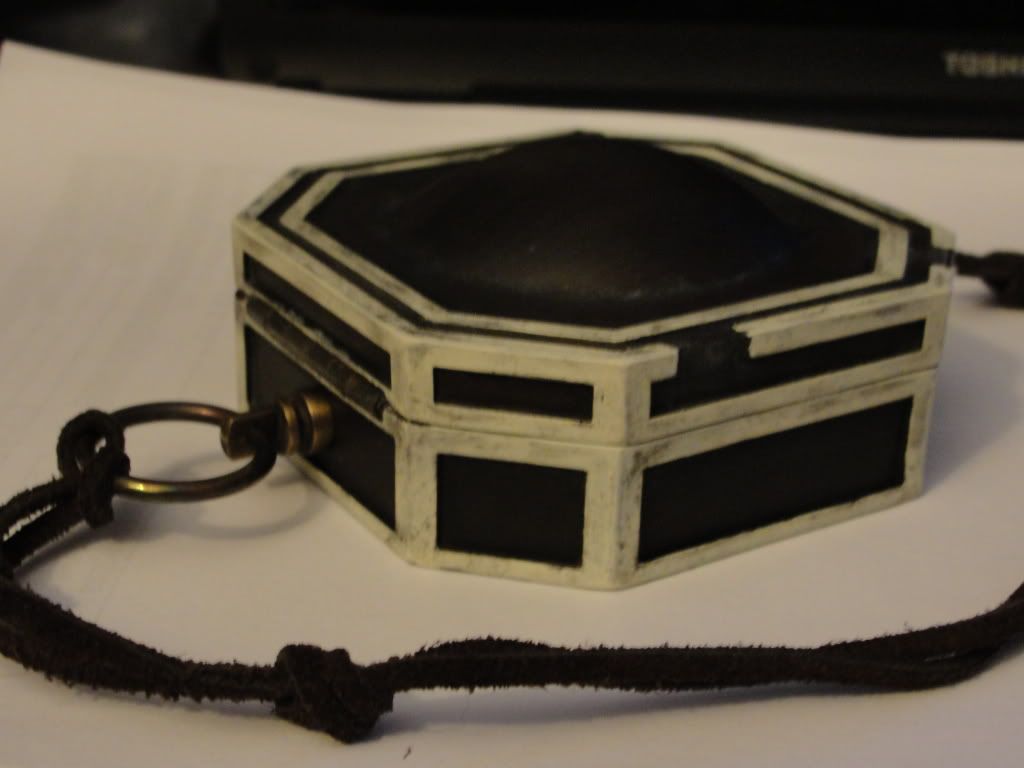
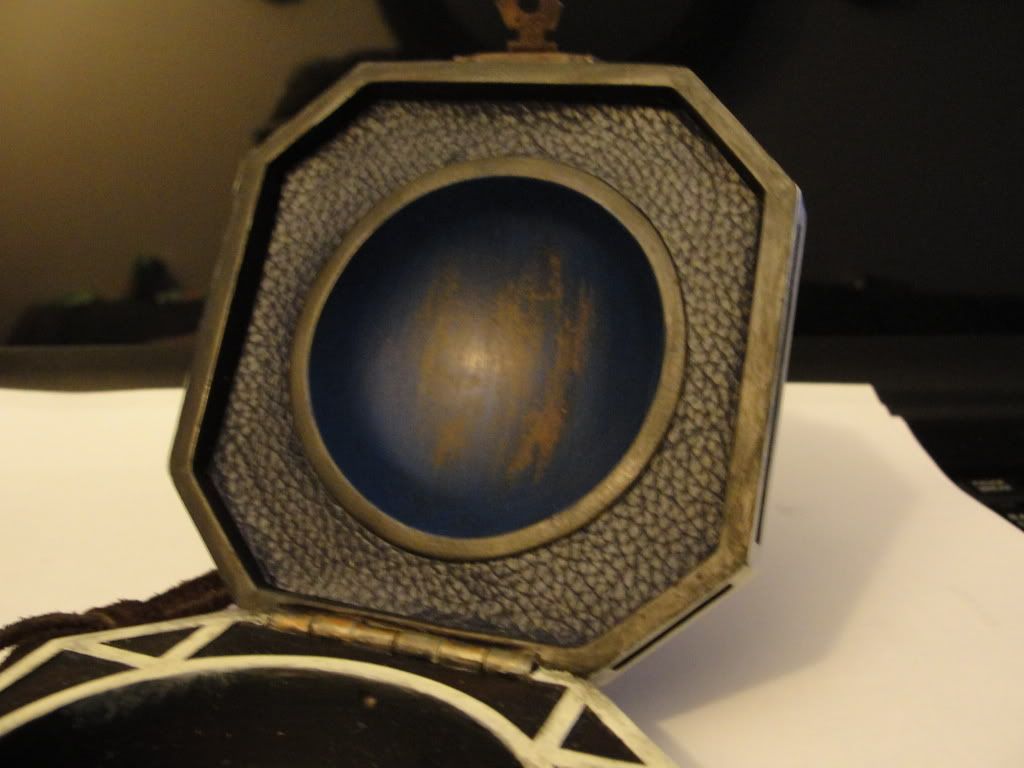
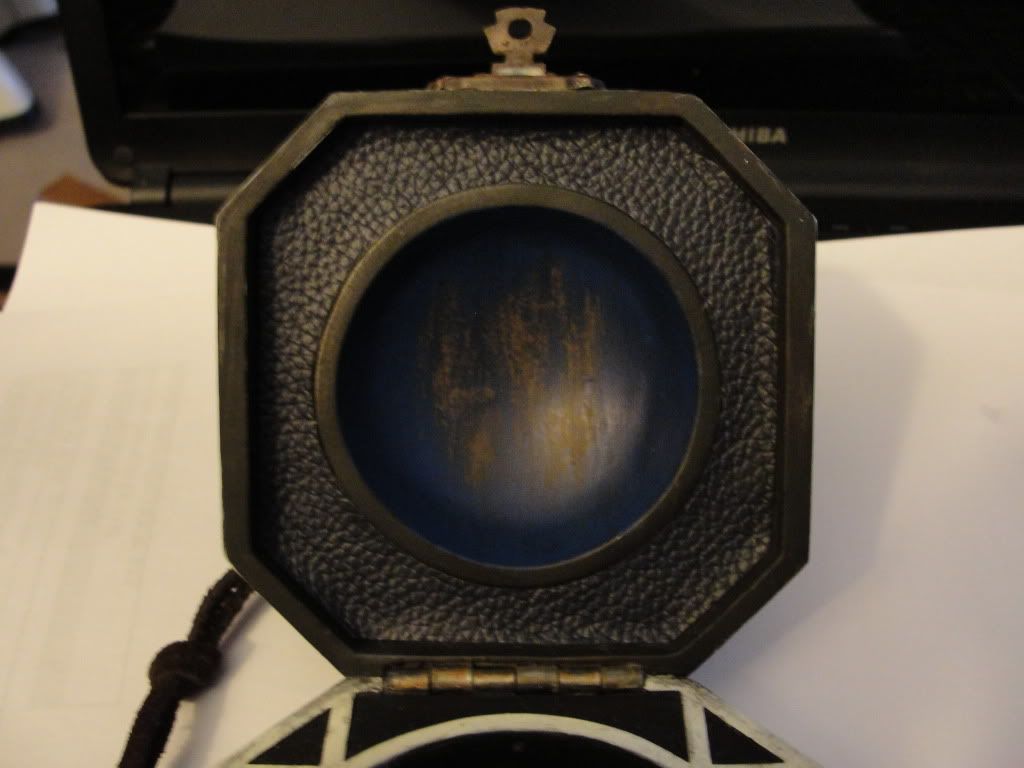
The numbered dial I got from board member MutantEnemy as I sourced out getting this done, but none of the local engravers felt they could get the job done right. The center, lower ring is a bronze bushing as I couldn't find a brass washer the right size. The color is not too far off, but I think after weathering it won't be noticebale at all. The struts are cut from K&S 155 sqaure brass tube. Its hard to tell from some pics if the original struts had the taper or not, but I cut them that way because I thought it looked nice. The center "fin" is hand cut and filed from K&S flat brass bar.

DSC00371.jpg


DSC00368.jpg


DSC00373.jpg


DSC00354.jpg


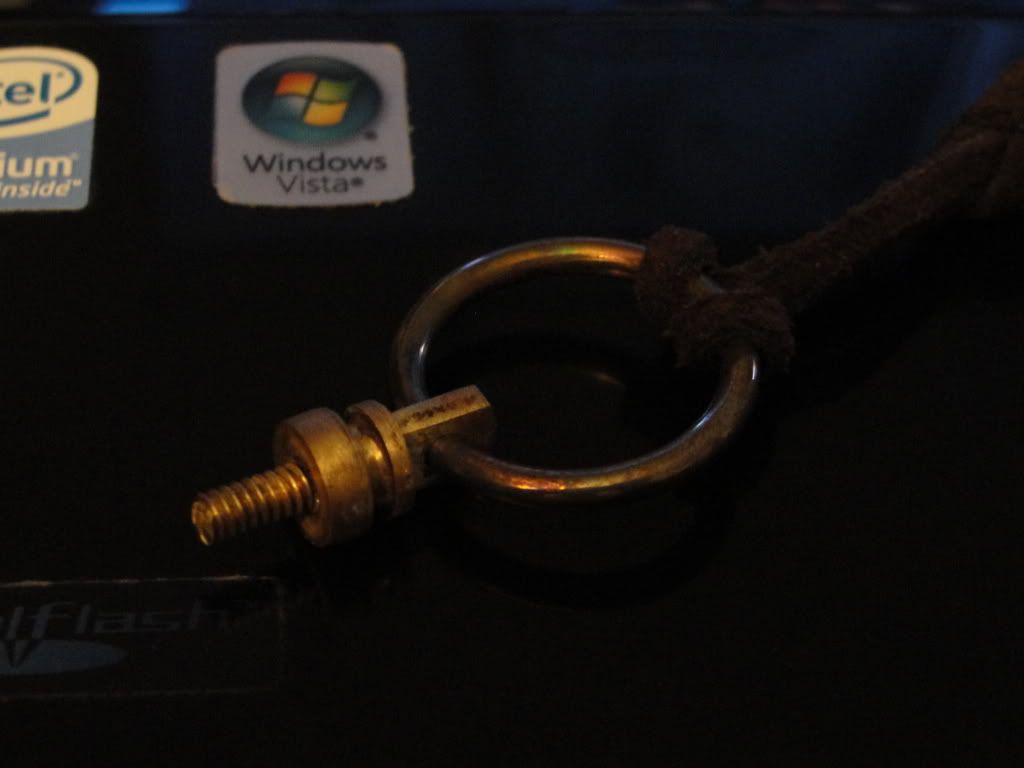
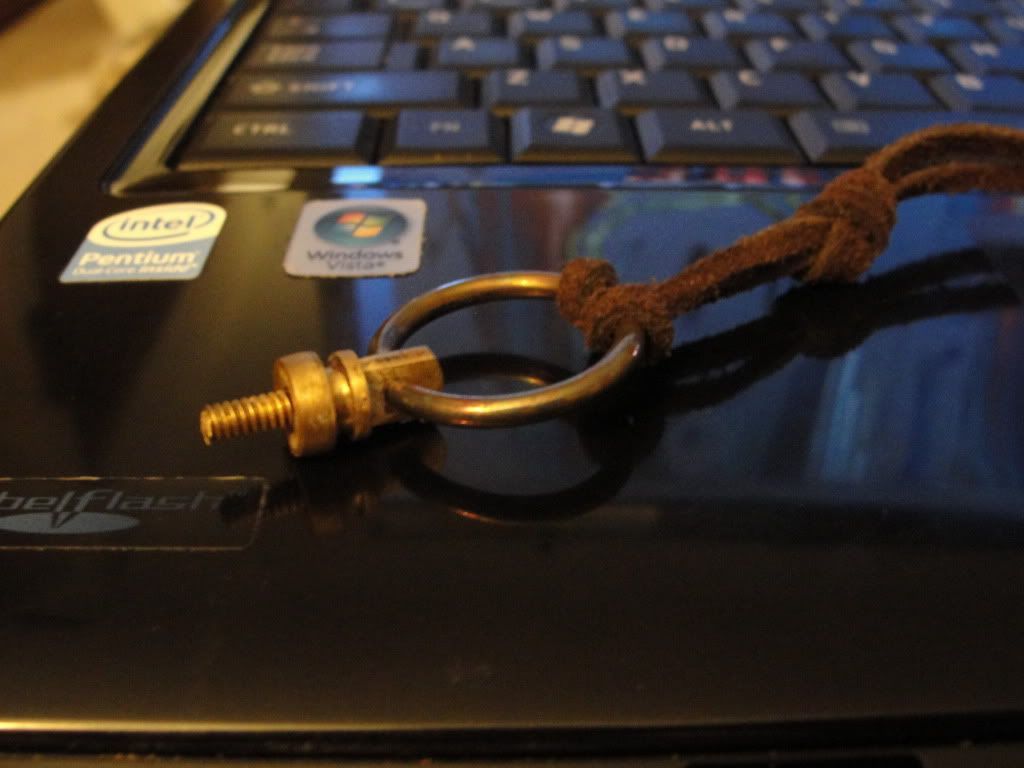
The main body is in primer right now and I have the clasp, clasp post, hanging ring, and dial already done. And will post pics of them later.

Let me know what you think so far! :thumbsup or :thumbsdown
 
Last edited:
Re: POTC Compass scratchbuild

"lanyard" ring

DSC00377.jpg


DSC00375.jpg


Made from a brass knurled knob with the knurl filed off, flat brass stock, brass threaded rod, and brass ring.
 
Re: POTC Compass scratchbuild

Where did you find the hardware for the lanyard ring?


DSC00381.jpg


The knurled knob, brass stock bar, and bolt I got from Ace Hardware (True Value Hardware...same difference check local listings). The rings I got from Hobby Lobby.

I took the knurled knob and screwed it down tight on the bolt and placed it in the chuck of my drill press. While on, I took the file to the knurled part until it was smooth. Then a quick pass of fine sandpaper and steel wool until nice and shiny.

I cut off a piece of the bolt to use as a post to insert into the body of the compass. A piece of brass bar got a hole drilled thru it and cut down then filed to shape. This was the tab for the ring to go into and that piece was then soldered onto the de-knurled knob.

The rings are actually steel rings but came "brass" plated. They are welded but a quick pass of the hacksaw popped the weld open. Spreading it open slightly with pliers I got the opp. sides lined up with the hole I drilled in the bar and let the pressure off. It's nice and springy so it closed right back together into the hole.

The Hobby Lobby rings came in a pack of 12 for $3. They are Treehouse Studio brand item # 181412 and it has a web site on the back of the package as Deprecated Browser Error so if no Hobby Lobby's near you you may be able to order some online.

The ring I darkened up some with the torch, but am currently waiting on a bottle of "Blacken-it" from Micromark to use on all the bits-n-pieces.

Hope this description wasn't too long and that it made sense LOL
 
Last edited:
Re: POTC Compass scratchbuild

Pay no attention to the deprecated browser error above. The web address was supposed to be craftsetc.com but this web address just takes you to Hobby Lobby's site.

Link above is safe to click or you can just clicky here: www.shop.hobbylobby.com

Type in 181412 in the search and the rings will pop up.
 
Re: POTC Compass scratchbuild-BRASS GETTING WEATHERED

UPS stopped by today and I got the "Blacken-It" in (along with other goodies...I love Micro-Mark) and decided to start weathering the brass bits while I'm waiting for washes to dry on the main compass body.

DSC00383.jpg


DSC00384.jpg
 
Re: POTC Compass scratchbuild-FINISHED EXTERIOR PICS!

Well...almost finished. Will probably work on some more weathering, but here are a few pics of the exterior. I can see a few touch up spots to address as well...

DSC00401.jpg


DSC00396.jpg


DSC00391.jpg


DSC00389.jpg


DSC00390.jpg


A couple of unfinished interior pics. Still need to add the stars inside the lid.

DSC00394.jpg


DSC00405.jpg


Thanks for looking and hopefully commenting
 
Last edited:
Re: POTC Compass scratchbuild-FINISHED EXTERIOR PICS!

Well it's my thread an' I'll post if I want to...post if I want to

Nver took many pics of the construction of the compass, but here's a few I'll throw in here.

DSC00100.jpg


DSC00103.jpg


Enjoy.
 
Re: POTC Compass scratchbuild-FINISHED EXTERIOR PICS!

This is really a very nice looking piece!! Great job on it!!
I kinda got lost here, though.....
Did you build a replica then cast it?

Also curious to know how you plan to afix the dial arms.

Shylaah
 
Re: POTC Compass scratchbuild-FINISHED EXTERIOR PICS!

This is really a very nice looking piece!! Great job on it!!
I kinda got lost here, though.....
Did you build a replica then cast it?

Also curious to know how you plan to afix the dial arms.

Shylaah


Yeah. Built from plastic signs and strip styrene. Smoothed out all the rough angles with Bondo glazing putty, primed, sanded, then molded. The piece in the pics above is the first cast from the molds for the top and the bottom.

For the dial arms I have drilled holes into the sidewalls of the compass dial recess and inserted small brass rods. The angled struts will just sit on those with some CA glue added to fix them in place.

Thanks for commenting!
 
Re: POTC Compass scratchbuild-FINISHED EXTERIOR PICS!

Yeah. Built from plastic signs and strip styrene. Smoothed out all the rough angles with Bondo glazing putty, primed, sanded, then molded. The piece in the pics above is the first cast from the molds for the top and the bottom.

For the dial arms I have drilled holes into the sidewalls of the compass dial recess and inserted small brass rods. The angled struts will just sit on those with some CA glue added to fix them in place.

Thanks for commenting!

Cool. It's a lot more complicated than it looks getting all that stuff in that little compass dial recess, isn't it!!??

Shylaah
 
Re: POTC Compass scratchbuild-FINISHED EXTERIOR PICS!

Cool. It's a lot more complicated than it looks getting all that stuff in that little compass dial recess, isn't it!!??

Shylaah

Yeah. Worked this up to drill the holes by hand/finger.

DSC00409.jpg


Just a small drill bit with a knurled knob CA glued to the end. I know such things exist already, but I didn't own any and necessity is the mother of invention afterall.
 
Re: POTC Compass scratchbuild-FINISHED EXTERIOR PICS!

VERY nice.

Any plans to sell these as kits or otherwise?

I could probably sell the shells if anyone is interested.

All other parts are too kitbashed by me to work up regularly. And the brass numbered dial was from another member.
 
Last edited:
Re: POTC Compass scratchbuild-FINISHED EXTERIOR PICS!

Yeah. Worked this up to drill the holes by hand/finger.

Just a small drill bit with a knurled knob CA glued to the end. I know such things exist already, but I didn't own any and necessity is the mother of invention afterall.

Necessity is indeed the mother of invention, and it always amazes me the different ways to the same end that people come up with! I've made 'emergency' pin vises myself, much more ghetto than that--just wrapping a rubber band snugly around the end of a drill bit for the grip :)

The outside certainly looks splendid, and I anxiously await seeing the insides finished up!

Shylaah
 
This thread is more than 13 years old.

Your message may be considered spam for the following reasons:

  1. This thread hasn't been active in some time. A new post in this thread might not contribute constructively to this discussion after so long.
If you wish to reply despite these issues, check the box below before replying.
Be aware that malicious compliance may result in more severe penalties.
Back
Top