Hello guys,
finally I finished my Iron Man faceplate kit, which was superbly created and cast by our very own vashdstampede. It's an incredible kit which I can highly recommend. :thumbsup
Although minimum cleanup was needed, I underestimated the time needed to fit the parts inside the mask. Some have to be heated and bend to assure a nice fit.
Onto the building process:
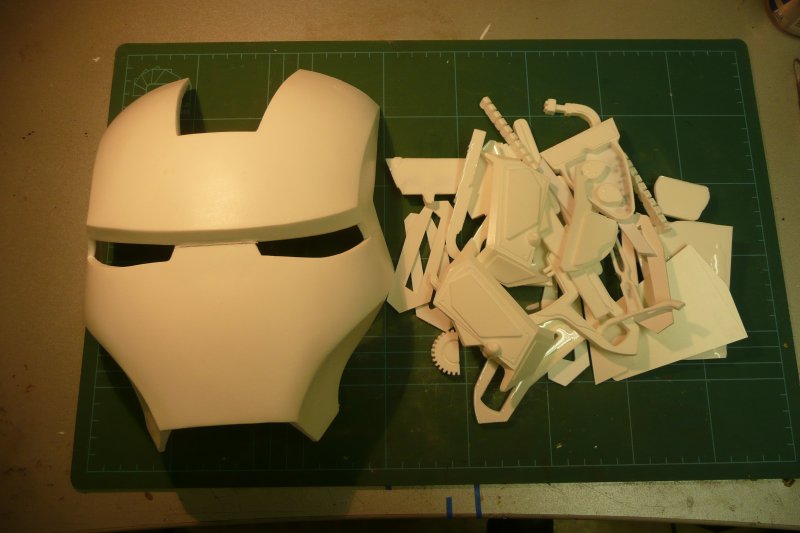
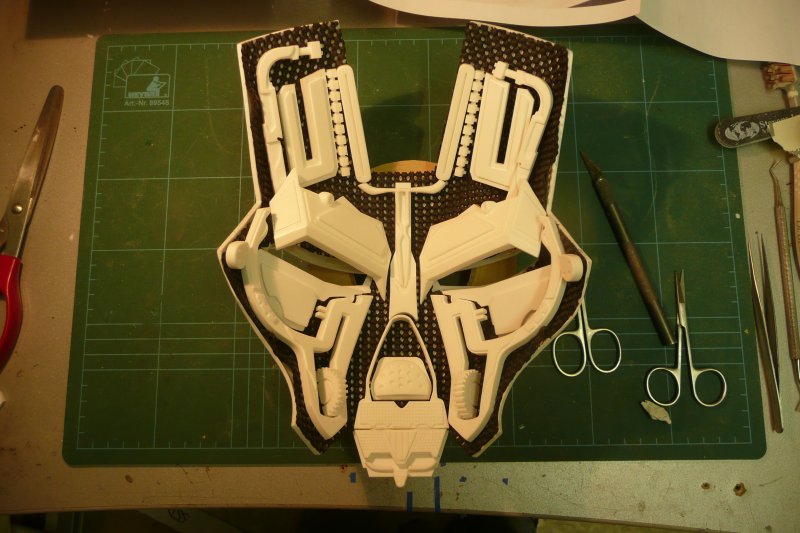
These are the parts that came with the kit. As you can see, I added putty to the line between the eyes for a little correction.

I applied a guide coat prior to sanding to show any imperfections.
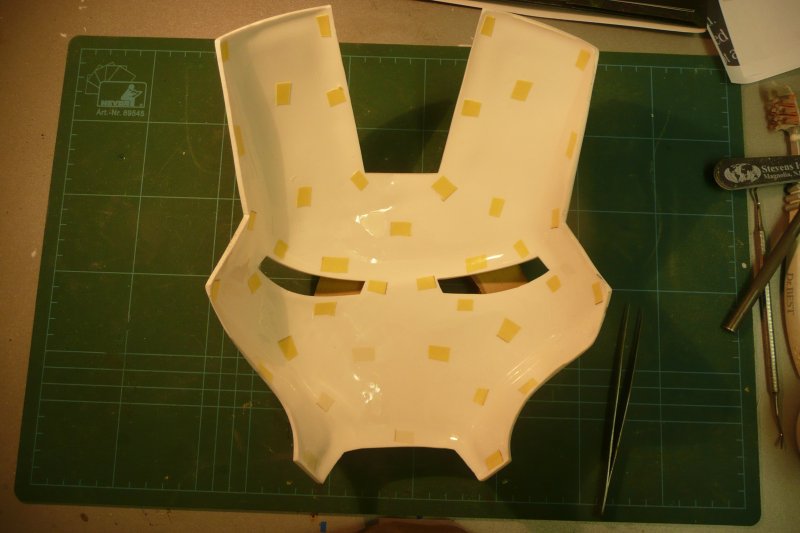
Some small pieces of double sided tape were added to the inside of the mask to fit the drawer rubber.
After fitting the drawer rubber, I decided to thicken the inner edges of the mask by applying some auto body putty.
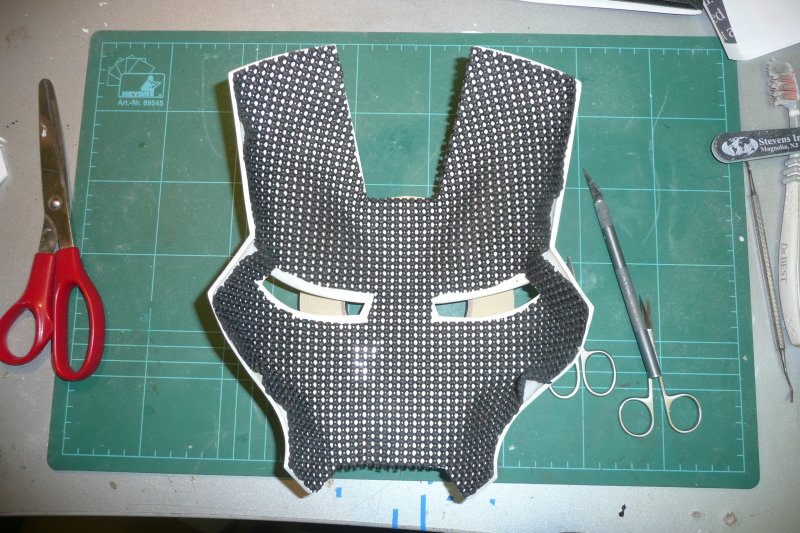
Here you can see the drawer liner laid out.
Test-fitting the parts. This required the mentioned heating and bending :wacko
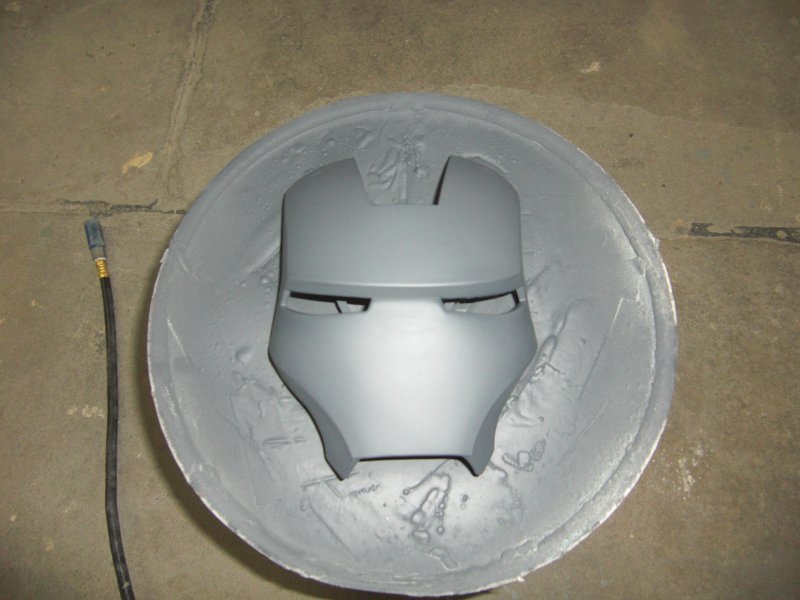
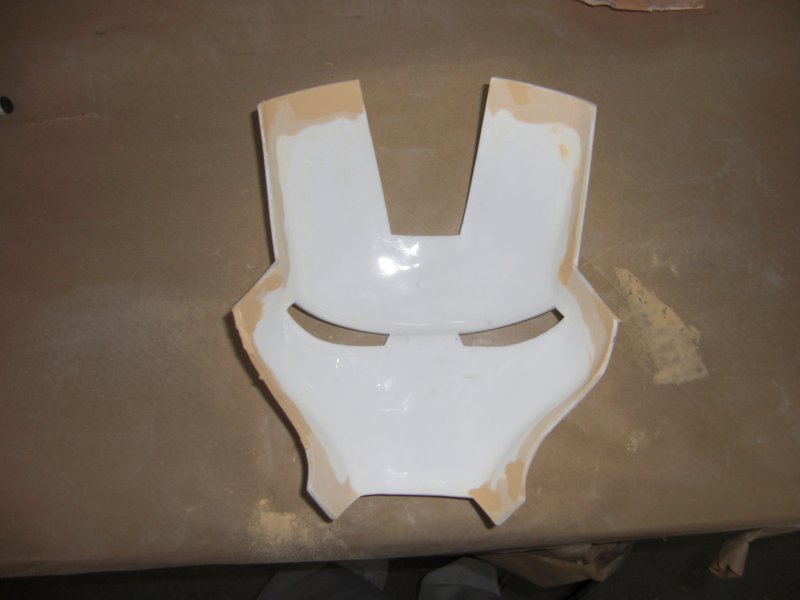
Two coats of automotive body filler were applied to the outside of the mask.
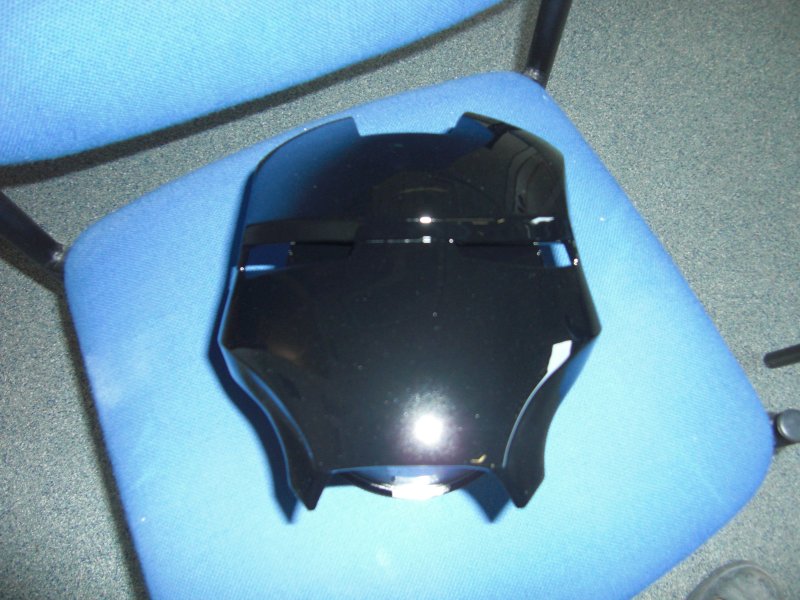
After sanding with 800 grid wet sand paper (again using a guide coat of flat black mist), the mask was sprayed with high gloss automotive lacquer using a spray gun.
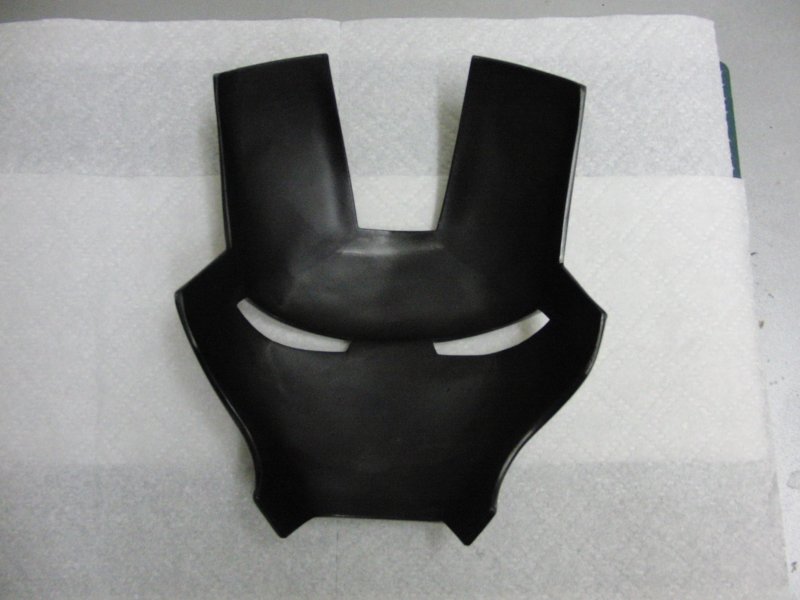
I painted the inside of the mask flat black using a rattle can.
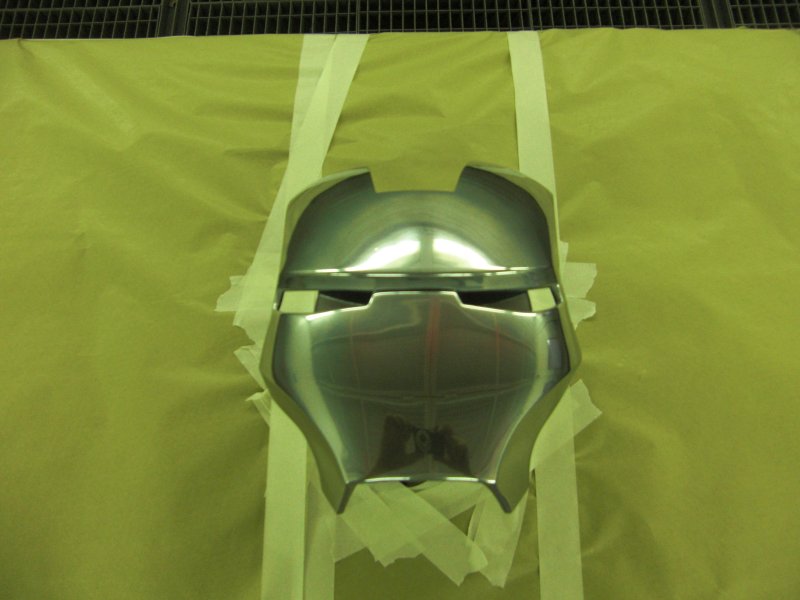
A few lightly misted coats of mirra chrome where applied using a small spray gun. Those where almost instantly polished using a clean cotton cloth.
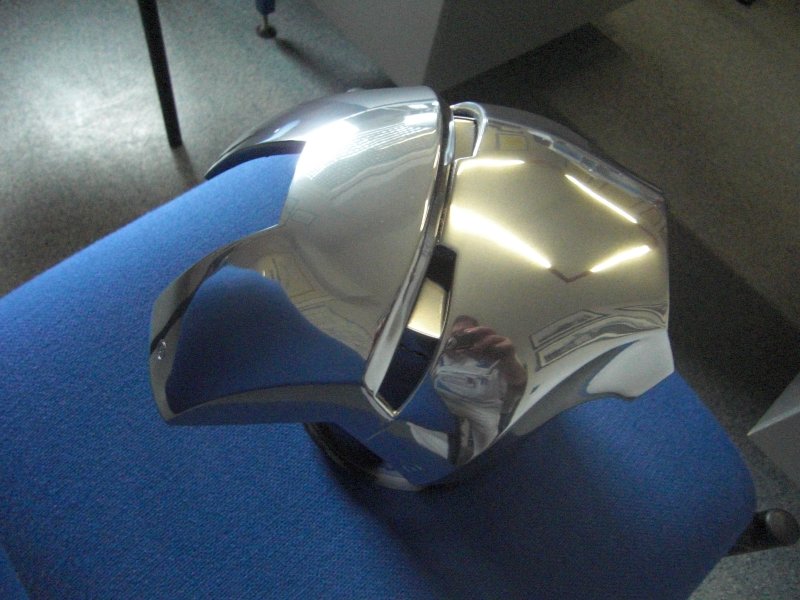
After a dry time of 48 hours, two coats of high gloss clear where applied. The waiting time is needed to ensure that the mirra chrome will not dull because of the solvents in the clear.
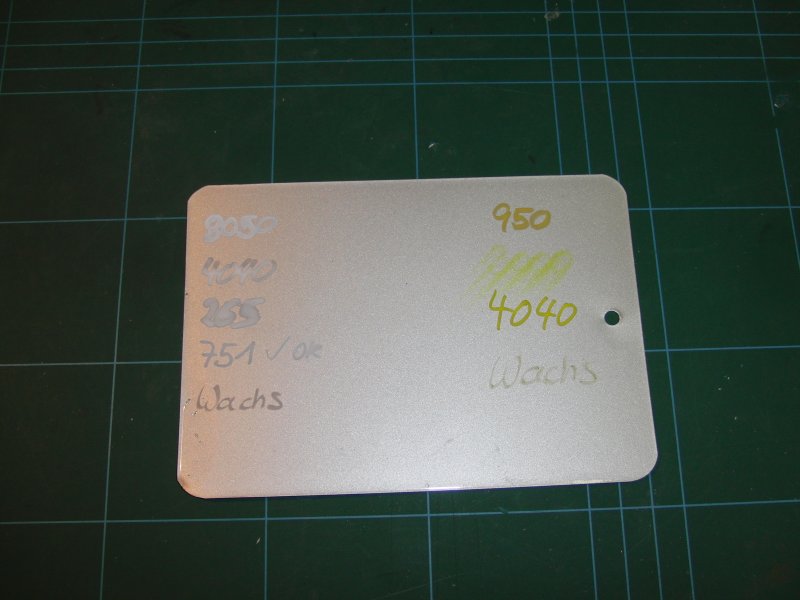
I bought some different pens to test how they will react to the final clear coat and tested them on a silver painted sheet of metal.
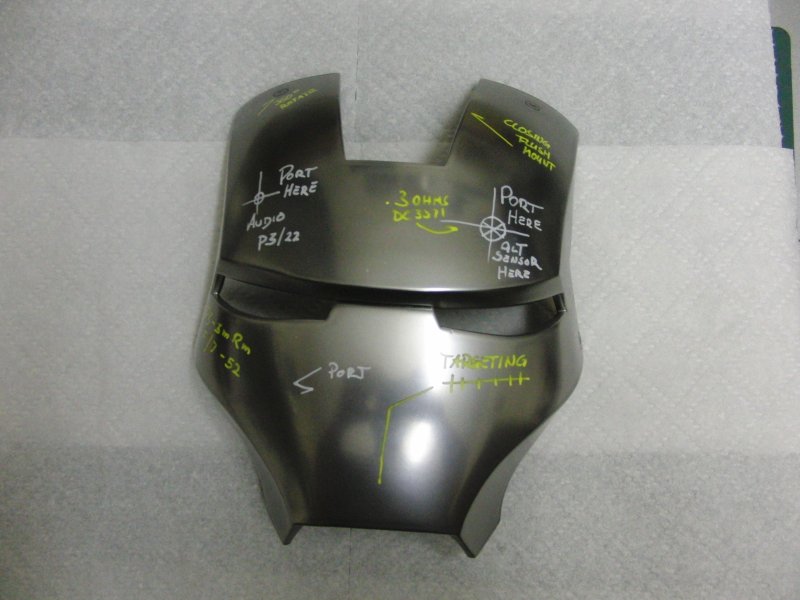
The mask was lightly sanded with grey 3M pad and the writing was done using the chosen pens. After that, I sprayed two coats of clear coat. I decided to go with semi gloss clear, because the chrome was to refelctive.
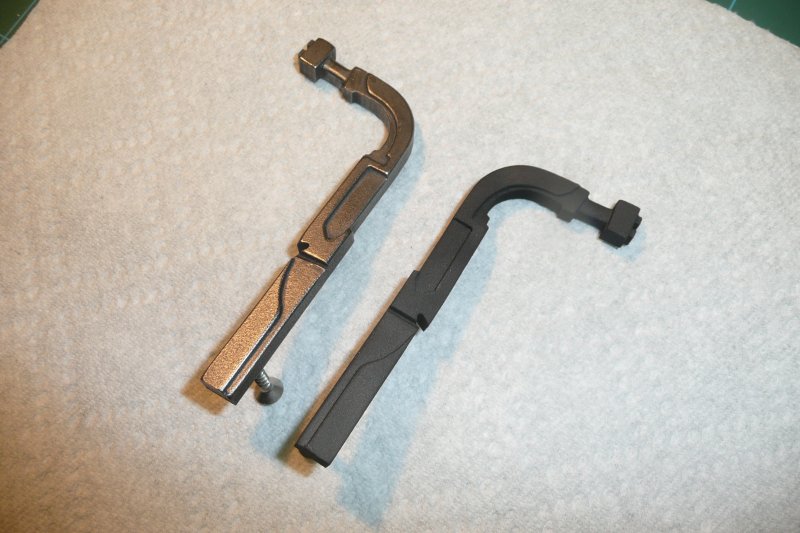
I chose Mr. Metal Color from gunze for most of the inner parts. The right part in the picture as it looks after applying the color using an airbrush. On the left side you can see what it looks after polishing with a cotton swab.
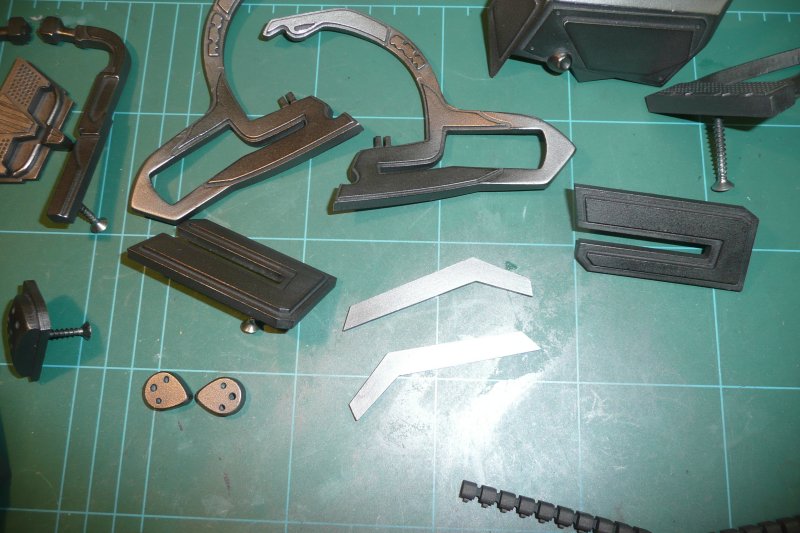
Some of the parts layed out.
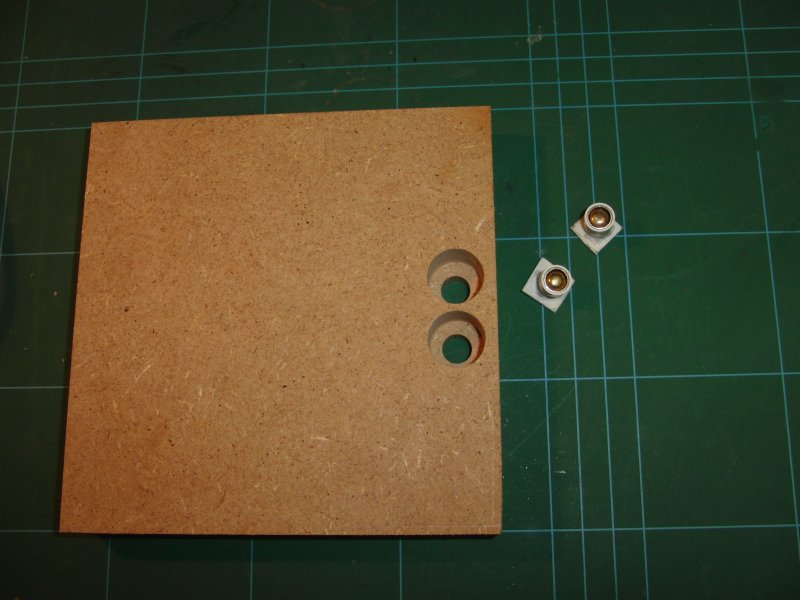
The base is made of mdf. The two pieces you see are the connectors for the lightsheet. These where made using aluminium and plastic tubing as well as two springs and two little thingies you need for sealing a padded envelope.
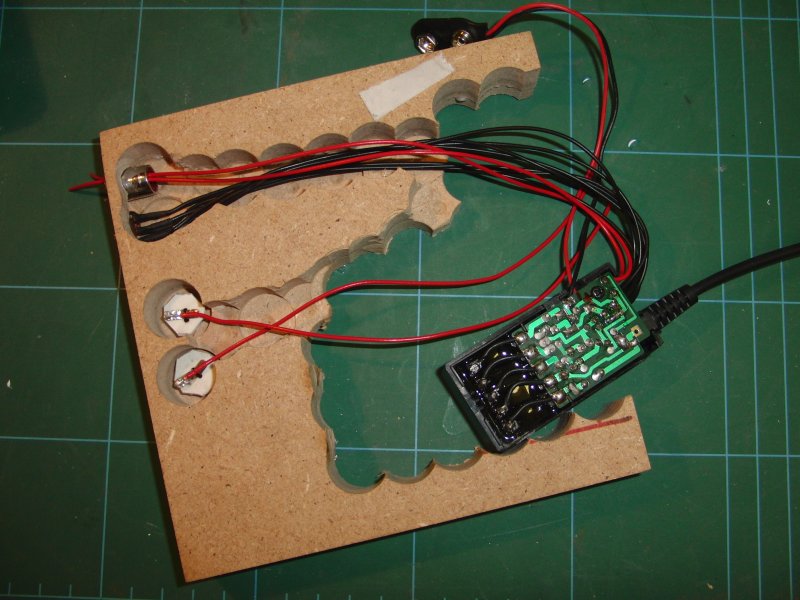
This is the drilled out base with the re-wired lighsheet controller. I needed to add an LED to show if there's power to the connectors when the mask does not rest on it's base. Everyone familiar with the volts generated to make lightsheet work will know why")
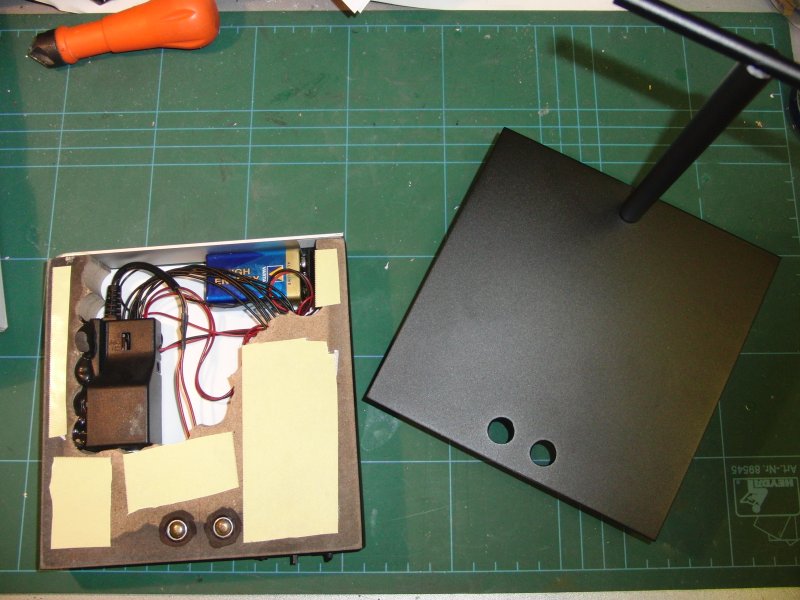
The picture shows the base and it's cover with the resting pole. Cover and pole are made out of aluminum and where painted with automotive flat black. The back of the base feature a hinged metal cover with a magnetic closure, so you can access the battery (9V) easily.
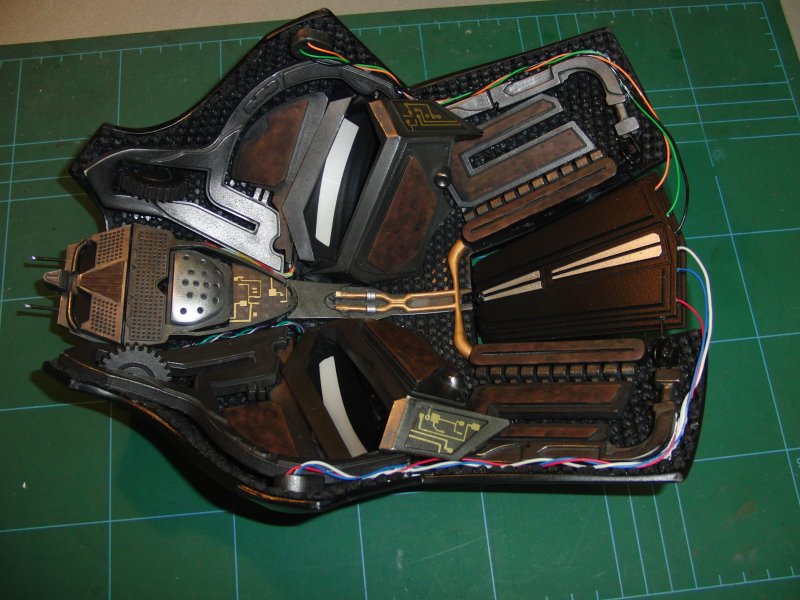
A picture of the finished inside of the mask. I stripped a printer cable for the different colored cables. The small "circuit" details where vinyl leftovers from a T800 fuel cell circuit which I rearranged. The leathery look of some parts was achieved by painting the parts light brown and adding a few darker washes.
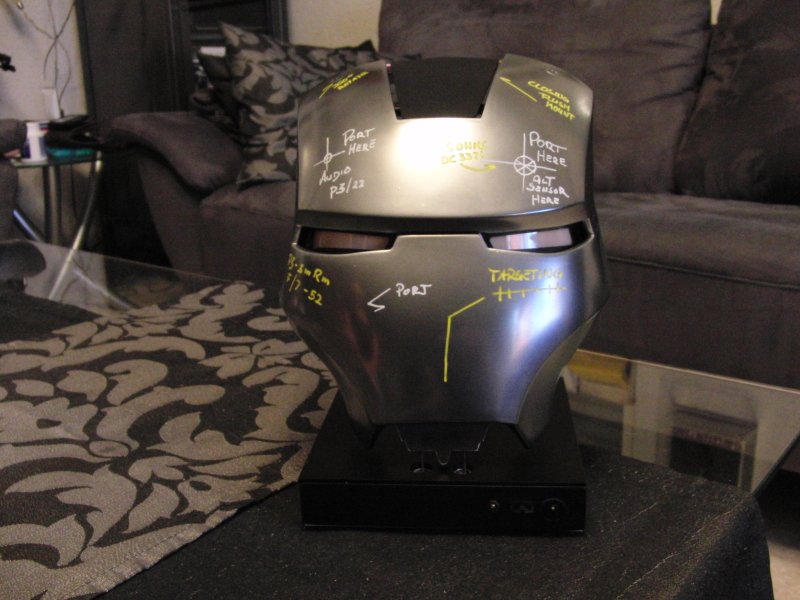
A picture of the mask resting on it's base. Notice the small pins coming out of the mouthpiece of the mask. I would have maybe come up with a better (invisible) solution, but I just did not have the nerve :lol

A picture of the mask with the power turned on.
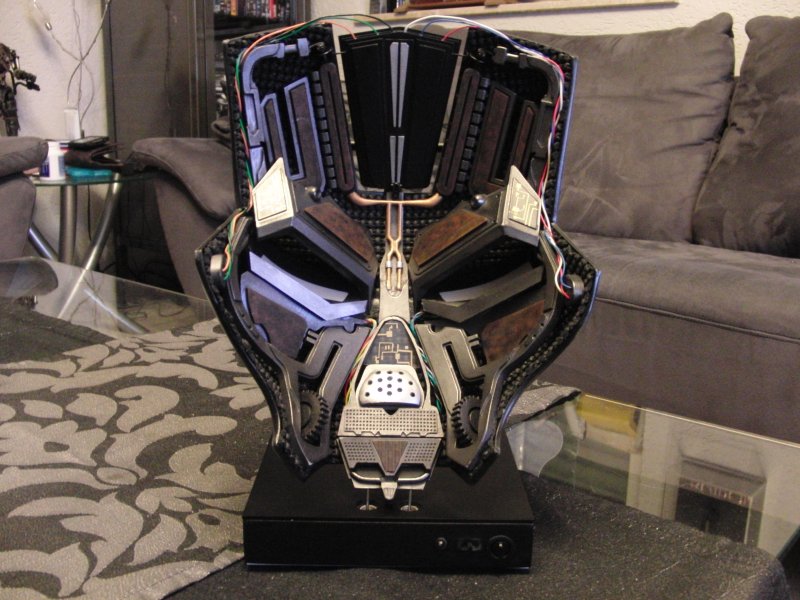
The inside on the mask shown while resting on the base.
Here is a little youtube video to show how the mask works:
http://www.youtube.com/watch?v=naIoJqLnxHk
Finally I can say, it was a lot of fun to build and paint this. A pleasant diversification from drilling more than 5,700 holes in a Super Star Destroyer kit.
I hope you like it
Thomas
finally I finished my Iron Man faceplate kit, which was superbly created and cast by our very own vashdstampede. It's an incredible kit which I can highly recommend. :thumbsup
Although minimum cleanup was needed, I underestimated the time needed to fit the parts inside the mask. Some have to be heated and bend to assure a nice fit.
Onto the building process:
These are the parts that came with the kit. As you can see, I added putty to the line between the eyes for a little correction.
I applied a guide coat prior to sanding to show any imperfections.
Some small pieces of double sided tape were added to the inside of the mask to fit the drawer rubber.
After fitting the drawer rubber, I decided to thicken the inner edges of the mask by applying some auto body putty.
Here you can see the drawer liner laid out.
Test-fitting the parts. This required the mentioned heating and bending :wacko
Two coats of automotive body filler were applied to the outside of the mask.
After sanding with 800 grid wet sand paper (again using a guide coat of flat black mist), the mask was sprayed with high gloss automotive lacquer using a spray gun.
I painted the inside of the mask flat black using a rattle can.
A few lightly misted coats of mirra chrome where applied using a small spray gun. Those where almost instantly polished using a clean cotton cloth.
After a dry time of 48 hours, two coats of high gloss clear where applied. The waiting time is needed to ensure that the mirra chrome will not dull because of the solvents in the clear.
I bought some different pens to test how they will react to the final clear coat and tested them on a silver painted sheet of metal.
The mask was lightly sanded with grey 3M pad and the writing was done using the chosen pens. After that, I sprayed two coats of clear coat. I decided to go with semi gloss clear, because the chrome was to refelctive.
I chose Mr. Metal Color from gunze for most of the inner parts. The right part in the picture as it looks after applying the color using an airbrush. On the left side you can see what it looks after polishing with a cotton swab.
Some of the parts layed out.
The base is made of mdf. The two pieces you see are the connectors for the lightsheet. These where made using aluminium and plastic tubing as well as two springs and two little thingies you need for sealing a padded envelope.
This is the drilled out base with the re-wired lighsheet controller. I needed to add an LED to show if there's power to the connectors when the mask does not rest on it's base. Everyone familiar with the volts generated to make lightsheet work will know why
The picture shows the base and it's cover with the resting pole. Cover and pole are made out of aluminum and where painted with automotive flat black. The back of the base feature a hinged metal cover with a magnetic closure, so you can access the battery (9V) easily.
A picture of the finished inside of the mask. I stripped a printer cable for the different colored cables. The small "circuit" details where vinyl leftovers from a T800 fuel cell circuit which I rearranged. The leathery look of some parts was achieved by painting the parts light brown and adding a few darker washes.
A picture of the mask resting on it's base. Notice the small pins coming out of the mouthpiece of the mask. I would have maybe come up with a better (invisible) solution, but I just did not have the nerve :lol
A picture of the mask with the power turned on.
The inside on the mask shown while resting on the base.
Here is a little youtube video to show how the mask works:
http://www.youtube.com/watch?v=naIoJqLnxHk
Finally I can say, it was a lot of fun to build and paint this. A pleasant diversification from drilling more than 5,700 holes in a Super Star Destroyer kit.
I hope you like it
Thomas