Gb1 Style Ghostbusters Proton Pack

Warrenzo

Well-Known Member
So with the uniform being pretty much complete bar 1 or two things, i thought it was time to get this thread up and running to let you all see how the Proton Pack is coming along.

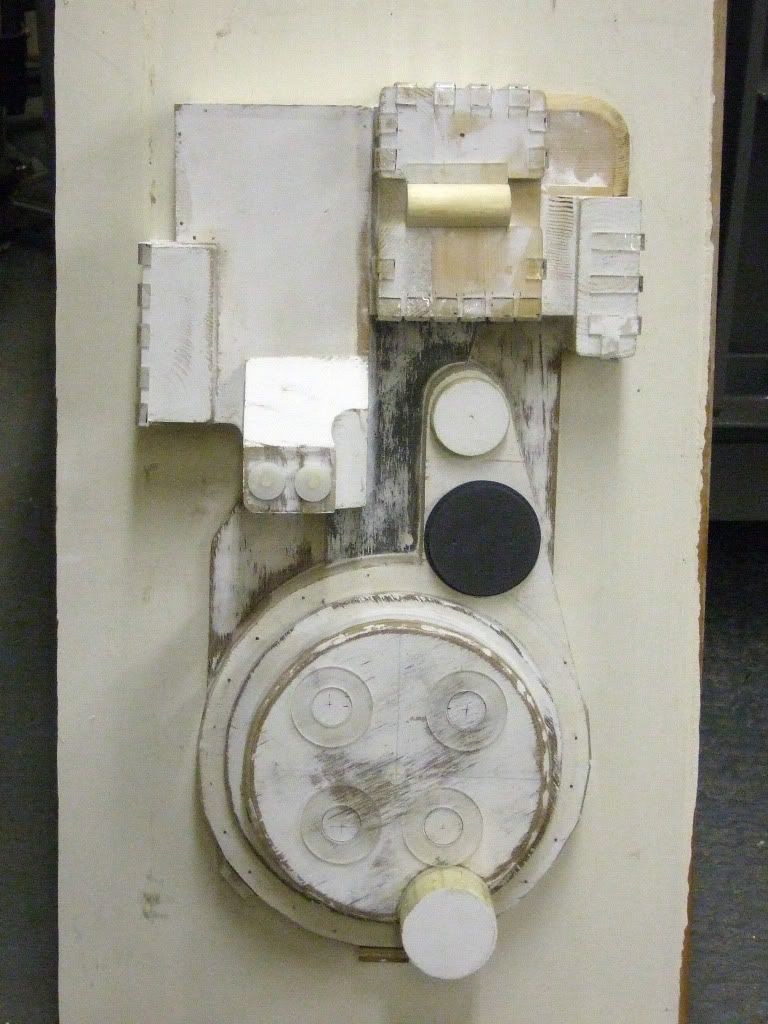
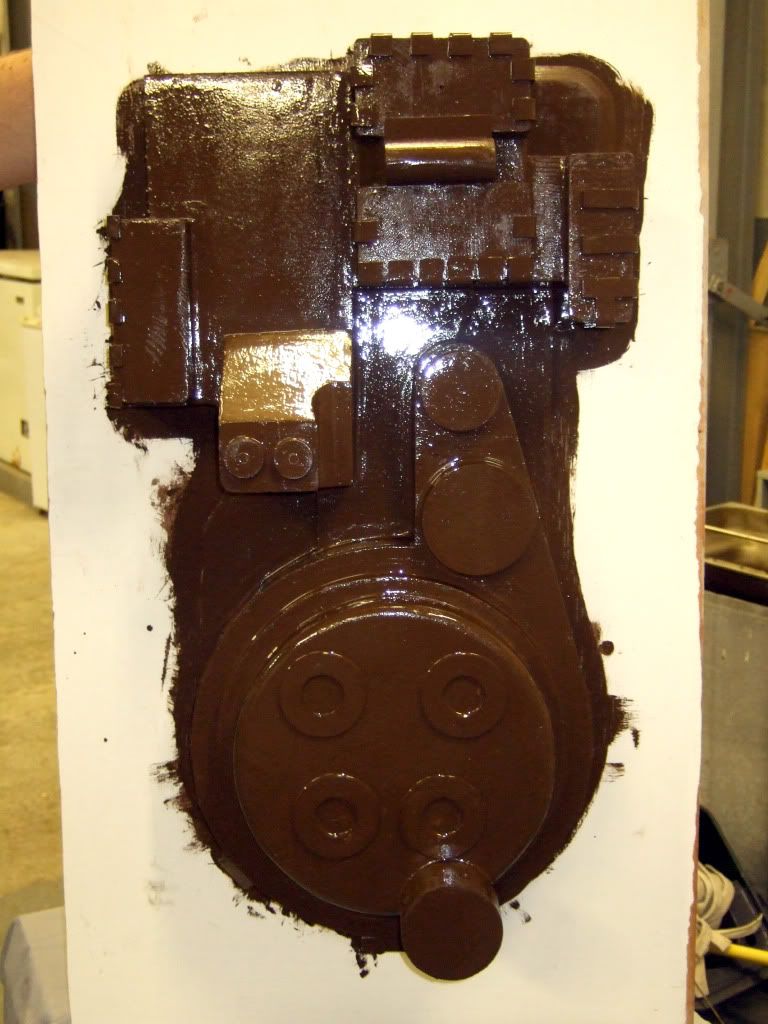
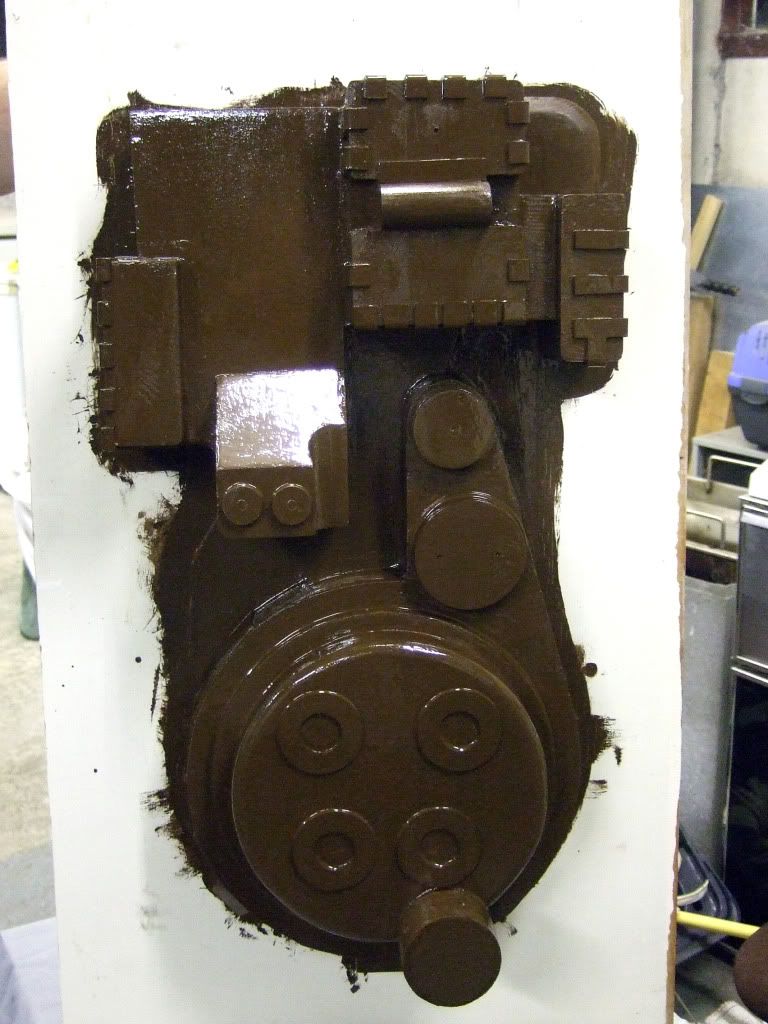
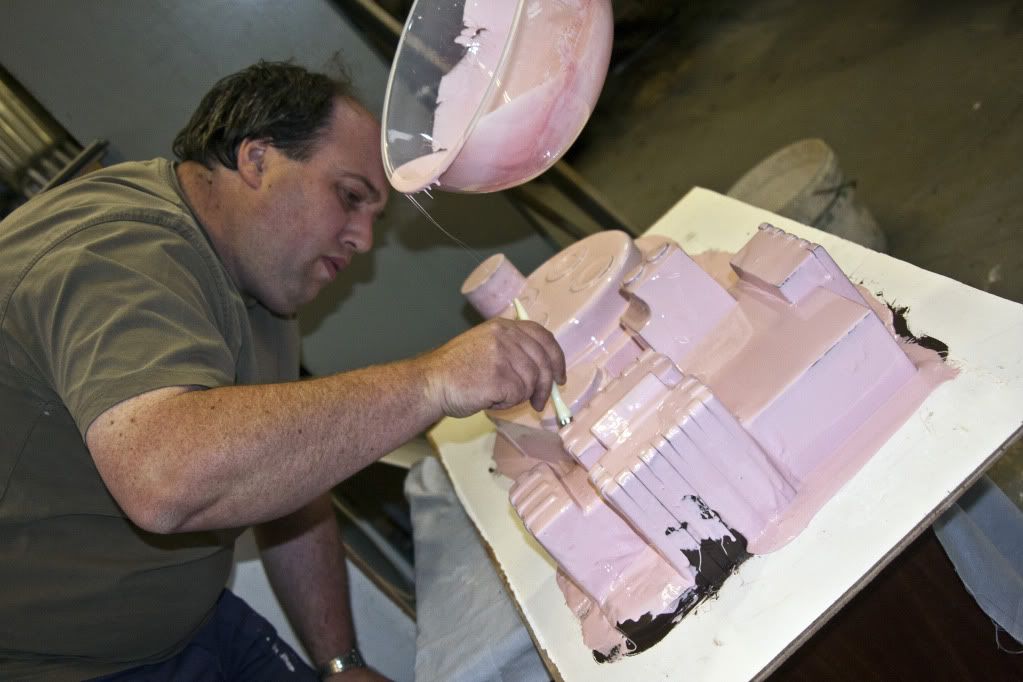
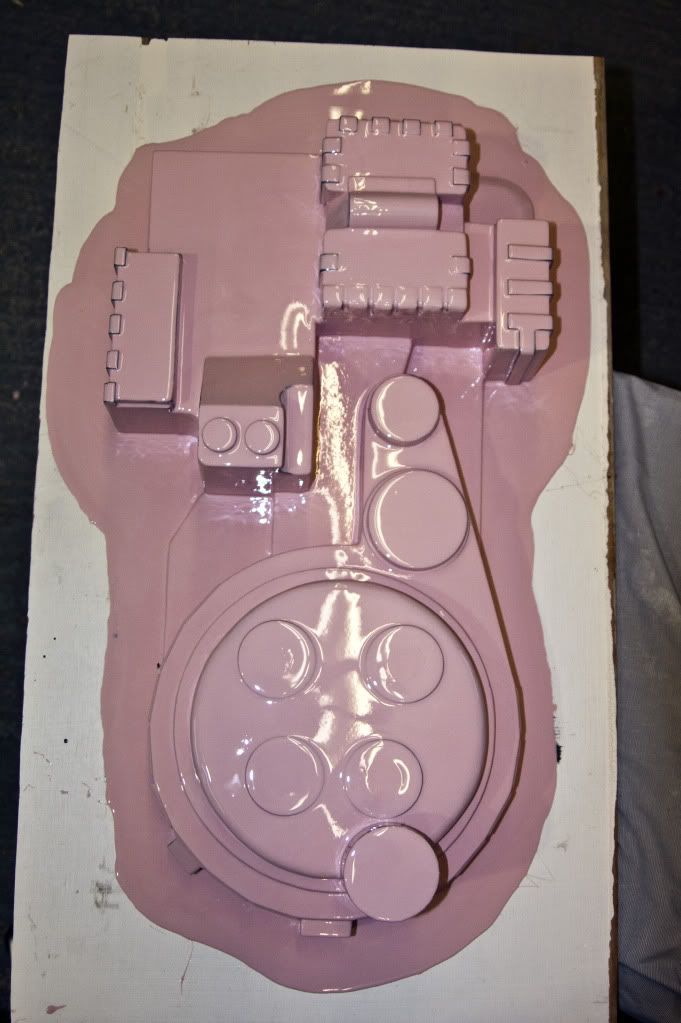
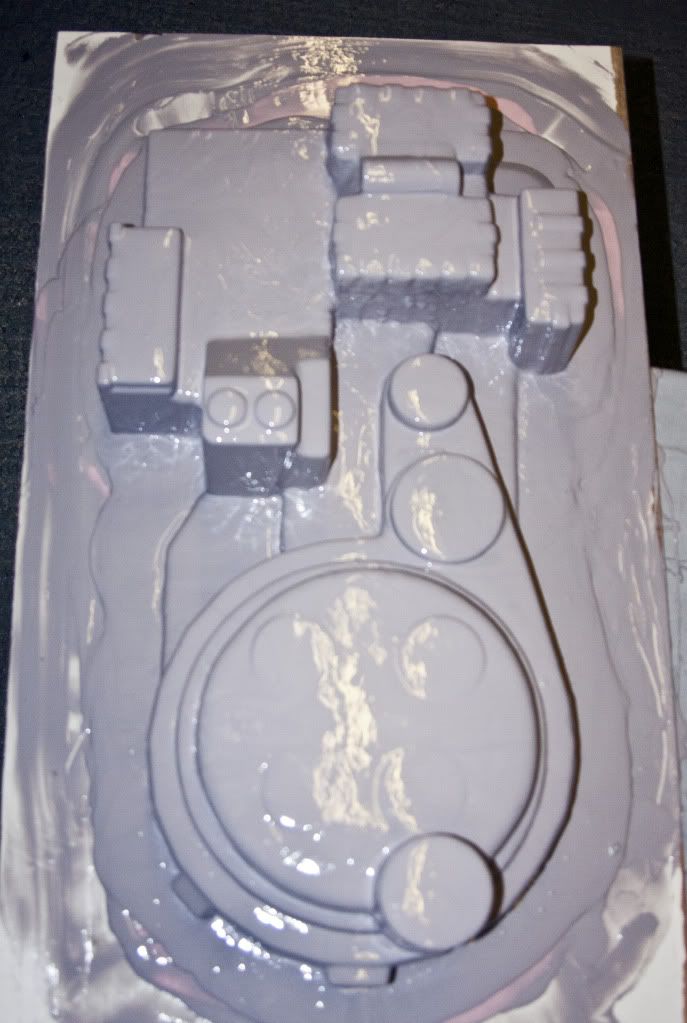
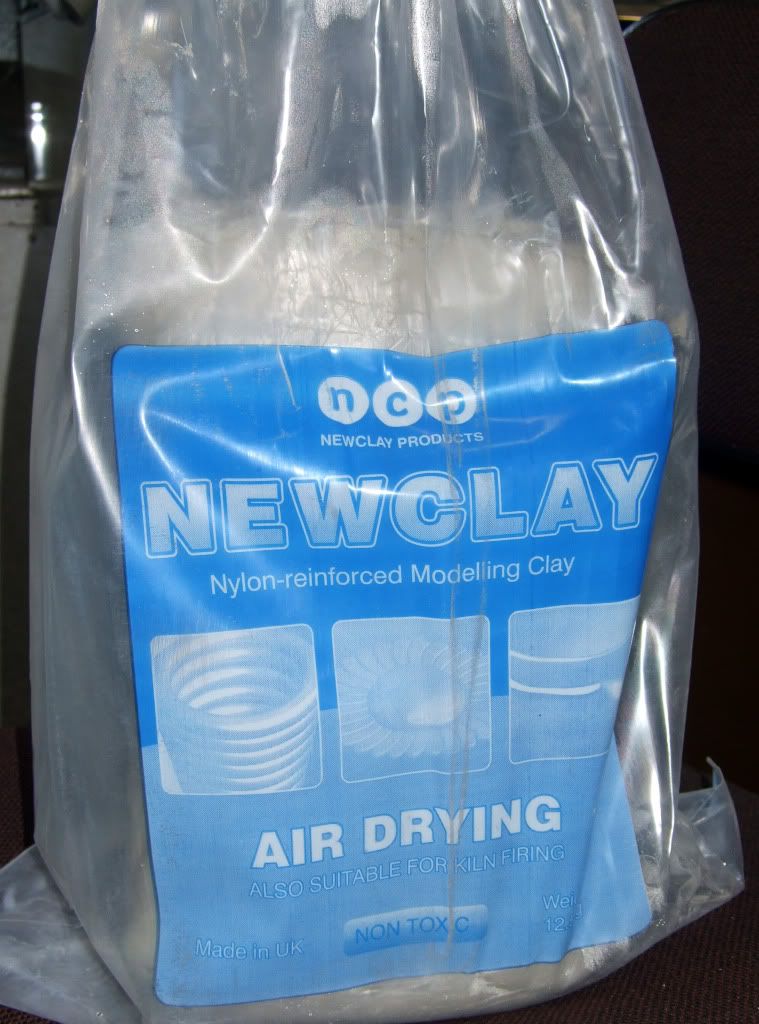
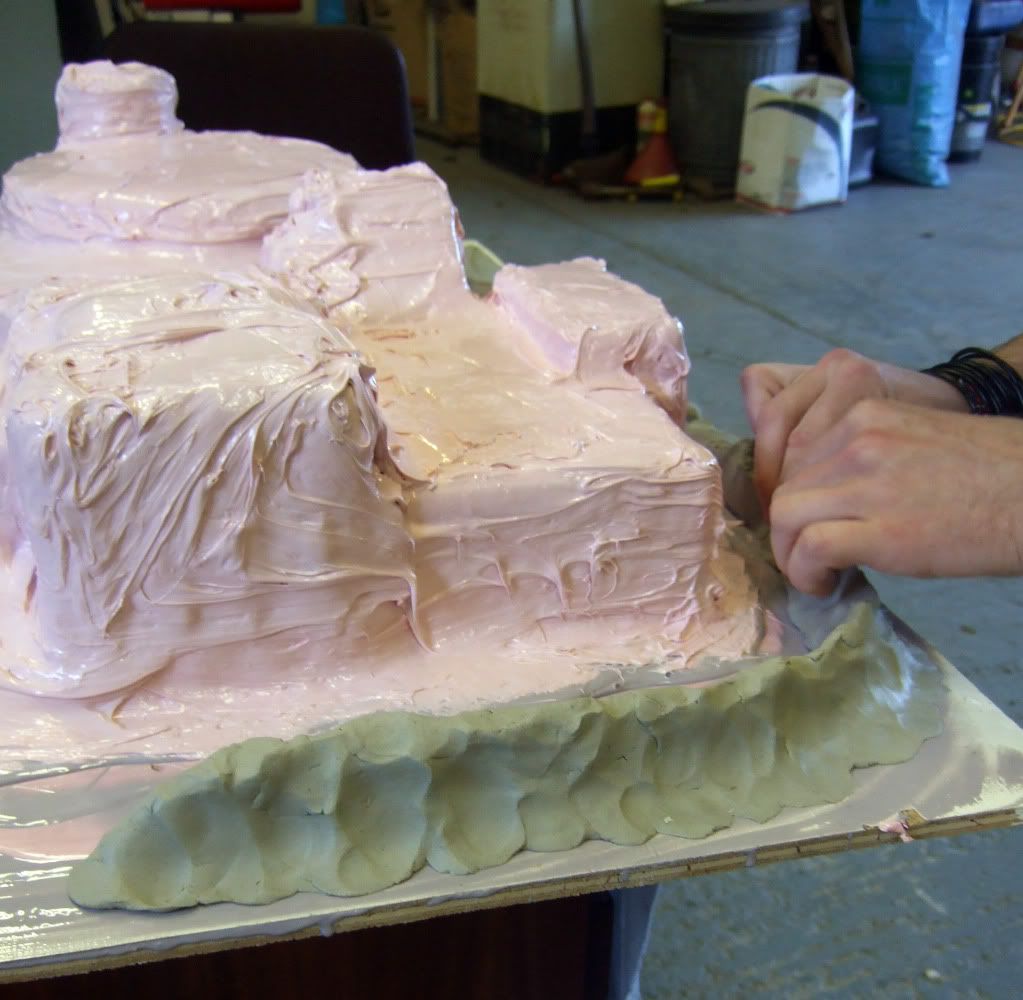
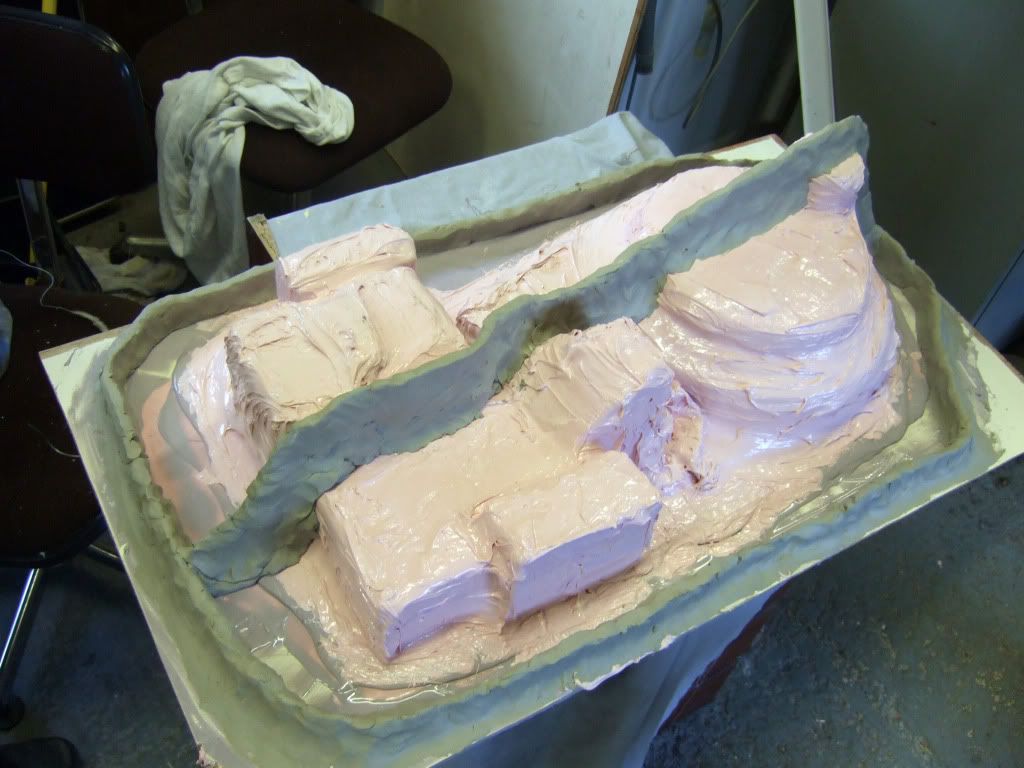
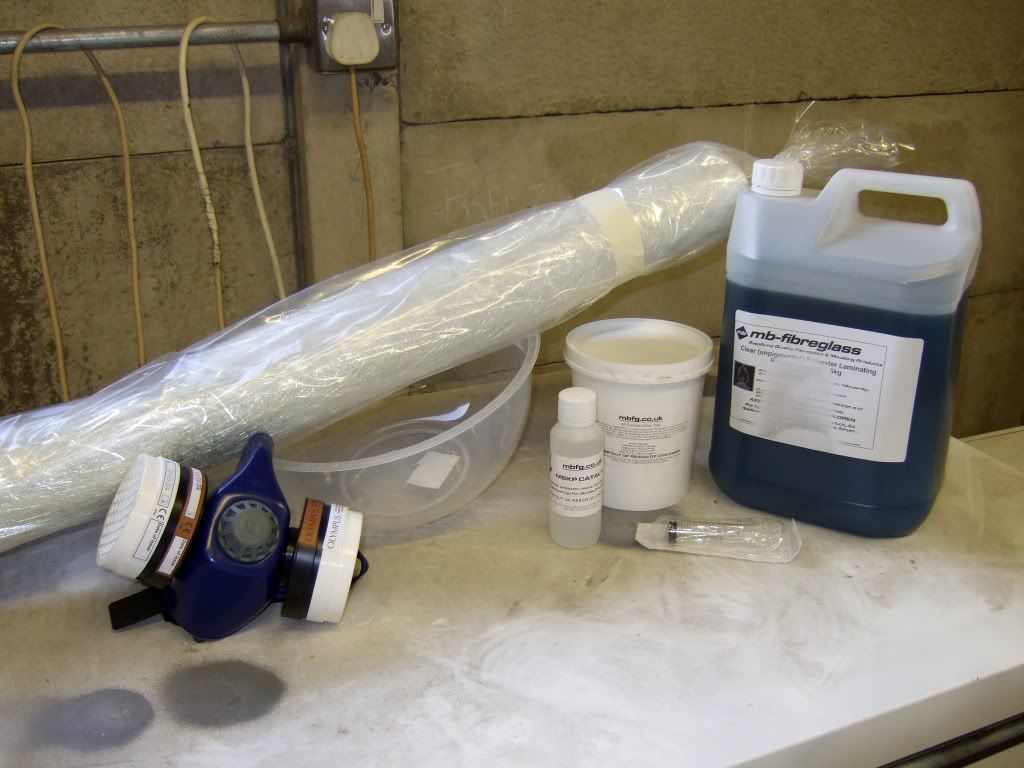
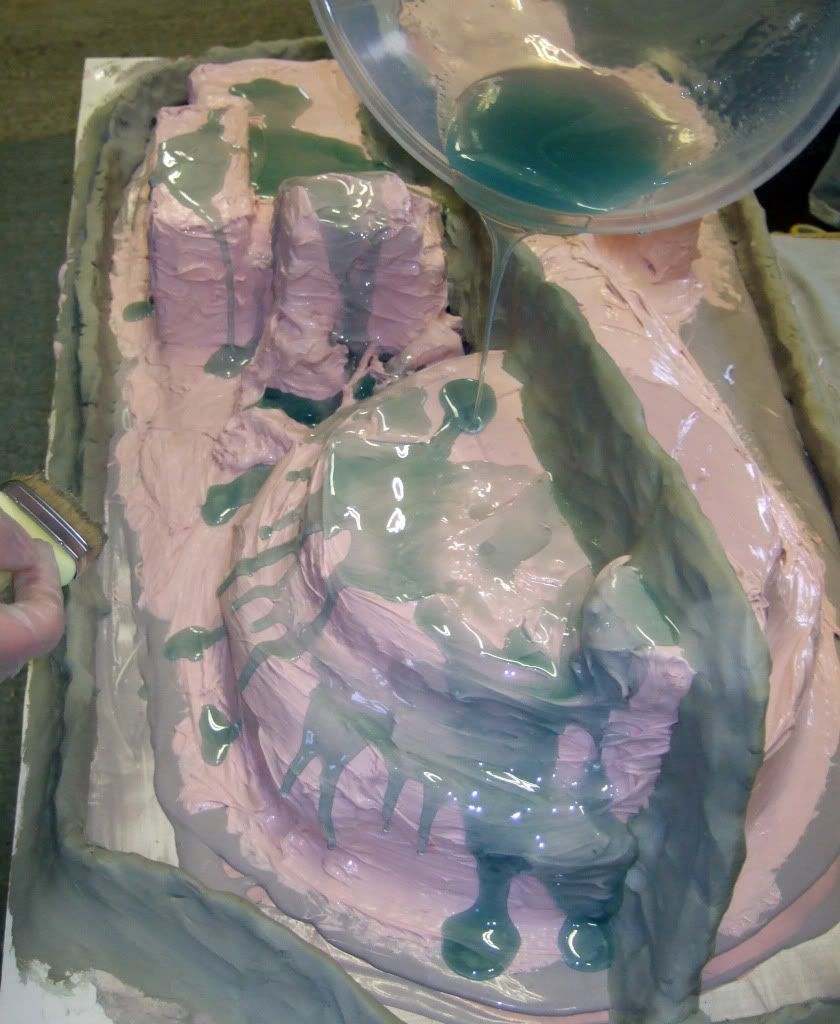
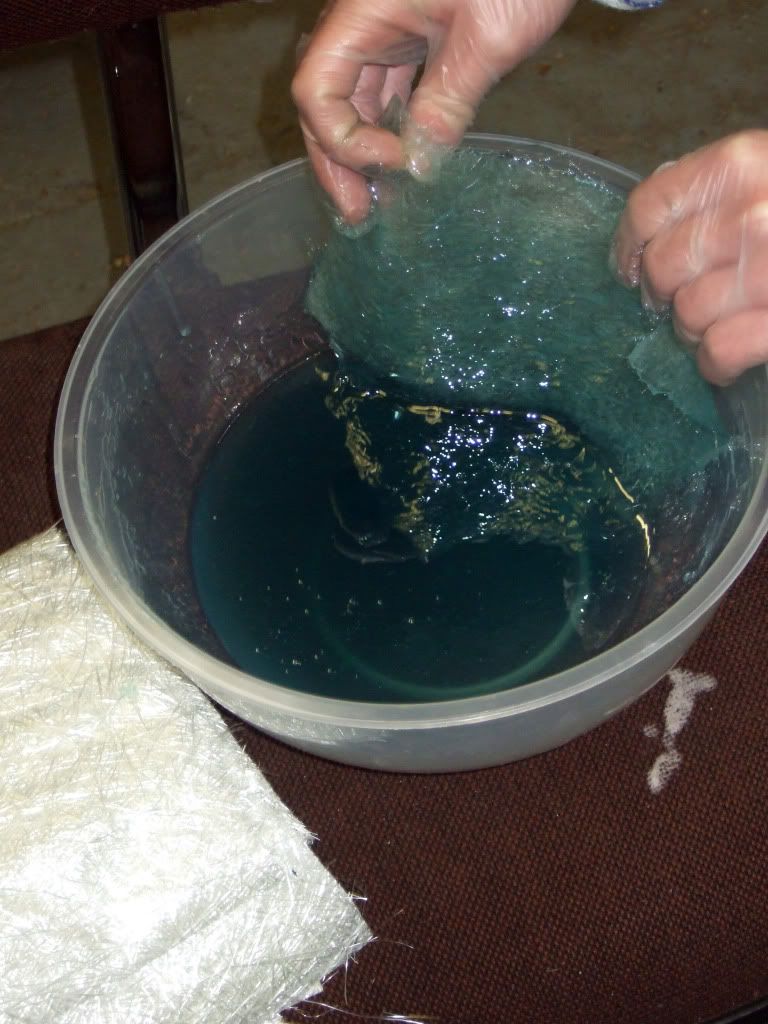
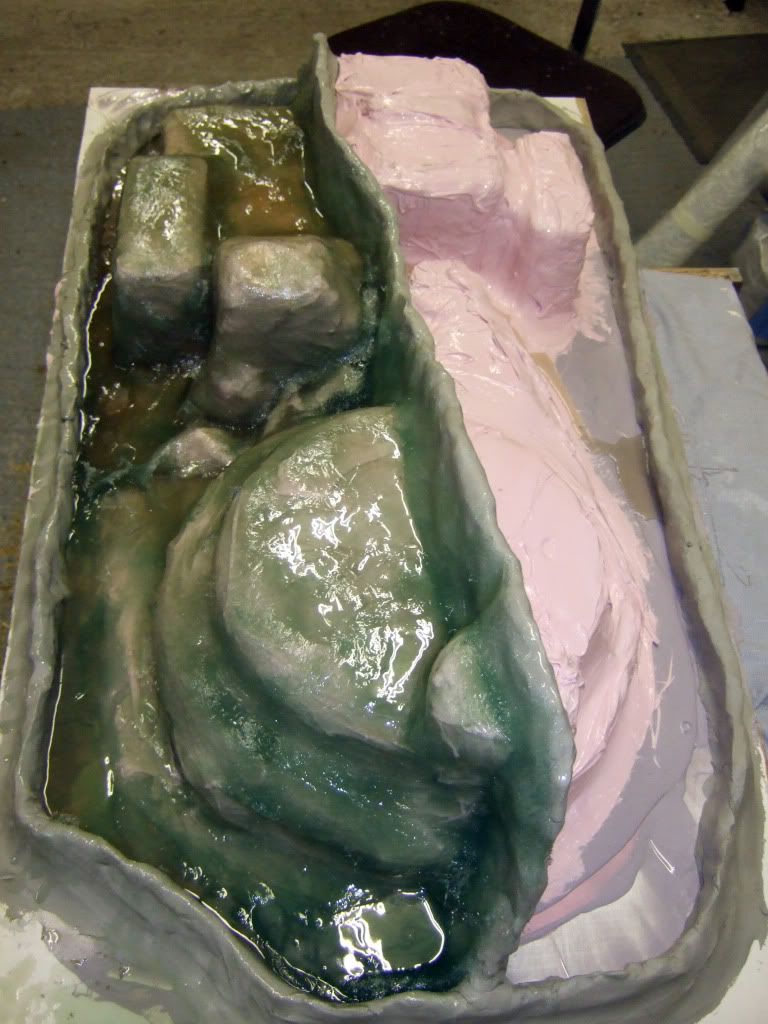
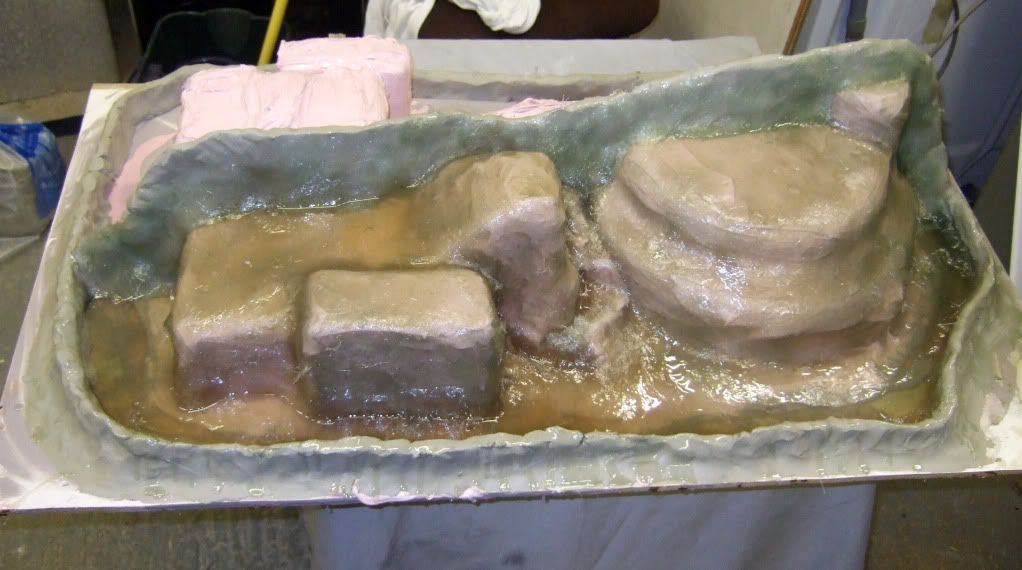
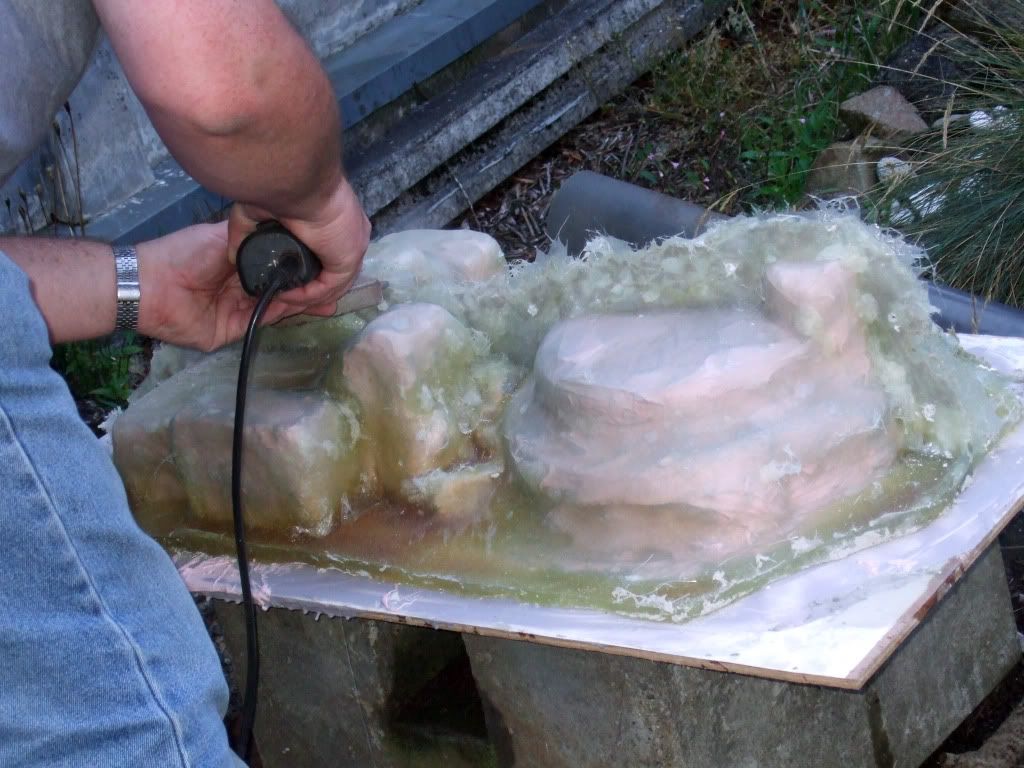
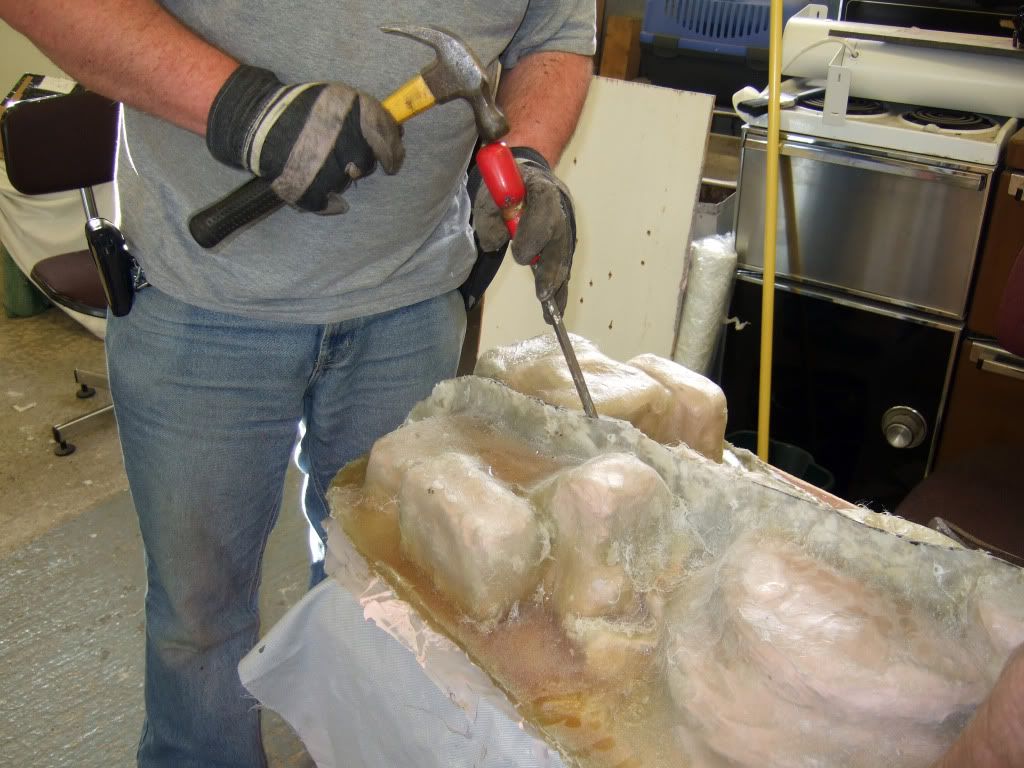
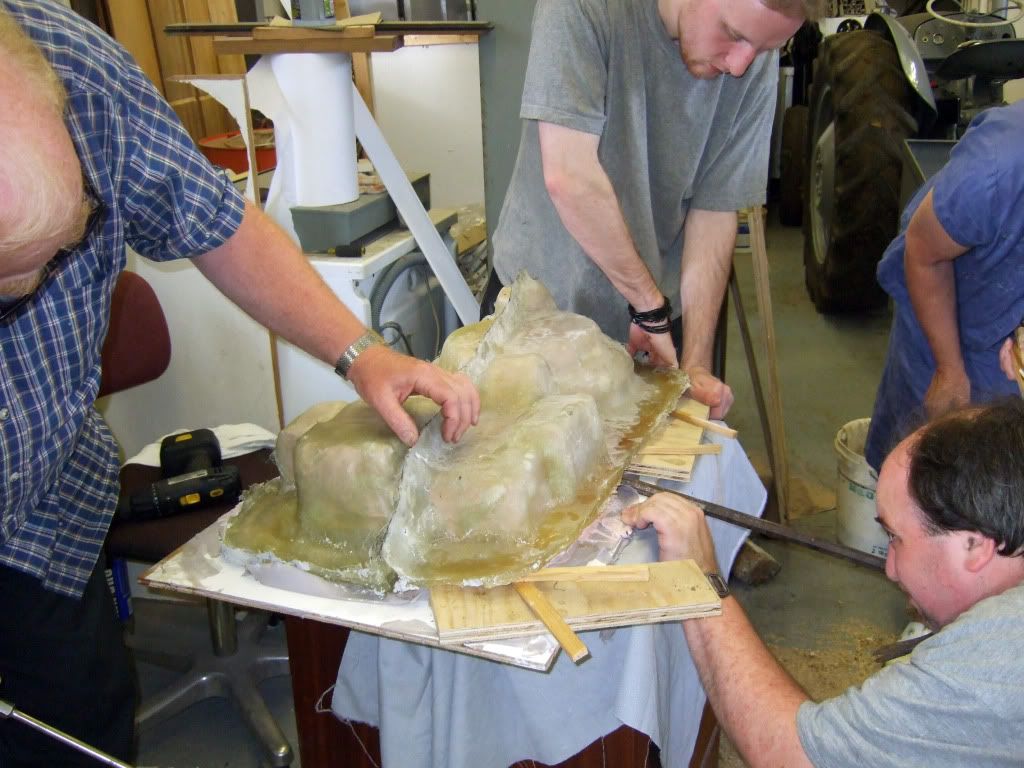
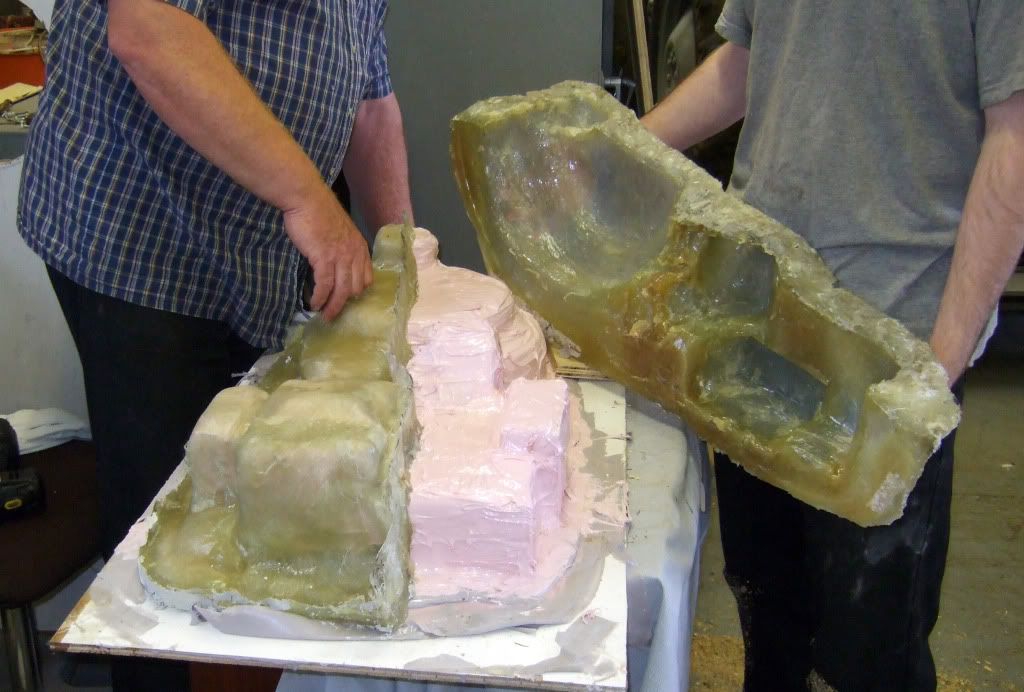
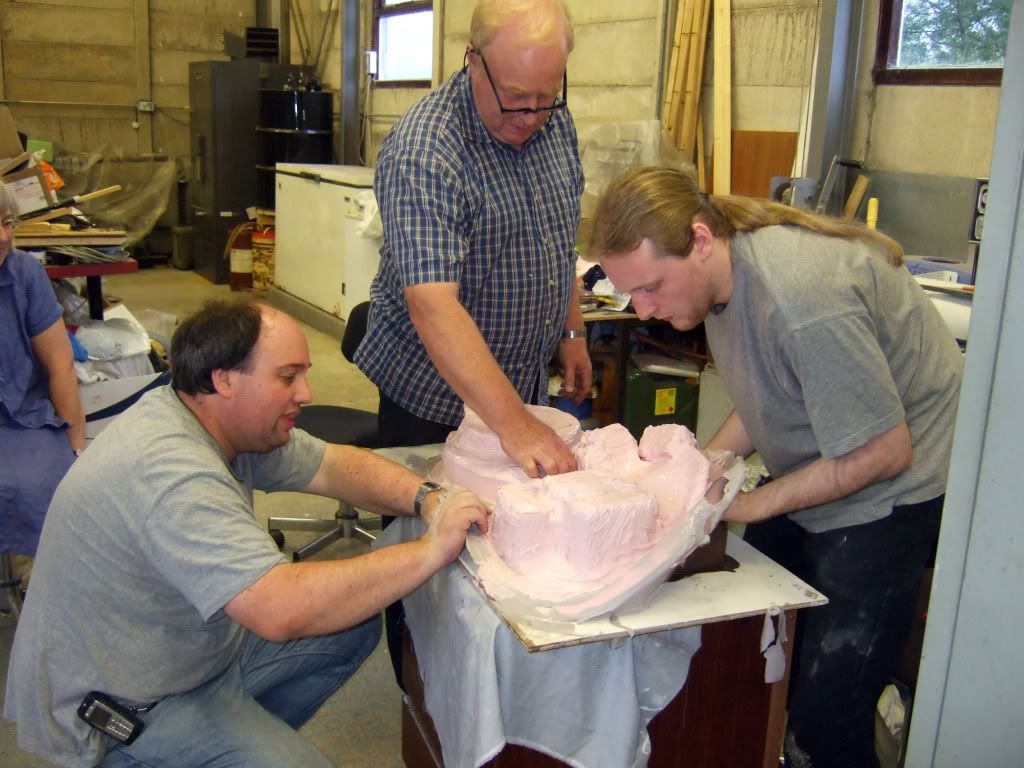
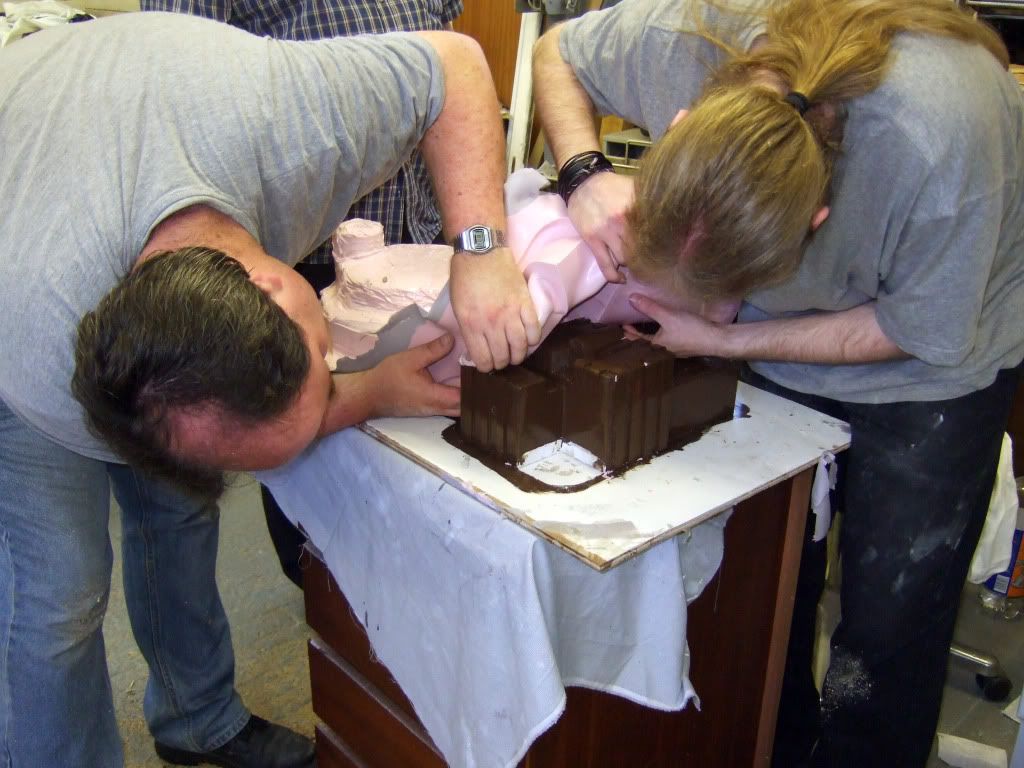
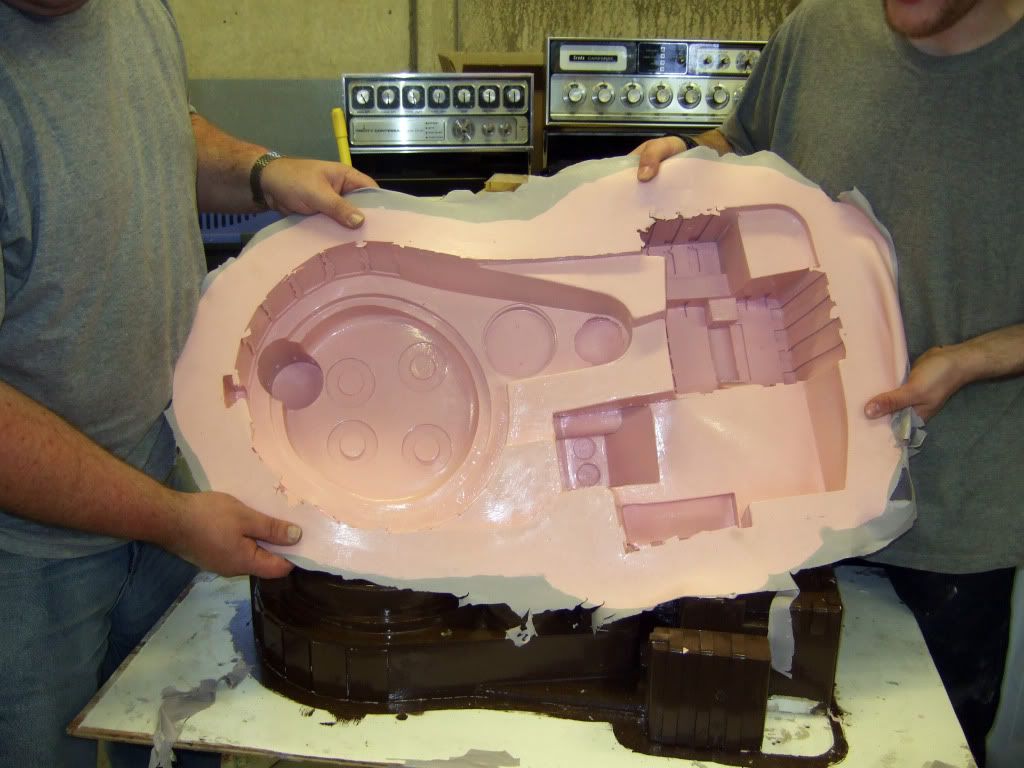
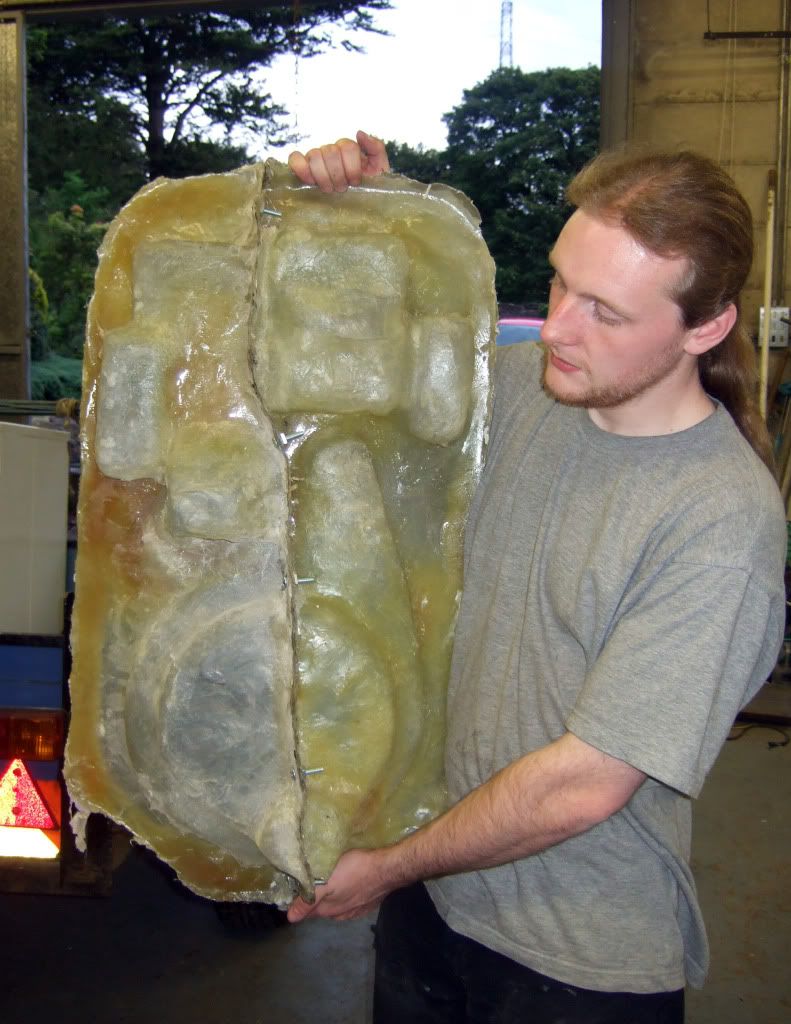
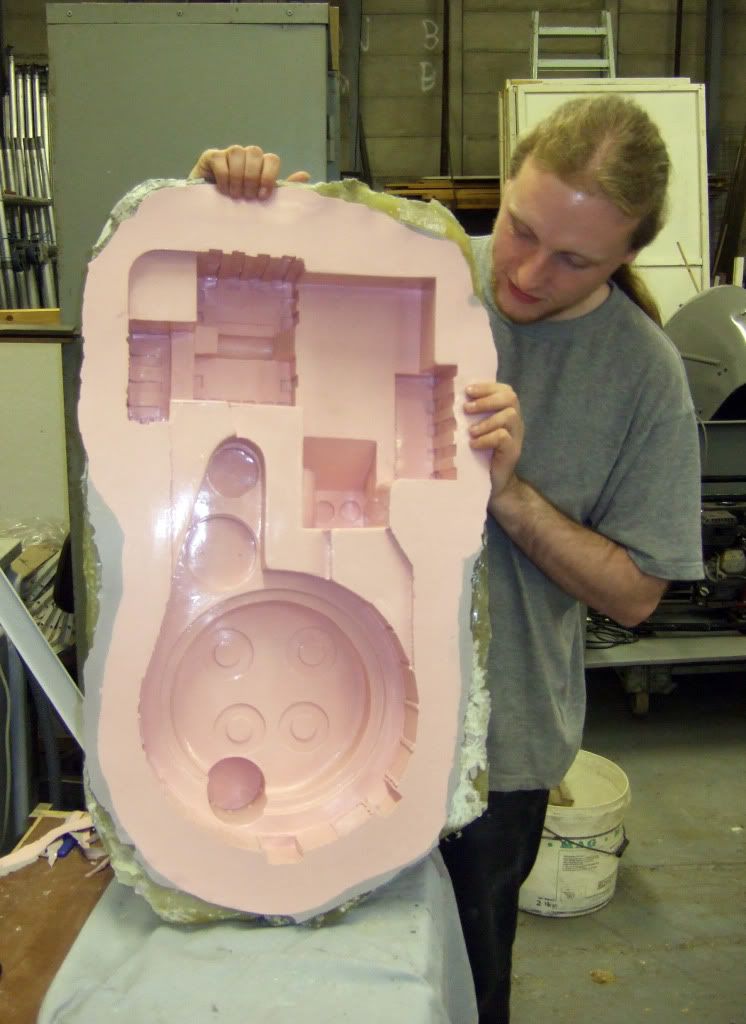
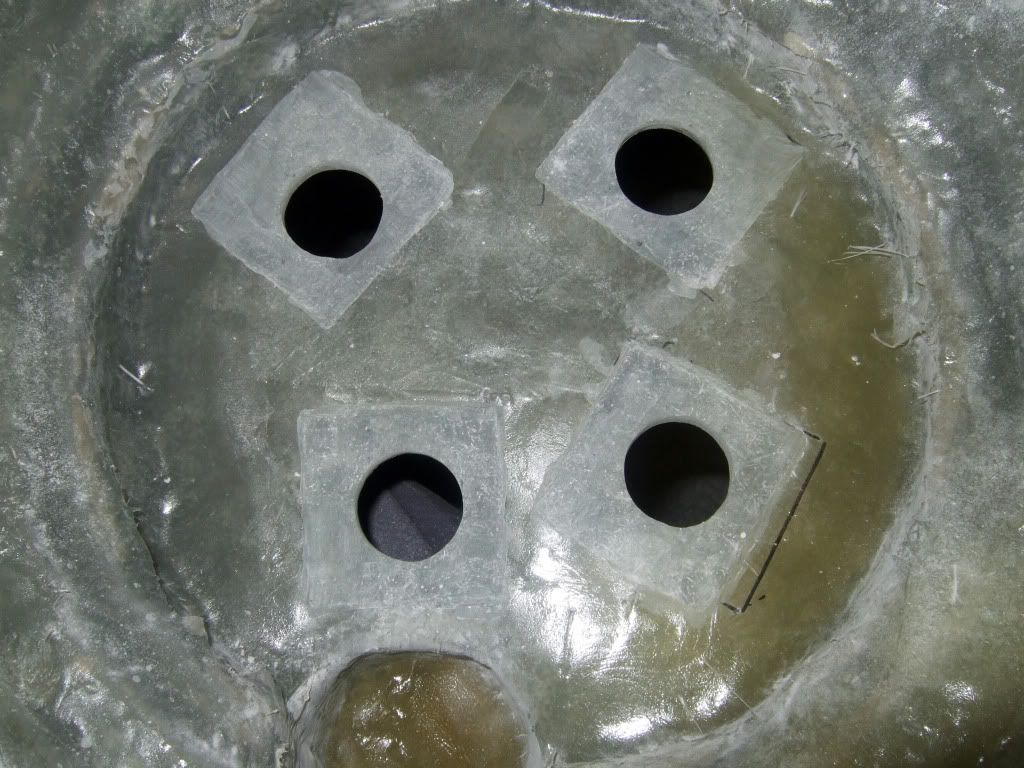
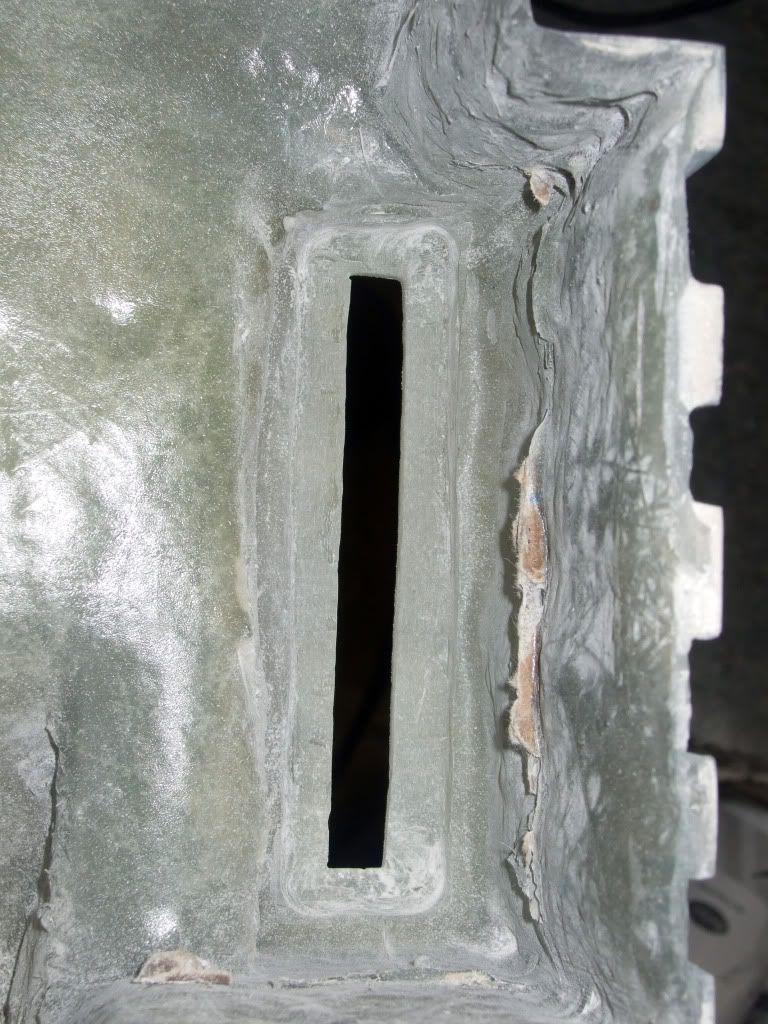
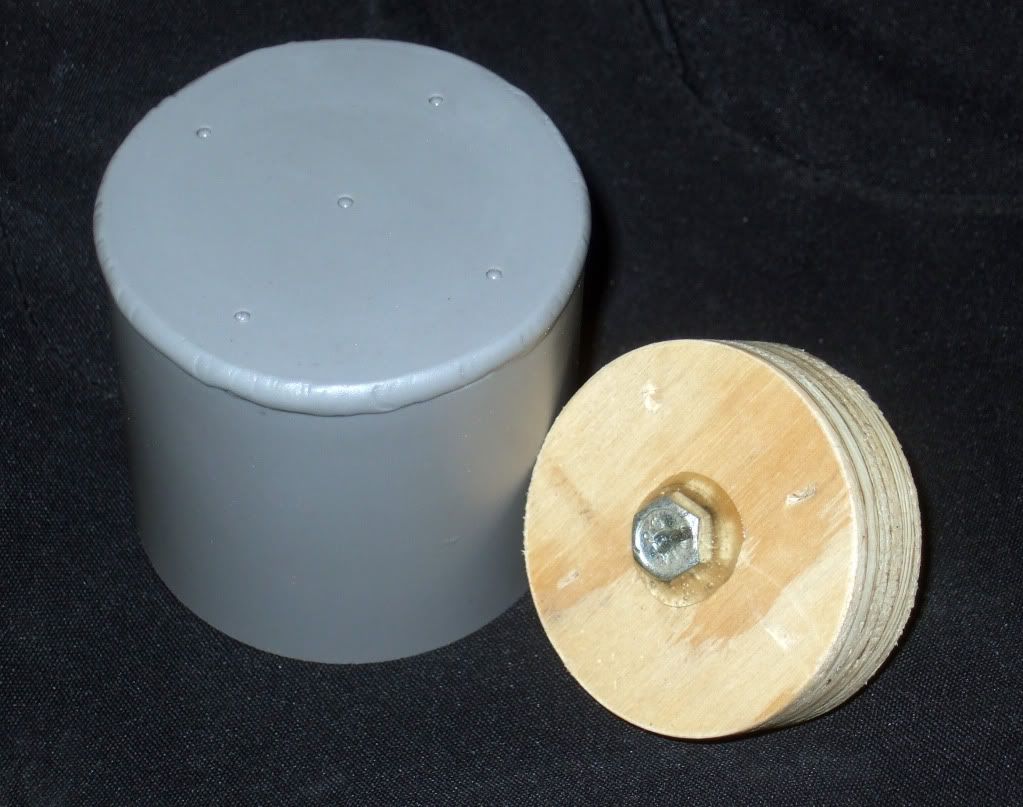
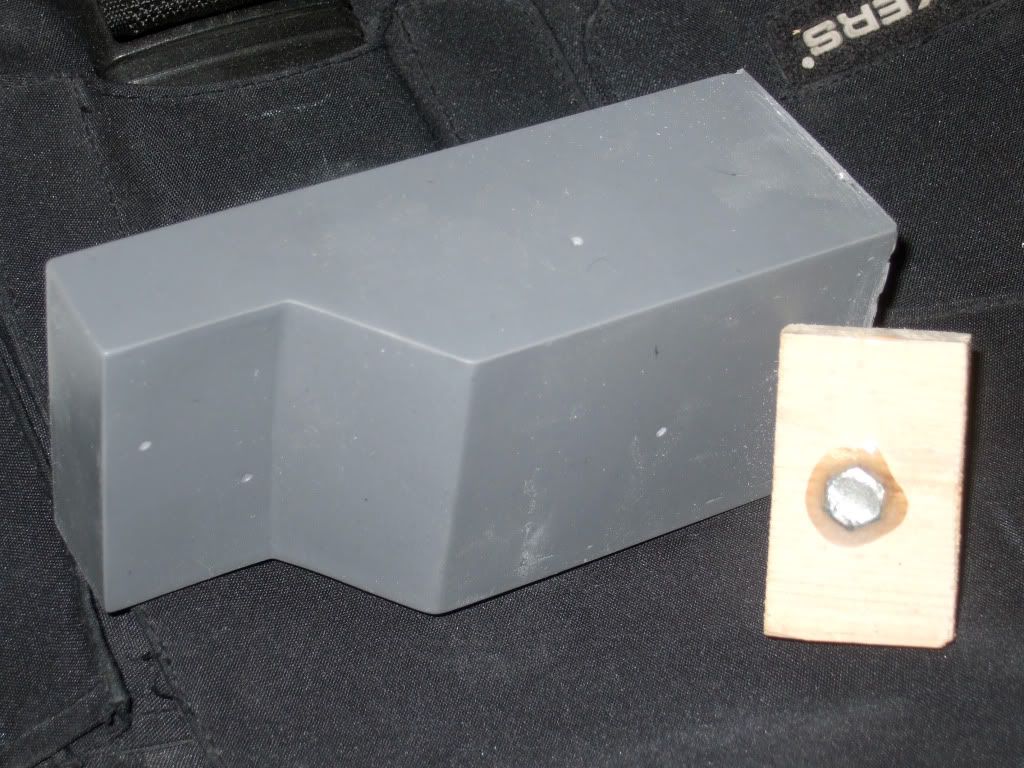
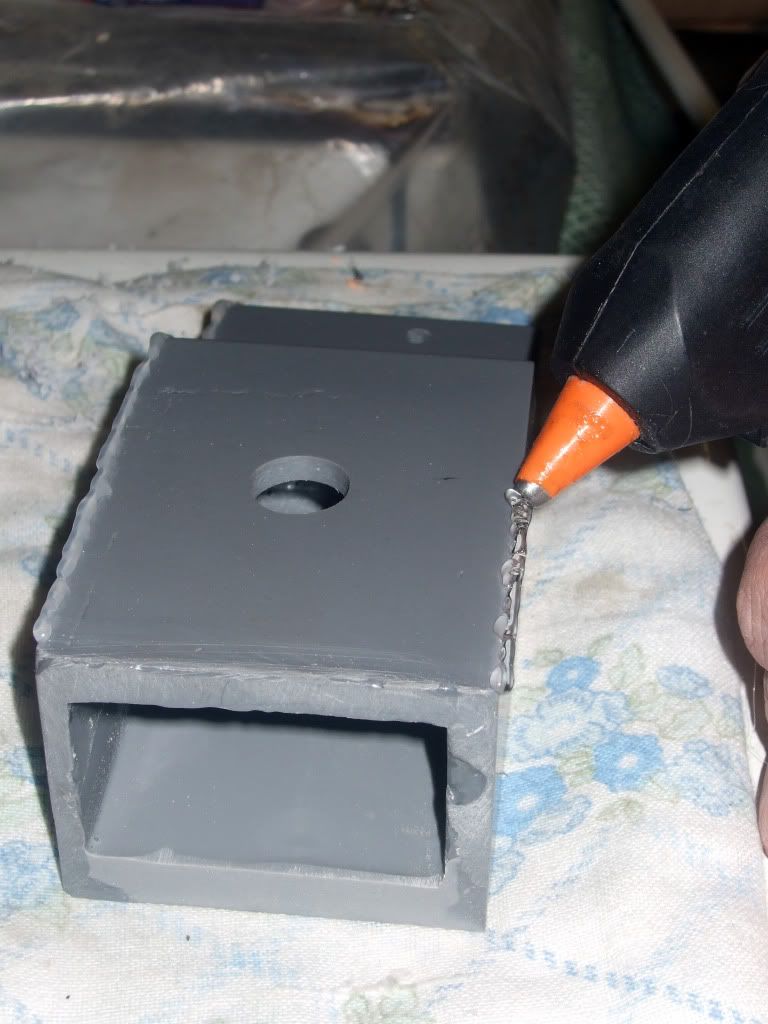
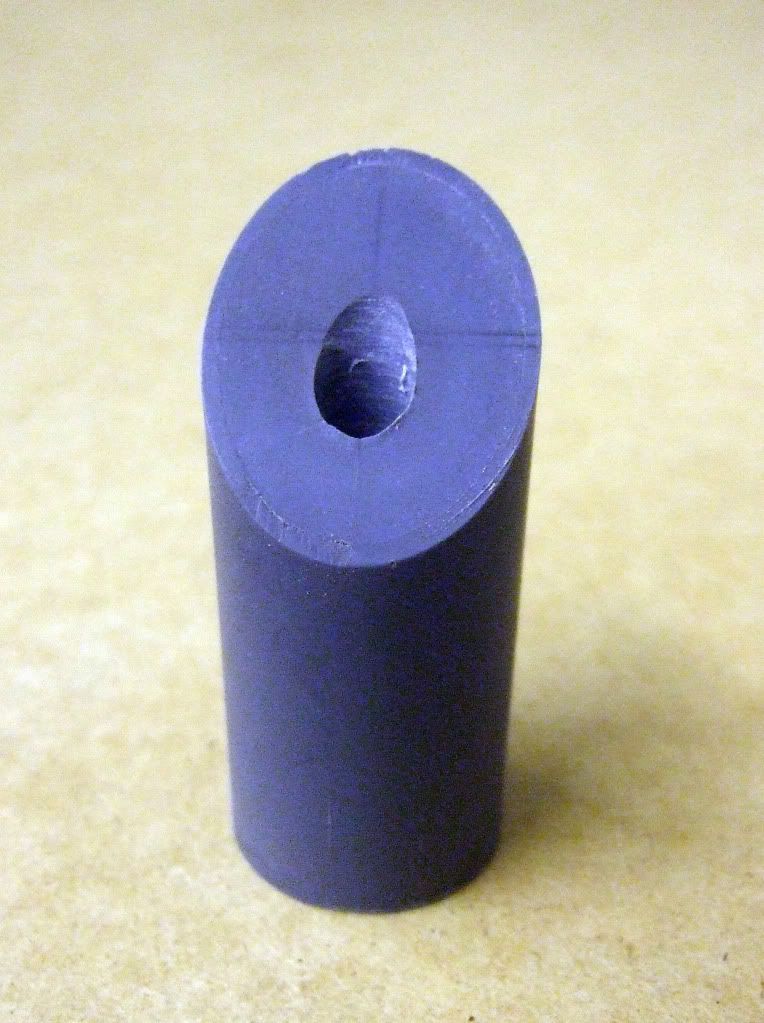
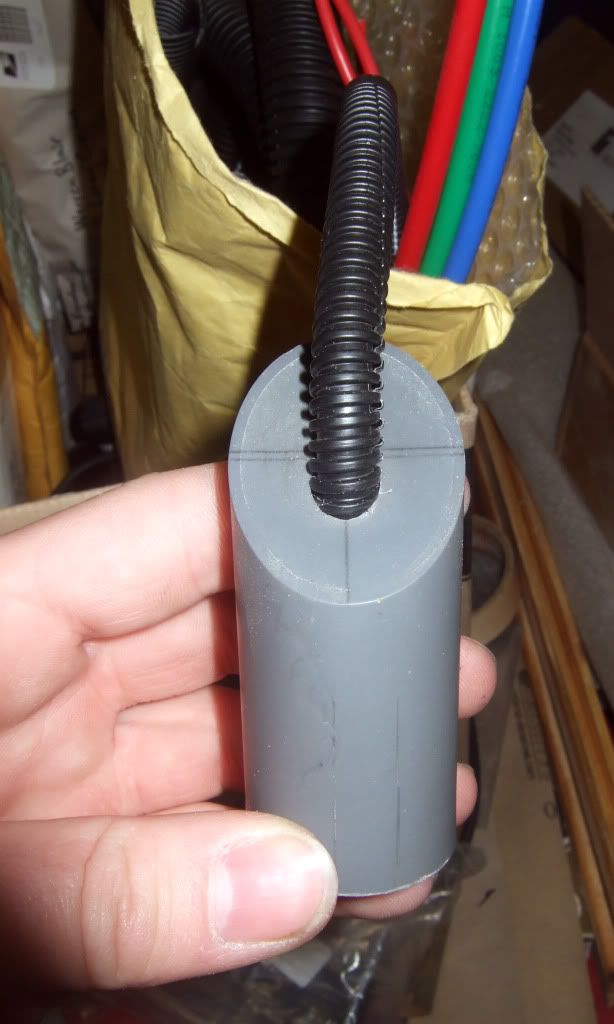
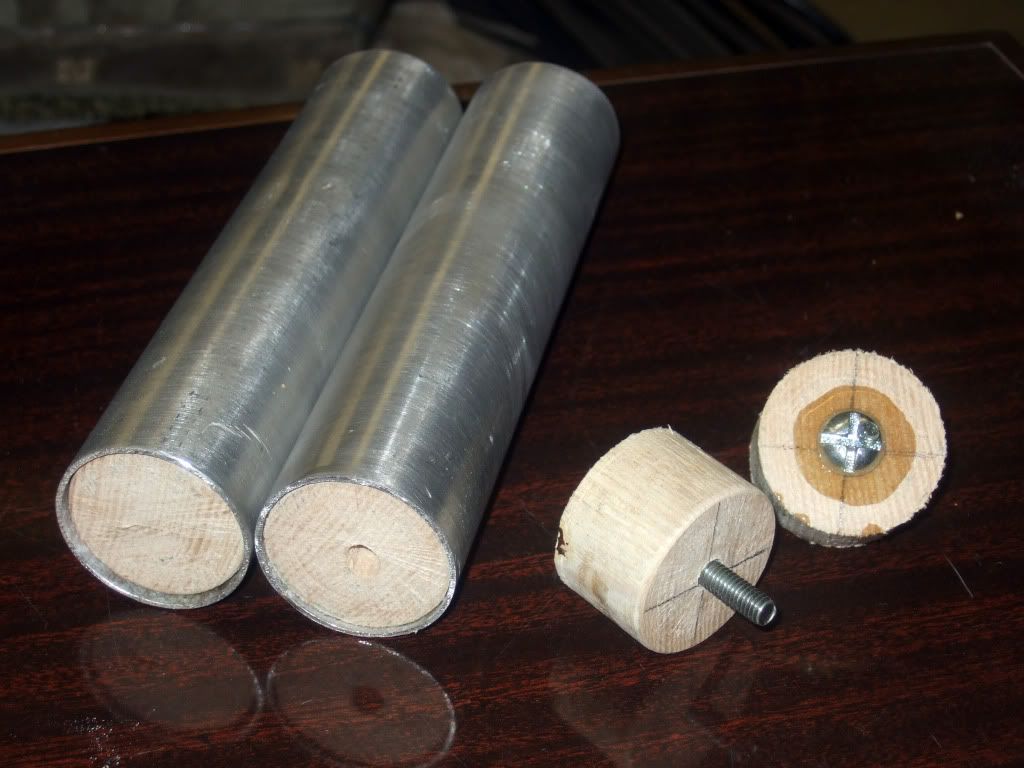
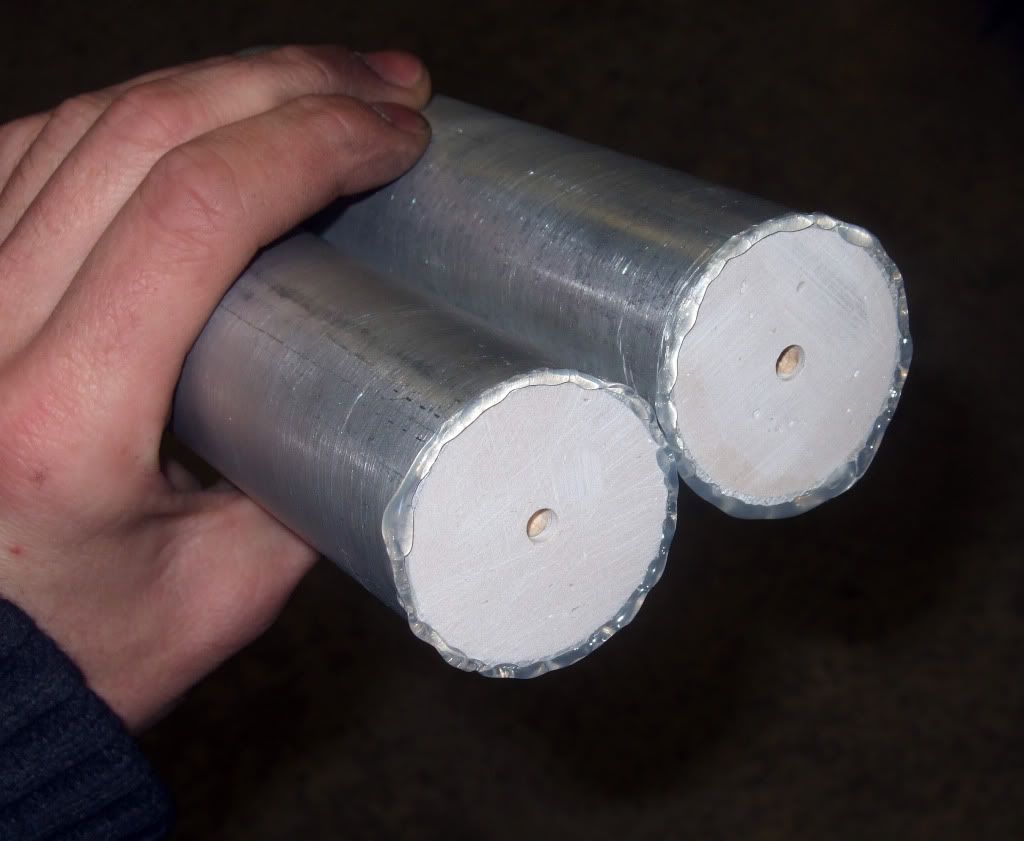
Now in the movie, the original packs where made from a Fiberglass shell mould, which is how i've decided to do both mine and Phil's to keep with the screen accuracy of it all. In order to do this a wooden buck must 1st be constructed (I wont go into detail about the fiberglass and rubber silicone until im ready and have pics to back it up.

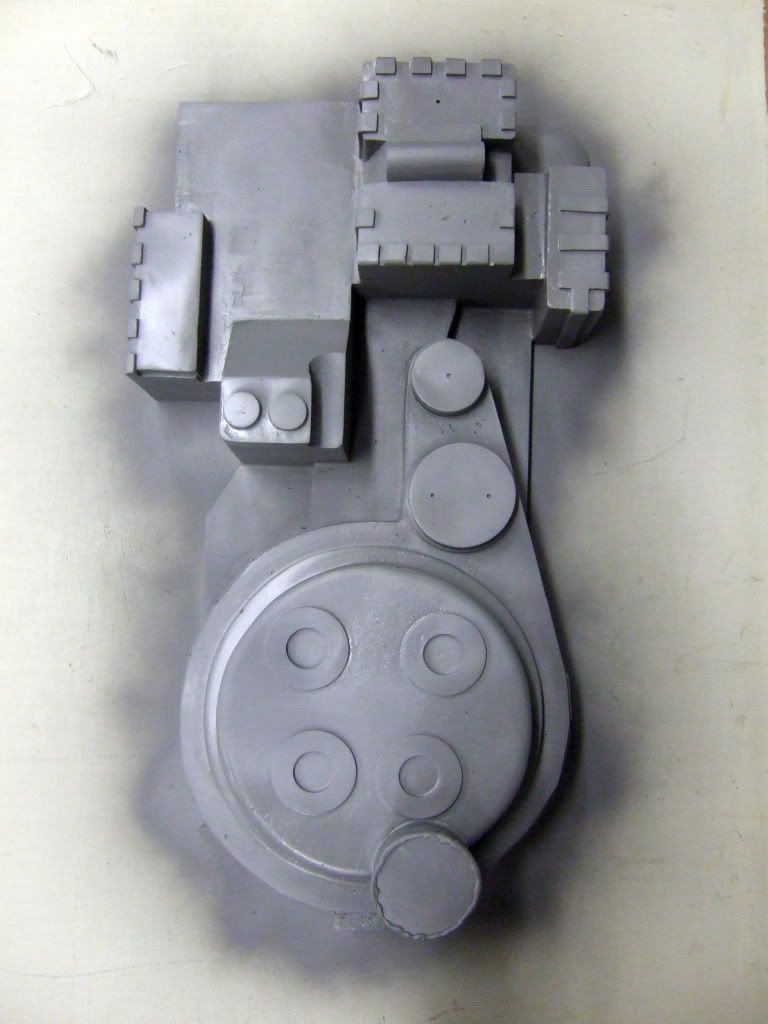
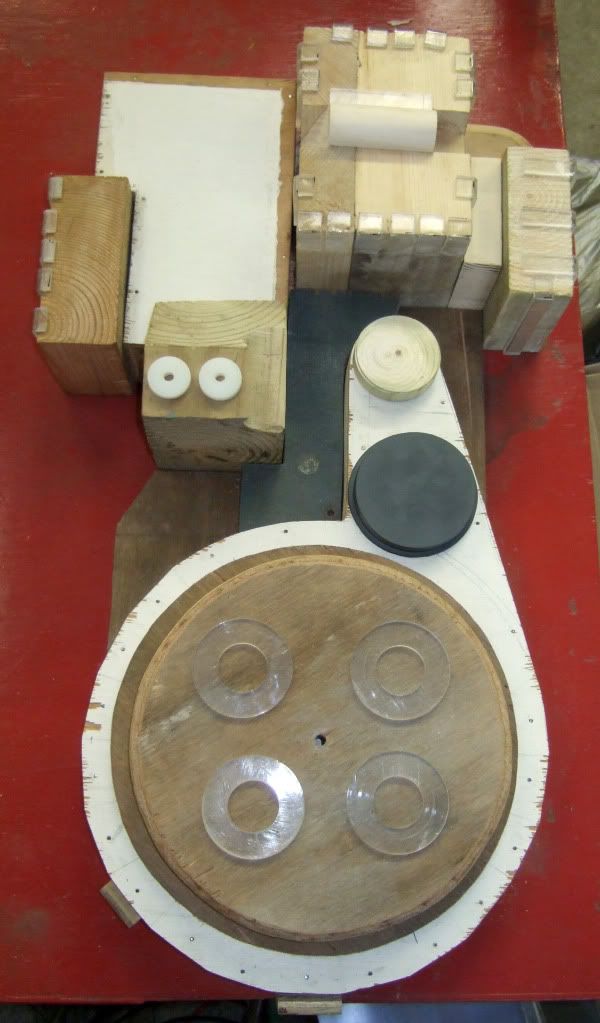
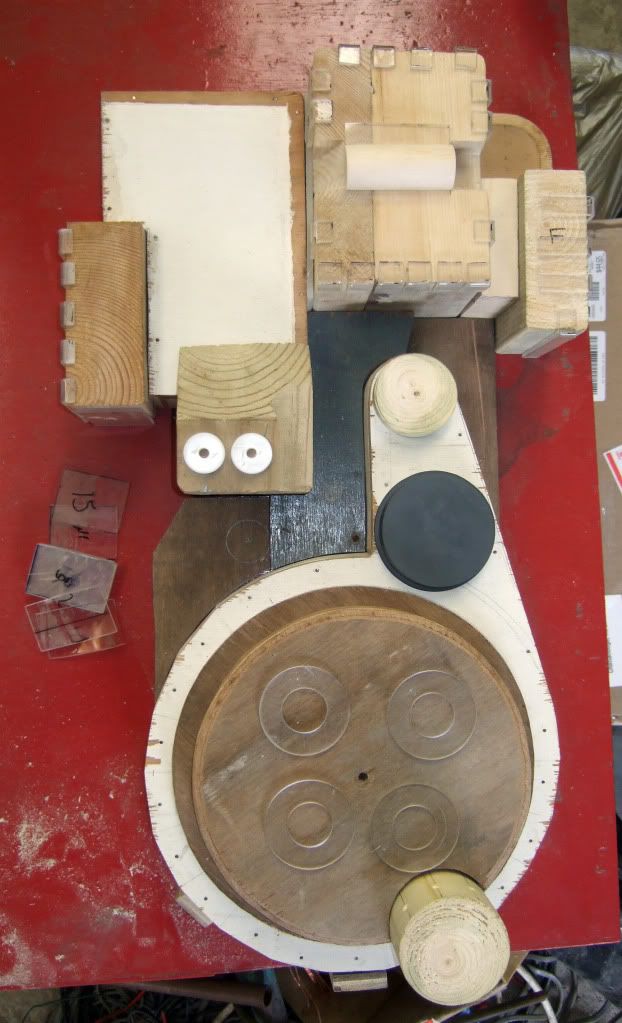
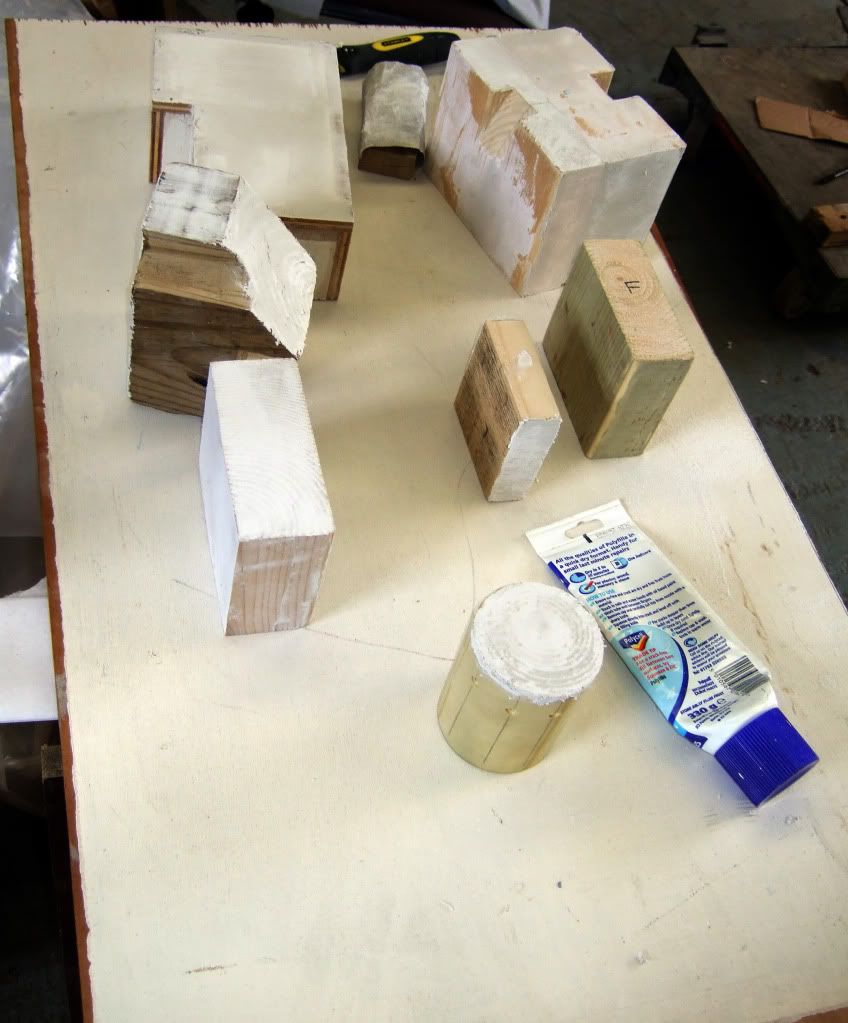
So below is a pic of how it sits at the moment. A friend and myself started this back at the beginning of April and have spent whatever time we can on it since to get it to this point. It's not completely finished yet as there are still a few things needing done, such as sanding, filling, shaping and of course using no nails...put together into one big piece which is then screwed to a sheet of wood, ready for moulding. Hopefully by the end of this week we should have it ready to begin the moulding process.

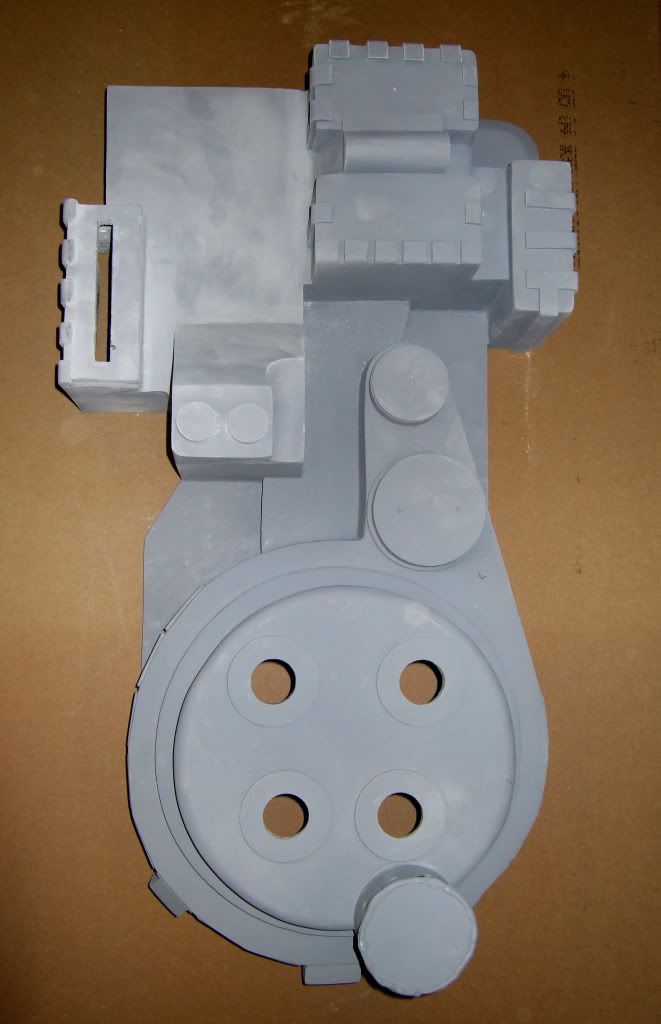
It is pretty much 97% made from scrap wood found lying in my friends shed and the rest plastic.

DSCF5634.jpg
 
Just a quick update on this. Didn't really get alot of time in on the buck 2day as i had to pick up the Silicone Rubber and Fiberglass that i will be using to make the shells from, but we managed to complete the little bits of details needing done before we begun to filler each part.

Here's a pic of the completed buck with the N-Filter attached. You can also see the squares 15 squares to the left that need to be glued onto the Synchronous Generator Spacer. I will attach these once all the filling and sanding is complete

DSCF5642.jpg


Also a pic of the filling process in the early stages.

DSCF5643.jpg
 
Thanks folks, really appreciate the compliments. For only being made from Foam Board, that's not a bad looking pack mate!! Keep at it, it'll be worth it in the end!!
 
Filliers, fillers, fillers and MORE BLOODY FILLERS!!!

Yes, you've guessed it, this week has mainly been taken up by filling and sanding numerous holes, cracks, dips and joins. Saying that it has been quite exciting seeing this build at this early stage start to take shape so quickly. I remember when all of this statred with a few blueprints, a few bits of would, a measuring tape and a pencil....aahh the memories of old lol!! :p

Anyhoo, back to the matter at hand....After making sure everything was ok and we were happen to continue, we set about the filling and sanding process, also we decided to screw each piece into place on a big woden board so that we can keep it altogether and minimise the mess. The idea of mounting it on the wall once finished has even been tossed around lol!!

So here's a pic of how she looks all filled, sanded screwed down and pilot holes drilled for other attachments

DSCF5691.jpg


Also a pic of it just wanting to be strapped to my back....actually i think this look suits, maybe i should just keep it like this and attach the Alice Frame now?? lol!!

DSCF5692.jpg


So once all of that was done with, we set about giving the wooden buck a coat of gloss paint to help stop the Silicone Rubber from trying to soak into the wood.

With and without flash

DSCF5700.jpg
DSCF5699.jpg
 
And so the scary biscuits bit begins!!!

Tonight was the night to make the Silicone Rubber mould, so here is a brief description of how it was done including pics.

To begin with we bought a 5.5KG tub of Silicone Rubber, a bottle of Silicone Catalyst, Thixo, Black Pigment, Release Agent,a few mixing bowls and a few paint brushes....i kinda forgot to include these in the photo, oopps!!

_MG_4275.jpg


For the 1st layer i mixed the Silicone and Catalyst until a salmon pink colour was achieved and poured this onto the wooden buck. Using the paint brushes we spread it over the buck until it was completely covered and left it to cure until it was tacky.

_MG_4279.jpg


1st Layer done.
_MG_4281.jpg


Once tacky, this was the cue to mix up the next batch. This time i aded a black pigment, making it easier to see where i may have missed any bits with this next layer. I also added some Thixo to thicken up the Silicone as this layer needs to be thicker. This was applied and again left to cure until tacky.

2nd Layer done
_MG_4288.jpg


Now it was time for the third and final layer. This time i added slightly more Thixo to make it even thicker. This proved to be a little too thick, but gave the mould that "just iced" cake look. It was so good i couldn't help myself and had to taste it just to be sure it really wasn't iceing lol!! I got caught in the act and quickly decided this might not be such a good idea after all and set the paint brush down....unplanned trip to A&E swiftly averted (y)

_MG_4289.jpg


3rd Layer done, with that oh so tempting iceing look!
_MG_4292.jpg


This is where we left it to completely cure and then it's time for the Fiberglass jacket to be done. We'll cover that next.
 
Ok, time for another update. Get ready for loads of picture viewing cause this is a big one!!!

So once the Silicone Rubber mould had set, it was time to break out the clay and build a fort err....i mean a wall around it.

DSCF5716.jpg


DSCF5718.jpg


We also built a clay wall on top to make sure the Fiberglass will be seperated into twho halfs.

DSCF5719.jpg


Next it time to begin making the fiberglass jacket on top of the Rubber Silicone. For this we bought a 5kg drum of resin, Hardener, thickener,, syringe, fiberglass matt and a mask to keep the smell/fumes out. Also (out of shot) we used latex gloves and a full body covering boiler suit type thing that they use for crime scene investigations.

DSCF5721.jpg


We mixed up a batch of the resin with the hardener and began to pour/paint it over one half of the rubber, making sure to cover the clay also.

DSCF5725.jpg


Once that was done we mixed up another batch, but this time added some of the thicknener. We previously had cut the fiberglass matt into good sized squares and dipped them into the mix, making sure it soaked in well and covered the whole of the 1st half right up to and including the clay.

DSCF5726.jpg


DSCF5727.jpg

DSCF5728.jpg


Once that was done, we allowed it to dry for roughly 24 hours.

tick....
tock....
tick....
tock....

And we're back!! Now it was time to do exactly the same process to the other side, but 1st we had to remove the clay wall that was built on top of the rubber. We then rubbered a generous amount of vaseline on the seam where we took the clay from. This helps to keep the two halfs from forming as one and allows it to come apart easilywhich is what we were aiming for.

Once that was dry it was time to crack this baby open.....oh what a job we had at doing that!!!
1st we decided to grind off the flash/jaggy bits from the seam to stop from getting cut. Then using a hammer and screwdriver just tap into the seam all along the length of it.

DSCF5791.jpg


DSCF5802.jpg
 
The next part was a bit of an effort/struggle and very time consuming as it took 3 of us to prise it open and roughly 1 hour. I'll let the next set of pics speak for themselves.

DSCF5804.jpg


DSCF5806.jpg


DSCF5808.jpg


DSCF5809.jpg


DSCF5810.jpg


DSCF5811.jpg


DSCF5813.jpg


And now we have our mould, ready for making the fibreglass shell which I’ll cover in my next instalment.

DSCF5814.jpg
 
So the wait is finally over and i have the 1st fiberglass shell out of the mould!!

It took alot of time, sweat, tears and hoping & praying it would come out looking half decent or it was ALOT of money's worth down the drain.

I don't have any pics of the actual moulding process seeing as my hands were full of resin and fiberglass matting, but we got it out and it looked pretty good for a 1st attempt. A few bits needed seeing to with a touch of fillers and sanding, but other than that it looked fine.

One that was done it was time to fake weld the N-Filter with hot glue.

DSCF6086.jpg


Once that was done, we shot it with a full tin of undercoat, just to see wut it would show up. Again, everything looks pretty good.

DSCF6087.jpg
 
So with the pack primed and everything looking good, it was time to get cracking on preparing the shell for all the extra's that have to be screwed, glued and fixed onto it.

First move was to drill out the holes on the Powercell and Cyclotron.

DSCF6203.jpg


One the were sorted we flipped the shell over and carved out indents on the Cyclotron and Powercell for the lenses to be able to sit in tight against the shell.

DSCF6210.jpg


DSCF6213.jpg


Next it was time to pay some atention to the resin that will be attached to the shell. For the HGA and Ion Arm i had to bake 2 wooden bungs to glue to the inside to allow me to be able to affix these to the shell. Once cut out i drilled a hole in the middle and glued a bolt into place

DSCF6214.jpg


DSCF6222.jpg


I then hot glued some fake weld onto the Ion Arm after drilling out all the holes for the Resistors and Legris Elbow.

DSCF6224.jpg


For the PPD all i had to do was drill a hole to allow the tubing and split loom into it.

DSCF6216.jpg

DSCF6219.jpg


For the Injectors i did the same as the HGA and Ion Arm with the wooden bungs on both ends. For these i made them out of 2 lengths on Aluminium pipe.

DSCF6229.jpg


For the bottom of the Injectors (the ends that are not directly screwed into the Shell) I slightly recessed the wooden bungs and covered them in Isopon fillers. After that i drilled a hole in the middle for the Hose Barb to fit into, and then i fake welded the bottoms with some more hot glue.

DSCF6234.jpg
 
That is awesome! I`m working on this exact same project but I`m still building my wood/MDF structure. Just wondering, how much silicone did you need in total for this project? I have to place an order soon and I was debating how much to order. Thanks!
 
Cheers dude, glad ya like it. I used a ull 5.5kg tub of silicone mate. just devide it into 3rds for 3 layers. All the best with ur build mate.
 
Thanks dude, this helps a lot. I would be also very interested to know more about how you did your fibreglass cast. Do you need to add anything to your silicone mold before pouring the fibreglass resin? (like mold release?). Sorry for all the questions, I'm new to this whole thing. thanks !
 
Don't worry about it dude, i'd rather people ask loads of questions and safe themselves alot of heartache. Also, sorry it's took me so long to reply...was busy with Invasion Belfast over the weekend there.

I didn't add a specific mold release to the Silicon itself, but i bought a tin of mold release and generously sprayed 3 coats on it before laying down the fiberglass resin. Ask away if ya have any more Q's mate
 
This thread is more than 11 years old.

Your message may be considered spam for the following reasons:

  1. This thread hasn't been active in some time. A new post in this thread might not contribute constructively to this discussion after so long.
If you wish to reply despite these issues, check the box below before replying.
Be aware that malicious compliance may result in more severe penalties.
Back
Top