You are using an out of date browser. It may not display this or other websites correctly.
You should upgrade or use an alternative browser.
You should upgrade or use an alternative browser.
A Daft Trooper-(TK takes on DP!)
- Thread starter TK9336
- Start date
Spengler28
Active Member
Wow! this is awesome!!
TK9336
Active Member
Thank you for the kind comments! I plan on installing the visor with allen screws and screw posts to make it removable. I do plan on obtaining another visor later down the road and bronze it, but that's for another time.
I am getting the last drill bit tomorrow needed to make clean incisions to insert the 3mm LEDs and jack for the Guy man helmet. I couldn't find a belt sander for doing small work needed on the glove panels, so I think a mouse sander will be sufficient and then clean it up with 600 grit sand paper, or finer just to clean up the edges of the piece.
I am getting the last drill bit tomorrow needed to make clean incisions to insert the 3mm LEDs and jack for the Guy man helmet. I couldn't find a belt sander for doing small work needed on the glove panels, so I think a mouse sander will be sufficient and then clean it up with 600 grit sand paper, or finer just to clean up the edges of the piece.
joshslayton
Well-Known Member
Dude this looks awesome are you gonna do the center matrix? I was too but i kinda have an idea on how to do it but im not sure if it will work like i was gonna try to get a sureelectronics 32x16 led matrix panel and make a costume led matrix and run them off the panel just like tekparasite with his thomas helmet any advice?
chris.jones
Active Member
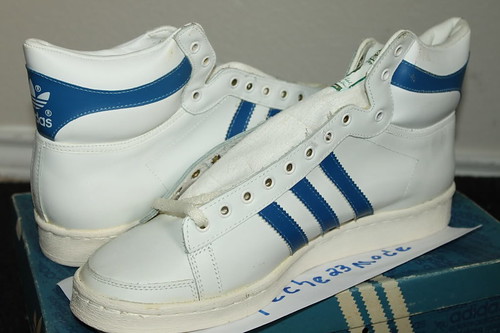
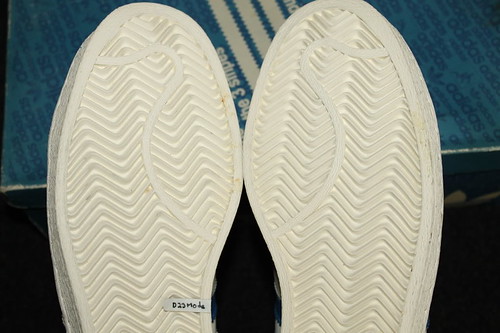
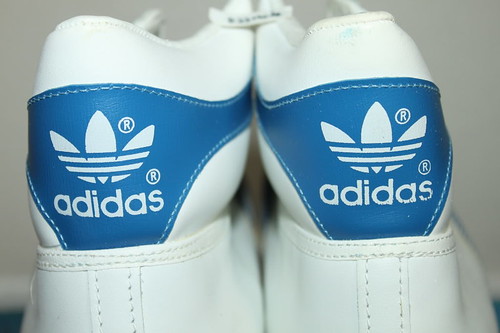
Hi all an update.
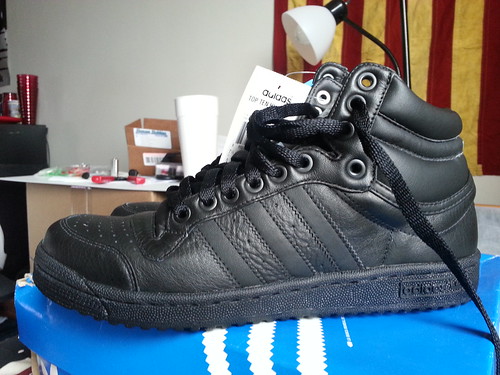
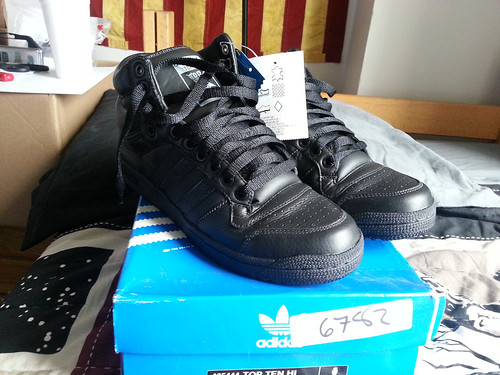
After getting ripped off by the Chinese supplier getting a sponge instead of my Top Tens I got a refund and tracked a pair down. These are EXTREMELY hard to find. So thinking I could squeeze into a 8 (which I wear for running shoes, but with sz 9-9.5 feet for normal kicks) I eagerly put them on today. They are a tight fit, and after closer review, Nizza Hi Tops in all black are a MUCH better match than Top Ten's. I can't believe I overlooked the Nizzas. I will have to paint the white bottoms but atleast they'll fit
20121025_131545 by TK9336, on Flickr
20121025_131524 by TK9336, on Flickr
20121025_123230 by TK9336, on Flickr
20121025_131508 by TK9336, on Flickr
I'd offer them here, but they are $80 and I doubt anyone wants them. Return and burn time baby.
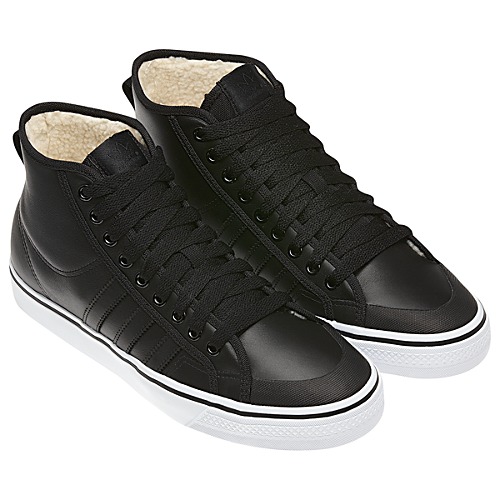
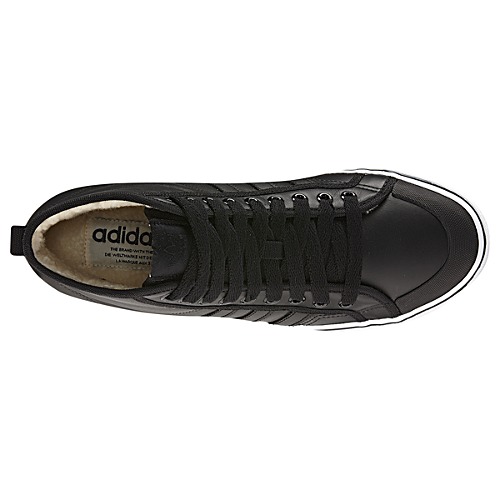
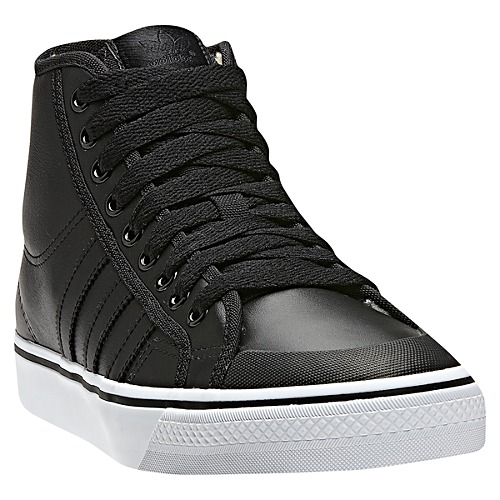
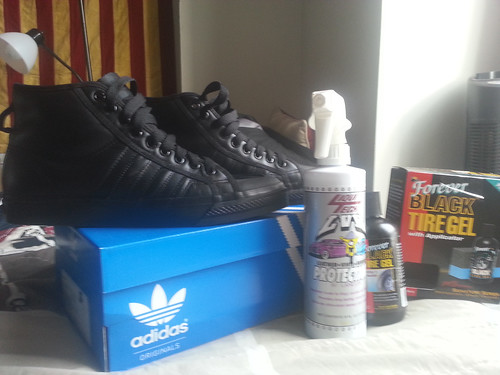
Nizzas- (Need to paint the white part but I am thinking black matte paint would be fine. Also put some shoe polish on them to make them shiny as in the reference pictures.)
G60917_06 by TK9336, on Flickr
G60917_05 by TK9336, on Flickr
G60917_02 by TK9336, on Flickr
The real deal-
shoe_zps590df151 by TK9336, on Flickr
daftpunkadidasproof by TK9336, on Flickr
395036728-1-2 by TK9336, on Flickr
147ce643 by TK9336, on Flickr


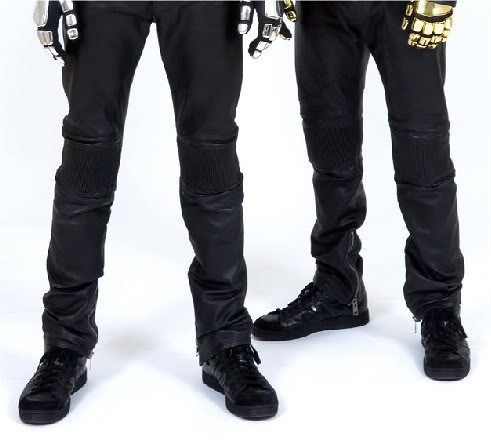

Search for Adidas Karen Abdul Jabbar in High Black. These are the original shoes dp is wearing.
TK9336
Active Member
DING DING DING!
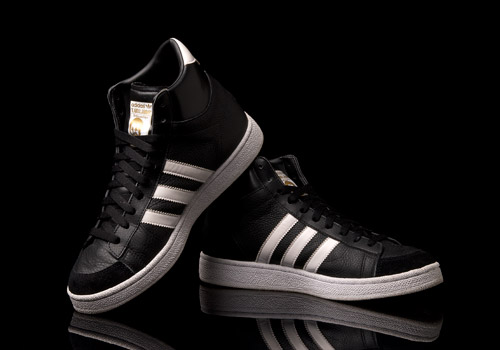
Thanks to Chris Jones of Berlin who posted on my thread over in the RPF who found the real Adidas style Daft Punk wears. Now to finding these, will be next to impossible. These are called Kareem Abdul Jabbar sneakers (first celeb endorsment of shoes) and they originated as basketball sneakers. Upon further review after my initial excitement, the 2005 reboot with the felt bumper is the exact same Daft Punk used. I want to believe from the pictures I have to reference these shoes that Daft's does indeed have felt bumpers (that's right, not all leather as first believed.)
Adidas Kareem Abdul Jabbar BBall Sneaks by TK9336, on Flickr
Adidas Kareem Abdul Jabbar BBall Sneaks by TK9336, on Flickr
Adidas Kareem Abdul Jabbar BBall Sneaks by TK9336, on Flickr
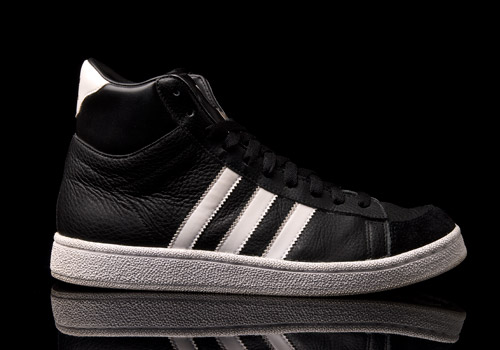
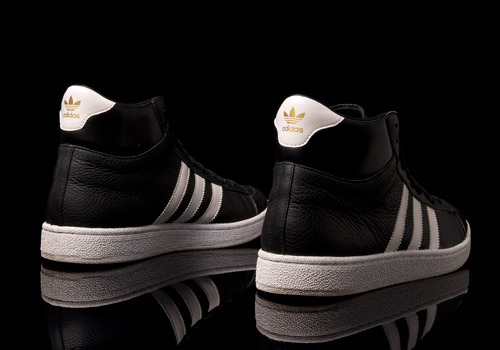
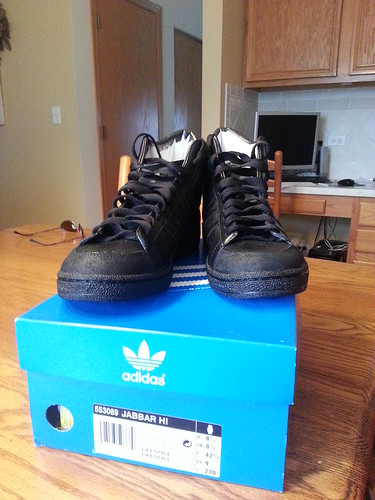
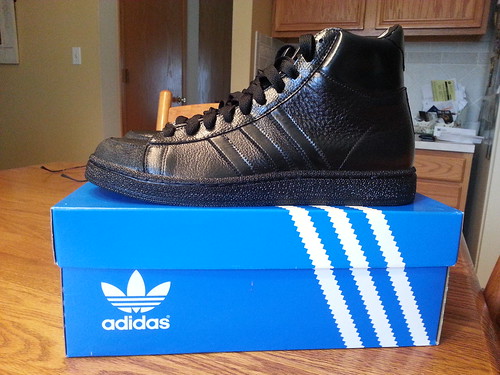
A bit of snooping around on the internet has led to the Adidas Jabbar Hi in black/gold/white. Black felt bumper. These are out there and much easier to find than the original Jabbars. Well, call me a mad man but I find this version to be darn near identical to every reference picture I have, including a multitude of screenshots from Electroma. You decide.
Adidas Jabbar Hi Black 2005 by TK9336, on Flickr
Adidas Jabbar Hi Black 2005 by TK9336, on Flickr
Adidas Jabbar Hi Black 2005 by TK9336, on Flickr
Now to find a pair, dye white stripes and use my Forever black on the soles to make'em black as the night. I am a happy guy, since these go cheaper, or about the same as the Nizzas I bought. When I procure a pair, I will upload photos, comparisions...as usual. I think we have a winner folks!
Mission: Successful.
Josh, I want to do that...eventually...but right now that kind of matrix is far above my skill. I want to try it after I finish this entire costume first. A fellow on the Daft Club boards, and here named ThreeFN is trying to make the matrix, but it has taken him a very long time (3 years I believe.) I want to do the 8x8 matrix like Tek, and Volpin did albeit on a larger scale, so we're on the same page there I think. Again, it will be a after thought.
Thanks to Chris Jones of Berlin who posted on my thread over in the RPF who found the real Adidas style Daft Punk wears. Now to finding these, will be next to impossible. These are called Kareem Abdul Jabbar sneakers (first celeb endorsment of shoes) and they originated as basketball sneakers. Upon further review after my initial excitement, the 2005 reboot with the felt bumper is the exact same Daft Punk used. I want to believe from the pictures I have to reference these shoes that Daft's does indeed have felt bumpers (that's right, not all leather as first believed.)
Adidas Kareem Abdul Jabbar BBall Sneaks by TK9336, on Flickr
Adidas Kareem Abdul Jabbar BBall Sneaks by TK9336, on Flickr
Adidas Kareem Abdul Jabbar BBall Sneaks by TK9336, on Flickr
A bit of snooping around on the internet has led to the Adidas Jabbar Hi in black/gold/white. Black felt bumper. These are out there and much easier to find than the original Jabbars. Well, call me a mad man but I find this version to be darn near identical to every reference picture I have, including a multitude of screenshots from Electroma. You decide.
Adidas Jabbar Hi Black 2005 by TK9336, on Flickr
Adidas Jabbar Hi Black 2005 by TK9336, on Flickr
Adidas Jabbar Hi Black 2005 by TK9336, on Flickr
Now to find a pair, dye white stripes and use my Forever black on the soles to make'em black as the night. I am a happy guy, since these go cheaper, or about the same as the Nizzas I bought. When I procure a pair, I will upload photos, comparisions...as usual. I think we have a winner folks!
Mission: Successful.
Josh, I want to do that...eventually...but right now that kind of matrix is far above my skill. I want to try it after I finish this entire costume first. A fellow on the Daft Club boards, and here named ThreeFN is trying to make the matrix, but it has taken him a very long time (3 years I believe.) I want to do the 8x8 matrix like Tek, and Volpin did albeit on a larger scale, so we're on the same page there I think. Again, it will be a after thought.
Last edited:
TK9336
Active Member
Sorry folks that I stepped away from updating, or working on these helmets for so long (I don't call researching a pair of shoes a real update). I caught the lazy/holiday bug and it's been wild being back home! I set up shop and squared off all the slits in the Thomas helmet. I am going to fill the upper nostril slits because on the Pinski lid they are too close together (in my opinion.) So just a little but of filling in already cut pieces. I can't stress the importance of having microfiles for these things.
TO DO-
-Filling and sanding (both). (Redoing the upper nostril bars to make look wider apart...really easy fix.)
-Guy lightfan chassis.
-All of Guy's (teks) LED's are soldered but need connecting. My own Chin equalizers will be done after everything else is (on the same day I do Thomas' sidebars). I need to make the project box but otherwise just alot of wiring.
-Attaching and cutting Thomas' earpucks.
-Drilling out holes for the RCA adapter and 3mm LEDs (I will upload pics of the EXACT bit you need for your drill, and dremel).
-Thomas Sidebars, I need to take a day and figure it out. It will probably take the whole day.
-Sanding both sets of glove panels (easy with a mouse sander...I already did quite a few in a small period of time).
-Send to the chromer.
Done-
-HAA Leather suit. $700 dollars in materials later, and 10 months waiting but I am going to physically drive down state and pick it up Wednesday evening, or Thursday noon.
-Thomas main 320 LED array (sandiskduo1).
-Glove liners (I might get the opera gloves instead for the realism lolz because even though they wear the short cuff black glove, all the pictures of them live show the opera glove. I would be willing to sell these. They are Seirus Black glove liners and cost $20 a pair. I have two! Shoot me a PM if interested. Both size Medium.)
-Adidas Nizza Hi Tops in FULL black. (Real ones are modified Adidas Kareem Abdul Jabbar [V2], I'm still on the hunt! Until then, these shoes are accurate enough for me).
-Visors are tinted. There is a small circle depression in the center of the Guy man visor (about the circumference of the back of a pen). It bugs the absolute ape**** outta me, but its very hard to see (you have to be standing over the helmet at a oblique angle to see it). One day I might get a nice one and dye it vertically opposed to horizontally. At 50 UK pounds, it's expensive. On that note, I just received over 4 feet of PETG plastic and wouldn't mind dying some more in the future for people who need a tinted visor without dealing with Niteshades.
Again, sorry for lack of updates...I added some pictures on this little facebook page I made to dump all the updates on costumes at http://www.facebook.com/9336industries
I have everything I need to finish this costume in front of me (including boxes to ship both helmets, and sets of gloves to the chromer. Anyone want to do this for me?
Sorenzo
Well-Known Member
I hope I can do your BEAUTITFUL cast justice! I wasn't aware you made a Thomas lid too? I am in the shadows of giants on this forum!
I sure you will
")
Yes, I've done a 2 Guy-M's, Classic and Tron and a Thomas. Thankfully its looking like I will be able to continue working on them in the new year, Thomas has been begging for some silicone for over a year now!
Darth Real Life is a total dick sometimes
TK9336
Active Member
Thanks Jon! It will fun to wear at C2E2 this April! Alot of builds...but I am going for complete...as close accuarate as possible.
Teaser 0 by TK9336, on Flickr
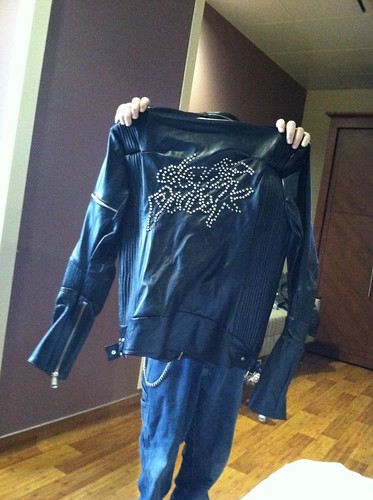
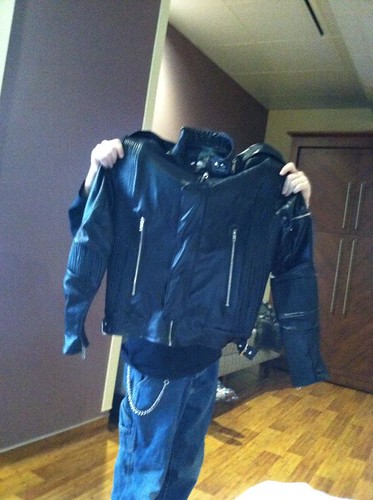
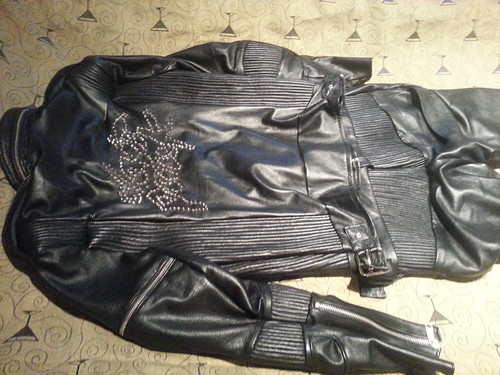
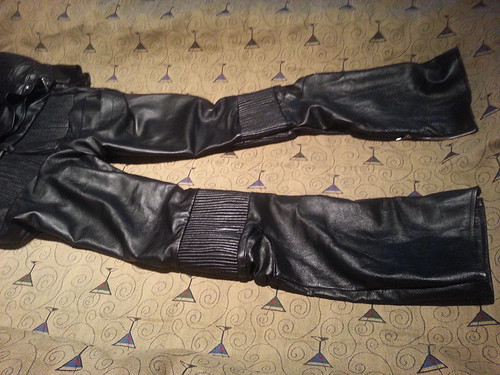
I didn't get the suit today, but tomorrow will be the day...now on 11 months in the making! These teasers kill me! I hope mine to be one of the most accurate renditions out there, to be on par with Volpin's made by Cathy at God Save the Queen's Fashions (which is bar none, the best replica out there). I used her patterns, and Italian imported lambskin leather, plus all the other bits (I really analyzed this one...if you thought my obession over the shoes was bad...this was far worse, hah!) I can't wait to see them. Here are some cell phone pics of the suit I received today. It should make Dior proud (I hope!)
Teaser 1 by TK9336, on Flickr
Teaser 2 by TK9336, on Flickr
Hard to see the details, but y'all know what it looks like. Each piping panel was done individually, filled individually. She said the small panels took three hours a piece (she sewn each pipe one at a time to get the same effect of the original...alot of care was taken into the construction of this piece.) Can't wait to wear this, take great pics, and get Heather to divulge a bit on the difficulty of making this piece. No helmet updates...been too excited to get the suit.
Teaser 0 by TK9336, on Flickr
I didn't get the suit today, but tomorrow will be the day...now on 11 months in the making! These teasers kill me! I hope mine to be one of the most accurate renditions out there, to be on par with Volpin's made by Cathy at God Save the Queen's Fashions (which is bar none, the best replica out there). I used her patterns, and Italian imported lambskin leather, plus all the other bits (I really analyzed this one...if you thought my obession over the shoes was bad...this was far worse, hah!) I can't wait to see them. Here are some cell phone pics of the suit I received today. It should make Dior proud (I hope!)
Teaser 1 by TK9336, on Flickr
Teaser 2 by TK9336, on Flickr
Hard to see the details, but y'all know what it looks like. Each piping panel was done individually, filled individually. She said the small panels took three hours a piece (she sewn each pipe one at a time to get the same effect of the original...alot of care was taken into the construction of this piece.) Can't wait to wear this, take great pics, and get Heather to divulge a bit on the difficulty of making this piece. No helmet updates...been too excited to get the suit.
TK9336
Active Member
Update:
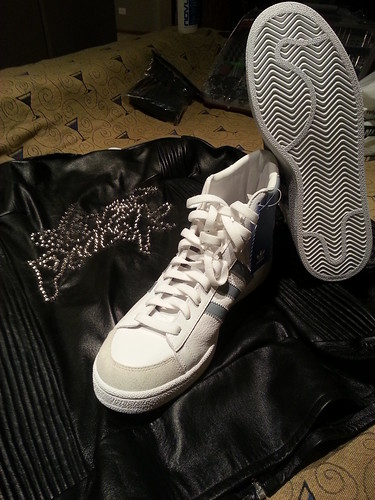
I have finally found a pair of grey/white Jabbar Hi tops. With help from the 1st Imperial Stormtrooper Detachment I received the information needed to make these black as coal. I have Angelus Black 4oz paint en route. How will they be shiny you say? I also have Angelus high gloss acrylic finisher coming too. I've read many accounts of people who swear by the stuff. Should be here by the close of the week.
Should be fun!
I still don't know about the felt toe bumper. Might be a RIT dye solution.
Stay funky my friends.
TK9336
Active Member
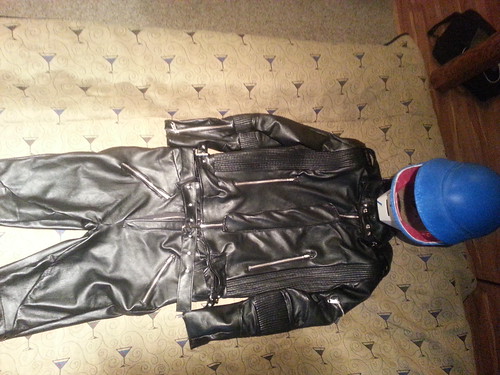
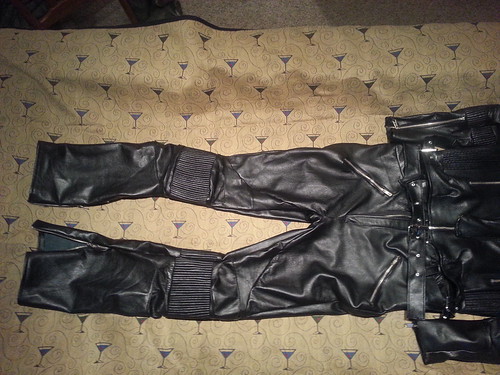
Pictures.
HAA Daft Punk Suit 2013 Round 1 by TK9336, on Flickr
HAA Daft Punk Suit 2013 Round 1 by TK9336, on Flickr
HAA Daft Punk Suit 2013 Round 1 by TK9336, on Flickr
HAA Daft Punk Suit 2013 Round 1 by TK9336, on Flickr
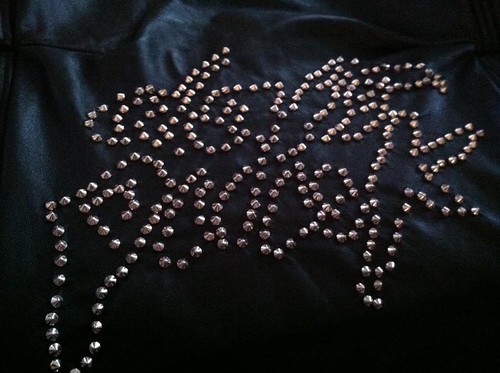
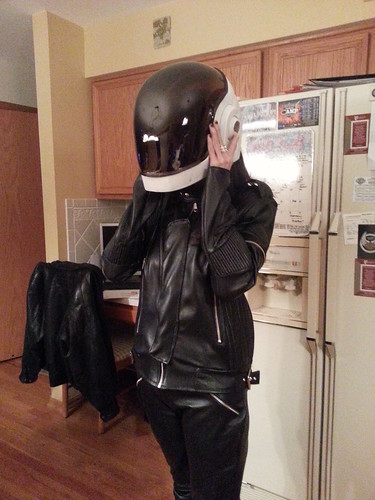
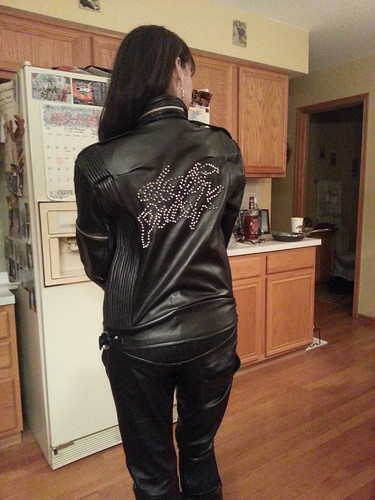
For you purists out there, will notice little things that are slightly off. The elbows and knee cuff (rod shaped pieces) are way too tight. To me the back of the jacket's "DAFT PUNK" looks off. Maybe too close together. Now I need a new tailor or seamstress to fix the entire suit, and reinforce it (liner, and even another layer of leather...if I did this again I would use tougher leather instead of premium lambskin.). I emailed Cathy @ God Saves the Queen's Fashion...maybe she could squeeze me in her busy schedule. Otherwise the hunt for a talented tailor/seamstress to fix my dream suit continues.
Up to the challenge? Email me at krskiera@sbcglobal.net
HAA Daft Punk Suit 2013 Round 1 by TK9336, on Flickr
HAA Daft Punk Suit 2013 Round 1 by TK9336, on Flickr
HAA Daft Punk Suit 2013 Round 1 by TK9336, on Flickr
HAA Daft Punk Suit 2013 Round 1 by TK9336, on Flickr
For you purists out there, will notice little things that are slightly off. The elbows and knee cuff (rod shaped pieces) are way too tight. To me the back of the jacket's "DAFT PUNK" looks off. Maybe too close together. Now I need a new tailor or seamstress to fix the entire suit, and reinforce it (liner, and even another layer of leather...if I did this again I would use tougher leather instead of premium lambskin.). I emailed Cathy @ God Saves the Queen's Fashion...maybe she could squeeze me in her busy schedule. Otherwise the hunt for a talented tailor/seamstress to fix my dream suit continues.
Up to the challenge? Email me at krskiera@sbcglobal.net
Last edited:
TK9336
Active Member
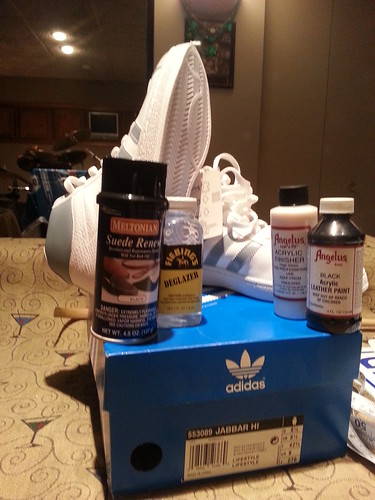
My Adidas Jabbar Hi Tops (the pair Daft Punk wears from Adidas) arrive tomorrow, and today I received the Angelus leather paint (black), and Acrylic High gloss finisher. I am going to the shoe repair store tomorrow to pick up Feibings Deglazer and preparer, and Meltonian Suede Renew to color the suede toe bumper. The suit might be a bummer, but the project goes on!
Pictures as always. Coming tomorrow...pretty excited!
Pictures as always. Coming tomorrow...pretty excited!
TK9336
Active Member
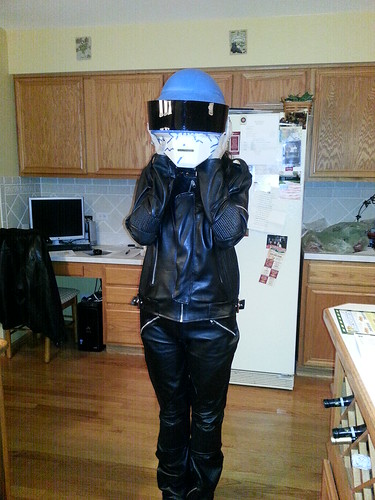
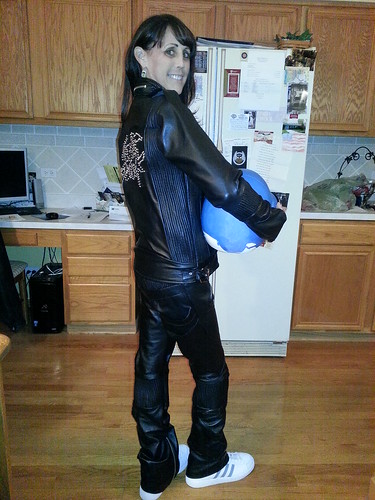
Not only did the shoes arrive, but my Mom fit into the suit meant for me! She's 5'4" and 110 lbs for perspective...I'm 5'7" and 165 lbs, Hah!
Mom wearin' mi Daft Punk by TK9336, on Flickr
Mom wearin' mi Daft Punk by TK9336, on Flickr
Mom wearin' mi Daft Punk by TK9336, on Flickr
Mom wearin' mi Daft Punk by TK9336, on Flickr
SHOES:
Daft Punk (source?)

Up close! by TK9336, on Flickr
ROUND 1: ADIDAS TOP TENS
Adidas Top Ten's (Round: 1) by TK9336, on Flickr
ROUND 2: ADIDAS NIZZA HI
BEFORE-
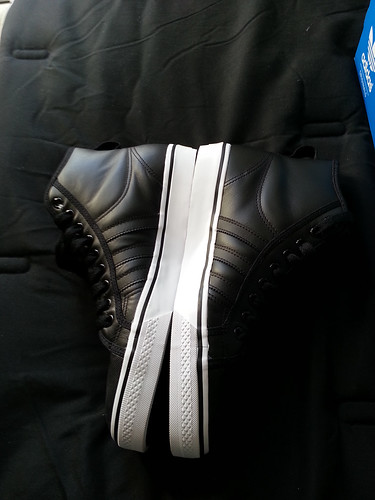
Nizza Hi tops, out of box by TK9336, on Flickr
AFTER-
Adidas Nizzas (Round:2) by TK9336, on Flickr
ROUND 3: FIGHT! ADIDAS KAREEM ABDUL JABBARS
Adidas Jabbars (Round: 3) by TK9336, on Flickr
This is what I plan to do to them-
Adidas Kareem Abdul Jabbars Sz 9 by TK9336, on Flickr
To finally, become this-
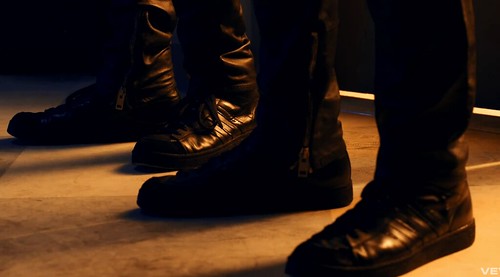
Daft Shoes @Flynn's Arcade by TK9336, on Flickr

Final by TK9336, on Flickr
I will take a stab at the shoes this weekend, and finalize the helmets. Going to be the most productive weekend for me in a long time!
Mom wearin' mi Daft Punk by TK9336, on Flickr
Mom wearin' mi Daft Punk by TK9336, on Flickr
Mom wearin' mi Daft Punk by TK9336, on Flickr
Mom wearin' mi Daft Punk by TK9336, on Flickr
SHOES:
Daft Punk (source?)
Up close! by TK9336, on Flickr
ROUND 1: ADIDAS TOP TENS
Adidas Top Ten's (Round: 1) by TK9336, on Flickr
ROUND 2: ADIDAS NIZZA HI
BEFORE-
Nizza Hi tops, out of box by TK9336, on Flickr
AFTER-
Adidas Nizzas (Round:2) by TK9336, on Flickr
ROUND 3: FIGHT! ADIDAS KAREEM ABDUL JABBARS
Adidas Jabbars (Round: 3) by TK9336, on Flickr
This is what I plan to do to them-
Adidas Kareem Abdul Jabbars Sz 9 by TK9336, on Flickr
To finally, become this-
Daft Shoes @Flynn's Arcade by TK9336, on Flickr
Final by TK9336, on Flickr
I will take a stab at the shoes this weekend, and finalize the helmets. Going to be the most productive weekend for me in a long time!
TK9336
Active Member
Well the conversion went swimmingly. I did feel bad taking such a brand new, clean pair of sneakers and making them as dark as the night. I guess I'll write up a tutorial for anyone else thinking about doing this if they cannot get a hold of Jabbar V2's, or well want to give it a shot.
Difficulty: Easy
Materials:
-Adidas Kareem Abdul Jabbar sneakers (Deadstock if possible).
-Angelus Black leather paint 4oz bottle (not the dye!)
-Angelus High Gloss Acrylic paint Finisher 4oz bottle.
-Angelus (or Fiebings) Deglazer and Preparer.
-Sponge applicator (multiple).
-Small brush for detail areas.
-Small bowl.
Adidas Kareem Abdul Jabbars Sz 9 by TK9336, on Flickr
TIME: 3-4 Hours.
Preparation is everything when making a replica, or anything. You don't have to get halfway, and have a "oh snap" moment because then it is very likely it is too late, and a mind numbing fix. Make sure your workspace is ready (some newspaper would do really.) This isn't a messy project, just make sure you shake the paint bottle, put it in a bowl, have a sponge applicator ready, and just take your time.
First off, take the laces out. Remember, if your shoes are "deadstock" they are factory fresh, they have just been in the box for a long time. Make sure there isn't any dirt, or dust on them that could contaminate the paint finish. Take a cloth, wipe it off, and just make sure there isn't anything that screams dirt. If your shoes are dirty however, make sure you clean them with simple soap, and water and dry them bad boys off.
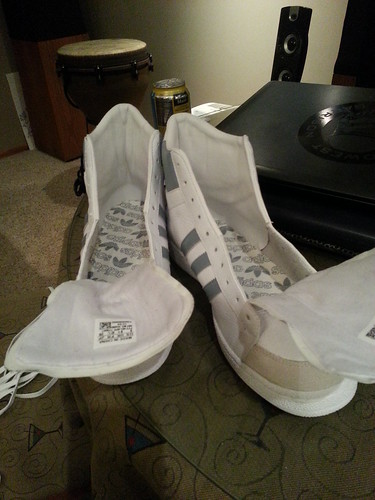
The Conversion by TK9336, on Flickr
NOTE: I used Meltonian Suede Re-Nu for my suede toe bumpers. I put on really thin coats and it went on, but it was taking forever, and the best results I was getting, was dark grey, not jet black. I wouldn't recommend it. The tip to painting suede is that a little paint goes a long way. You have to work the paint into the suede, otherwise glopping it on will look bad, and not work well. I don't recommend using that product, as the Angelus works fine, when using a sponge and taking your time.
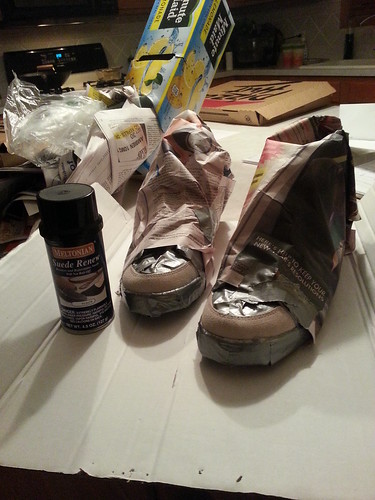
The Conversion by TK9336, on Flickr

The Conversion by TK9336, on Flickr
(Definitely not black...but it served as a great undercoat!)

The Conversion by TK9336, on Flickr
(Painting suede [covered a little later in this post]. One coat on the left versus none on the right.)
Now, where were we? Right.
Deglazer, this stuff will stink up whatever space your working in, and the fumes aren't good for you either. Make sure you have a ventilated workspace! You don't need a ton, just spread over the LEATHER parts. Keep it off the rubber and suede. You don't need much because all your doing is taking off the protective factory finish. You can do the touch test. The factory finish leather will feel smooth and your finger glides across it. Once deglazer is on, it feels a little more natural. It feels a little rougher, but not a whole ton. You can, and will feel a subtle difference. This stuff also runs (consistency of water) so don't soak your sponge in it like I did, and end up finding another sponge to absorb the waterfall.
Coat it with two thin coats. Let dry. Like 10-15 minutes, let the juice do its work.
After it's dry feel to shake up your black paint. This paint has more similarity to sludge than water based paint. Once mixed up, it should have the flow of normal paint. However note: if you let the paint in your bowl sit out too long it will harden. So don't walk away from the paint and expect it to be the same an hour later. With that I recommend...paint in sections! Pour out a little paint at a time, and don't go ham right away! Too much paint too quickly won't settle correctly, or bond as well and be MUCH more prone to cracking.

The Conversion by TK9336, on Flickr
Don't freak out after you do an area you see streak marks from your sponge, remember thin coats! When you do every part on the shoe, go back and start at the first section you started at. It should be dry to the touch by then! You want a rich black, and that small bottle has WAY more than enough to do BOTH shoes. You could do another two pairs!
AGAIN: With Angelus paint, a A LITTLE GOES FAR! The biggest thing here is patience. Let the paint dry and take your time, hell...enjoy it! Put on TRON: Legacy, or Interstella 5555...I watched Pulp Fiction. Also, remember to have a drink near by. No one likes being thirsty! Rush it, and it will LOOK rushed!
The Conversion by TK9336, on Flickr
That is the meat and potatoes of it. A little goes a long way here. I recommend doing the center of the shoe, and tongue last. After that, using SMALL amounts, hit up that suede. This part will take time to get right. Just take your time. I have stressed that enough yet? Rush it, and you soak the suede, and you can't really fix that.
If there anywhere you missed, use a small brush and fill in the areas with a good amount of paint (I found this happened on the top areas of stiches, and the recessed seam in the sole). Then your sponge and spread the paint around in that area, and not only is the spot filled, but it doesn't look like you filled it.
Once everything is where you want it to be, put away your Angelus paint Break out the High gloss finisher. You really do not need a lot of this. Just pour a little, work it in. Pour a little more, repeat until completed. You notice a instant change. Essentially, you putting a clear layer over the paint that seals it, and protects it from the cruel world! It should also not be any bit tacky. Once dry, lace those bad boys up and break them in a bit. I think the results speak for themselves.
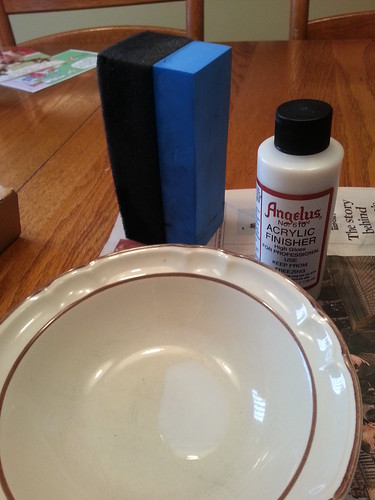
The Conversion by TK9336, on Flickr
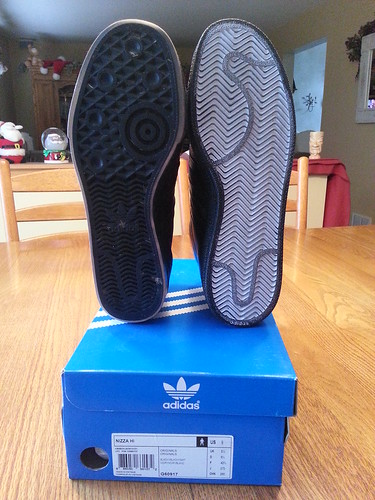
OPTIONAL: Using the high gloss on the soles. I know, I know the soles weren't shiny...but the protection keeps paint from scraping off left and right. I wore my previous pair of modified Nizzas for about three months around a college campus. I haven't figured out anyway to really paint, or dye the rubber soles to be permanent. The leather paint is most certainly strong, and won't be taken off easily...I really applaud Angelus on that. I also put on the Forever Black tire dye on the soles, for kicks (no, not for kicking people), maybe it might help the finish last longer. I still have yet to put on the gloss finish on the soles, but I first put on the Angelus paint, then Forever Black, and will put on the gloss.
Last reminder...the paint on the soles will only rub off when making abrasive contact with other objects, and the recessed areas will remain black. If out at a con (like I plan to do) I will just bring the tiny bottle of paint and the sponge applicator, and re apply as necessary.
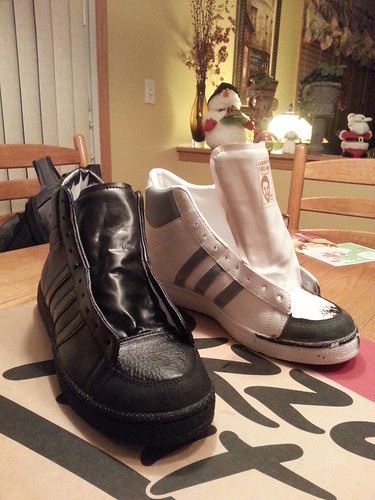
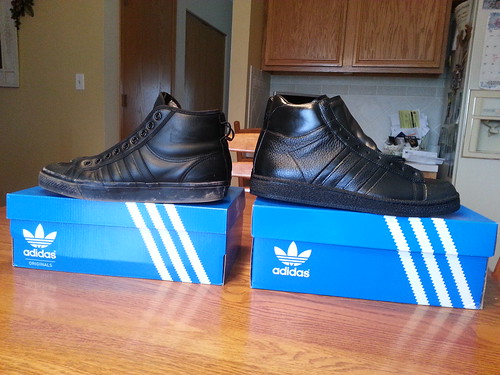
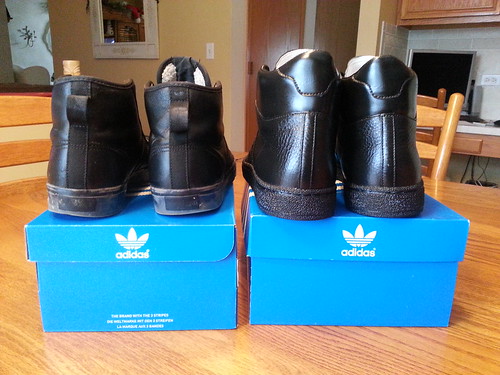
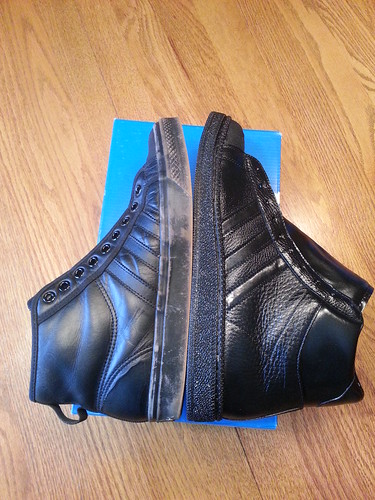
Now for a compassion next to my Nizza Hi tops. You can see they have a little wear and tear from regular wear.

The Conversion by TK9336, on Flickr
The Conversion by TK9336, on Flickr
The Conversion by TK9336, on Flickr
The Conversion by TK9336, on Flickr
The Conversion by TK9336, on Flickr
(Yes I only lightly went over the bottom. Once I have a official photoshoot done I will do it for it. Otherwise...it will just come off in time anyways...)
The Conversion by TK9336, on Flickr
The Conversion by TK9336, on Flickr
That ALL said...if I could just get the V2 Jabbars (which are smooth leather, and all black) I would and skip all this work ANY day of the week. If you can get the Brown Jabbars hi tops V2 in your size, or if your lucky to find black...just get them! When your soles scrape off the black paint on top of the brown, it won't even be noticeable. The only thing with the V2's...is that they lack the suede toe bumper. My recommendation? Once you have V2's in your possession, take them to get a suede toe bumper added by a cobbler. BAM! That's all you'd have to do.
So in closing I say, happy hunting!
Difficulty: Easy
Materials:
-Adidas Kareem Abdul Jabbar sneakers (Deadstock if possible).
-Angelus Black leather paint 4oz bottle (not the dye!)
-Angelus High Gloss Acrylic paint Finisher 4oz bottle.
-Angelus (or Fiebings) Deglazer and Preparer.
-Sponge applicator (multiple).
-Small brush for detail areas.
-Small bowl.
Adidas Kareem Abdul Jabbars Sz 9 by TK9336, on Flickr
TIME: 3-4 Hours.
Preparation is everything when making a replica, or anything. You don't have to get halfway, and have a "oh snap" moment because then it is very likely it is too late, and a mind numbing fix. Make sure your workspace is ready (some newspaper would do really.) This isn't a messy project, just make sure you shake the paint bottle, put it in a bowl, have a sponge applicator ready, and just take your time.
First off, take the laces out. Remember, if your shoes are "deadstock" they are factory fresh, they have just been in the box for a long time. Make sure there isn't any dirt, or dust on them that could contaminate the paint finish. Take a cloth, wipe it off, and just make sure there isn't anything that screams dirt. If your shoes are dirty however, make sure you clean them with simple soap, and water and dry them bad boys off.
The Conversion by TK9336, on Flickr
NOTE: I used Meltonian Suede Re-Nu for my suede toe bumpers. I put on really thin coats and it went on, but it was taking forever, and the best results I was getting, was dark grey, not jet black. I wouldn't recommend it. The tip to painting suede is that a little paint goes a long way. You have to work the paint into the suede, otherwise glopping it on will look bad, and not work well. I don't recommend using that product, as the Angelus works fine, when using a sponge and taking your time.
The Conversion by TK9336, on Flickr
The Conversion by TK9336, on Flickr
(Definitely not black...but it served as a great undercoat!)
The Conversion by TK9336, on Flickr
(Painting suede [covered a little later in this post]. One coat on the left versus none on the right.)
Now, where were we? Right.
Deglazer, this stuff will stink up whatever space your working in, and the fumes aren't good for you either. Make sure you have a ventilated workspace! You don't need a ton, just spread over the LEATHER parts. Keep it off the rubber and suede. You don't need much because all your doing is taking off the protective factory finish. You can do the touch test. The factory finish leather will feel smooth and your finger glides across it. Once deglazer is on, it feels a little more natural. It feels a little rougher, but not a whole ton. You can, and will feel a subtle difference. This stuff also runs (consistency of water) so don't soak your sponge in it like I did, and end up finding another sponge to absorb the waterfall.
Coat it with two thin coats. Let dry. Like 10-15 minutes, let the juice do its work.
After it's dry feel to shake up your black paint. This paint has more similarity to sludge than water based paint. Once mixed up, it should have the flow of normal paint. However note: if you let the paint in your bowl sit out too long it will harden. So don't walk away from the paint and expect it to be the same an hour later. With that I recommend...paint in sections! Pour out a little paint at a time, and don't go ham right away! Too much paint too quickly won't settle correctly, or bond as well and be MUCH more prone to cracking.
The Conversion by TK9336, on Flickr
Don't freak out after you do an area you see streak marks from your sponge, remember thin coats! When you do every part on the shoe, go back and start at the first section you started at. It should be dry to the touch by then! You want a rich black, and that small bottle has WAY more than enough to do BOTH shoes. You could do another two pairs!
AGAIN: With Angelus paint, a A LITTLE GOES FAR! The biggest thing here is patience. Let the paint dry and take your time, hell...enjoy it! Put on TRON: Legacy, or Interstella 5555...I watched Pulp Fiction. Also, remember to have a drink near by. No one likes being thirsty! Rush it, and it will LOOK rushed!
The Conversion by TK9336, on Flickr
That is the meat and potatoes of it. A little goes a long way here. I recommend doing the center of the shoe, and tongue last. After that, using SMALL amounts, hit up that suede. This part will take time to get right. Just take your time. I have stressed that enough yet? Rush it, and you soak the suede, and you can't really fix that.
If there anywhere you missed, use a small brush and fill in the areas with a good amount of paint (I found this happened on the top areas of stiches, and the recessed seam in the sole). Then your sponge and spread the paint around in that area, and not only is the spot filled, but it doesn't look like you filled it.
Once everything is where you want it to be, put away your Angelus paint Break out the High gloss finisher. You really do not need a lot of this. Just pour a little, work it in. Pour a little more, repeat until completed. You notice a instant change. Essentially, you putting a clear layer over the paint that seals it, and protects it from the cruel world! It should also not be any bit tacky. Once dry, lace those bad boys up and break them in a bit. I think the results speak for themselves.
The Conversion by TK9336, on Flickr
OPTIONAL: Using the high gloss on the soles. I know, I know the soles weren't shiny...but the protection keeps paint from scraping off left and right. I wore my previous pair of modified Nizzas for about three months around a college campus. I haven't figured out anyway to really paint, or dye the rubber soles to be permanent. The leather paint is most certainly strong, and won't be taken off easily...I really applaud Angelus on that. I also put on the Forever Black tire dye on the soles, for kicks (no, not for kicking people), maybe it might help the finish last longer. I still have yet to put on the gloss finish on the soles, but I first put on the Angelus paint, then Forever Black, and will put on the gloss.
Last reminder...the paint on the soles will only rub off when making abrasive contact with other objects, and the recessed areas will remain black. If out at a con (like I plan to do) I will just bring the tiny bottle of paint and the sponge applicator, and re apply as necessary.
Now for a compassion next to my Nizza Hi tops. You can see they have a little wear and tear from regular wear.
The Conversion by TK9336, on Flickr
The Conversion by TK9336, on Flickr
The Conversion by TK9336, on Flickr
The Conversion by TK9336, on Flickr
The Conversion by TK9336, on Flickr
(Yes I only lightly went over the bottom. Once I have a official photoshoot done I will do it for it. Otherwise...it will just come off in time anyways...)
The Conversion by TK9336, on Flickr
The Conversion by TK9336, on Flickr
That ALL said...if I could just get the V2 Jabbars (which are smooth leather, and all black) I would and skip all this work ANY day of the week. If you can get the Brown Jabbars hi tops V2 in your size, or if your lucky to find black...just get them! When your soles scrape off the black paint on top of the brown, it won't even be noticeable. The only thing with the V2's...is that they lack the suede toe bumper. My recommendation? Once you have V2's in your possession, take them to get a suede toe bumper added by a cobbler. BAM! That's all you'd have to do.
So in closing I say, happy hunting!
Similar threads
- Replies
- 18
- Views
- 865
- Replies
- 1
- Views
- 144
- Replies
- 5
- Views
- 352
- Replies
- 3
- Views
- 258