Creating DV Rotj Lightsaber Parts

cboath

Master Member
I'm modeling these parts up with plans to stick them on shapeways for everyone to have access to be able to print them in the medium of their choice.

If someone wants to machine it, drop me a line, i've got no problem with that either.

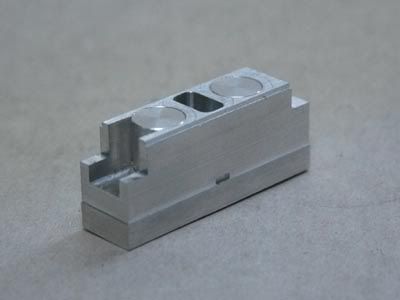
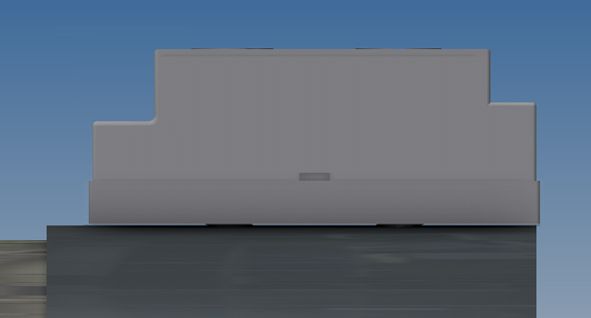
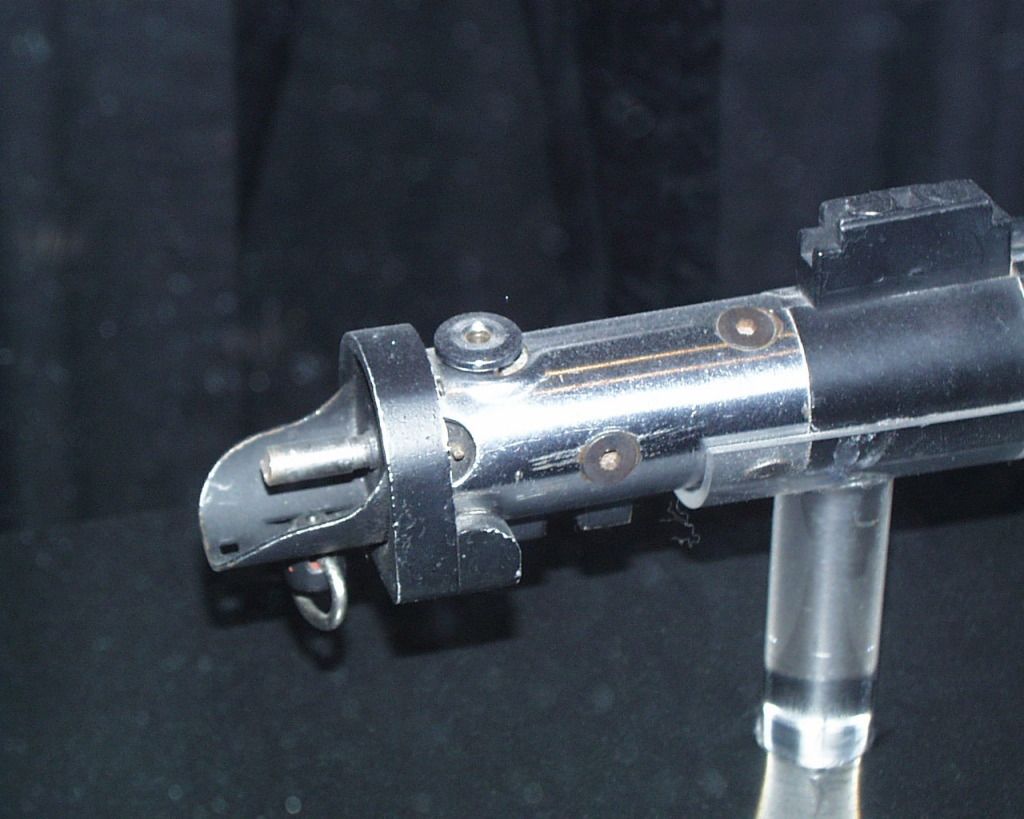
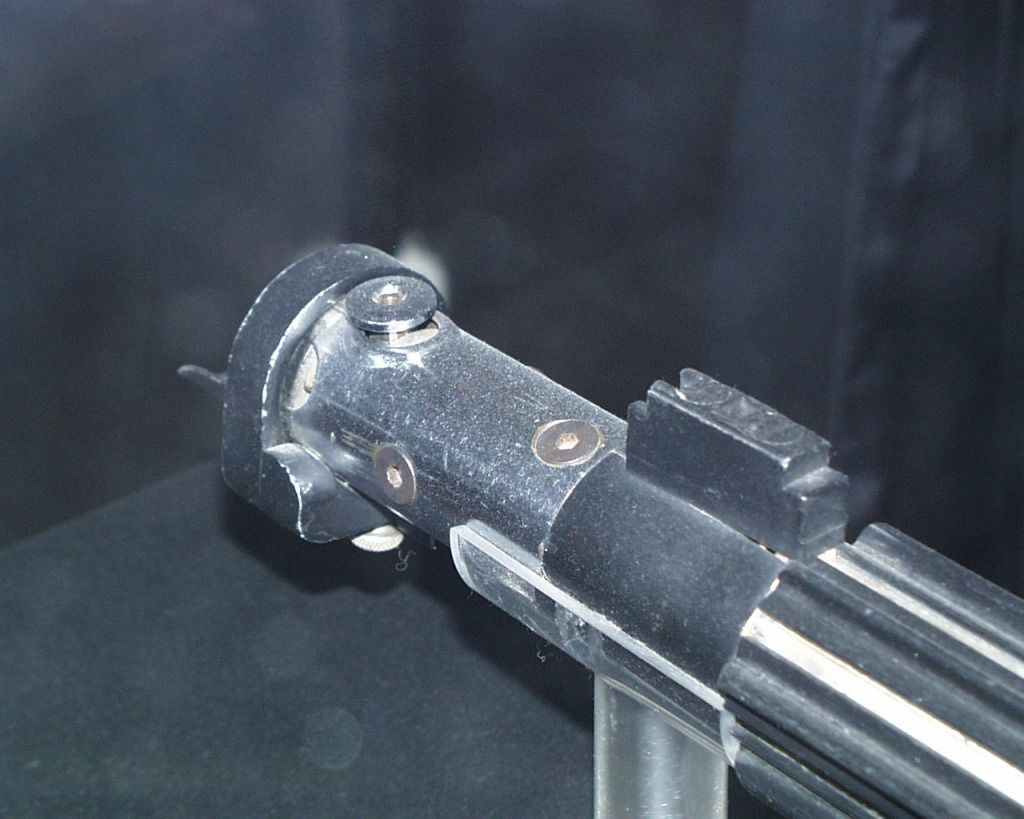
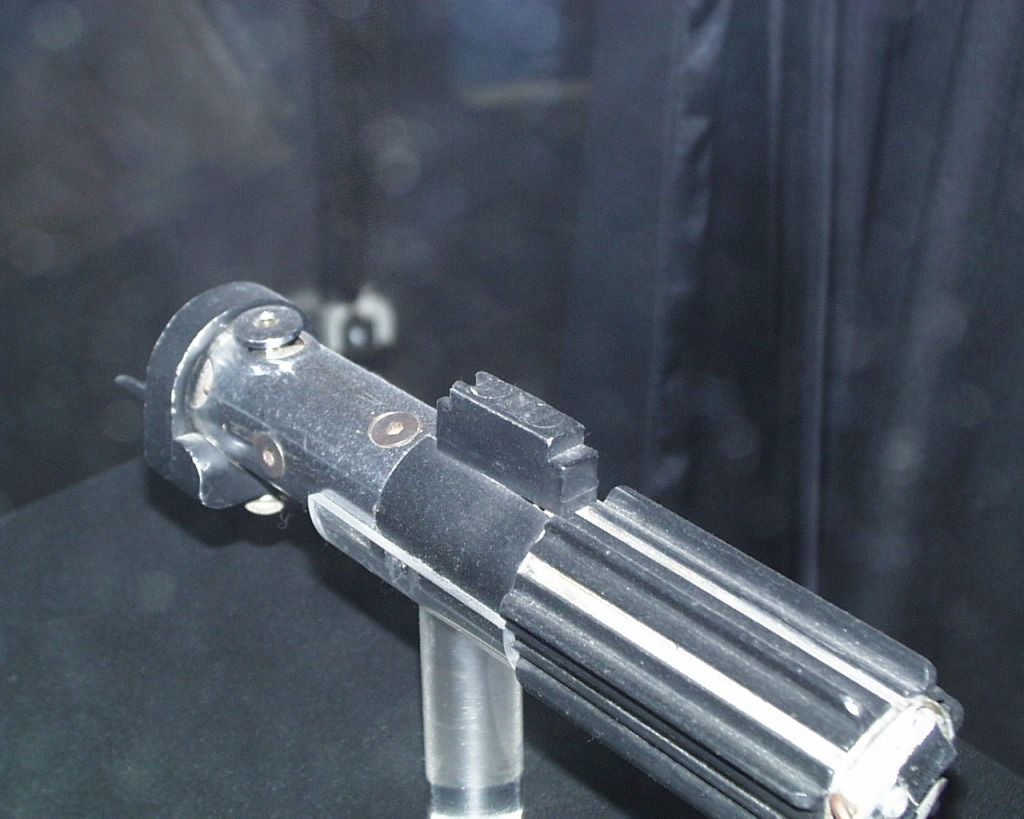
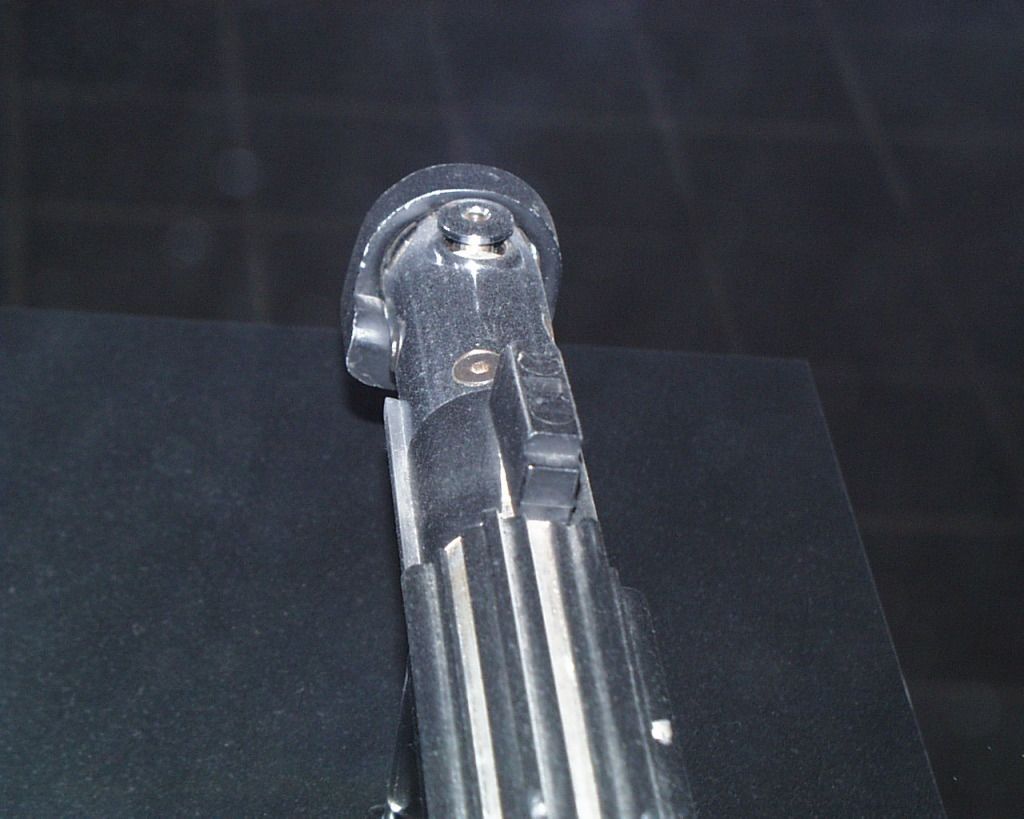
First piece is the shroud. Second piece is the control box, and after that whatever piece is desired most.

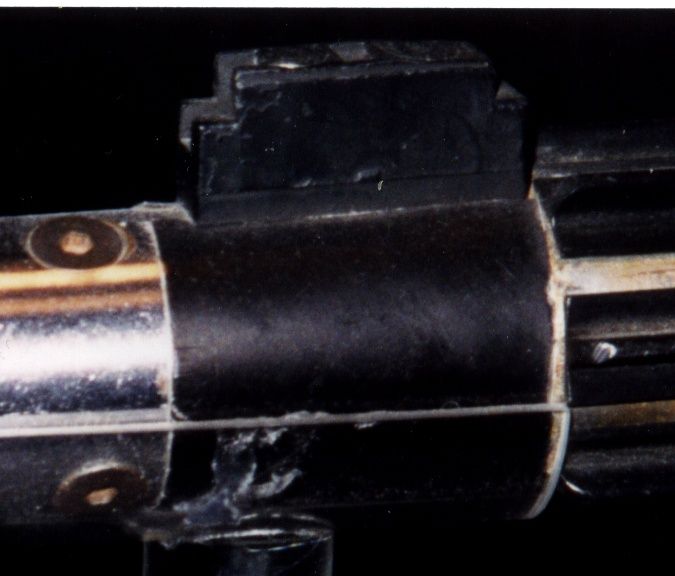
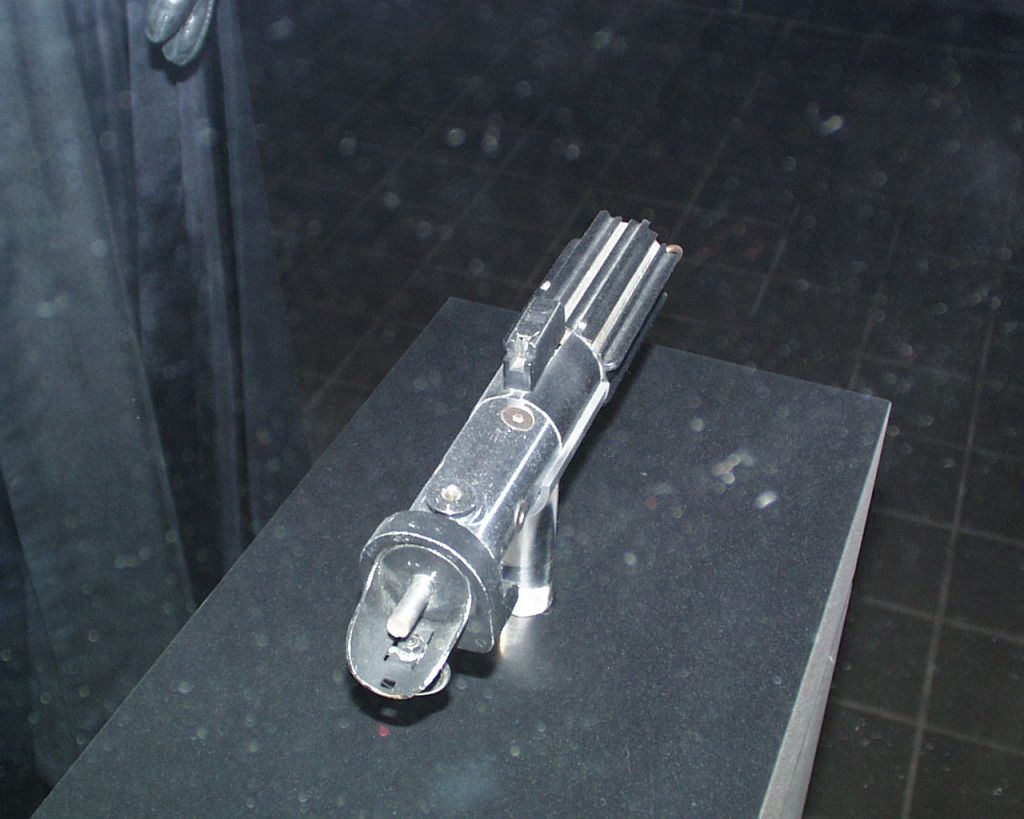
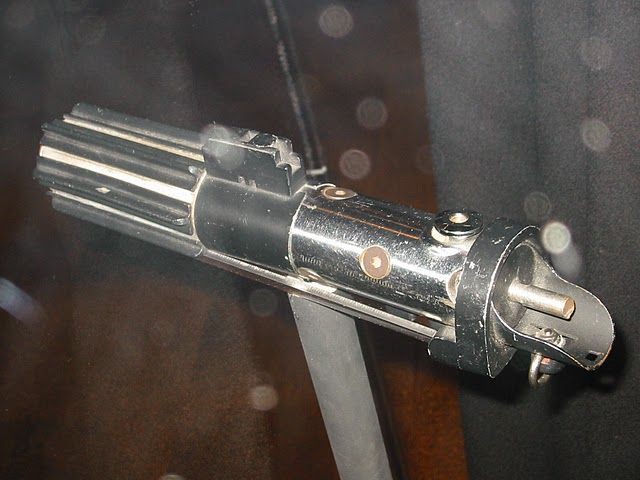
With that in mind and in striving to make these as accurate as possible, i'm looking for feedback as to what's right and wrong. I've seen a couple shots of the Ob1Kenny parts and have used only shots of the actual saber that's been on display and featured in the 'more details of the vader rotj' thread of a LONG time ago :) Not a lot of elevation shots in that thread to take dimensions off though :)

I made a quickie version of the top of a graflex based on the wraparound template found in that thread, so if some of the graflex stuff is off, that's why. I didn't go back and look it in detail, just went with the template.

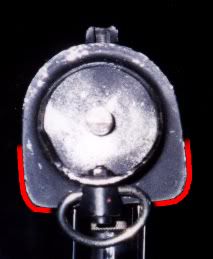
I can tell you the hole through the shroud is 1.5" in diameter. Probably needs to be a bit bigger to allow for sliding on/off a graflex. Possibly an extra 1/16" to allow for that.

Anyhow, here's the first draft:

Edit: Oh, the capture06 shot is looking from the back side so you can see the oversized cut in the backside of the shroud. I stuck a solid black piece inside the graflex shell because it just looked really weird with nothing in there, hence the big black cross section :)
 
Last edited:
Re: Creating DV Rotj Parts

Wow that's great work cboath!

Here's the only picture I have from the front :

DVROTJ08.jpg


and as you can see it's not quite symmetrical on the curves :

DVROTJ08-S.jpg


-Chaim
 
Last edited:
Re: Creating DV Rotj Parts

Scaling it I got radii of .25" and a hair over .21". I used .25 for both because it looked awkward otherwise.

Should it stay unequal do you think?
 
Well . . . I always like it to be unequal since that gives it more of a feeling of a vintage or found part like the graflex or MPP and the 'used future'-appearance as George Lucas liked to call it. What do you think?

:popcorn

-Chaim
 
Don't have the time at the moment to adjust the model for a comparison, but I wonder how noticeable it would be, if at all, without an end shot.

I'll try and work up another version of the model to see if we can tell.

Anyone else see any evidence on the original of chamfering around the top hole (where the graflex goes through) or the bottom side?
 
You're right ... this chamfering appearance can always be achieved by means of filing the sides afterwards and before painting. No need to adjust your 3D model at this time I suppose :)


-Chaim
 
I've made some subtle changes to the shroud - reduced the rounded edges a bit and added the chamfer. In staring at the MOM picks, i believe I see it... :)

Newly added is the control box.

What do you think of the groove at the base? I have it .03" (1/32") high, and .015" (1/64) deep. Seems slight by the number but seems overly obvious to me on the model...
 
Hi cboath,

Indeed excellent first attempt. When looking at this design made by Obi1Kenny :

controlbox1.jpg


I strongly believe there's no groove at all but the bottom part should be higher up
and it sticks out ever so slightly :

cb05-FX-1.jpg

(Design courtesy cboath and although slightly adjusted for use of example it is not screen-
accurate according to my adjustments)

also the two almost square pieces missing from the top of this rectangular design ...
are not the same in size! The front should be slightly larger then the back. The back
square in your design looks correct in size though. (See picture above).

Mind you I'll have to check my reference files of the original DV ROTJ lightsaber if
Obi1Kenny's design is indeed screen accurate . . . or perhaps you, cboath, have those
pictures at hand to check this?

-Chaim
 
I only recently dug through the archives here for reference pics, so i'm guessing there are a lot missing.

Using the below images, they look pretty much the same height to me.

I sorta agree about the groove, but sometimes I think I see it and sometimes I don't. When I think there's no groove, I'm not sure there's even an offset on the long sides, just the short ones. To bad this isn't on display near me right now - i'd go in and snap some gargantuan photos :) The second shot below tells me there's no groove period, but I look at other shots and see what appear to be highlighted edges in the same spot....

If you've got better photos, please let me know. Side/top views were extremely hard to come by. Most were at varying angles making scaling sizes extremely difficult.
 
I've got most of those. None show me conclusively if there's a groove there or not, though i lean towards not.

The first 2 pics tell me the two sides are cut down evenly on both sides as well. The front one looks like it's more because of the notch that cut along the outer edge. Your eye sees the back edge in the front and the front edge in the back which makes the front look cut down more than it actually is. Draw a line along the back edge and continue it and it will line up with the front edge - i've done this with 4 different images.

Those images also make it look like the rectangular notch on the side sticks out as opposed to being cut into the box itself.

The first 2 pics also make it appear the box is 2 pieces - like a rubber or something dull on the bottom and a harder plastic/metal on the top. However the third image makes me think groove by the way the light hits it.
 
Don't know if I'm chiming in out of order here, what with being new n all that... But that 'control box' looks exactly like the kind of magnetic door catches that used to be on my Mums kitchen cupboard doors when I was a kid (Back in the 70's in the UK).
 
Not of line at all. It's a rare item from the OT that I believe has yet to be identified.

Wouldn't happen to have any photos that show that latch would you? :)
 
@ akc5150 : Does this represent the vintage cupboard magnetic doorlatch you're talking about?

Magneticdoorlatch.jpg


-Chaim

No, that is not the one. I don't have the picture handy, but I will post it up if someone doesn't beat me to it.

How fascinating to see this thread emerge. Again, thanks for letting me know, Brian!

I will contribute however I can. It may be a few weeks before I have some really hard data, though.
 
I did also have the idea of old push button light switches or door locks, many of them have the buttons/circles lined up like this
 
I made a mistake in my reply, for the record. I thought the reference was to the latch that is behind the shroud. Apologies for not reading more in-depth on this topic.

Could it be? Possibly, it could be a mounted activation box, absolutely. I never thought of it that way.
 
This thread is more than 9 years old.

Your message may be considered spam for the following reasons:

  1. This thread hasn't been active in some time. A new post in this thread might not contribute constructively to this discussion after so long.
If you wish to reply despite these issues, check the box below before replying.
Be aware that malicious compliance may result in more severe penalties.
Back
Top