Solider
Well-Known Member
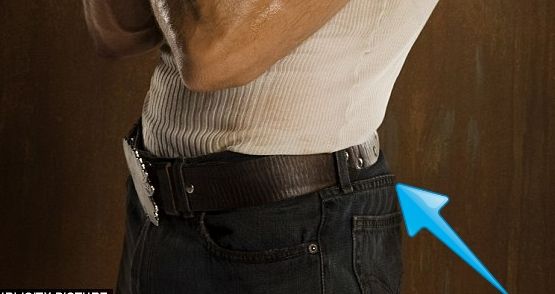
For a custom Wolverine belt strap.
First go to a shopping mall or a store where you can find 1 distressed brown leather belt with a permanently attached buckle (usually less expensive)(also you want to find one that has the buckle sewed is not riveted or snapped because you want to use your own rivets so they all match) However, if you get one with a snapped on removable buckle try and match the rivets to snaps for consistency . . Get a belt as log as possible, much longer then your waist(so you have room to cut off the two pieces). This should run about $20 - $30.
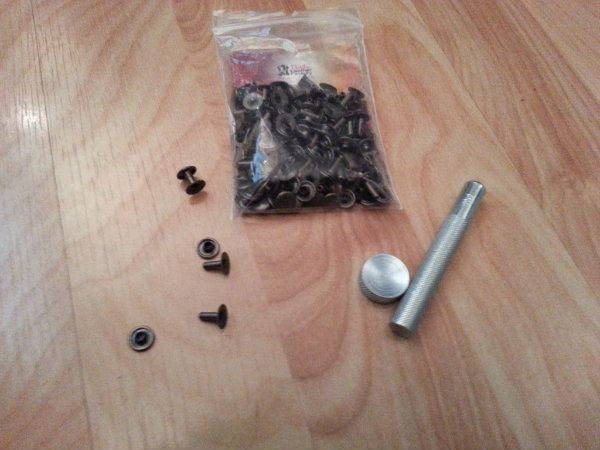
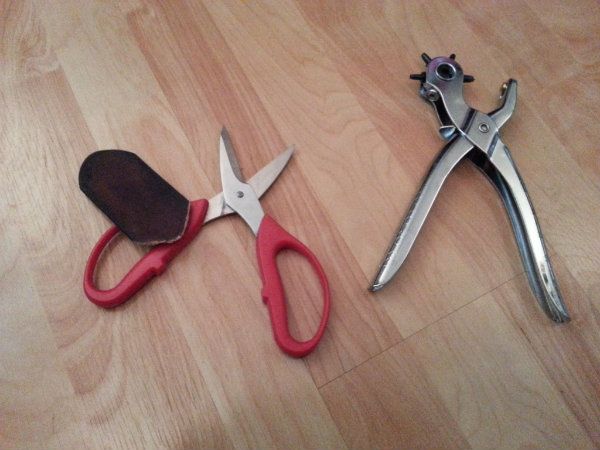
You will need leather rivets, and rivet set tool, leather scissors, a leather hole punchers, and ether a small amount of matching dark brown lather dye or 1 dark brown sharpie marker. This should be around $30 read below to get the length for you approximately.
Next you cut the buckle off (If it's a non-removable kind) of the belt as close as you can to the buckle. Now measure and cut off 2 pieces about 3 and 1 half to 4 inches long off of one of the ends or 1 off each end cutting the piece off the end after the holes if there is enough there. Usually the end with the pre-punched holes has around 4 inches between the last hole and the tip.
Then you dye or color in the end of the cut edge.
If you have a non-removable buckle belt strap: Thread the end through your Wolverine Indian head buckle, belt strap bar and pinch the pieces together living enough room on the back for the rivets to hold the 2 together. . Then as close as you can get to the end of the belt to pound the rivets together without hitting the buckle on the front , hold folded over pieces of the belt strap the you threaded through the buckle tight and punch 2 holes for the rivets and rivet the belt. (you hammer the rivets using the set tool) Now the buckle is permanently attached to the end of the belt.
Now shape the 2 pieces of belt you cut to look like the extra pieces attached to the Wolverine belt with the leather scissors. Dye or color in the cut edges when you get them right.
Now place the belt on yourself using the jeans you want to wear. If possible try and get it so you use the first hole on the strap so there are no visible belt holes. (You will tuck the end of the belt under the buckle under the strap, not over the strap) looking down, line up one of the shaped pieces to your left so it falls on the corner of you hip where the Wolverine belt piece should go. Mark the location with your bodies bend in mind. Do the same for the back piece at the back corner of your right hip. With the belt off punch the first hole through both the belt and the piece together and rivet them. Then, with the correct bend to the belt (matching your waist bend) punch and rivet the rest of the piece to the strap. 3 rivets at each end of the shaped pieces. Do the same on the back pieces.
Punch a holes if needed to latch the buckle to. If the other end of the belt is too long cut away and dye or color the cut edge. Remember to leave enough belt so you can add hole if you gain weight.
Now you just made a movie quality custom belt to your exact waist measurements for around $60 or less.
(I bought 2 belts when one would have done it. And they were not identical so I had to try and dye them to match. I spent a lot more then I should have). I might make a second belt now that I have stream lined the process and already have to tools. All I need to do is find the perfect belt for cheep somewhere.
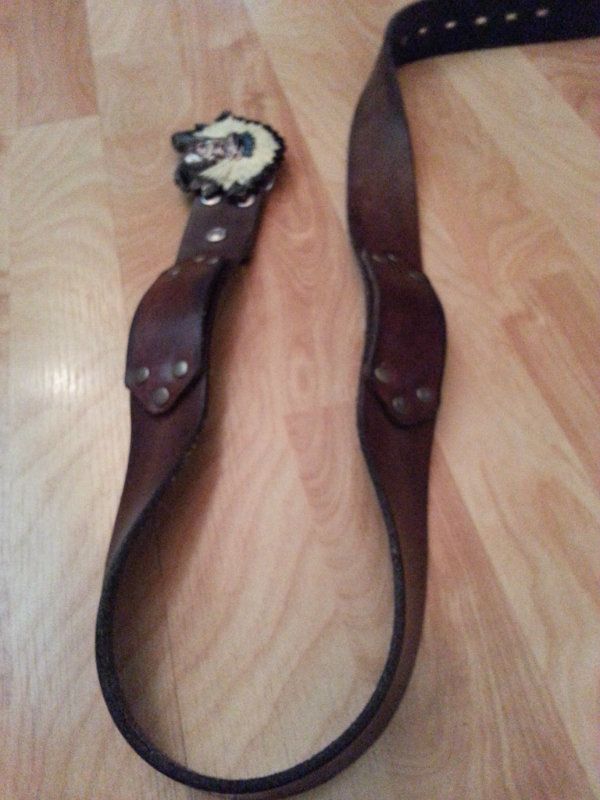
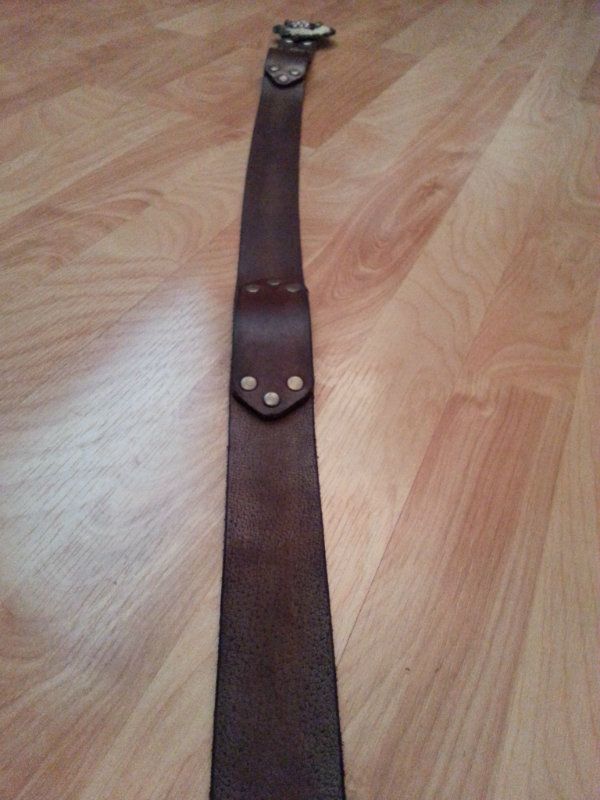
EDIT: TEXT MOVE: And this is the prototype belt. The rivets don't match the snaps so I'm going to use this method to make the perfect one next. Also the 2 detail pieces on this prototype are to long I think. Plus there are three snaps and I only want 2 rivets at the end by the buckle. But here is my first belt.
First go to a shopping mall or a store where you can find 1 distressed brown leather belt with a permanently attached buckle (usually less expensive)(also you want to find one that has the buckle sewed is not riveted or snapped because you want to use your own rivets so they all match) However, if you get one with a snapped on removable buckle try and match the rivets to snaps for consistency . . Get a belt as log as possible, much longer then your waist(so you have room to cut off the two pieces). This should run about $20 - $30.
You will need leather rivets, and rivet set tool, leather scissors, a leather hole punchers, and ether a small amount of matching dark brown lather dye or 1 dark brown sharpie marker. This should be around $30 read below to get the length for you approximately.
Next you cut the buckle off (If it's a non-removable kind) of the belt as close as you can to the buckle. Now measure and cut off 2 pieces about 3 and 1 half to 4 inches long off of one of the ends or 1 off each end cutting the piece off the end after the holes if there is enough there. Usually the end with the pre-punched holes has around 4 inches between the last hole and the tip.
Then you dye or color in the end of the cut edge.
If you have a non-removable buckle belt strap: Thread the end through your Wolverine Indian head buckle, belt strap bar and pinch the pieces together living enough room on the back for the rivets to hold the 2 together. . Then as close as you can get to the end of the belt to pound the rivets together without hitting the buckle on the front , hold folded over pieces of the belt strap the you threaded through the buckle tight and punch 2 holes for the rivets and rivet the belt. (you hammer the rivets using the set tool) Now the buckle is permanently attached to the end of the belt.
Now shape the 2 pieces of belt you cut to look like the extra pieces attached to the Wolverine belt with the leather scissors. Dye or color in the cut edges when you get them right.
Now place the belt on yourself using the jeans you want to wear. If possible try and get it so you use the first hole on the strap so there are no visible belt holes. (You will tuck the end of the belt under the buckle under the strap, not over the strap) looking down, line up one of the shaped pieces to your left so it falls on the corner of you hip where the Wolverine belt piece should go. Mark the location with your bodies bend in mind. Do the same for the back piece at the back corner of your right hip. With the belt off punch the first hole through both the belt and the piece together and rivet them. Then, with the correct bend to the belt (matching your waist bend) punch and rivet the rest of the piece to the strap. 3 rivets at each end of the shaped pieces. Do the same on the back pieces.
Punch a holes if needed to latch the buckle to. If the other end of the belt is too long cut away and dye or color the cut edge. Remember to leave enough belt so you can add hole if you gain weight.
Now you just made a movie quality custom belt to your exact waist measurements for around $60 or less.
(I bought 2 belts when one would have done it. And they were not identical so I had to try and dye them to match. I spent a lot more then I should have). I might make a second belt now that I have stream lined the process and already have to tools. All I need to do is find the perfect belt for cheep somewhere.
EDIT: TEXT MOVE: And this is the prototype belt. The rivets don't match the snaps so I'm going to use this method to make the perfect one next. Also the 2 detail pieces on this prototype are to long I think. Plus there are three snaps and I only want 2 rivets at the end by the buckle. But here is my first belt.
Last edited:
") I knew that I made the 2 pieces to long
I knew that I made the 2 pieces to long