War Machine MK1 Pepakura Foam HD Build - Iron Man 2

Gladiator

Member
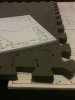
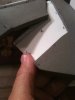
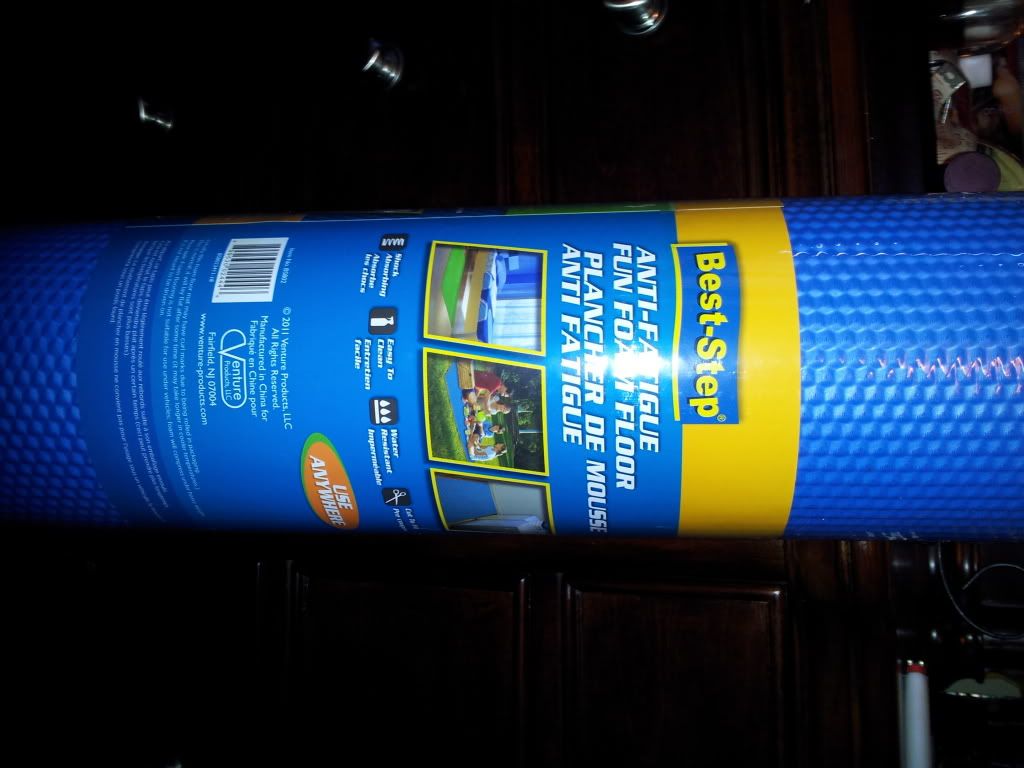
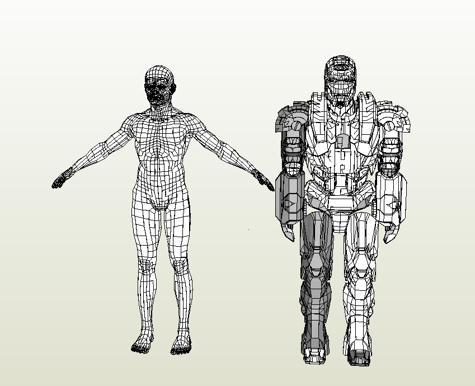
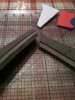
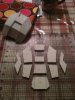
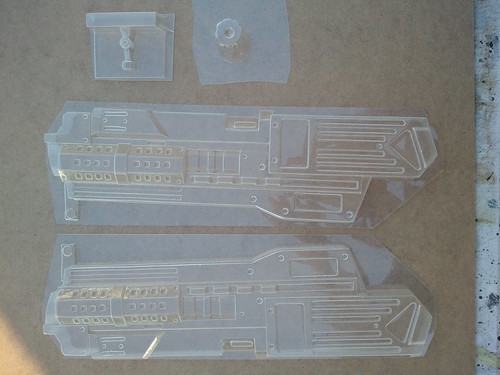
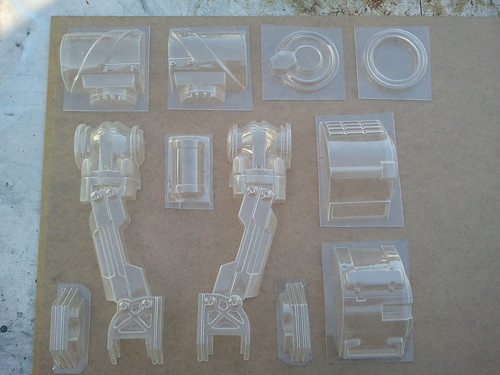
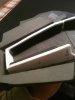
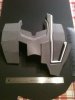
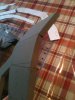
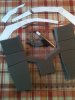
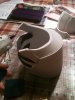
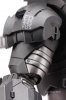
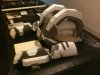
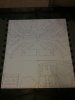
Greetings all. I've started this thread to document my War Machine MK 1 build attempt. This will be mostly foam, the exception being some cast parts. I'm basing the build off the fantastic templates shared here on the RPF. In this case, I'm using a mash up of templates including some HI DEF ones intended for fiberglass resin builds, but applied to foam. I'll post plenty of pictures to show some techniques I used based on tips and examples from other foam builders.

Special thanks and a "shout out" to Stealth, Juice, Zabana, Darkside501st, robo3687, Sharkhead, JFcustom, Stagefivedrift, Spektrum917, Laellee and Wondersquid for templates, techniques and assistance (apologies for anyone inadvertently omitted). Most of all thanks for the inspiration you've brought to the forums.


Be sure to check out some great, recent/current War Machine builds in work here on the RPF by Don juan, made007, and Mr Bonky; not an exhaustive list. If you like attention to detail, you'll really appreciate their work.


This is my second build (previous was Iron Man MK6, foam), and so far War Machine seems complicated but lots of fun. I had started a few months ago, but set it aside for a while for other things. But now it's back in gear. Stay-tuned for progress pics - updates may be slow, as it's a slow build on purpose. I hope you find my notes useful - my small way of giving back to this community.
 

Attachments

  • image.jpg
    image.jpg
    456.6 KB · Views: 842
Last edited:
Subscribed:thumbsup

Zabanas files are nicely detailed, I used them myself to help on a friends build.
Eager to see how your project works out.
 
So, for this build I'm using EVA foam, with a variety of thicknesses: 2, 3, 6, and 10mm. This is allowing me to layer and overlap foam pieces to create more details that you otherwise might not get. It's still not as much detail as you'll get with fiberglass/resin builds, but taking the cheaper foam route, it's a good compromise. I picked up this method from JFcustom - check out "JFcustom's FOAM files" thread for a detailed description on techniques. The key for me was the overlapping (see the attached pictures for an example).

I used Pepakura Designer to measure * features on the templates that I wanted to include on suit components (raised sections, indents, insets, etc.).
A good example of this is the HI DEF chest/back templates. These parts have lots of depth that you can emulate with layered foam pieces.


* Note: you need Pepakura Designer to use the point-to-point measurement feature. You also need this feature to properly scale the templates to fit your unique body frame. Probably the most asked question, "What scale do I use?!" Answer - the one that fits you ;)


I'm also using a hot knife to add other finer details, such as bolts, grooves, etc. as I go along.


Tip: I often found it easier to add feature details to templates and trace them onto foam BEFORE cutting and assembly (example - a groove and bolt marks on biceps). By doing this, you ensure even placement of features on left/right side of your build. If you're using STEALTH's method of cutting out one template and flipping it over for opposite side, this will save you time and extra work.


Other KEY tip: They're not kidding when they tell you to keep a SHARP blade. If you want clean cuts for your build, keep your Xacto sharpened or have lots of replacement blades.
 

Attachments

  • image.jpg
    image.jpg
    492.9 KB · Views: 323
  • image.jpg
    image.jpg
    513.9 KB · Views: 340
One more tip while I'm thinking about it (and before I forget).


Measure twice - cut once


It works in carpentry and here as well. Be sure of your measurements before you spend loads of time tracing and cutting. You do learn a lot by trial and error (part of the fun), but attention to measures will help keep the error and aggravation to a minimum. I did lots of paper planning for scaling and assembly planning before I even printed templates. Why?...because brain good not sometimes work so.
image.jpgimage.jpg
 
Last edited:
Depending on how far you are, I've got reworked foam unfolds of the original hi-def Zabana/Robo paper peps.... These are different than the other foam conversions floating around;tThey are a bit more difficult to build, but I wanted as much of the paper-pep detail built into my foam build as possible. Here's what I'm talking about (my foam unfolds follow the HD Drift/Zabana models):


If you're up for trying them, I'll upload a ZIP with those parts and post a link. I built a couple of suits using them, since then they've just been gathering dust in my hard drive.
 
Depending on how far you are, I've got reworked foam unfolds of the original hi-def Zabana/Robo paper peps.... These are different than the other foam conversions floating around;tThey are a bit more difficult to build, but I wanted as much of the paper-pep detail built into my foam build as possible. Here's what I'm talking about (my foam unfolds follow the HD Drift/Zabana models):

https://www.mediafire.com/convkey/ed9c/xvxox58df3ytxw64g.jpg
https://www.mediafire.com/convkey/9e76/7b1rlodxur21rz44g.jpg

If you're up for trying them, I'll upload a ZIP with those parts and post a link. I built a couple of suits using them, since then they've just been gathering dust in my hard drive.

Laellee, that would be great, thanks! Those look great. So far I've got biceps, forearms, handplates, neck, and chest done; back almost done. I'm willing to give those a try. I'm with you on adding the details where possible. BTW, I've followed your work - very nice!

- - - Updated - - -

Thanks Murdoch. I've seen folks use that brand of foam mat. Where did you buy that? Is it the same consistency as the EVA sheets?
 
OK, I just grabbed a pile of my unfolds and zipped 'em up.... The chest and back might not be there completed in hi-def for a foam unfold, these were all custom scaled to one person so of course you'll want to check scales with point-to-point... If there's a hi-def unfold that's missing, let me know and I'll add it in; I did these a long time ago and they aren't exactly organized beautifully on my drive. Also, PDOs labeled as 'separated' in their names have been set up to not be split up over multiple sheets (not a big deal either way).

Anyways, you might find something you like in there to use... The scales were set for a 5'11" guy.

http://www.mediafire.com/download/7eaeikb9ndm4e4f/1115+combo+zips.zip

And, just to give you more garbage to download, the following file is a not-unfolded PDO of all the above pieces at their individual scales assembled, next to the mannequin of the guy they were built for. That file comes in handy to check part sizes in relation to each other. good luck on finishing your suit!


http://www.mediafire.com/download/7eaeikb9ndm4e4f/1115+combo+zips.zip
 
Here's one example of the foam layering I was talking about. The pieces in the picture are part of the chest, side pieces that go around the lower rib cage. I used 1/2" foam (exercise mat) for these pieces. I cut inward from the side of the piece to create a "step" where it's neighboring piece (6mm piece) will go. This creates an overlap, and on the surface creates an inset that matches the template. Knowing how deep to make the "step" depends on your template scale - so use point-to-point measurement. In my case here, I think this resulted in about a 4mm step. You need a sharp blade to do this cleanly.
 

Attachments

  • image.jpg
    image.jpg
    599.6 KB · Views: 268
Laellee, that would be great, thanks! Those look great. So far I've got biceps, forearms, handplates, neck, and chest done; back almost done. I'm willing to give those a try. I'm with you on adding the details where possible. BTW, I've followed your work - very nice!

- - - Updated - - -

Thanks Murdoch. I've seen folks use that brand of foam mat. Where did you buy that? Is it the same consistency as the EVA sheets?
It's exactly the same material, just half the thickness...GM
 
Hand plate assembly - some overlap used to put the center pieces together. This is all 6mm foam.
 

Attachments

  • image.jpg
    image.jpg
    579.4 KB · Views: 281
Very nice! Thank you for the shout out too, I will be sending out your Weapons kit today barring any craziness with molds. :)
 
Very nice! Thank you for the shout out too, I will be sending out your Weapons kit today barring any craziness with molds. :)

Thanks Wondersquid! Glad you posted those pictures too. Those looked exceptionally difficult to pep; thought casting would be the easier route. I'm thinking going this route will also make it easier to include some internal light and sound effects.
 
Some of the work done on the chest plate. Modified a little bit from the template to create a single base for the "straps" that come over the shoulders (see pics). I cut the foam on the backside ("V" cuts) to make sure the whole piece was angled the same as the template. This created a solids base for the foam chest strap pieces. I also added some solid core/rigid foam inside the chest straps to reduce any flexing and to help keep them straight.
 

Attachments

  • image.jpg
    image.jpg
    568.8 KB · Views: 205
  • image.jpg
    image.jpg
    604.8 KB · Views: 260
  • image.jpg
    image.jpg
    535.2 KB · Views: 218
  • image.jpg
    image.jpg
    605.4 KB · Views: 233
Work on the biceps...gotta show off some muscle. :)
I used some of the extra pepakura template pieces (typically not used in a foam build) as guides to make these. I did this on the front face of the bicep and on the back. I basically taped the card stock guide to the foam, and used it as a stencil to mark setback lines for gluing to the next piece. By doing that I was able to replicate some the small edge details from the pepakura model on the foam section (see the "edge/lip" on the back of the bicep and comparison to a model). It was a little tedious doing this, but I liked the results.
 

Attachments

  • image.jpg
    image.jpg
    574.7 KB · Views: 326
  • image.jpg
    image.jpg
    195.1 KB · Views: 379
Last edited:
Update - chest and arms. Still need to connect the forearm-elbow-bicep pieces. I'm planning on using chicago screws, which work great. Need to figure out connection point to the forearm though.
 

Attachments

  • image.jpg
    image.jpg
    497.4 KB · Views: 283
This thread is more than 7 years old.

Your message may be considered spam for the following reasons:

  1. This thread hasn't been active in some time. A new post in this thread might not contribute constructively to this discussion after so long.
If you wish to reply despite these issues, check the box below before replying.
Be aware that malicious compliance may result in more severe penalties.
Back
Top