Iron man Mk3 Cardboard (freehand Build. wip)

TonySingh

Member
I once Built an iron man from eva foam using paperkura. It was from the Prop maker Stealth . And seriously Alot of Credit to him and all those involved in creating those amazing files.


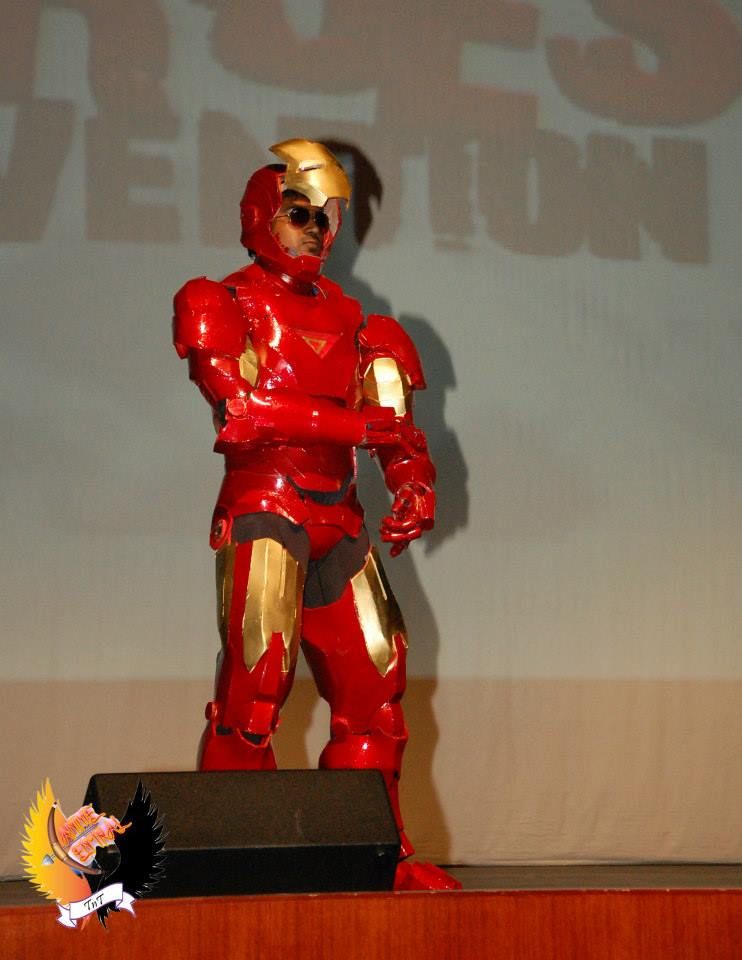
But it was pretty much my first time building with eva foam, and i didnt understand alot about the durability and proper priming etc. And in the end it flaked, chipped creased. But, it gave me my first taste of Cosplay and prop making and ive been hooked since.
Ive been working with budget builds since and gotten a knack for Cardboard and papermache. Im far from polished work, but im hoping to get there one day.


For referance Im working with a youtube video https://www.youtube.com/watch?v=7cPI3CO3fEY That is the best referance I can fine/ use. (personally though i wish i could get my hands on the toy itself ;/ but this works fine too.

.

Oh btw....is there really a much difference between the Mk2 and mk3 other than the Paintjob?

Materials intended to be used :
Carboard.
Hotglue
Newspaper
Wood Glue.
Gypsum Putty
Concrete Primer.
(ADDED : EVA FOAM 2mm)

Due Finish time. October 31st.
 
Last edited:
Well...lets get this started.
I looked up alot of hottoy models for reference to help me work things out. Starting off with the boot.


Then in my head, starting breaking things apart.And drawing them up on paper


Then i started scaling and working out how it would fit me


I learned a tip using a ruler helps in cutting Cardboard. and it helps it from crushing the edges in. Which helps alot.


Heres the...snout? part of the front of the boot.


Doing things freehand, means cheaking over your scaling and just going with what feels right. for me 100% accuracy is something i try to avoid. I prefer acting and putting my own spin on things. ^^ its more fun


So here is the an overall with the parts sketched and worked out. If it will help someone , thats good enough for me.


Added the side guards, and starting work on the heel. I decided to take some effort to make them rotate so i can bend my heel when i work.


now the heel. I had to rack my head to find pics for them exposed but looked up a video and screen capture.


The back heel was much easier to work out with this pic.


I worked out adhead to make the screw pegs. Using a 3/16 : thick board and cut a groove into the cardboard. However I coated the entire part in PVA glue so it would be a bit more stiffer to work with


Somtimes you just go for broke. and just do it XD


After some tinkering I made the pivot point work. I slipped in small circle of plastic I cut from a cooking oil bottle to keep it from ware and tear while it moves


So whats done left...you do right....


Ok so I noticed from the movie shot, he had an over guard that I remember can be kind of uncomfortable when your bending your foot. Its acts like the *tounge* part of the shoe. I had to think to add it to the front, but to make it pivot with my foot for comfort. And worked out a rough sketch


After somemore tinkering, the best i could up with. So here is all disassembled. Ill be paper maching each part seperate


Here it is assembled. Flat.


Heel Pivoted


And while i hope i never have to bend my foot at this angle....@.@....atleast i know i can. All 3 part can work independant so....im hoping it will be comfortable while moving around
:3 All on a budget.


ARMOR ON!


Next up Shins and Ankle Guards...~
 
So heres my breakdown and build of the Shins.

alot of slowmtion and sketching out the shapes


The tongue guard was simple to work out.


This part covers the shoe tongue itself. Im making it free moving using bolts that will screw into the shin ankle guards


Some mock scaling and workings


Scaling up a bit and down till i get it right.


Looks werid, but it works


Things were looking good at this point


Following out the front half was complete


To work out the back half, there was a great shot of the inner workings


Started with the back flaps.


So trials and errors


But after a while it comes together


So in the end here are some mock sketches i made of the parts of the boot with the completed shin


Ok next up the thigh parts. Along with the interconnection for them.
 
My Reaction to making these thigh pieces.....


OMG IT SUCCKKKKEEDDD.....I had to hunt all over the vids, the movie, ..till finally i got a some worth while shots an An Hot Toy Review with some much needed high detail shots. Thank thank you...><

This one was used for the outside angle. Wish it was straight on. but it was enough.


Back view..off the bat i knew the joint connection would have to made with something durable..ill work on that bridge when i get to it.


Now this part...was ok,but this there is a odd ball part where it there are flap guards if someone has and idea on how to make them slip into each other or a how too thats been done by someone. i would appropriate it.


And here is where I worked out the Inner Guard, this also gave a good angle for the front aswell


And finally the distance between the leg and thigh


So sketched out the front knee and worked out the side and front view


After a while started putting it together. Making sure to keep templates on what works and what doesnt...and yes...alot didnt work ><


The front view, just temp glued in place to work out


To work out how to scale out parts for the next part.....you got to do some crazy things...@.@...but..it works.


If you can find this pieace on from the images above, i proud of myslef of getting the look alike


Finally go the inner thigh in order.. alot of wasted boxes...


The outer thigh workings, to get the curve right, i trace it out on paper and worked it untill it got something to look the part.


Heres a good example on how i scale, i put up paper agaist it, and draw along the edge, and cut it out to make sure atleast the lining cut to match, so im always 1/2 done


omg....

It took me..like...2 days..to get this far and a few hours on frustration..


Side View


A little crooked here and there, but nothing ispermantly glued to adjust..but...finally..i got the thigh finished..


I have to work on the other side, but it wont take as long.
Next up, Cod and doggles for the hips.
 
Ok, so updated progress it possible redo of all parts explained later on.

Referance pics


Work on the the Pelvis/Cod armor.


Its not that hard a part to work with but t did take some doing to figure out the curves


Taking shape


Worked on the Hip toggles while i was at it.


><...alot of work and trying to cut neat.


Sanded the edges a bit, and wrapped strips of masking tape to the shape of it


Pelvis complete. I also decided to add the first and second rows of the abs to it, the rest will clip on from above so there a bit of movement, but not so much that it will shift out of place and look akward.


Back view.


Referance Pics for Spin.


I wanted to make it my own so i altered the shape and look if it a bit, so it a bit more arrow headed.


I realised that by running it against its own strip, it moved and flexed on how i wanted...hmmm..ideas for that might come in handy later


The side abs where kinda....hard ;/ cause there are a few shot with it showing how it looks.


but in the end, managed to work it out.


Sorry it a little fuzzy but template for the pelvis completed


_____________________________________________________________________________________________________________

Its at this point, i realised that if i had to papermache and coat it would take an god like feat and hours of work. It was then, thanks to a friend an idea popped into my head.
making my own templates and working it out pieace by pieace i went out and bought a roll of EVa foam. 2mm.


I redid the boot, making all the parts seperate and papermache glue treated them to increase their strenght.


Next I cut identical parts from the foam and lined it all up


I made some parts with risers (two-three layers of cardboard) to give some dept and dimension and flat glued the foam onto it...


Before it knew it..i made a new boot. And to be honest. I really liked out it turned out. I have experiance painting eva foam and not having it crack or flake on me. plus for the grooving that shows i can easily fill those with gutter groove putty, gypsum putty, or any kind of cheap filler.
However Ill will still paper mache the inside of it to give it strenght.


So i will be redoing all the parts ive done so far. may scale them up one size and use the eva over layer on them for this build. It takes a load of my mind to the amount of work it would take to do the papermache for both the inside and out.
So in my next update it should be the new parts refurnished.

 
So ive doing some experiments before i move one. In a nut shell, i used silcone putty, the kind you can get from a hardware to seal up roof guttering for the edges, and primed using concrete primer when it dries it can be sanded and be used to some extent to filler up cracks etc and CHEAPER :3 and did some light dusting of sliver and black.

.Im wondering to go Full silver for the mk2 or the scuffed ;/ ?????????????/
 
OK sooooooo Major recap :

Orginal PLan Finish before October 31st : Not Happening....... >< *flips table...*

Use and design from handmade Templates.... : On track :3

Cardboard and Papermache Build : On Track :3

..Additional Expense of Add EVA foam....><.....hurrrr..

But some good news Finally. Had some issues adding the Eva to the Cardboard, mostly as there always thislittle gap in-between that annoys the hell out of me. But as this is the first time im going about it, Im going to let the chips fall where ever.
On a really good note and bad.... i had to fine tune the parts, which resulted me in making nearly 3-4 copies of a part just to make it...make sense...as i went along. Which was...time consuming and frustrating to no end.

And lastly, Yes i do plan on painting it sliver....having a photoshot with it, then in the Red And Gold After. But since the EVa foam is white...i thought..heck before i do any of that, screw it im going to have some fun and make MY suit ^^..... So here the updated photos.

I simpy use 2mm foam ( but i recommed 3mm but its 1/2 the price...and eh..1mm difference doesnt look so bad.) and spray glued it onto the cardboard surface, while paper-maching the inside for strenght. It very durable to my standards, (droped it, tugged it, kicked it around ,light and flexes just enough so that it doesnt pinch your skin.


Heres were i decided to go nuts on the thing im no artist but i guess...Ill call it.... Vector Suit ? >:


Im sorry but all in in my head i hear is... Im to sexy for my love love going to leave meeeeee...~ XD

Im only this far and a ton ***** load to do. But....for me ^^... i cant be happier.
 
I dont know what god I appeased, I just hope its a woman and i can marry her . Because for the ..THe Cod and Abdomen is the most freakish hardest aspect for this build, I had to trow out tear and stare into the abyss to work it it out and say screw it and..just like that..>< it was infront of me....like...wtf Hands...were you on auto pilot or something. Its slips on like pants and fits every snug, with enough room for me to breath ...-w- yay.

So something for me , is when working with cardboard, its edges makes or break it. So if it wasnt mentioned before I often paper mache the edges or the entire thing to help strengthen and protect the edges.


I know normally i show the template for this but beacuse its pretty much off the parts i already made, i just edited here and there to make it sleeker to the best i can do.


And this was done in one day, i was like...omg...><..thank you. thank you..tommrow ill decal vector it. ...sleepppp......
 
really awesome work. its incredible how you get the correct form without templates

Thanks, but its alot of trials and errors along the way. xp After you do it for a while , you start to get an eye on how to work things out.

Ok so updated on the Chest, which surprised me how much i procrastinated on it but did it on one day.

I had to find a clear image of the chest and ribs and found a glossy Hot toy version


Then i started doing the draw 1/2 flip templates. Took a few tries to get it right.


After a bit got the base of the idea going.


I was kinda skeptical at thispoint because I worried about getting the scale right ....


I was right andgot the scale wrong, took about 2 more tires before i got the chest right.


To do the ribs, I lined it up along some cardboard,got the average, then worked and trimmed it to get it to fit.


After a while I worked out the ribs


Here's the ribs up close.


For the ribs, I like how it looked Stepped up *personal preferance *


Hereit it just set in place, the nice thing about my method is you can bend the foam/cardboard and it will retain the shape very well with out stressing out your glue joints.


Finally the chest pieace. Im content with it and will go on to work on the back.
 
How do you think it will hold up and movement in the suit once it is done I had a few issues with my foam build parts tearing etc but my sizing was all wrong

Foam on its own will tear, its just its natural nature due to weardown. Espically in part that move. Of Course scale is important. Ive worn the legs in and out to feel them out.
You have to remember in this build, the foam acts only as a *skin* to cover the cardboard, which is reinforced with 2-3 layers of paper mache onthe inside. So the foam itself isnt affected by wear.
Ive made complete papermache Armor before and alot who see it pass it off as fiberglass.
 
Cool build. I really like the mark 3, and you're doing a fantastic job of it so far. Have you made any more progress since the last post?
 
This thread is more than 9 years old.

Your message may be considered spam for the following reasons:

  1. This thread hasn't been active in some time. A new post in this thread might not contribute constructively to this discussion after so long.
If you wish to reply despite these issues, check the box below before replying.
Be aware that malicious compliance may result in more severe penalties.
Back
Top