Infinity Gauntlet with light up gems

BinaryJungle

New Member
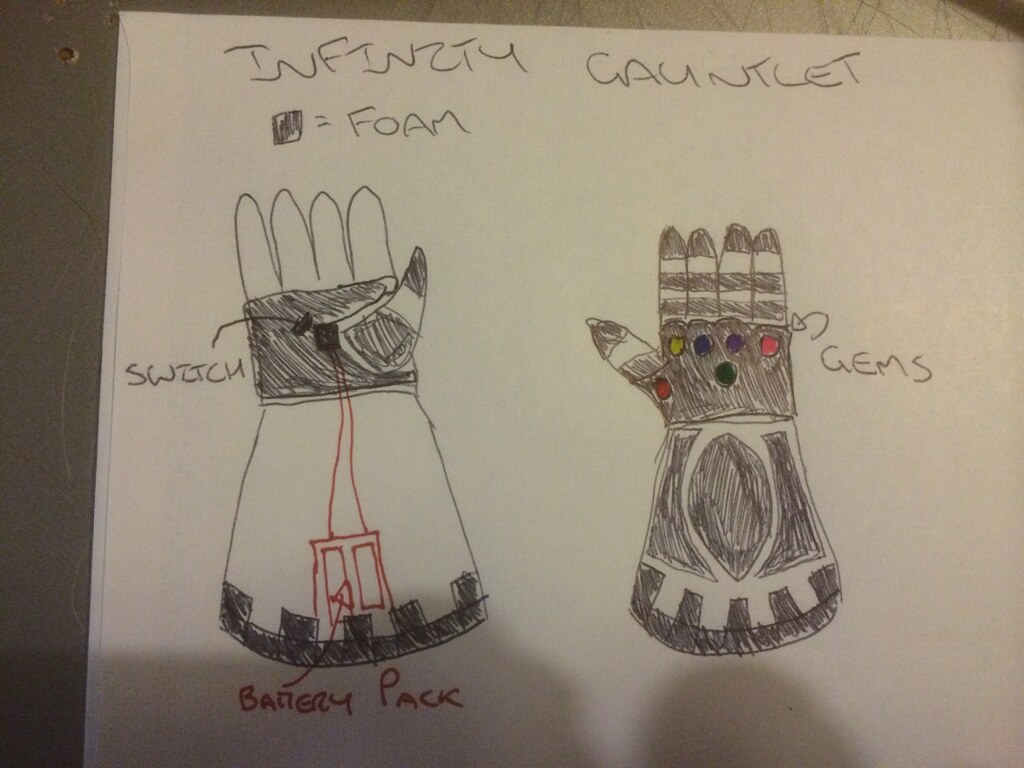
So following on my ghost rider costume and wanting to find another use for these LED's that I love so much I was inspired by seeing a Thanos cosplay at the London Film and Comic Con and thought how awesome it would have been if I was ghost rider with the infinity gauntlet.

14584639549_1eb3a86e99_b.jpg


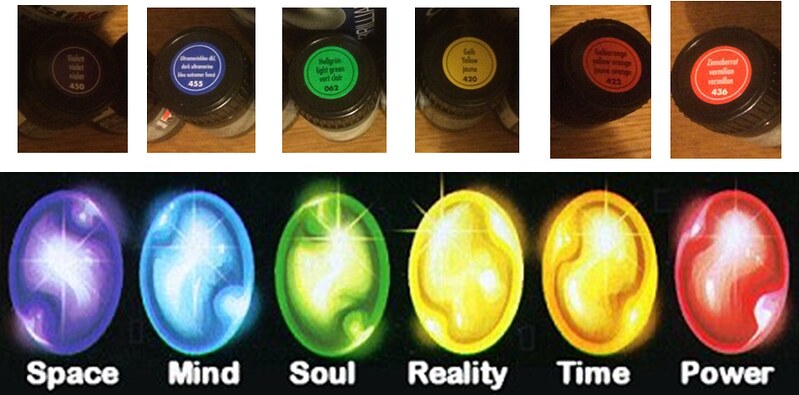
My prop making isn't great so started off with what I thought would be the focus of the build which is the light up gems, I would like them to have some kind of sequence but have no idea where to start with that so will continue to research it.

14768118741_4330057e3e_o.jpg


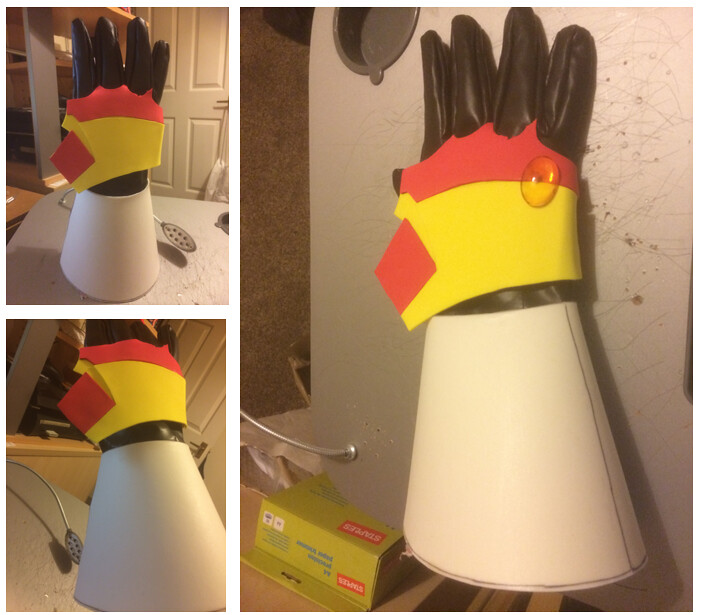
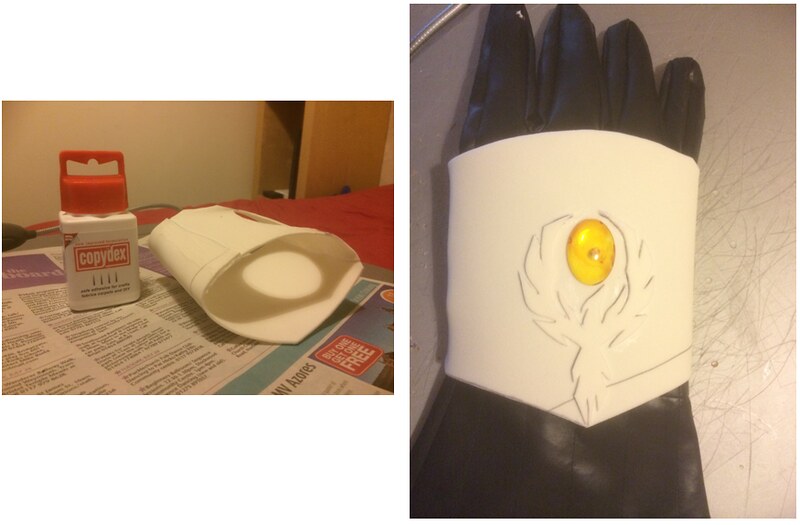
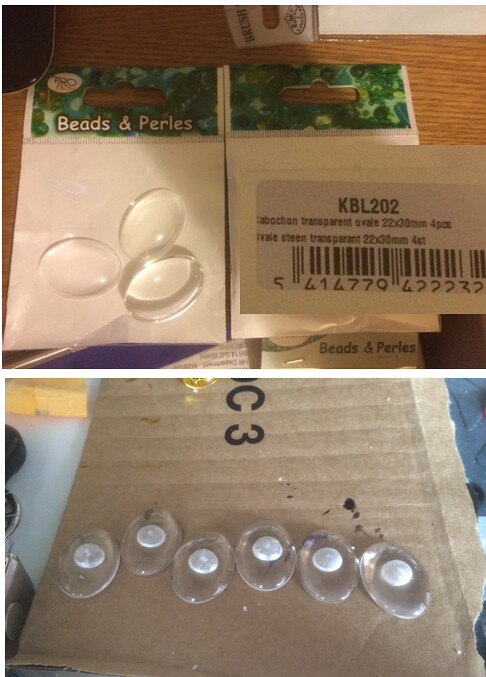
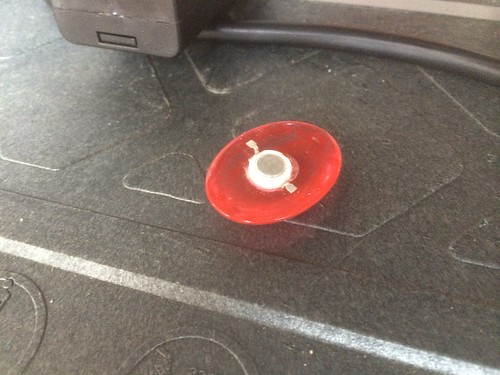
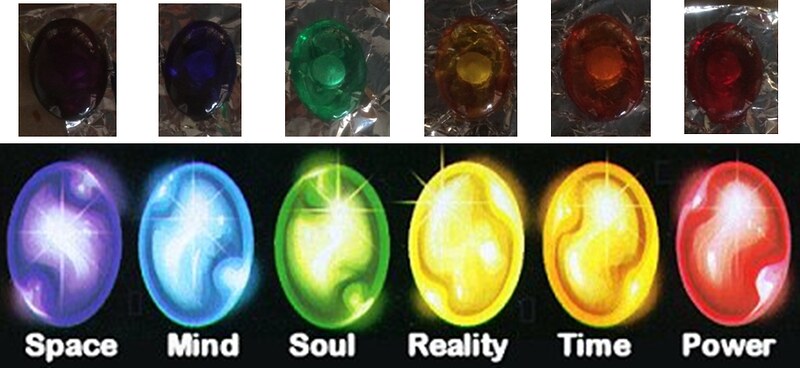
I managed to find some adequate sized acrylic transparent stones in hobbycraft which looked ideal, and then drilled some holes to fit the LED's which are the perfect size and depth for the LEDs.

14770951902_5e5c365e57_b.jpg


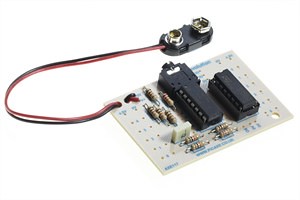
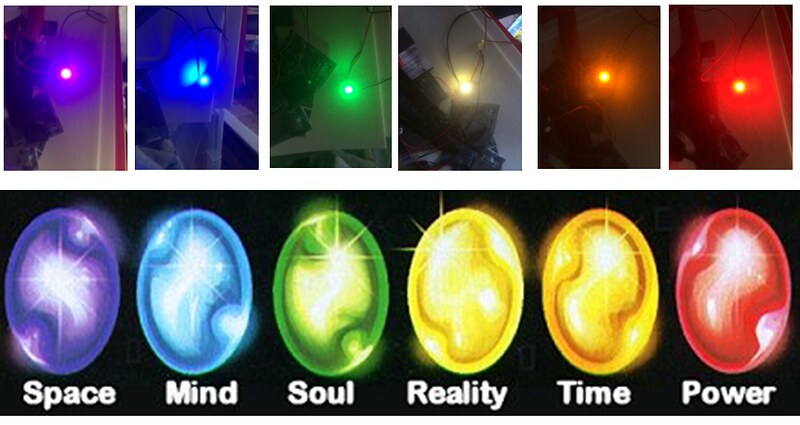
So before I bought paint I tried using a marker pen to colour my protoype and it looks a bit naff but decided to use it and test the LEDs which work perfectly!

14584825267_eff1b4430f.jpg


14584657078_2e38e23a63.jpg


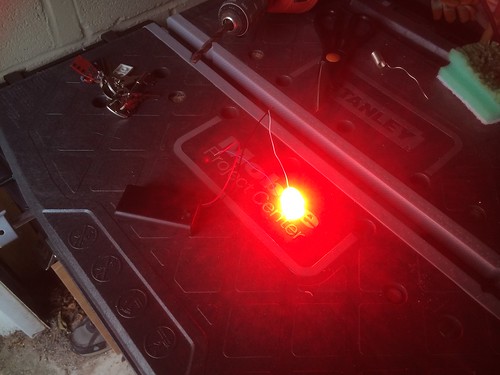
God I love these LED's (although other people should be aware they are not designed for long term illumination as they get hot fast!)
 
So onwards with painting the gems! I found some great glass paint in Hobbycraft (I love that place!)

14584648078_64b968af63_c.jpg


With the paint applied ... I didn't use a brush to paint them instead i propped them up on some bent paperclips and used a dropping pippet to drop the pain on the gem centrally and let it run as per the surface of the gem. Looks a lot better than my painted effort!

14584581770_e24eba2450_c.jpg


and the LEDs (not inside the gems yet) ...

14770952712_3c2fb864e8_c.jpg
 
Last edited:
Thanks both :)

Tonight's update is that my base for the gauntlet arrived in the post (horay!) it is a pair of darth vader gloves from an online fancy dress shop and they are just the right shape. So I took my trusty spray paint and applied the first coat on the left gauntlet which is going to act as my test.

14780088945_5f9f7406f6_b.jpg


Next step is to look at the other decoration for the gauntlet and making it look a bit more armoured.

Also found a potential controller for my LED's so I can have a funky sequence when they are turned on, have ordered one to see if I can get it working.

14593585887_47f1cfd543.jpg
 
You might also want to look at Poweredplay gaming. They make LED light kits for models and they also a programable controler.
 
Thanks everyone :) a small update tonight.

So I have been thinking about how to make the gauntlet more armoured looking and I'm rubbish at foam craft and papercraft so thought I would cheat a little and combine the hand unit from this post http://www.therpf.com/f78/iron-man-war-machine-easy-hand-files-150409/index2.html and a truncated cone to attach to the glove.

As you can see this didn't turn out so well...

14795920394_dc602b195e_b.jpg


14818117913_599916d62e_b.jpg


14795920244_25e98773c4_b.jpg


So what this did highlight is the importance of prototyping in paper matching the gauntlet / glove you are using as a base to ensure everything fits correctly. So on the back of an envelope I sketched out what this might look like when finished.

14818118563_f1a5162fb1_b.jpg


An issue I need to deal with is how to seal the foam as I have tried several coats of PVA on test pieces and this doesn't seem to work, any idead's would be greatly appreciated!

Also wishing I purchased the circuit board assembled now lol sigh ... maybe the programmable lights will have to wait.
 
Last edited:
So seriously losing the will on this gauntlet and foam business :(

The next prototype looks rubbish so may have to go back to the drawing board again :( One thing I did like is a small phoenix (nod to the phoenix force ;) that I was looking to put on the upper part with the central gem.

14789924776_6868a7baed_c.jpg


So in going back to the drawing board I am drawn to a couple of youtube videos for inspiration.

http://www.youtube.com/watch?v=8z4Lc98gadE - I like the format of this one :)

http://www.youtube.com/watch?v=Kznt75OIhts - Again this one has light up gems!

http://www.youtube.com/watch?v=0N-3Z1O_EvE - Like the fingers on this one.

Hopefully I'll get somewhere with these!
 
I'm gonna keep an eye on this one. Looking good!

If you end up needing a more flexible paint, try Meltonian Nu Life - their gold looks great. Many times you can find it at shoe-repair places, but if not, eBay always has some: http://www.ebay.com/itm/Meltonian-N...t=LH_DefaultDomain_0&var=&hash=item43b41ce2b6

Here's what it looks like in photos. I don't mean to threadjack, but this is one of the few photos I have of what the gold looks like (and proof it'll hold up on a glove - mine was leather and foam as well, though I did the comic book version):

23.JPG
 
Plasti Dip also comes in a gloss clear, called "glossifier." I put that down first to seal everything and make it shiny smooth, then used the nu life over that.
 
This thread is more than 9 years old.

Your message may be considered spam for the following reasons:

  1. This thread hasn't been active in some time. A new post in this thread might not contribute constructively to this discussion after so long.
If you wish to reply despite these issues, check the box below before replying.
Be aware that malicious compliance may result in more severe penalties.
Back
Top